¡Saludos Comunidad Creativa! ✨ | ¡Greetings Creative Community! ✨
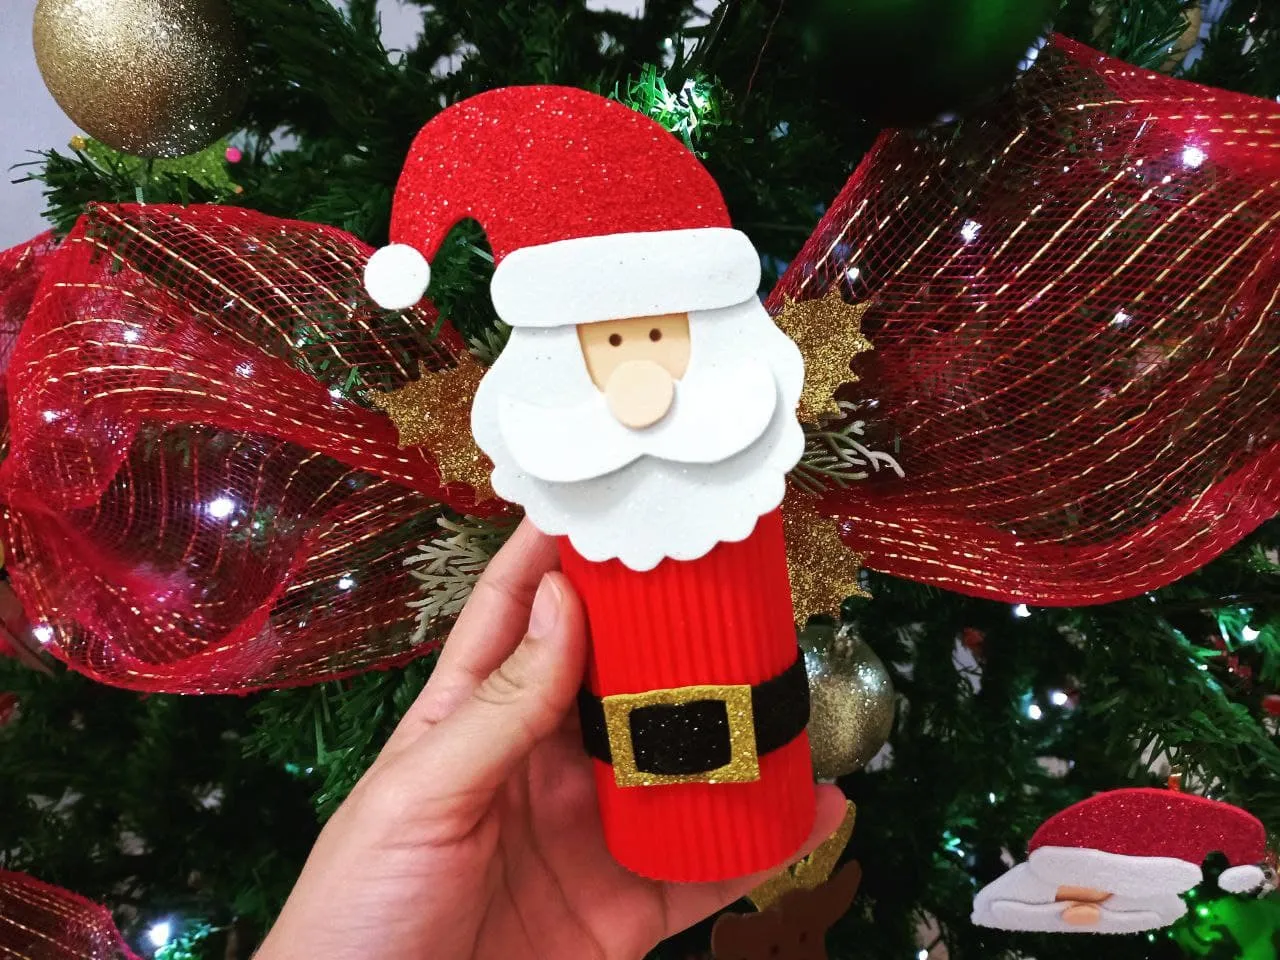
Apenas van 4 días de diciembre y yo estoy muy emocionada por la navidad, es por eso que desde hace poco más de una semana vengo trabajando en manualidades navideñas para compartirles, el día de hoy les traigo un tutorial más para elaborar un lindo adorno de Santa Claus con un tubo de cartón, tengo muchos de estos así que decidí aprovecharlos haciendo adornos navideños y son muchísimas las ideas que hay con este material, aquí les dejo la más reciente que he hecho, espero que les guste.
There are barely 4 days of December and I am very excited about Christmas, that is why for a little more than a week I have been working on Christmas crafts to share with you, today I bring you one more tutorial to make a cute Santa ornament Claus with a cardboard tube, I have many of these so I decided to take advantage of them by making Christmas decorations and there are many ideas that there are with this material, here I leave the most recent one that I have made, I hope you like it.

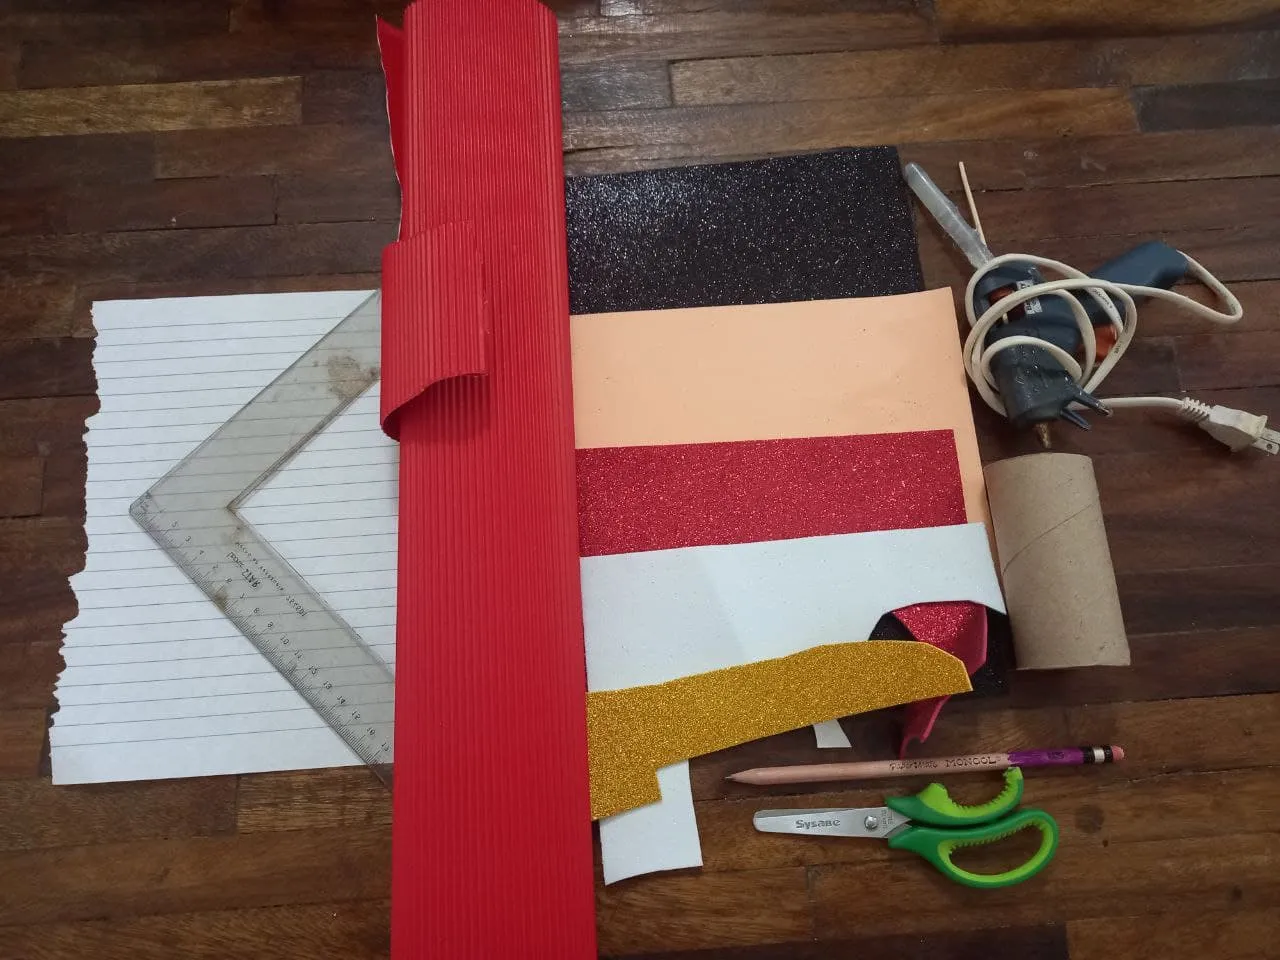
- 1 Tubo de cartón.
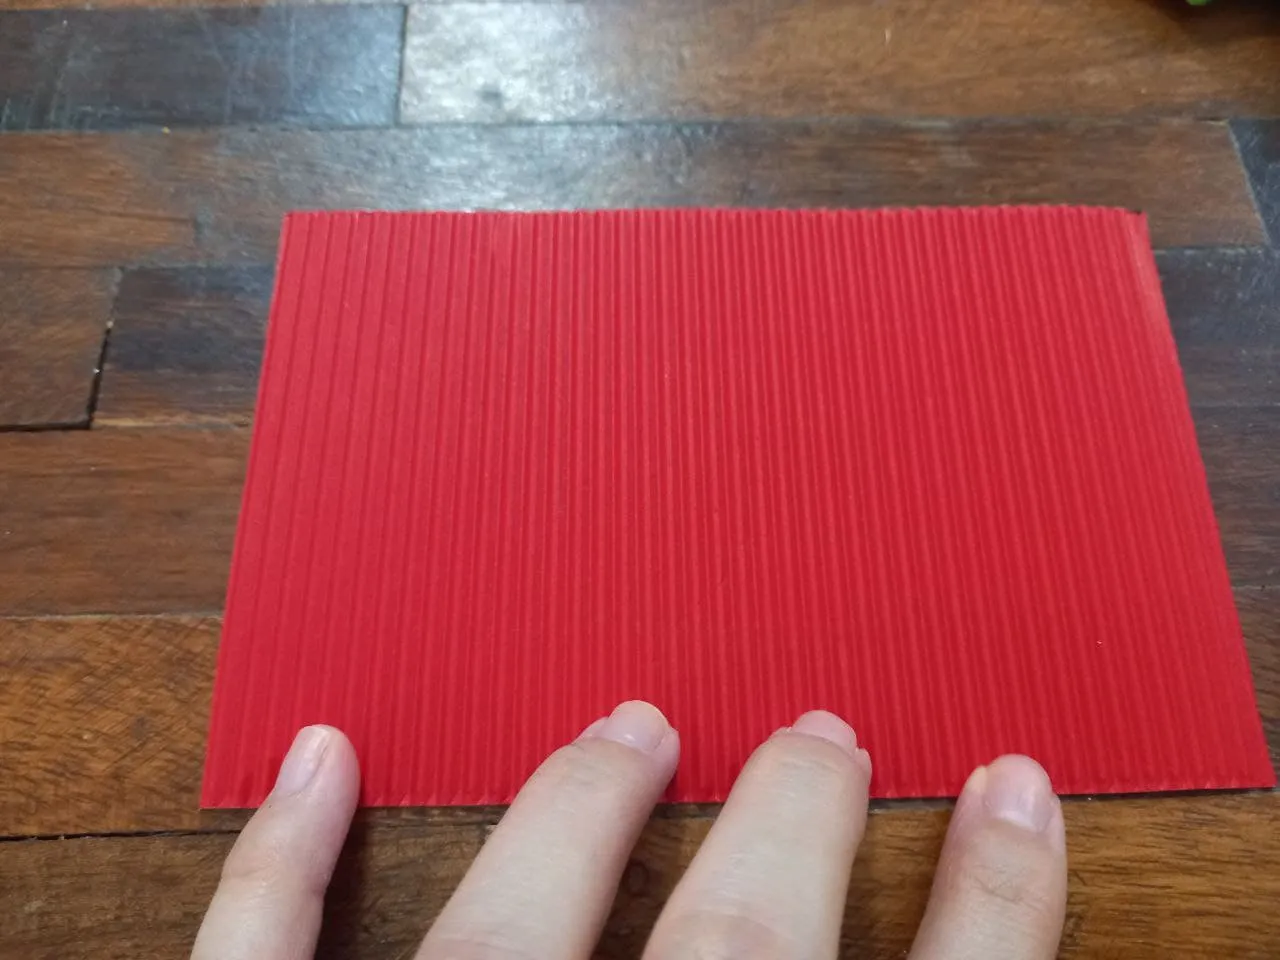
- Cartulina corrugada roja.
- Foami escarchado rojo.
- Foami escarchado negro.
- Foami escarchado dorado.
- Foami escarchado banco.
- Foami color piel.
- Silicón.
- Pistola de silicón.
- Lápiz.
- Hoja de papel.
- Tijera.
- Regla.
- 1 cardboard tube.
- Red corrugated cardboard.
- Red frosted foam.
- Black frosted foam.
- Golden frosted foam.
- Foami frosty bank.
- Skin color foam.
- Silicone.
- Silicone gun.
- Pencil.
- Paper sheet.
- Scissor.
- Rule.

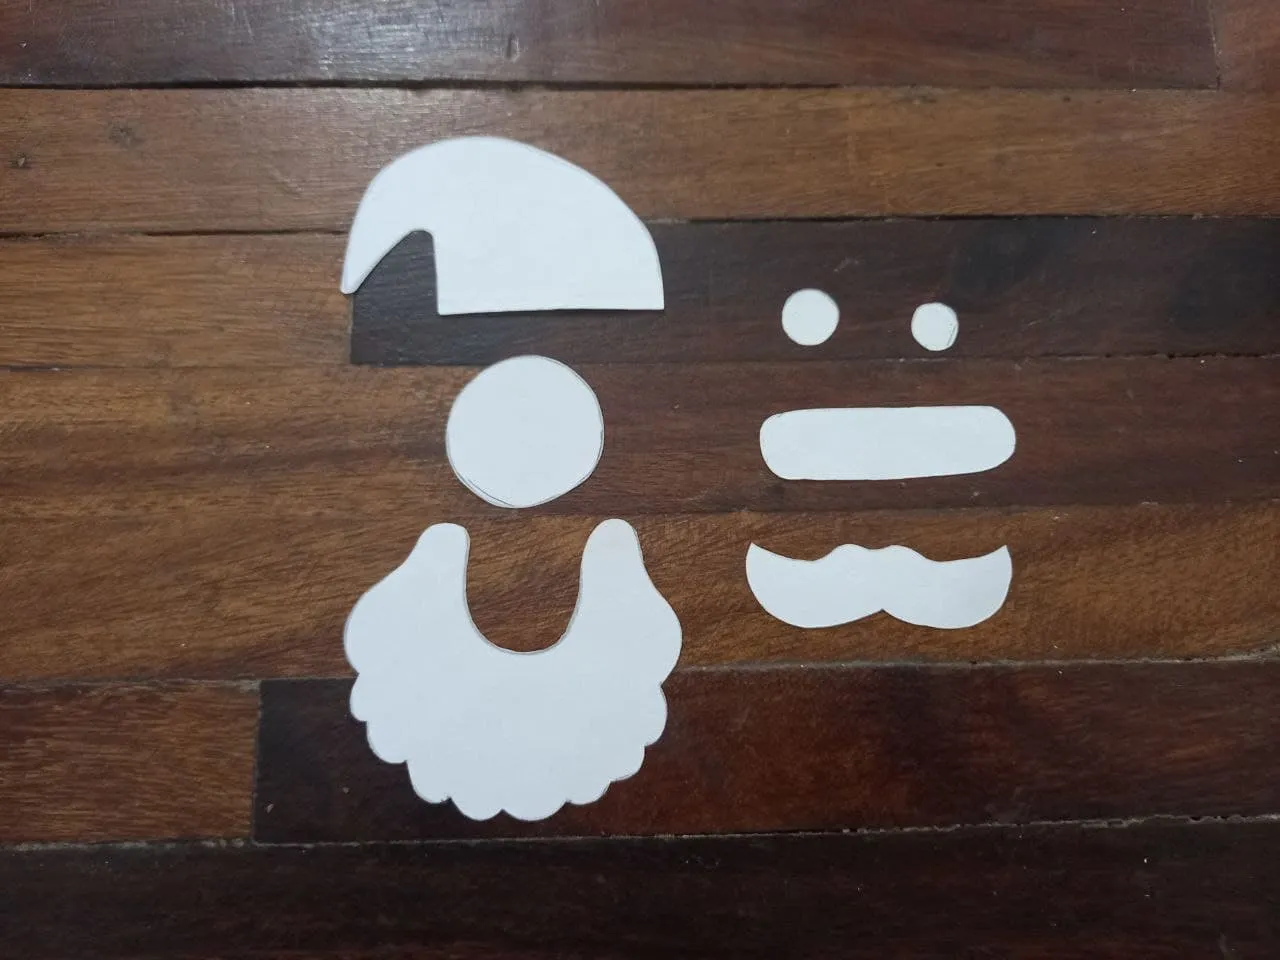
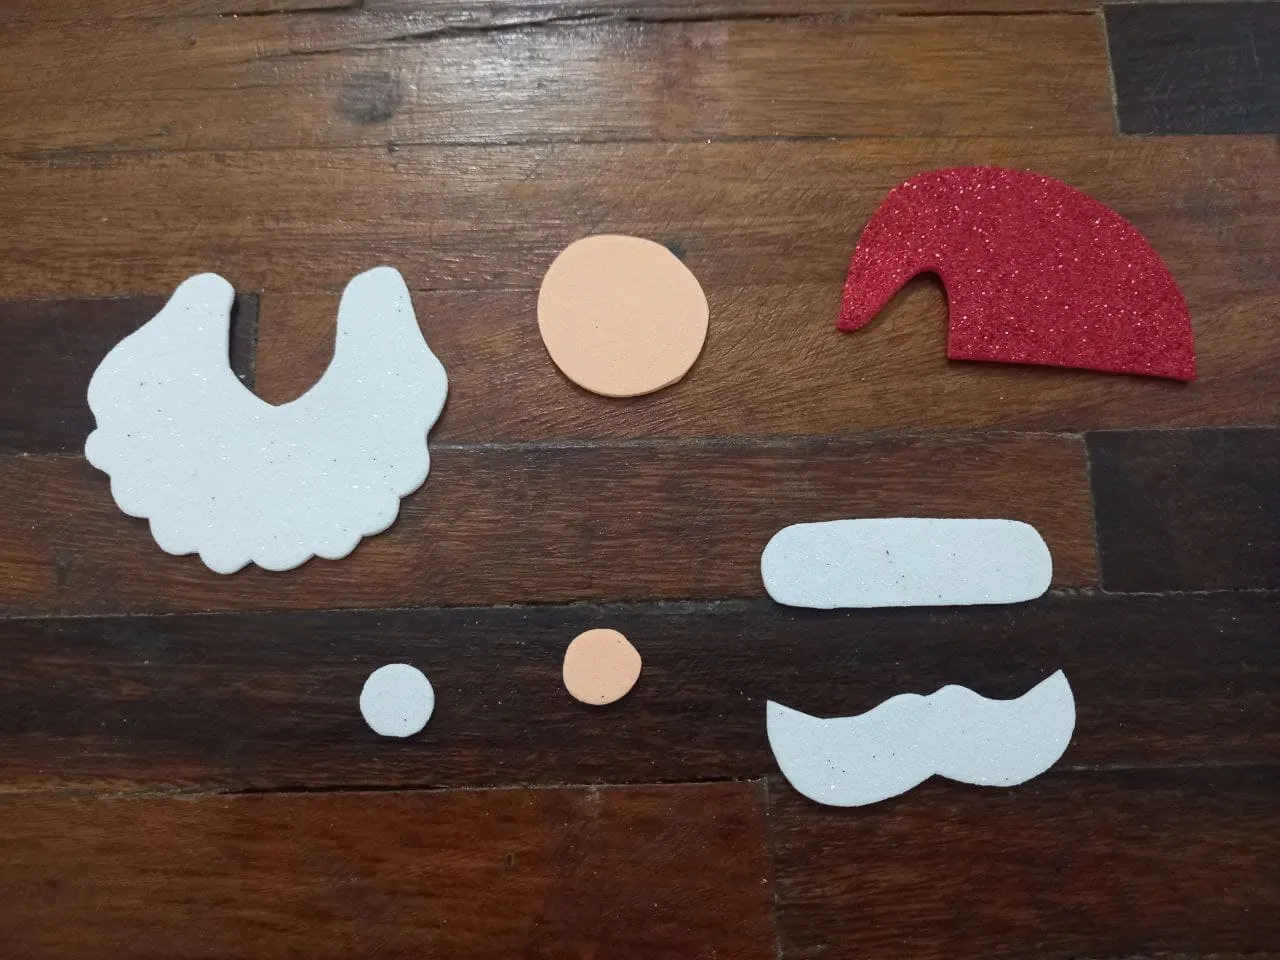
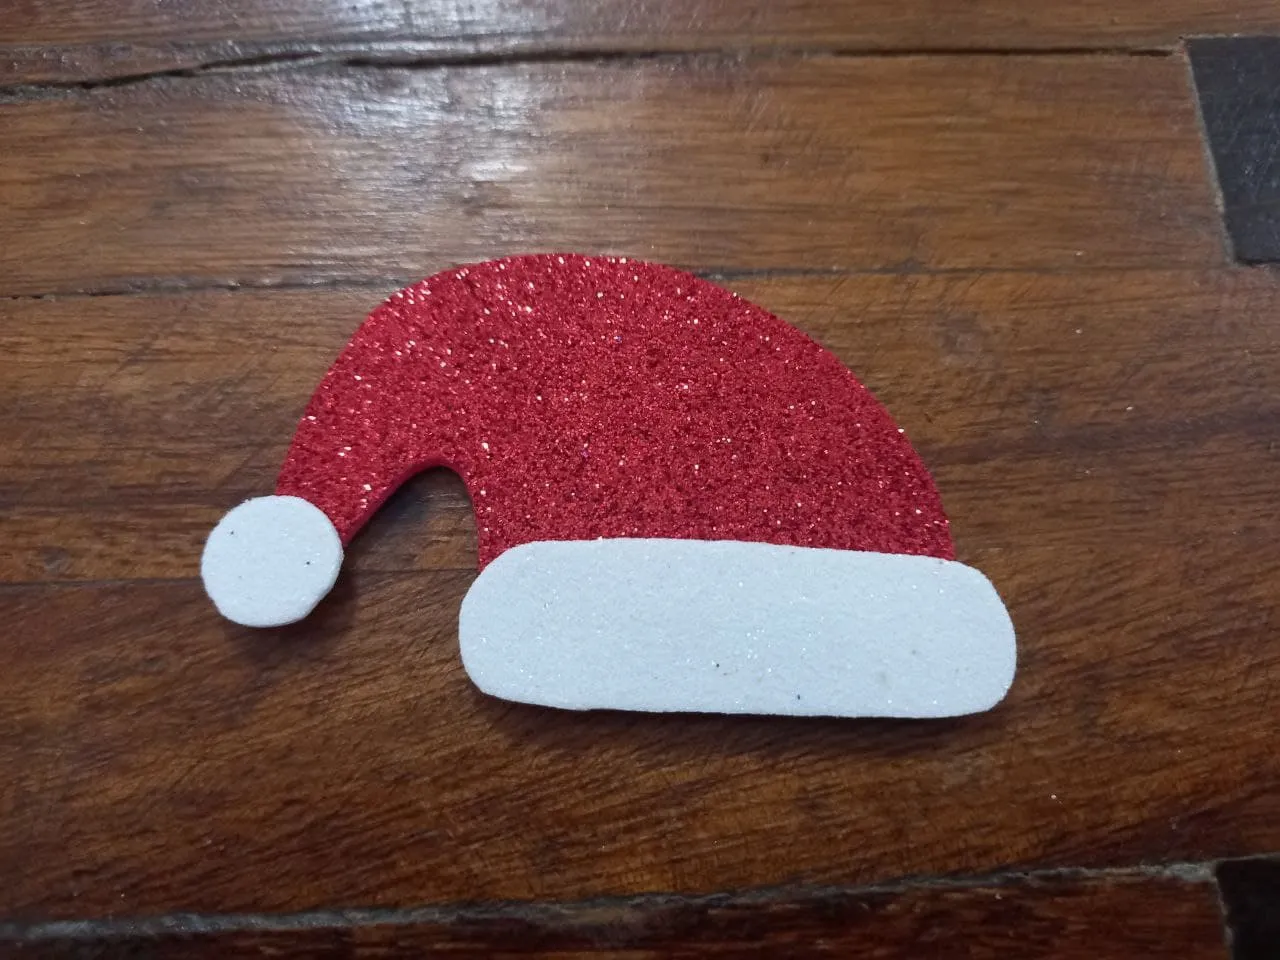
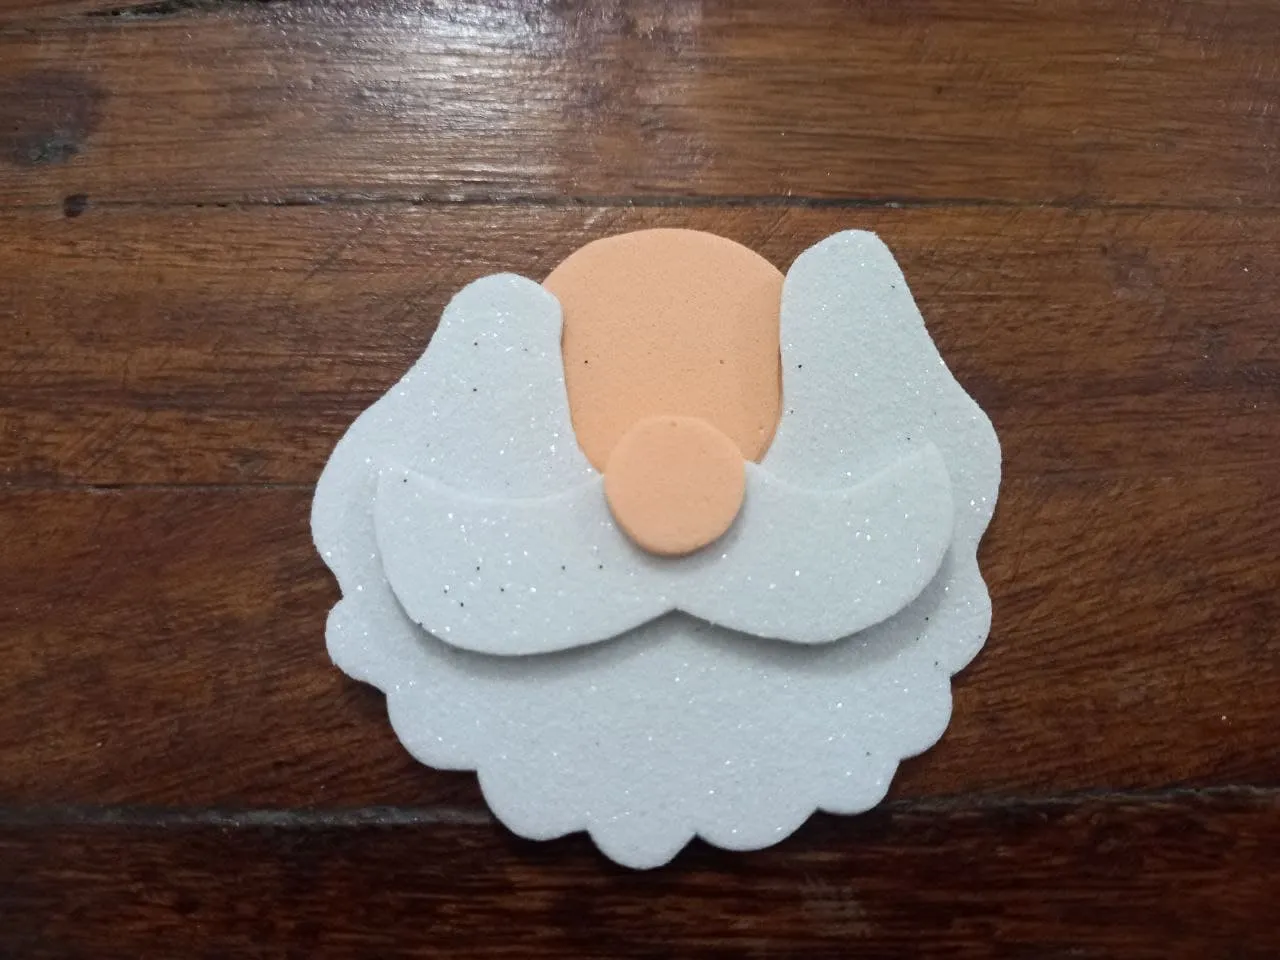
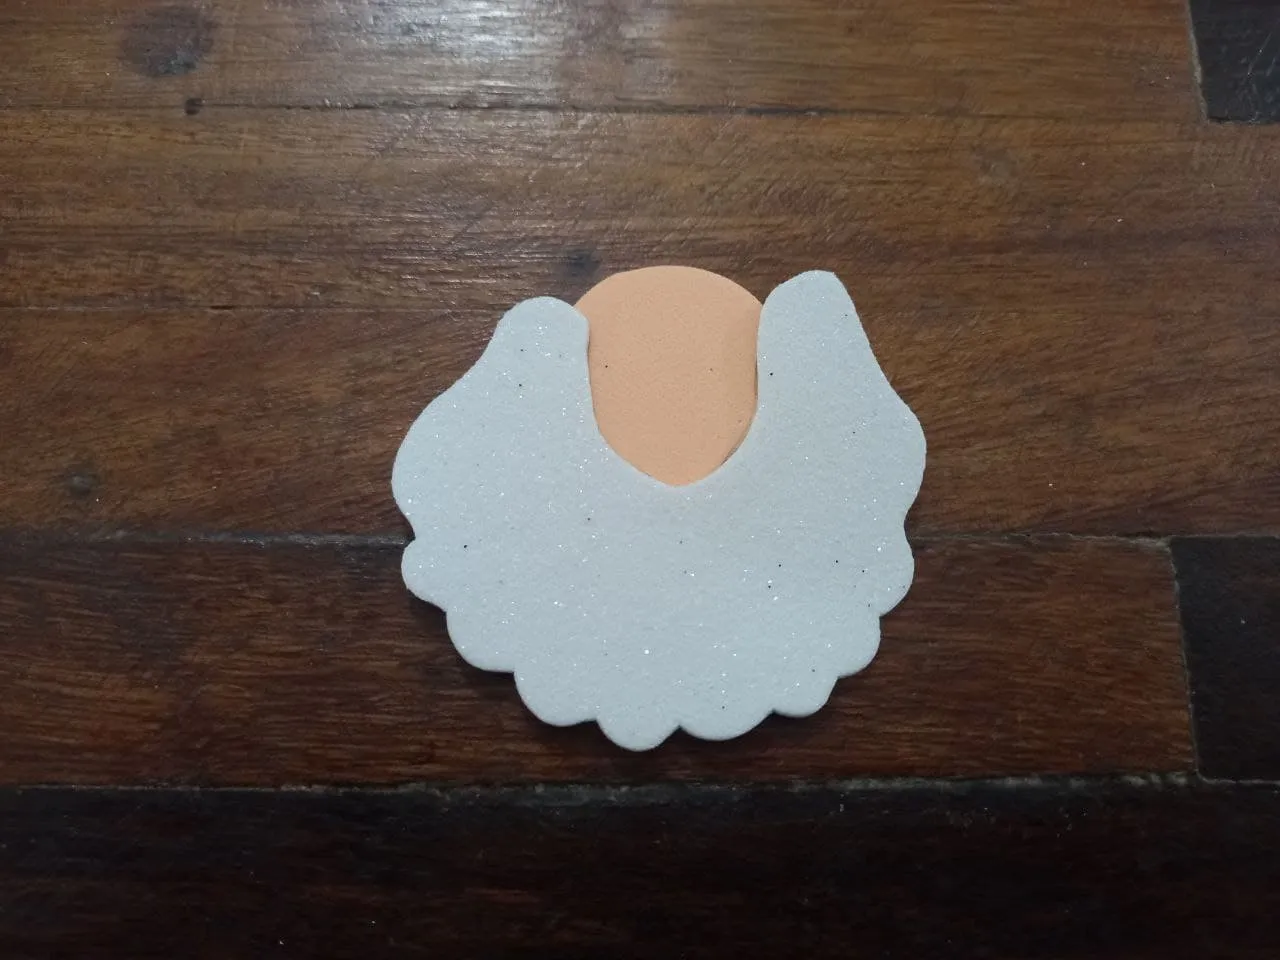
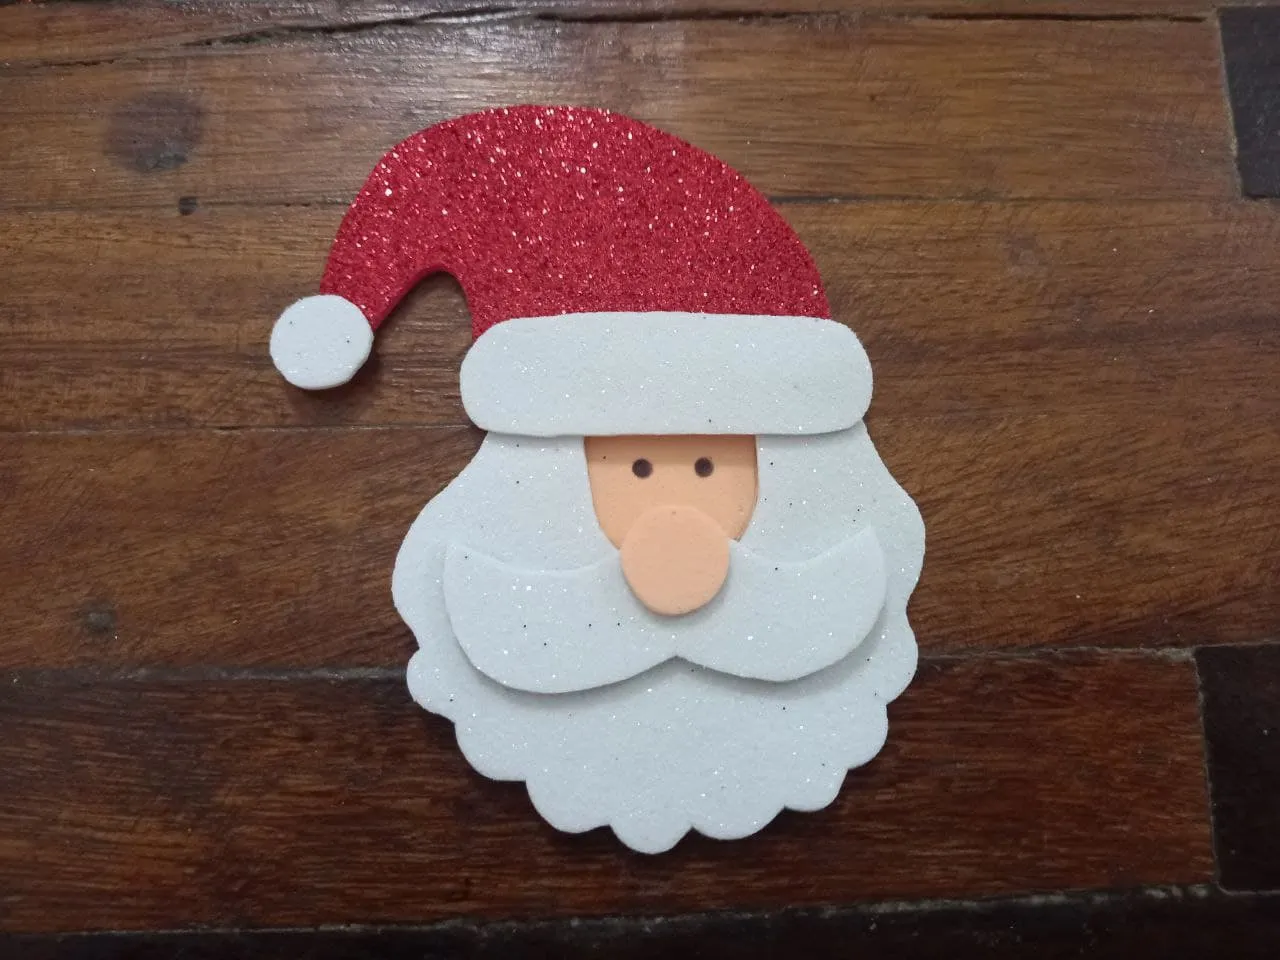
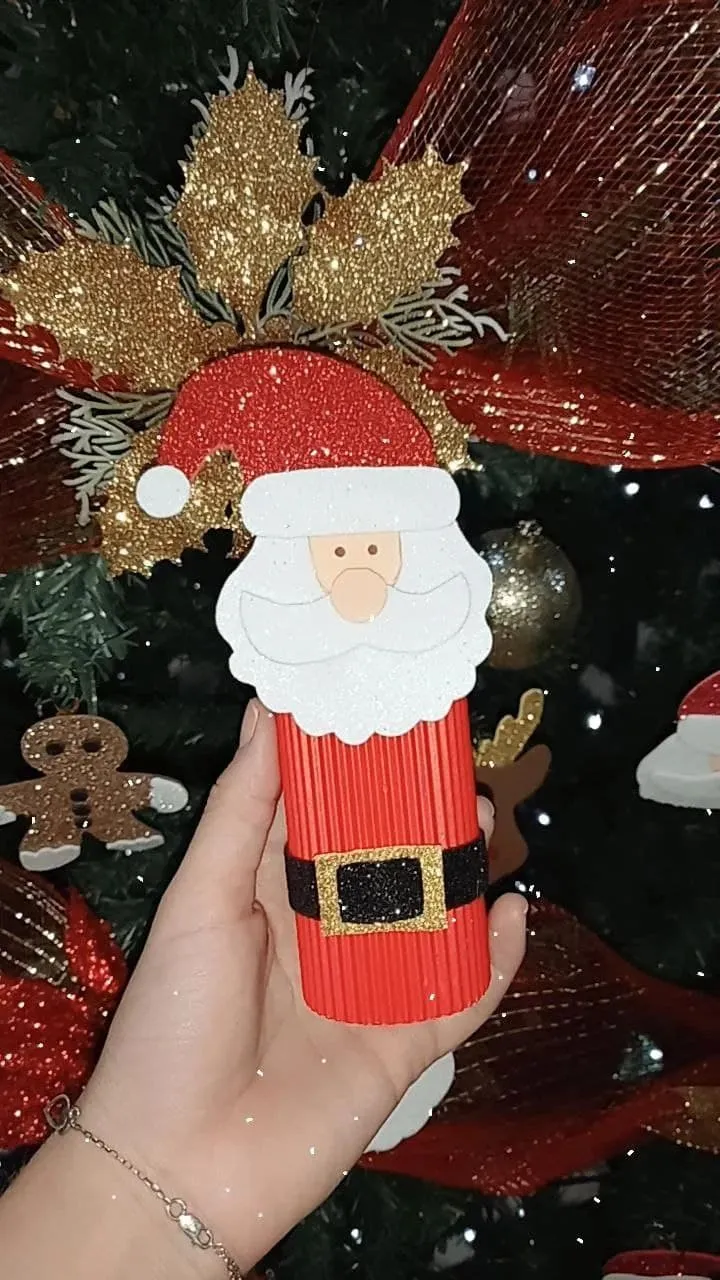
🎄PASO 1. En la hoja de papel vamos a dibujar las piezas para formar a Santa Claus, una barba, cabeza, bigote, borde del gorro, gorro, y dos círculos pequeños que serán la nariz y el pompón del gorro, recortamos y pasamos las piezas al foami en su color correspondiente, la cabeza y nariz en color piel, el gorro en color rojo, la barba, borde del gorro, pompón del gorro y bigote en blanco y recortamos.
🎄 STEP 1. On the sheet of paper we are going to draw the pieces to form Santa Claus, a beard, head, mustache, edge of the hat, hat, and two small circles that will be the nose and pompom of the hat , we cut and pass the pieces to the foam in their corresponding color, the head and nose in skin color, the hat in red, the beard, edge of the hat, pompom of the hat and mustache in white and cut.

🎄 PASO 2. Armamos el Santa Claus y comenzamos pegando el borde del gorro en la orilla inferior de este y el pompón en la punta, luego pegamos la barba sobre el rostro, el bigote sobre la barba y sobre ella la nariz, pegamos el gorro en la parte superior de la cabeza y finalizamos dibujando los ojos con un lapicero.
🎄 STEP 2. We assemble the Santa Claus and start by gluing the edge of the hat on the bottom edge of it and the pompom on the tip, then we glue the beard on the face, the mustache on the beard and on it the nose We glue the hat on top of the head and finish by drawing the eyes with a pencil.

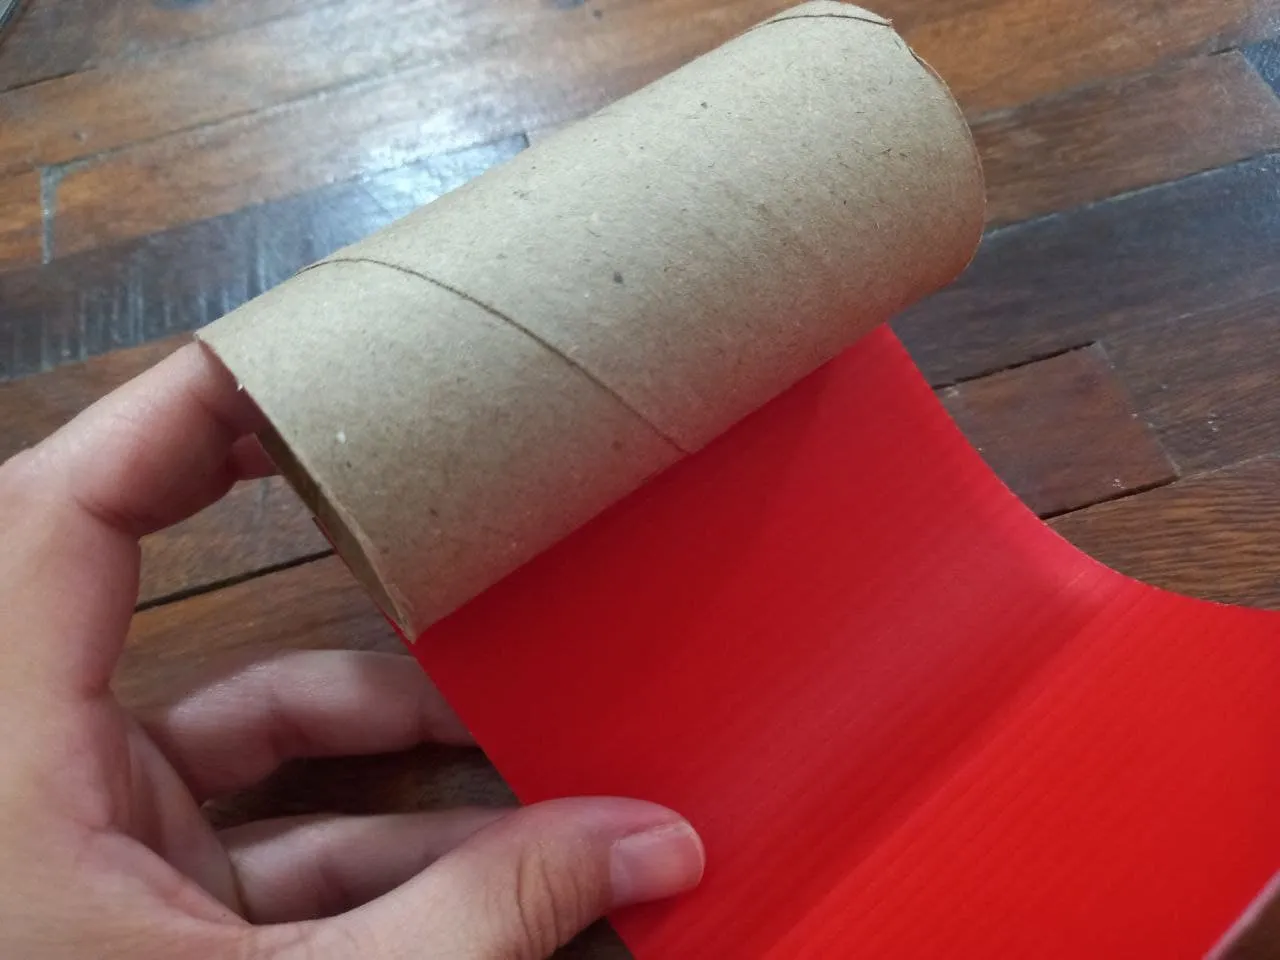
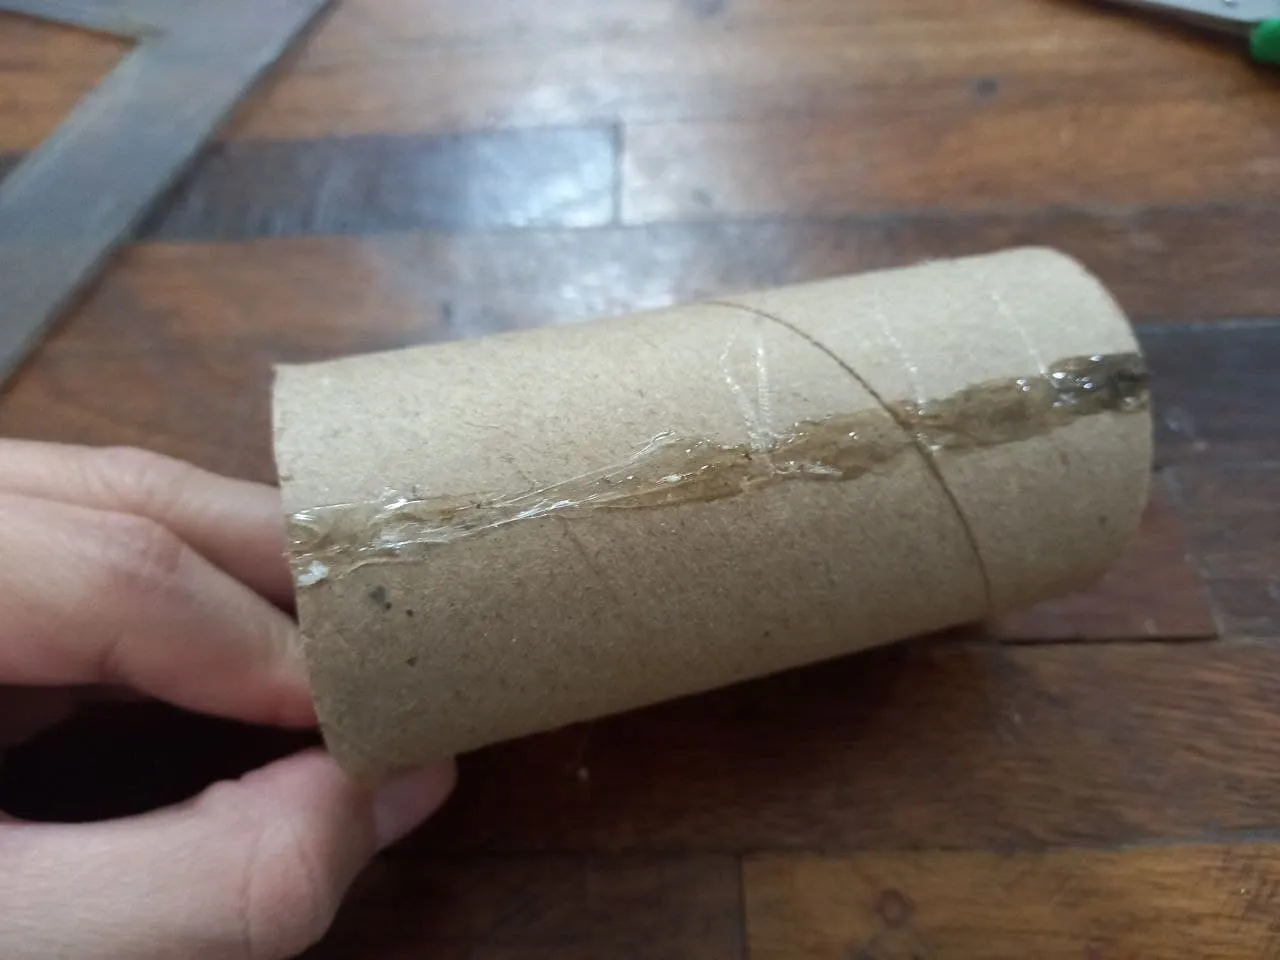
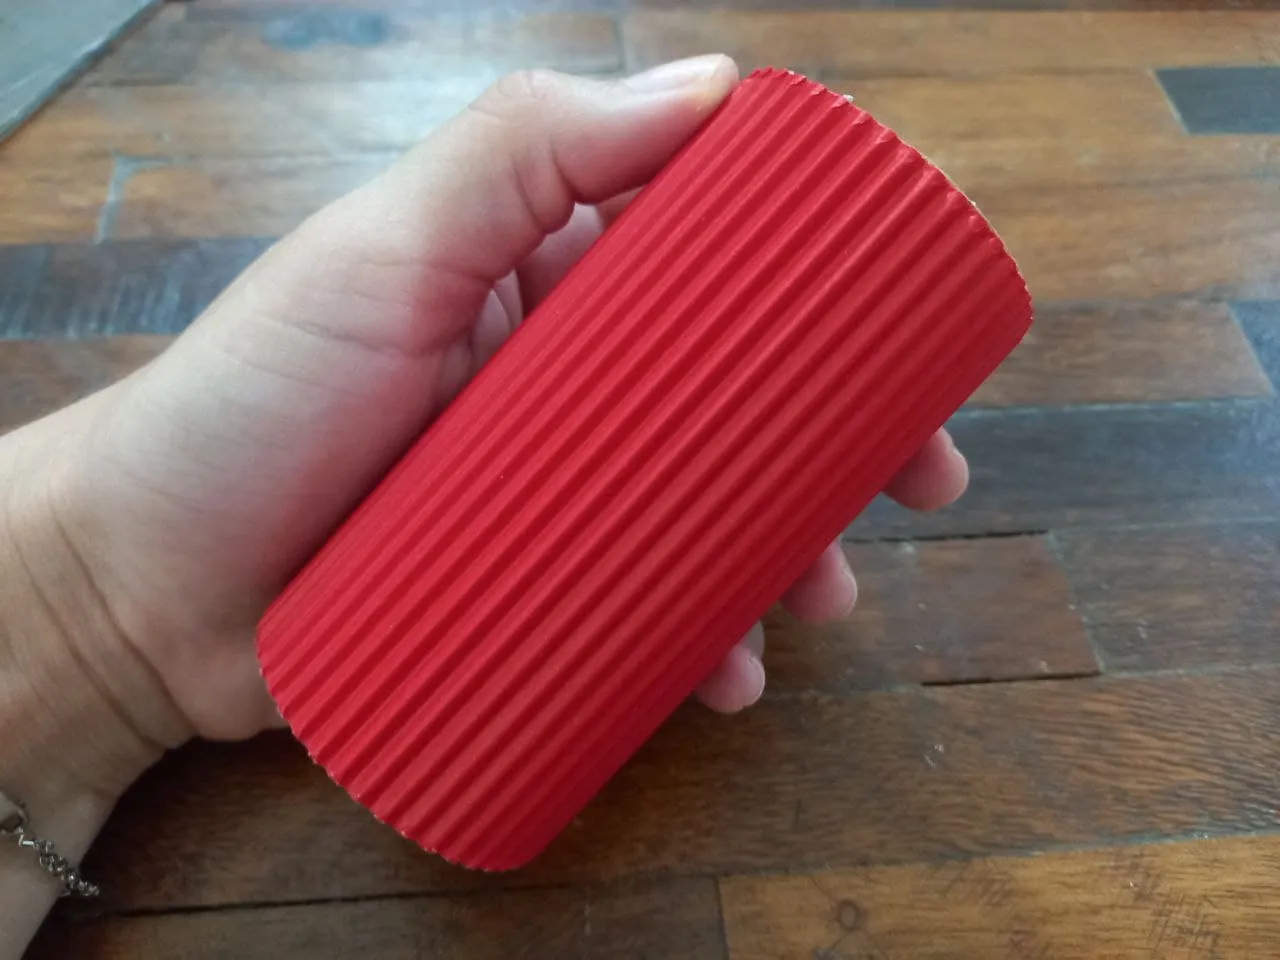
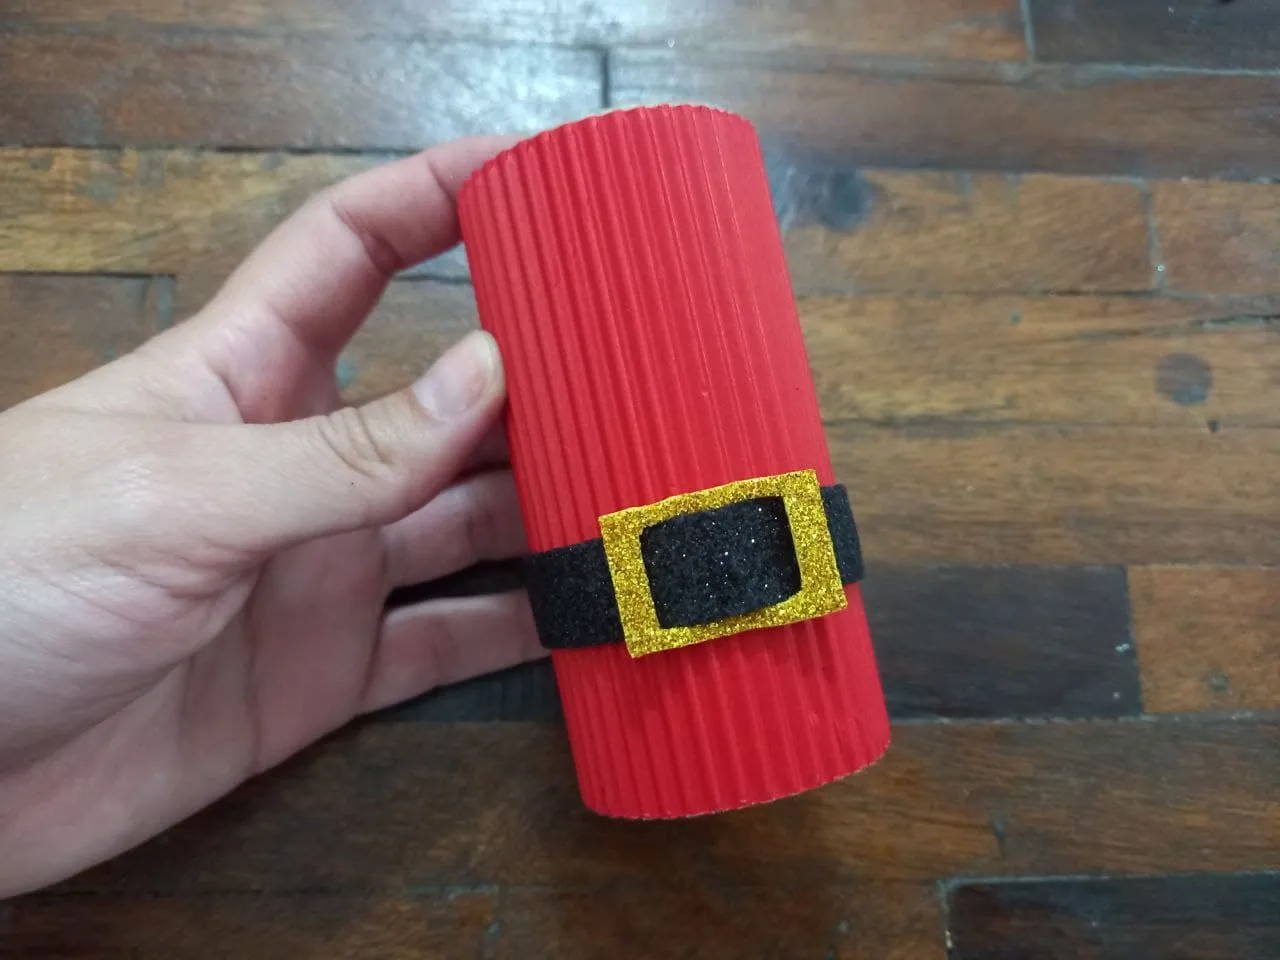
🎄PASO 3. Ahora armaremos el cuerpo de Santa Claus, el cual será el tubo de cartón, con la regla medimos una pieza de cartulina corrugada roja del tamaño ideal para cubrir por completo el tubo de cartón, aplicamos silicón sobre este y pegamos la cartulina hasta quedar completamente cubierto.
🎄 STEP 3. Now we will assemble the body of Santa Claus, which will be the cardboard tube, with the ruler we measure a piece of red corrugated cardboard of the ideal size to completely cover the cardboard tube, we apply silicone on it and we glue the cardboard until it is completely covered.
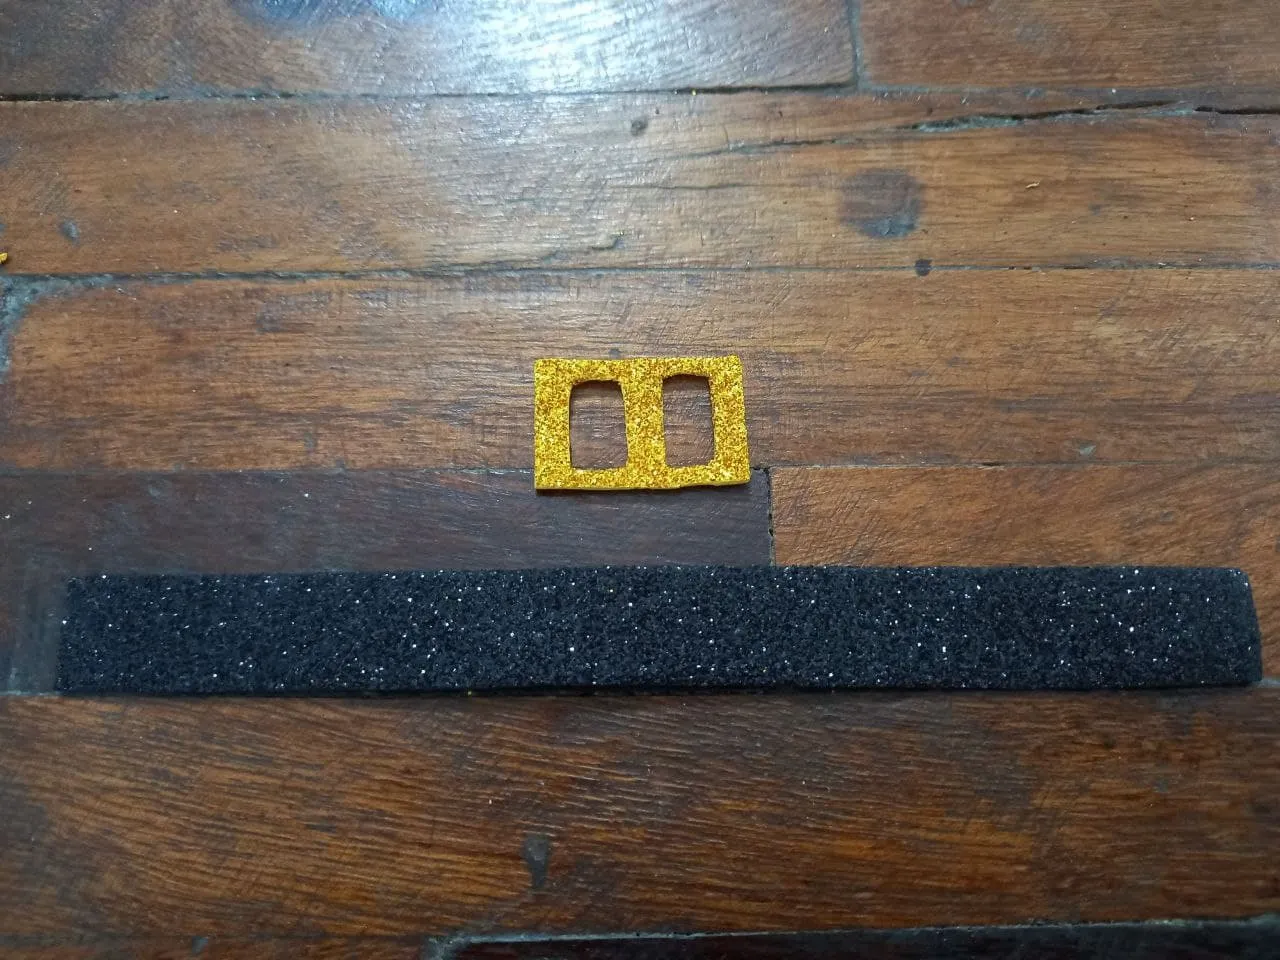
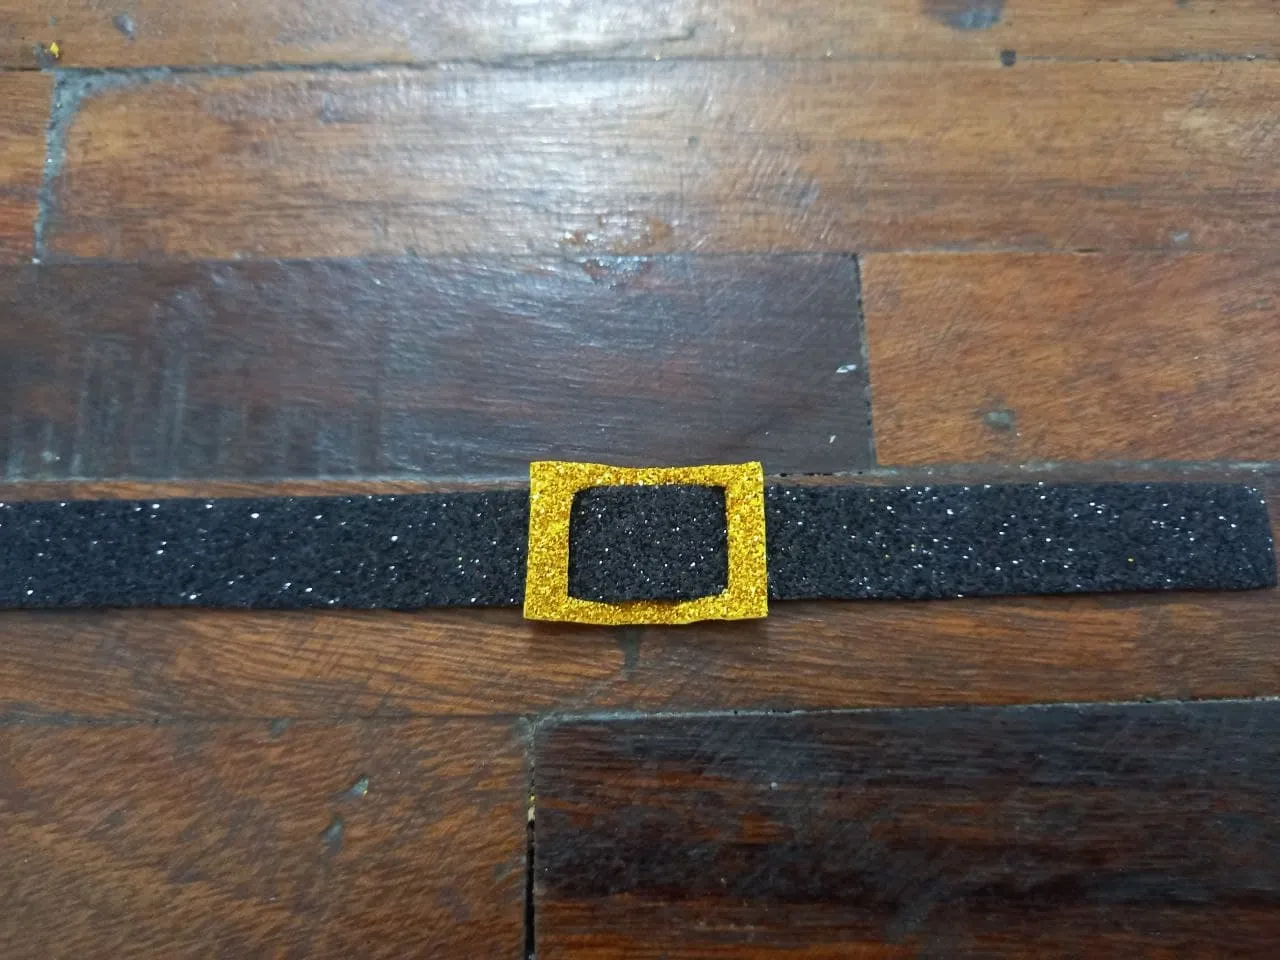
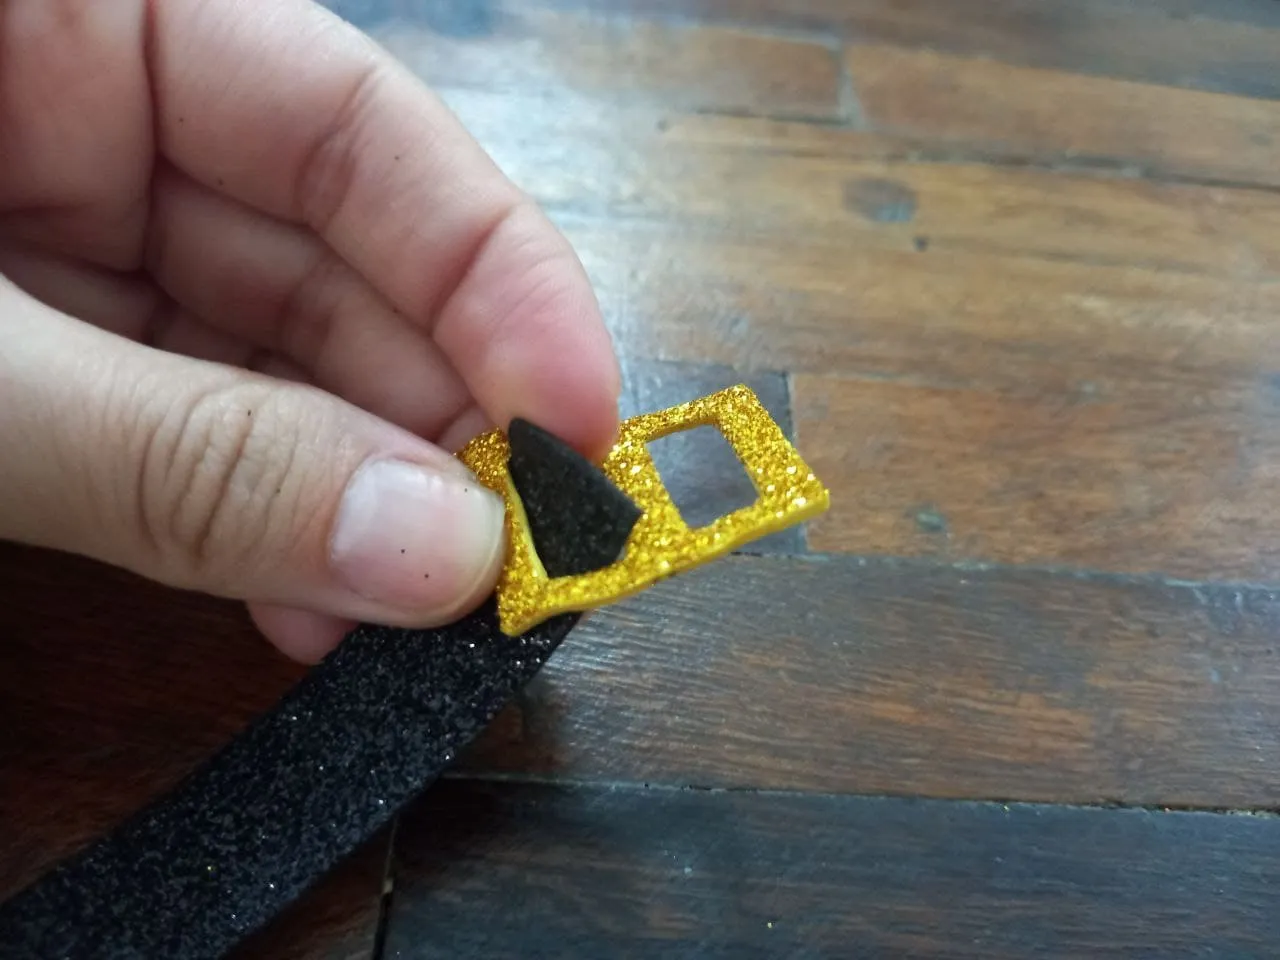
🎄PASO 4. Hacemos una tira delgada de foami negro escarchado que tenga el largo justo para cubrir el tubo de cartón y en foami dorado hacemos una hebilla y sus agujeros del centro deben tener el tamaño ideal para que pase la tira de foami negra, luego pasamos la tira por la hebilla y la rodamos hasta el centro, aplicamos silicón en su parte trasera y pegamos sobre el tubo de cartón un poco más debajo de la mitad de este.
🎄 STEP 4. We make a thin strip of frosted black foami that is just long enough to cover the cardboard tube and in golden foami we make a buckle and its holes in the center must be the ideal size for the strip to pass through. Black foami, then we pass the strip through the buckle and roll it to the center, apply silicone to its back and stick on the cardboard tube a little more under the middle of it.
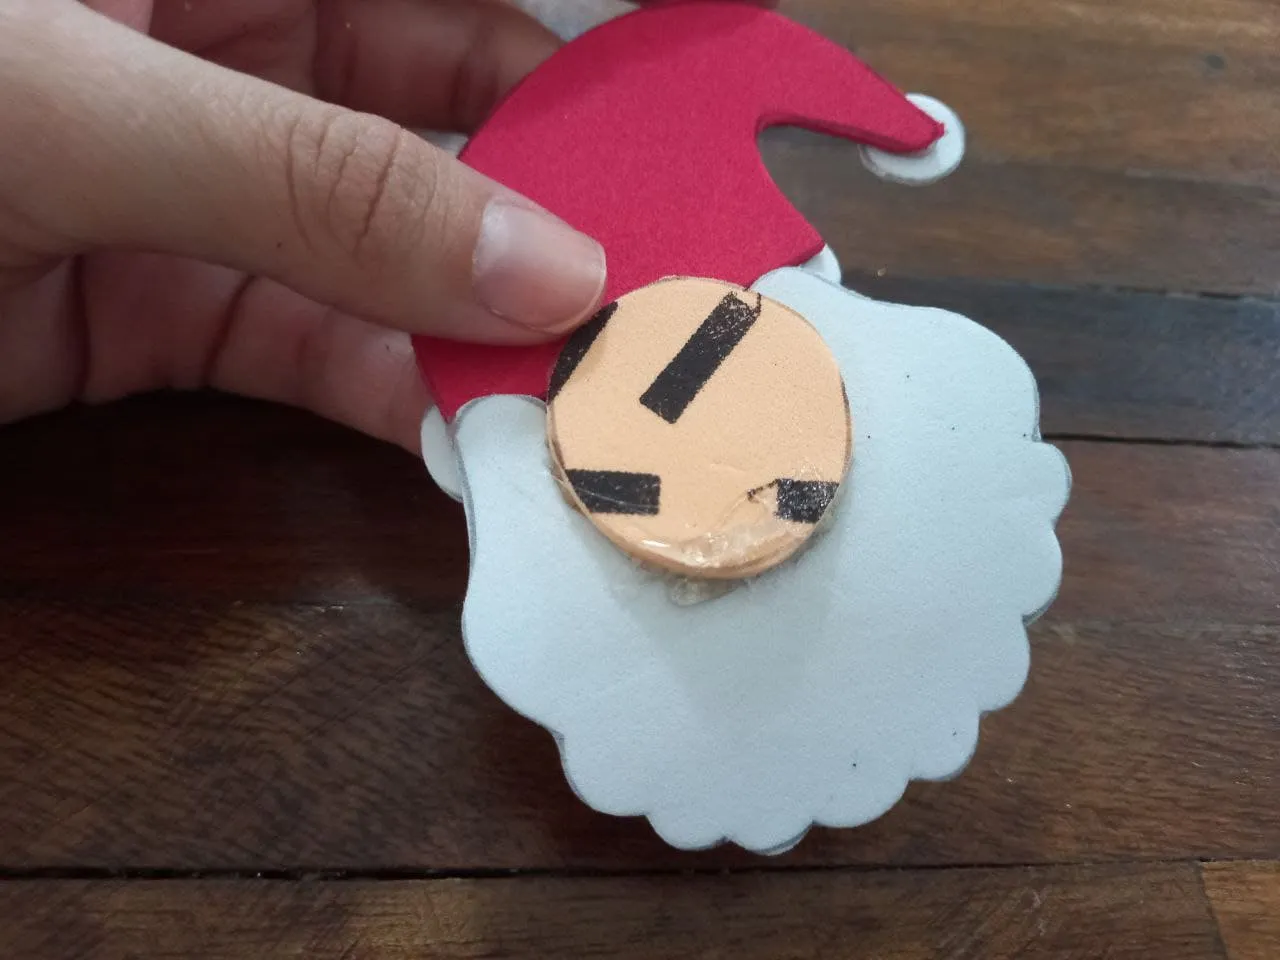
🎄PASO 5. Por último, pegamos la cabeza de santa en la parte superior del tubo de cartón justo en el centro fijándonos por la hebilla del cinturón.
🎄 STEP 5. Finally, we glue the santa's head on top of the cardboard tube right in the center, fixing us by the belt buckle.
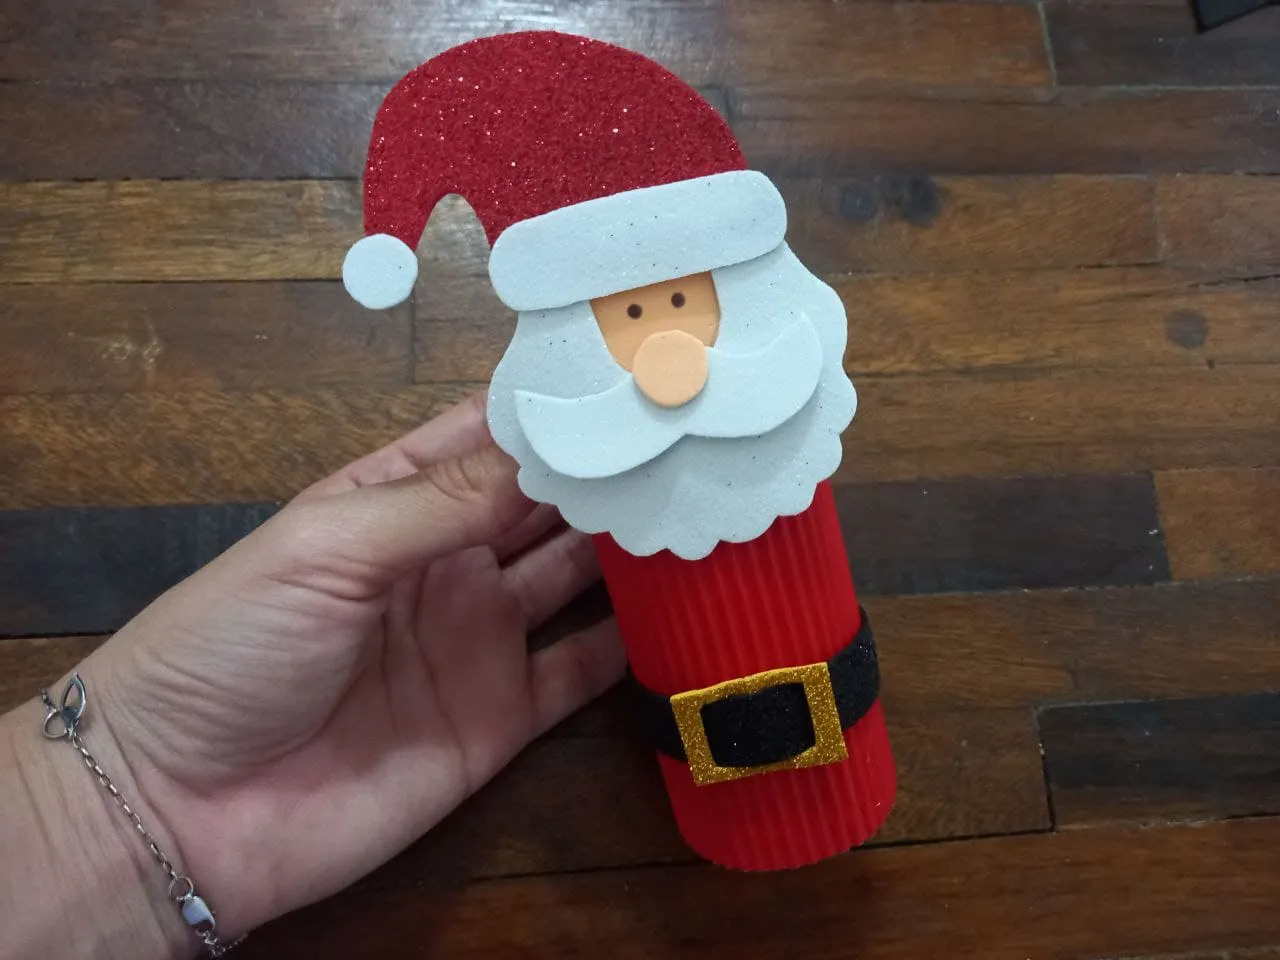
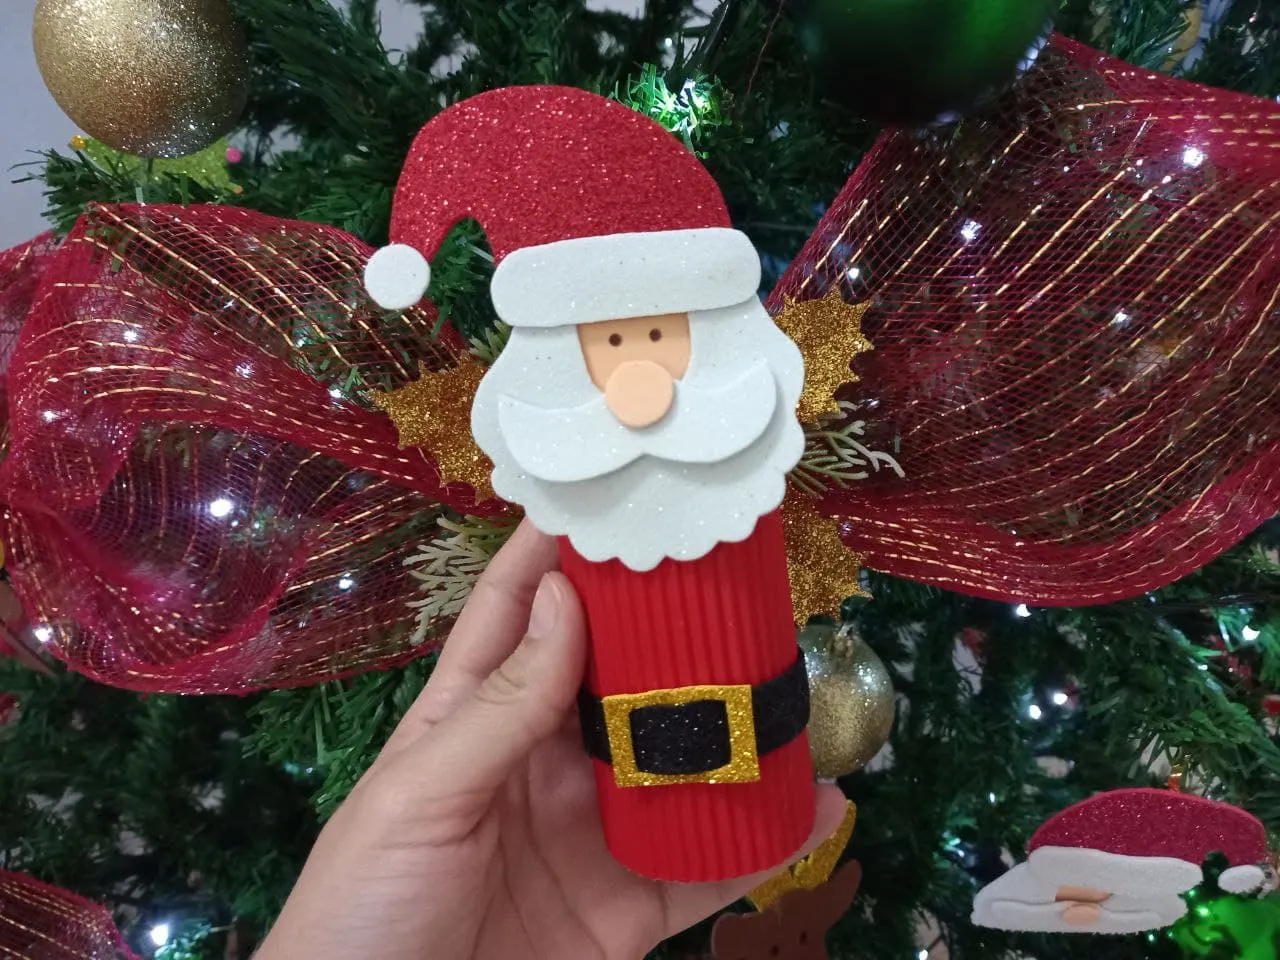
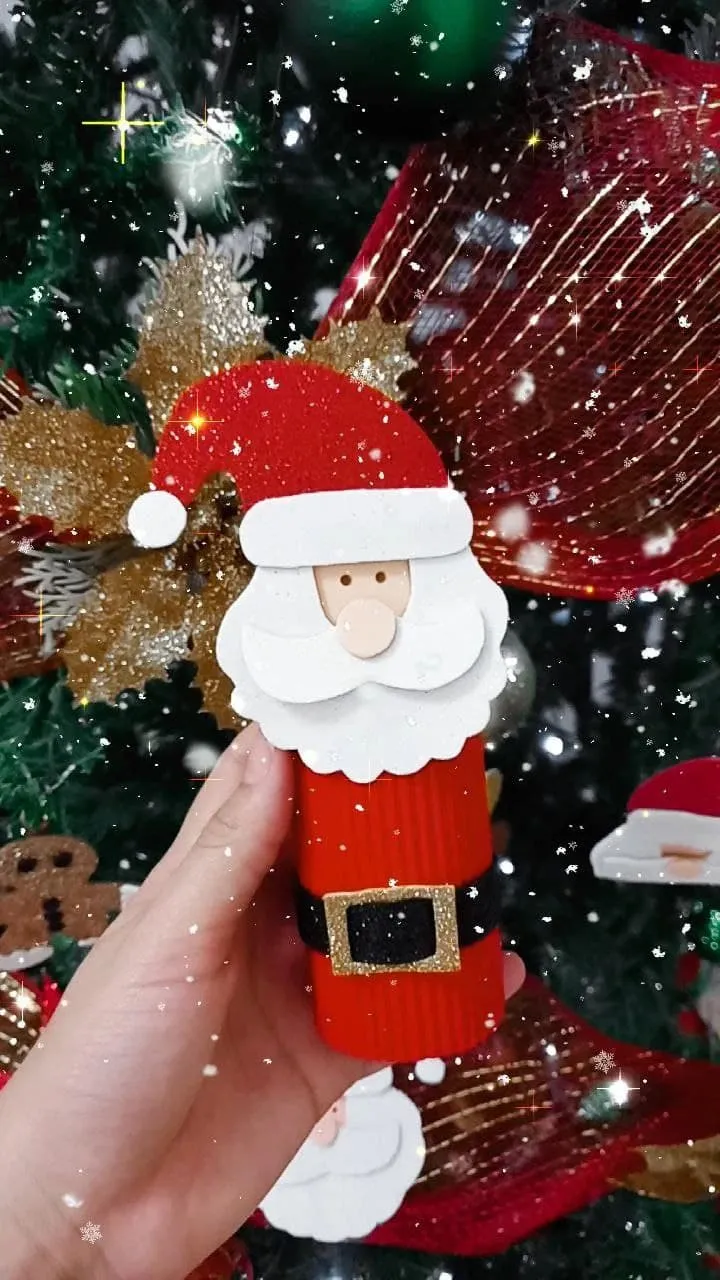
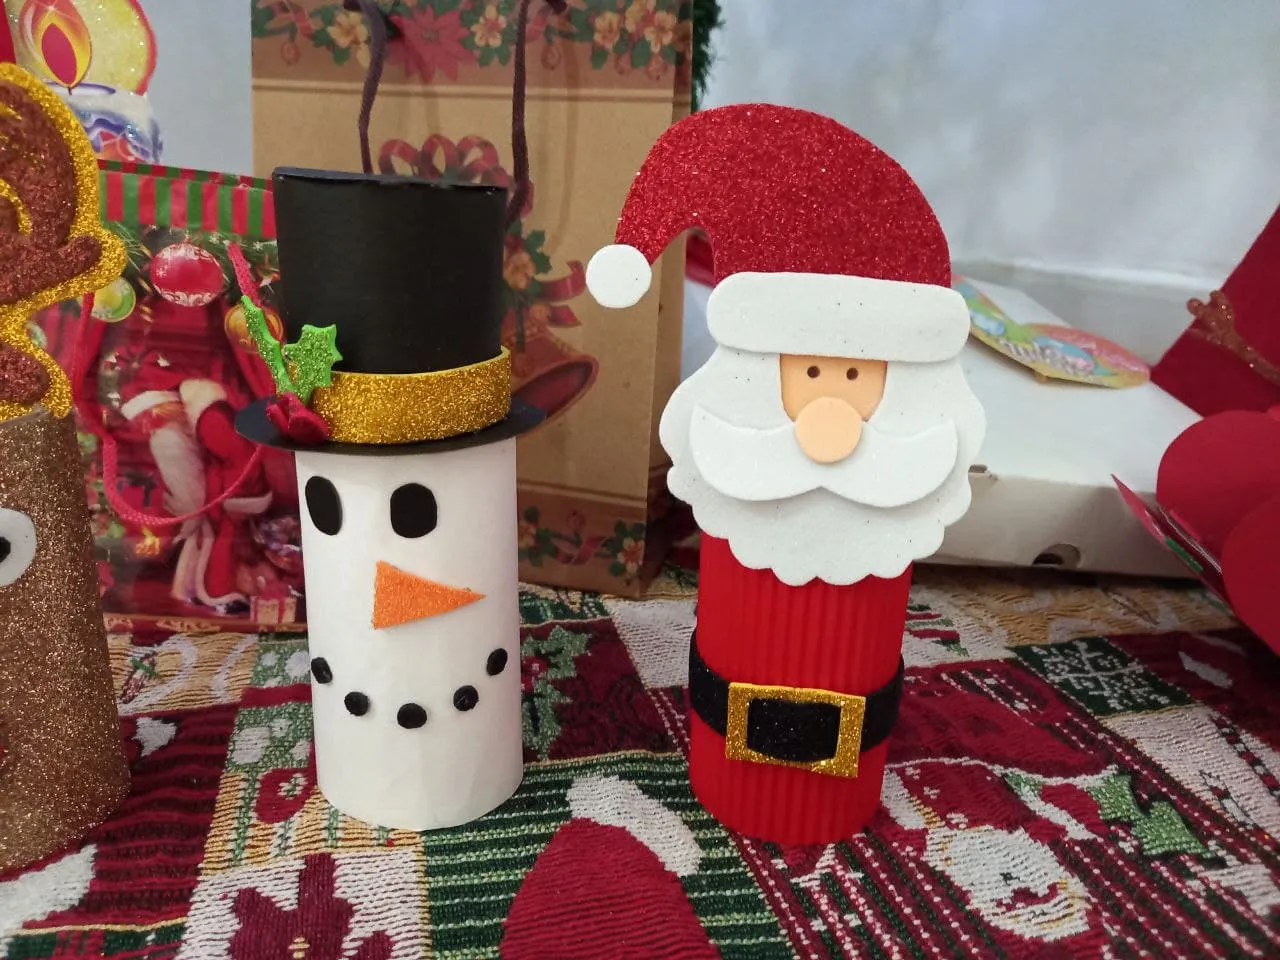
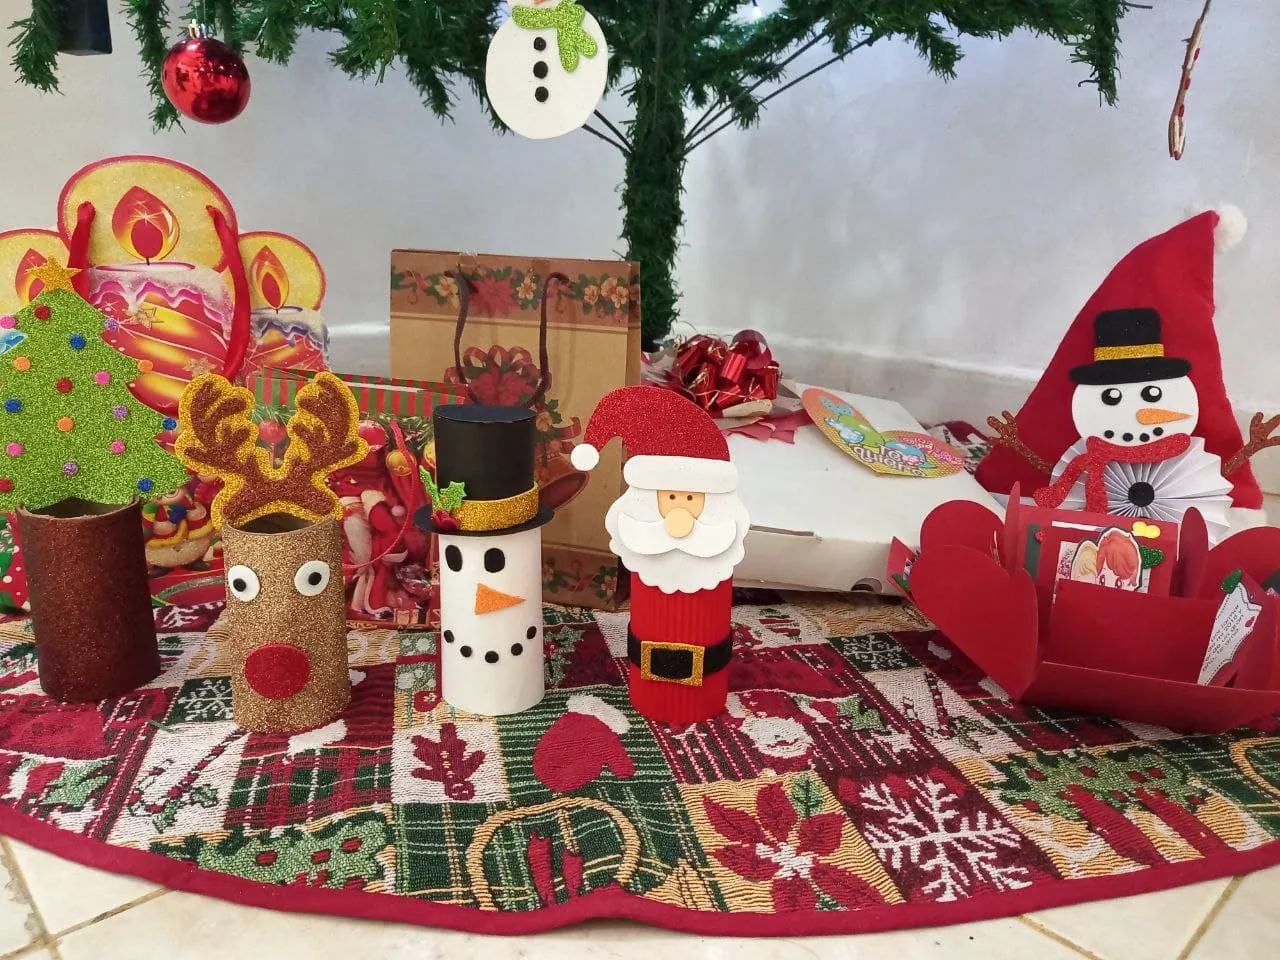
¡Y listo! Ya tenemos un hermoso adorno de Santa Claus para decorar en navidad, queda muy lindo en cualquier espacio y le da ese toque navideño que buscamos en esta época, en lo personal a mí me gusta colocar estos adornos en el pie del árbol pero en cualquier otro lugar de nuestro hogar luce muy bien.
¡And ready! We already have a beautiful Santa Claus ornament to decorate at Christmas, it looks very nice in any space and gives it that Christmas touch that we are looking for at this time, personally I like to place these decorations at the foot of the tree but in any other place of our home looks great.


Todas las fotografías son de mi propiedad.
Fotografías capturadas con mi Samsung Galaxy A12
Nos vemos en mi próxima publicación.
¡Tengan un feliz día!
All photographs are my property.
Photos captured with my Samsung Galaxy A12
See you in my next post.
¡Have a happy day!