Saludos, hoy les presento el proceso de creación de este dije con el icono del pez que tiene inscrito el nombre de Jesús; esto fue hecho bajo el pedido de una persona que me contacto por internet y quería este modelo, ella tenía ya uno, pero lo perdió, conversamos, le comente que las opciones era hacerlo en bronce y bañarlo en plata o hacerlo directamente en plata, y decidió que fuera de plata.
Necesitaba la imagen del pez con la inscripción de Jesús, empecé a buscar internet donde afortunadamente hay muchas imágenes de referencia y pude tomar una, pasándola luego al programa de ilustración vectorial Inkscape, ajustando la medida y hacer uno que otro cambio necesario.
Los materiales y herramientas que use son los siguientes:
- Arco de Segueta para joyería, Sierras de segueta de 2/0
- Lámina de plata de 0.8 mm y alambre de plata del mismo espesor.
- Dremel con eje flexible
- Fresa para abrir hueco de 0.8 mm
- Limas y lija de grano 220, 360 y 400.
- Motor de banco, con disco para pulir de tela, cera de pulir
- Soplete y soldadura de plata, bórax como fundente.
- Piedra Refractaria y ácido para decapado.
- Pega de Barra
PROCESO
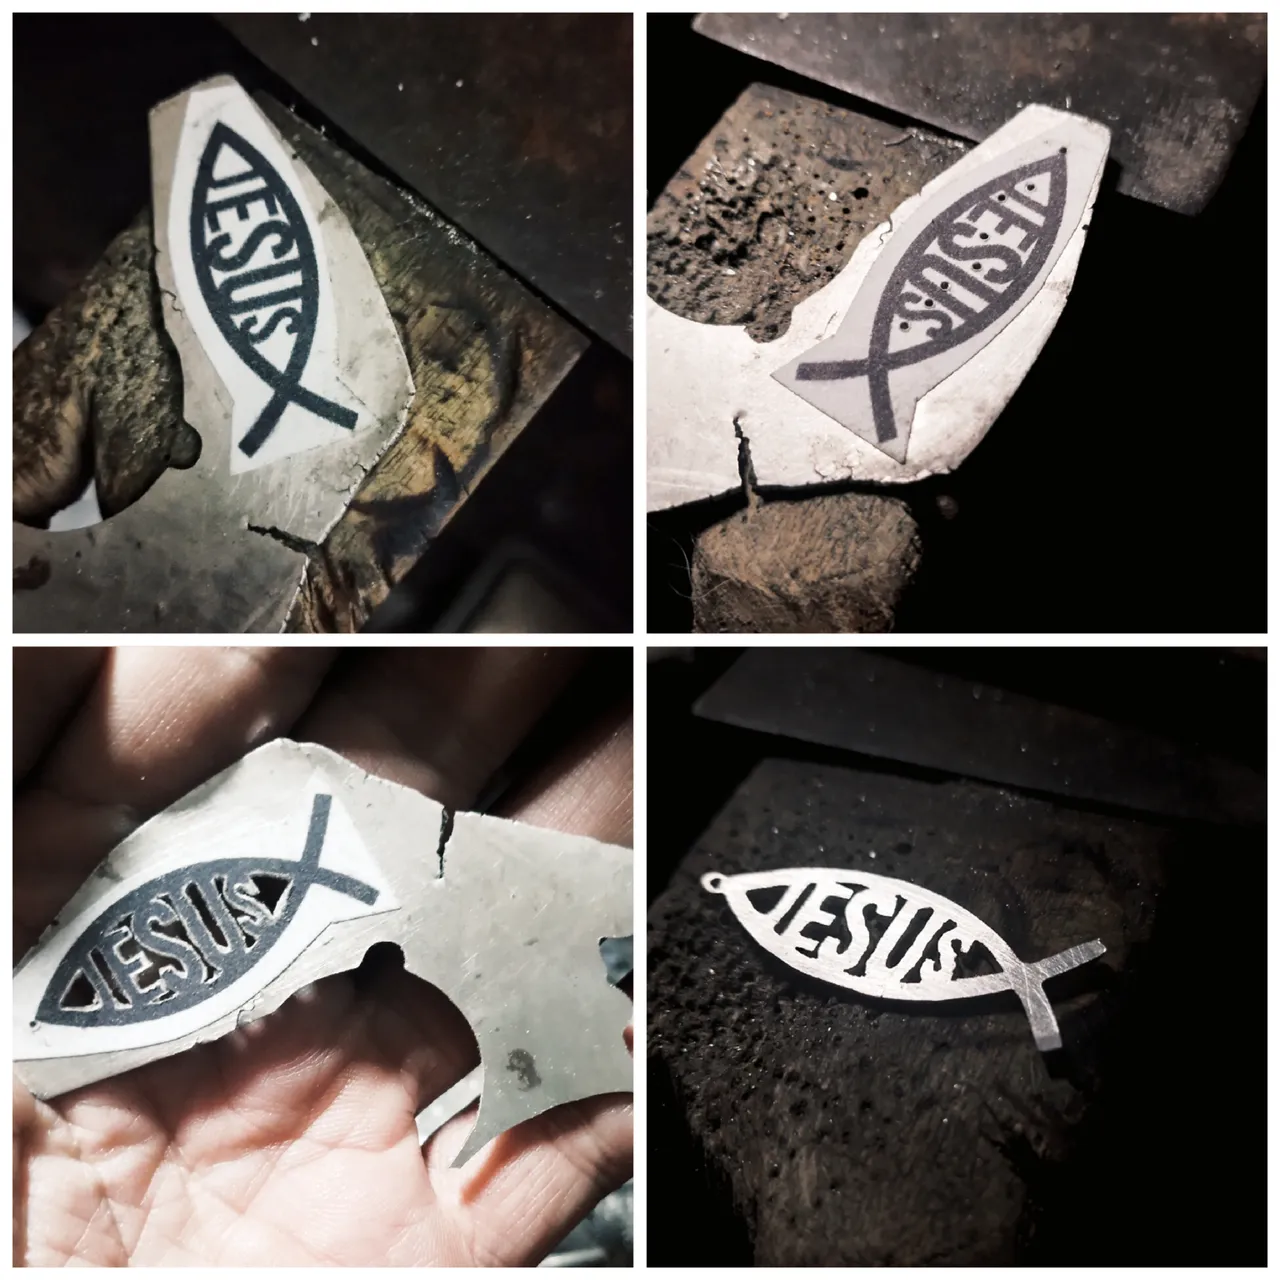
Pegue la impresión sobre la lámina de plata con pega de barra, puse la fresa para abrir hueco e hice las perforaciones dentro con el uso del Dremel y la fresa de 0,8 mm; estas perforaciones son para los cortes internos, que son las primeras que se hacen para facilitar el proceso de corte de la pieza, porque si los hago después se complica por el tamaño reducido de la pieza.
Posteriormente, agarro el arco de segueta con la sierra 2/0, empezando a hacer los cortes internos, después recorté con la segueta la silueta exterior, todo esto con mucho cuidado, tomando como referencia el dibujo.
Una vez terminada la primera etapa de cortes, retiró el dibujo que estaba pegado y observar cuáles son las imperfecciones que se deben nivelar, por dentro con el uso de la segueta y por fuera con las limas.

Una vez ya contento, empiezo a pasar lija con las lijas número 220 y 360 para quitar imperfecciones y que después de corregir, paso luego a soldar la argolla elaborada con hilo de plata de 0.8 mm, por lo que vamos a la piedra refractaria, aplicando bórax en el área de unión de la argolla, se le ponen la soldadura de plata y se le aplica fuego con el soplete.
Terminado esto se mete en un ácido espacial para que la plata blanquee, a este proceso se le llama decapado; que permite quitar restos de bórax y la oxidación del metal.
Lo vuelvo a lijar con lija número 360 y 400, después voy al motor de banco para pulir y así sacarle brillo con la cera de pulir.
( )
)
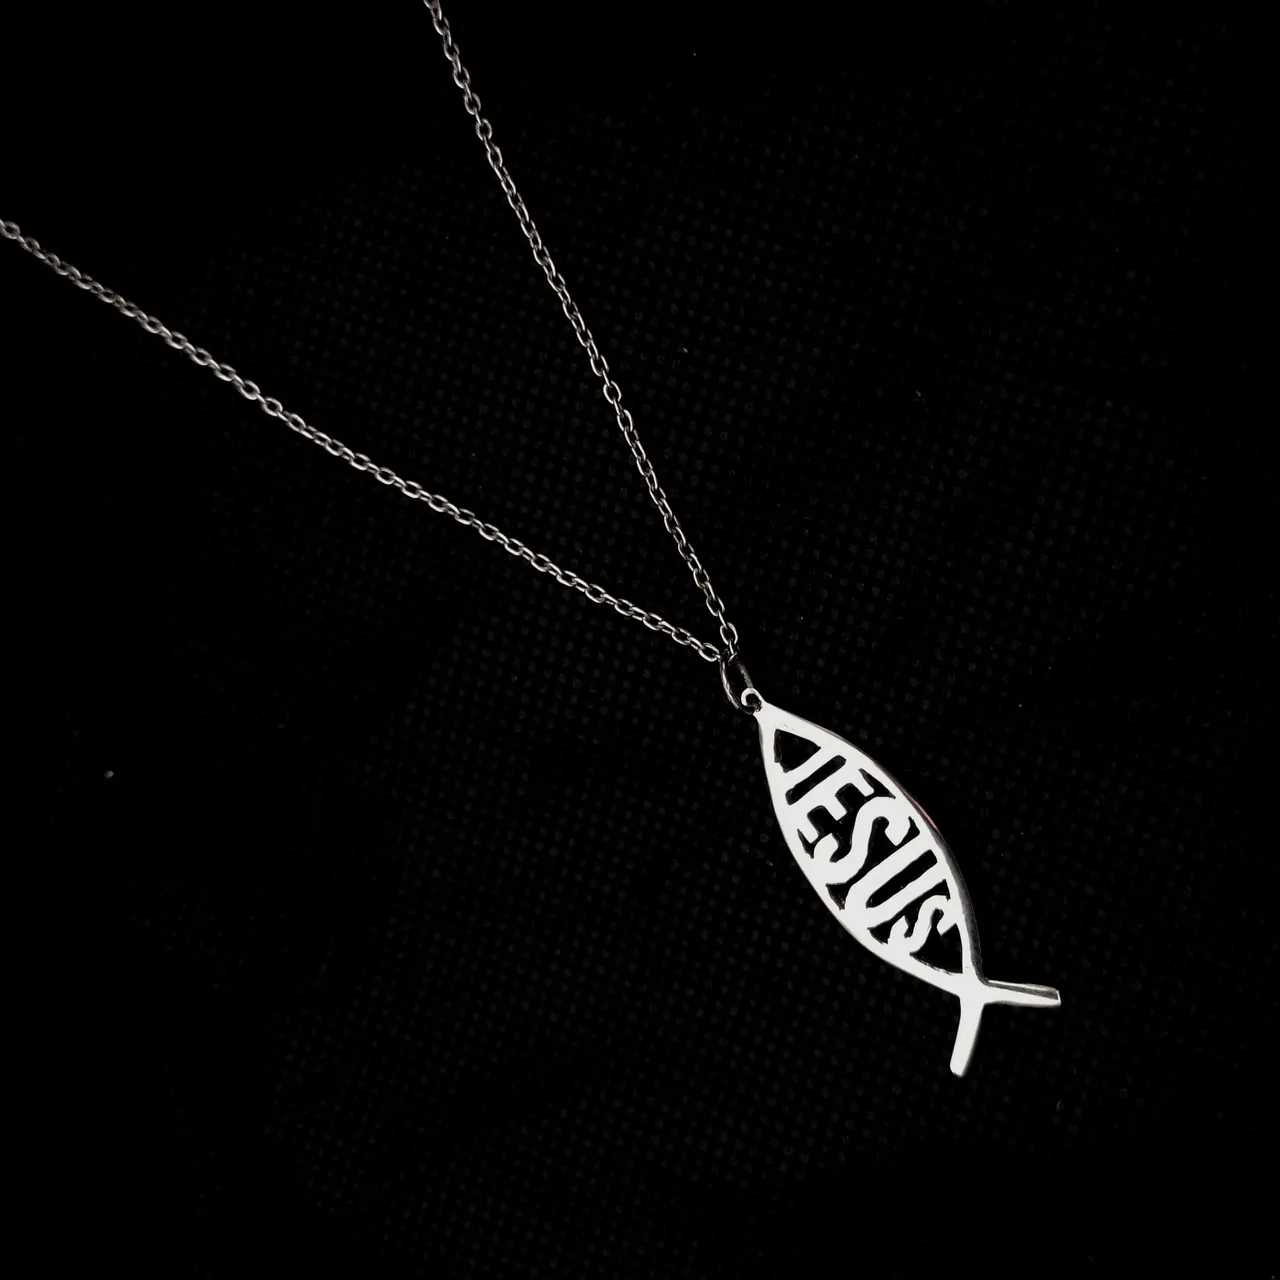
Este es el resultado final, ya la pieza montada en una cadena, espero que les guste y estaré atento a los comentarios.
Si deseas conocer mi trabajo de joyería puedes seguirme en:
https://www.instagram.com/m16ueljoyas
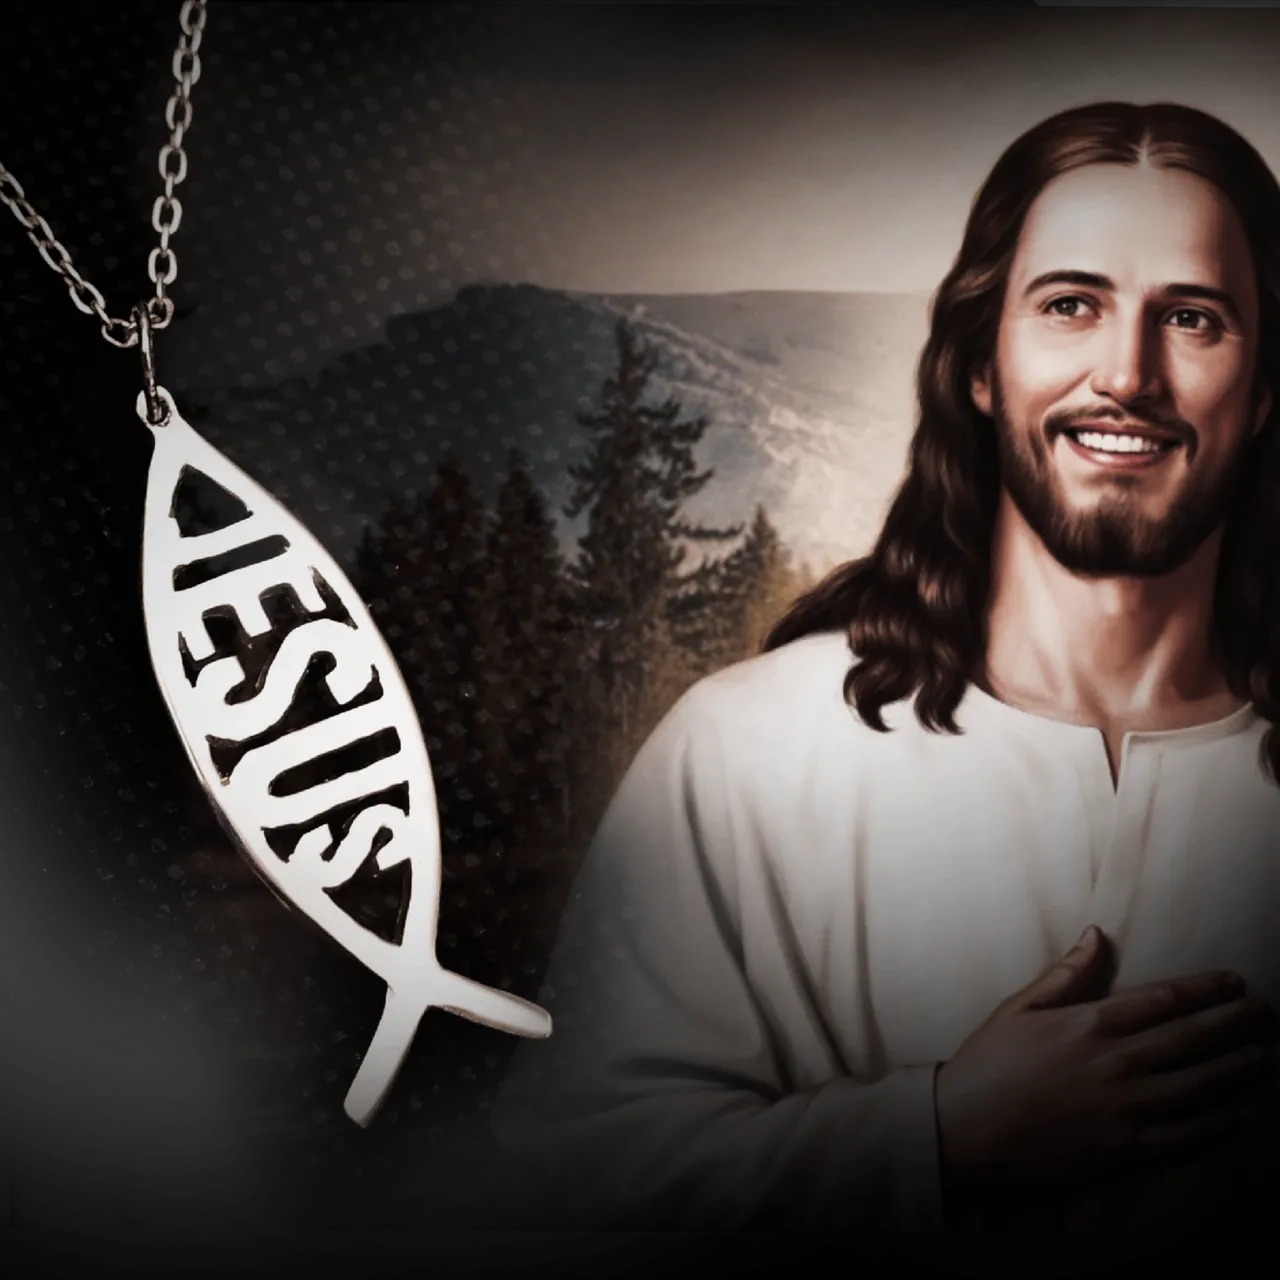
Nota: collage de fotos hecha con PicsArt; La imagen principal fue editada en PicsArt y el Cristo fue hecho con ia desde Ideogram.

Imagen de Cristo Autogenerada por mí en Ideogram: https://ideogram.ai/g/om1_bfA9QjWqIjJmTRpnZA/0
////////////////////////////////////// ///////////////////////
English - Google Translate
Greetings, today I present the process of creating this pendant with the icon of the fish that has the name of Jesus inscribed on it; this was made at the request of a person who contacted me online and wanted this model, she already had one, but she lost it, we talked, I told her that the options were to make it in bronze and silver plated or to make it directly in silver, and she decided that it should be silver.
I needed the image of the fish with the inscription of Jesus, I started searching the internet where fortunately there are many reference images and I was able to take one, Then I transferred it to the vector illustration program Inkscape, adjusting the measurement and making any necessary changes.
The materials and tools I used were the following:
- Jewelry hacksaw, 2/0 hacksaws
- 0.8 mm silver sheet and silver wire of the same thickness.
- Dremel with flexible shaft
- 0.8 mm hole cutter
- Files and sandpaper with 220, 360 and 400 grit.
- Bench motor, with cloth polishing disc, polishing wax
- Blowtorch and silver solder, borax as flux.
- Refractory stone and acid for pickling.
- Glue Stick
PROCESS
I glued the print onto the silver sheet with glue stick, put the cutter to open the hole and made the holes inside using the Dremel and the 0.8 mm cutter; these holes are for the internal cuts, which are the first ones made to facilitate the process of cutting the piece, because if I make them later it gets complicated due to the small size of the piece.
Afterwards, I took the hacksaw arch with the 2/0 saw, starting to make the internal cuts, then I cut out the outer silhouette with the hacksaw, all this very carefully, using the drawing as a reference.
Once the first stage of cutting is finished, I remove the drawing that was glued and observe which are the imperfections that need to be leveled, inside with the use of the hacksaw and outside with the files.
Once I am satisfied, I start to sand with the number 220 and 360 sandpaper to remove imperfections and after correcting, I then proceed to solder the ring made with 0.8 mm silver wire, so we go to the refractory stone, applying borax in the area where the ring joins, the silver solder is applied and fire is applied with the blowtorch.
Once this is done, it is put into a special acid so that the silver whitens, this process is called pickling; it allows to remove borax remains and the oxidation of the metal.
I sand it again with 360 and 400 grit sandpaper, then I go to the bench motor to polish and thus make it shine with the polishing wax.
()
This is the final result, the piece already mounted on a chain, I hope you like it and I will be attentive to the comments.
If you want to see my jewelry work you can follow me at:
https://www.instagram.com/m16ueljoyas
Note: photo collage made with PicsArt; The main image was edited in PicsArt and the Christ was made with AI from Ideogram.
Image of Christ Self-generated by me in Ideogram: https://ideogram.ai/g/om1_bfA9QjWqIjJmTRpnZA/0