
El Cho Ku Rei es un símbolo que significa "pon aquí todo el poder del universo" y es usado en la práctica del Reiki, que es una antigua especialidad de sanación a través de la energía, regularmente con el uso de las manos. Este símbolo me lo mando a hacer un amigo para ponerlo en venta en su tienda esotérica y en este post te voy a dar un recorrido de su proceso de elaboración, por medio de la técnica del calado sobre metal, de la cual me puedo considerar un orfebre experimentado, modestia aparte.
Los materiales, herramientas e insumos usados son los siguientes:
❤️ Lámina de plata ley 950 de 1 mm. Argollas de plata.
❤️ Arco de segueta y sierra o pelo de segueta 2/0.
❤️Pinzas de joyería.
❤️ Dremel
❤️fresas de 0.75 mm para abrir los huecos.
❤️ Lija 3M 280, 360 y 400
❤️ Motor de banco, cera de pulir, mopa de pulir.
❤️ Soplete, soldadura de plata y bórax como fundente.
PROCESO
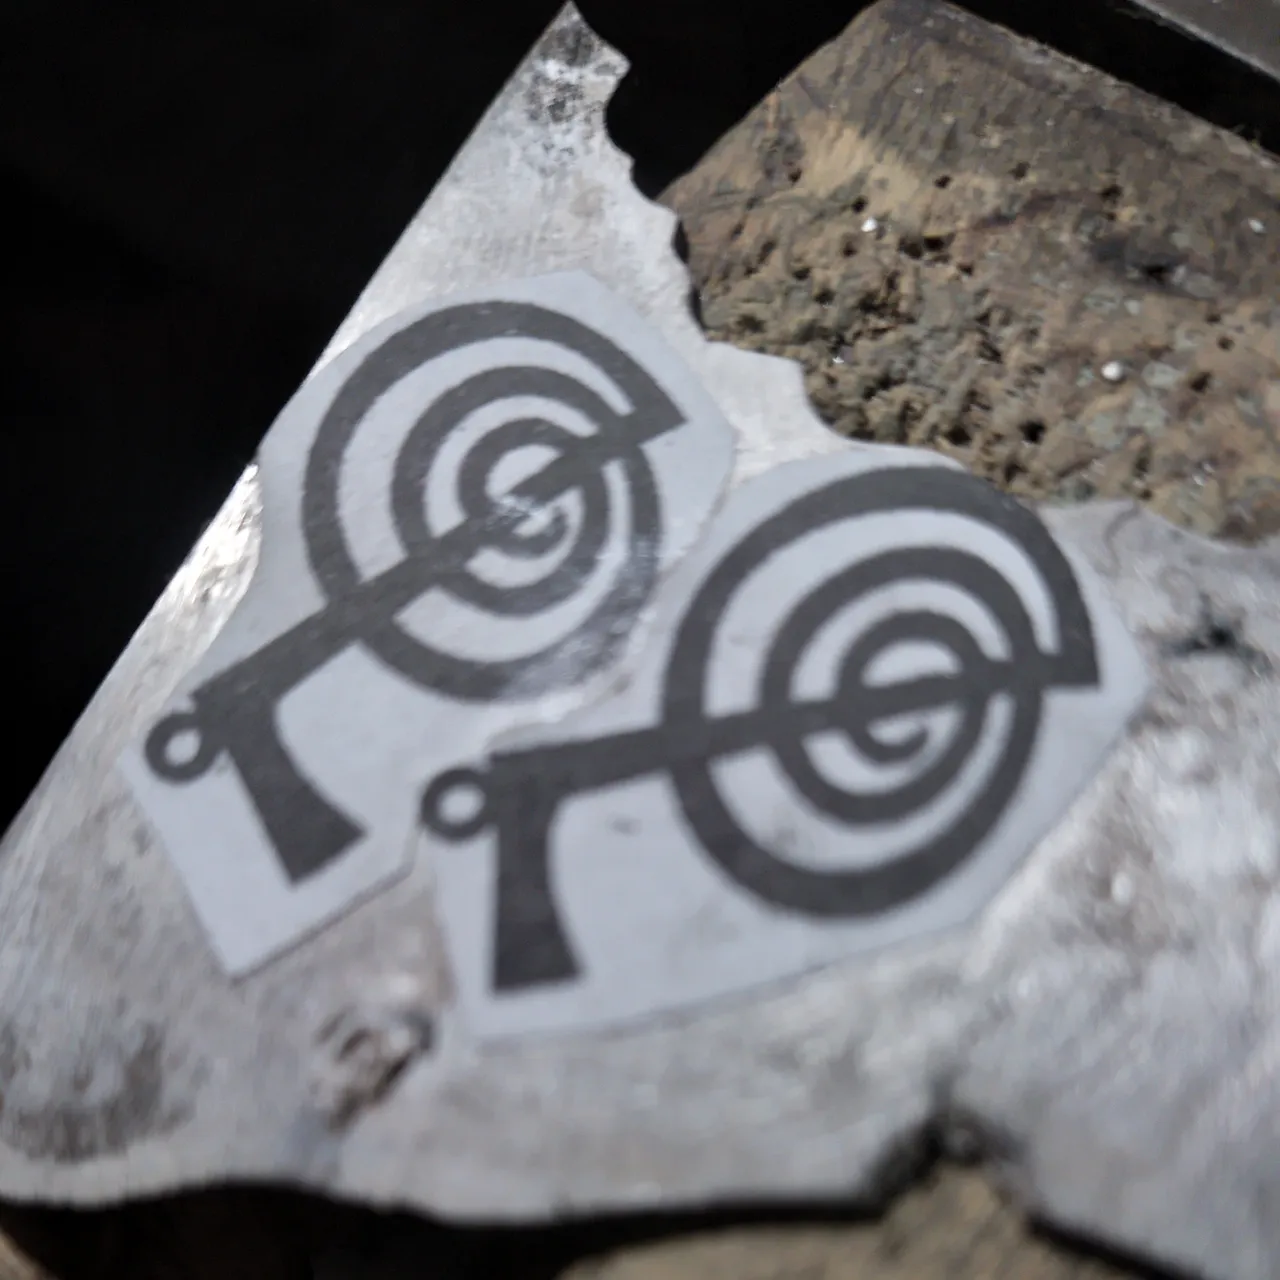
Antes de todo dibuje el símbolo en la computadora usando Inkscape y allí mismo ajuste el tamaño, imprimí, recorte y pegue en la lámina de plata con pega blanca. El dibujo me servirá de guía para los cortes que debo hacer.

Con la fresa de 0,75 mm y el Dremel, procedí a abrir los huecos en la parte interior de la figura, para poder hacer los cortes internos que son los primeros que se hacen para poder facilitar el trabajo, ya que si corto la silueta exterior en un principio me traería mucha complicación, lo que significa perdida de tiempo y estrés innecesario.
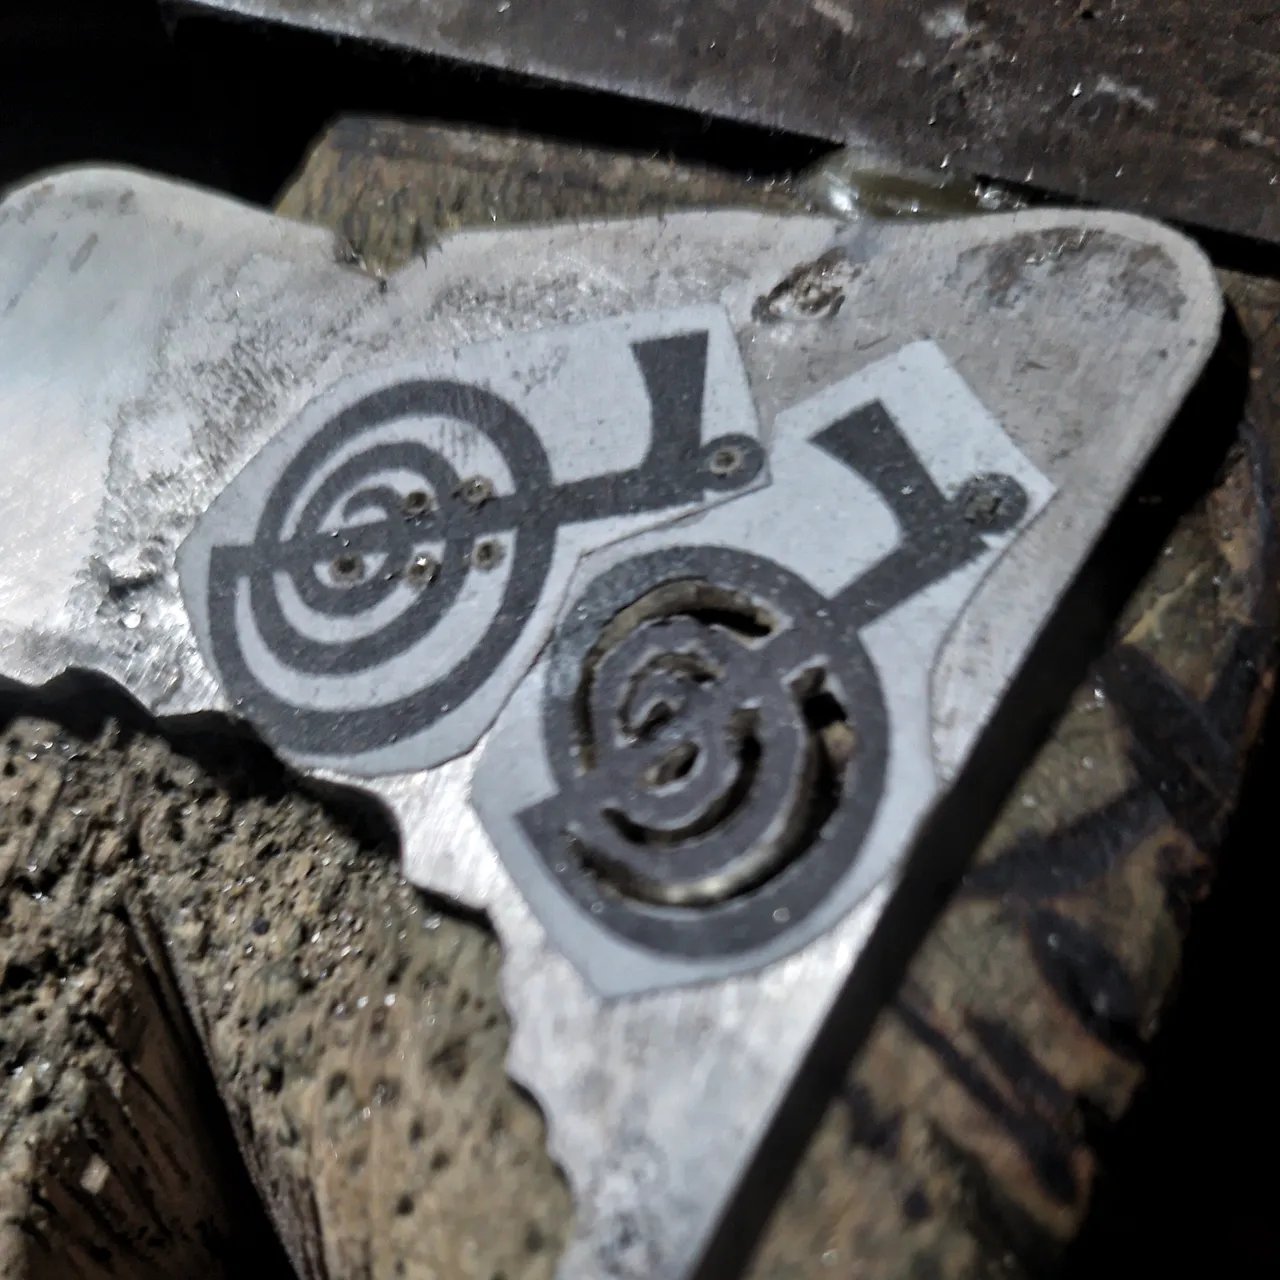
Con la segueta y el uso del pelo de segueta o sierra 2/0 comienzo a hacer los cortes internos.

Después de cortar el interior, se hace el corte de la silueta exterior, manteniendo la calma y concentración para evitar errores.

Así se ve, después de haber retirado la impresión, tiene algo de imperfecciones, así que toca corregir usando la segueta principalmente.
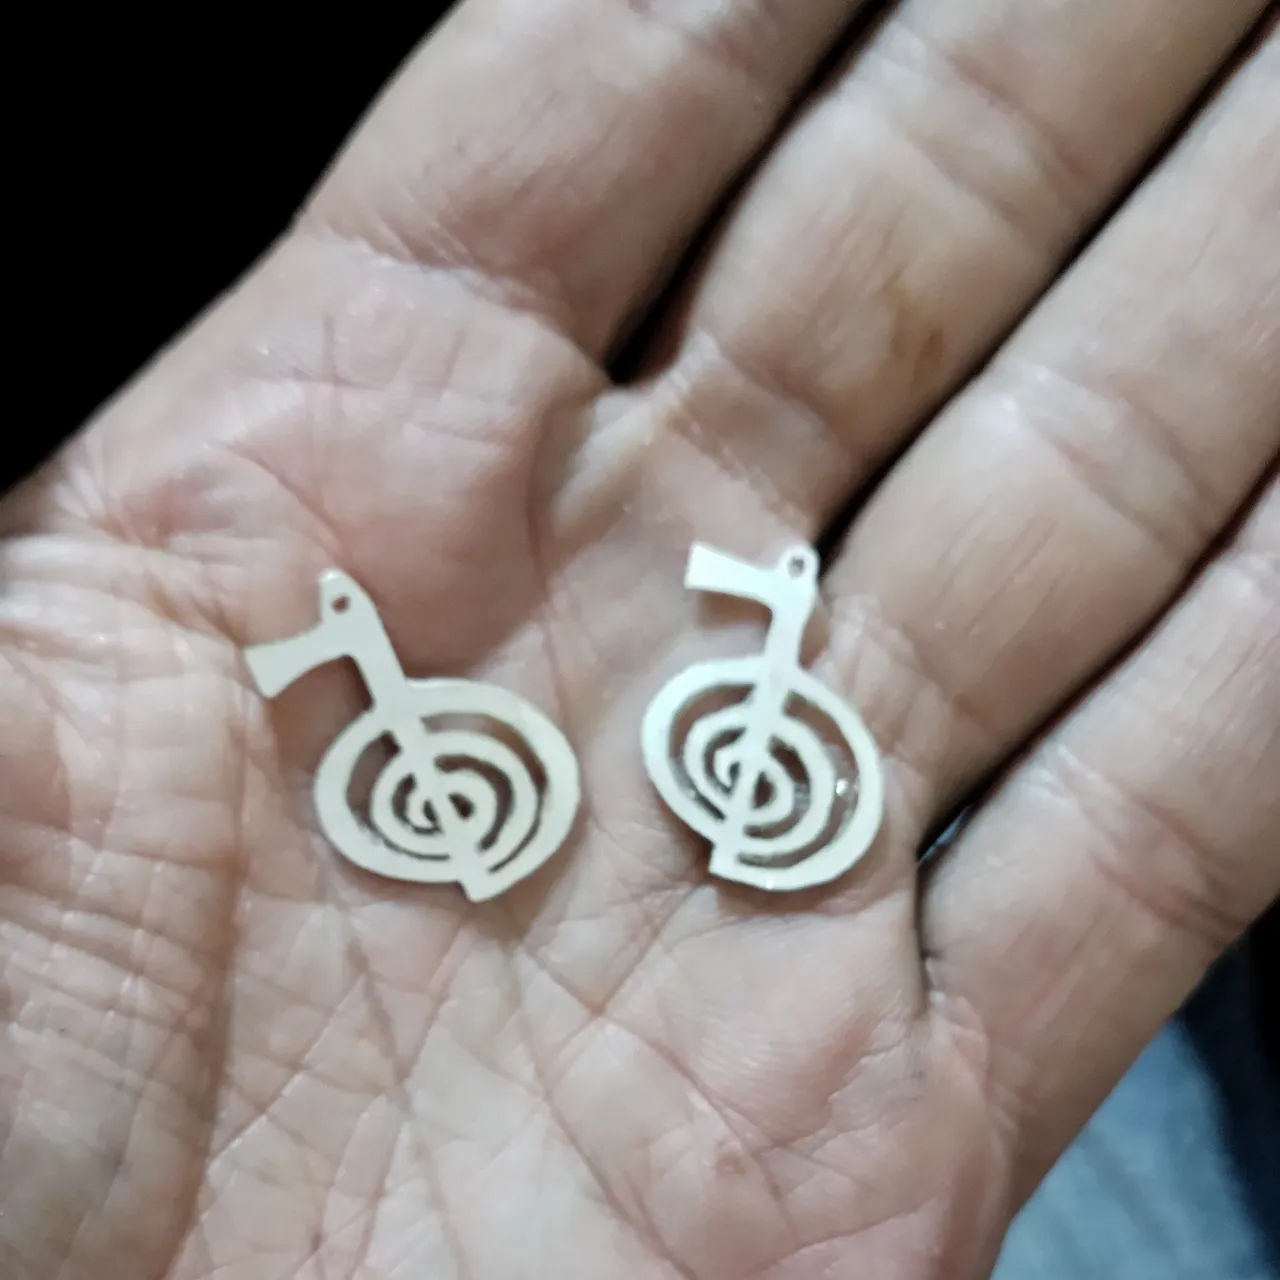
Las piezas quedaron así después de un poco de paciencia, cortando, intentando que las figuras queden perfectas y parecidas.
Luego de que la figura fue corregida, toca pasar la lija, que se aplica sobre la superficie, empezando de la figura usando las lijas 280, 360 y 400, también se corrigió con lima donde fuera necesario.

Antes de pulir soldé los aros de plata por donde pasara la cadena o cordón la persona que adquiera cualquiera de las piezas. Para soldar esta pieza empleé el soplete, soldadura de plata. Después de esto ya se puede hacer el proceso de pulido con el motor de banco, la mopa de tela de algodón y la cera de pulir.
En la imagen anterior y la siguiente se observa la pieza terminada.

Espero les haya gustado, me encantaría leer sus opiniones sobre este trabajo, que para mí fue relativamente simple, lo complejo está en explicar cada proceso.
Si te gusta mi trabajo lo puedes ver y seguir en mi perfil:
https://www.instagram.com/m16ueljoyas
¡Muchas Gracias por su atención!!!!
English with Google translator
The Cho Ku Rei is a symbol that means "put all the power of the universe here" and is used in the practice of Reiki, which is an ancient specialty of healing through energy, regularly with the use of the hands. I had this symbol made by a friend to put it up for sale in his esoteric store and in this post I am going to give you a tour of its elaboration process, through the technique of openwork on metal, of which I can consider myself an expert. experienced goldsmith, modesty aside.
The materials, tools and supplies used are the following:
❤️ 1 mm 950 sterling silver sheet. Silver hoops.
❤️ Saw bow and saw or saw hair 2/0.
❤️Jewelry tweezers.
❤️ Dremel
❤️0.75 mm burs to open the gaps.
❤️ 3M sandpaper 280, 360 and 400
❤️ Bench motor, polishing wax, polishing mop.
❤️ Blowtorch, silver solder and borax as a flux.
PROCESS
First of all, I drew the symbol on the computer using Inkscape and adjusted the size right there, printed, cut out and glued it to the silver sheet with white glue. The drawing will serve as a guide for the cuts I should make.
With the 0.75 mm milling cutter and the Dremel, I proceeded to open the holes in the inside of the figure, to be able to make the internal cuts, which are the first to be made to facilitate the work, since if I cut the silhouette exterior at first would bring me a lot of complications, which means loss of time and unnecessary stress.
With the saw and the use of the hair of the saw or 2/0 saw I begin to make the internal cuts.
After cutting the interior, the exterior silhouette is cut, maintaining calm and concentration to avoid mistakes.
This is how it looks, after having removed the print, it has some imperfections, so it is necessary to correct it using the saw mainly.
The pieces looked like this after a little patience, cutting, trying to make the figures perfect and similar.
After the figure was corrected, it was time to sandpaper, which was applied to the surface, starting from the figure using sandpaper 280, 360 and 400, it was also corrected with a file where necessary.
Before polishing, I soldered the silver rings through which the person purchasing any of the pieces would pass the chain or cord. To solder this piece I used a torch and silver solder. After this, you can do the polishing process with the bench motor, the cotton cloth mop and the polishing wax.
In the previous and next images you can see the finished piece.
I hope you liked it, I would love to read your opinions about this work, which for me was relatively simple, the complex part is explaining each process.
If you like my work you can see it and follow it on my profile:
https://www.instagram.com/m16ueljoyas
Thank you very much for your attention!!!!