Welcome to my blog
Bienvenidos a mi blog
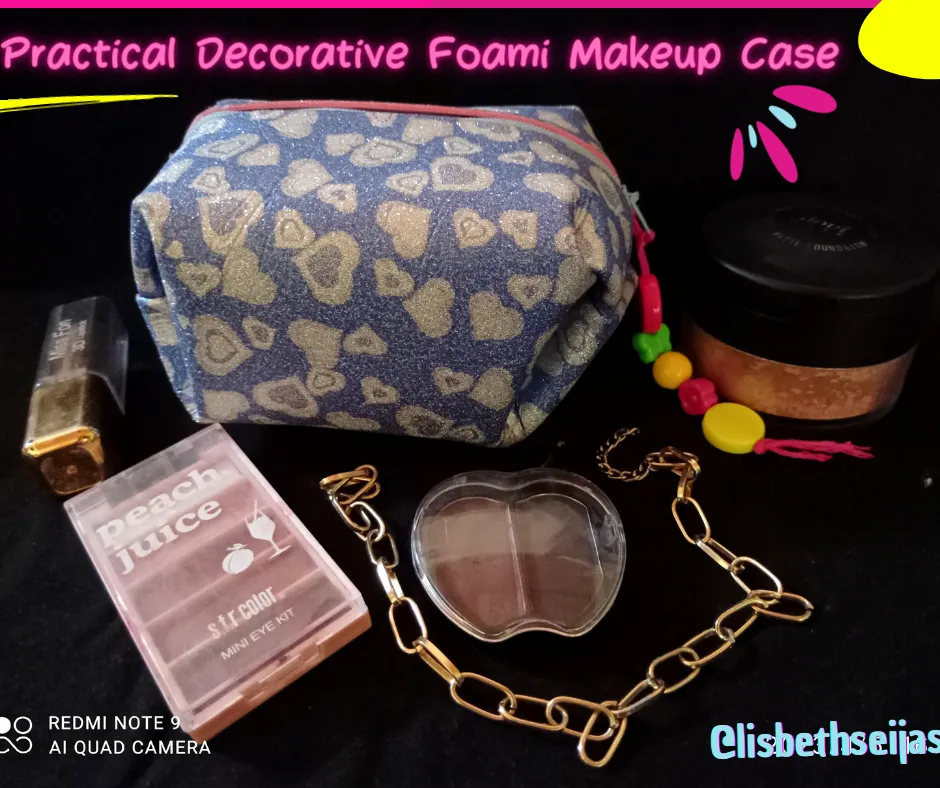
Greetings creative friends of hive diy, today I come with a practical makeup case project made with decorative foami. This type of material such as foami and used for endless crafts, I took the opportunity to go to a market that sells everything and took the opportunity to buy several materials for various things I want to do. I tell you that I made this case for my daughter, since she is of teenage age and she is starting to ask me for makeup, of course I have only bought her a few since I consider that she is not old enough for exaggerated makeup. The truth is that whenever I tell her to look for makeup she doesn't know where to put it, so I decided to make this simple and practical case so she can have her makeup more organized and it doesn't roll around everywhere. I show you the step by step in this pos
Saludos amigos creativos de hive diy, hoy vengo con un proyecto de práctico estuche de maquillaje realizado con foami decorativo. Este tipo de material como el foami e usado para un sin fin de manualidades, aproveche que fui a un mercado que vende de todo y aproveché de comprar varios materiales para varias cosas que quiero realizar. Les cuento que este estuche lo realizó para mi hija, ya que está en edad de adolescentes y ya empieza a solicitarme maquillajes, claro solo le he comprado algunos ya que considero no tiene edad para maquillaje exagerados. Lo cierto es que ella siempre que le digo busca tal maquillaje no sabe dónde lo coloca, entonces decidí realizar este sencillo y práctico estuche para que pueda tener más organizado su maquillaje y no ande rodando por cualquier lado. Te muestro el paso a paso en esta publicación
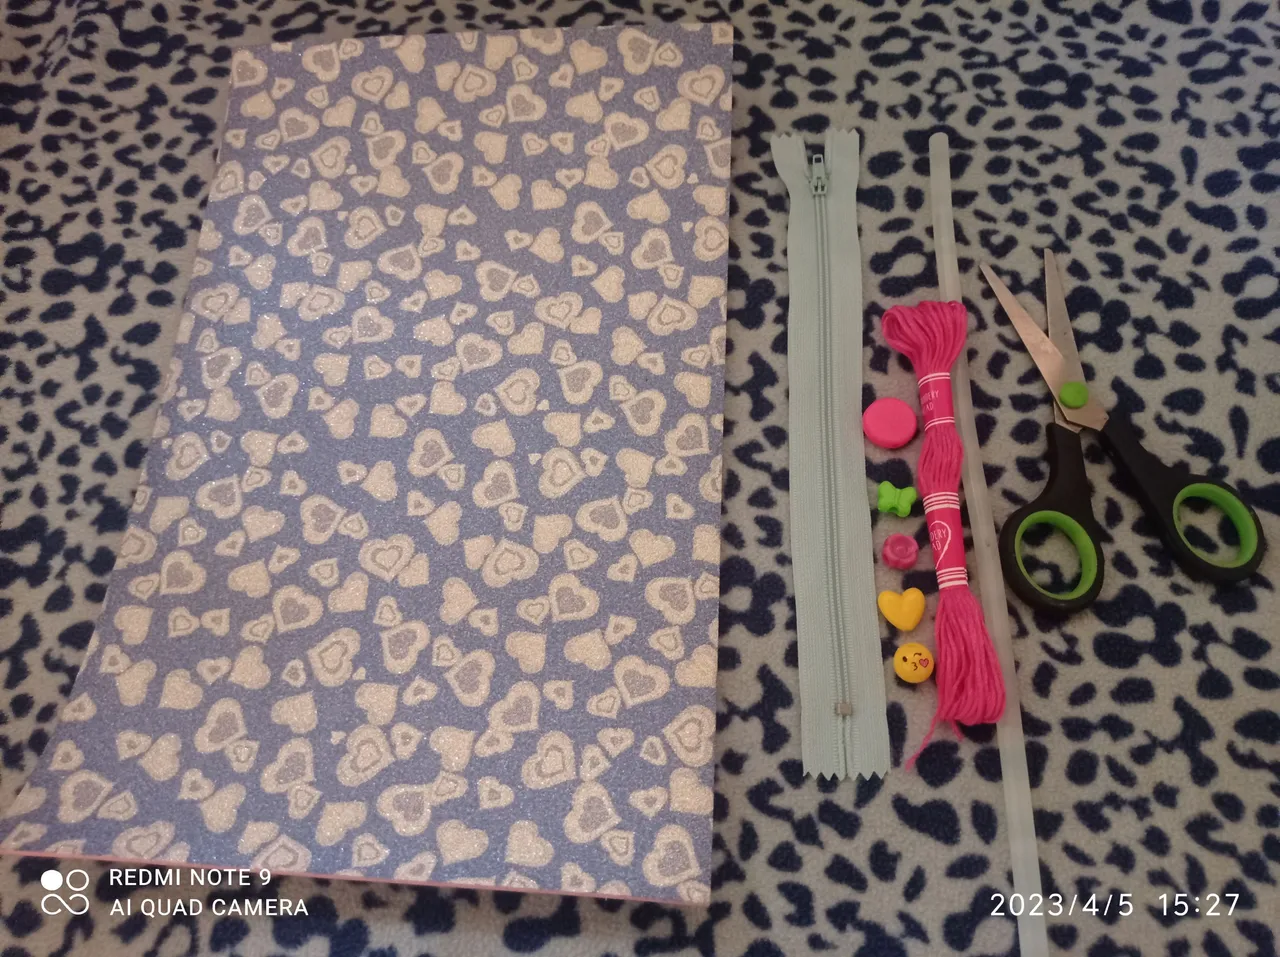
Materials
1 letter size decorative foami
1 thin silicone stick
Light blue zipper number 20
Scissors
Weaving thread
Decorative stones of various colors
Materiales
1 foami decorativo tamaño carta
1 silicón en barra delgado
Cierre azul claro número 20
Tijera
Hilo de tejer
Piedras decorativas de varios colores
Step by step
Paso a paso
Step 1
Paso 1
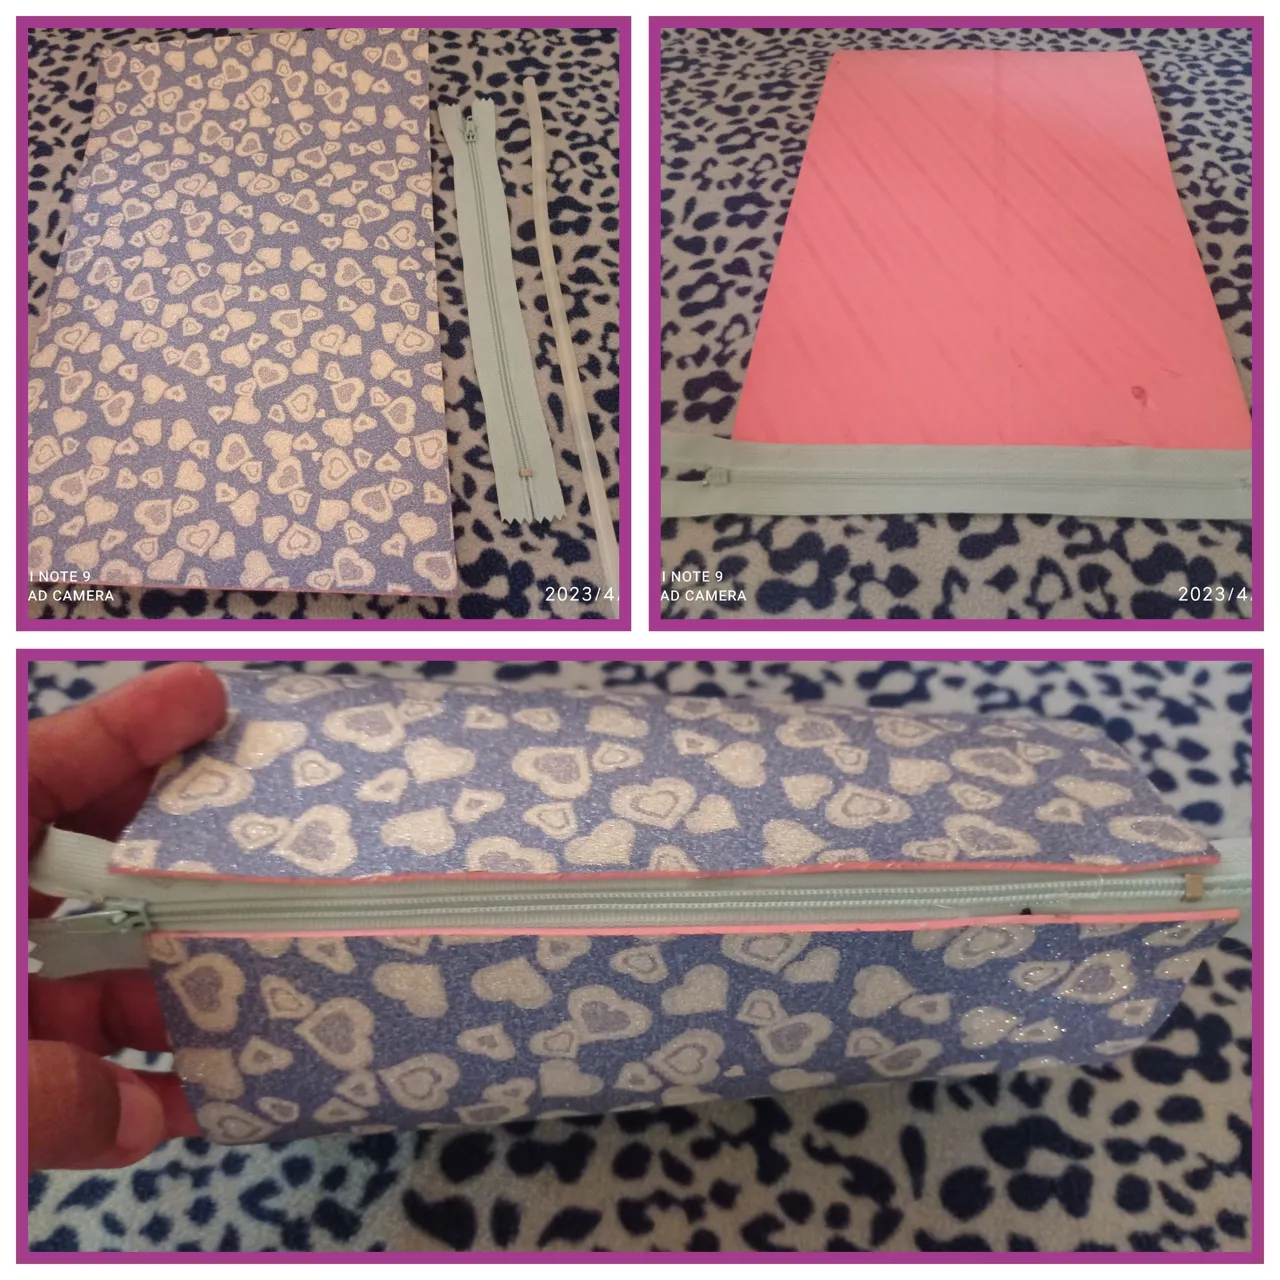
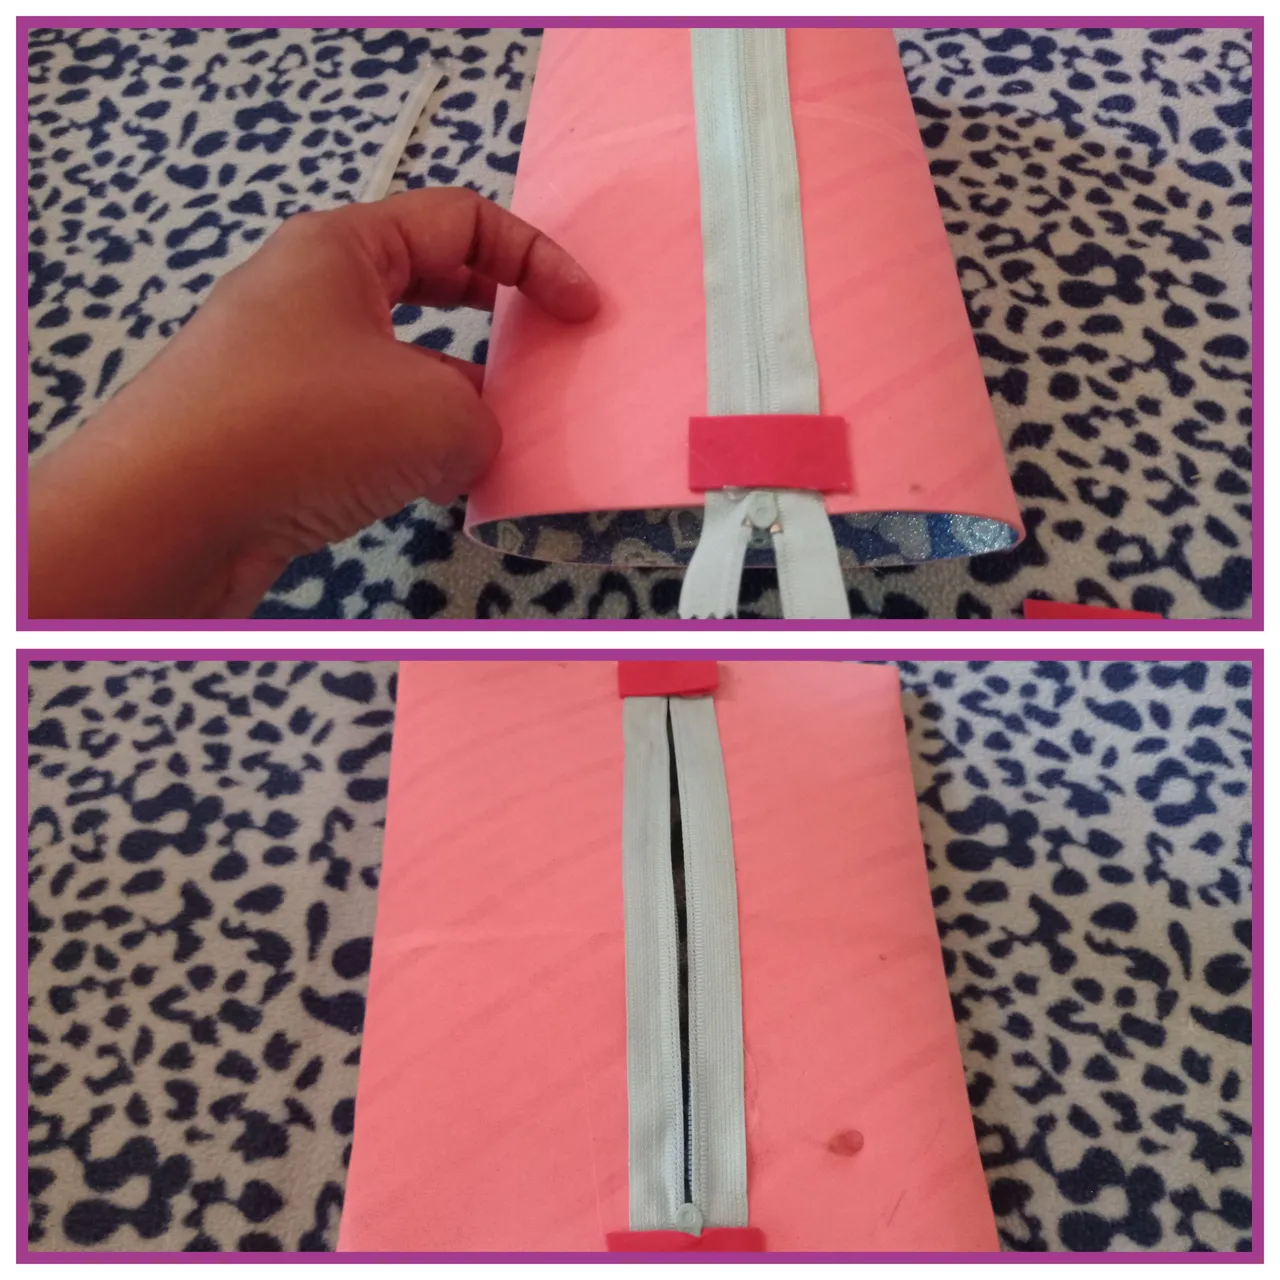
To start this project take the decorative foami and place it on the opposite side, the one I am using has a different color on the other side. If you use a unicolor foami there is no problem which side you start with. Well with the help of the silicone I place on one of the ends and glue a part of the zipper, then I place again on the other end silicone and glue the other part of the zipper.
Para iniciar este proyecto tome el foami decorativo y coloque por lado contrario, el que estoy usando tiene un color diferente por el otro lado. Si usas un foami unicolor no hay problema por el lado que empieces. Bueno con ayuda del silicón coloco en uno de los extremos y pego una parte del cierre, luego vuelvo a colocar en el otro extremo silicón y pego la otra parte del cierre
Step 2
Paso 2
Once the zipper is glued we proceed to open it and flip the foami over, we can see what is left with the pink part. Here I took the scissors and cut a small square of foami that was left over and glued it on both ends of the zippers.
Ya pegado el cierre procedemos abrirlo y volteamos el foami, podemos ver qué queda con la parte rosada. Aquí tome la tijera y corte un cuadrito de foami que tenía sobrante y pegue en ambas puntas de los cierres.
Step 3
Paso 3
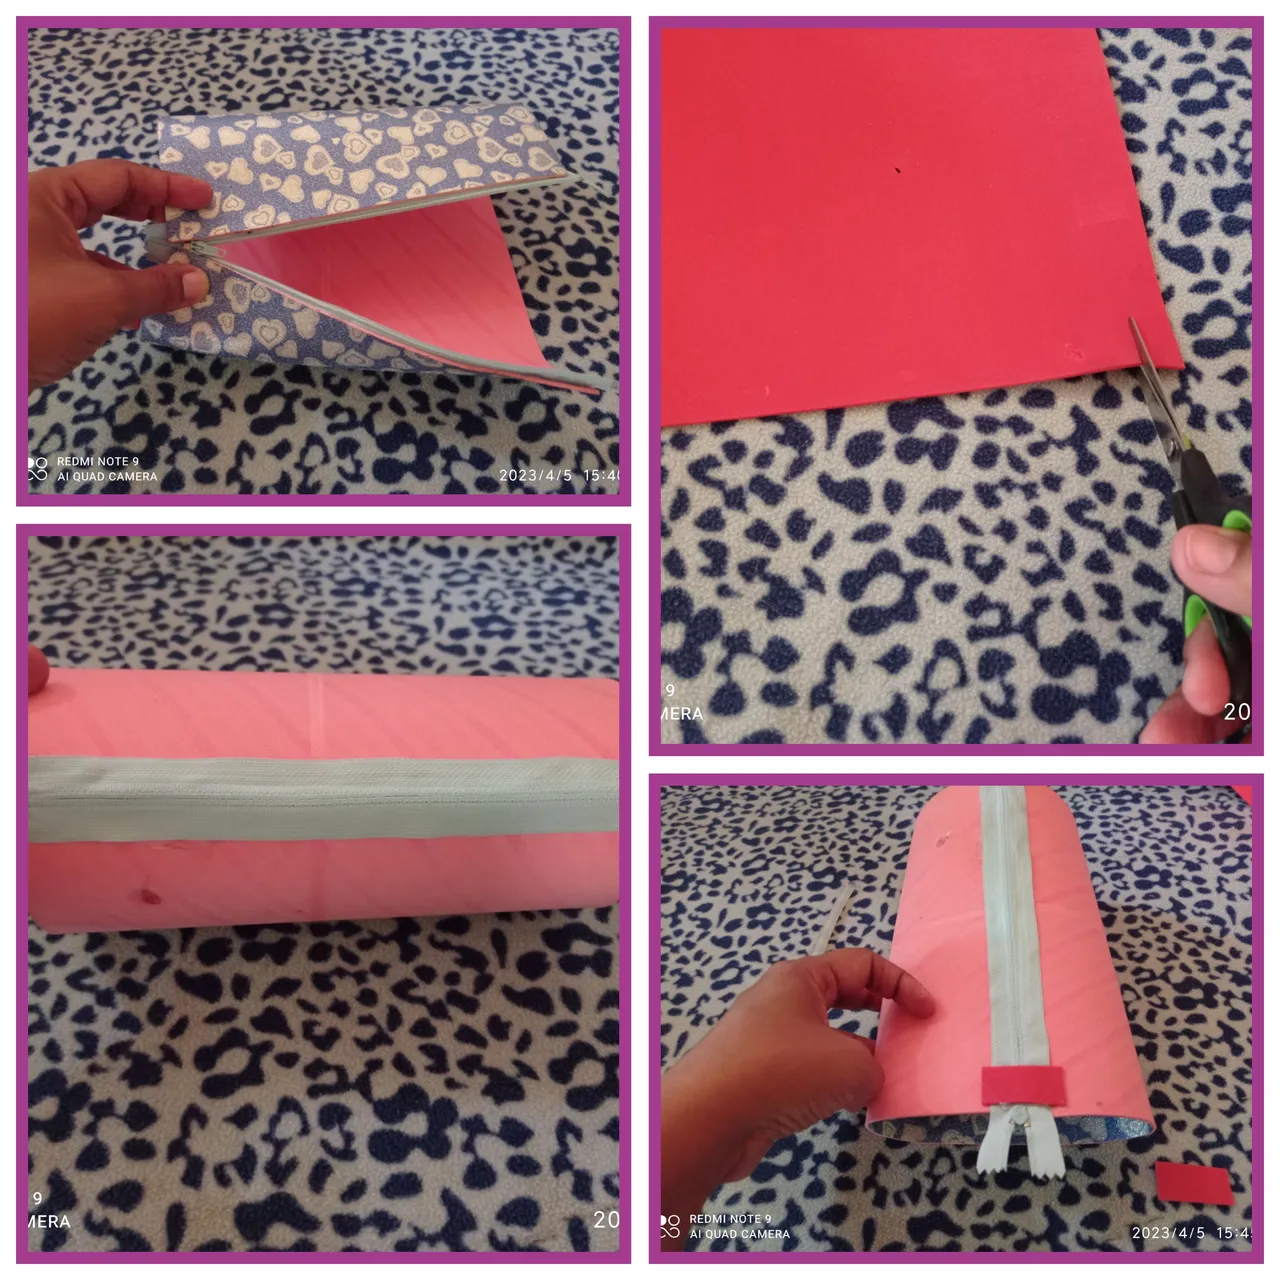
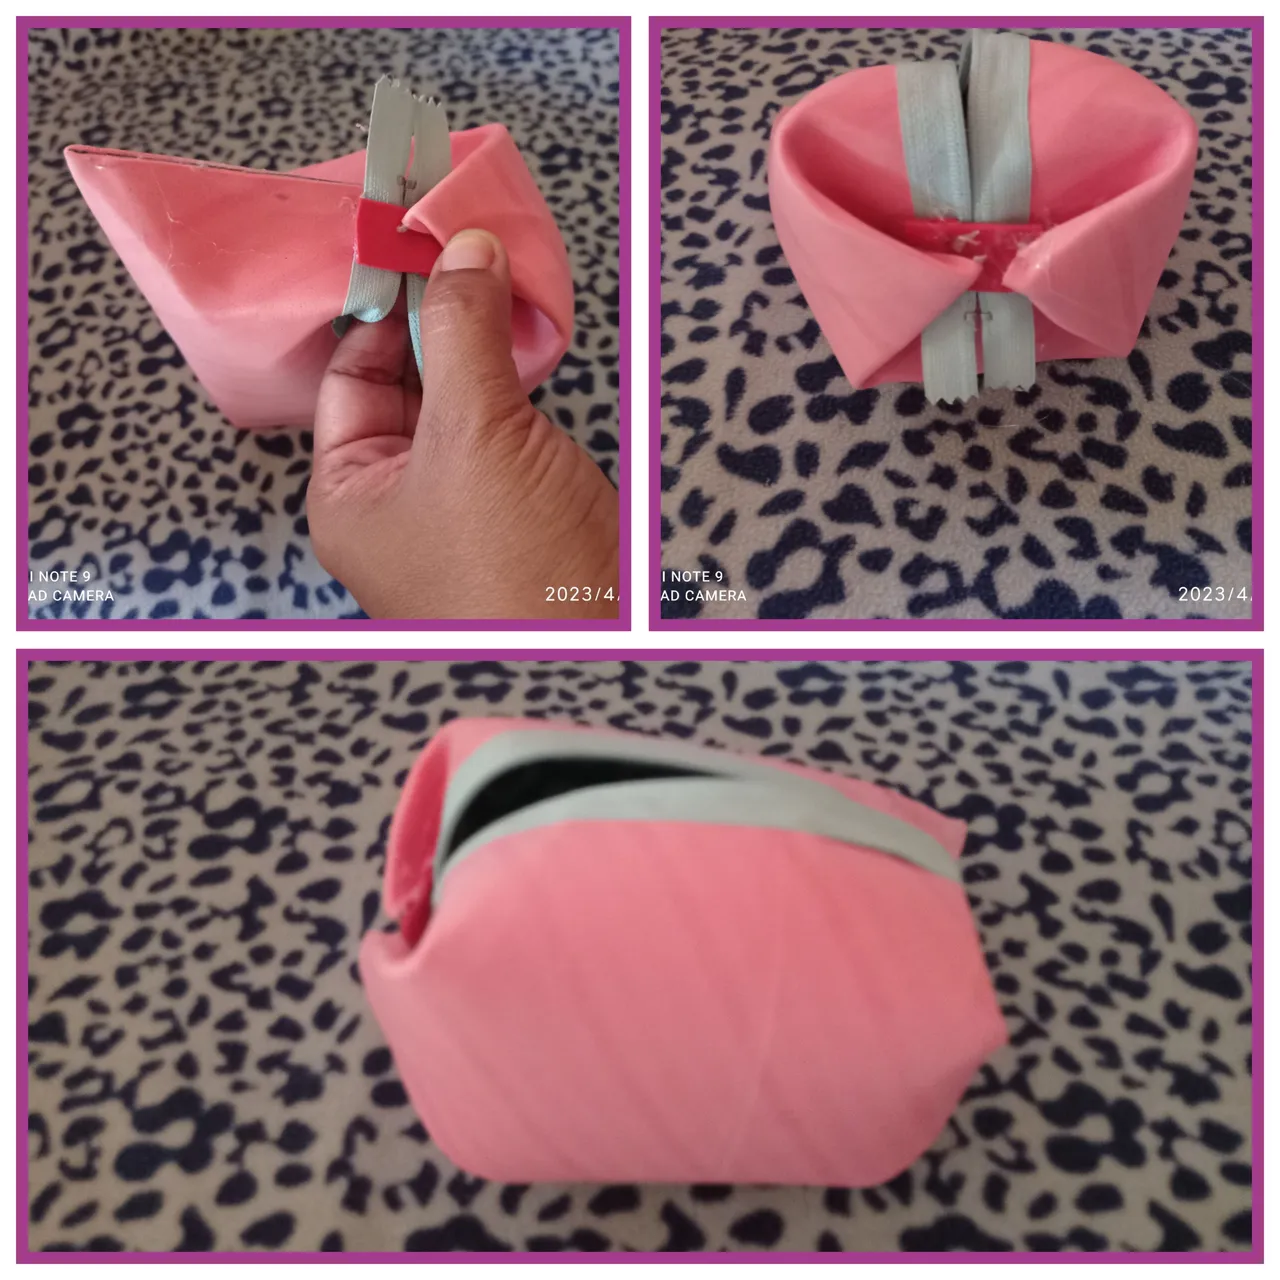
Now with the hot silicone I glue both ends flattening with our hand and it should be as you can see in the picture.
Ahora con el silicón caliente pego ambos extremos aplanando con nuestra mano y debe quedar como lo ven la fotografía
Step 4
Paso 4
Now we fold the ends inwards and glue on the small piece of foami, this procedure will be done on both sides. This will allow us to give the shape to the makeup case.
Ahora doblamos las puntas hacia adentro y pegando sobre el trozo pequeño de foami, este procedimiento lo realizaremos en ambos lados. Esto nos permitirá darle la forma al estuche de maquillaje
Step 5
Paso 5
After gluing both sides we must turn it over and we have the shape of the case.
Luego haber pegado ambos lados debemos voltearlo y ya tenemos la forma del estuche.

Step 6
Paso 6
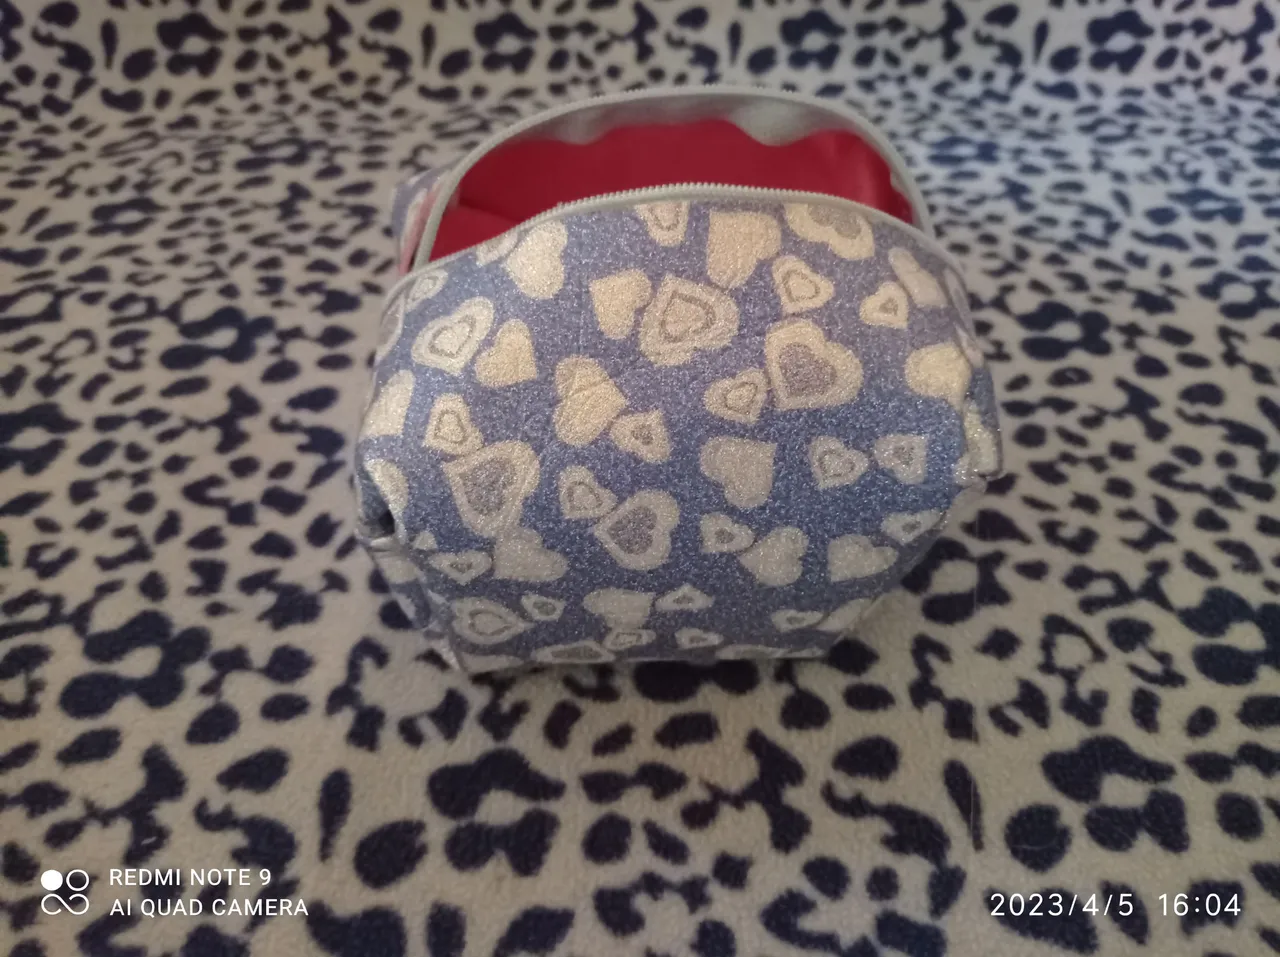
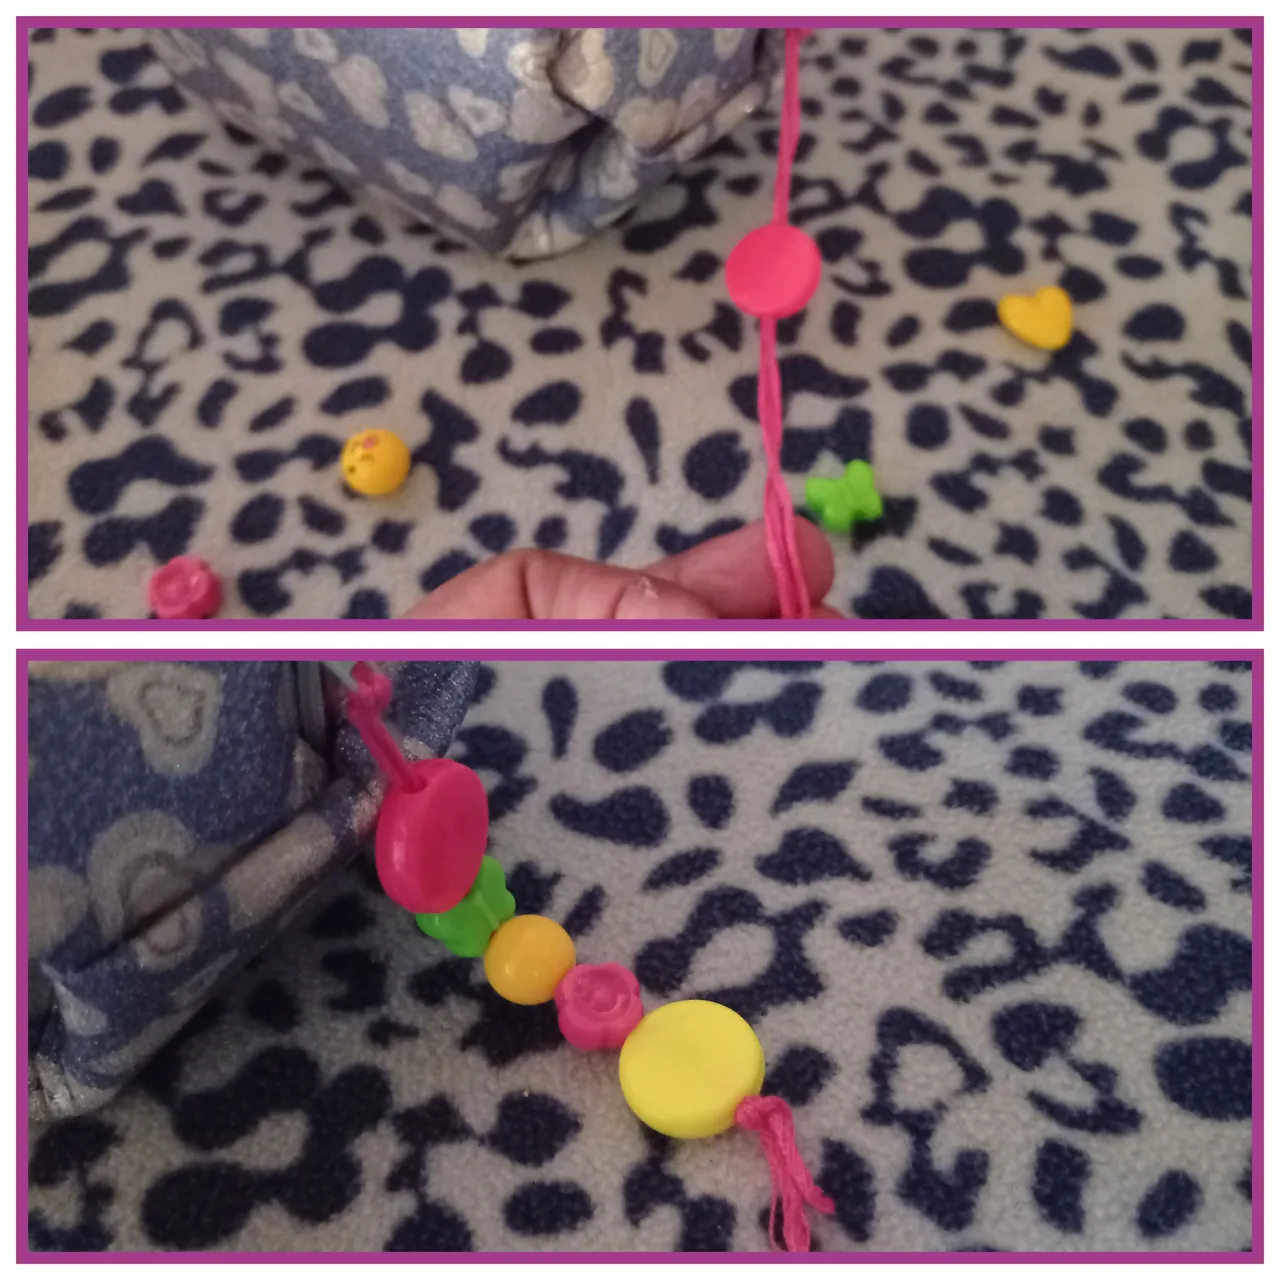
To decorate and make it look more eye-catching, I wanted to make a keychain handle that is attached to the clasp and is easier to open, so I took the knitting yarn with three threads and tied a knot in the clasp handle.
Para decorar y se vea más llamativo quise realizar un agarradero tipo llavero que va pegado al cierre y se más fácil para abrir.Para ello tome el hilo de tejer con tres hilos y realice un nudo en agarradero del cierre.
#Step 7
Paso 7
I began to incorporate the plastic pieces of different colors, so that the thread could enter in a better way by burning the ends a little. This way it was more practical to incorporate them. At the end I made two simple knots to hold the pieces.
Empecé a incorporar las piezas plásticas de diferentes colores, para que entrara el hilo de mejor manera queme un poco las puntas . De esta manera fue más práctico incorporarlas. Al final realizar dos nudos sencillos para sujetar las piezas.
Step 8
Paso 8
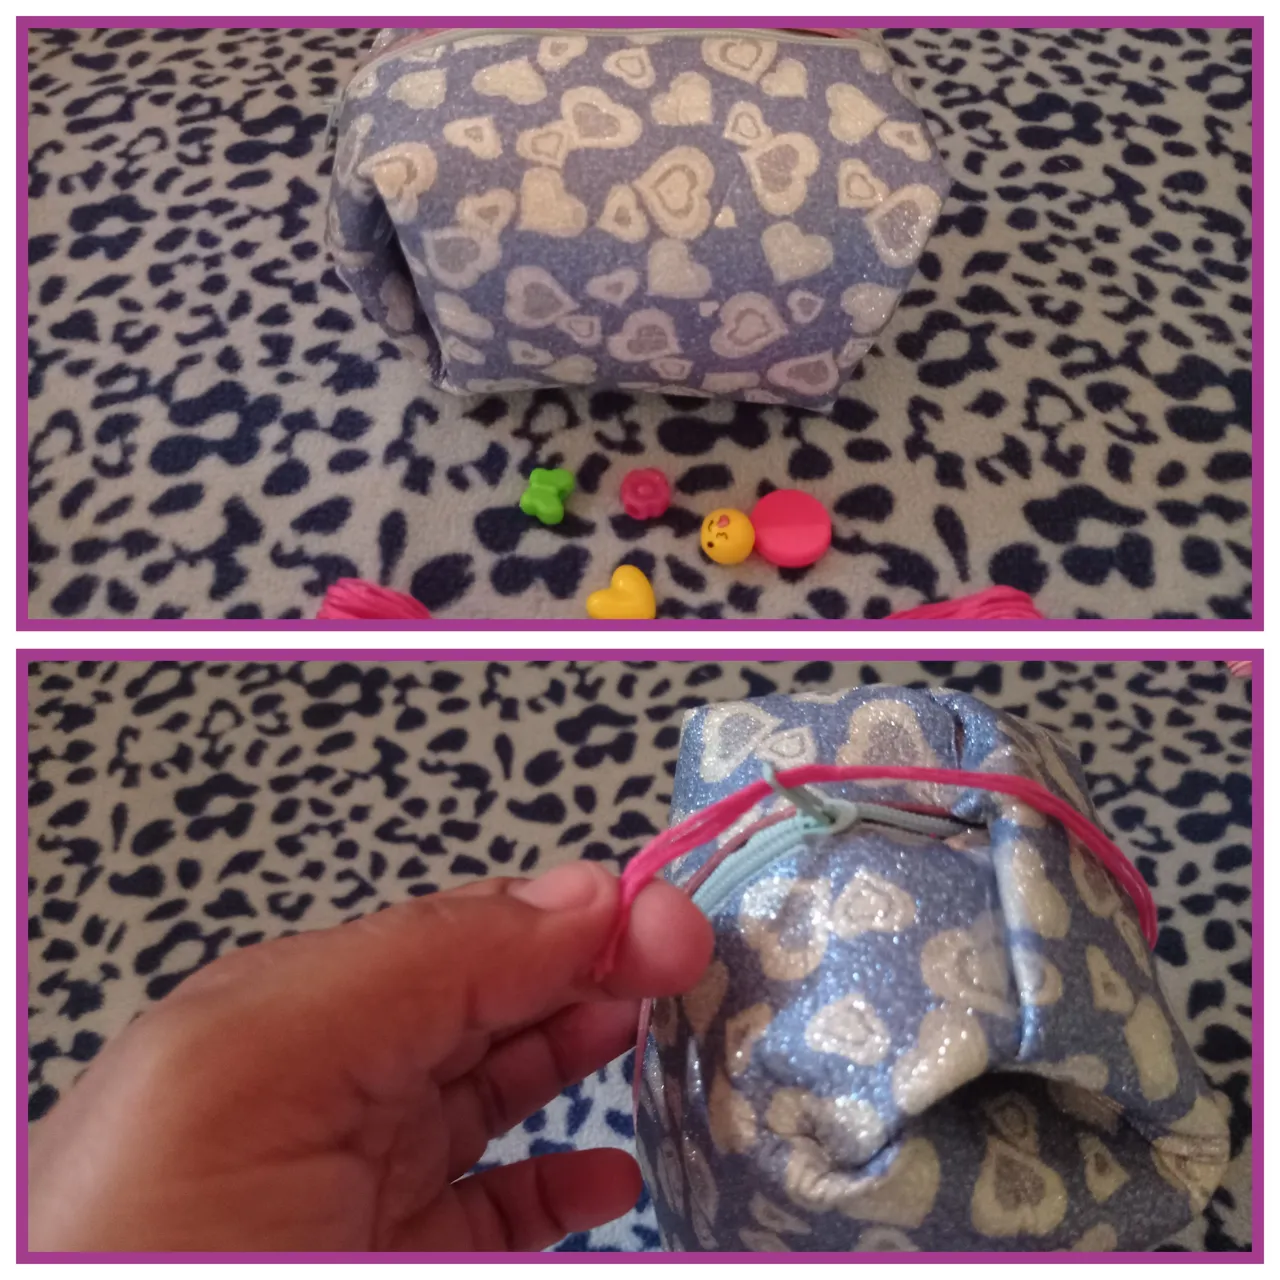
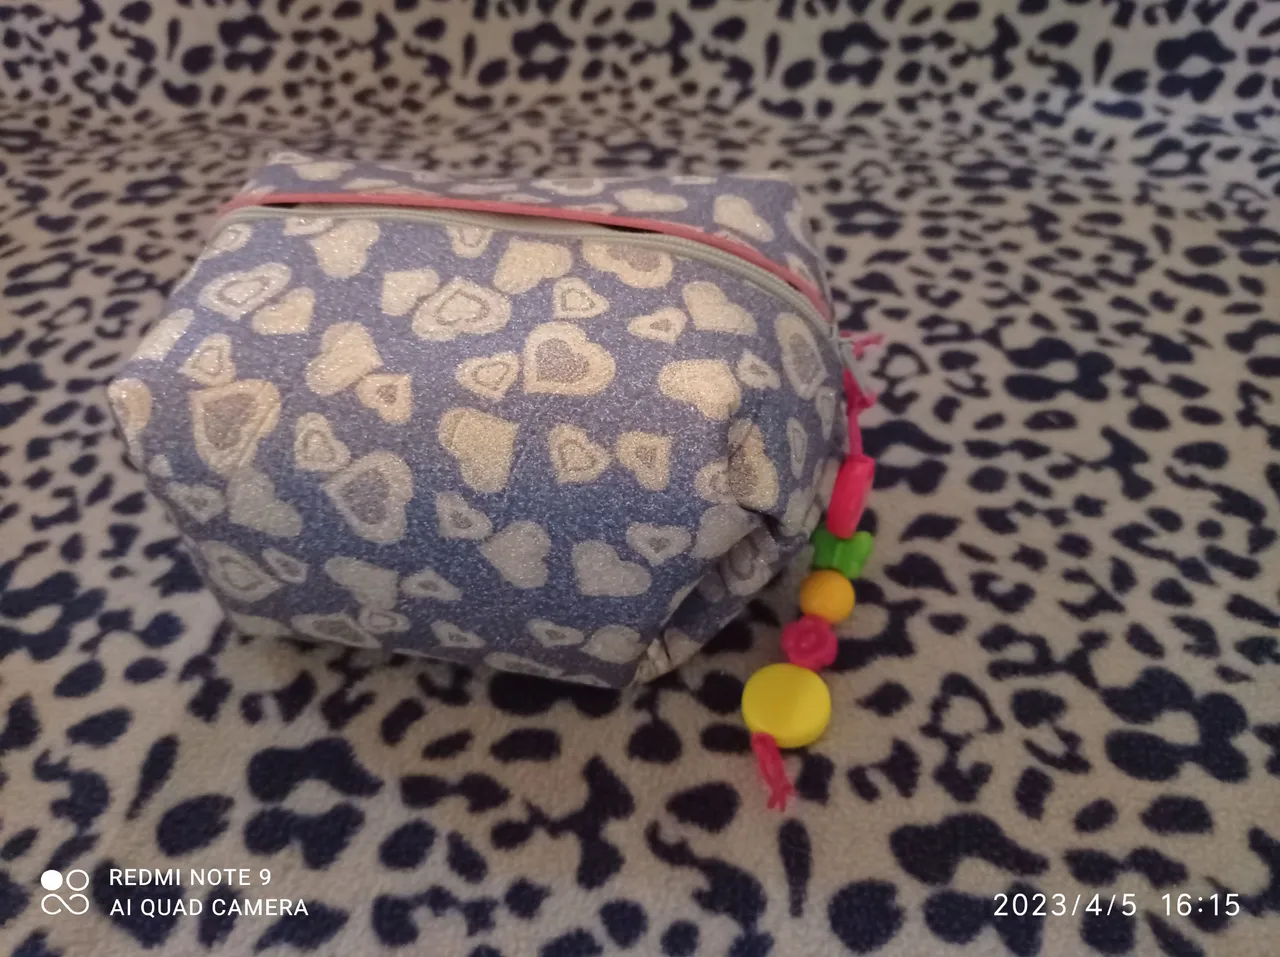
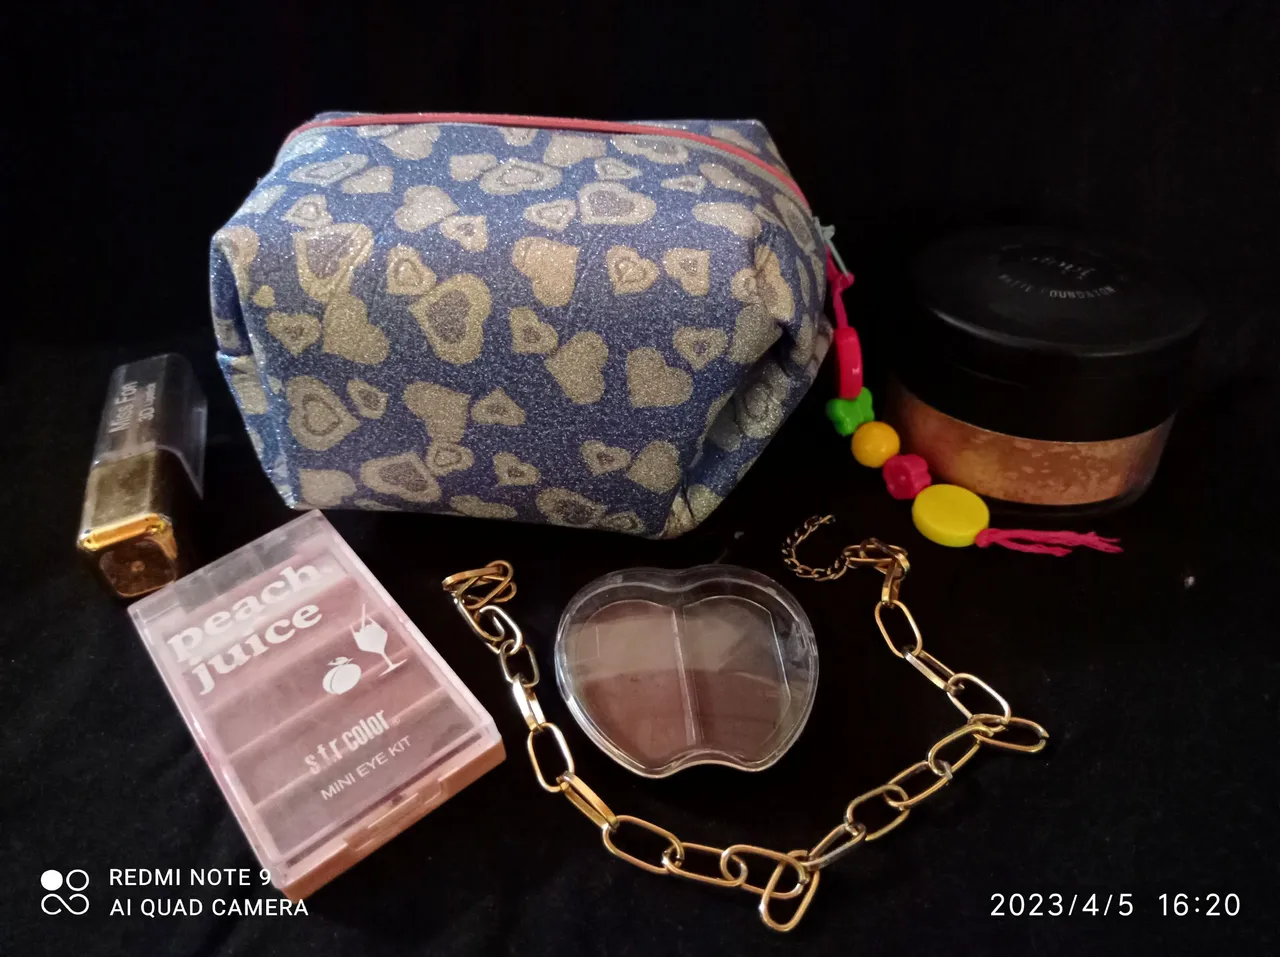
This is how this practical makeup case turned out.
De esta manera quedó este práctico estuche de maquillaje
Final Result
Resultado Final
Beautiful and colorful case that I made for my daughter.
Hermoso y colorido estuche que realizó para mi hija.

Vote la-colmena for witness
By @ylich
I hope you like it
Photographs are my property
Translator used Deelp
Photo collage made by GridArt
Cover edited in canva
Thanks for reading
Espero les guste
Fotografías son de mi propiedad
Traductor utilizado Deelp
Collage fotográfico realizado por GridArt
Portada editada en canva
Gracias por leerme