Hola gente bella y creativa. Les vengo a mostrar el procedimiento de una caja de regalo en forma de corazón, que hice para darle un obsequio a mi sobrina que está próxima a cumplir años.
Hello beautiful and creative people. I am here to show you the procedure of a heart shaped gift box, which I made to give a gift to my niece who is about to have her birthday.


💜 Cartulina estampada
💜 Cartulina escarchada plateada
💜 Cartulina lila
💜 Cartón duro
💜 Acetato
💜 Papel crepe o ceda rosado o lila
💜 Silicona caliente
💜 Pega
💜 Regla
💜 Marcadores
💜 Stamped cardboard
💜 Silver frosted cardstock
💜 Lilac cardboard
💜 Hard cardboard
💜 Acetate
💜 Pink or lilac crepe or silk paper
💜 Hot glue
💜 Glue
💜 Ruler
💜 Markers

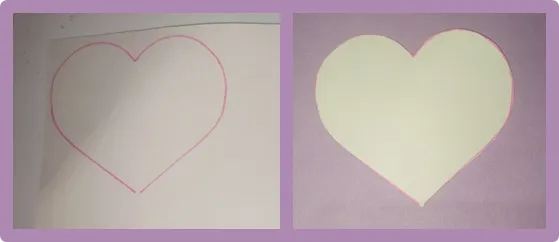
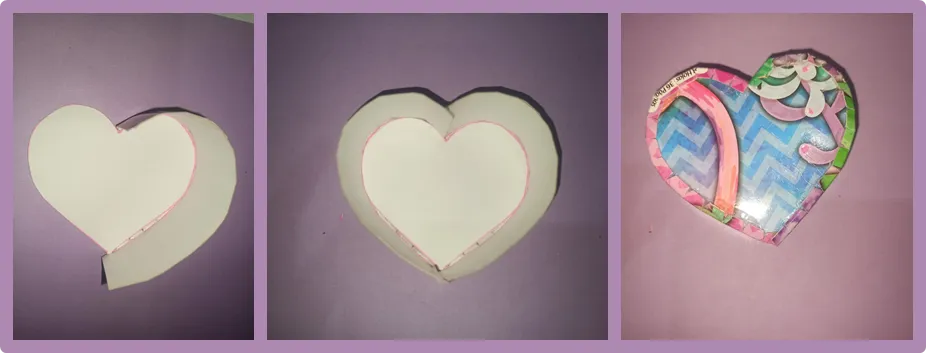
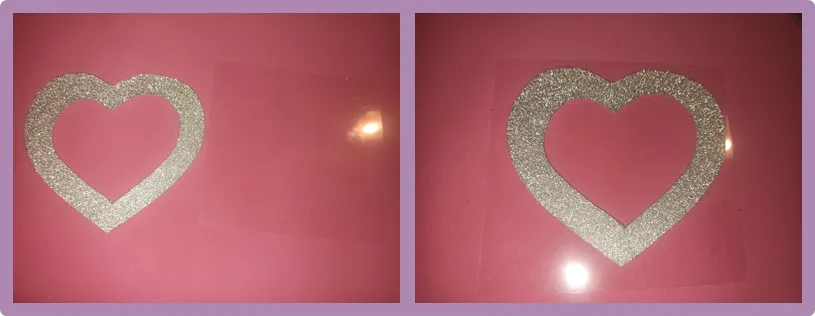
💜 Paso 1 💜
Hago un corazón en el cartón
💜 Step 1 💜.
I make a heart out of cardboard.
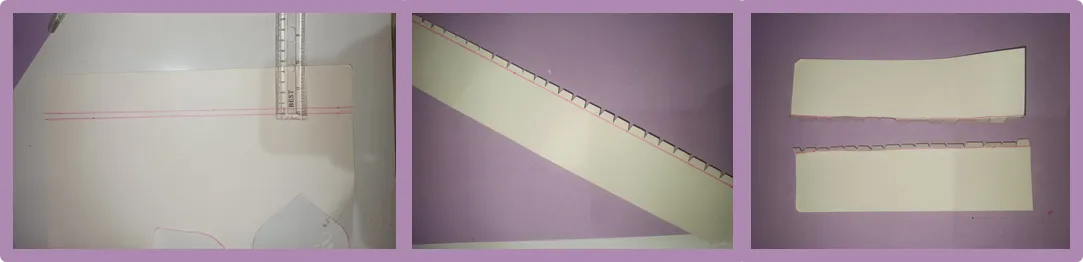
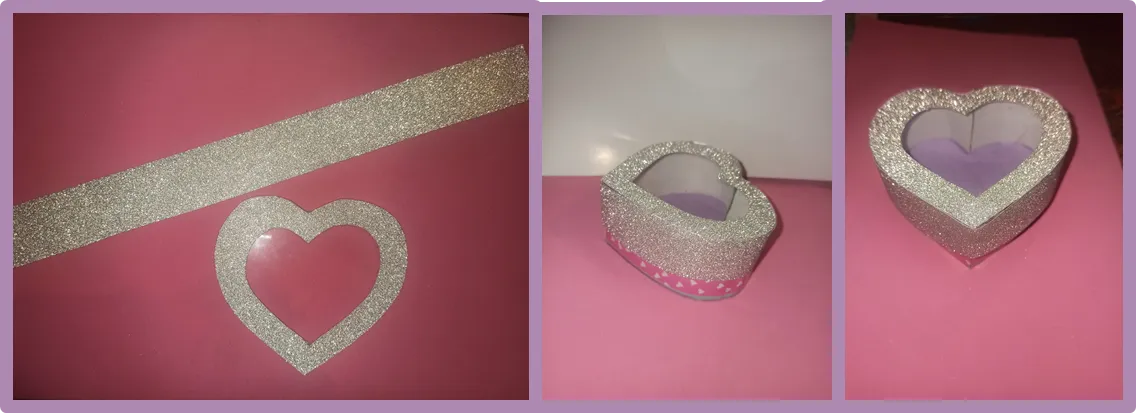
💜 Paso 2 💜
Hago una tira de cartón, marcando con la regla 4.5 cm de ancho por 30 cm de largo.
Marco una línea a 0.5 cm y hago piquetes con la tijera
La tira de cartón la pico a la mitad, entonces quedarían dos tiras de 4.5 cm de ancho por 15 cm de largo.
💜 Step 2 💜
I make a strip of cardboard, marked with the ruler 4.5 cm wide by 30 cm long.
I mark a line at 0.5 cm and make picks with the scissors.
I cut the cardboard strip in half, so there would be two strips 4.5 cm wide by 15 cm long.
💜 Paso 3 💜
- Las tiras de cartón las pego con silicona caliente por el borde del corazón, pegado las pestañas en la parte de abajo del corazón.
💜 Step 3 💜.
- I hot glue the cardboard strips with hot silicone along the edge of the heart, gluing the tabs on the bottom of the heart.
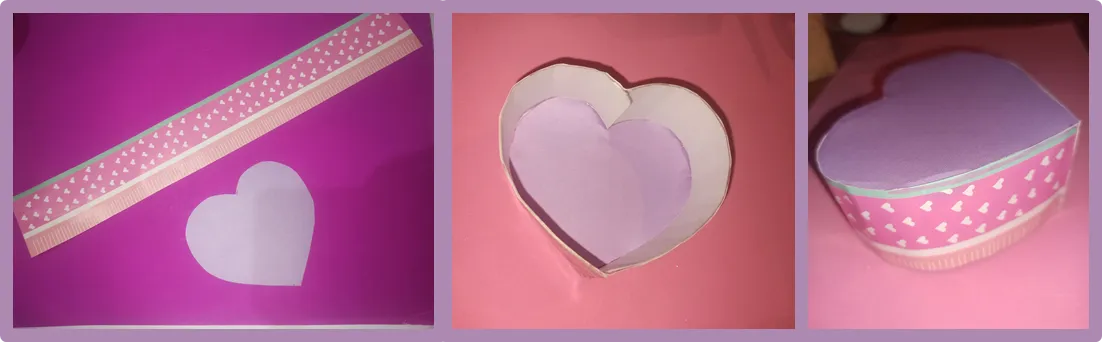
💜 Paso 4 💜
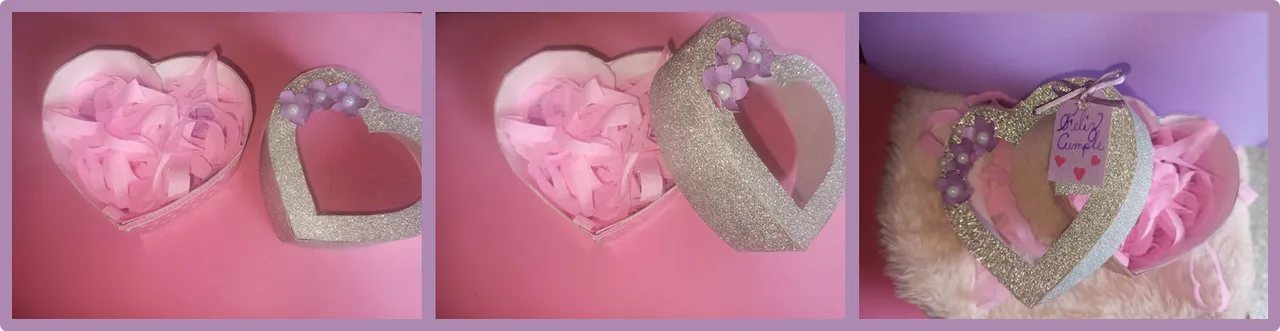
Ya tengo la base de la caja formada. Ahora voy a decorar.
Para forrar la caja he utilizado cartulina estampada y cartulina de color lila.
Con la cartulina estampada hice una tira de la misma altura y grosor que la caja y la pegué alrededor con pegamento.
Con la cartulina lila hice dos corazones del mismo tamaño para pegarlos en el fondo de la caja y por debajo.
Ahora ya tengo listo el fondo de la caja de regalo.
💜 Step 4 💜
I already have the base of the box formed. Now I'm going to decorate.
To line the box I used patterned cardstock and lilac-colored cardstock.
With the printed cardboard I made a strip of the same height and thickness as the box and glued it around with glue.
With the purple cardboard, I made two hearts of the same size to glue on the bottom of the box and underneath.
Now I have the bottom of the gift box ready.
💜 Paso 5 💜
- Hago otro corazón en cartón, dentro del mismo corazón voy a marcar otro corazón más pequeño.
💜 Step 5 💜.
- I make another heart in cardboard, inside the same heart I will mark another smaller heart.
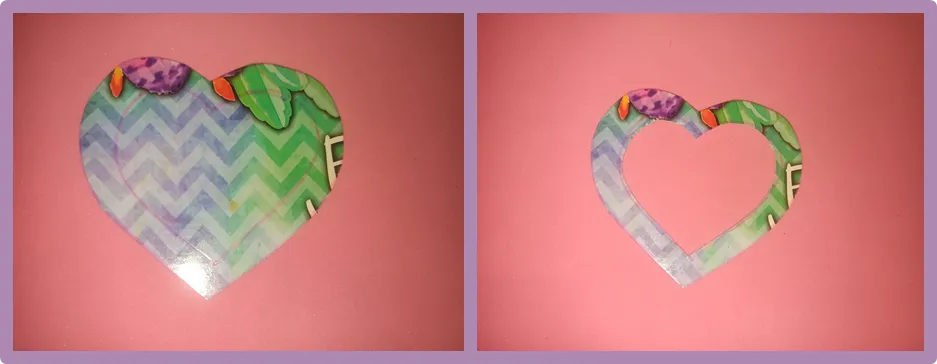
💜 Paso 6 💜
- El corazón del paso anterior lo forro con la cartulina escarchada. Trazo la forma del corazón en la cartulina, recorto y pego.
💜 Step 6 💜.
- I like the heart from the previous step with the frosted cardstock. I trace the heart shape on the cardstock, cut it out and glue it.
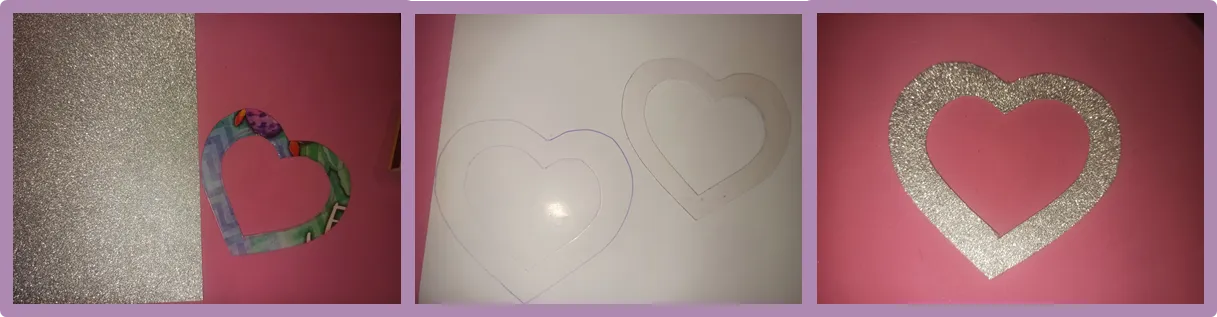
💜 Paso 7 💜
- Pego una lámina de acetato en el centro del corazón.
💜 Step 7 💜
- I glue a sheet of acetate in the center of the heart.
💜 Paso 8 💜
En la cartulina escarchada hice una tira de 2 cm de ancho por 30 cm de largo. Lo pegué con silicona caliente alrededor del corazón.
Ya esta lista la tapa
💜 Step 8 💜
I made a strip 2 cm wide by 30 cm long on the frosted cardstock. I hot glued it with hot silicone around the heart.
The lid is now ready
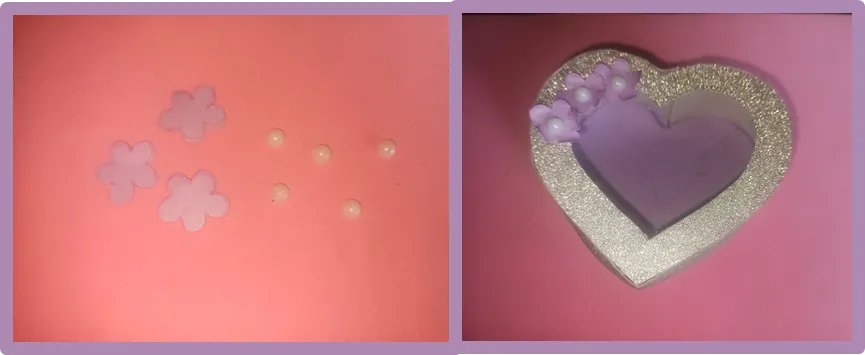
💜 Paso 9 💜
- A decorar la tapa. Hice unas pequeñas flores en cartulina lila, se le da forma a cada pétalo con la tijera. Y unas perlitas que coloque en el centro de las flores.
💜 Step 9 💜
- To decorate the lid. I made some little flowers out of lilac cardstock, you shape each petal with the scissors. And some little pearls I placed in the center of the flowers.
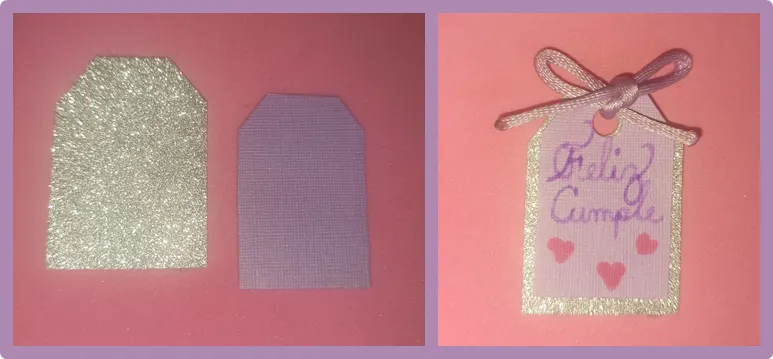
💜 Paso 10 💜
Con cartulina escarcha y lila hice una pequeña tarjeta donde escribí con marcador morado" Feliz Cumple"
Hice un agujero con el perforador y un lazo con cinta que luego pegue en la tapa.
💜 Step 10 💜.
With frosted and lilac cardstock I made a small card where I wrote with purple marker" Happy Birthday".
I punched a hole with the hole punch and a ribbon bow which I then glued on the lid.
💜 Paso 11 💜
- Hice tiras con papel crepé para colocar dentro de la caja. Para luego colocar el regalo, chocolates, o cualquier accesorio como un reloj, aretes, pulseras.
💜 Step 11 💜
- I made strips with crepe paper to place inside the box. Place the gift, chocolates, or any accessories like a watch, earrings, or bracelets.
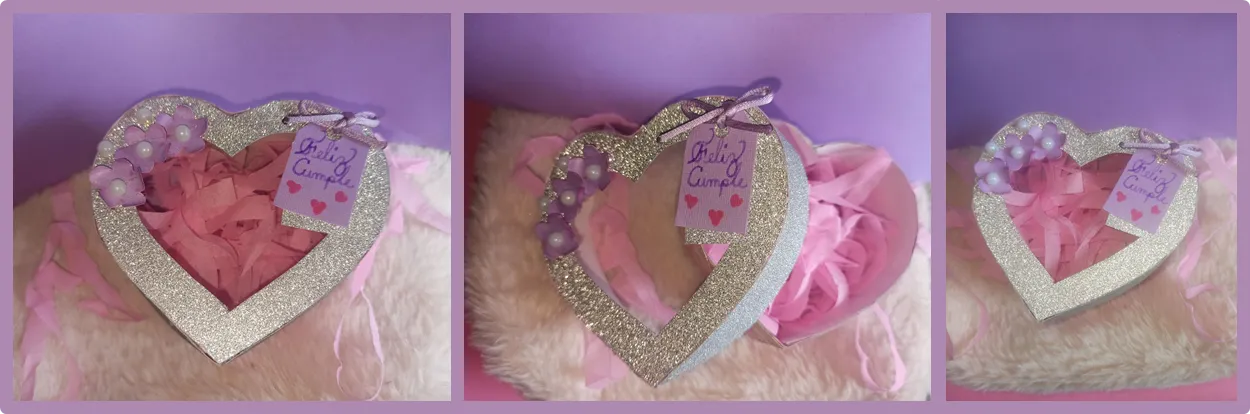
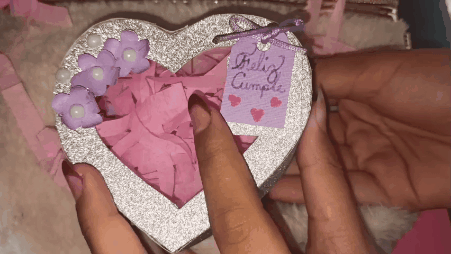
💜 Resultado final 💜
💜 Final result 💜
Otros trabajos similares :
| DIY - Surprise gift box [ENG/ESP] | DIY- Gift boxes 2 ideas [ENG/ESP] |
|---|---|
 |  |
Fotografías de mi propiedad tomadas con el celular Redmi note 8 pro, editadas en canva
Traducción realizada con la versión gratuita del
traductor DeepL
Todos los diseños fueron creados en canva
Photographs of my property taken with the Redmi note 8 pro cell phone, edited in canva
Translation made with the free version of
translator DeepL
All designs were created in canva