(ENG)
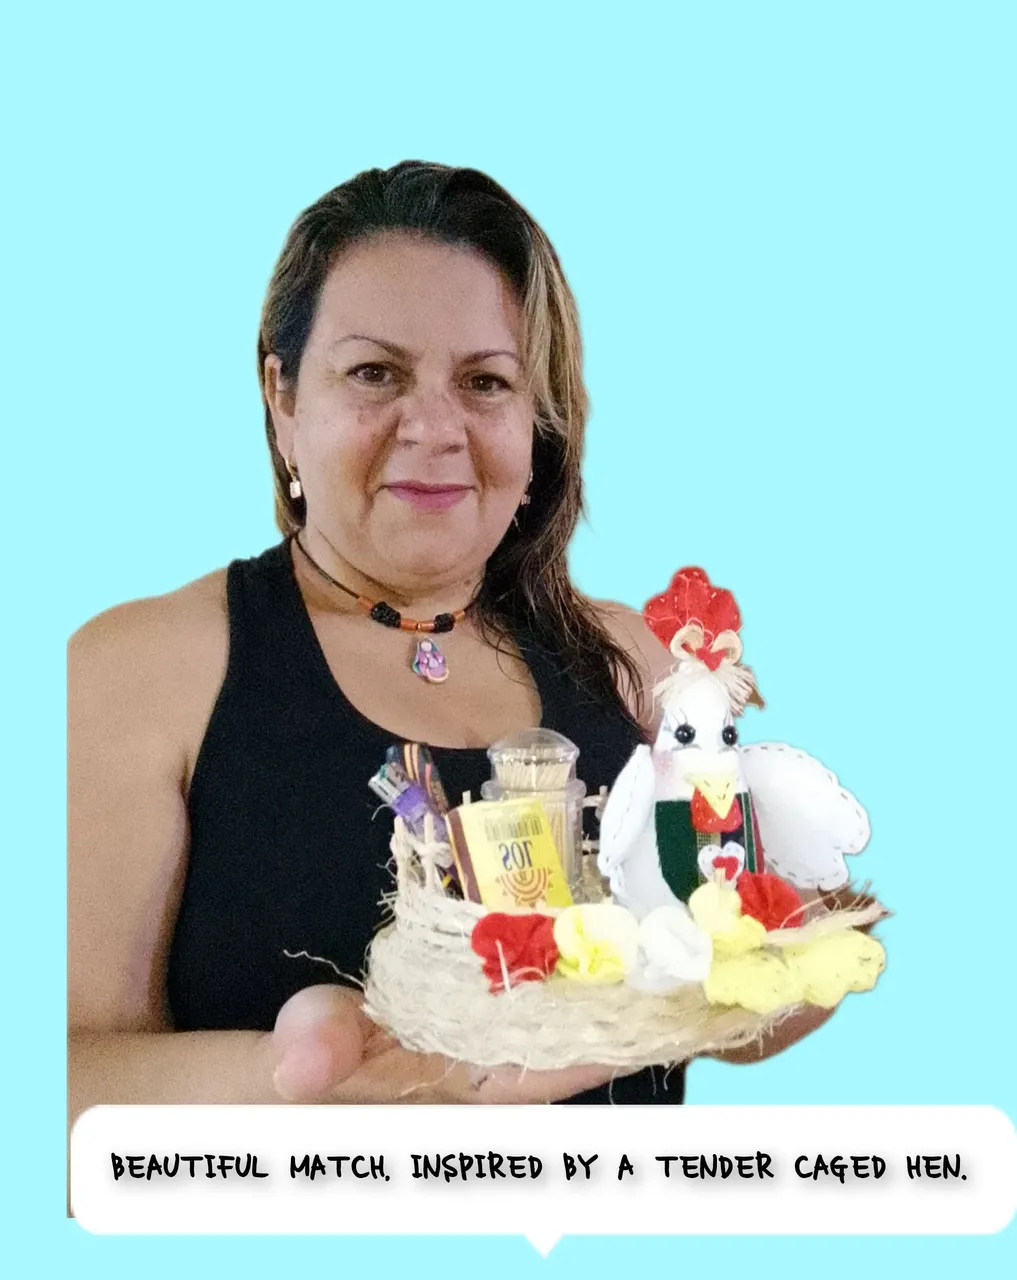
Hello everyone, I wish you a great start to the weekend, filled with many good and productive things. I am pleased to be joining you today in this great community, Lovers of crafts and recycling. . @hivediy, I'm going to show you a great creation, full of joy and bright colors, which not only helps to organize our matches, tinderboxes, matches, among others, but also looks very nice on our little thing, it is a very nice vase, inspired by a happy and colorful caged hen, I made it using recyclable and useful material. Without further ado, I invite you to follow me and I show you how to make your own.
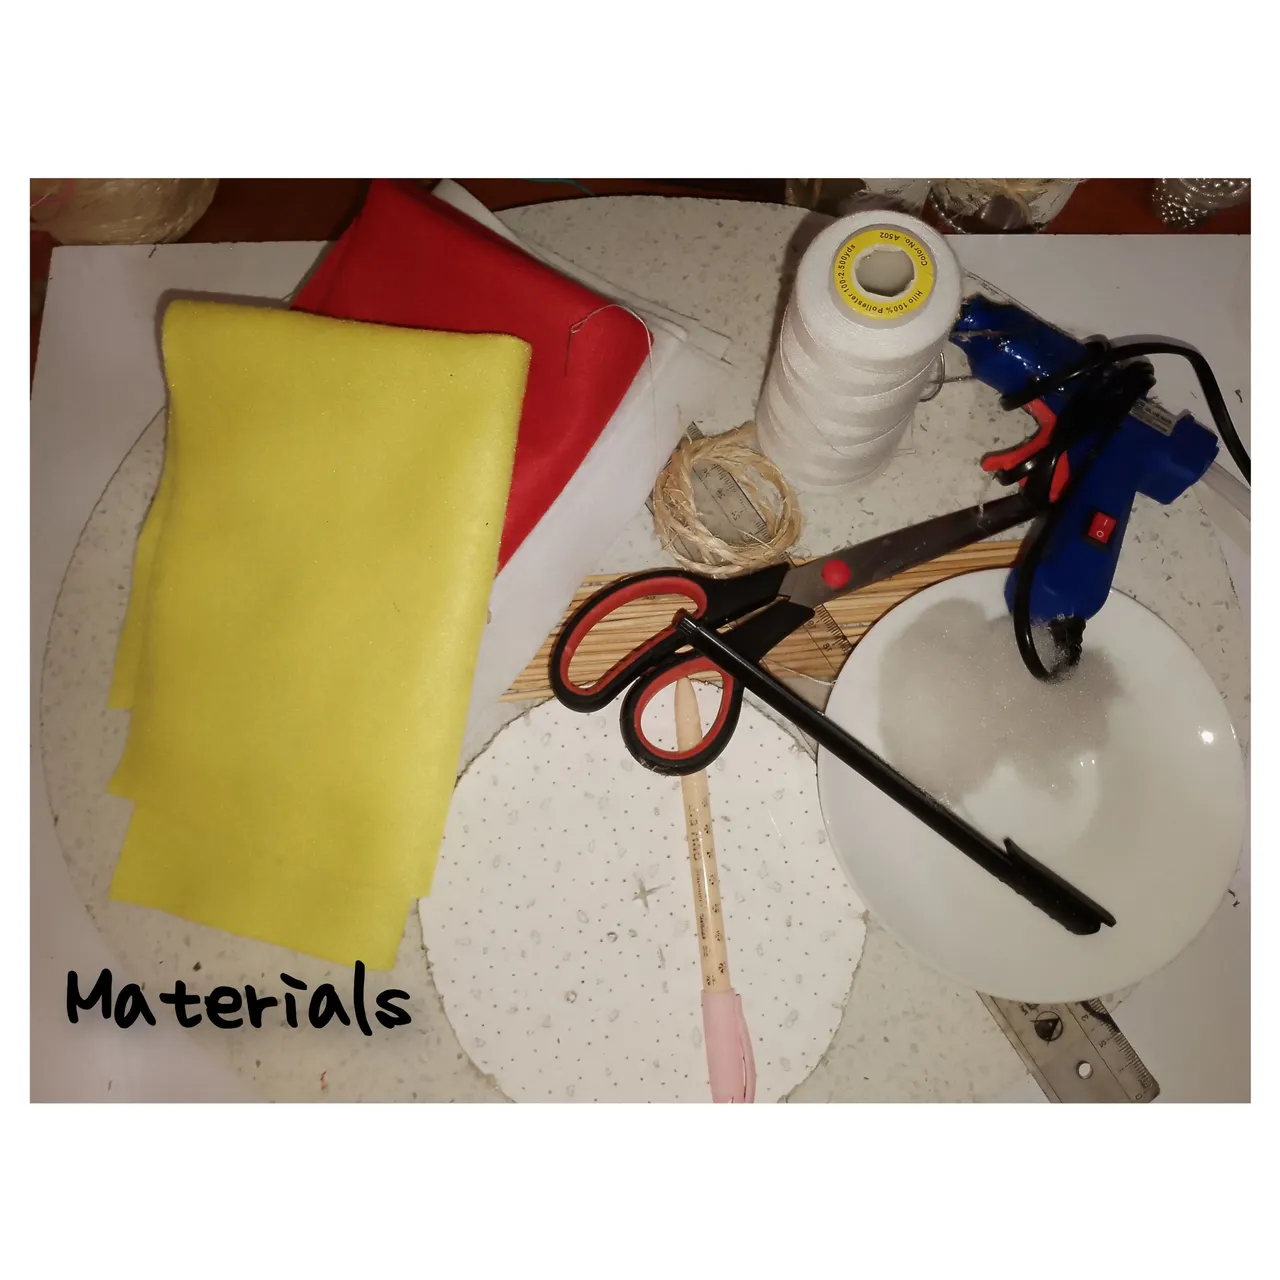
Materials.
. After collecting, those circles that must be removed when mounting the mineral fiber ceiling to the ceilings, and then placing the lamps on them. I will only use two, circles of
. Tall chopsticks.
. Mecatillo.
. Glue, hot silicone.
. Ruler.
. Marking pencil.
. Black eyeliner.
. Needle and thread, colors (black and white).
. Colored felts (white, red, yellow) . Striped fabric cutting.
. Wadding or filling. . Two half pearls n6.
. Scissors.
Steps:
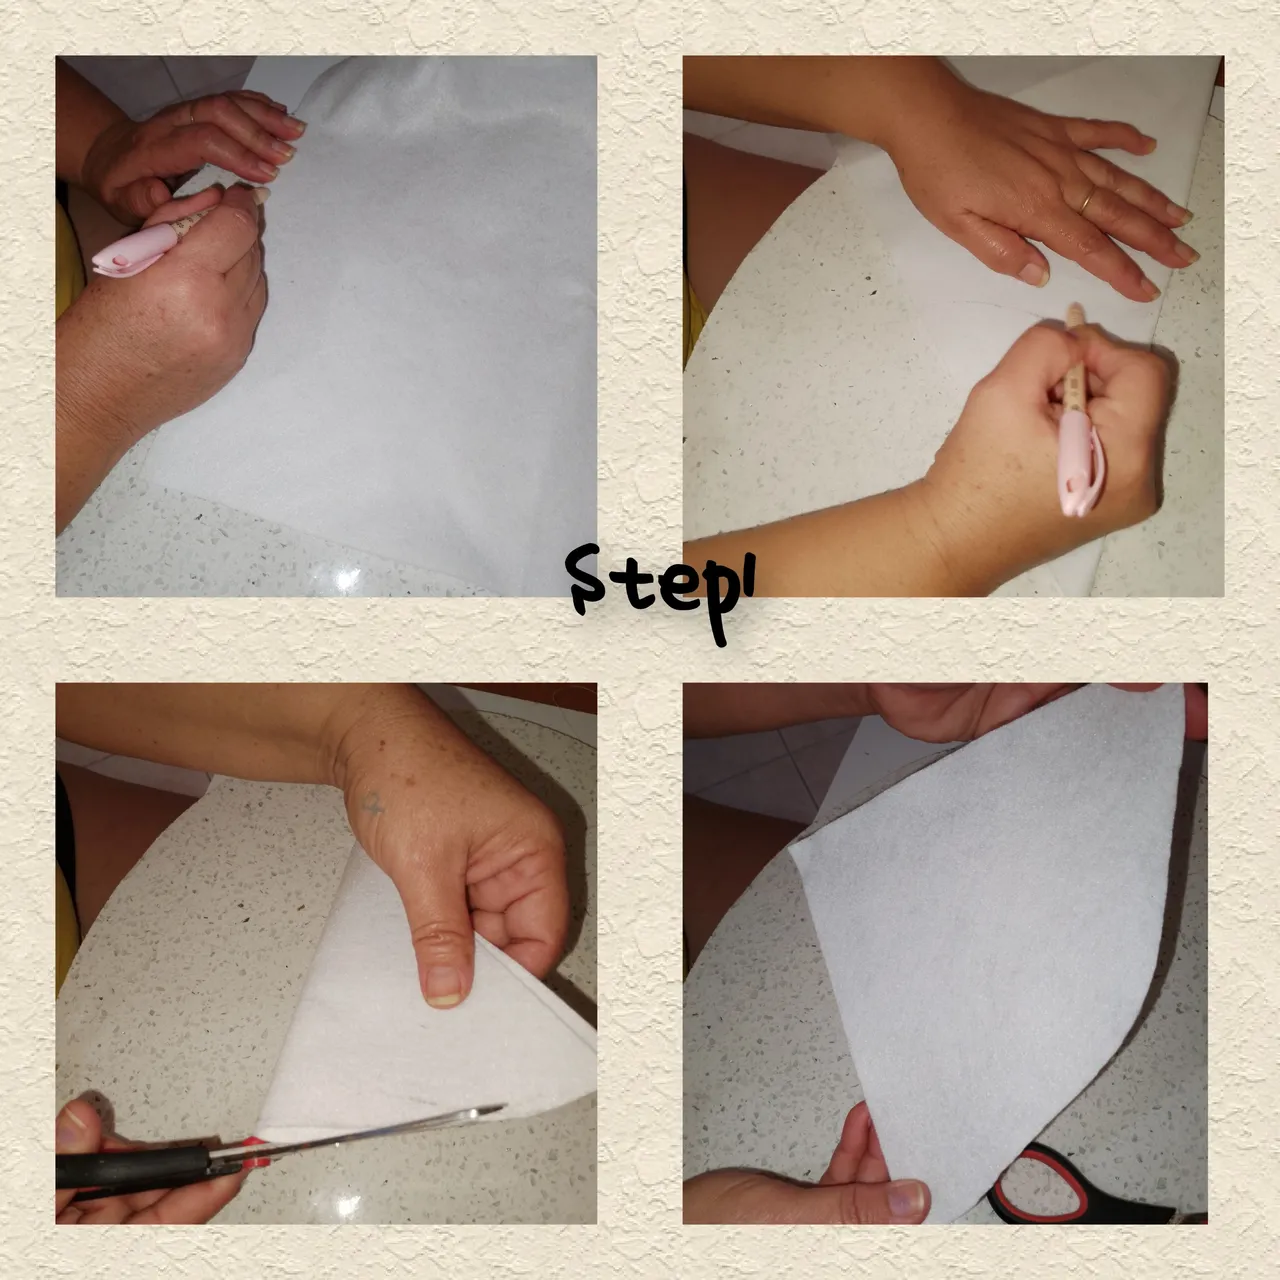
1.) I will begin, elaborating, on the cheerful caged Hen. So I start, marking on the white felt, a triangle, which I make at the bottom, cut round, semi-circular. Once the piece is ready and cut out, I glue the straight ends, with thread and needle seams. The seam is ready, I turn it around, leaving the seam on the inside.
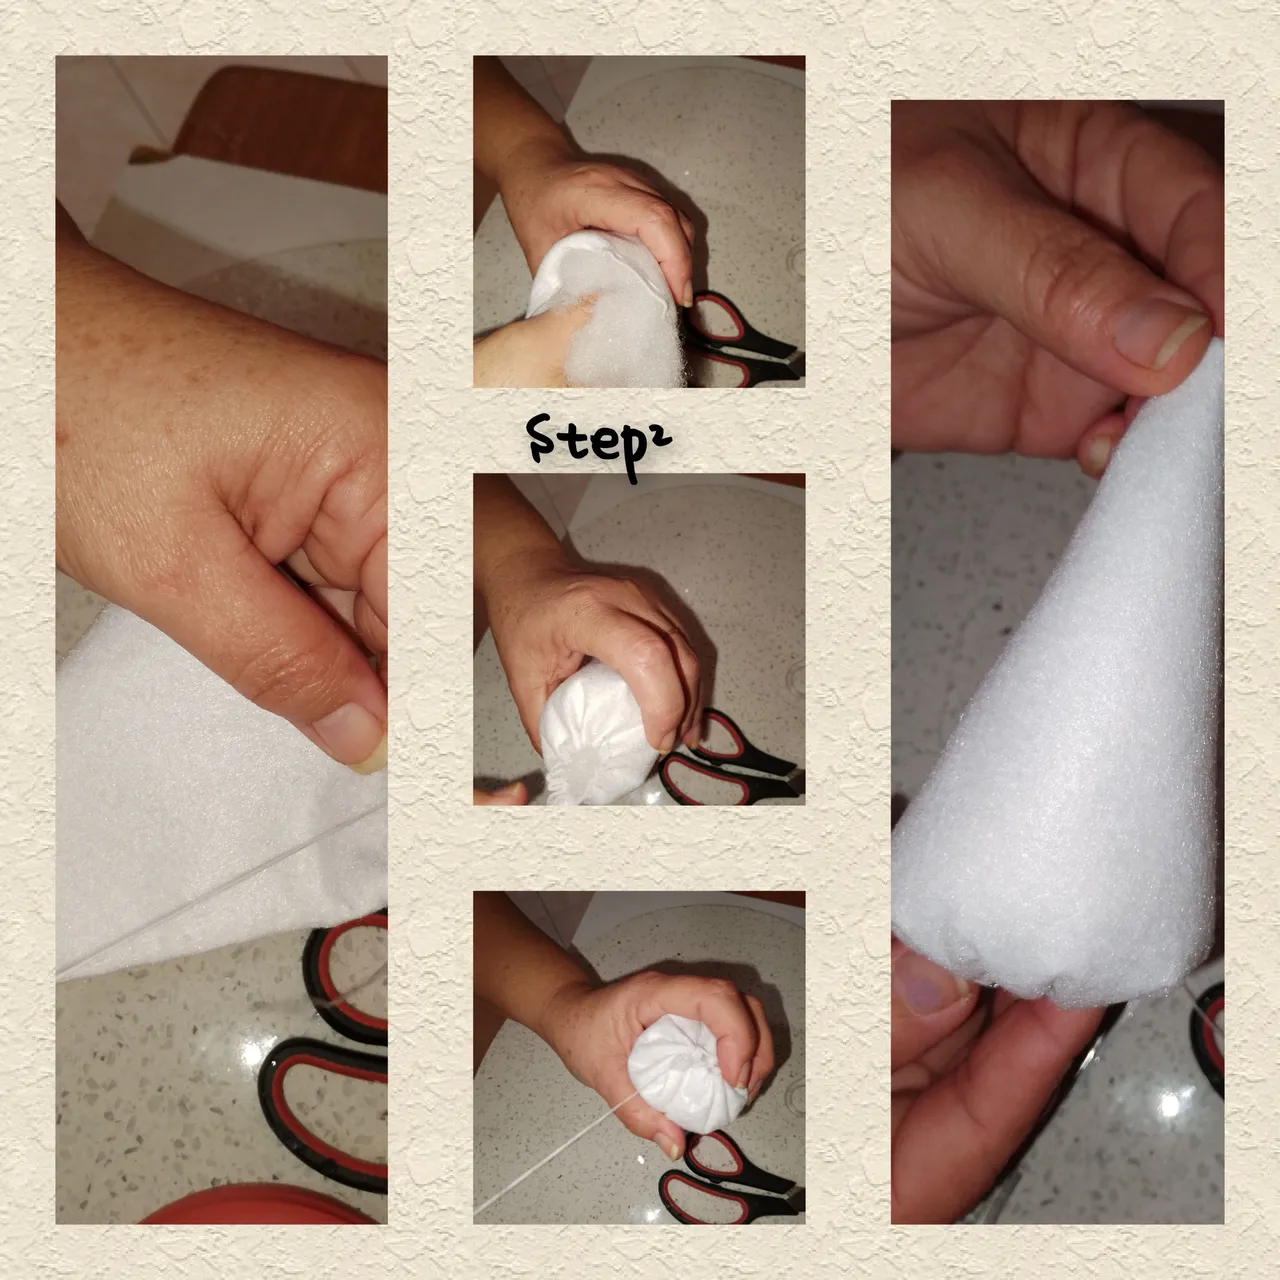
2.) I stitch the circular part, I pick up the seam a little and fill it, I expand the filling so that it is uniform, I finish off at the bottom.
3.) From the red felt, I draw and cut out the crest, the tail and the piece that will go under the beak, from the yellow felt, I draw and cut out the beak, and the legs of the hen. I cut all of these pieces in pairs, since I will sew with a needle and thread, on the upper part, and I will place a little filling, before sewing in its entirety.

4.) ready the pieces, made in the previous step, the next thing will be to glue them on the piece made in step n1, the chicken now taking shape.
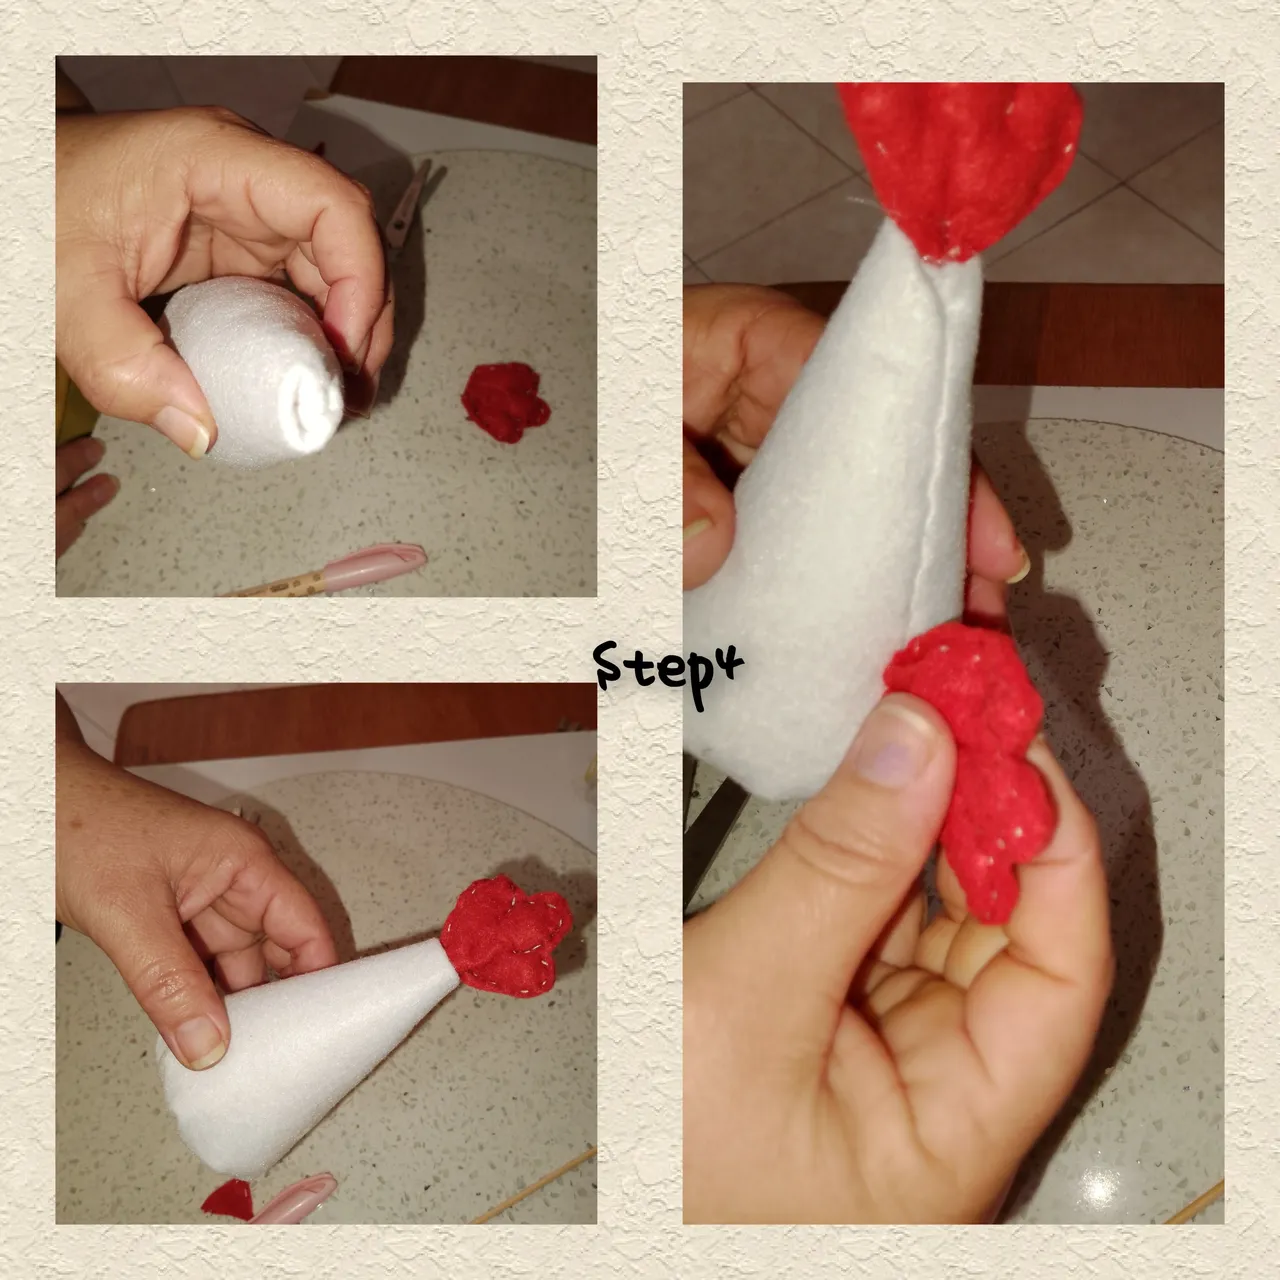
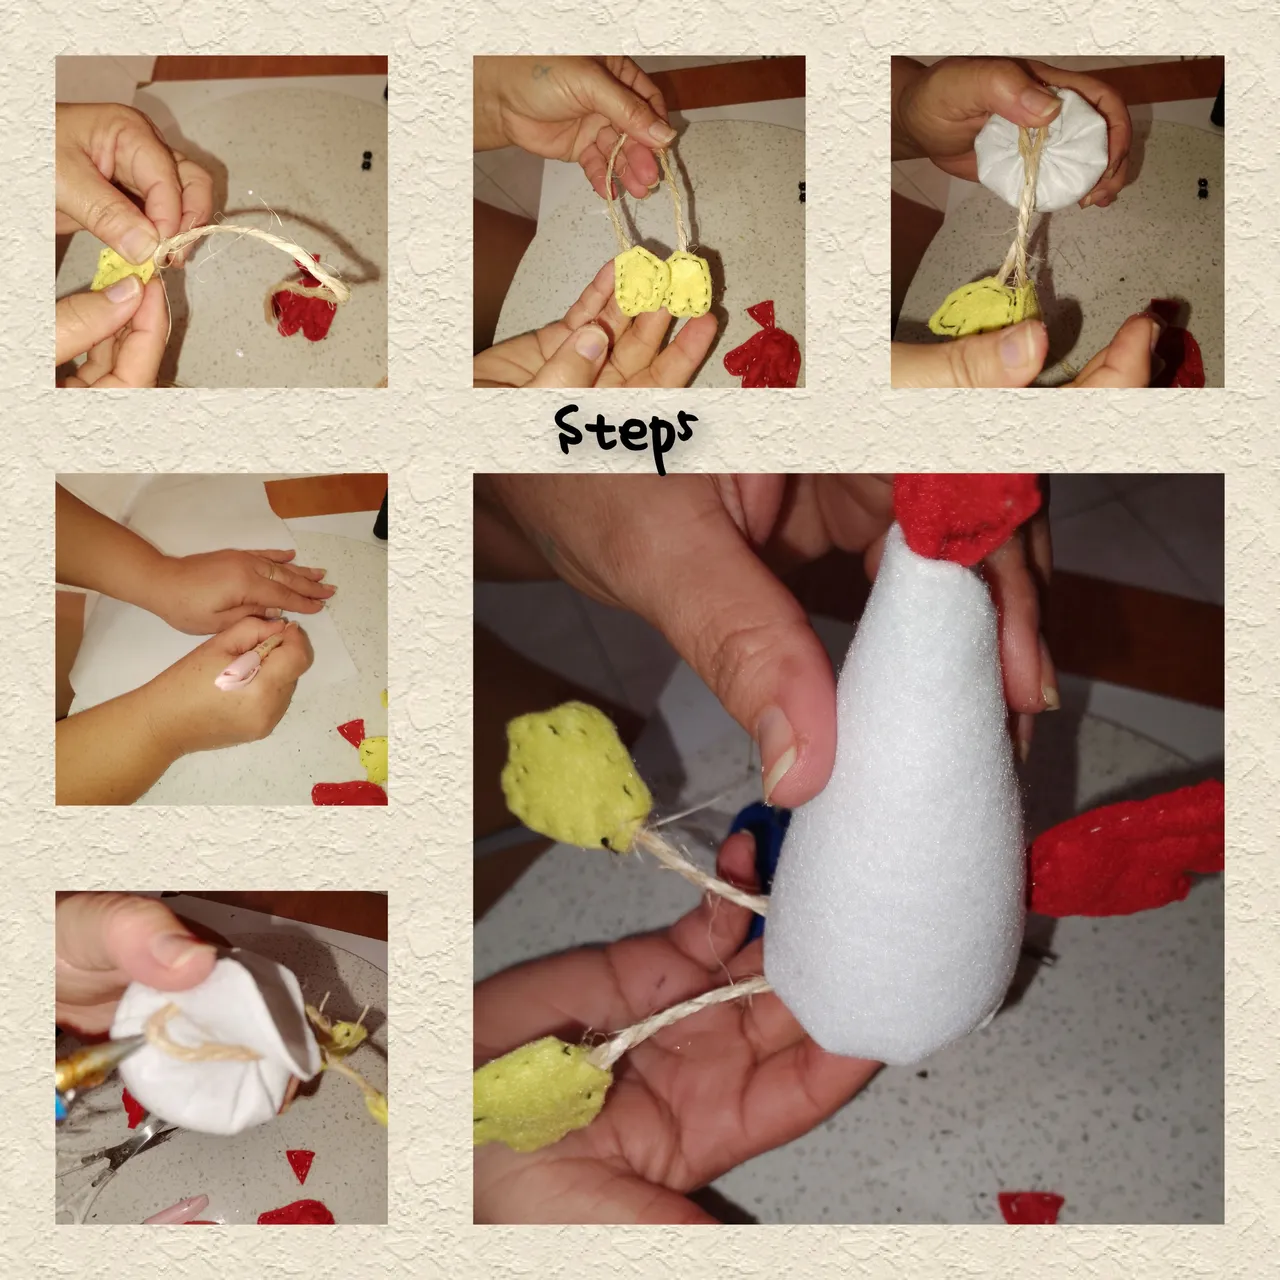
5.) for the legs, I will cut a small piece of string, and glue one on each end, then I fold the string in equal parts and glue it to the bottom of the hen's body, mark a circle of white felt, apply silicone and glue, this is how I cover the mecatillo
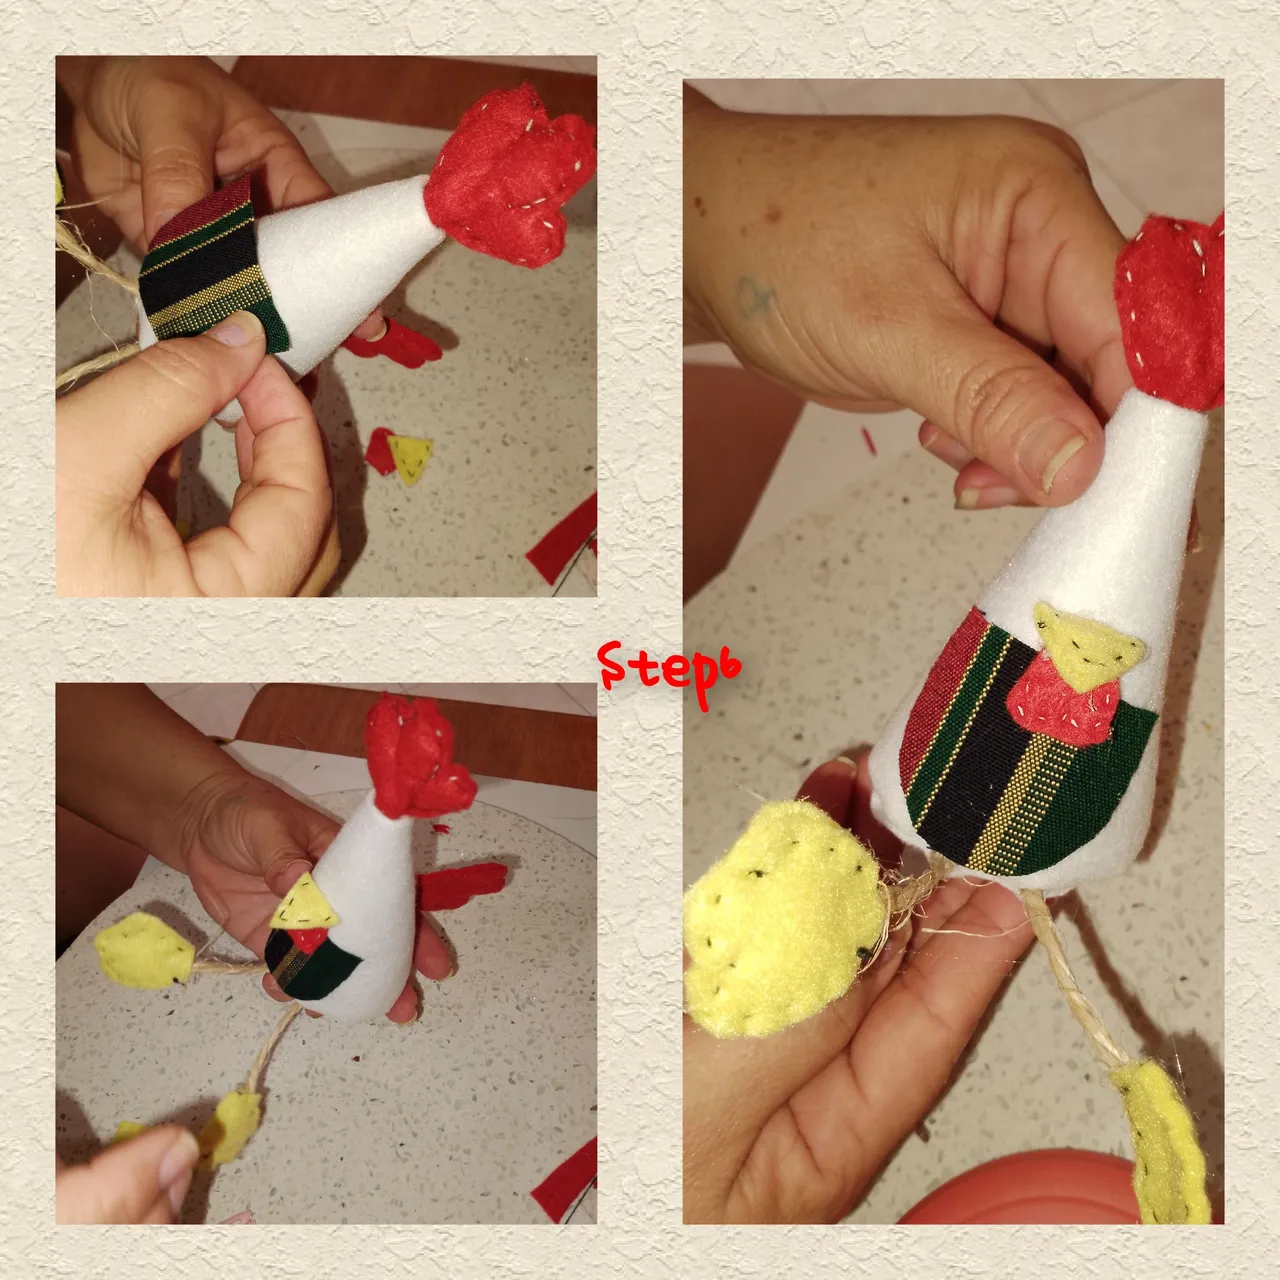
6.) From the printed fabric, I cut out a small apron and glued it to the lower part of the hen's body. Followed by the peak.
7.) I draw the wing on the white felt, cut it out, in a piece of two, that is, I must cutfour pieces, but be careful since they must be in reverse, for the right and left sides. I continue sewing along the edge, fill with batting, sew in its entirety and glue one of the sides with cd silicone. Likewise, she separated the pearls and glued them on, representing the eyes. Using the eyeliner pencil, she tweezed some eyelashes and created a delicate mecatillo bow and placed it at the bottom of the crest.

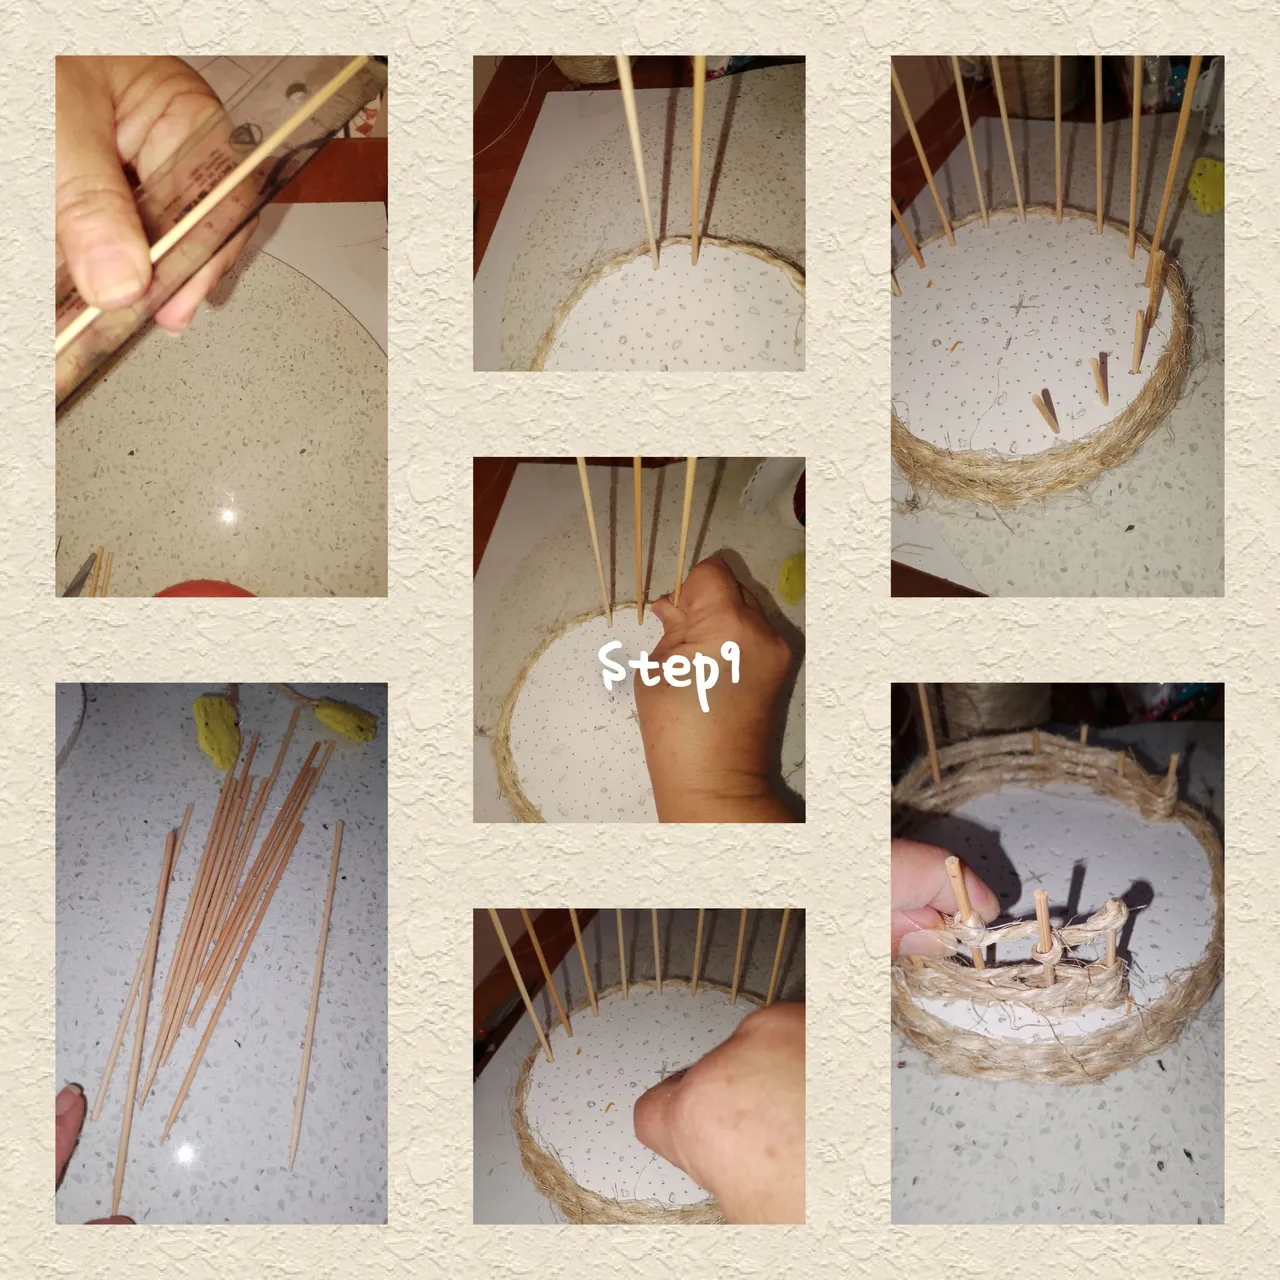
8.) I glue the circles fibra mineral face to face. I separate the strands of the mecatillo, not to give it more volume, and applying silicone I cover the entire edge of the circles.
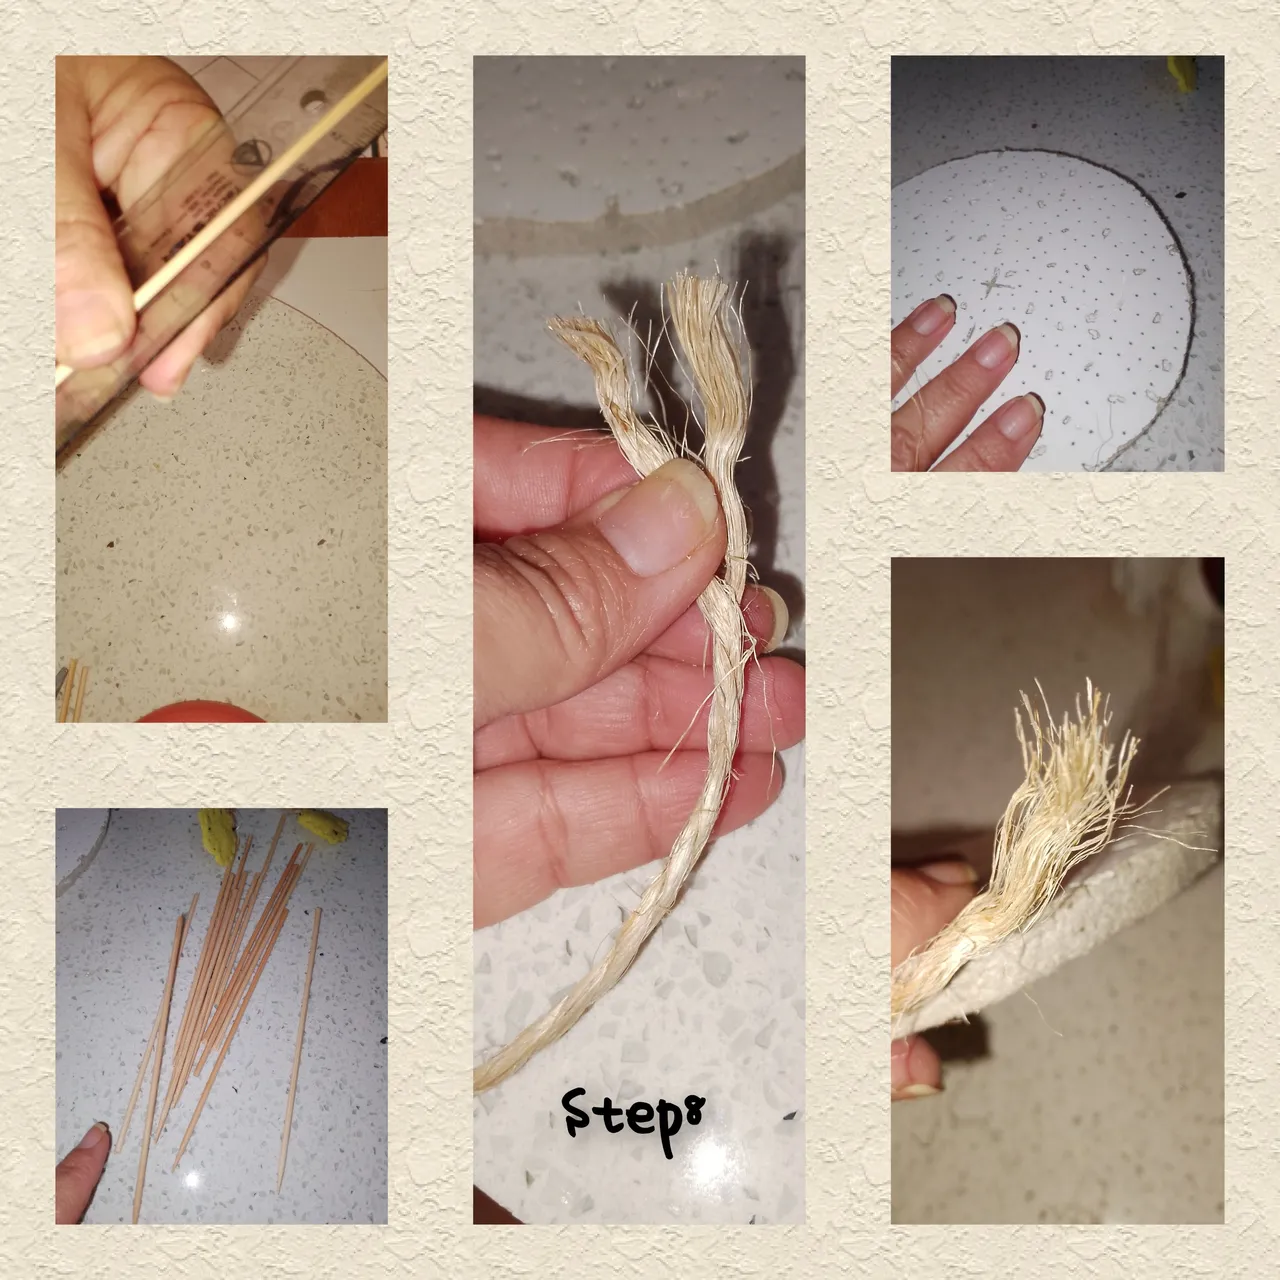
9.) I measure with the ruler, and mark 12 and 6cm, of the tall and short stick, after cutting, I cover almost the entire circle, leaving behind the largest and most hooked sticks, in the circle , mineral fiber, is a simple process so that this material of the circle is similar to that of the common anime. Once this is done, I verify that the chicken can sit in the space without toothpicks. I continue, weaving the chopsticks a little with twine. And finally, I hit the chicken.
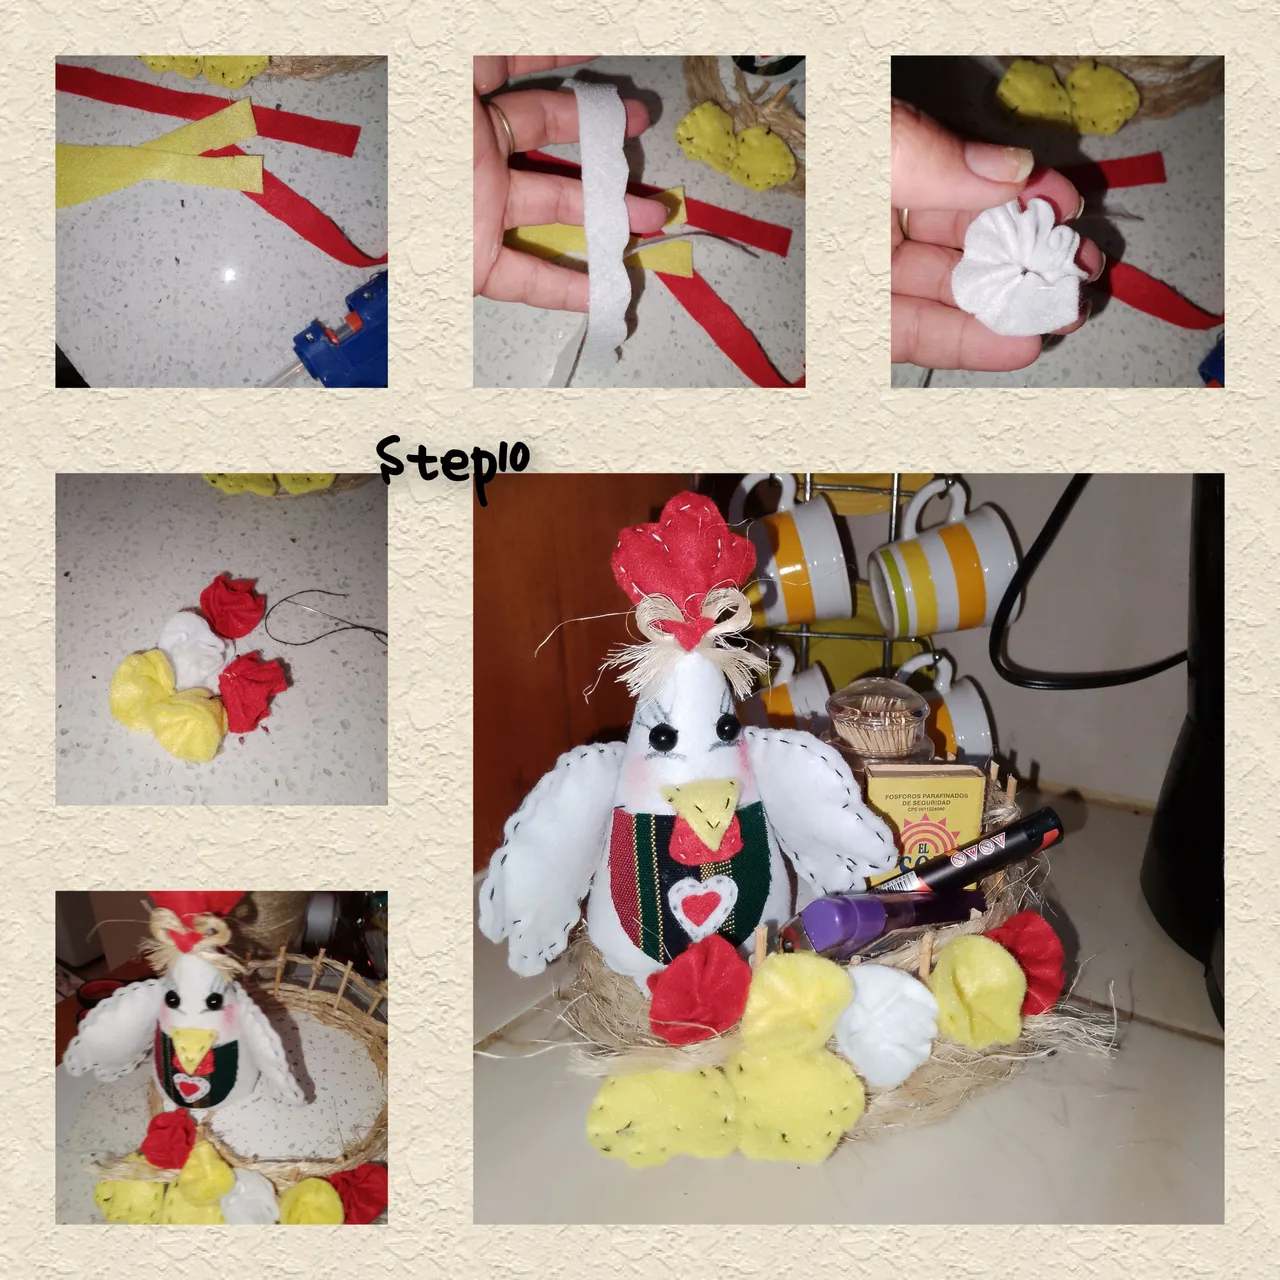
 10.) To finish, I cut 10cm strips of felt, using just the colors I have used so far. I gave some waves to one of the ends of the ribbon and made small flowers. Next, I hit the circle, near the sitting hen.
. All photos are my property.
. Use incollage
. Use language translator.
Grateful that you followed me to your liking, it will be until the next opportunity.
(ESP)
Hola a todos, les deseo un gran inicio de fin de Semana, que este lleno de muchas cosas buenas y productivas. Me complace estar acompañándoles hoy en esta gran comunidad, amantes de las manualidades y el reciclaje. @hivediy, paso a mostrarles una gran creación, llena de mucha alegría, y vistosos colores, que ayuda no solo a organizar nuestros cerillos, yeskeros, fósforos, entre otros, sino que luce muy bonito en nuestra cosita, se trata de un muy lindo florero, inspirado en una alegre y colorida gallinita enjaulada, la hice utilizando, material reciclable y de provecho. Sin más les invito a seguirme y les muestro, coso hacer la suya.
Materiales.
. Luego de recoger, esos círculos que deben desprender al montar el cielo razo de fibra mineral a los techos, para luego colocarles las lámpara. Solo utilizaré dos, círculos de
. Palillos de altura.
. Mecatillo.
. Pegamento, silicón caliente.
. Regla.
. Lápiz para marcar.
. Delineador negro.
. Aguja e hilo, colores (blanco y negro).
. Fieltros colores (blanco, rojo, amarillo)
. Recorte de tela de rallas.
. Guata o relleno.
. Dos medias perlas n6.
. Tijeras.
Pasos:
1.) comenzare, elaborando, a la alegre Gallina enjaulada. Así que comienzo, marcando en el fieltro de color blanco, un triángulo, a quien hago en la parte inferior, corte redondo, semi circular. Listo la pieza y recortada, pego los extremos rectos, con costuras de hilo y aguja. Lista la costura, doy vueltas dejando por la parte de dentro, la costura.
2.) soy puntadas a la parte circular, recojo un poco la costura y relleno, expando el relleno, par que quede uniforme, remato en el fondo.
3.) De el fieltro color rojo, dibujo y recortó, la cresta, la cola y la pieza que iré debajo de el pico, de el fieltro color amarillo, dibujo y recortó el pico, y las patas de la gallina. Todas estás piezas, las recortó en pares.ya que cosere con aguja e hilo, por la parte superior, y colocaré un poco de relleno, antes de coser en su totalidad.
4.) listo las piezas, hechas en el paso anterior, lo siguiente será, pegarlas sobre la pieza hecha en el paso n1, tomando ya forma la gallina.
5.) para las patas, cortaré un pedacito de mecatillo, y pego una en cada extremo, luego doblo en partes iguales, el mecatillo y pego en la parte inferior de el cuerpo de la gallina, marco un círculo de fieltro color blanco, aplicó silicón y pego, así cubro el mecatillo
6.) de la tela estampada, recortó un pequeño delantal y pego en la parte baja de el cuerpo de la gallina. Seguido de el pico.
7.) dibujo sobre el fieltro de color blanco el ala, recortó, en pieza de dos, es decir debo cortar cuatro piezas, pero siendo cuidadosa ya que deben ser en reversa, para el lado derecho e izquierdo. Sigo cosiendo por el borde, relleno con guata, coso en su totalidad y pego con silicón en cd uno de los lados. Así mismo, separó las perlas y se las pego, en representación de los ojos.
Con el lápiz delineador, pinza algunas pestañas y armó un delicado lazo de mecatillo y coloco en la parte inferior de la cresta.
8.) Pego los círculos de ......cara a cara. Separo, las hebras de el mecatillo,nopara darle más volumen, y aplicando silicón cubro todo el.borde de los círculos.
9.) mido con la regla, y marco 12 y 6cm, de palito de altura y corto, luego de cortado, cubro casi en su totalidad el círculo, dejando para parte de tras, los palitos de mayor tamaño y engancho, en el círculo, de fibra mineral, es un proceso simple tan que este material de el círculo, es parecida a la de el, anime común. Hecho esto, verifico que en el espacio sin palillos, pueda ir sentada la gallina. Continuo, tejiendo un poco los palillos con mecatillo. Y finalmente, pego la gallina.
10.) para finalizar, corto tiras de 10cm de fieltro, usando justo los colores que hasta ahora use. Doy algunas ondas en uno de los extremos de el listón y armó pequeñas flores. Seguidamente, pego en el círculo, cerca de la gallinita sentada.
. Todas las fotos son de mí propiedad.
. Use incollage
. Use traductor lenguaje.
Agradecida me haya seguido de su agrado, será hasta una próxima oportunidad.