👋🏻👋🏻👋🏻☺️☺️☺️☺️☺️👋🏻👋🏻👋🏻
Buenas, buenas por aquí, gente linda y creativa de hivediy, les deseo un maravilloso dia, cargado de buena vibra, de mucha alegria y sobre todo mucho amor. Estoy fascinada ante tanto derroche de talento que abunda en esta hermosa comunidad, agradecida siempre con todos sus integrantes por mostrar tan bellos proyectos y por siempre apoyarnos los unos a los otros.
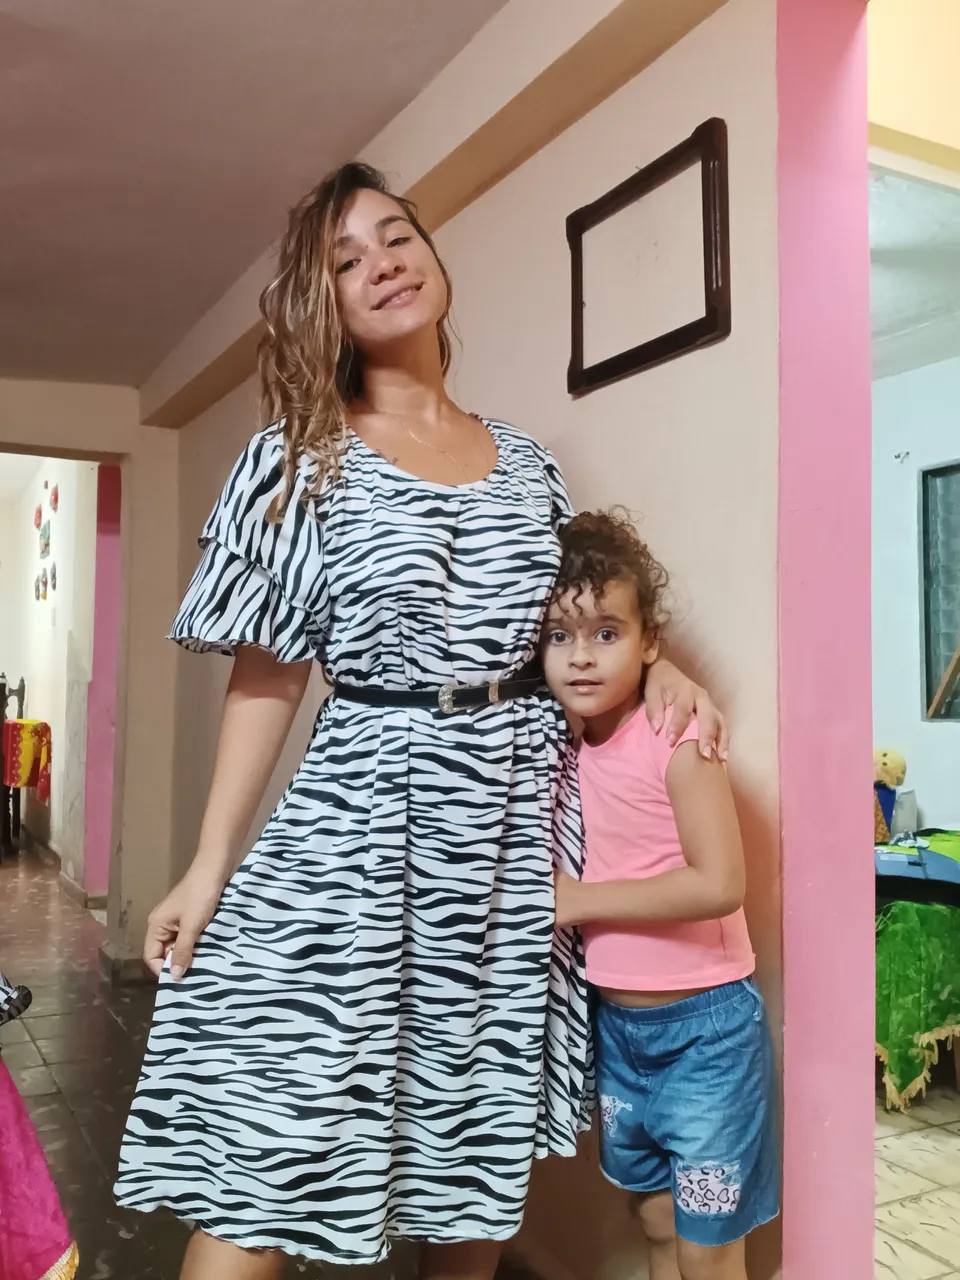
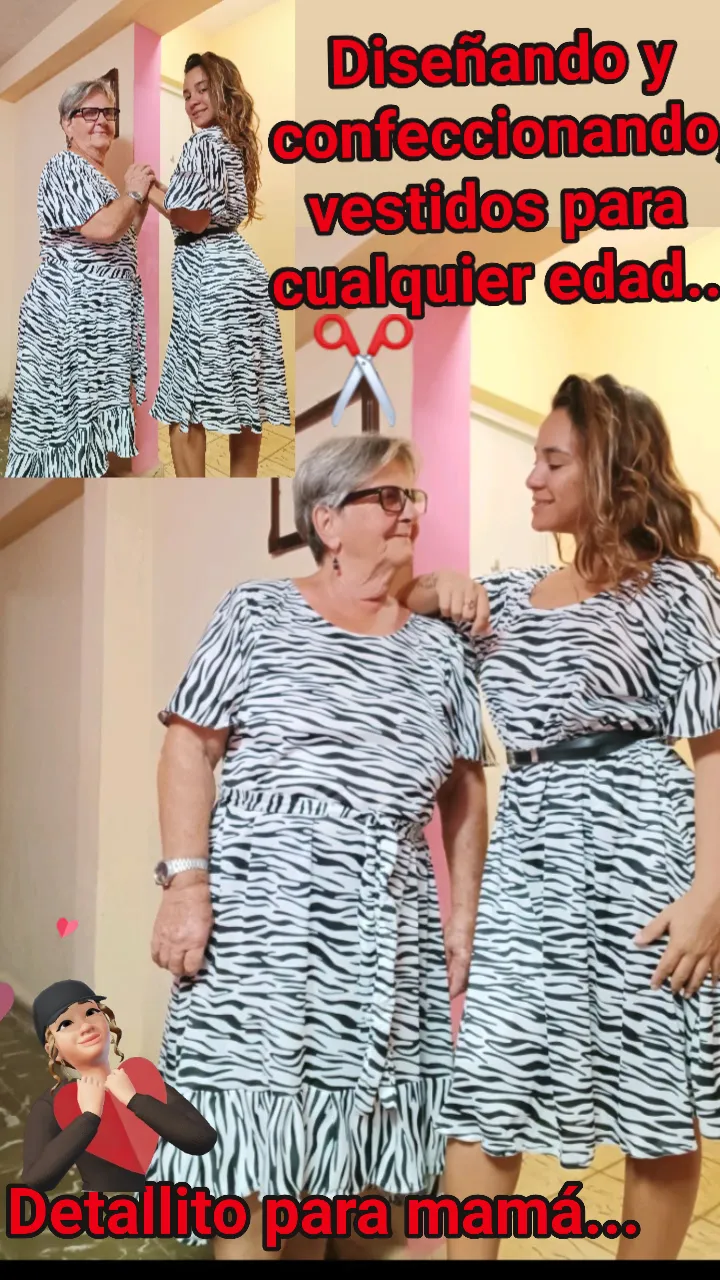
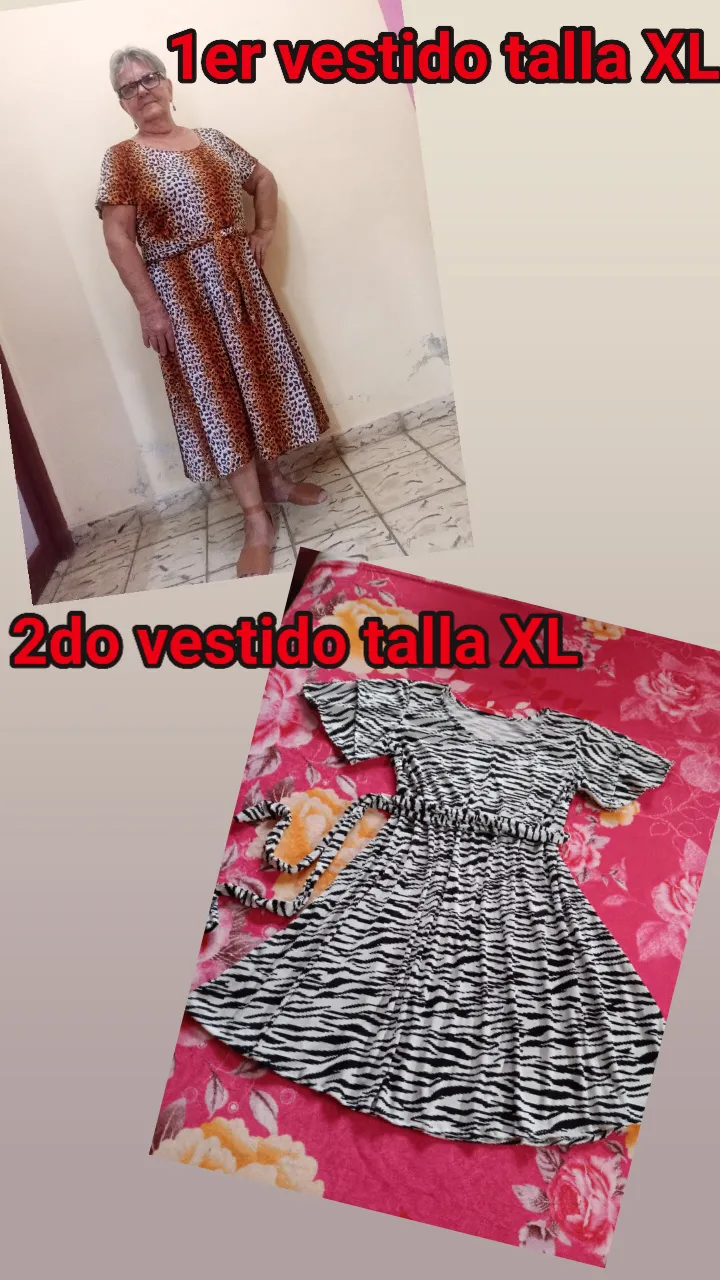
Estoy super emocionada pues, ya es mi segunda experiencia realizando prendas de vestir tallas mucho mas grandes que las que habito hacer. En esta ocasion, queria impresionar a la jefa de la casa, la mandamas y la heroina, mi mamitaaa....
👋🏻👋🏻👋🏻☺️☺️☺️☺️☺️👋🏻👋🏻👋🏻
Good, good here, beautiful and creative people of hivediy, I wish you a wonderful day, full of good vibes, lots of joy and above all lots of love. I am fascinated by so much talent that abounds in this beautiful community, always grateful to all its members for showing such beautiful projects and for always supporting each other.
I am super excited because it is already my second experience making garments much larger sizes than the ones I usually make. This time, I wanted to impress the boss of the house, the bossy one and the heroine, my mommy ....
👋🏻👋🏻👋🏻☺️☺️☺️☺️☺️👋🏻👋🏻👋🏻
Realice el mismo estilo medio acampanado, como ya lo habia hecho anteriormente, pero en esta ocasión cambie el estilo de las mangas, y para el de mi mama le hice un coqueto vuelo debajo, dando un estilo mas jovial...
I made the same half flared style, as I had done before, but this time I changed the style of the sleeves, and for my mom's I made a flirty flight underneath, giving a more jovial style...
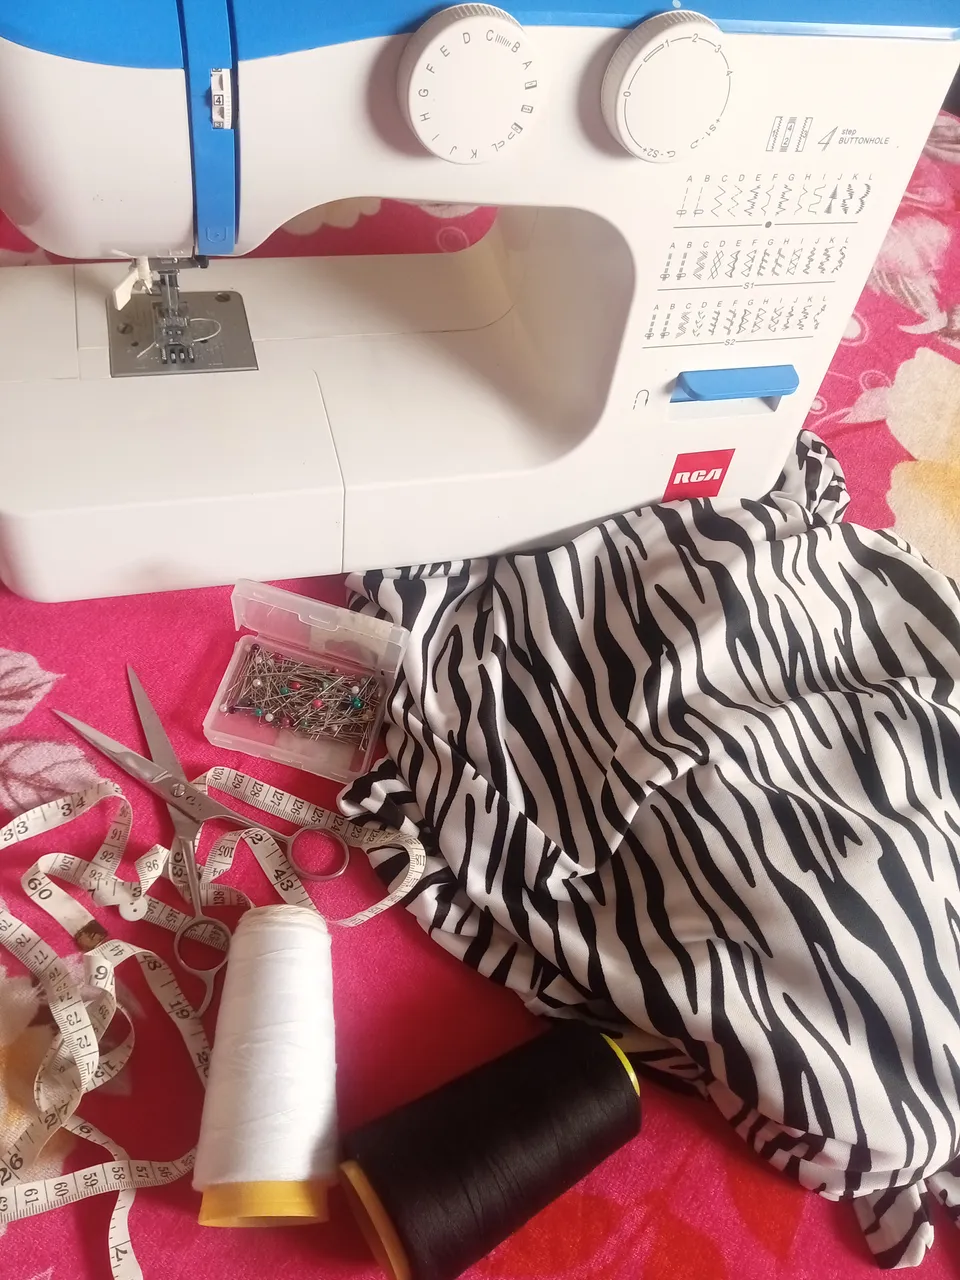
Los invito a acompañarme en este tutorial por partida doble, jj. Les dejo los materiales y herramientas que emplee para ejecutar estos lindos vestidos. Espero y os guste. Bendecido día...
I invite you to join me in this double tutorial, jj. Here are the materials and tools I used to make these cute dresses. I hope you like it. Blessed day...
🤍🖤🤍🖤🦓🦓🦓🦓🦓🤍🖤🤍🖤
Materiales / Materials
✨✨✨✨🧷📏✂️🏮✨✨✨✨
fabric
Scissors
Thread and needle
Elastic
Measuring tape
Pins
Sewing machine
🤍🖤🤍🖤🦓🦓🦓🦓🦓🤍🖤🤍🖤
Procedimiento:
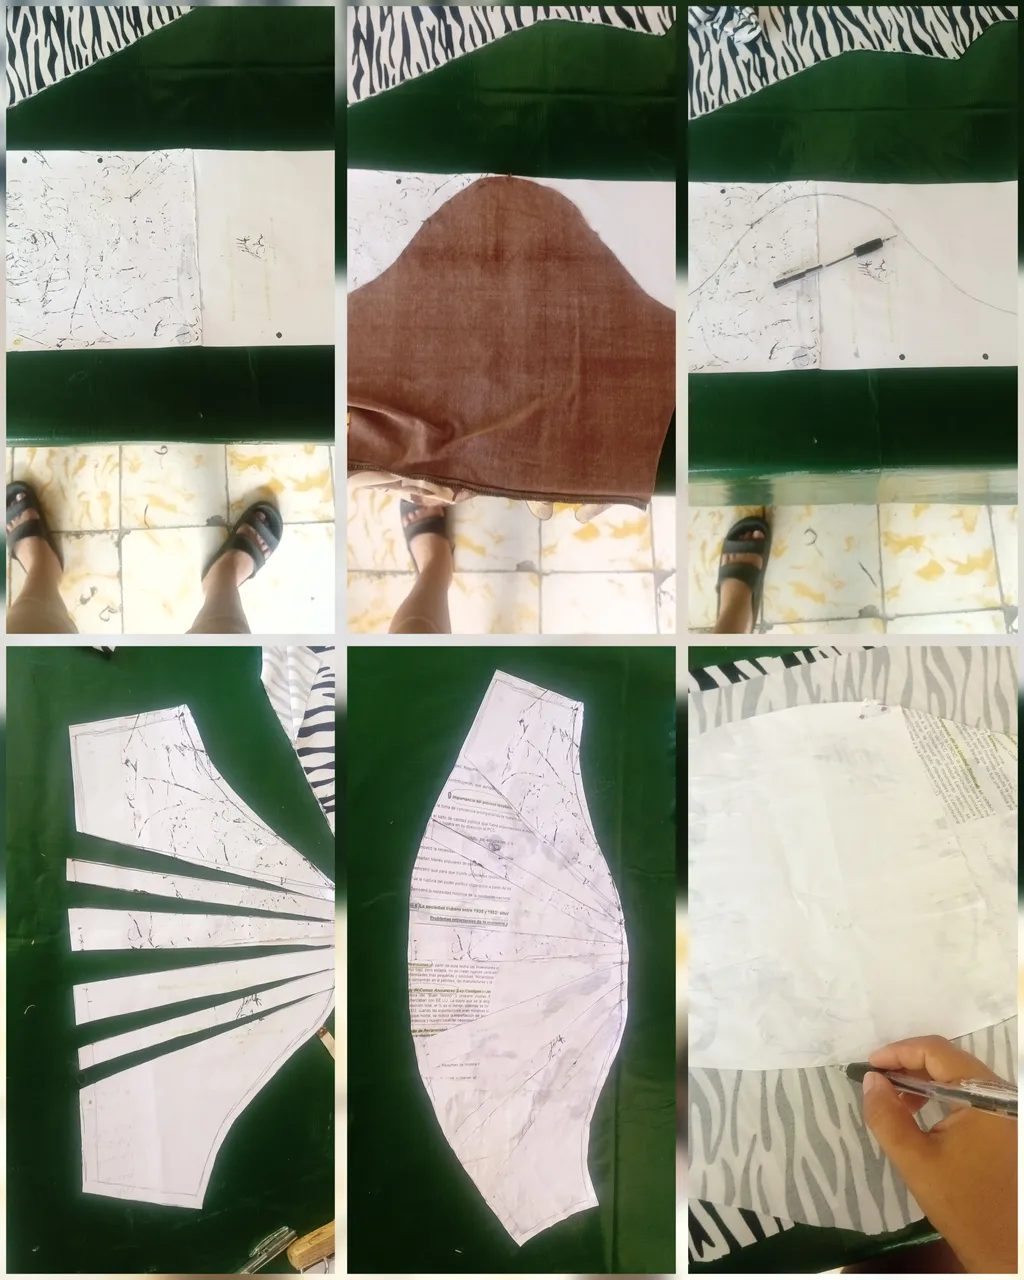
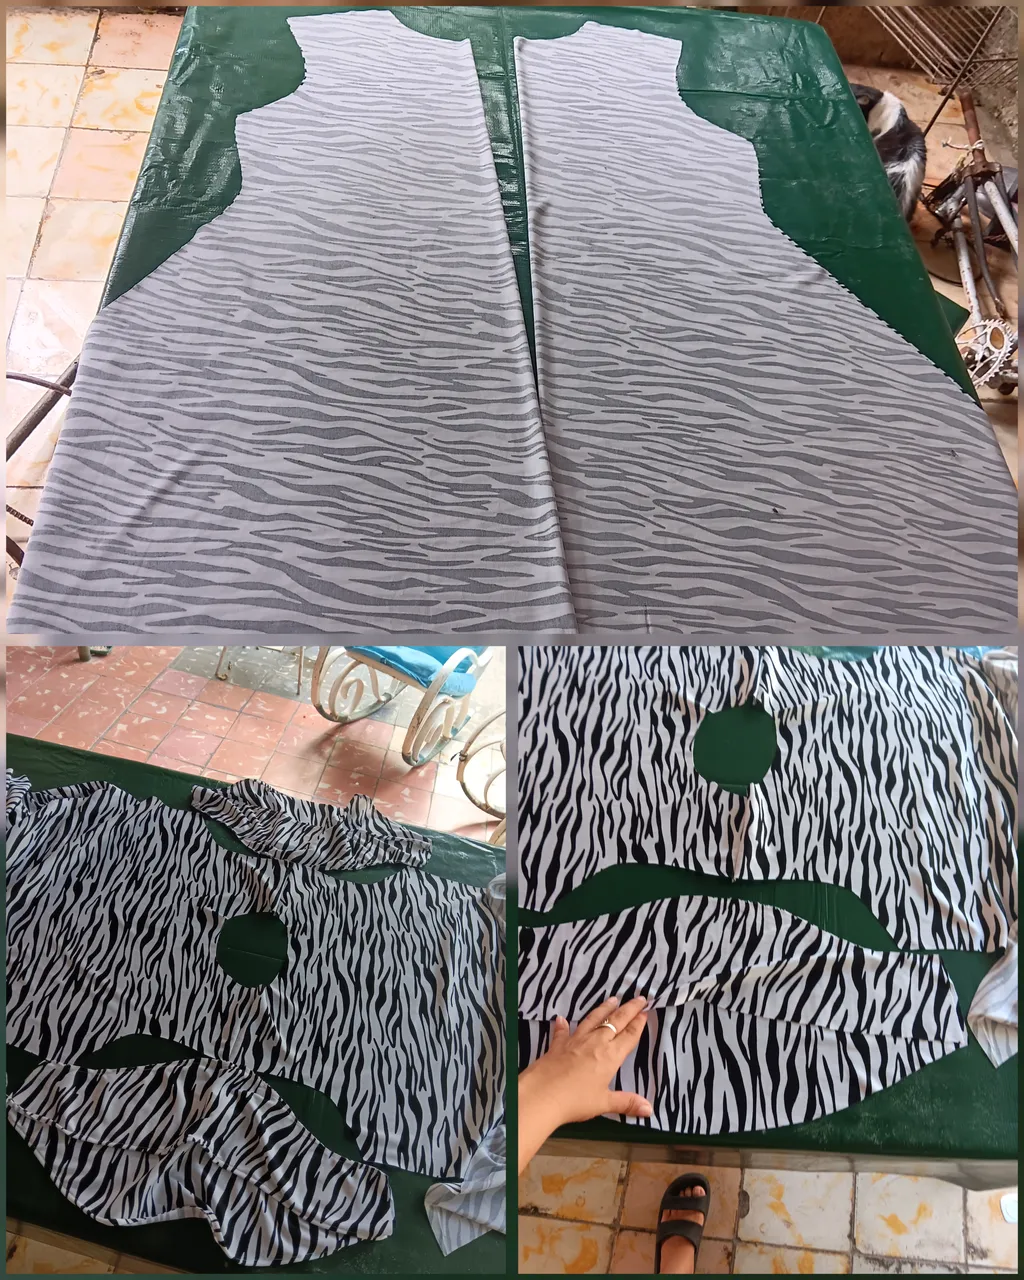
1er paso:
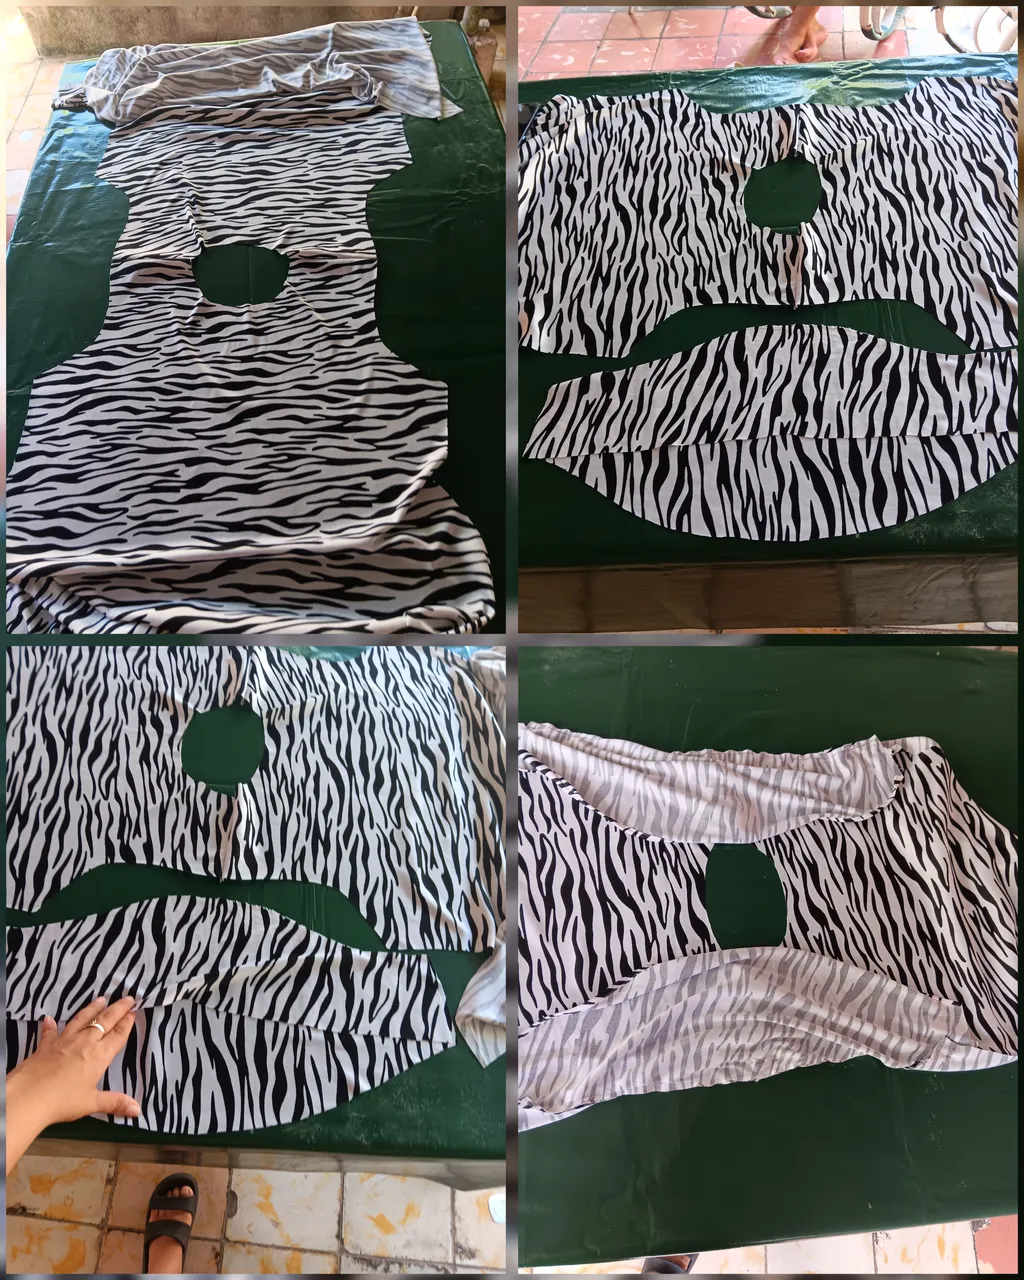
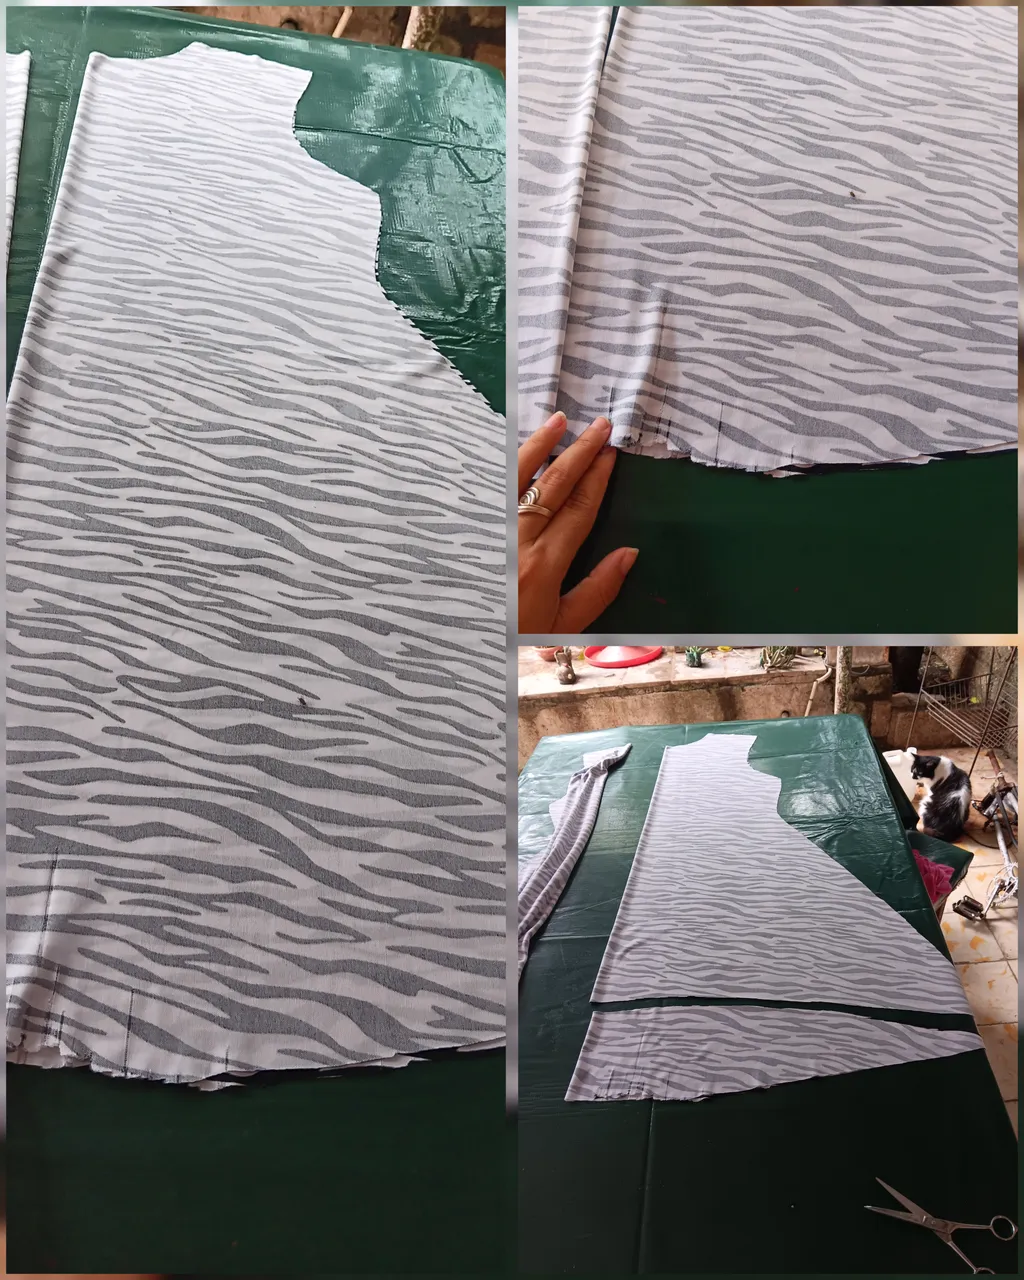
Doble la tela por la mitad, obteniendo dos partes iguales. Con ayuda de una muestra saque delantero y trasero del vestido, con un hermoso corte princesa. Corte el cual favorece mucho cualquier silueta.
A parte de las dos partes, también saque las dos mangas.
Fue un nuevo reto, pues esas mangas nunca las habia hecho, y hacer el patron, fue otro proceso, pero con un poco de paciencia y espíritu de trabajo, lo logre...
Procedure:
1st step:
Fold the fabric in half, obtaining two equal parts. With the help of a sample, take out the front and back of the dress, with a beautiful princess cut. This cut is very flattering to any silhouette.
In addition to the two parts, I also took out the two sleeves.
It was a new challenge, because I had never made those sleeves before, and making the pattern, was another process, but with a little patience and spirit of work, I did it...
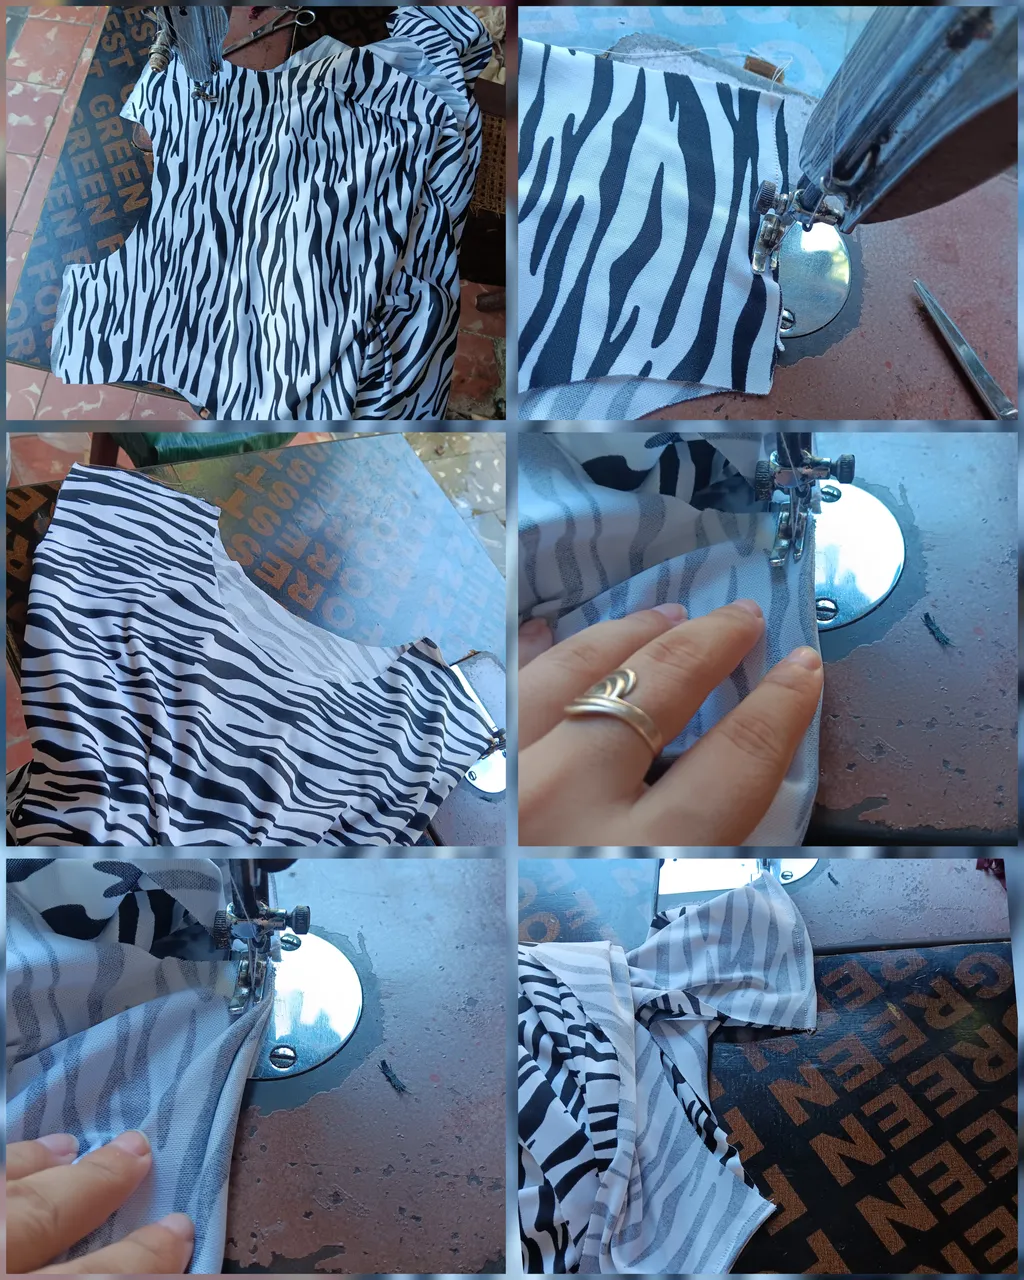
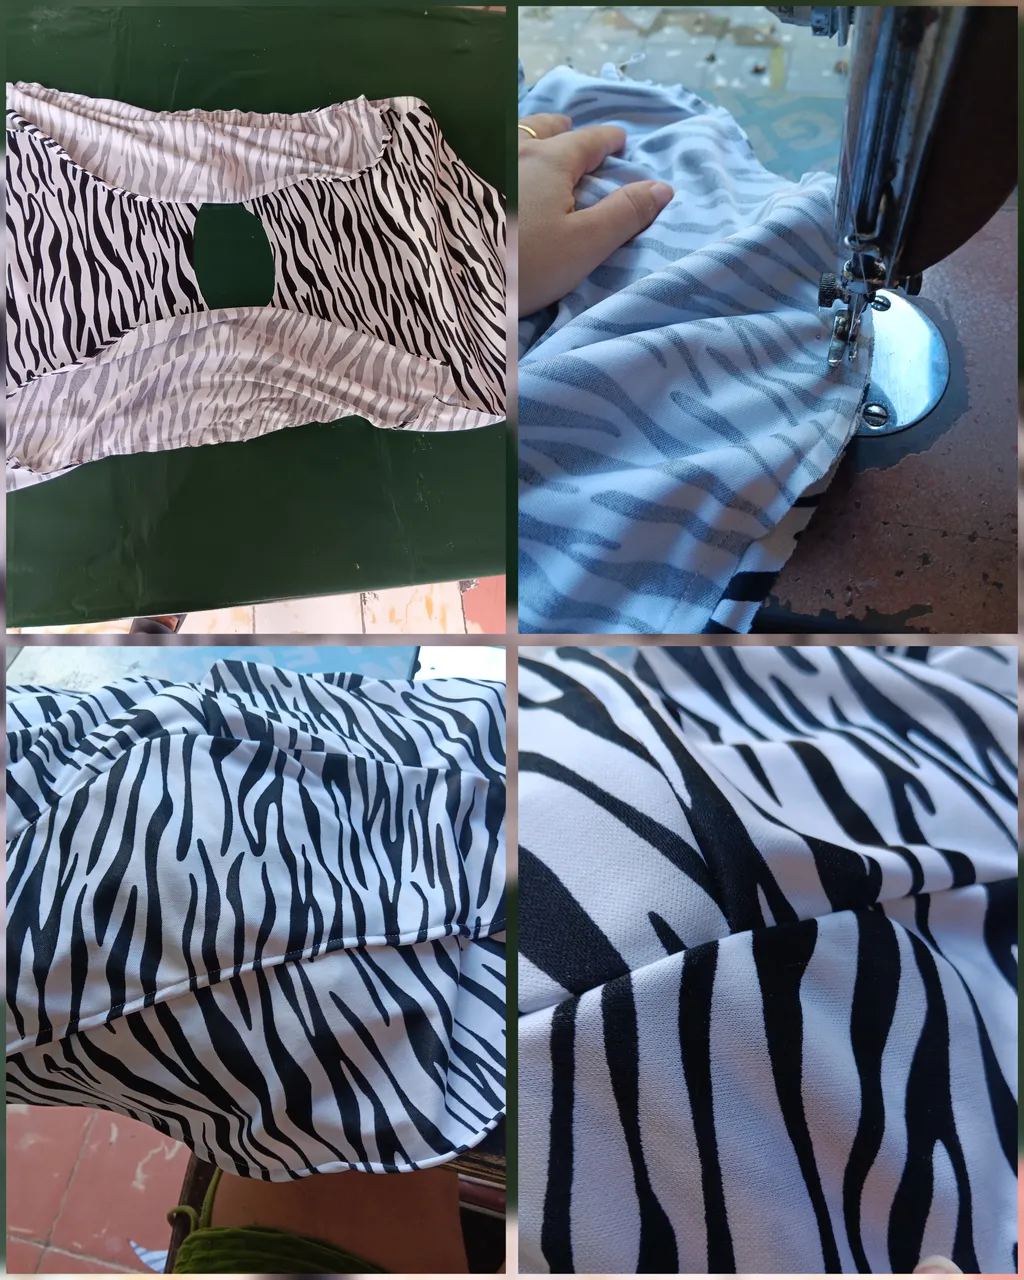
2er paso:
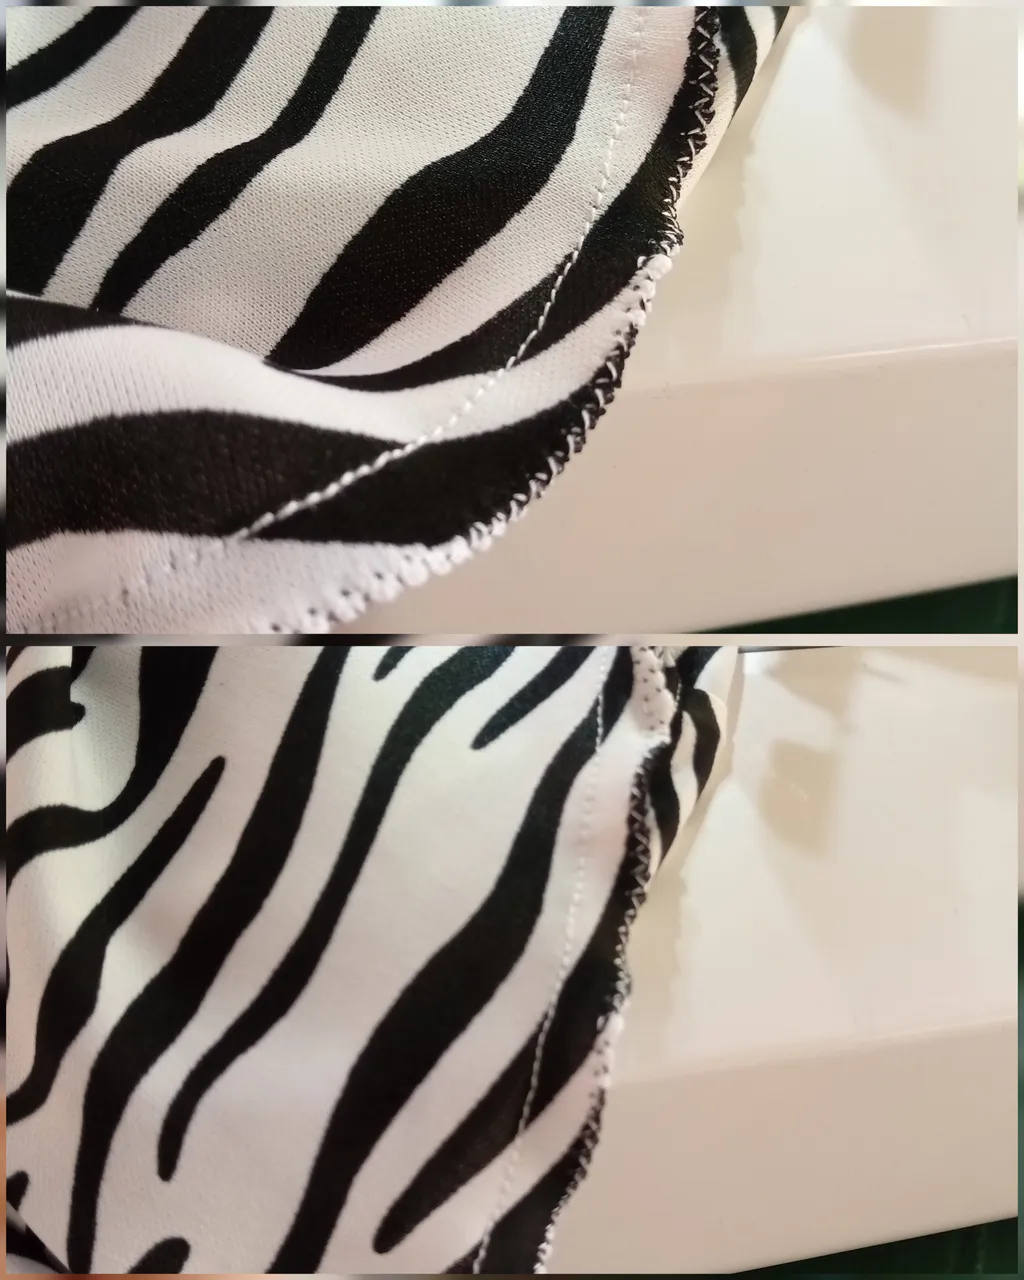
Uni con una costura francesa el delantero con el tracero por la parte de los hombros, solo en esta zona, pues luego de ponerle la manga es que cierro los dos laterales...
Para dicha costura, primero cosi las dos piezas por la parte del derecho, para luego voltearla al reves y pasar nuevamente por la zona ya cocida. De esta forma evito que se siga deshilando y le da un mejor acabado a este tipo de diseño.
2nd step:
I join with a French seam the front with the back at the shoulders, only in this area, because after putting the sleeve is that I close the two sides...
For this seam, I first sewed the two pieces on the right side, and then I turned it inside out and sewed it again on the already sewn area. This way I avoid further fraying and gives a better finish to this type of design.
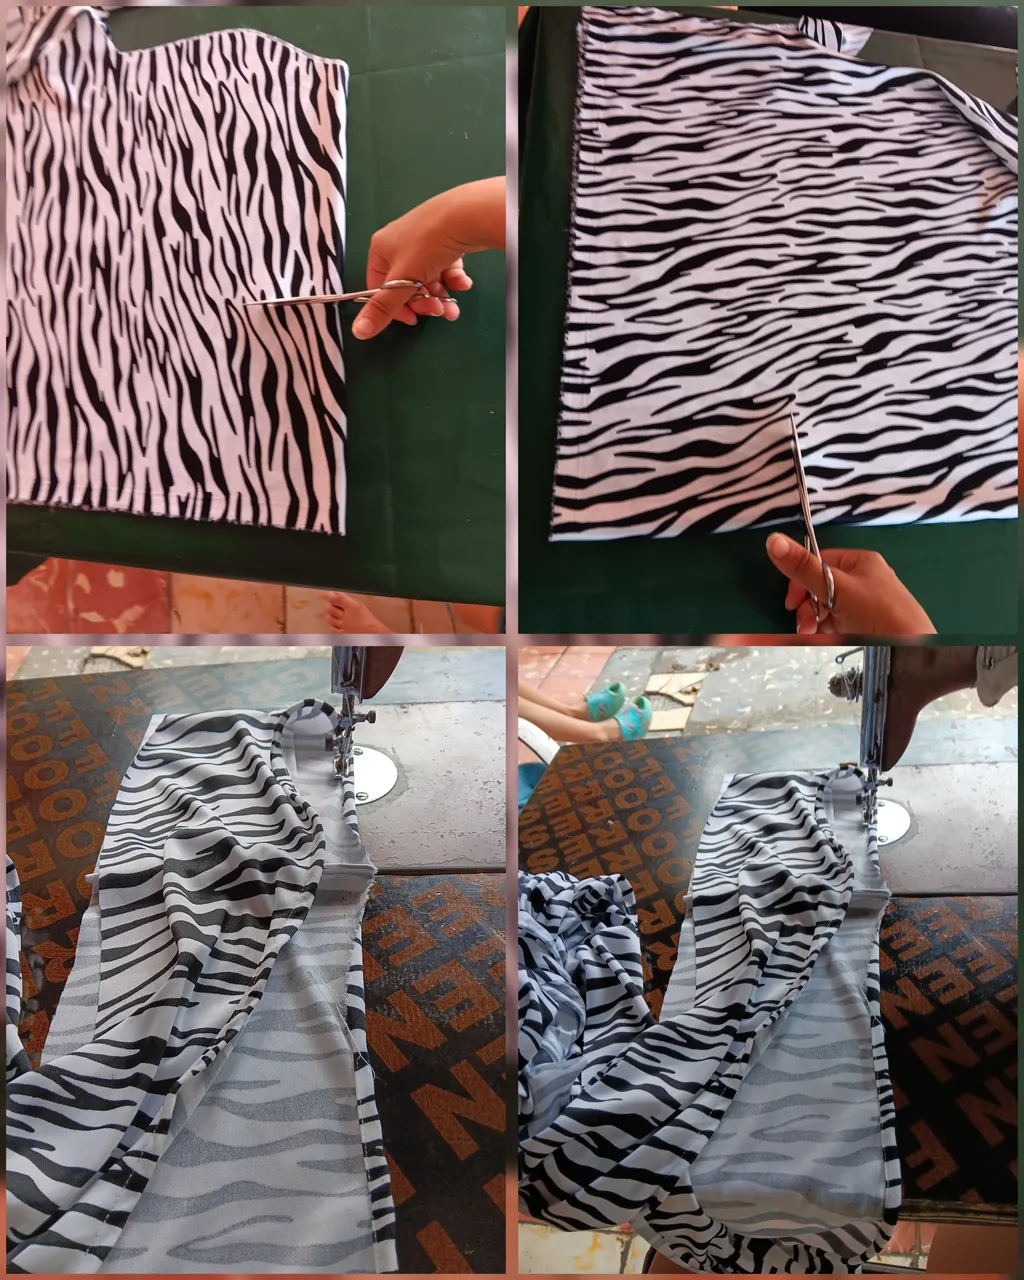
3er paso:
Tome las mangas, y las uni, ya que eran dos una mas corto que la otra, y les hice un dobladillo a cada una. Luego las supuse encima de la mesa junto con el vestido, para ver como quedaba.
Los sujete a la prenda con ayuda de los alfileres...
Step 3:
I took the sleeves, and joined them together, since there were two of them, one shorter than the other, and hemmed each one. Then I put them on the table together with the dress, to see how it looked.
I attached them to the garment with the help of the pins...
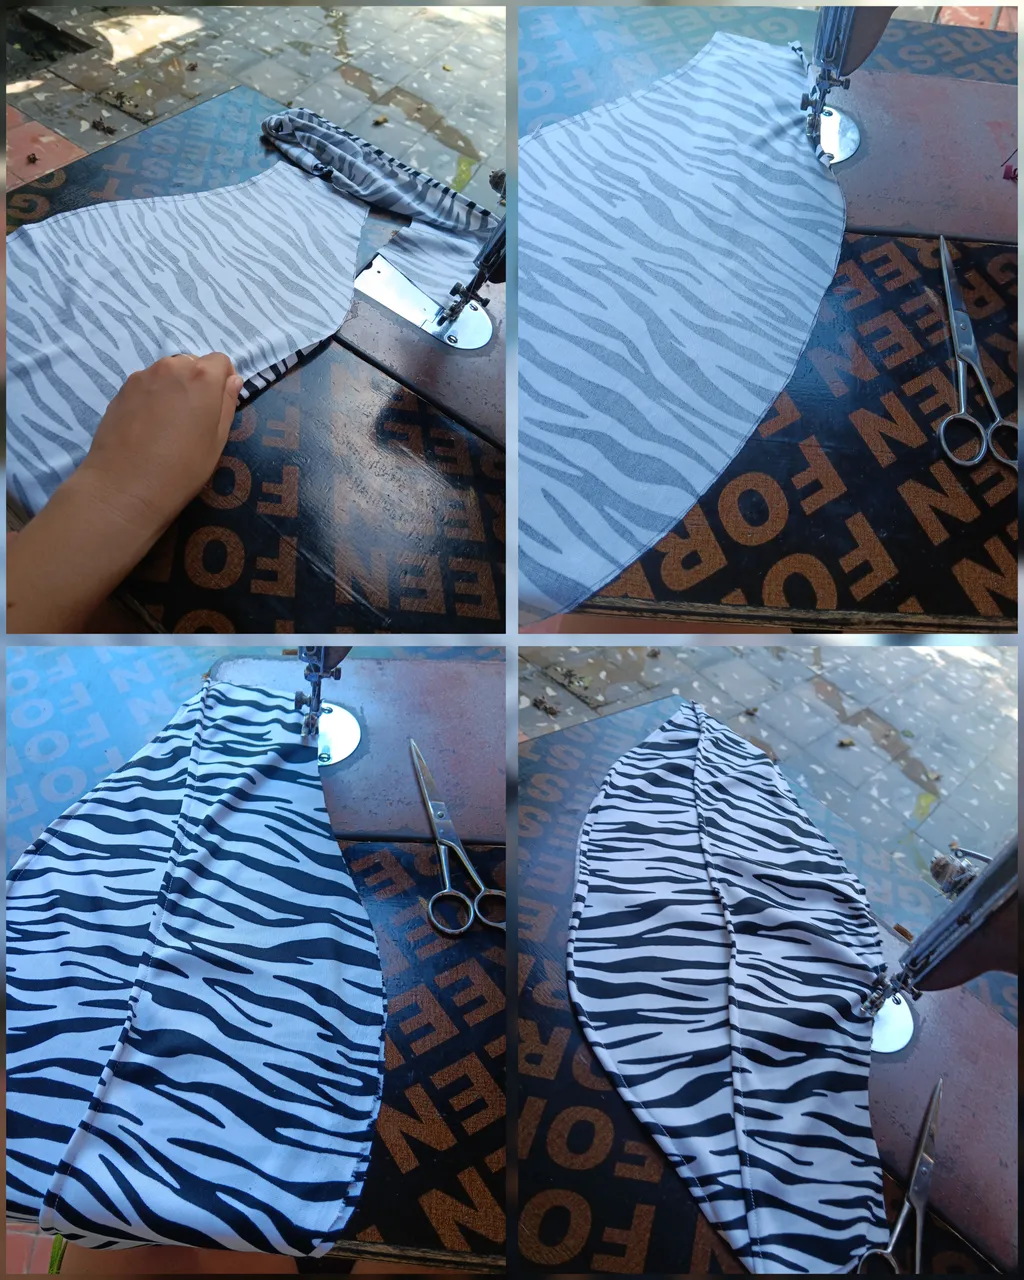
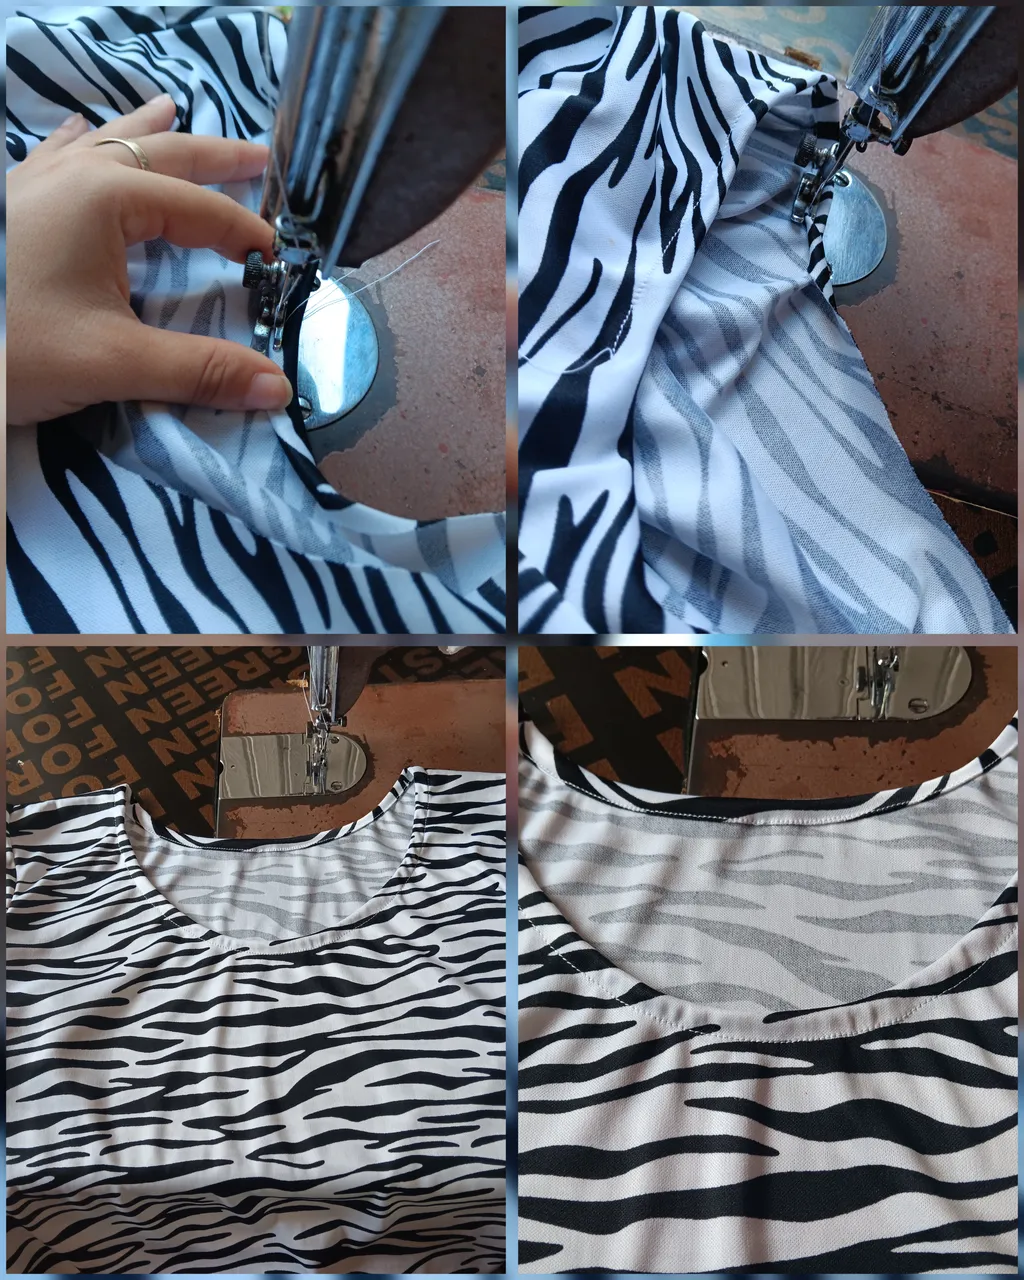
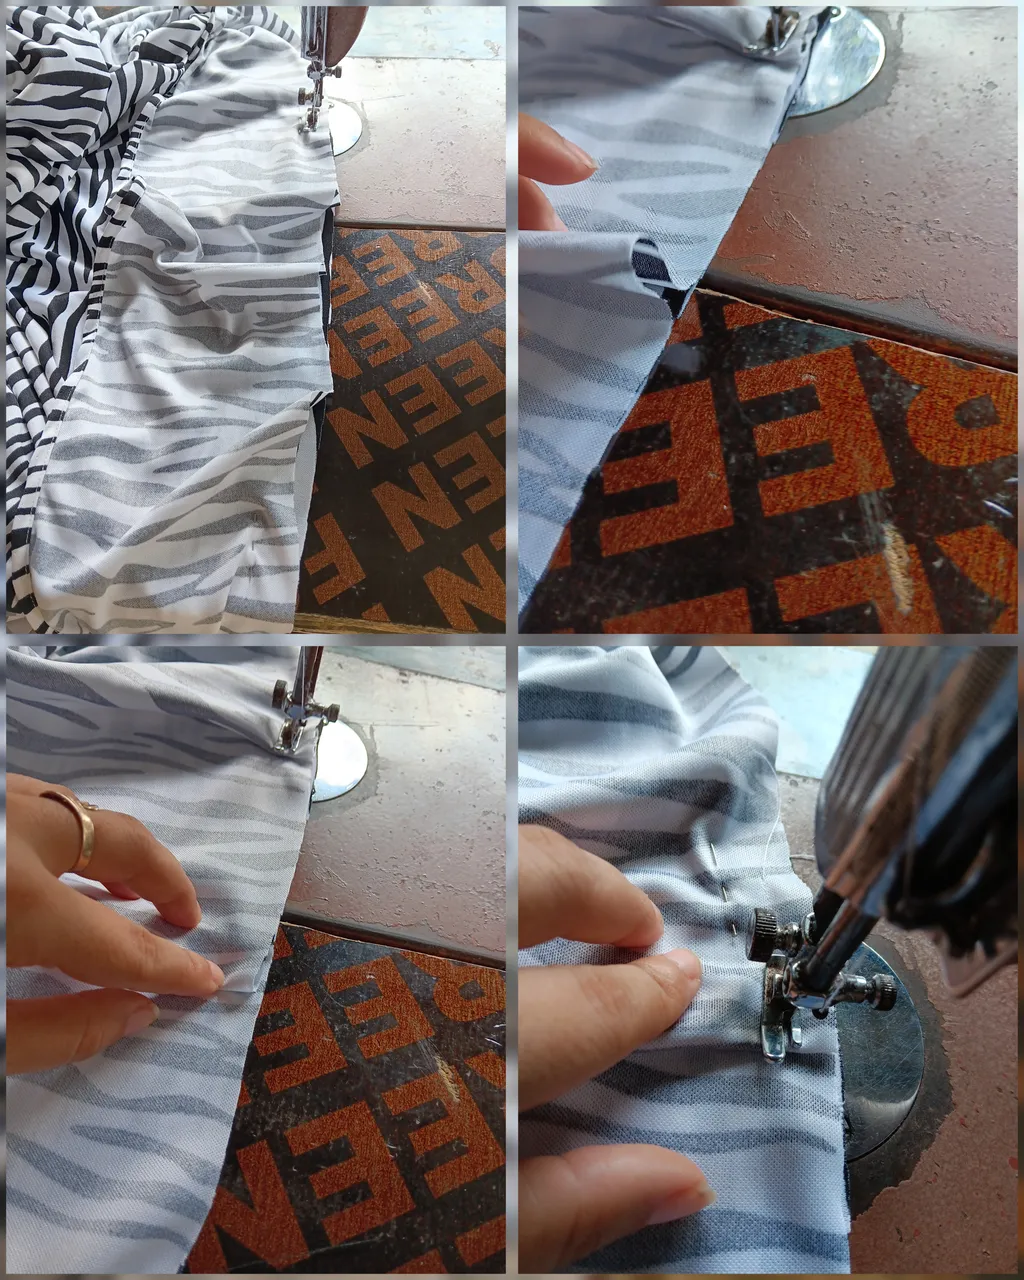
4to paso:
Uni las mangas con el vestido con ayuda de los alfileres. Para ello marque desde el centro hasta las puntas de la manga. O sea, desde donde empieza la lomita hasta la punta de abajo. No se si me entienden, no conozco mucho de los terminos en la costura. Pero con ayuda de las imágenes podran entender y comprender mejor a lo que me refiero...
Luego pase una costura recta y sucesivamente una costura en zic zac con ayuda de la máquina eléctrica, para dejarle un mejor acabado y mas fortaleza por dentro ..
4th step:
Join the sleeves to the dress with the help of the pins. To do this, mark from the center to the ends of the sleeve. That is to say, from the beginning of the ridge to the bottom end. I don't know if you understand me, I don't know much about sewing terms. But with the help of the pictures you will be able to understand better what I am talking about...
Then I sew a straight seam and then a zic zac seam with the help of the electric machine, to give it a better finish and more strength on the inside.

5to paso:
Ya colocadas las mangas, pase una costura por los dos costados, desde la manga hasta la parte baja del vestido. Y finalmente la selle con una costura en zic zac con ayuda de la máquina eléctrica para darle un mejor acabado...
5th step:
Once the sleeves are in place, sew a seam on both sides, from the sleeve to the bottom of the dress. And finally seal it with a zic zac seam with the help of the electric machine to give it a better finish...
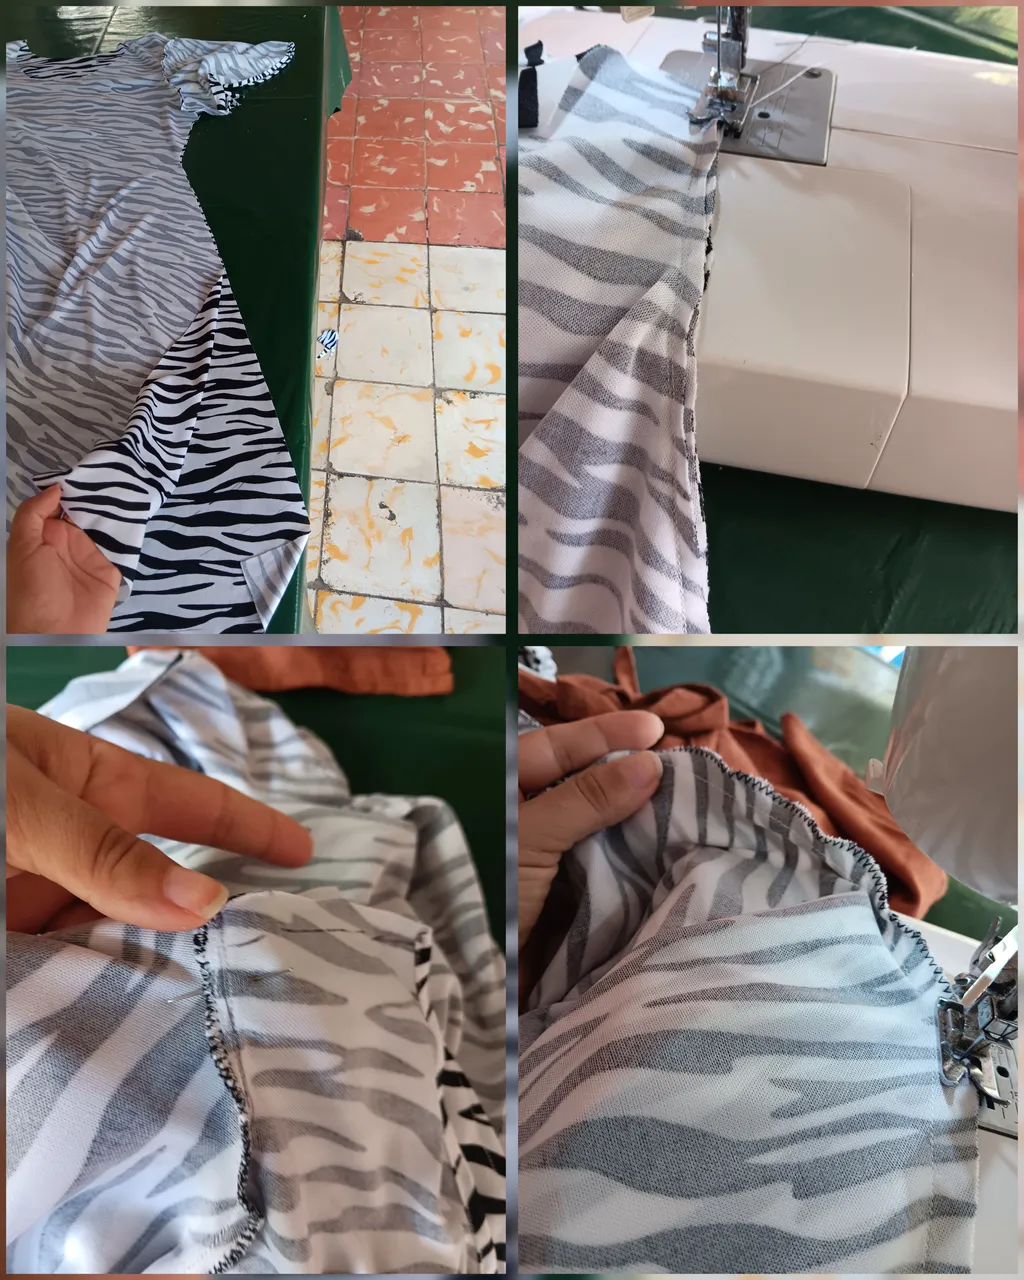
6to paso
Por ultimo pase costura por el cuello, haciendo primero un dobladillo y a la parte baja del vestido.
Luego por todo el borde de las mangas y el bajo del vestido hice una costura en zic zac, para darle mas soltura y movimiento a esas zonas...
6th step
Lastly, I sewed around the neckline, making first a hem and to the bottom of the dress.
Then all around the edge of the sleeves and the bottom of the dress I made a zic zac seam, to give more looseness and movement to those areas...
🤗🤗Nota/Note🤗🤗
Realice el mismo procedimiento para ambos vestido. Aunque el de mama, tuve que modificar en la parte delantera, debido a que la tela estaba algo dañada.
Le hice un corte, en forma de arco. Dando la sensación de ser corte delante y largo detrás. Para que quedara mas bonito, le agregue un vuelo y le deje sus mangas simples...
I did the same procedure for both dresses. Although I had to modify the front part of the breast dress, because the fabric was a little damaged.
I made a cut, in the shape of a bow. Giving the sensation of being cut in the front and long in the back. To make it prettier, I added a ruffle and left the sleeves simple...
✨✨✨✨✨✨👗👗👗✨✨✨✨✨✨
Resultado/Result
✨✨✨✨✨✨👗👗👗✨✨✨✨✨✨


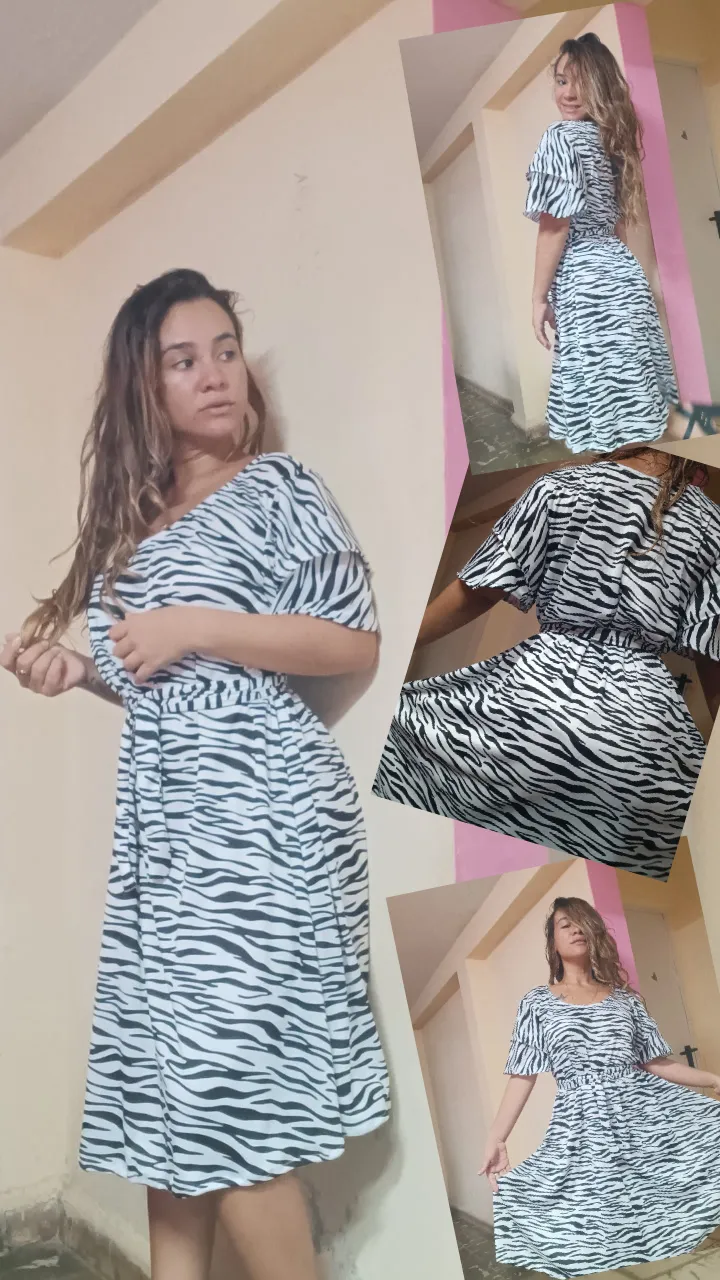
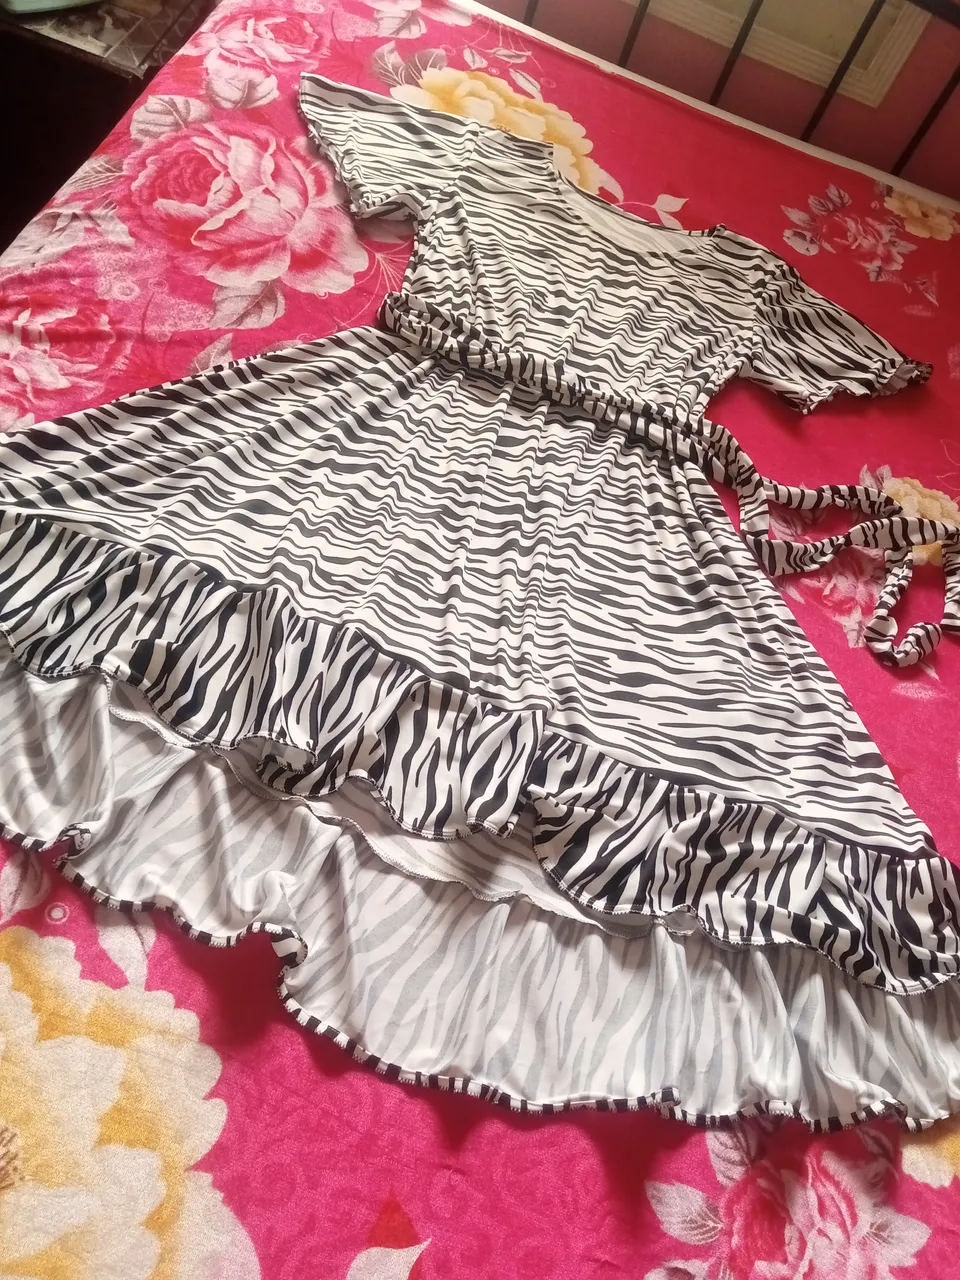
De esta manera se puede crear un lindo vestido, no formal, a la moda, en tendencia y sobre todo, una prenda ideal para combinarlo con cualquier tipo de calsado, siempre a comodidad del que lo porte.
😊😊😊😊😊😊😊😊😊😊😊😊😊😊
This way you can create a nice dress, not formal, fashionable, trendy and above all, an ideal garment to match it with any type of outfit, always at the comfort of the wearer.

Espero que les alla gustado y les sirva de alguna ayuda este pequeño minitutorial. Pido disculpas si no se entiende bien alguna informacion, pues nos soy muy buena explicando estos procedimientos. Gracias de antemano, espero y os guste mi contenido, y agradeceria que dejaran sus lindos comentarios y se aventuraran conmigo en este proyecto. Bendiciones y lindo dia.
🙏🏻🙏🏻🙏🏻🙏🏻🙏🏻🙏🏻🙏🏻🙏🏻🙏🏻🙏🏻🙏🏻🙏🏻🙏🏻
I hope you liked it and I hope this little mini tutorial will be of some help to you. I apologize if some information is not well understood, because I am not very good at explaining these procedures. Thank you in advance, I hope you like my content, and I would appreciate if you could leave your nice comments and venture with me in this project. Blessings and have a nice day.
El texto o resumen es totalmente de mi autoria.
The text or summary is entirely my own.
Mi inspiración quería salir en este post, por qué no, si es mi principal fuente de creación/My inspiration wanted to be in this post, why not, if it is my main source of creation....