Holi, holi amigos de Hive. Les deseo un dia hermoso, lleno siempre de pura vibra positiva, cosas lindas y prosperidad en cada uno de sus proyectos. Agradecida por poder seguir compartiendo e inspirandome en tan creativa comunidad. Me llena de mucho gozo poder disfrutar de todos los proyectos que plasman dia a dia, cada uno de sus integrantes.
El dia de hoy me encantaria compartirles mi trabajito mas reciente. Un lindo vestido creado con retazos de tela, este es un proyecto de reciclaje y mucha creatividad. Espero y sea de su agrado...
Holi, holi friends of Hive. I wish you a beautiful day, always full of pure positive vibes, beautiful things and prosperity in each of your projects. Grateful to be able to continue sharing and inspiring me in such a creative community. It fills me with a lot of joy to enjoy all the projects that each one of its members create day by day.
Today I would love to share with you my most recent work. A cute dress created with scraps of fabric, this is a recycling project and a lot of creativity. I hope you like it....

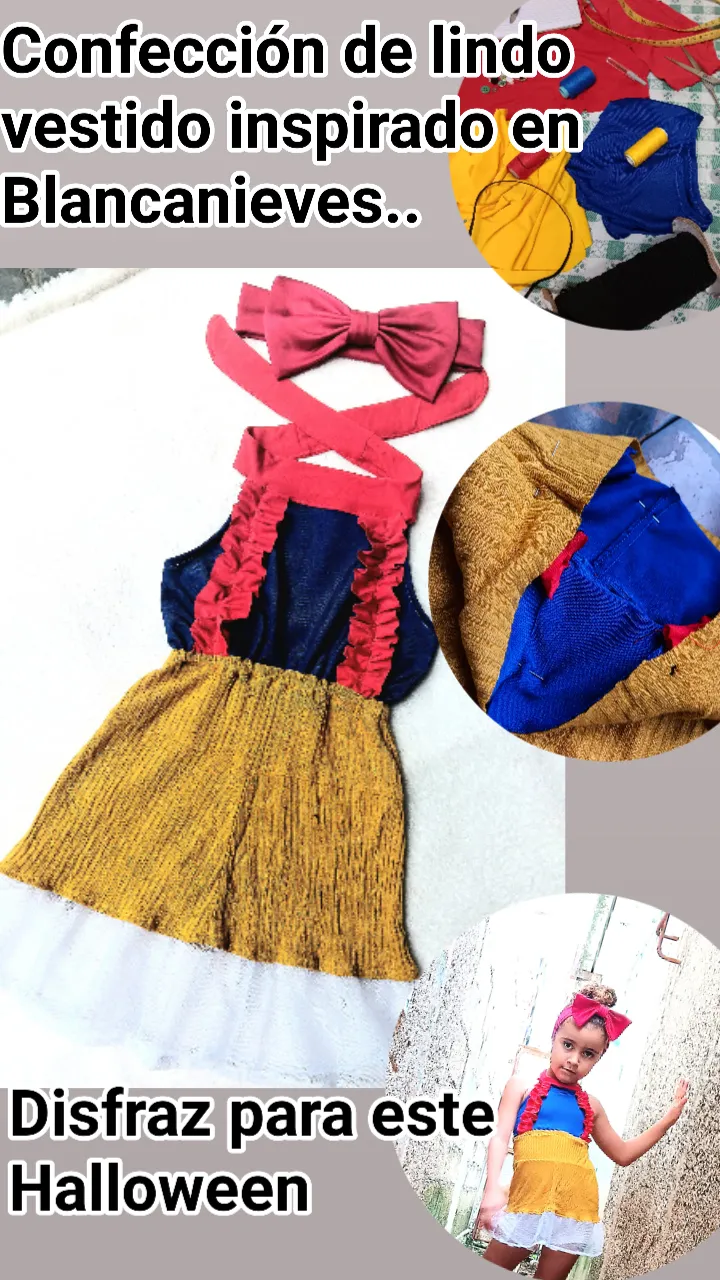
Para la elaboracion de este lindo vestido pense en me inspire debido a sus colores, en una version del vestido de la princesa Blancanieves de Disney's...
Fue un reto, hacia mucho que deseaba hacer algo asi, lo que a carencia de telas, no tuve mucha variedad para recrear, asi que tenía que trabajar con lo que estuviese a disposición...
For the elaboration of this pretty dress I thought I was inspired by a version of Disney's Snow White's princess dress....
It was a challenge, I had wanted to make something like this for a long time, but due to the lack of fabrics, I didn't have much variety to recreate, so I had to work with whatever was available...
👇🏻👇🏻👇🏻👇🏻👇🏻👇🏻👇🏻👇🏻👇🏻👇🏻👇🏻👇🏻👇🏻
Imagen de referencia/Reference image
👆🏻👆🏻👆🏻👆🏻👆🏻👆🏻👆🏻👆🏻👆🏻👆🏻👆🏻👆🏻👆🏻

Bueno, sin mas demoras, los invio a observar e interactuar en este detallado paso a paso de como confeccionar un lindo vestido con retazos de tela.
Espero y os guste, y sirva de algo a aquellos que aman tanto la costura como a mi. Gracias por su atencion.
Well, without further delay, I invite you to observe and interact in this detailed step by step on how to make a nice dress with scraps of fabric.
I hope you like it, and that it will be useful to those who love sewing as much as I do. Thank you for your attention.
🪡✂️🧵🪡✂️🧵🪡✂️🧵🪡✂️🧵🪡✂️🧵🪡✂️🧵
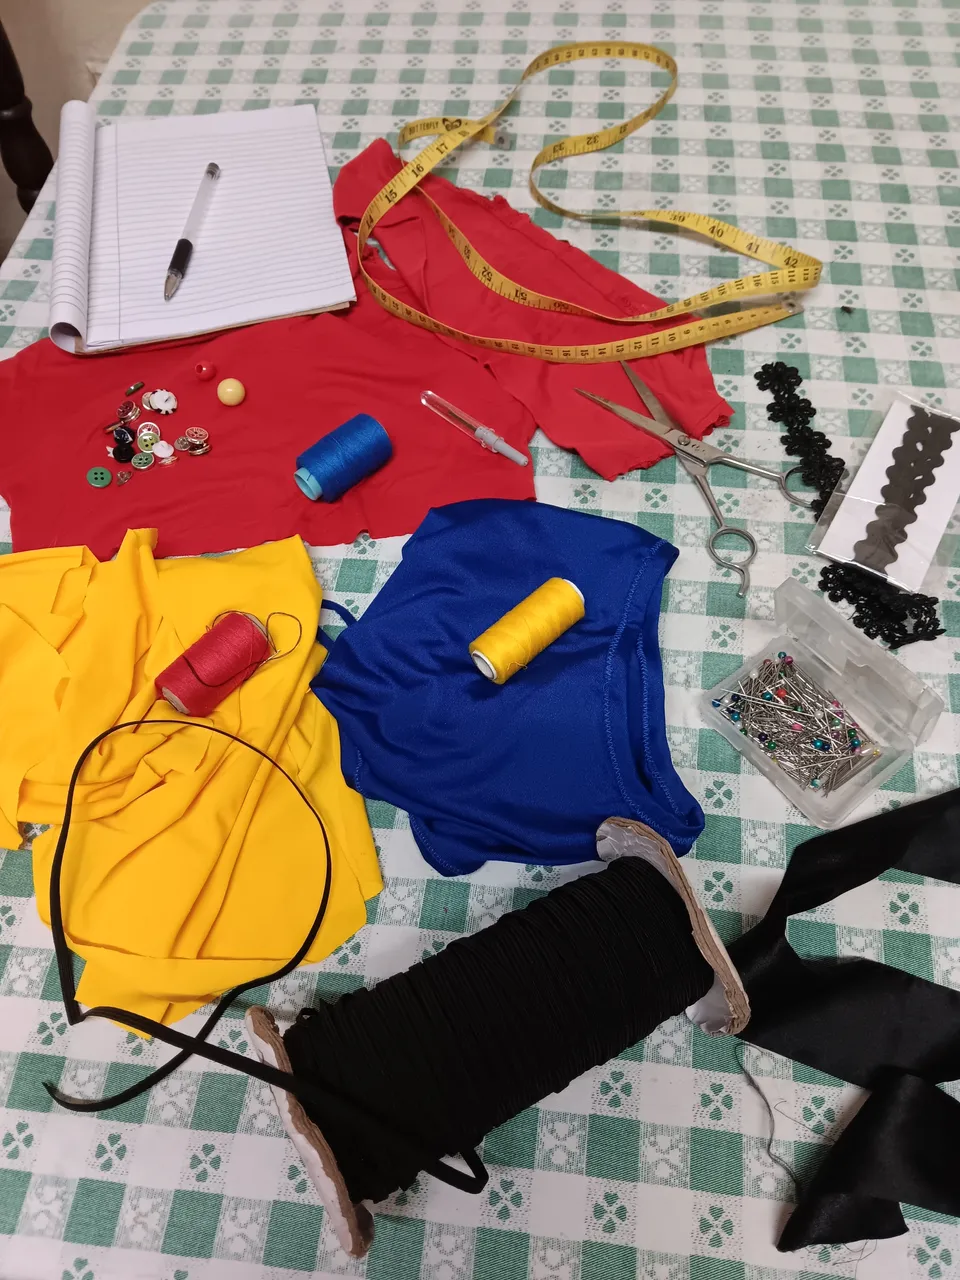
Materiales / Materials
🪡✂️🧵🪡✂️🧵🪡✂️🧵🪡✂️🧵🪡✂️🧵🪡✂️🧵
Fabric
Scissors
Thread and needle
Elastic
Measuring tape
Pins
Sewing machine
Procedimiento:
1er paso:
Tome unos retazos que tenia de unas telas antiguas. Las coloque en la mesa y me puse a imaginar varios diseños. Como Halloween esta a la vuelta de la esquina, decidi inclinarme por crear un disfraz, para lucirlo en esta ocasión tan especial. En seguda que vi los colores, me vino a la cabeza, Blancanieves, y comemce a crear.
Tome una parte de un vestido amarillo, para crear la parte baja, luego de una blusa azul, saque un crop top para la parte de arriba del vestido y con unos listones rojos, saque dos rizos que quedaran en frente y le hice el cuello, que quedaria amarrado...
Procedure:
1st step:
I took some scraps I had from some old fabrics. I placed them on the table and began to imagine various designs. As Halloween is just around the corner, I decided to create a costume to wear on this special occasion. As soon as I saw the colors, Snow White came to my mind, and I started to create.
I took a part of a yellow dress, to create the lower part, then from a blue blouse, I took a crop top for the top of the dress and with some red ribbons, I took two curls that would be in front and I made the neck, which would be tied...

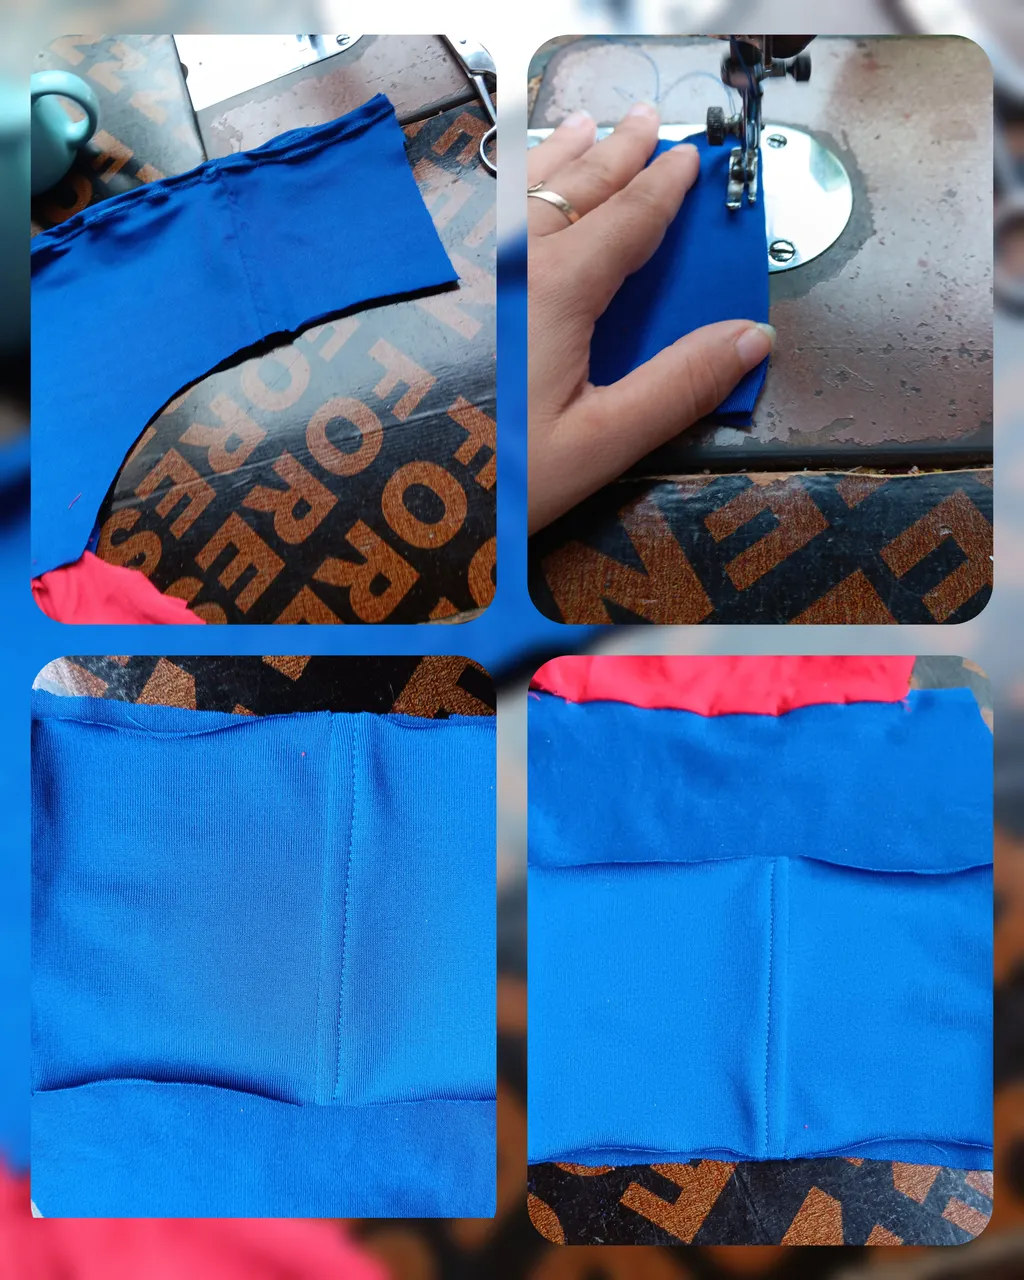
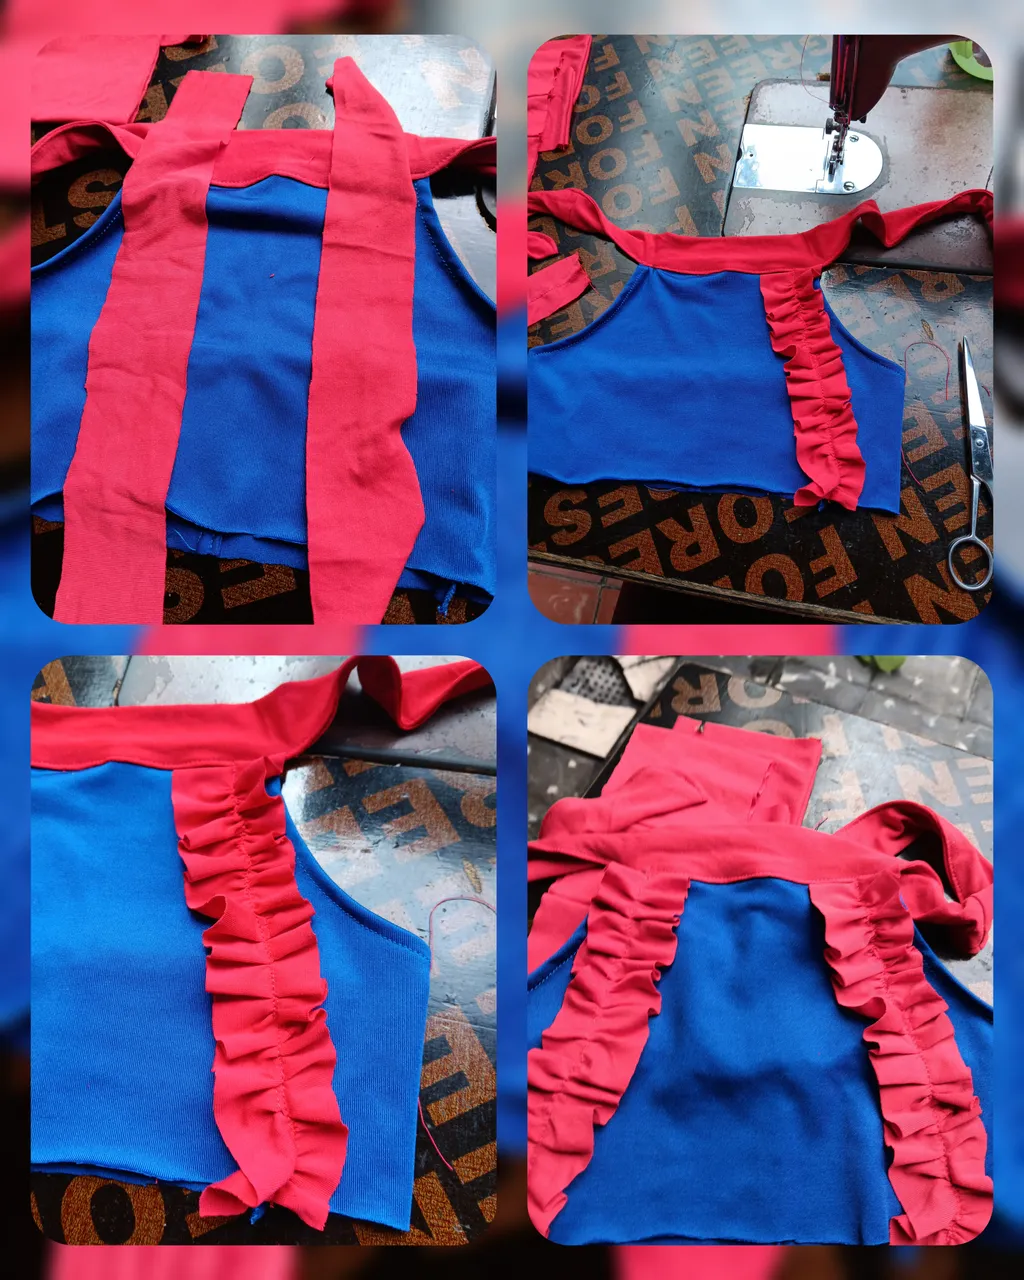
2do paso:
Comence uniendo la parte tracera de la blusa, y luego en los costados o todo el contorno de la misma, le realice un dobladillo, para luego hacerla un rollito y meterla dentro del liston rojo para que el cuello quede por dentro...
2nd step:
I started by joining the back part of the blouse, and then on the sides or all the contour of the blouse, I made a hem, and then I made a roll and put it inside the red ribbon so that the neck is inside...

3er paso:
Como no somos perfectos y estoy segura, que a varios les ha ocurrido, tuve que descoser las dos pintas del cuello, pues, antes de coserlo debia de pasar el dobladillo por todo ese contorno. Pero no hay nada que no tenga solución...
3rd step:
As we are not perfect and I'm sure that this has happened to many of you, I had to unpick the two neck pints, because, before sewing it, I had to hem it all around the neck. But there is nothing that can't be solved...

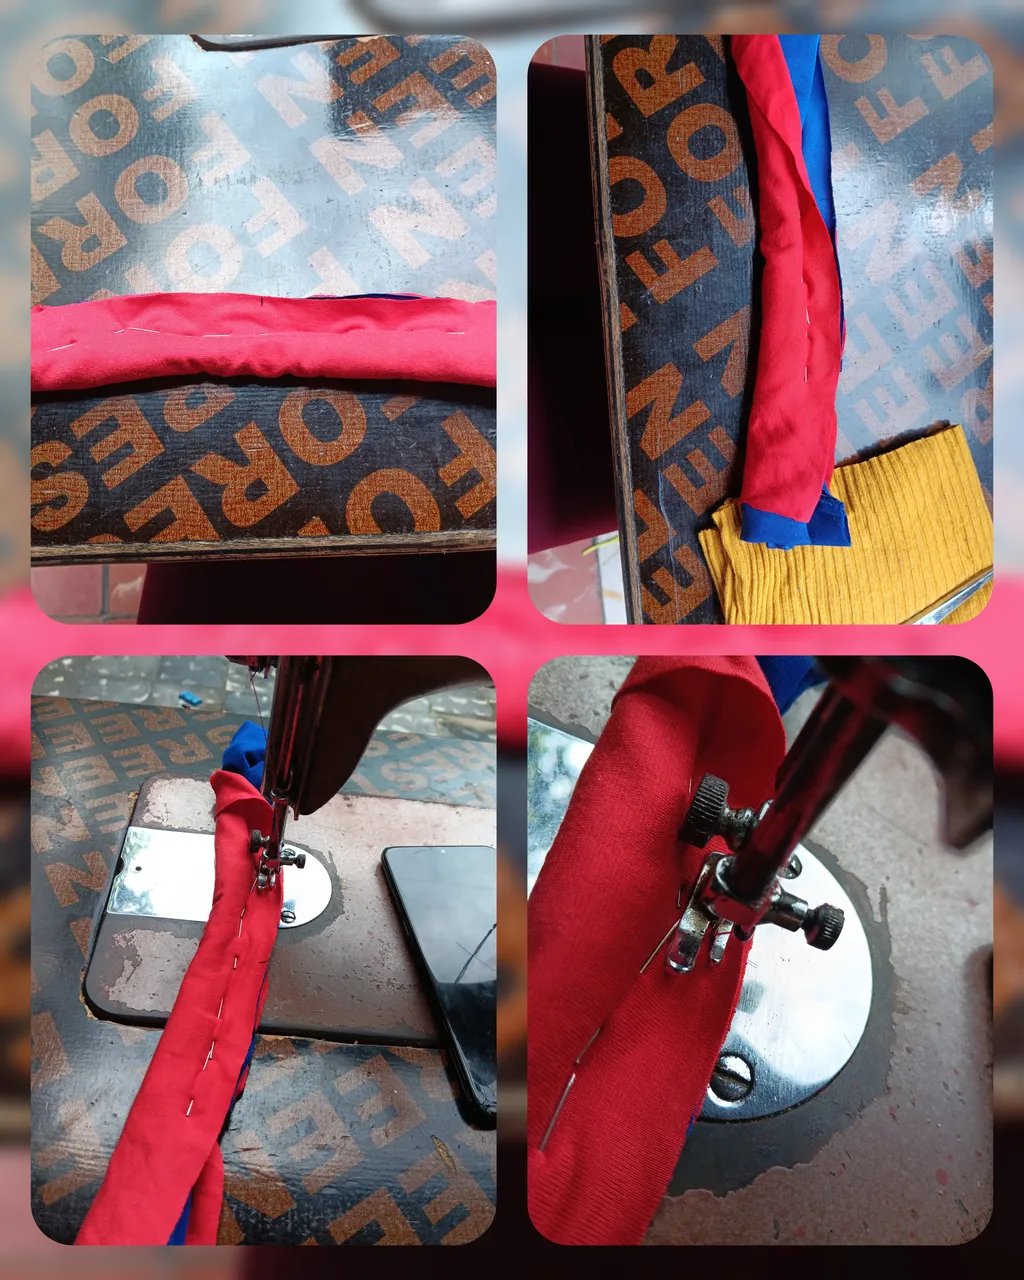
4th paso:
Luego rice dos lintones rojos y los cosi justo en frente. Al cuello, le empate dos piezas mas, oara que quedara mas largo y pudiece amarrarse en el cuello...
4th step:
Then I sewed two red ribbons and sewed them right in front. To the collar, I tied two more pieces, so that it would be longer and could be tied at the neck...

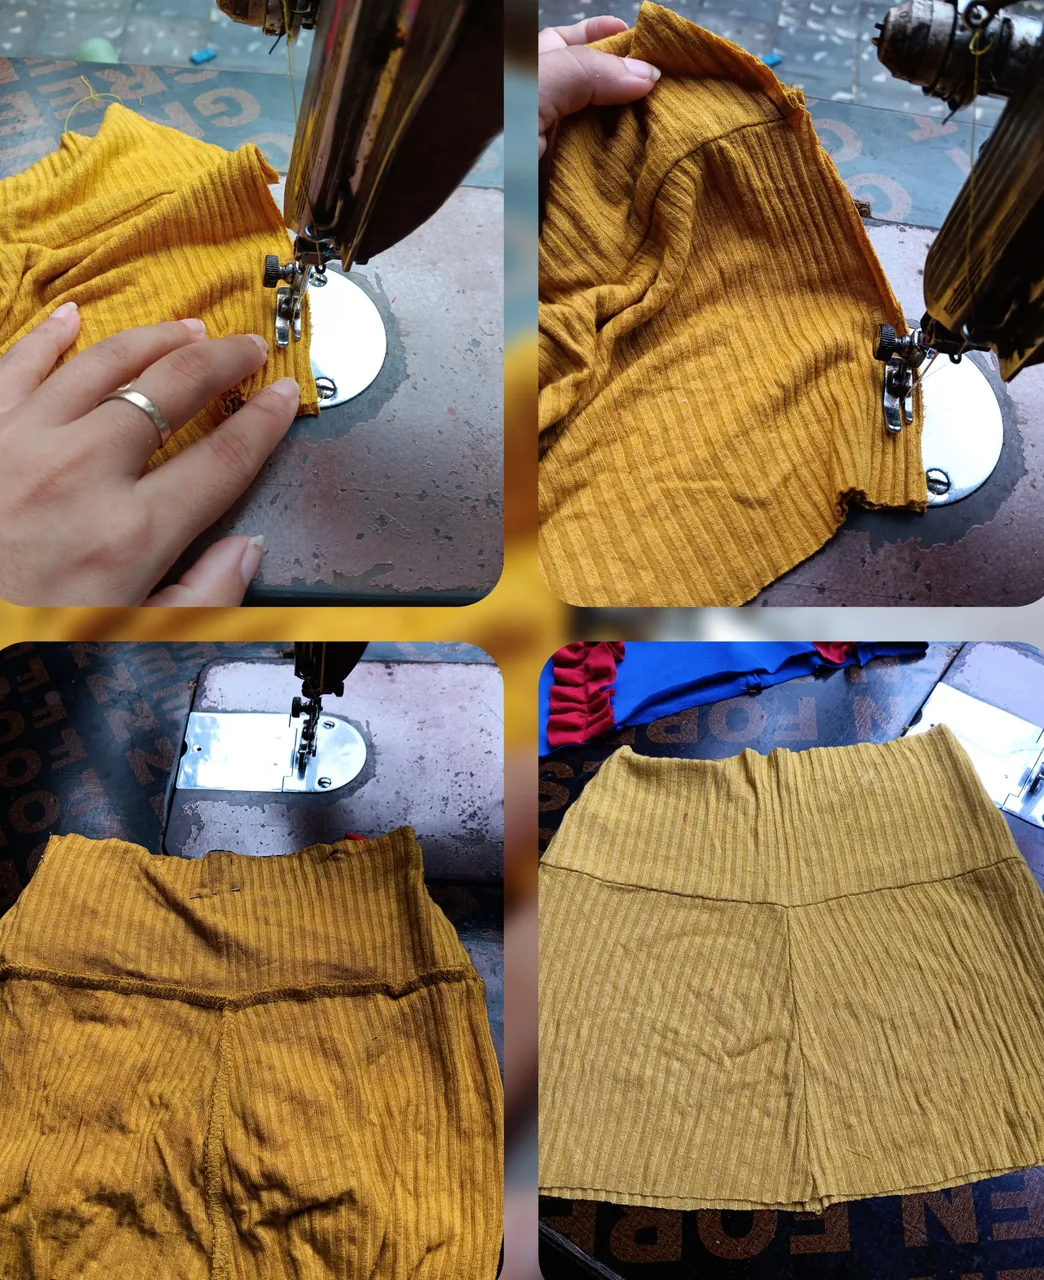
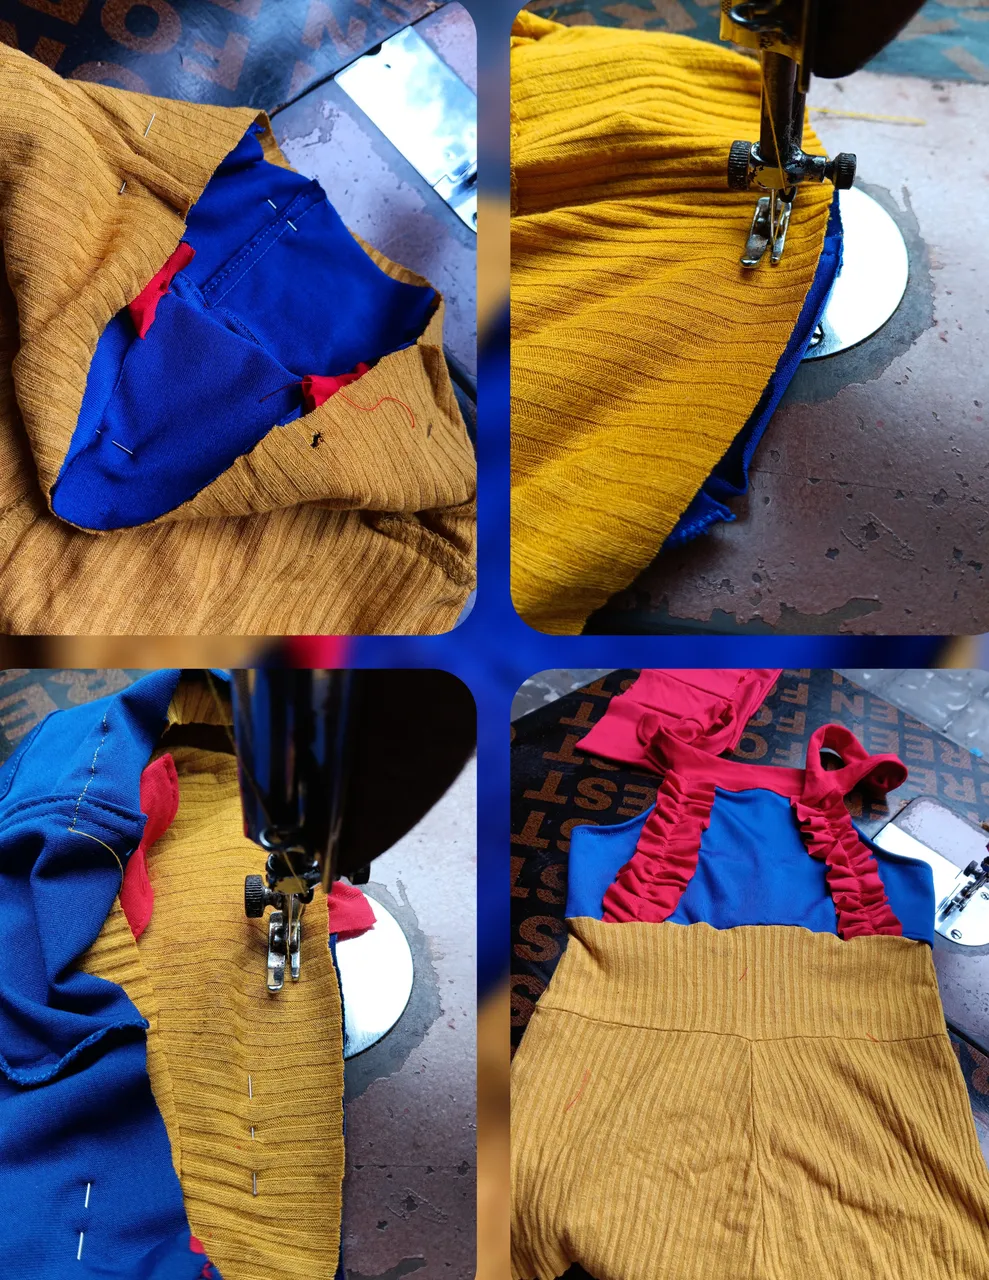
5to paso:
La parte baja, o falda del vestido, la cosi en los dos laterales, haciendo una costura francesa. Luego la uni con alfileres a la parte de arriba, dandole mas firrmeza a la hora de coser.
Pase una costura por todo el contorno, uniendo ya ambas partes del vestido. Ya unidas, pase otra costura pero a 2cm de separación de la ya realizada anteriormente...
5th step:
The lower part, or skirt of the dress, I sewed it on both sides, making a French seam. Then I pinned it to the upper part, giving it more firmness when sewing.
I sewed a seam all the way around, joining both parts of the dress. Once joined, I sewed another seam but 2cm apart from the previous one...

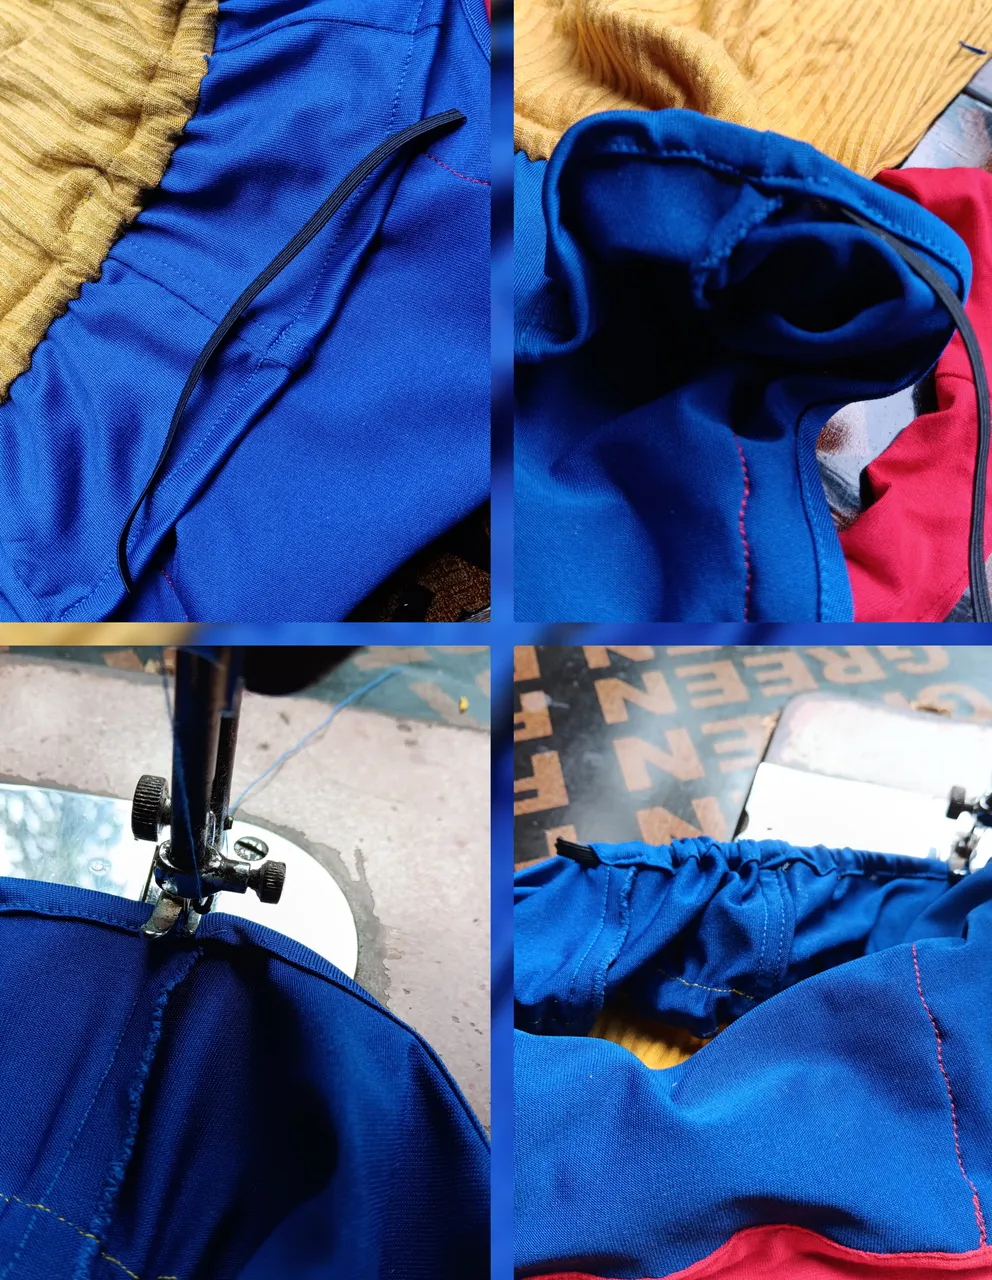
6to paso:
Luego le coloque el vuelo de tul blanco, haciendo que sobresalga del vestido. Dando efecto de sayuela. A la oarte trasera de la blusa, le coloque un elastico, para que quedara mas justa..
6th step:
Then attach the white tulle flounce, making it protrude from the dress. Giving it the effect of a small dress. At the back of the blouse, I put an elastic, so it would be tighter.

🌹🌸✨🥁Resultado/result🥁✨🌸🌹

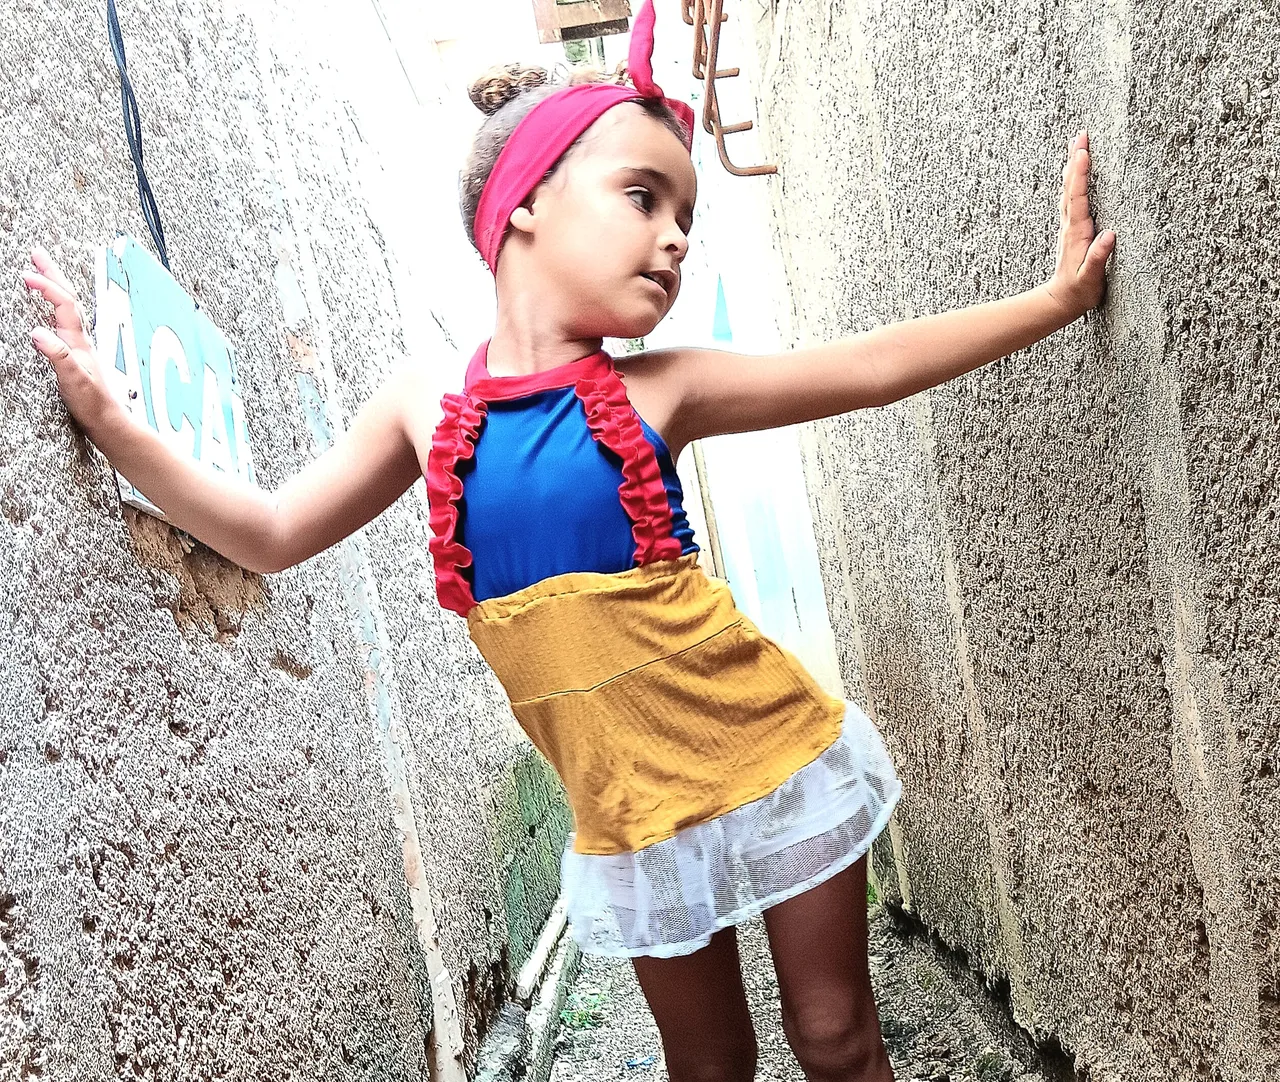

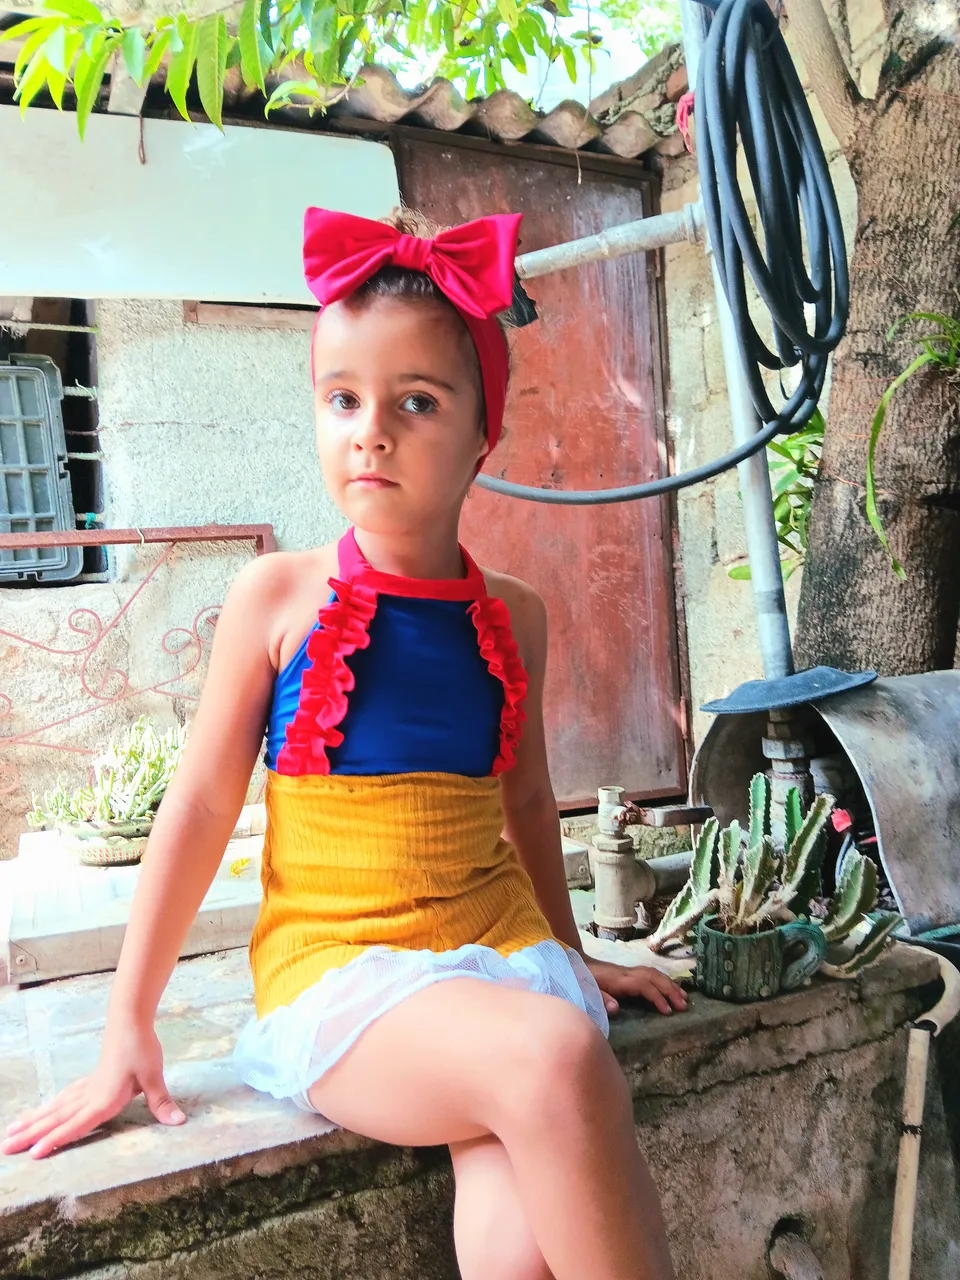
Espero que les haya gustado este trabajo🙏, que les sirva de algo a los que aman los retos como yo🥰. Agradeceria que dejaran sus lindos comentarios y su grato apoyo💪. Bendiciones para todos y feliz semana para todos. Besos y exitos🤞.
I hope you liked this work🙏, that it will be useful to those who love challenges like me🥰. I would appreciate if you leave your nice comments and your support💪. Blessings to all and happy week to all. Kisses and success🤞.
El texto o resumen es totalmente de mi autoria.
The text or summary is entirely my own.