Buenas, buenas por aquí, gente linda de Hive, les deseo un maravilloso dia. Cargado de buena vibra, de mucha alegria y sobre todo mucho amor. Estoy fascinada ante tanto derroche de talento que abunda en esta hermosa comunidad, agradecida siempre con todos sus integrantes por mostrar tan bellos proyectos y por siempre apoyarnos los unos a los otros.
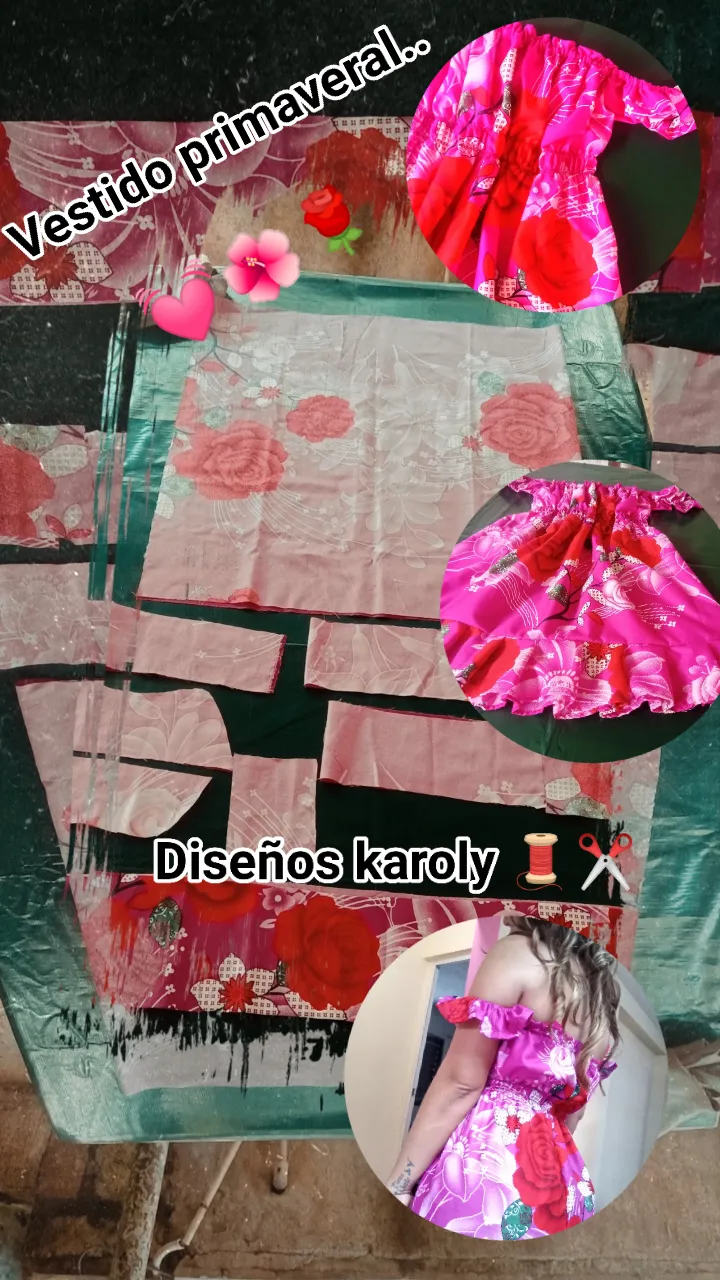
El dia de hoy les voy a compartir un lindo paso a paso, de la confeccion de un hermoso vestido, esta vez para una preciosa nena de 9 años.
Hello, hello here, beautiful people of Hive, I wish you a wonderful day. Full of good vibes, lots of joy and above all lots of love. I am fascinated by so much talent that abounds in this beautiful community, always grateful to all its members for showing such beautiful projects and for always supporting each other.
Today I am going to share with you a beautiful step by step of the making of a beautiful dress, this time for a beautiful 9 year old girl.

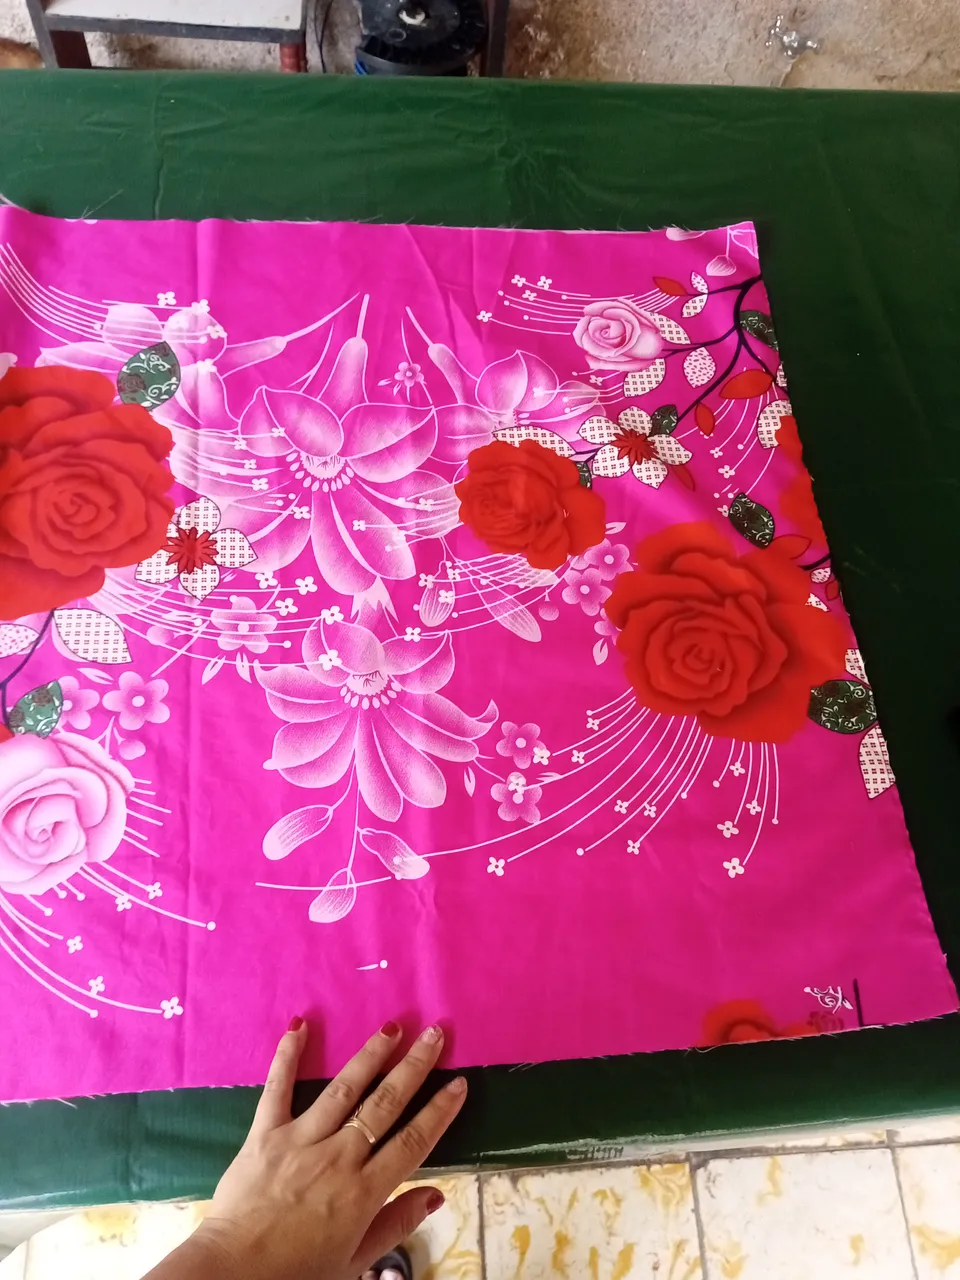
Este tejido es muy parecido a la textura de los que ya en otras ocasiones he trabajado, pero es mucho mejor, pues ya que no se deshila y es mas gorda su estructura. La gama de colores me flipa, es una belleza. Cada creacion con estos estampados es un extasis a los ojos.
This fabric is very similar to the texture of the ones I have worked with before, but it is much better, since it does not unravel and its structure is fatter. I love the color range, it is a beauty. Each creation with these prints is an ecstasy to the eyes.
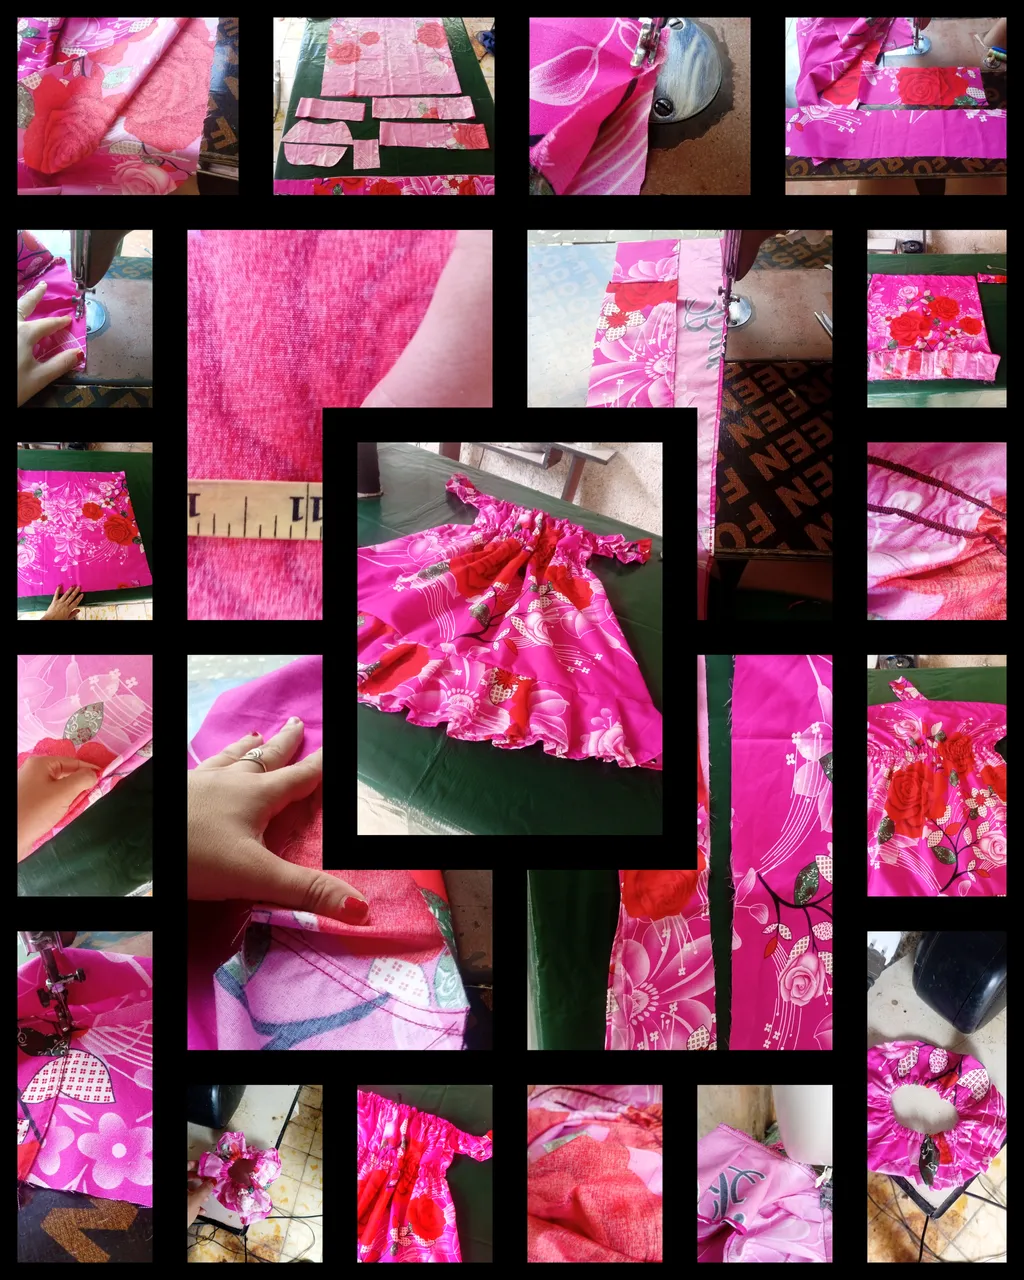
Aquí les dejo un minitutorial, con un pequeño collage de fotos, mostrando el paso a paso del mismo y los materiales que utilice para recrear esta prenda. Para los amantes del reto y la costura, espero que les sirva y ayude en sus creaciones futuras.
Here is a mini tutorial, with a small collage of photos, showing the step by step and the materials I used to recreate this garment. For those who love the challenge and sewing, I hope it will help you in your future creations.
Materiales / Materials
Rose fabric
Scissors
Thread and needle
Elastic
Measuring tape
Pins
Sewing machine

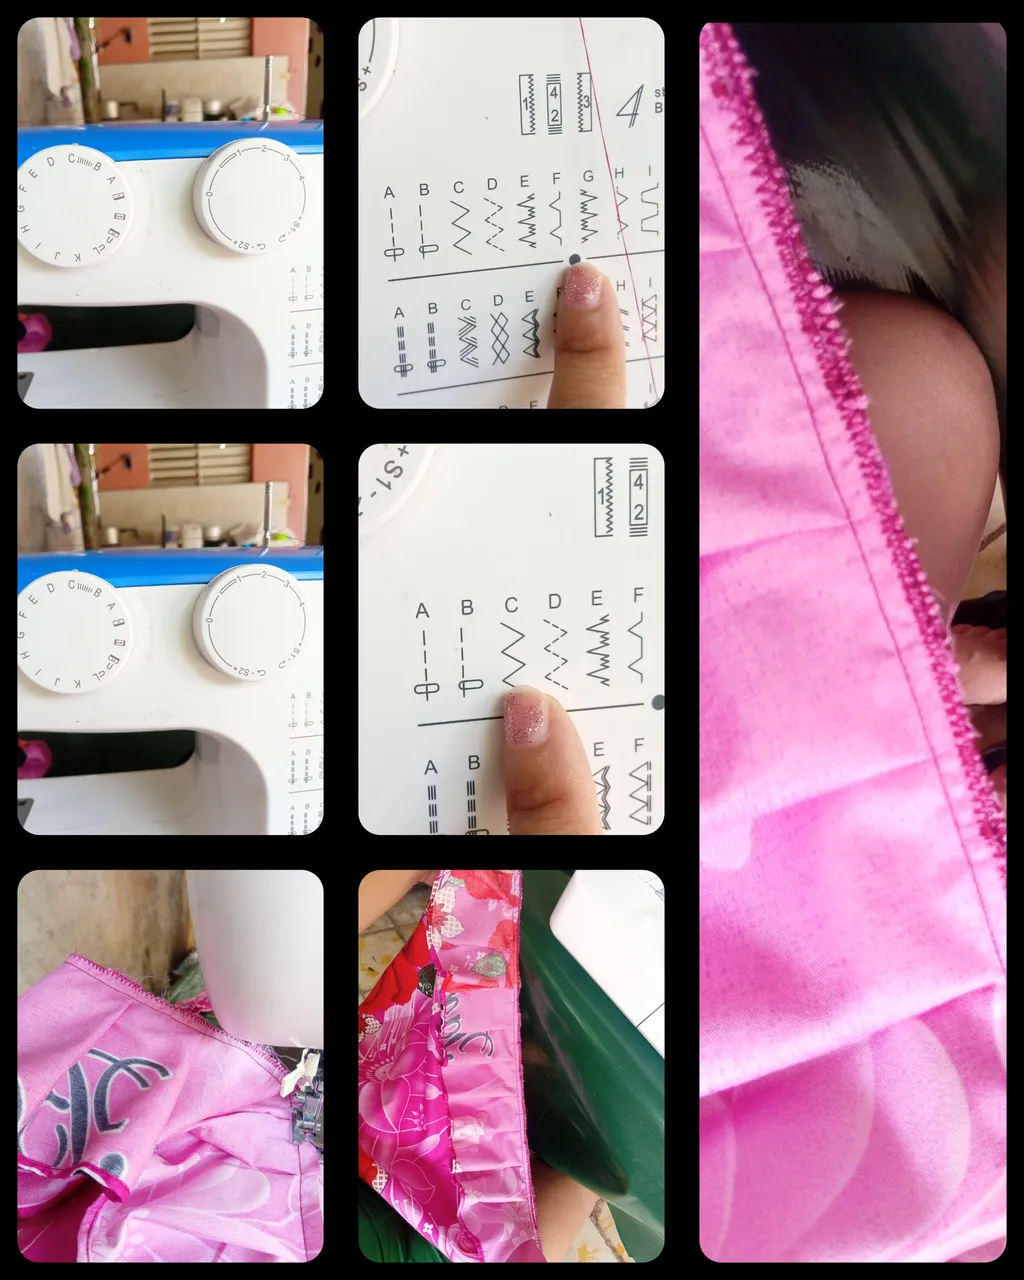
Procedimiento:
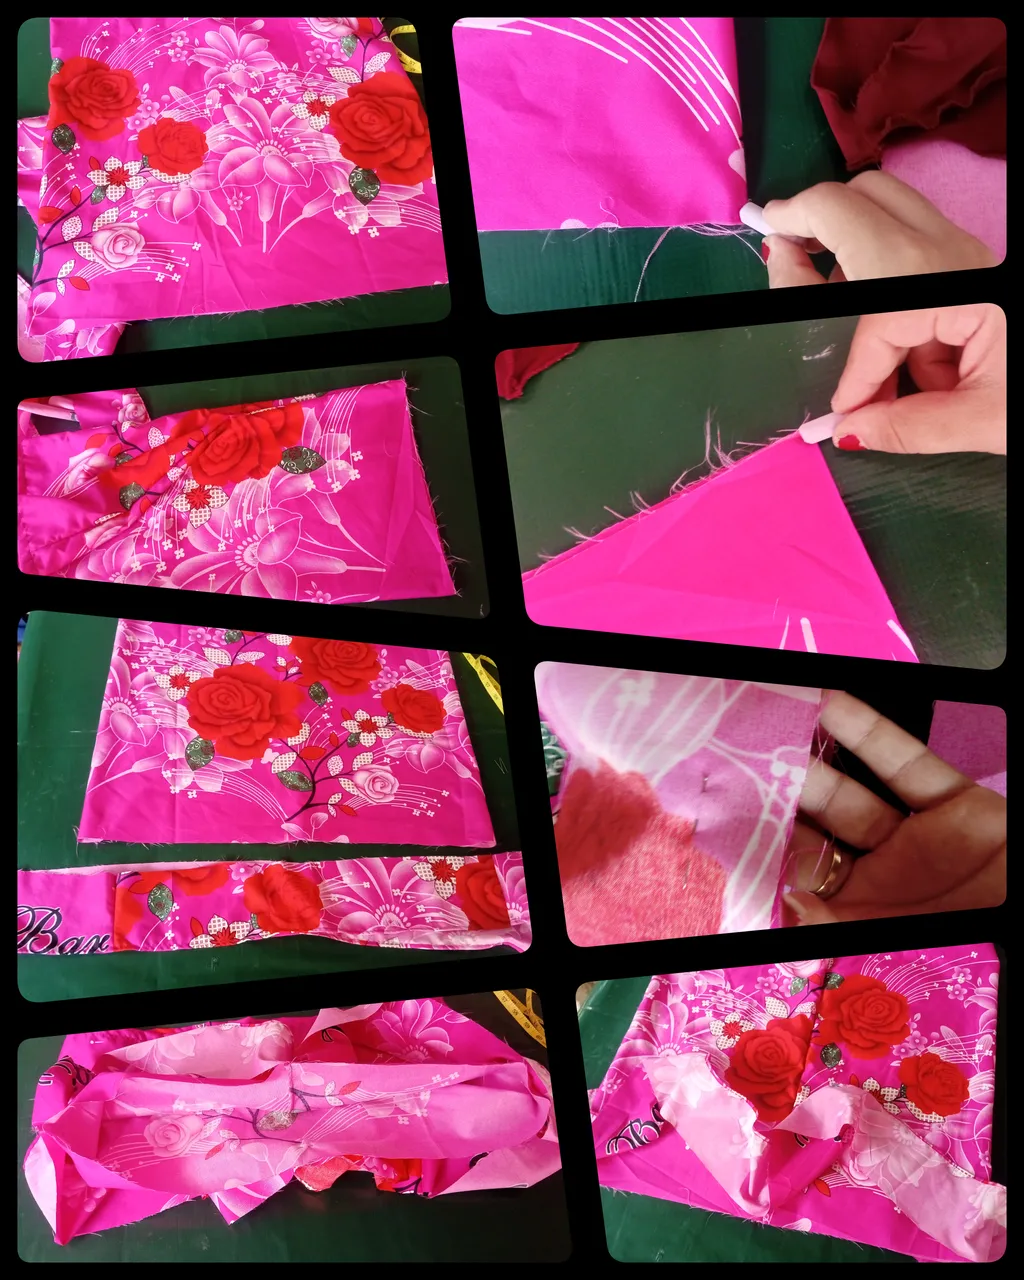
1er paso:
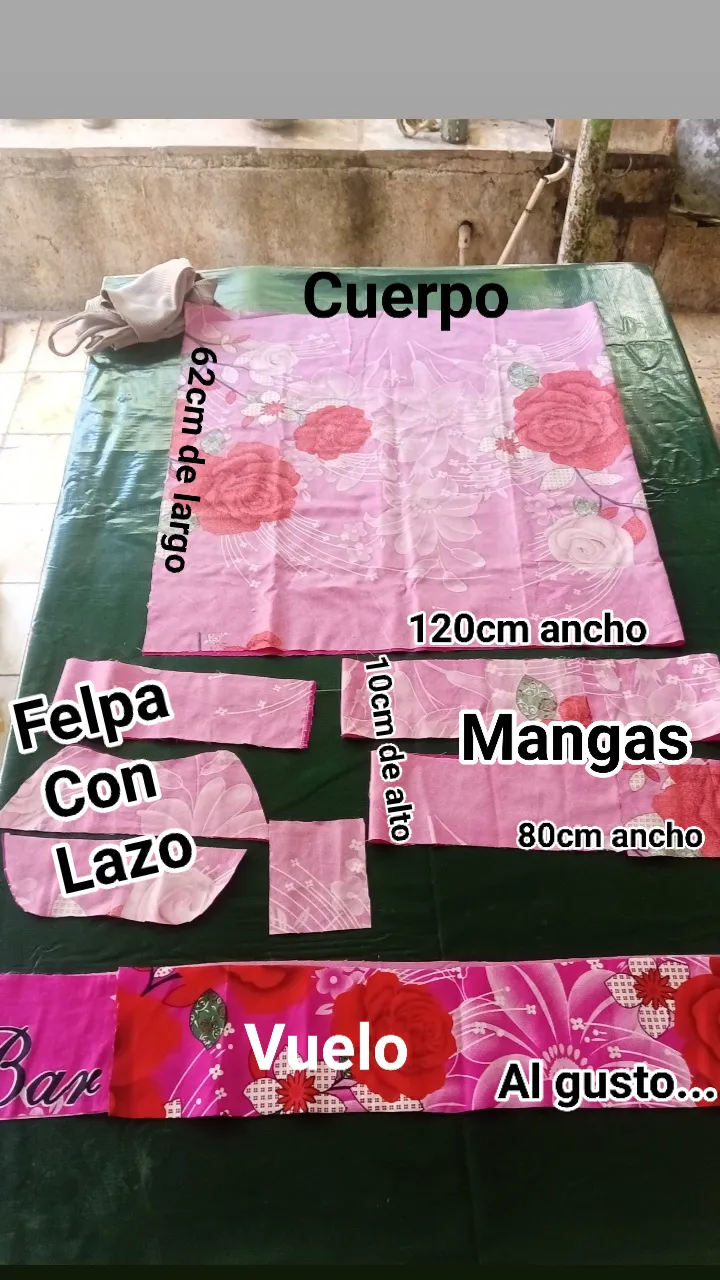
Doble la tela por la mitad, obteniendo dos partes iguales. De alli saque un vuelo y las mangas del mismo.
Procedure:
1st step:
Fold the fabric in half, obtaining two equal parts. From there take out a flounce and the sleeves of the same.
2er paso:
Uni con una costura francesa todas las piezas del vestido, o sea, las cerre por la parte que quedaba abierta. Dandole asi mas textura y forma al trabajo que queria ejecutar.
Para dicha costura, primero cosi las dos piezas por la parte del derecho, para luego voltearla al reves y pasar nuevamente por la zona ya cosida. De esta forma evito que se siga deshilando y le da un mejor acabado a este tipo de diseño.
2nd step:
I joined with a French seam all the pieces of the dress, that is, I closed them by the part that was open. Thus giving more texture and shape to the work I wanted to execute.
For this seam, I first sewed the two pieces on the right side, and then I turned it inside out and sewed it again on the already sewn area. This way I avoid further fraying and gives a better finish to this type of design.
Cuerpo

Mangas
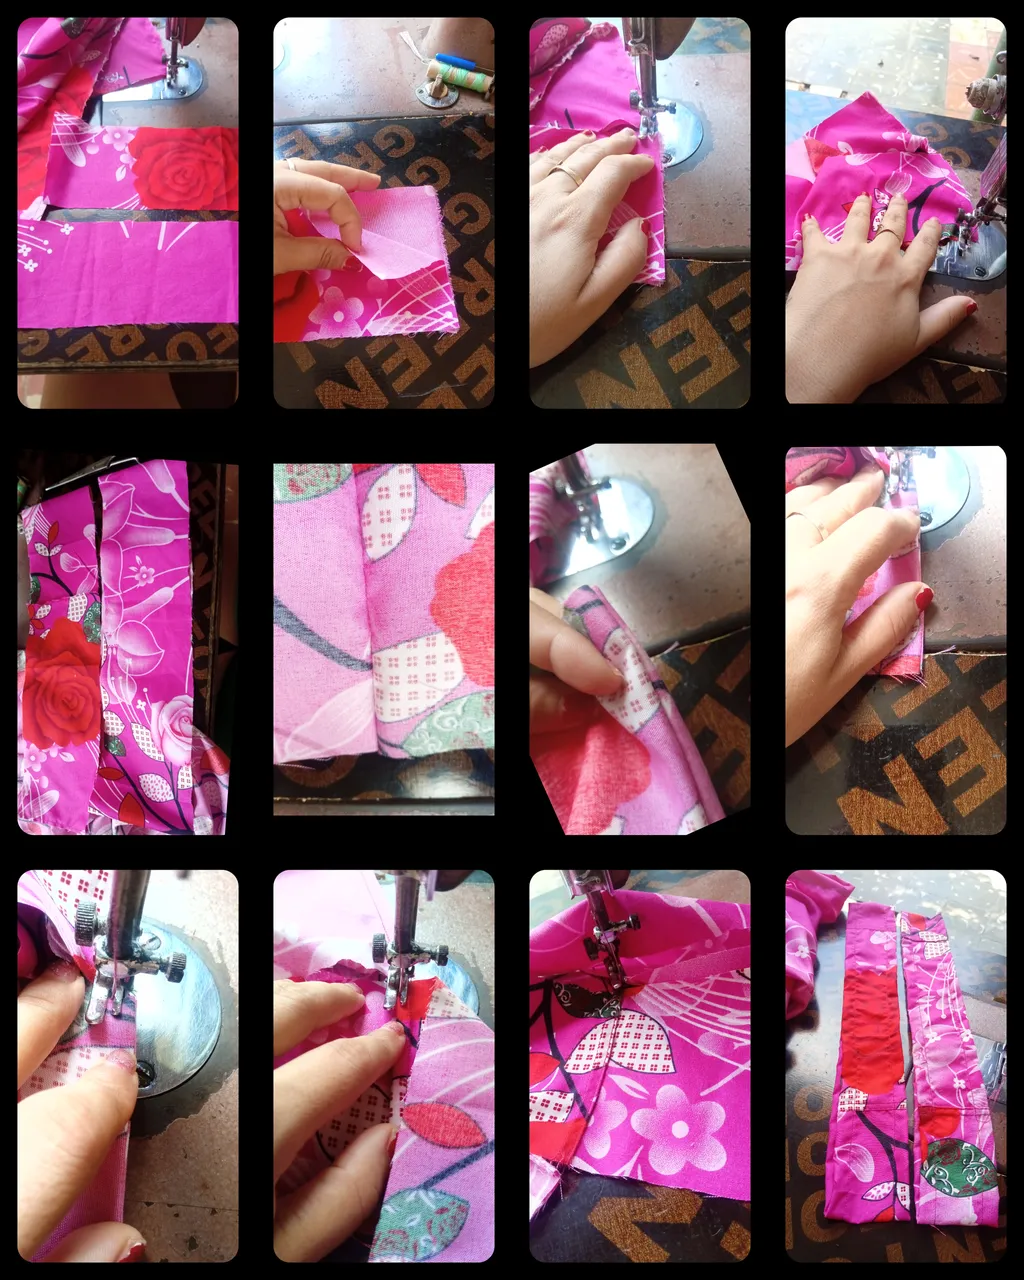
Vuelo
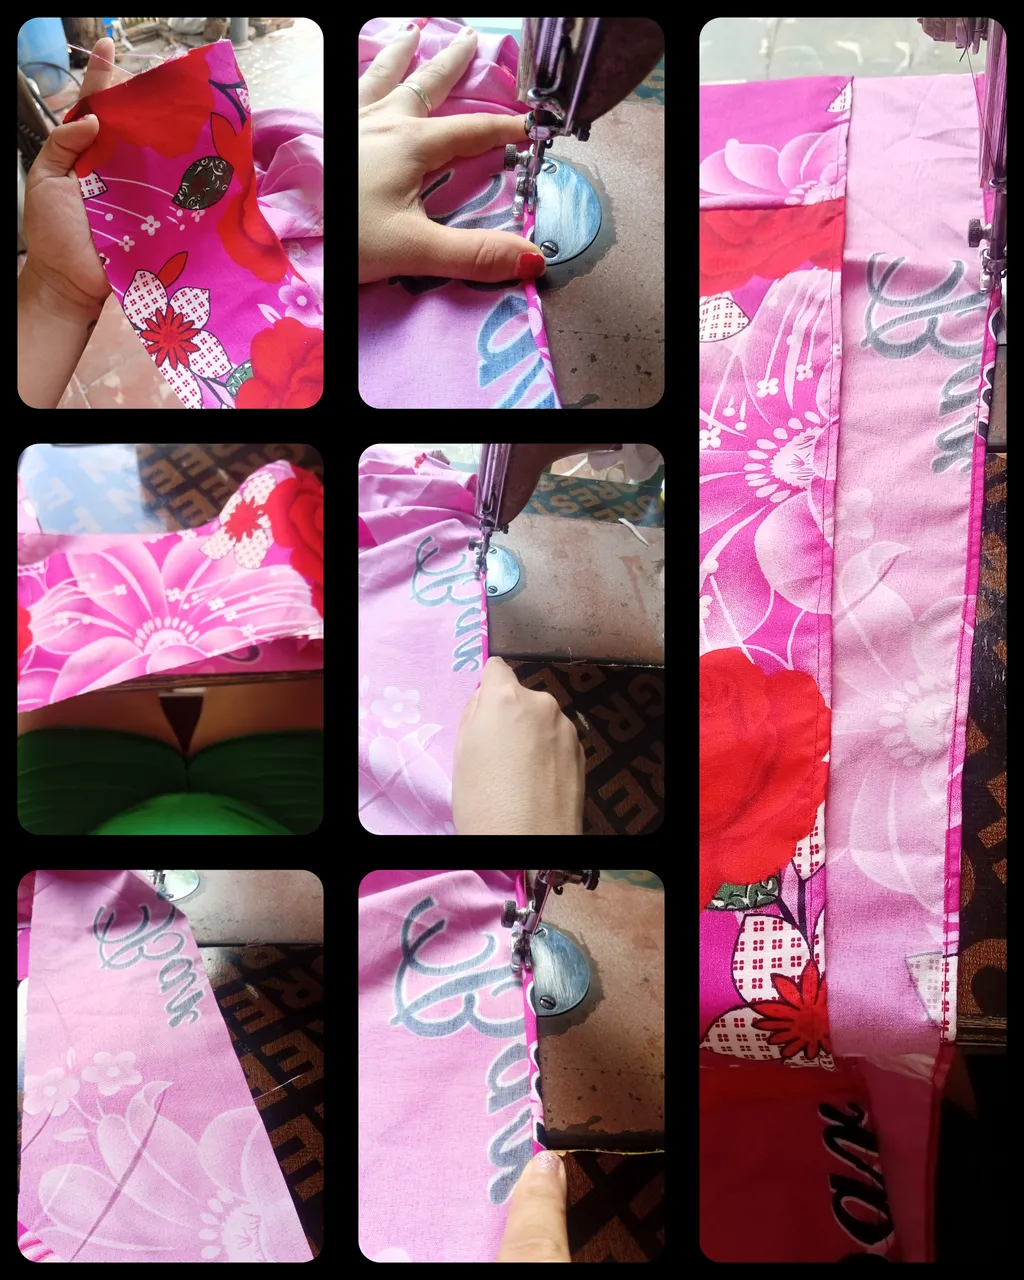
3er paso:
Uni el vuelo al cuerpo del vestido. Montando uno encima de otro(estilo tachones), dando un aire al estilo de las faldas colegiales.
Luego selle con una costura en tik tak, para darle mas firmeza y un mejor acabado a la prenda.
Step 3:
Join the flounce to the body of the dress. Mounting one on top of the other (studs style), giving an air of school skirt style.
Then seal with a tik tak seam, to give more firmness and a better finish to the garment.
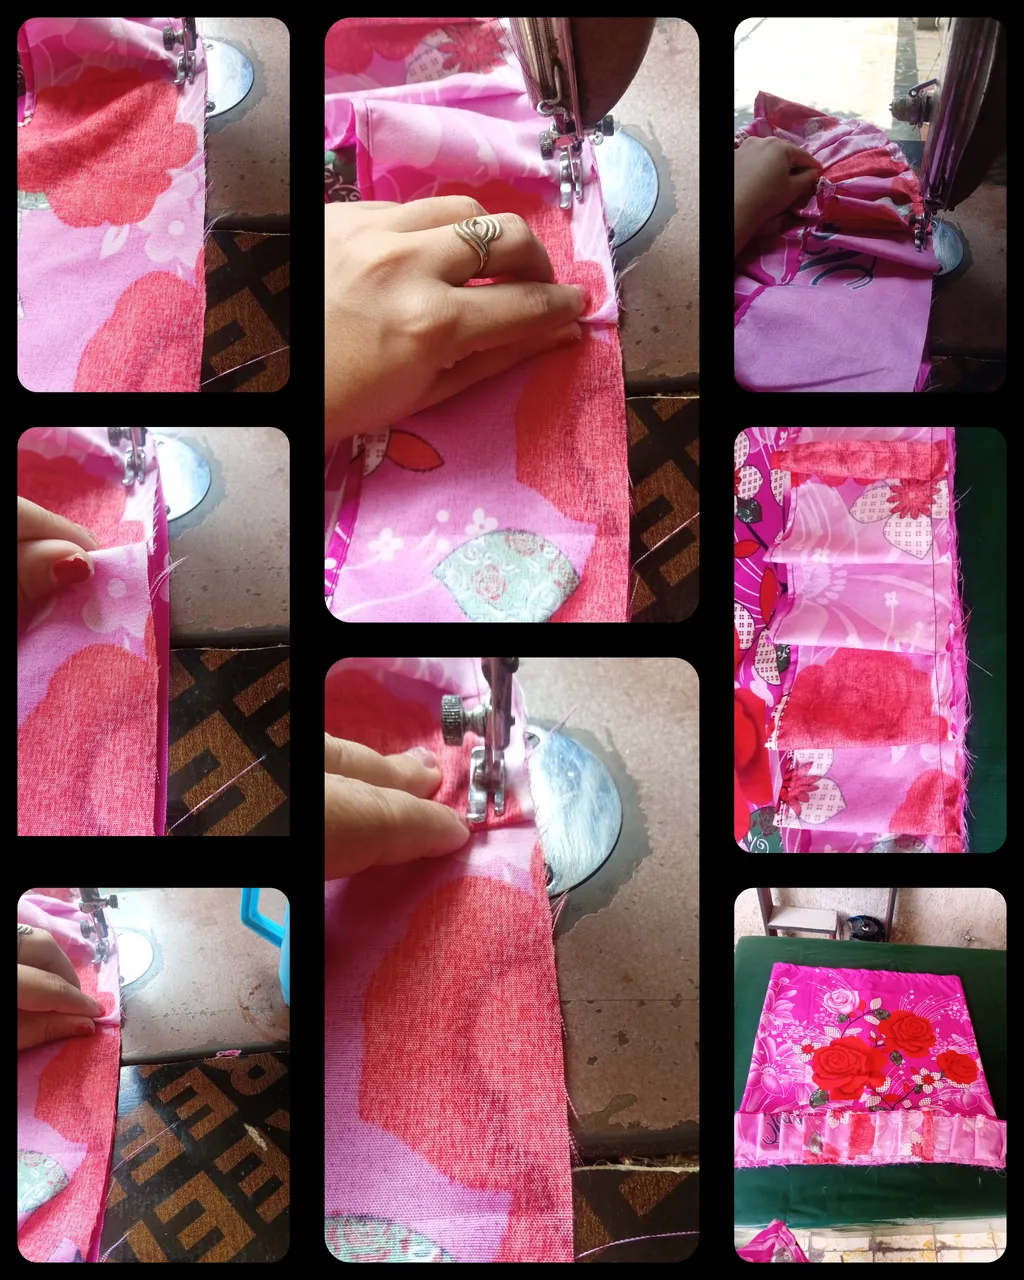
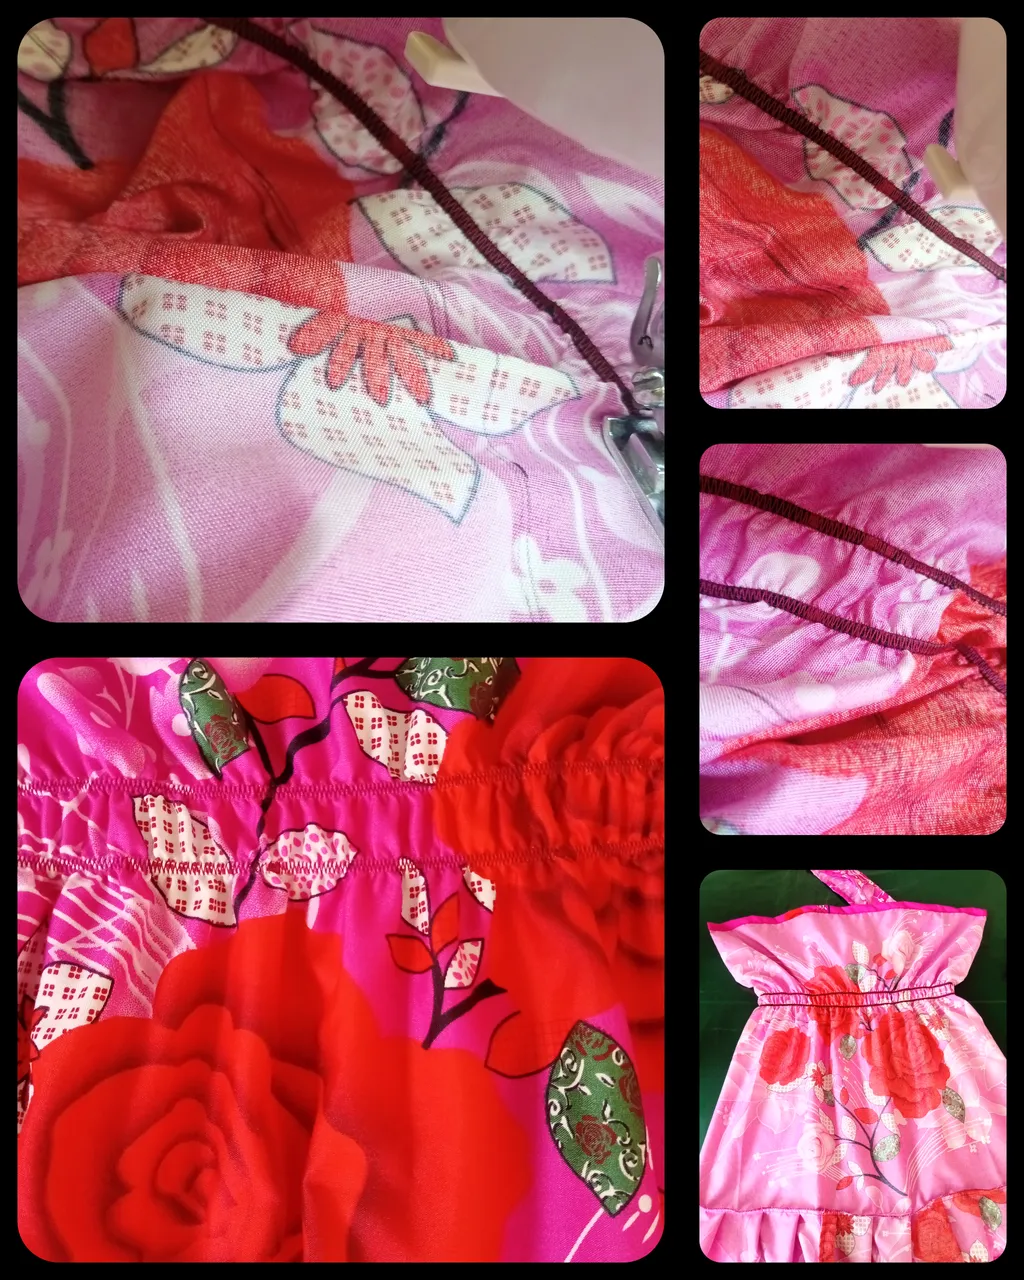
4to paso:
Le realice los falsos a las manguitas, dejando un pequeño orificio para liego pasar la pretina(elástico) por ahi. Luego de colocar los elásticos, cerre dicho orificio y cosi las manguitas a los costados del vestido.
Le cosi dos elasticos en la parte de la cintura, con una costura en tik tak. Y culmine colocando el elástico en la parte superior del vestido. Dejando 2cm de costura, para darle una mejor vista y diseño al vestido.
4th step:
I made the false sleeves, leaving a small hole to pass the waistband through it. After placing the elastic, close the hole and sew the sleeves to the sides of the dress.
I sewed two elastics at the waist, with a tik tak stitch. And I finished by placing the elastic at the top of the dress. Leaving 2cm of seam, to give a better view and design to the dress.

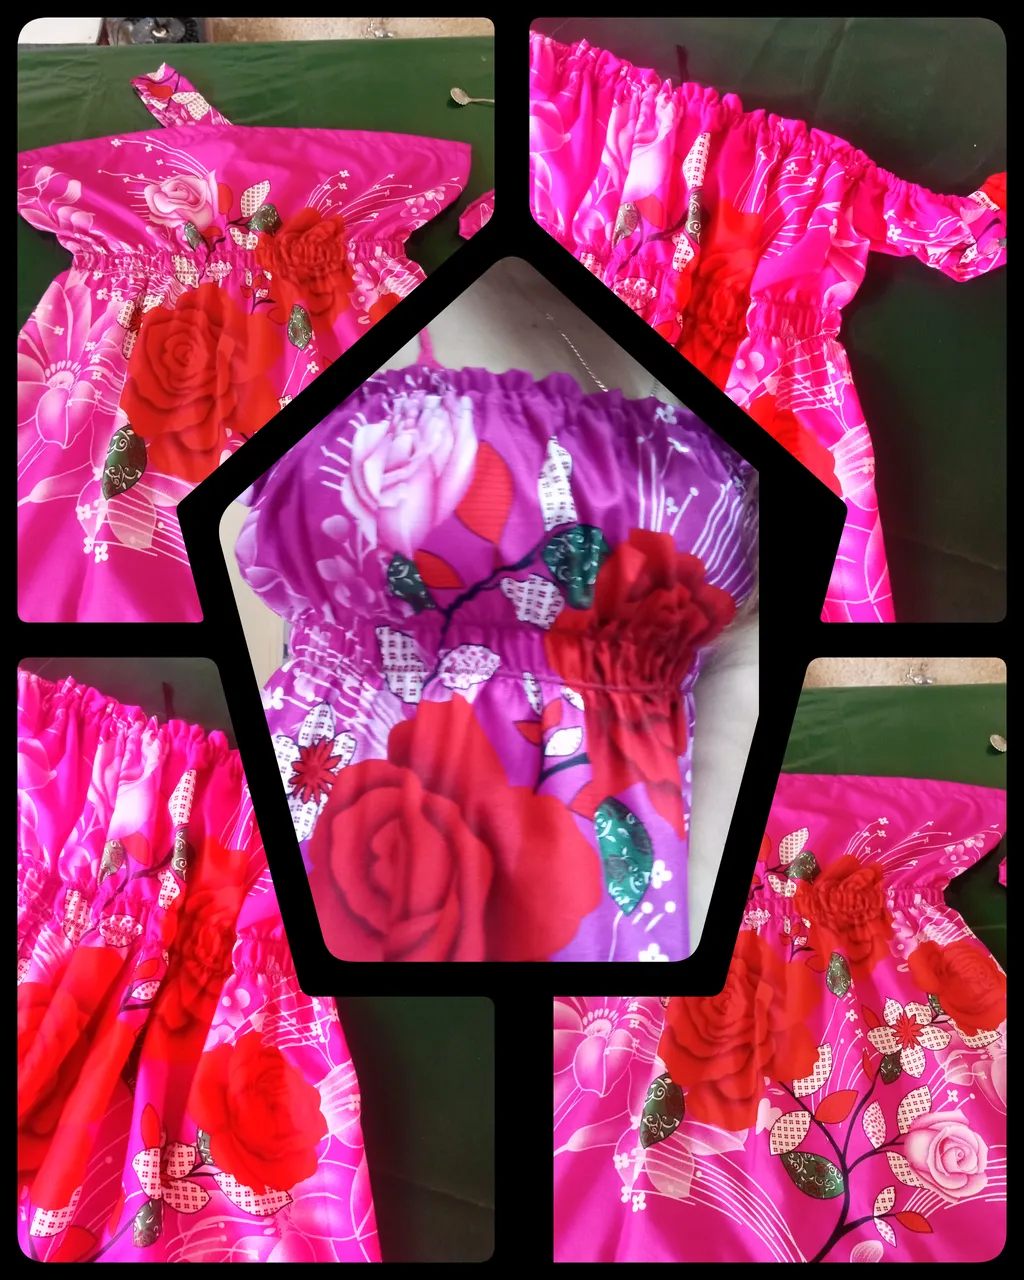
Resultado/Result
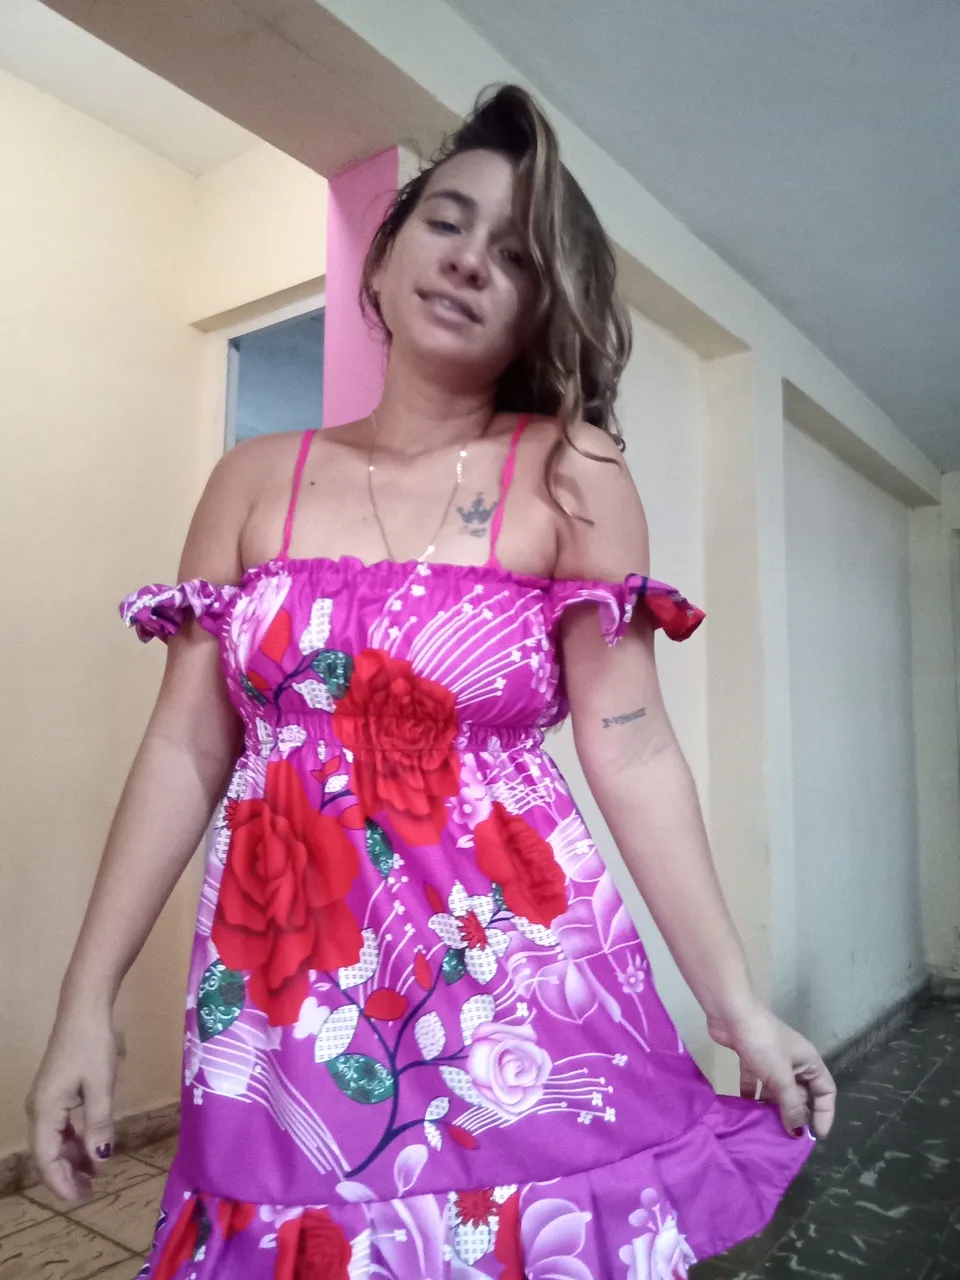
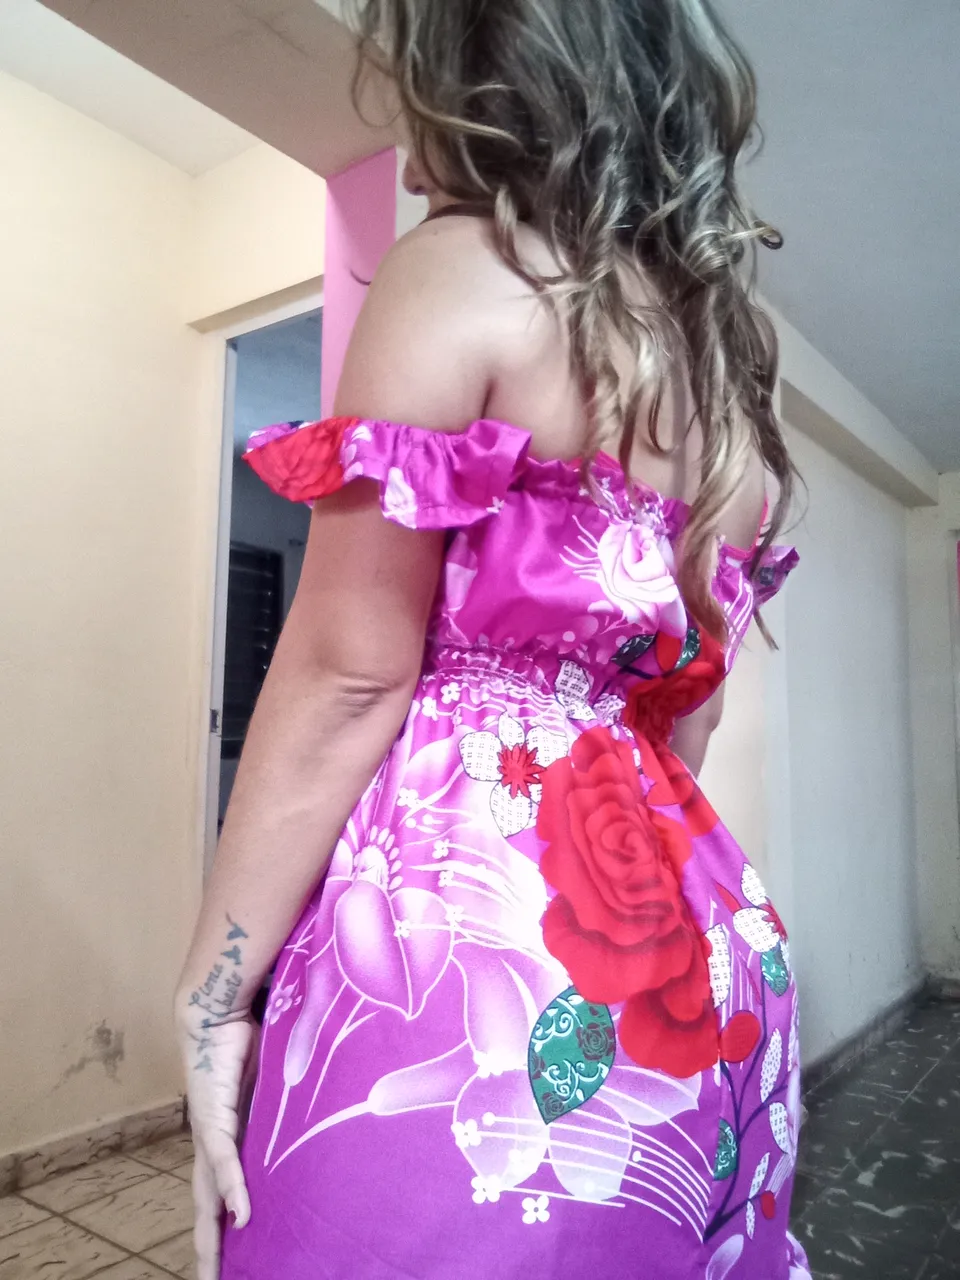
De esta manera se puede crear un lindo vestido, no formal, a la moda, en tendencia y sobre todo, una prenda ideal para combinarlo con cualquier tipo de calsado, siempre a comodidad del que lo porte.
This way you can create a nice dress, not formal, fashionable, trendy and above all, an ideal garment to match it with any type of outfit, always at the comfort of the wearer.
Espero que les alla gustado y les sirva de alguna ayuda este pequeño minitutorial. Pido disculpas si no se entiende bien alguna informacion, pues nos soy muy buena explicando estos procedimientos. Gracias de antemano, espero y os guste mi contenido, y agradeceria que dejaran sus lindos comentarios y se aventuraran conmigo en este proyecto. Bendiciones y lindo dia.
I hope you liked it and I hope this little mini tutorial will be of some help to you. I apologize if some information is not well understood, because I am not very good at explaining these procedures. Thank you in advance, I hope you like my content, and I would appreciate if you could leave your nice comments and venture with me in this project. Blessings and have a nice day.
El texto o resumen es totalmente de mi autoria.
The text or summary is entirely my own.