--
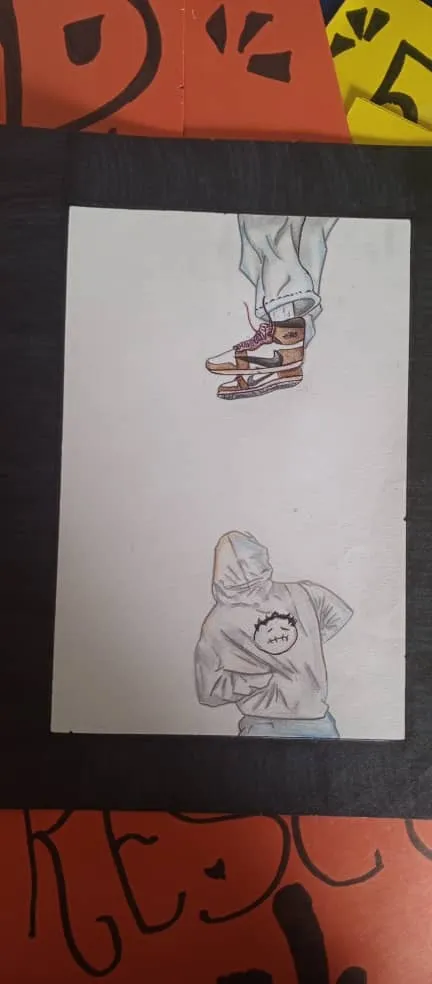
Hola la amigos de Hive Diy aquí les presento el paso a paso de este dibujo basado en las Nike retro 1 de Travis Scott, las cuales tienen detalles muy originales que en lo particular me gustan mucho, la idea es hacer un dibujo que se pueda ver en dos perspectivas diferentes espero les guste.
Hello friends of Hive Diy here I present the step by step of this drawing based on the Nike retro 1 of Travis Scott, which have very original details that I particularly like a lot, the idea is to make a drawing that can be seen in two different perspectives I hope you like it.
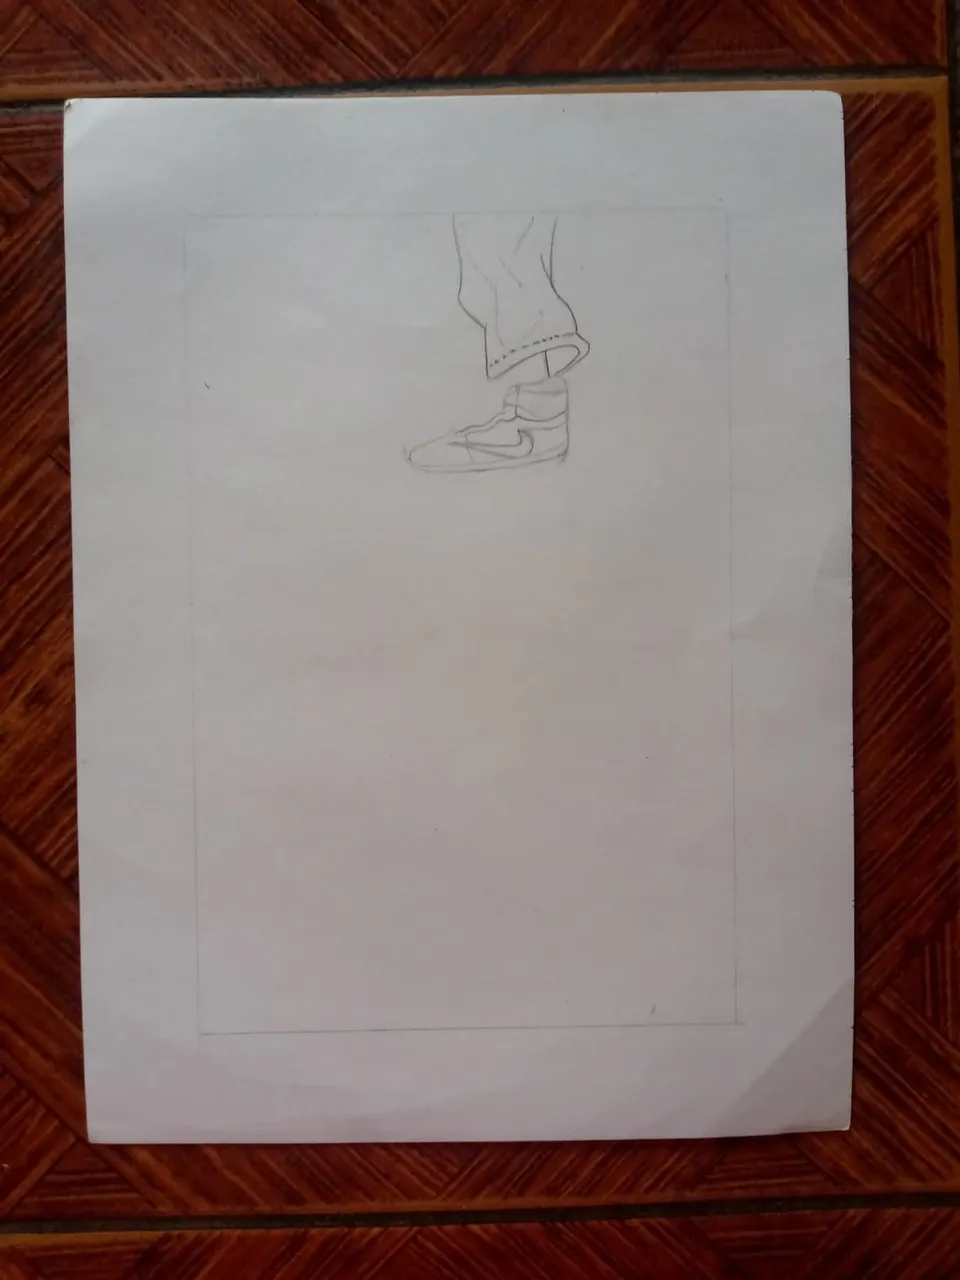
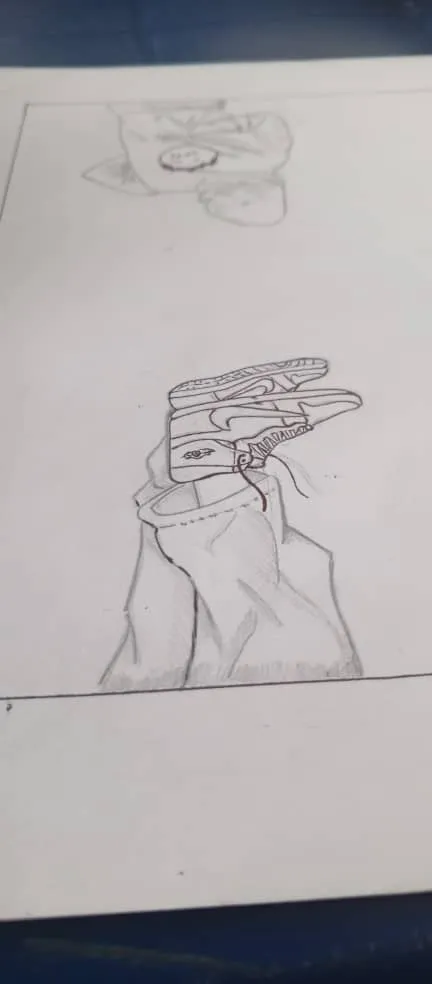
Lo primero que haremos será hacer un margen en la hoja, este margen contara con 3cm en cada lado, luego haremos la silueta de lo que será el pantalón, la pierna y el zapato izquierdo, teniendo esto listo haremos algunos detalles básicos y pequeños en el zapato y en el pantalón para ir dándole forma al dibujo.
The first thing we will do will be to make a margin on the sheet, this margin will count with 3cm on each side, then we will make the silhouette of what will be the pants, the leg and the left shoe, having this ready we will make some basic and small details in the shoe and pants to give shape to the drawing.
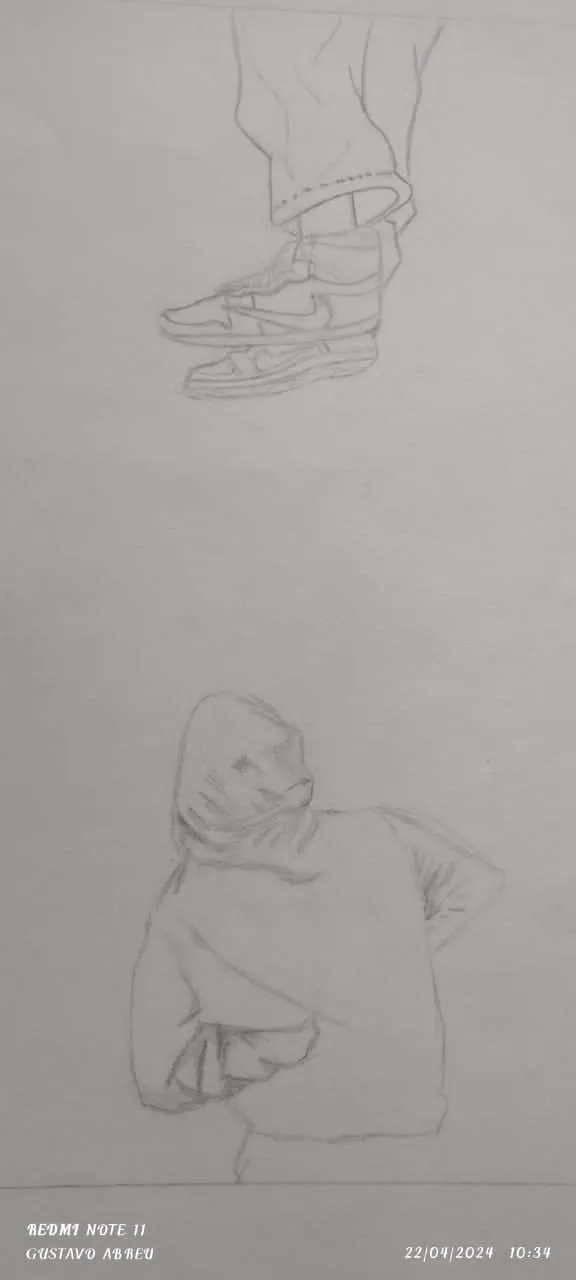
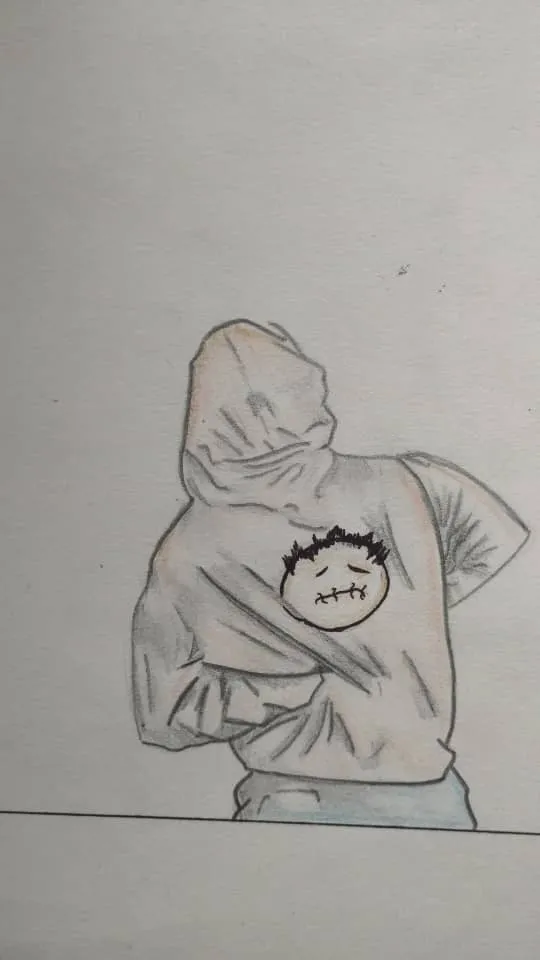
Siguiendo en ese orden terminaremos añadiendo detalles en el zapato izquierdo y haremos la pierna y el zapato derecho de esta forma, para darle un poco de profundidad al dibujo y mostrarlo desde una perspectiva de altura. Habiendo terminado el boceto de las Nike retro 1 de Travis, lo que haremos será la silueta de un chico con suéter de espalda observando los zapatos, aplicaremos un poco de sombra para darle forma y sentido a la posición.
Following in that order we will finish adding details on the left shoe and we will do the leg and the right shoe in this way, to give a little depth to the drawing and show it from a height perspective. Having finished the sketch of Travis's Nike retro 1, what we will do will be the silhouette of a boy with sweater back watching the shoes, we will apply some shadow to give shape and sense to the position.
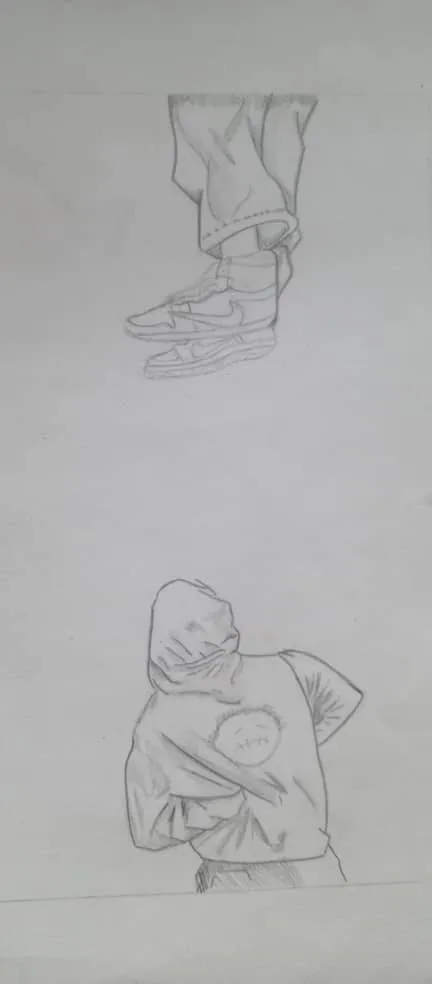
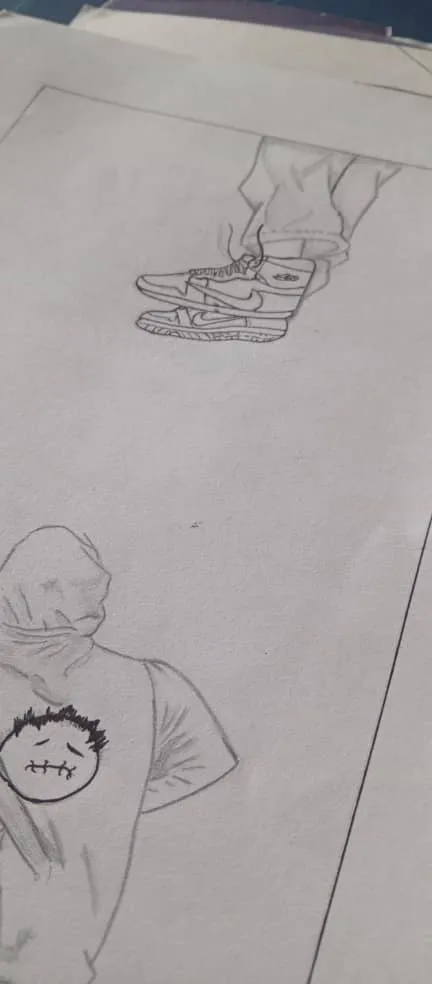
Teniendo ya listo el boceto lo que haremos será profundizar en las sombras y en los detalles ya que eso hará que nuestro dibujo resalte, terminaremos dándole la forma final al suéter y al pantalón gracias a las sombras y detalles que apliquemos.
Having the sketch ready, what we will do is to deepen in the shadows and details that will make our drawing stand out, we will finish giving the final shape to the sweater and the pants thanks to the shadows and details that we apply.
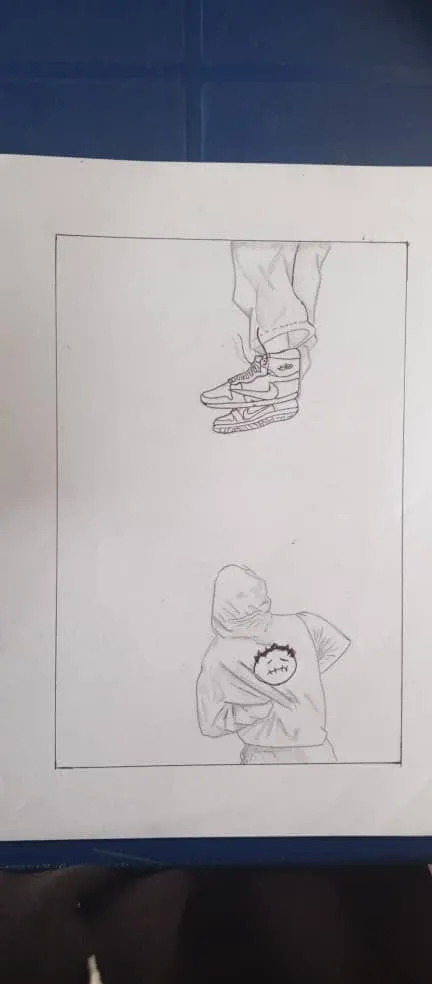
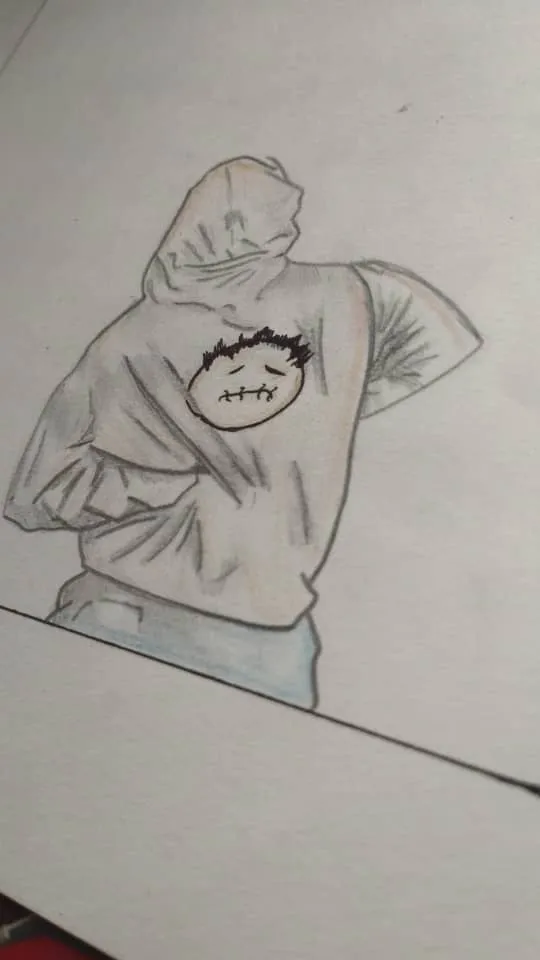
Ya con eso listo podemos pasar a la siguiente fase que seria el delineado, para ellos usaremos un bolígrafo y lo aplicaremos en los detalles mas importantes que serian el margen, los detalles del zapato y el pequeño logo del suéter, tenemos que tener mucho cuidado a la hora de delinear ya que no habrá vuelta atrás en caso de un error.
With that ready we can move on to the next phase which would be the outlining, for them we will use a pen and apply it in the most important details that would be the margin, the details of the shoe and the small logo of the sweater, we have to be very careful when outlining because there will be no turning back in case of a mistake.
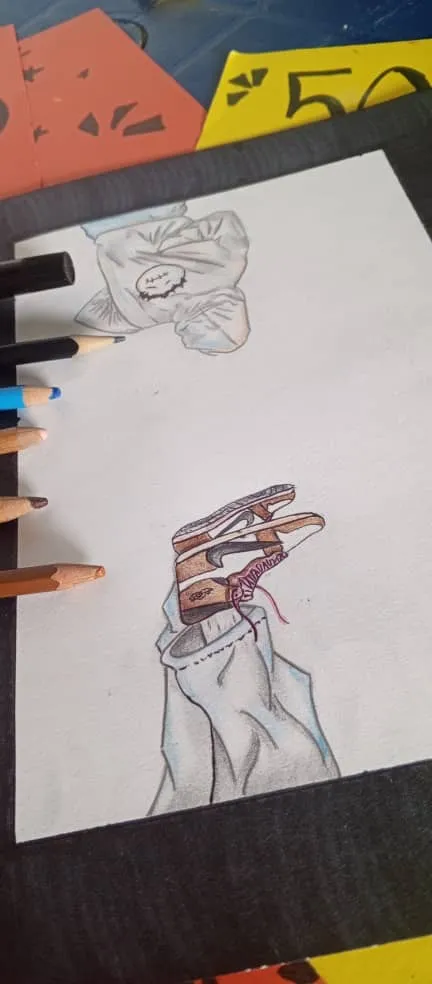
Para la siguiente fase utilizaremos un color marrón oscuro, un Marrón claro, un color azul celeste y un color beige o rosado claro.
For the next phase we will use a dark brown color, a light brown, a light blue color and a beige or light pink color.
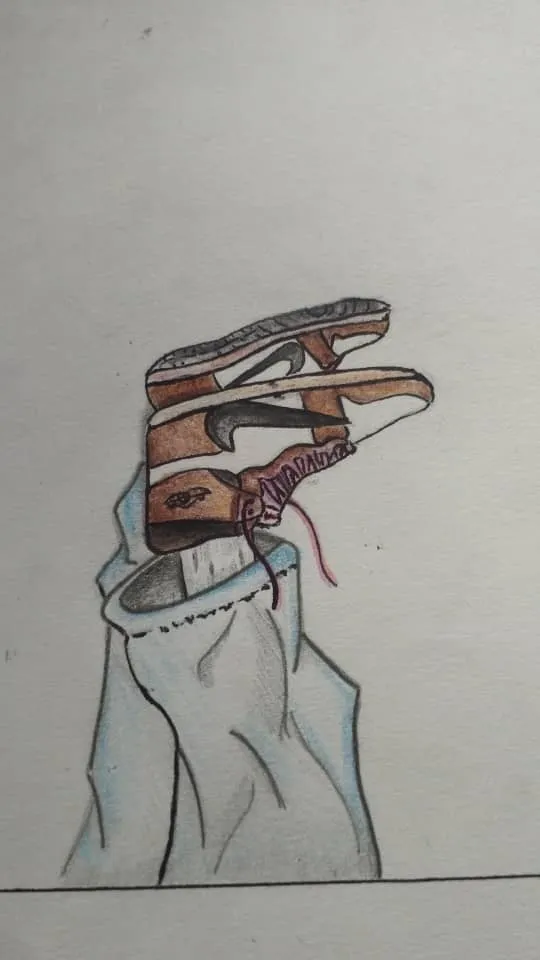
Luego de delinear pasaremos a la 3 fase que será el añadir color y vida a nuestro dibujo, lo primero que hacemos será marcar los puntos de iluminación en el pantalón con color azul celeste, teniendo esto listo el segundo paso será colorear las retro 1 Nike, para esto aplicaremos los colores de mas oscuro a mas claro para que se mezclen de mejor manera, es importante aplicar el marrón oscuro en las sombras y el marrón claro en los puntos de iluminación dejando espacios en blanco.
After outlining we will pass to the 3rd phase that will be to add color and life to our drawing, the first thing we do will be to mark the points of illumination in the pants with light blue color, having this ready the second step will be to color the retro 1 Nike, for this we will apply the colors from darker to lighter so that they are mixed in a better way, it is important to apply the dark brown in the shadows and the light brown in the points of illumination leaving spaces in white.
Luego aplicaremos también los puntos de iluminación en el suéter usando el color beige o rosado claro, es importante destacar que esto lo hacemos para que no solo sea un dibujo blanco y negro sino también combinar algunos colores para que den un toque especial al dibujo.
Then we will also apply the points of illumination on the sweater using the beige or light pink color, it is important to note that we do this so that it is not only a black and white drawing but also combine some colors to give a special touch to the drawing.
Ya prácticamente tenemos el dibujo casi listo lo que haremos será difuminar las sombras para que se vea el dibujo lo mas limpio posible.
Now we have the drawing almost ready, what we will do is to blur the shadows so that the drawing looks as clean as possible.
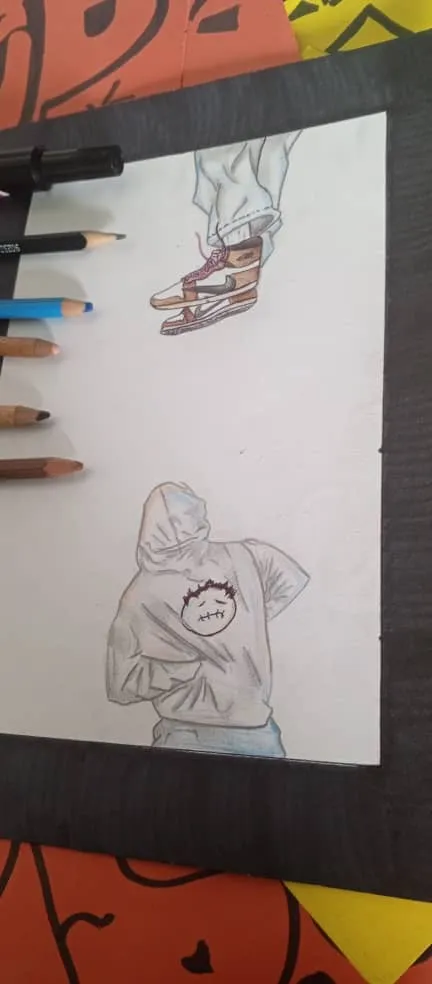
Lo próximo que haremos será iluminar con azul celeste algunas partes del suéter y aplicar marcador negro en el exterior del margen dándole un toque espacial al dibujo.
The next thing we will do is to lighten with light blue some parts of the sweater and apply black marker on the outside of the margin giving a spatial touch to the drawing.
Y así mis amigos de Hive Diy tendremos un dibujo que se puede ver en dos perspectivas distintas, espero que les haya gustado y ayude a inspirarse para crear mas arte.
And so my friends from Hive Diy we will have a drawing that can be seen in two different perspectives, I hope you liked it and help inspire you to create more art.
Thanks for reading, see you in a future post!