Hi guys. This week has started with highs and lows, but mostly with many lows, surprises and disappointments. However, here I am with my head held high and motivated because I know that everything will get better. I hope that for you it is the opposite and that you are doing very well. Today I have made a very pretty yarn doll. I think it is ideal for decoration or souvenirs. I hope you like it as much as I do.
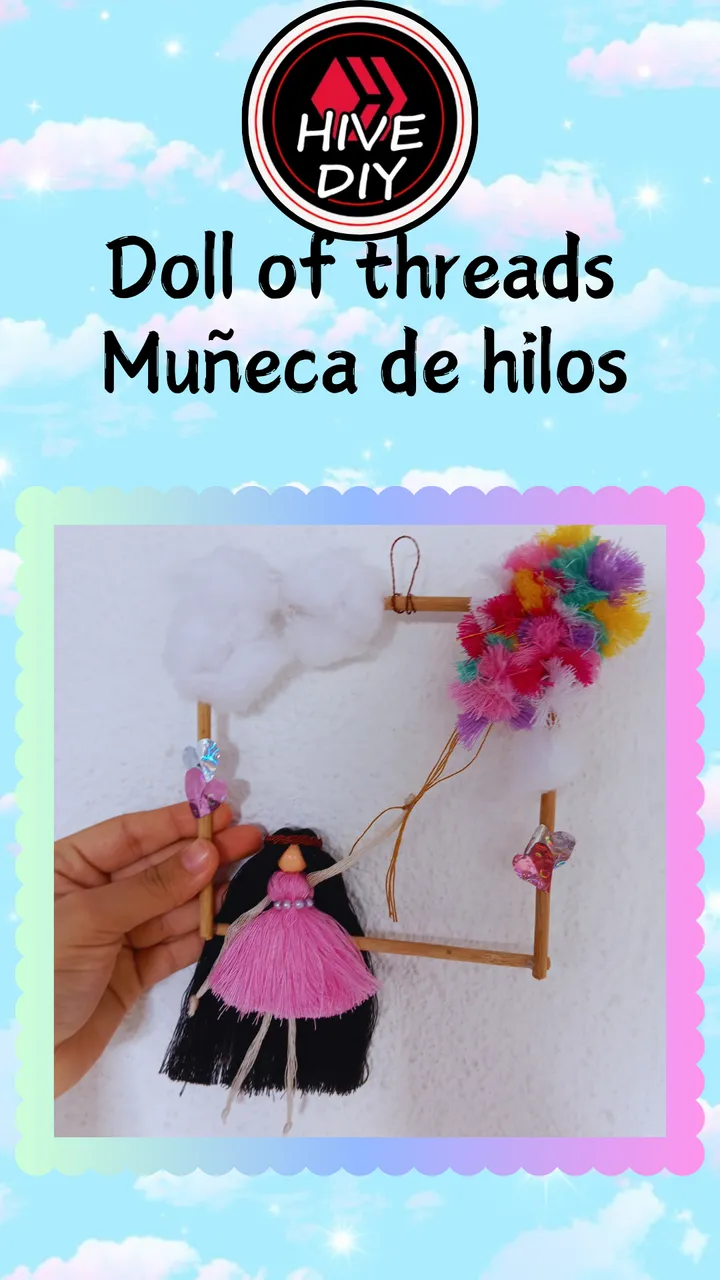
Hola chicos. Está semana ha comenzado con altos y bajos, pero sobretodo con muchos bajos, sorpresas y desilusiones. Sin embargo acá estoy con la frente en alto y motivada porque sé que todo mejorará. Deseo que para ustedes sea todo lo contrario y les esté yendo muy bien. Hoy he realizado una muñeca en hilos bastante linda. Me parece ideal para decoración o souvenirs. Espero les guste tanto cómo a mi.
Materials:
Colored yarns.
4 sticks of height.
Silicone.
Large bead.
Cotton.
Recycled copper.
Small beads.
Scissors.
Cardboard.

Materiales:
Hilos de colores.
4 Palitos de altura.
Silicón.
Cuenta grande.
Algodón.
Cobre reciclado.
Cuentas pequeñas.
Tijeras.
Cartón.
Step 1:
Cut 4 pieces as shown in the pictures and roll them up with the threads. The biggest one will be for the black thread, we will use it for the doll's hair. The medium one will be the pink one, for the dress. The two smaller ones will be to make little monkeys that will make the effect of the balloons. Finally, we will make a long skin colored thread for the legs and a shorter one for the arms.

Paso 1:
Cortamos 4 piezas de tal cual como se ven en las fotos y enrollamos con los hilos. La más grande será para el hilo negro, este lo usaremos para el cabello de la muñeca. El mediano será el rosa, para el vestido. Los dos más pequeños serán para hacer monitos que harán el efecto de los globos. Por último haremos un hilo largo color piel para las piernas y uno más corto para los brazos.
Step 2:
We make all the bows tying with a thread in the center and cut the ends to match.
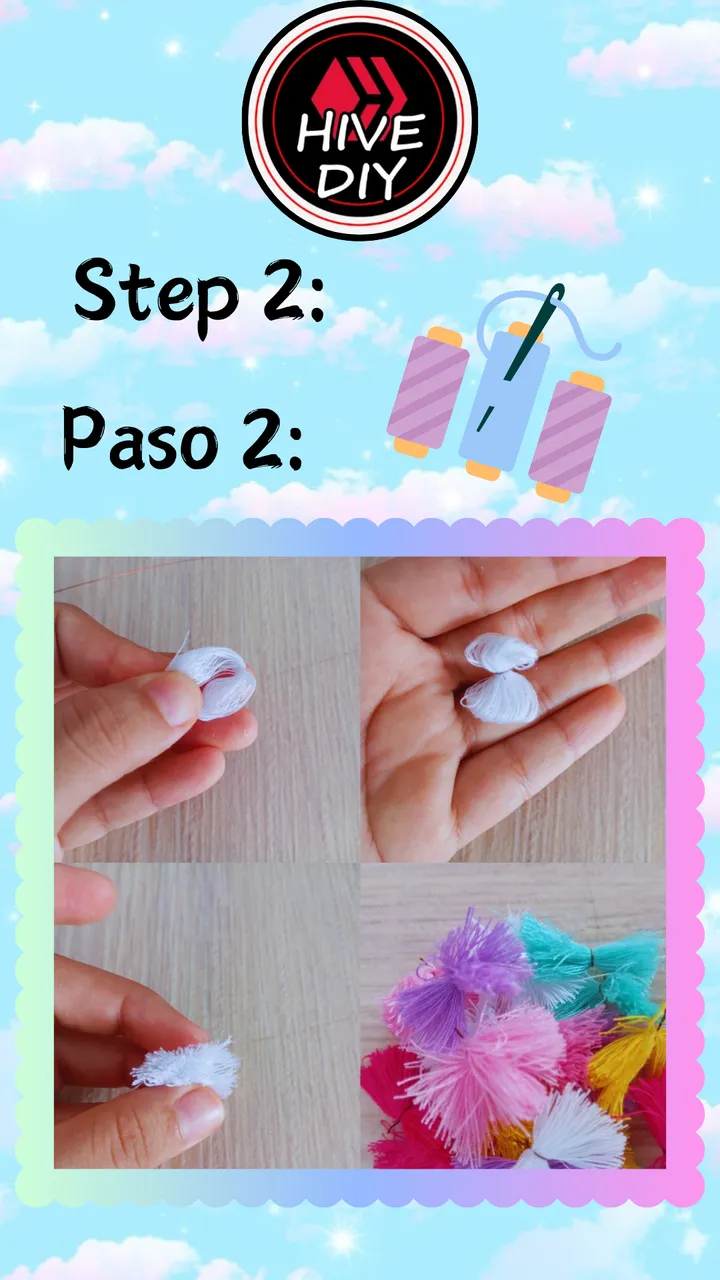
Paso 2:
Realizamos todos los moños amarrando con un hilo en el centro y cortamos las puntas para emparejar.
Step 3:
We will make a square with the sticks and the silicone. In the corner we will pay a piece of cardboard in the shape of a balloon.

Paso 3:
Haremos un cuadro con los palitos y el silicón. En la esquina pagaremos una pieza de cartón en forma de globo.
Step 4:
We will make the doll starting with the hair, we tie with several strands of thread, we join the ends and insert the big bead. We open the threads and place what would be the dress, we tie again tightly.

Paso 4:
Haremos la muñeca empezando por el cabello, amarramos con varias hebras de hilo, juntamos las puntas en insertamos la cuenta grande. Abrimos los hilos y colocamos lo que sería el vestido, volvemos a amarrar bien ajustado.
Step 5:
We place the shortest thread for the arms of the doll and we will make a knot with the threads that will be the legs, we center the dress, we tie several knots so that it does not come loose and we cut the rest.

Paso 5:
Colocamos el hilo más corto para los brazos de la muñeca y haremos un nudo con los hilos que serán las piernas, centramos en el vestido ,amarramos haciendo varios nudos para que no se suelte y cortamos lo restante.
Step 6:
Shape the dress, adjust what would be the waist. level well with the scissors and place the small beads.
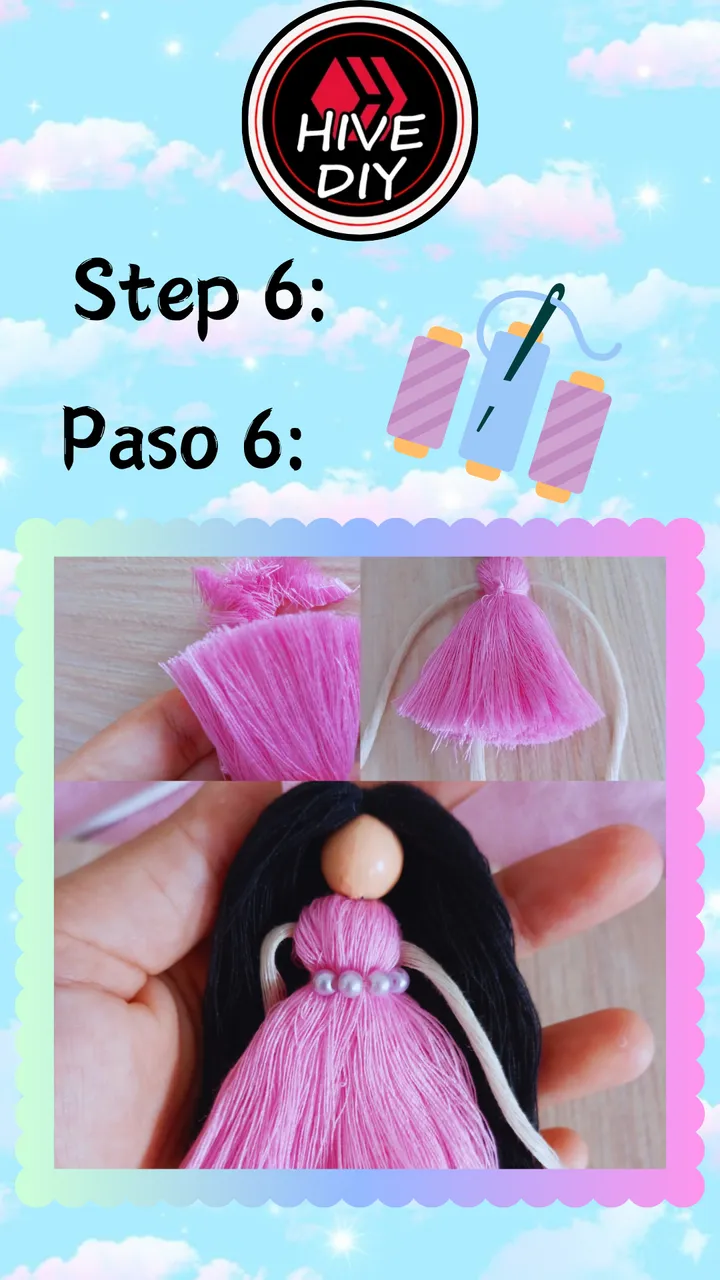
Paso 6:
Damos forma al vestido, ajustamos los que sería la cintura. nivelamos bien con la tijera y colocamos las cuentas pequeñas.
Step 7:
We will twist several strands of copper and take 6 of the same size, we join with a little silicone and proceed to make the tiara of the doll. We divide 3 and pass the other 3 in the form of X we will twist the 2 that will be in the middle giving a single turn, then we pass the copper again and repeat the process. Once ready, cut the ends well and seal with very little silicone.
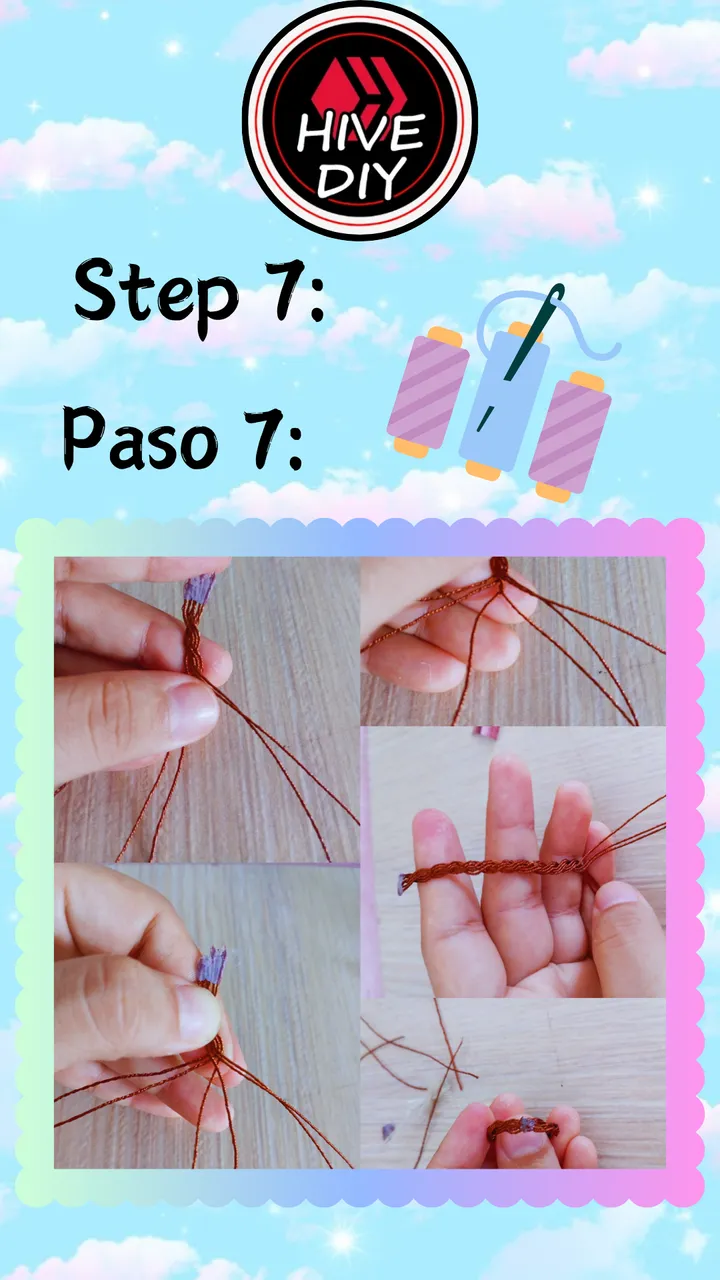

Paso 7:
Entorcharemos varios hebras de cobre y sacaremos 6 del mismo tamaño, unimos con un poco de silicón y procedemos a hacer la tiara de la muñeca. Dividimos 3 y pasamos los otros 3 en forma de X entorcharemos los 2 que quedarán en medio dando una sola vuelta, luego pasamos nuevamente los cobres y repetimos el proceso. Una vez listo cortamos bien las puntas y sellamos con muy poquito silicón.
Step 8:
Glue some threads to the cardboard piece, fill with the bows and make clouds with the cotton. Place the doll in a corner and glue the balloon threads to her hand. Place the details and that's it.
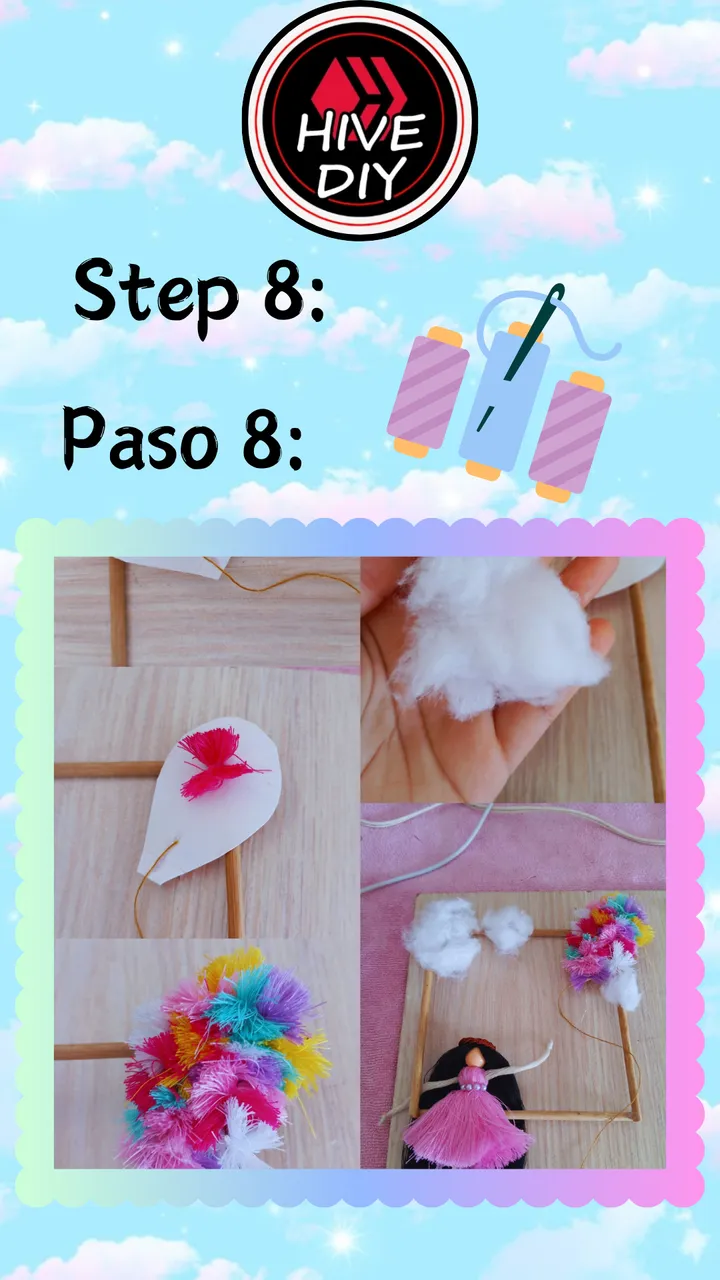
Paso 8:
Pegamos unos hilos a la pieza de cartón, rellenamos con los moños y haremos nubes con el algodón. Colocaremos la muñeca en una esquina y los hilos del globo los pegamos a su mano. Colocamos los detalles y listo.
I hope you liked this content, I personally was fascinated.
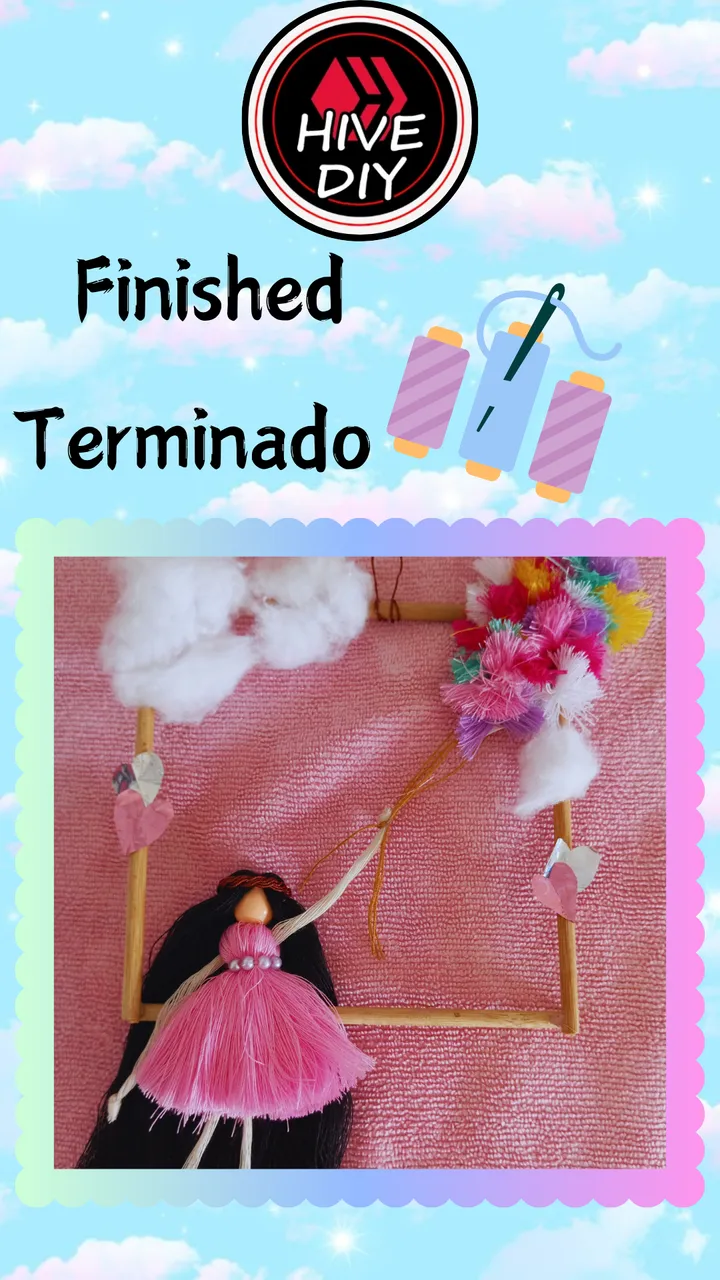
Ojalá les haya gustado este contenido, a mi en lo personal me fascinó.
A hug from afar and take care of yourselves guys.
Un abrazo desde la distancia y cuídense mucho chicos.

Translation with DeepL
Photos taken with Redmi 12
Editing done in Canva
Traducción con DeepL
Fotos tomadas con Redmi 12
Edición realizada en Canva