¡¡Hola, hola, hola!! ”Nunca es tarde para comenzar y menos para descubrir un nuevo talento”, un cordial saludos y feliz fin de semana tengan mis queridos artesanos de @hivediy feliz de compartir con ustedes, como amantes del arte en cualquiera de sus expresiones hoy les comparto un nuevo talento, el cual estoy empezando a desarrollar.
Hello, hello, hello!!! "It's never too late to start and even less to discover a new talent ", cordial greetings and happy weekend have my dear artisans of @hivediy happy to share with you, as lovers of art in any of its expressions today I share with you a new talent, which I am beginning to develop.
Cada uno de nosotros tiene un inmenso potencial de dones y talentos por descubrir, en mi vida nunca me habría imaginado que hoy me estaría aprendiendo técnicas de encuadernación, pues es algo que no me llamaba mucho la atención, pues para reciclar las hojas de cuadernos simplemente quitaba las hojas dañadas y con pega o grapas las juntaba y listo tenía un “cuaderno nuevo”.
Each one of us has an immense potential of gifts and talents to discover, in my life I would never have imagined that today I would be learning binding techniques, because it is something that did not call me much attention, because to recycle the sheets of notebooks I simply removed the damaged sheets and with glue or staples I put them together and ready I had a "new notebook ".
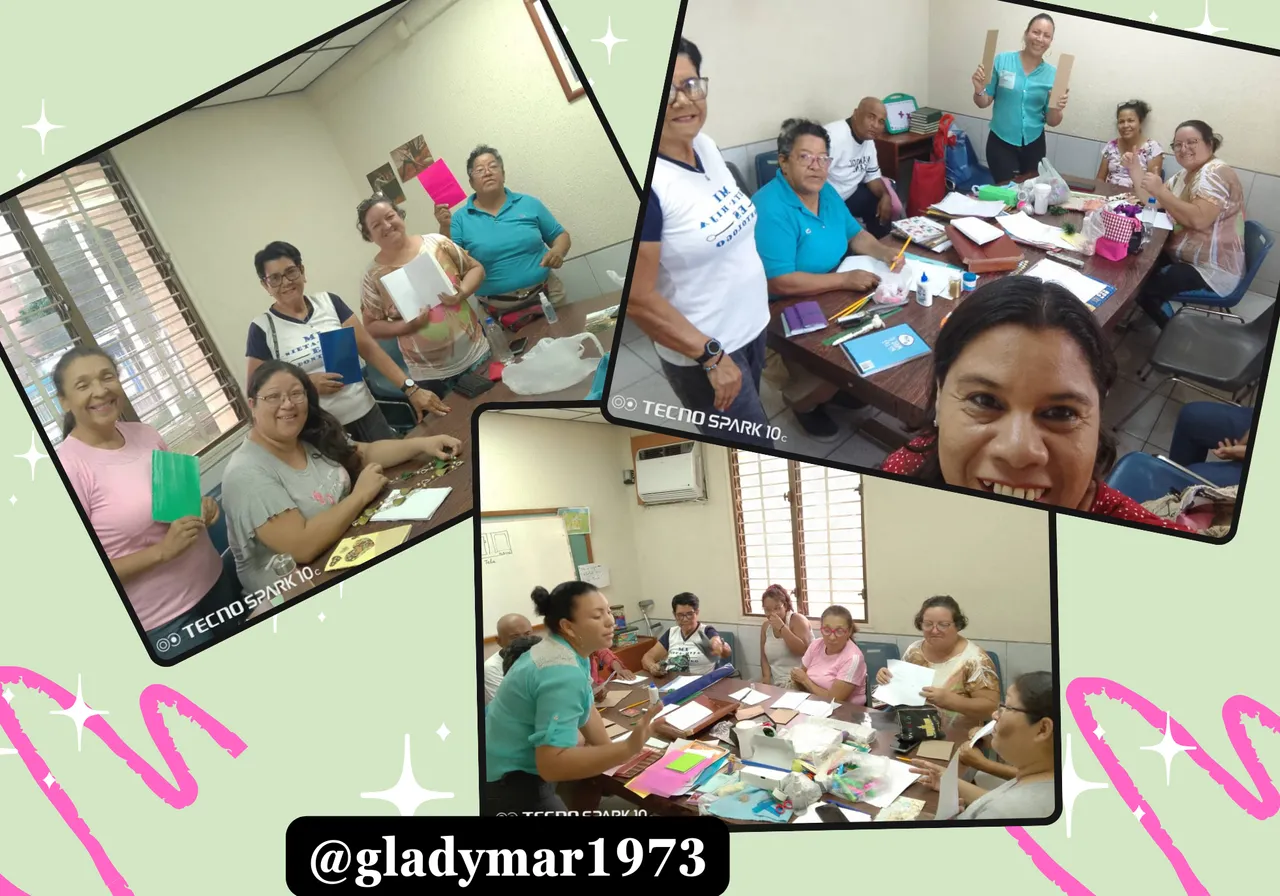
Fotos cortesia de @motica29Recientemente una amiga me invito a realizar un taller que dictaría sobre cuadernos artesanales y se despertó en mí el gusanito creativo y sin pensar comencé a buscar esas cositas guardadas que tenía en casa sin ninguna función aparentemente, lo hermoso de este arte es que podemos darle una nueva oportunidad a esos materiales que tenemos guardados en nuestra casa u oficina.
Recently a friend of mine invited me to a workshop she was giving on craft notebooks and the creative little worm awoke in me and without thinking I started to look for those little things I had at home without any apparent function, the beauty of this art is that we can give a new opportunity to those materials we have stored at home or in our office.
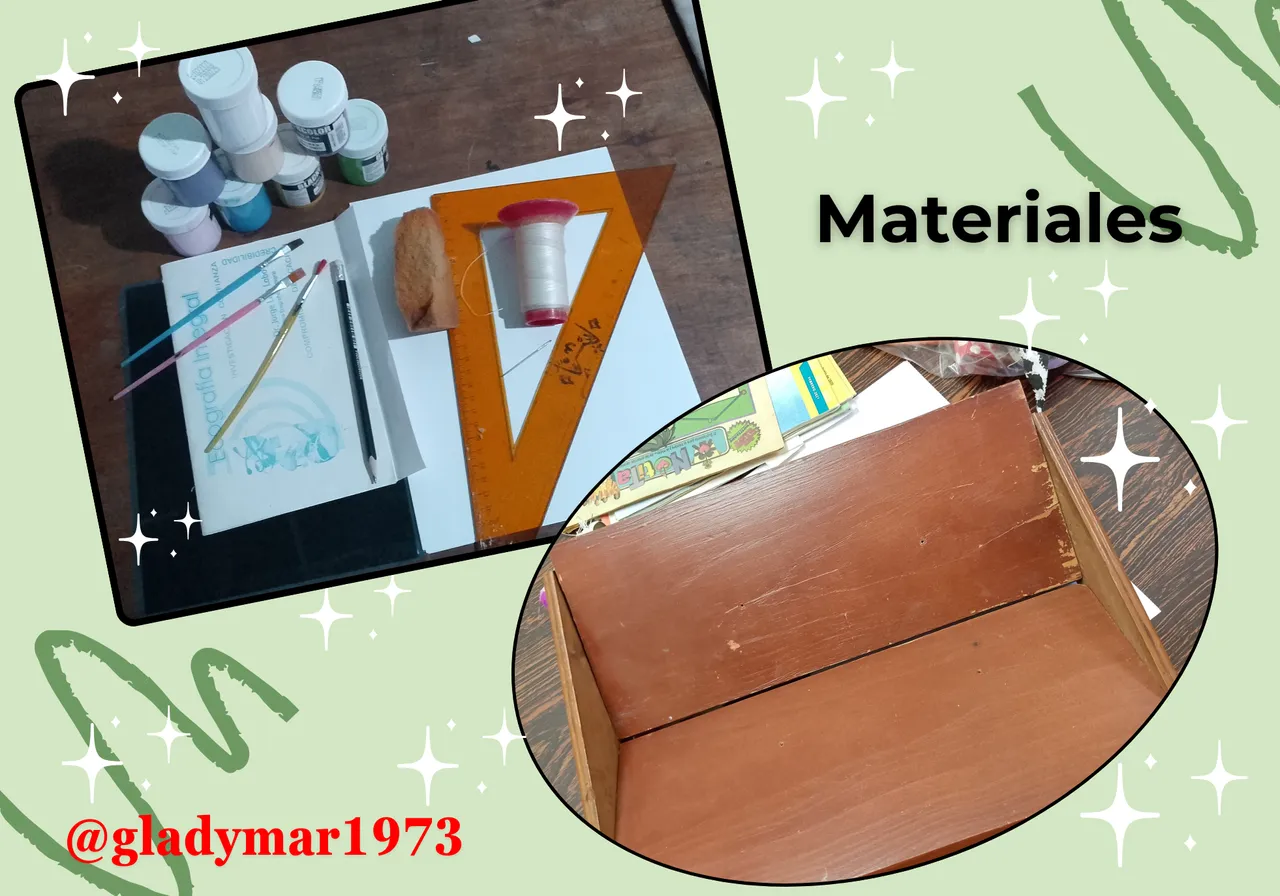
Entre los materiales que utilizamos en el inicio del taller están:
- Hojas blancas tamaño carta
- Cartulinas recicladas
- Regla, lápiz
- Pintura al frio y pinceles.
- Pega
- Recortes de revista
- Aguja
- Hilo encerado o cera de abeja.
- Cuna para papelero.
- Retazo de madera o tarjeta de PVC
Among the materials we use at the beginning of the workshop are:** ** Letter size white paper
- Letter size white sheets
- Recycled cardboard
- Ruler, pencil
- Cold paint and brushes.
- Glue
- Magazine clippings
- Needle
- Waxed thread or beeswax.
- Cradle for paper basket.
- Scrap wood or PVC card.
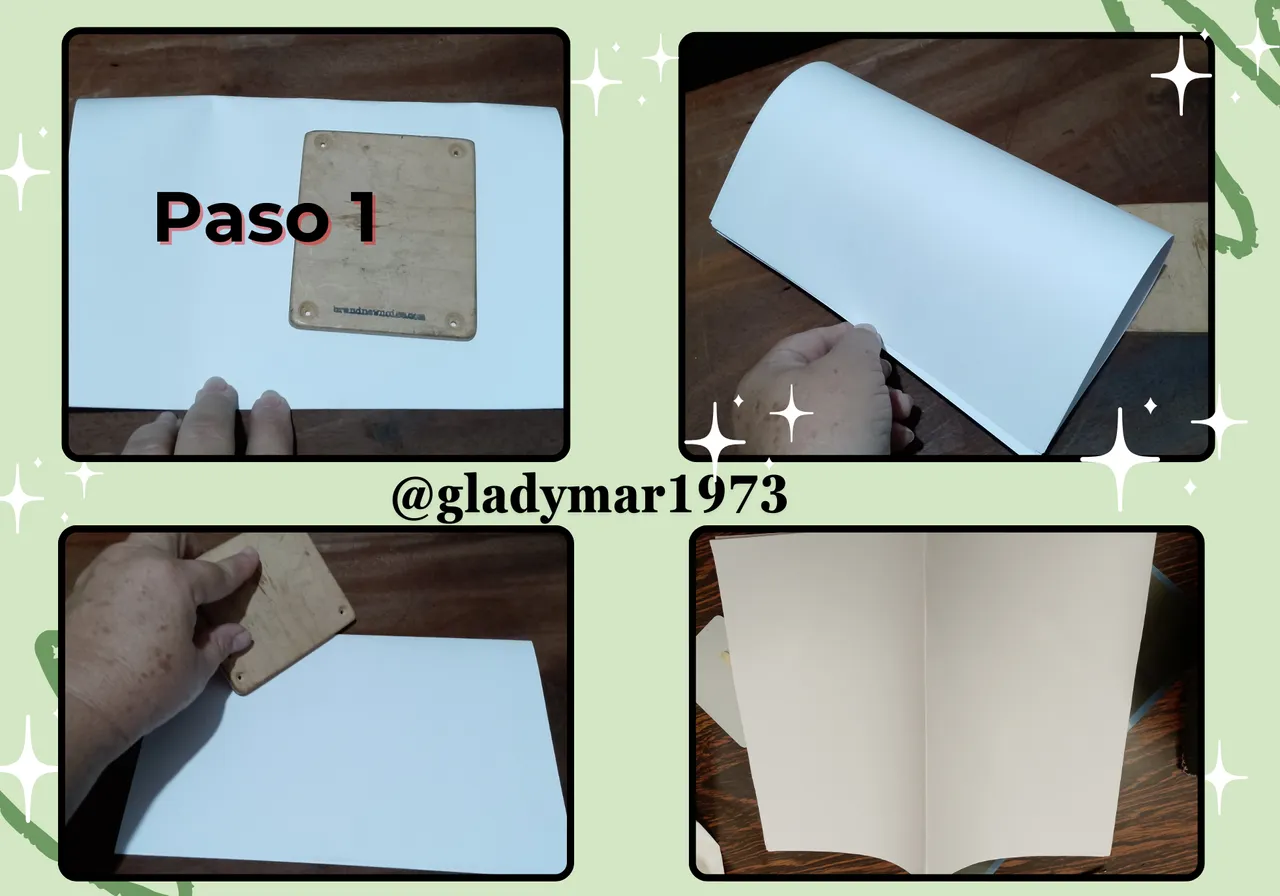
Paso 1 Doblamos las hojas tomando el centro y ajustando hasta llevar el doblez al centro, luego con la ayuda de una tarjeta o en mi caso una tablita lisa prensamos desde el centro hacia las orillas para que en lo posible nuestras hojas queden alineadas, Nota cada cuadernillo lleva aproximadamente entre 5 a 10 hojas.
Step 1 Fold the sheets taking the center and adjusting until the fold is at the center, then with the help of a card or in my case a smooth board we press from the center to the edges so that as far as possible our sheets are aligned, Note each booklet takes approximately 5 to 10 sheets.
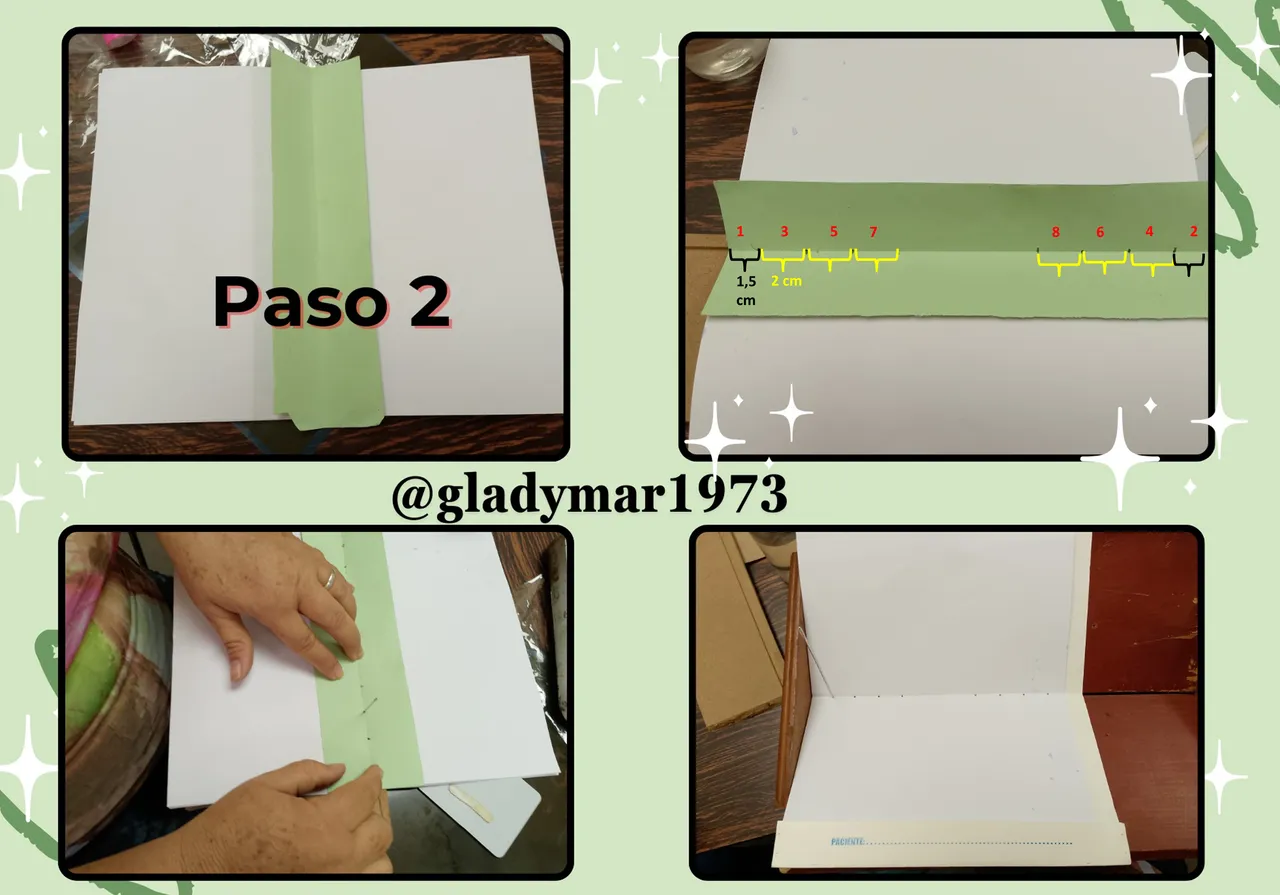
Paso 2 tomamos una cartulina con las mismas medidas de nuestras hojas y otra del largo de nuestras hojas por 6 cm de ancho y la centramos al igual que hicimos con las hojas; la primera como guarda para nuestro cuadernillo y la segunda nos servirá de guía para perforar tanto la guarda como las hojas; seguidamente procedemos a marcar la distancia requeridas para las perforaciones están se hacen siguiendo la secuencia indicada en la imagen, 1,5 cm de margen tanto superior como inferior y 2 cm entre cada puntada, obteniendo así 8 perforaciones.**
Step 2 we take a piece of cardboard with the same measurements of our sheets and another of the length of our sheets by 6 cm wide and we center it as we did with the sheets; the first as a guard for our booklet and the second will serve as a guide to perforate both the guard and the sheets; then we proceed to mark the distance required for the perforations are made following the sequence indicated in the image, 1.5 cm of margin both top and bottom and 2 cm between each stitch, thus obtaining 8 perforations.
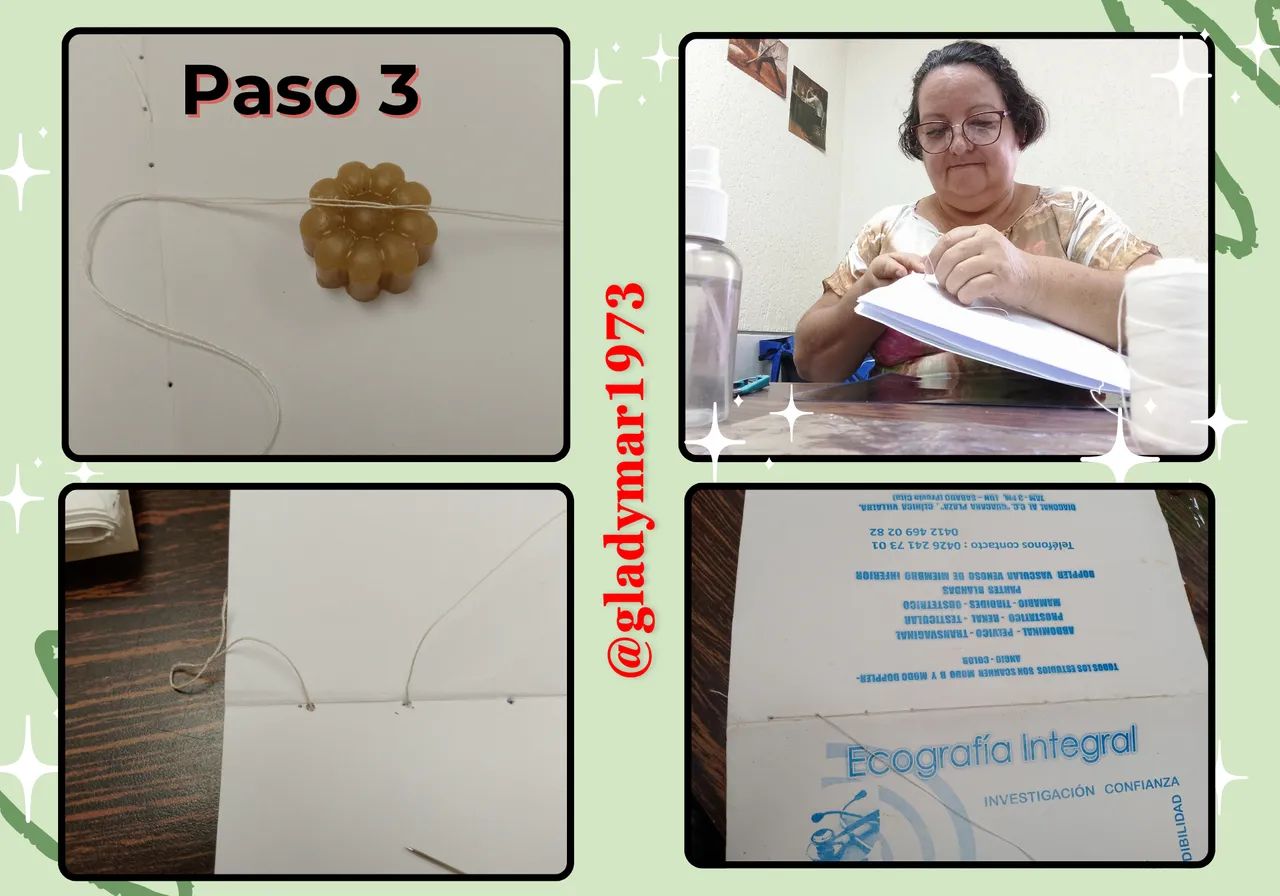
Paso 3 antes de proceder a coser si nuestro hilo no es encerado procedemos a pasarlo 3 veces por la cera de abeja (esto para evitar que el papel dañe el hilo), con nuestro hilo ya encerado procedemos a coser en la misma secuencia como hicimos la perforación, comenzando por la parte interna de nuestro cuadernillo, cosemos del 1 al 8 y regresemos de nuevo del 8 al 1, ajustamos la costura, sacamos nuestros hilo a la parte externa del cuadernillo y cortamos dejando la hebra restante. Nota para esta costura tomamos el doble del largo de nuestro cuadernillo más 10 cm.
Step 3 before proceeding to sew if our thread is not waxed we proceed to pass it 3 times through the beeswax (this to prevent the paper from damaging the thread), with our thread already waxed we proceed to sew in the same sequence as we did the perforation, starting from the inside of our booklet, we sew from 1 to 8 and return again from 8 to 1, we adjust the seam, we pull our thread to the outside of the booklet and cut leaving the remaining strand. Note for this seam we take twice the length of our booklet plus 10 cm.
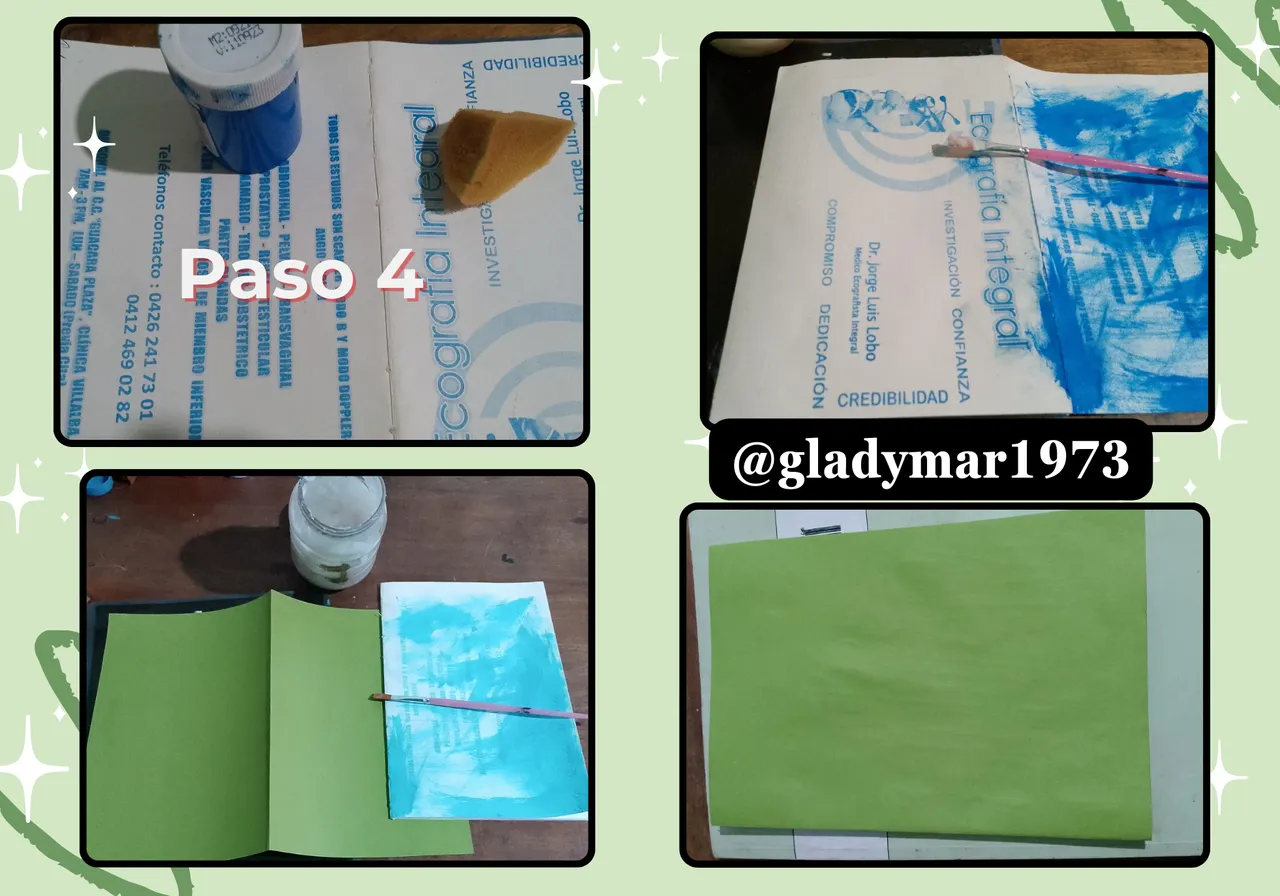
Paso 4 con nuestro cuadernillo ya listo al principio quise dejar la costura expuesta y probar mis dotes en pintura pero fue un desastre jeje, por lo que opte a colocar otra cartulina un poco más gruesa a la guarda.
Step 4 with our booklet ready at first I wanted to leave the stitching exposed and try my hand at painting but it was a disaster hehe, so I opted to place another cardboard a little thicker to the guard.

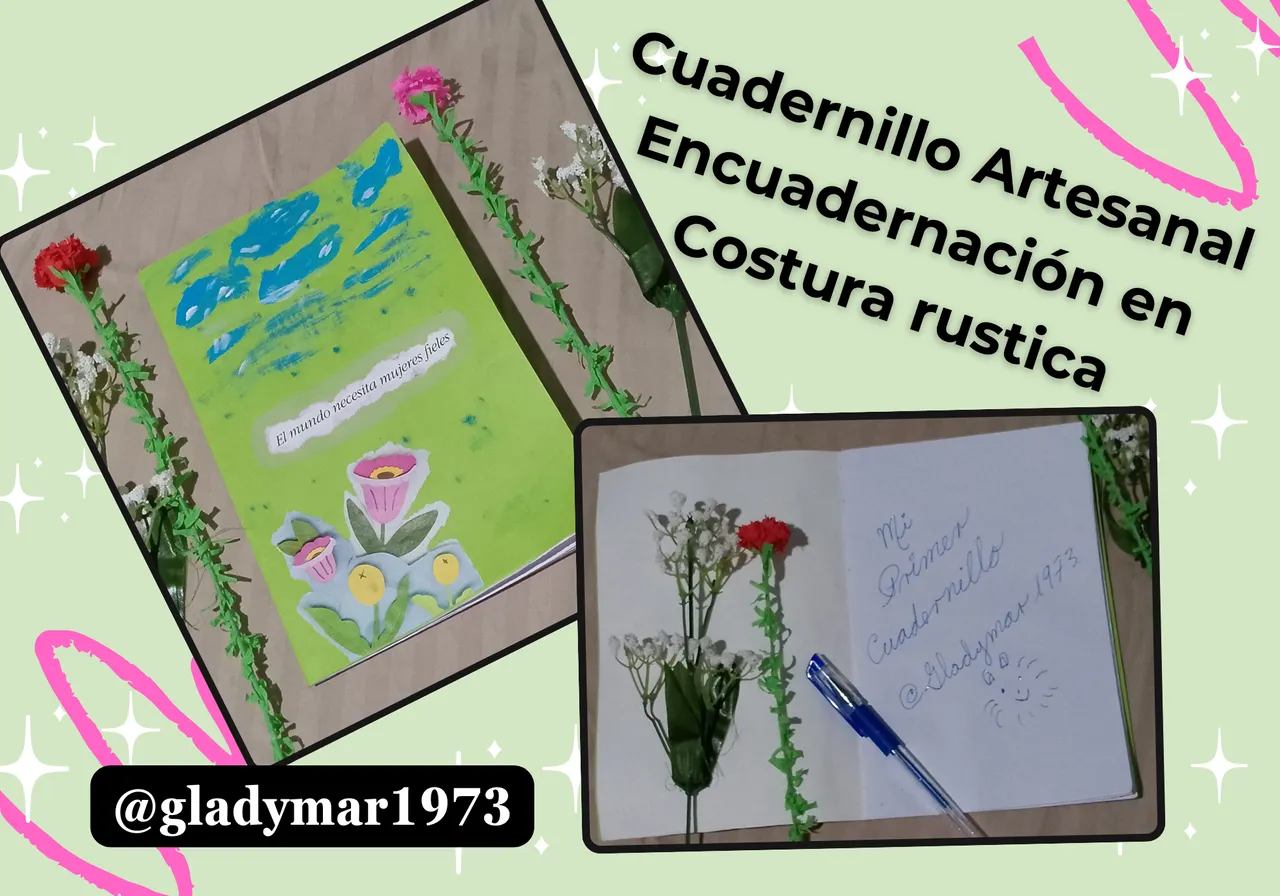
Paso 5 para finalizar “recorté con la mano” una flores de una revista y las pegué al igual una frase que me gusto de la misma revista “El mundo necesita mujeres fieles”, seguido si pinte algunas nubes, personalicé la primera hoja de mi cuadernillo y listo ya está terminado.
Step 5 to finish I "hand cut" a flower from a magazine and glued it and a phrase that I liked from the same magazine "The world needs faithful women ", then I painted some clouds, personalized the first page of my booklet and that's it, it's finished.

Contenido original.
Fotos tomada con mi Celular Moto E6I y editadas en Canvas.
Los banner fueron creados por mí en Canvas.
La traducción fue a través de www.DeepL.com,Translator (versión gratuita).
Original content.
Photos taken with my Moto E6I cell phone and edited in Canvas.
The banners were created by me in Canvas.
The translation was through www.DeepL.com,Translator (free version).