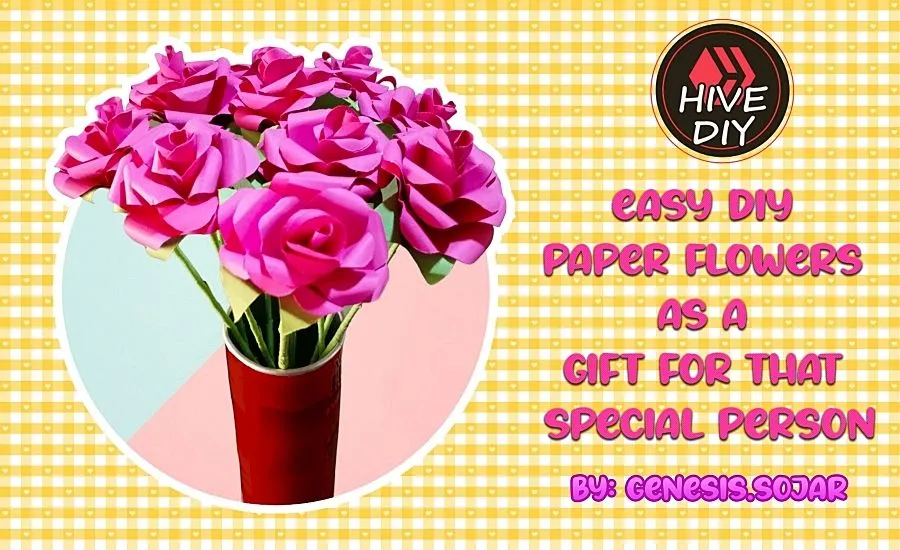
✨💐Hello community! Welcome | ¡Hola comunidad! Bienvenido/a💐✨
Espero te encuentres ¡muy, muy bien hoy! El post de hoy tratará de como hacer este hermoso ramo de flores de papel lo cual no es tan difícil de realizar. Esta es una idea para que se regales a aquella persona especial en cualquier momento y que podrás realizarlo solo con los siguiente materiales:
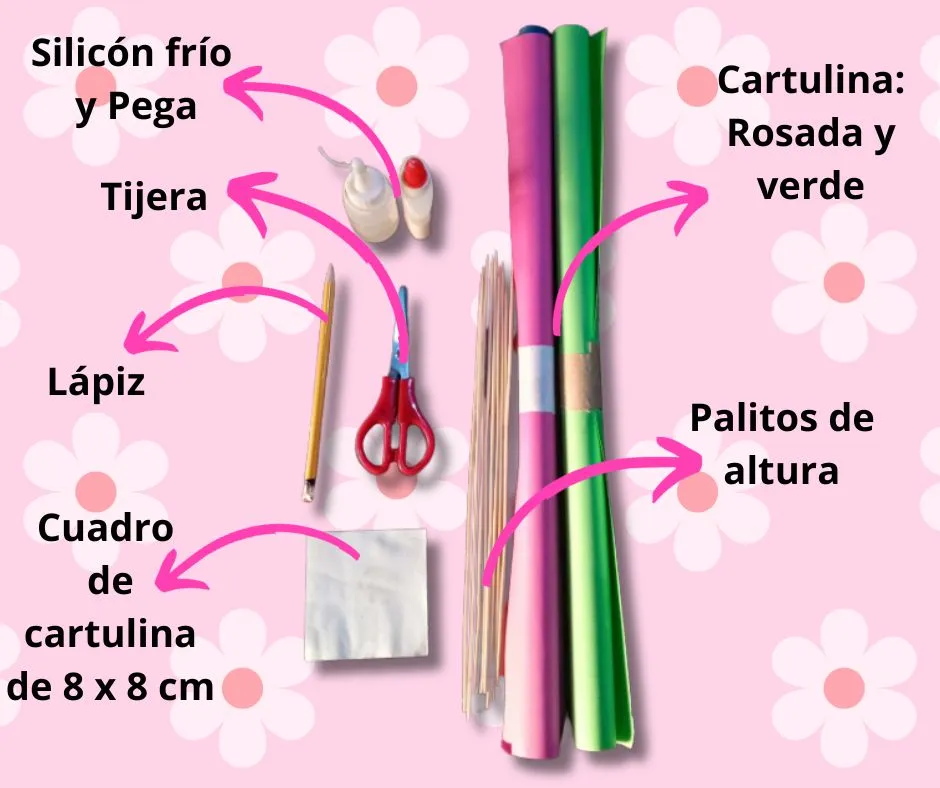
•💐💖Materials to be used💐💖•
•💐💖Materials to be used💐💖•
| - Scissor | - Tijera | |
|---|---|---|
| - School white glue | - Pega blanca escolar | |
| - Cold silicon | - Silicon al frio | |
| - Height sticks | - Palitos de altura | |
| - Color cardboard: pink and green | - Cartulina color: Rosada y verde | |
| - Pencil | - Lápiz | |
| - Picture 8 cm x 8cm | - Cuadro de 8 cm x 8cm |

•💐💖STEP BY STEP💐💖•
•💐💖STEP BY STEP💐💖• Con el cuadro de 8x8 cm que ya tenemos recortado, vamos a marcarlo en la cartulina rosada unas treinta (30) veces, ya que para hacer una flor se necesitan tres (3) cuadritos. En este caso, haremos diez (10) florecitas para hacer un mini ramito. Luego de haberlas ya marcador en la cartulina pasamos a recortarlas.
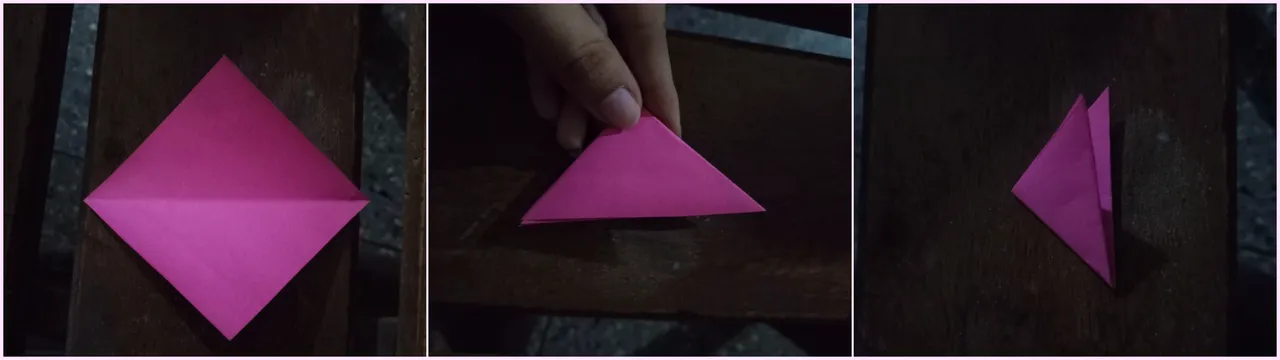
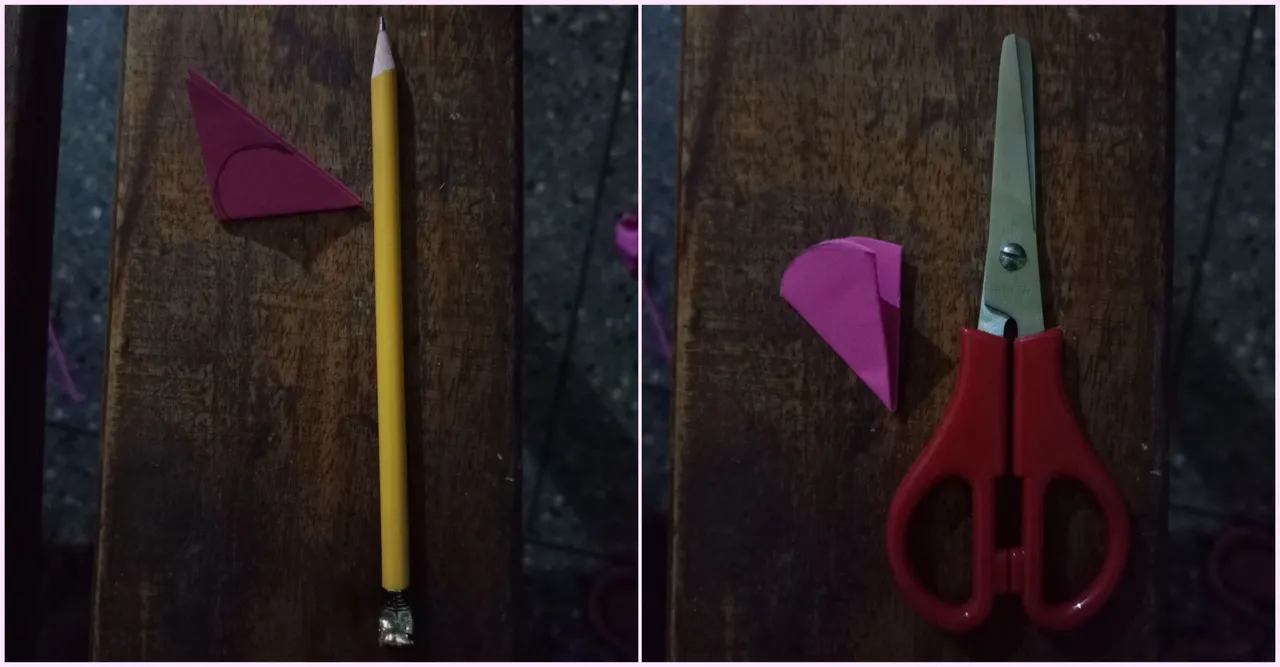
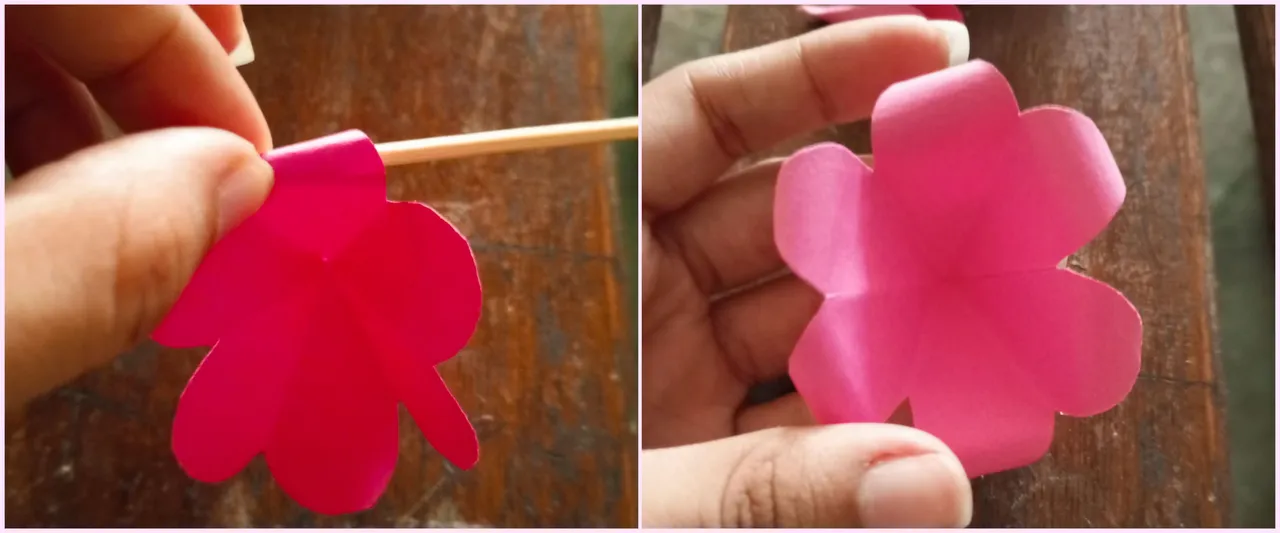
Ya recortado los cuadritos organizamos de tres en tres hasta llegar a diez (10) secciones, esto con intención de no perderlos. Entonces, agarramos la primera sección y el primer cuadrito lo doblamos por la mitad; a continuación, lo volvemos a doblar de nuevo por la mitad y por ultimo otra vez por la mitad. O sea, lo tenemos que doblar tres (3) veces hasta hacer un rectángulo pequeño. Después, pasamos a trazar una línea dando la ilusión que cuando la recortemos tenga forma de gota. Esta línea irá desde un poquito más abajo del centro del rectángulo hasta el otro extremo. Esto se puede apreciar mejor en las imágenes que se encuentran más abajo.
El paso anterior lo repetiremos con las demás secciones hasta que ya no queden más rectángulos. Ahora lo que queda es recortar las tres formas de flor. Recortaremos un (1) pétalo de la primera, luego recortaremos dos (2) pétalos de la segunda y, por último, recortaremos tres (3) pétalos de la tercera. Los pétalos que quedan los guardamos para pegarlos con silicón al frío, e ir armando la flor.
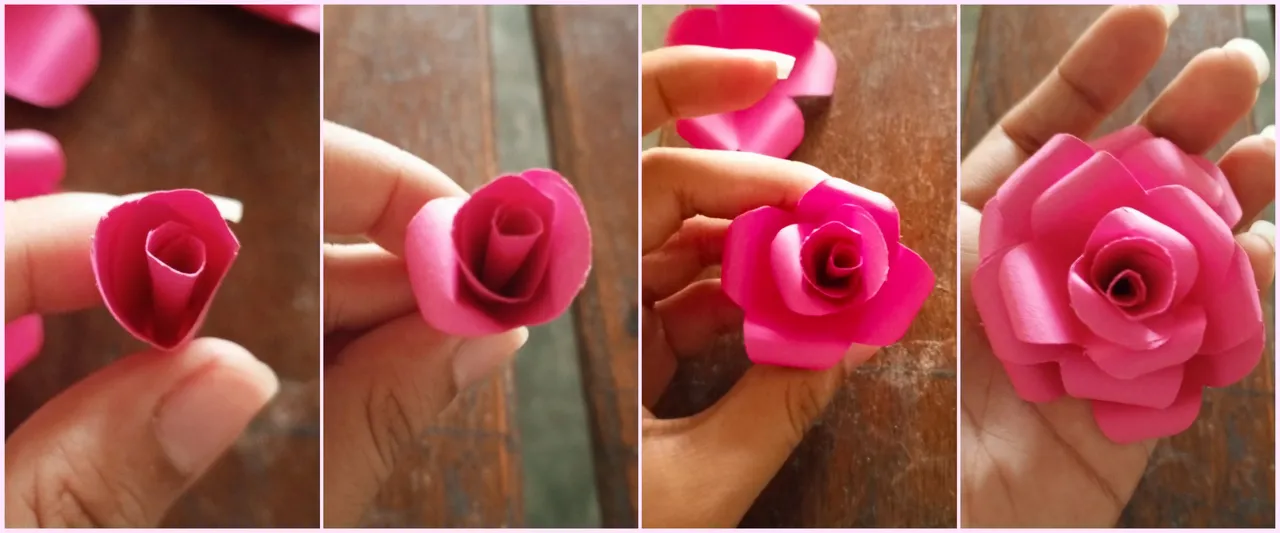
En este paso pegaremos y armaremos la flor (como se muestra en la imagen) quedando cada una de esa forma y utilizando los pétalos sobrantes que recortamos anteriormente. Para darle más forma de pétalo colocaremos el palito de altura abajo de este y lo enrollaremos un poquito hacia abajo. Esto se puede observar mejor en la imagen. Luego, continuamos armando los pétalos, uno encima de otro. Desde el más pequeño al más grande hasta quedar ese resultado. Lo repetimos con los otros 9 pétalos o los que hallan hecho.
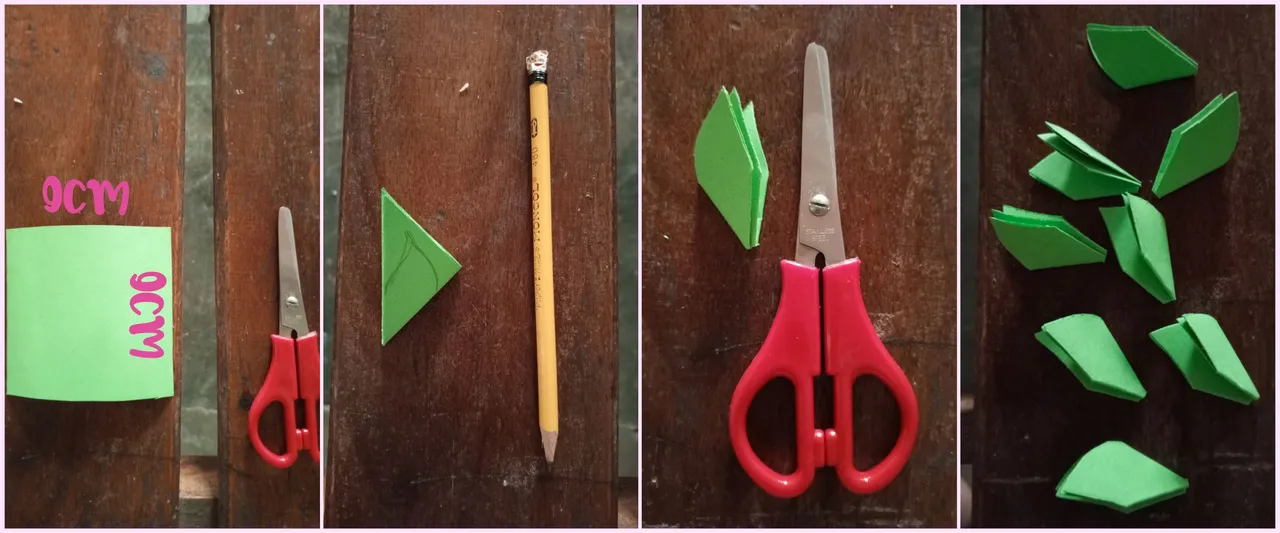
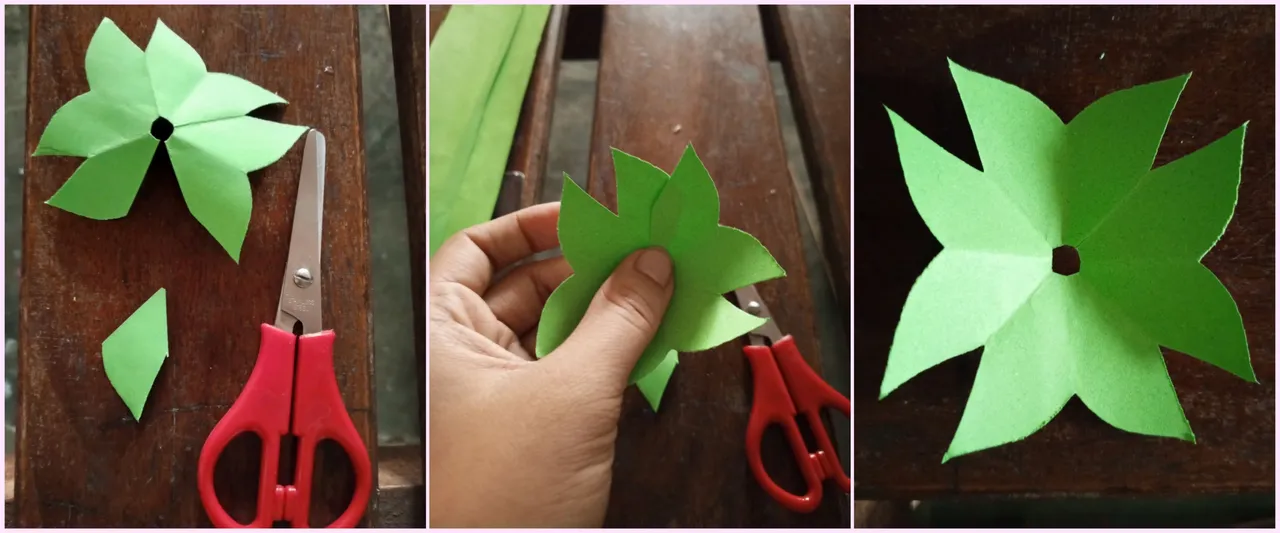
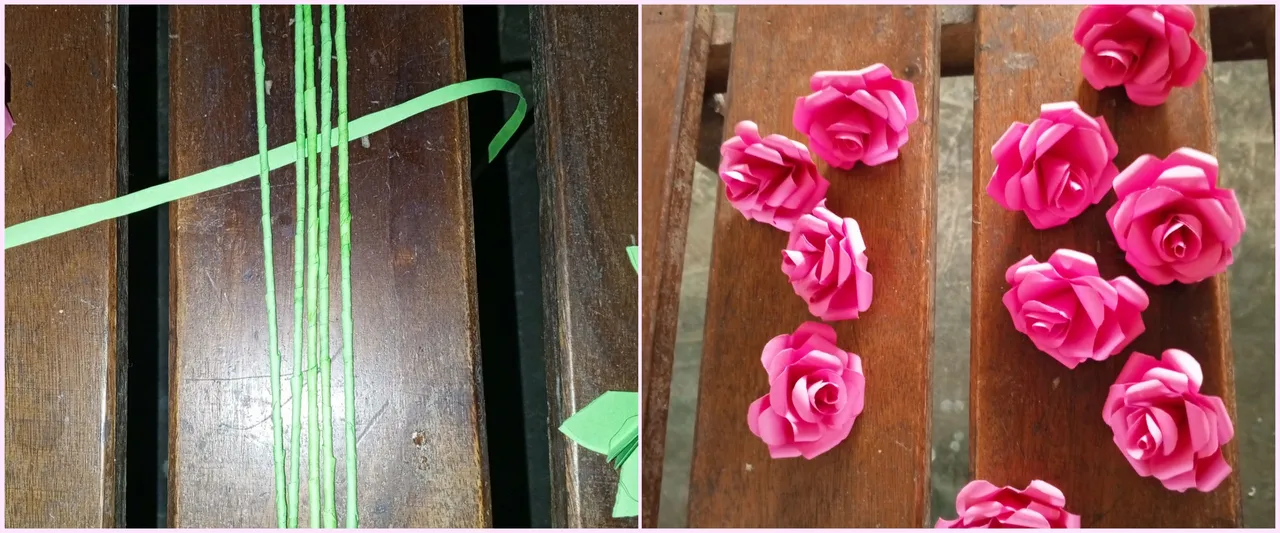
Por otra parte, vamos a forrar los palitos de altura con la cartulina verde. Recortaremos tiras largas del tamaño que deseen y procedemos a pegarlas a los palitos con el silicón. Finalizando esto, vamos a hacer las hojas de la flor. Como dice la imagen recortaremos un cuadrito de 11x11cm (Me había equivocado, esto es para que les salga más grande y sobresalga de la flor) y haremos los diez (10) para las diez florecitas. Repetimos lo mismo que hicimos en el paso número dos de doblarlo y lo que cambiaria es que en vez de recortarlo tipo gota hacemos una forma de hojita y luego, le recortamos solamente una (1) de las hojitas. Además le recortaremos abajo para que entre por el palito de altura.
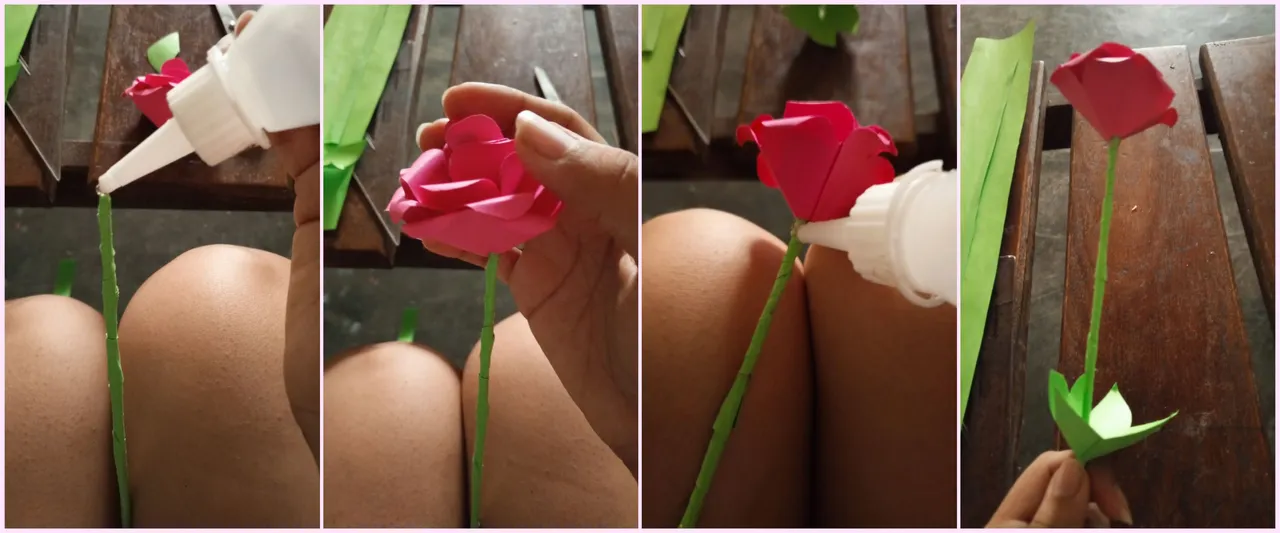
Por último y para finalizar, armamos nuestras florecitas con el silicón o la pega (en este paso utilice los dos porque se me acabó el silicón). Para que el palito de altura entre en las flores, la recortaremos abajo haciéndole un hoyito y solamente le aplicamos silicón al palito de altura y lo pegamos a la flor.
With the 8x8 cm square that we have already cut out, we are going to mark it on the pink cardboard about thirty (30) times, since three (3) squares are needed to make a flower. In this case, we will make ten (10) little flowers to make a mini bouquet. After marking them on the cardboard, we cut them out.
Once the squares have been cut out, we organize them in threes until we reach ten (10) sections, so as not to lose them. Then, we take the first section and fold the first square in half; next, we fold it in half again and finally in half again. In other words, we have to fold it three (3) times to make a small rectangle. Then, we draw a line giving the illusion that when we cut it out it will have the shape of a drop. This line will go from a little below the center of the rectangle to the other end. This can be better seen in the images below.
Repeat the previous step with the other sections until there are no more rectangles left. Now all that remains is to cut out the three flower shapes. We will cut one (1) petal from the first one, then we will cut two (2) petals from the second one and, finally, we will cut three (3) petals from the third one. Keep the remaining petals to glue them with cold silicone and assemble the flower.
In this step we will glue and assemble the flower (as shown in the image) leaving each one in that shape and using the leftover petals that we cut out previously. To give it more petal shape we will place the height stick below the petal and roll it down a little bit. This can be seen better in the gif. Then, we continue assembling the petals, one on top of the other. From the smallest to the largest until we get this result. We repeat this with the other 9 petals or the ones you have made.
On the other hand, we are going to line the tall sticks with the green cardboard. We will cut long strips of the size you want and proceed to glue them to the sticks with the silicone. Finishing this, we are going to make the leaves of the flower. As shown in the picture, we will cut out a 11x11cm square (I was wrong, this is so that it will be bigger and stand out from the flower) and we will make the ten (10) for the ten little flowers. We repeat the same thing we did in step number two of folding it and what we would change is that instead of cutting it as a drop, we make a leaf shape and then, we cut only one (1) of the leaves. We will also trim the bottom so that it will fit through the height stick.
Finally and to finish, we assemble our little flowers with silicone or glue (in this step I used both because I ran out of silicone). For the height stick to fit into the flowers, we will cut a small hole in the bottom of the flower and then we just apply silicone to the height stick and glue it to the flower.
•💐💖IMAGES OF STEP 1&2💐💖•
•💐💖IMAGES OF STEP 1&2💐💖• 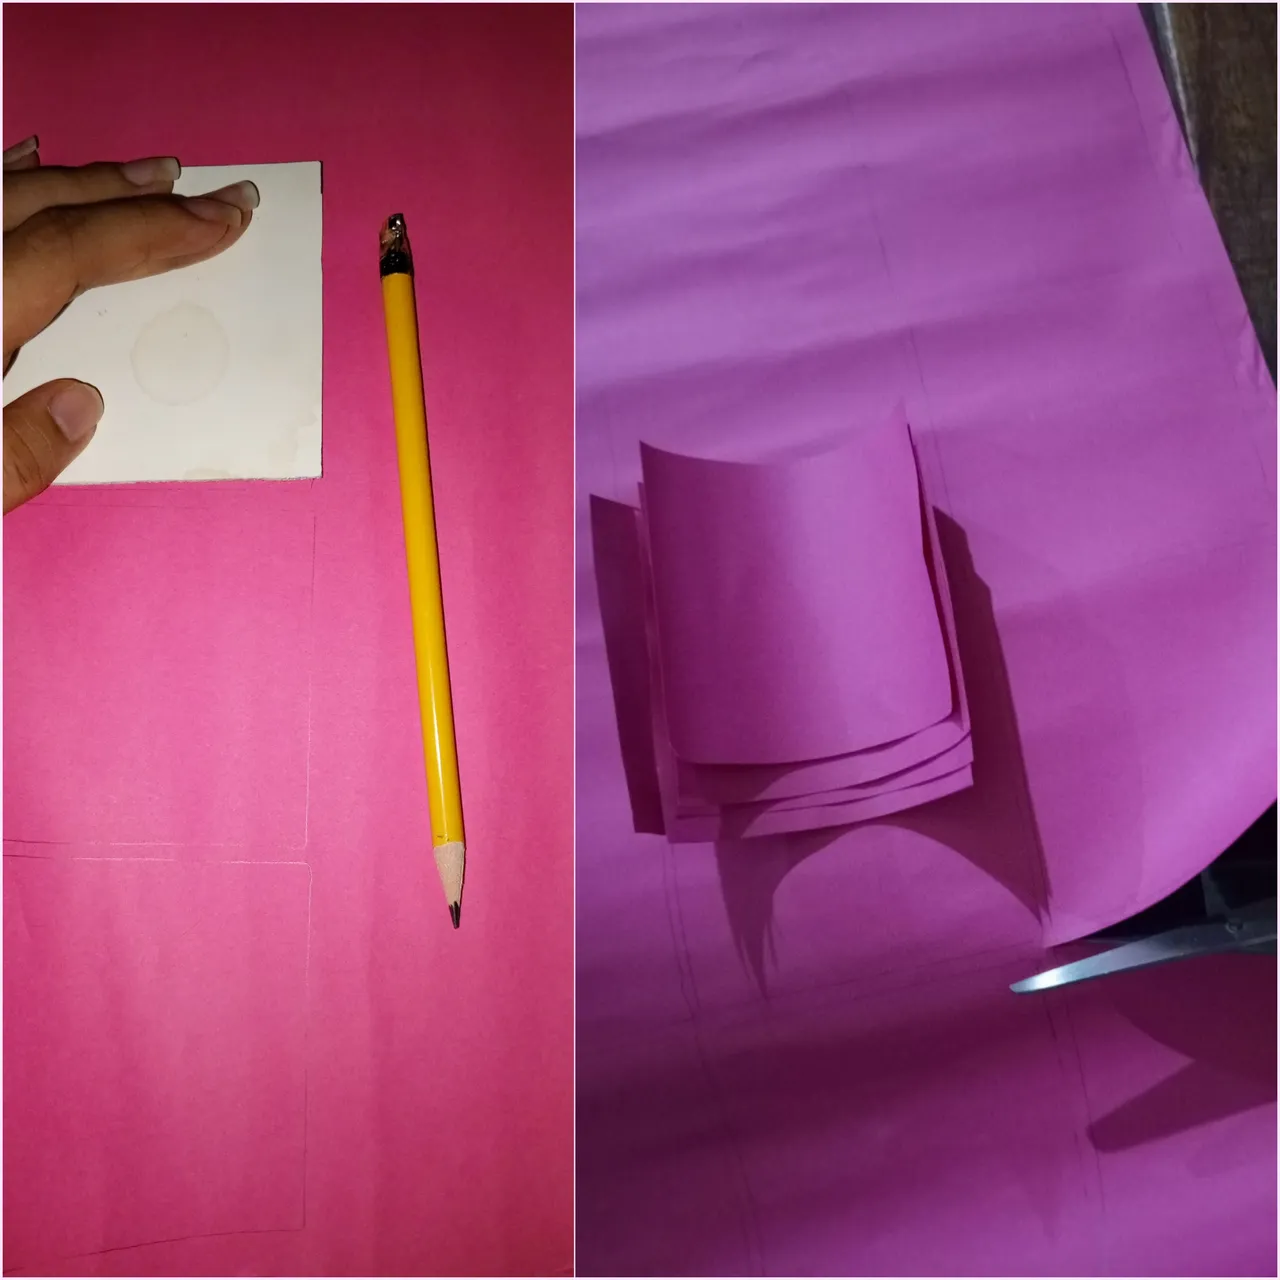

•💐💖IMAGES OF STEP 3&4💖💐•
•💐💖IMAGES OF STEP 3&4💖💐• 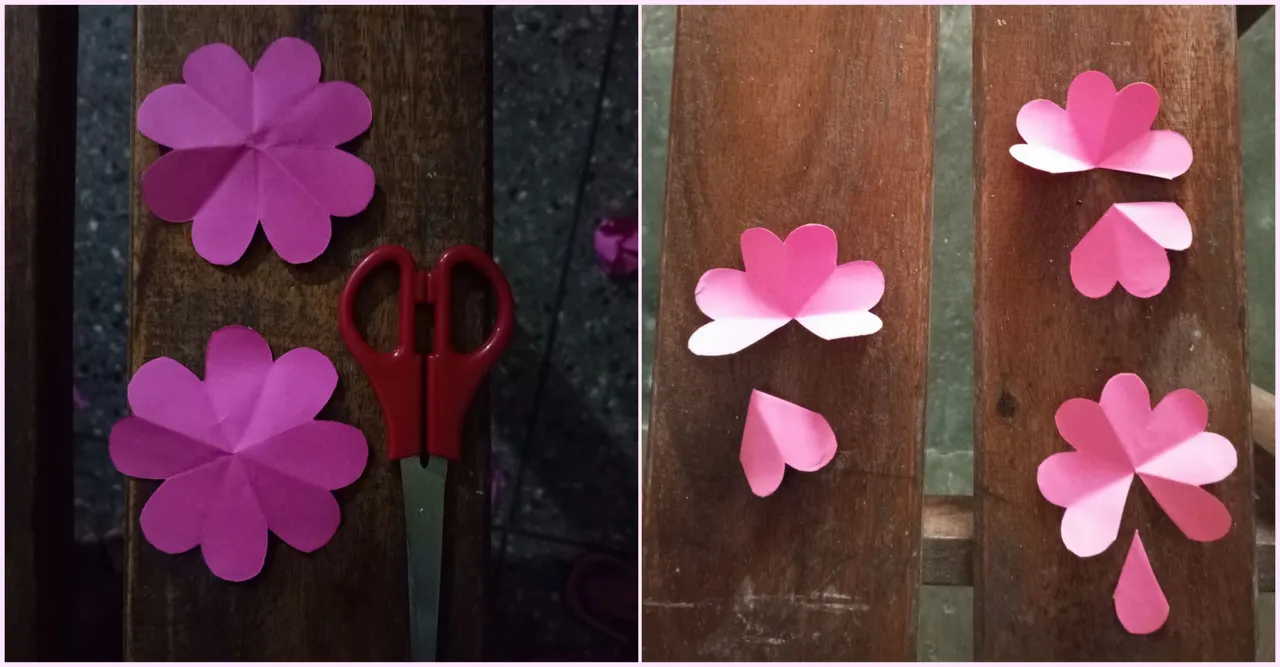
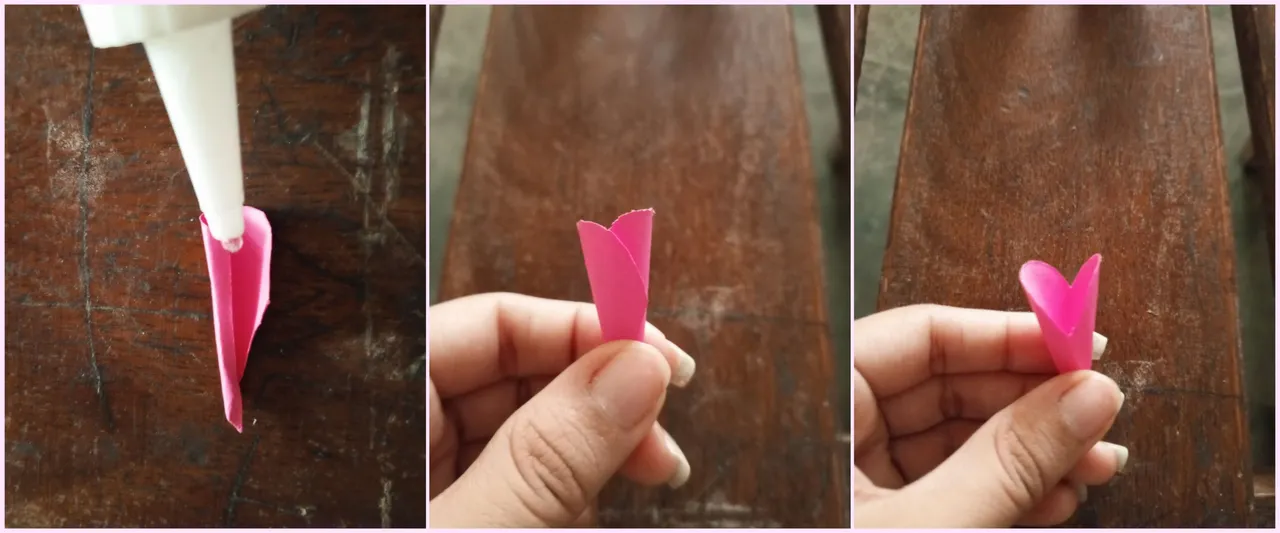
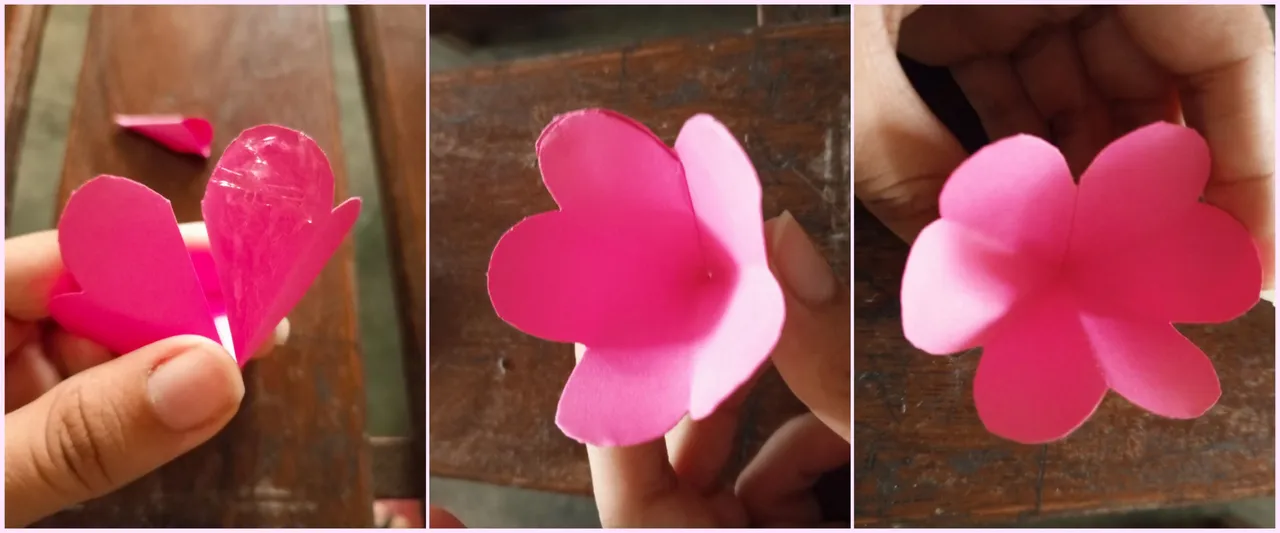
•💐💖IMAGES OF STEP 5&6💖💐•
•💐💖IMAGES OF STEP 5&6💖💐• 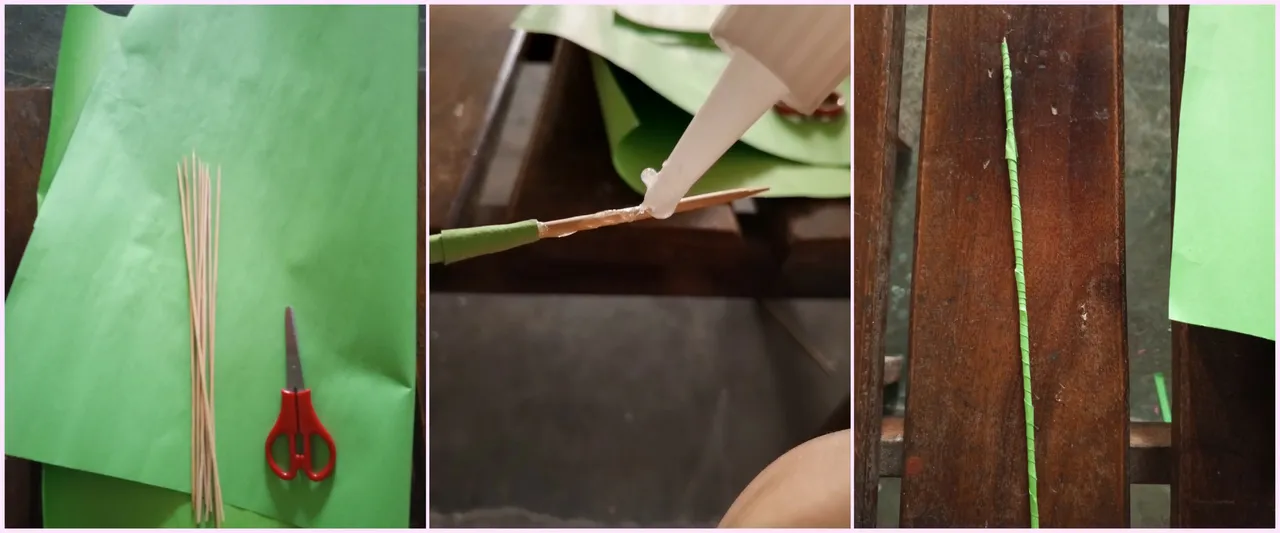

•💐💖RESULT💐💖•
•💐💖RESULT💐💖•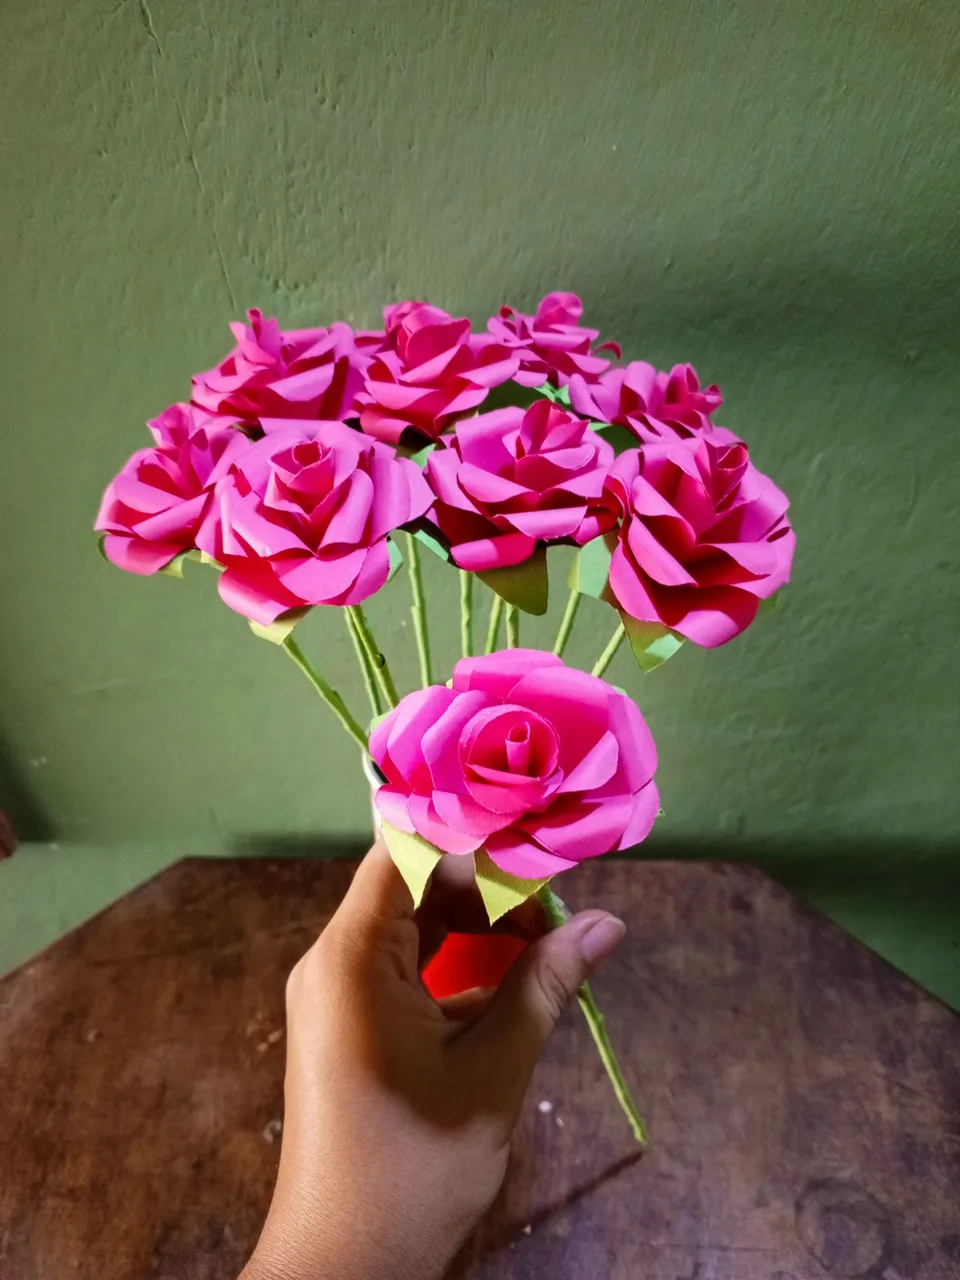
Y este es el resultado😊
Realmente espero que puedas hacer esta manualidad tan bonita, sobretodo que se lo regales a alguien especial. Espero poder traerles pronto como hacer girasoles con cartulina. Apreciaría mucho que me comentaras que si te gustó el resultado como a mí😊💐💖.
I really hope you can make this beautiful craft, especially if you give it as a gift to someone special. I hope to bring you soon how to make sunflowers with cardboard. I would really appreciate if you could comment me if you liked the result as I did😊💐💖.

💞Thank you so much for making it this far! I hope you liked my post, I'll see you next time!💞
💞¡Muchas gracias por llegar hasta aquí! Espero que te halla gustado mi post. ¡Nos vemos en una próxima oportunidad!💞
📲 Todas las fotografías fueron tomadas con un teléfono Tecno Spark 10 pro
📷 TODAS LAS FOTOS SON DE MI PROPIEDAD