English
Some time ago I went to the beach on vacation. I had a great time and one of the little things I brought back as a souvenir were snails. Seeing them there, on the shelf where I place these souvenirs and figurines, I thought of doing something with them.
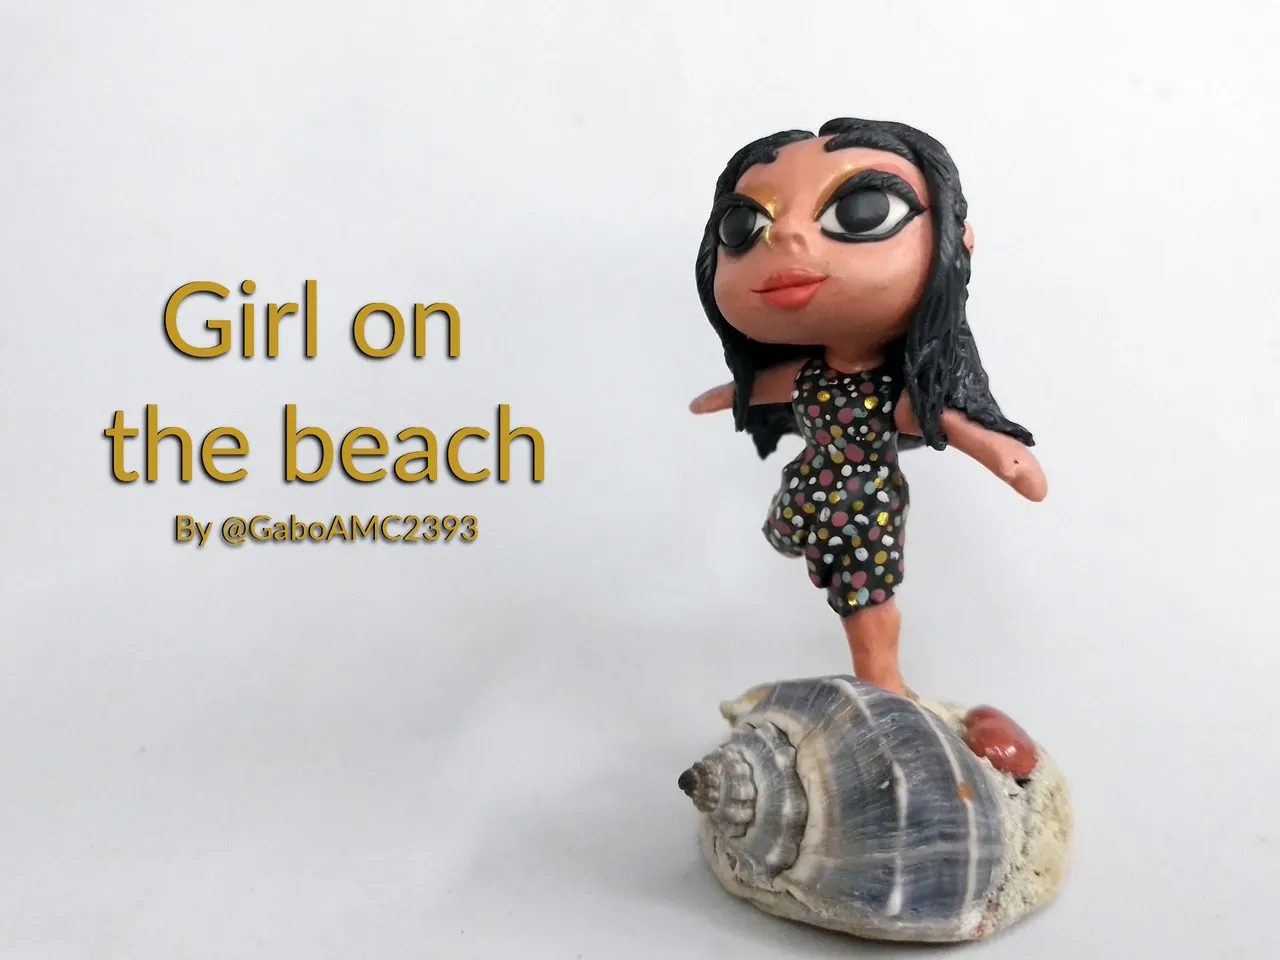
I have several projects in mind, but one of the things that came to my mind was to integrate them into a beach themed sculpture. I present to you then, this little sculpture of a Girl on the beach.
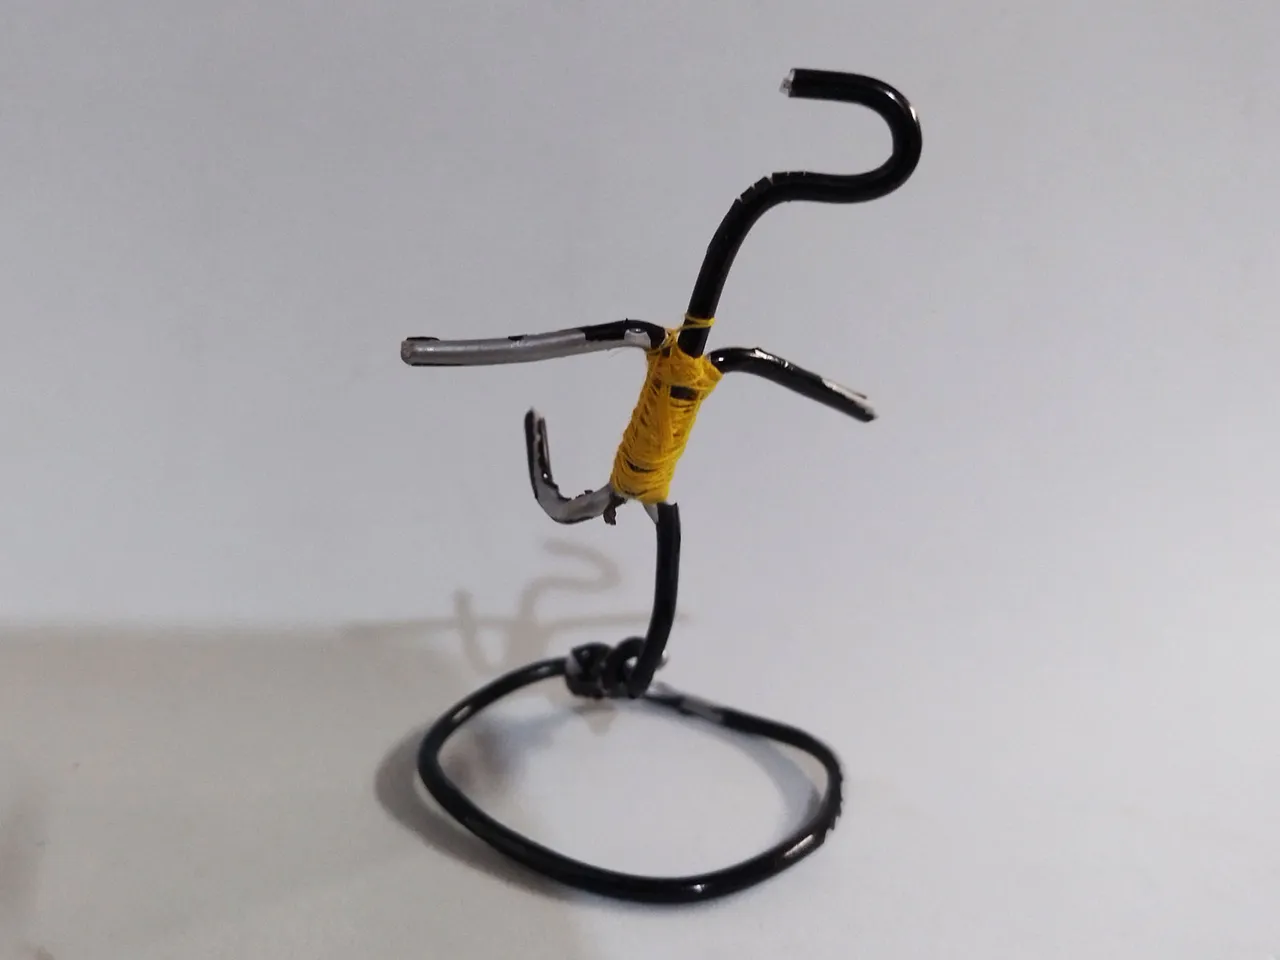
As you know, this kind of sculptures I make are usually supported by a wire skeleton. It is not always like that, but this one needed one, because it was a sculpture with a dynamic pose, that is to say, a pose that simulates movement.
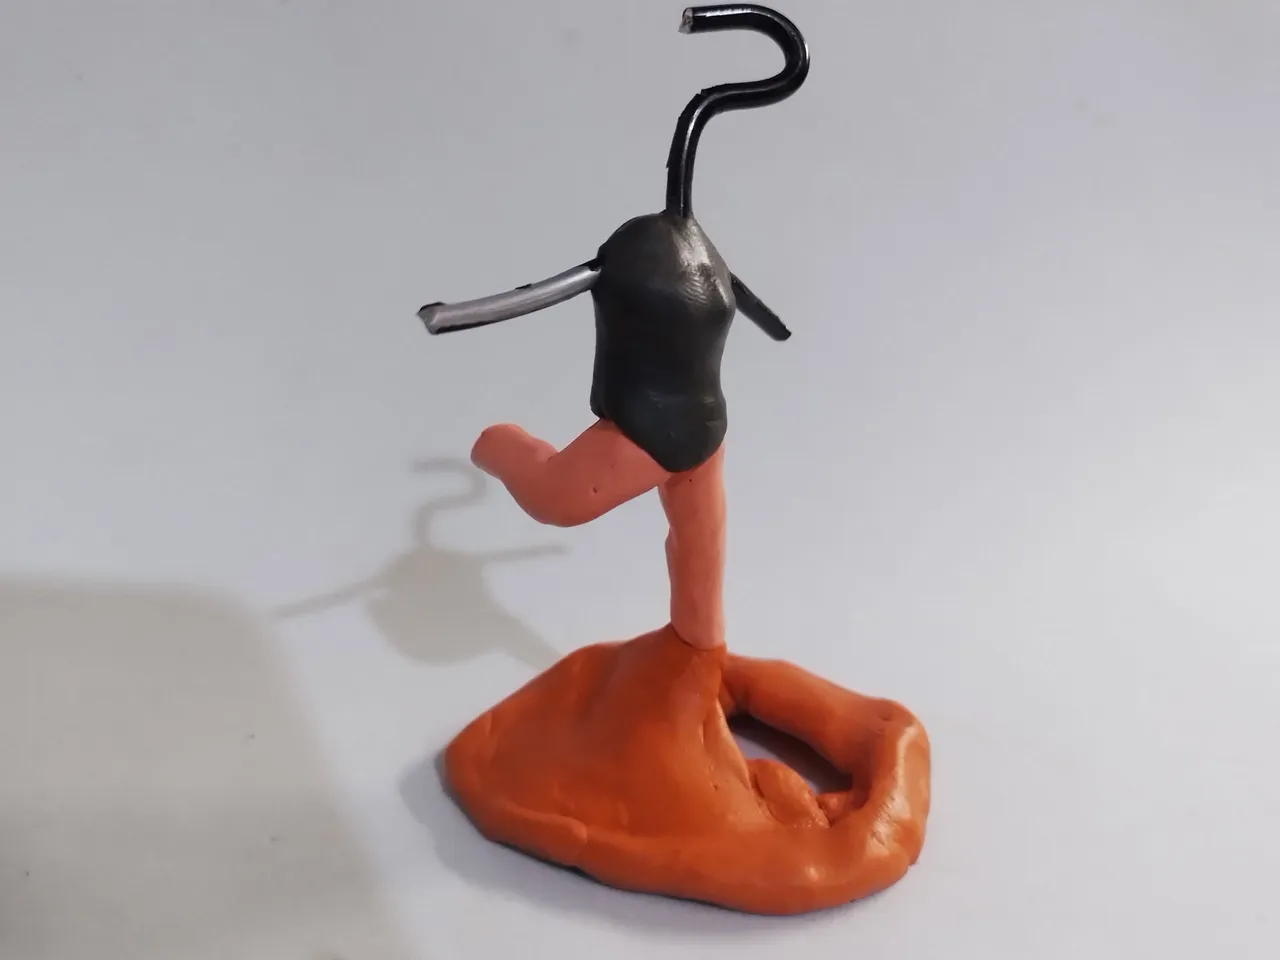
As you can see below, this was the skeleton I designed for the figurine. It is made with aluminum wire and attached with thread, lots of thread. Because of the size of the figurine it is not necessary to use glue, the same thread, together with the same friction of the wire, will be enough to hold it:
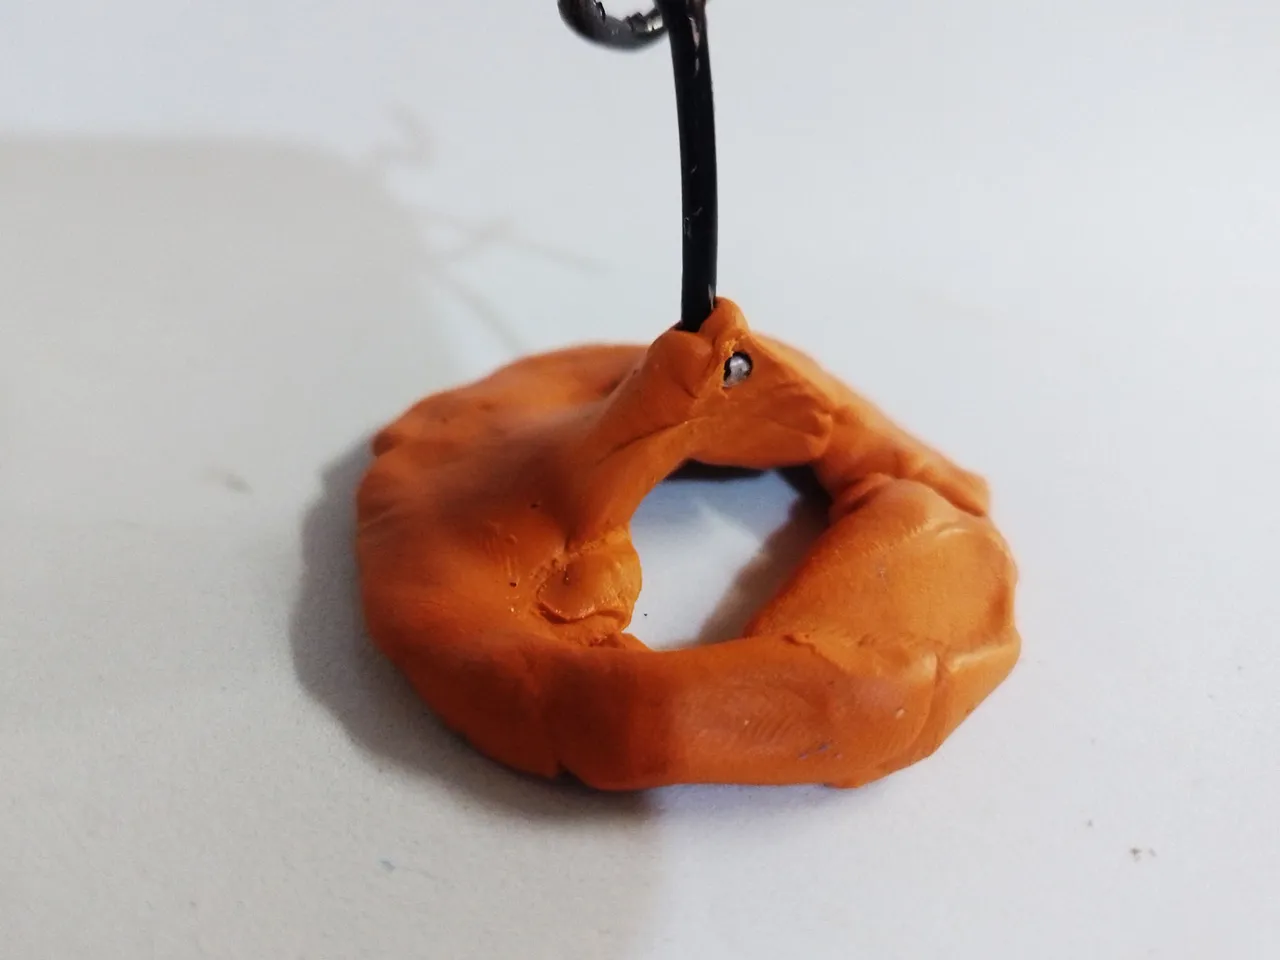
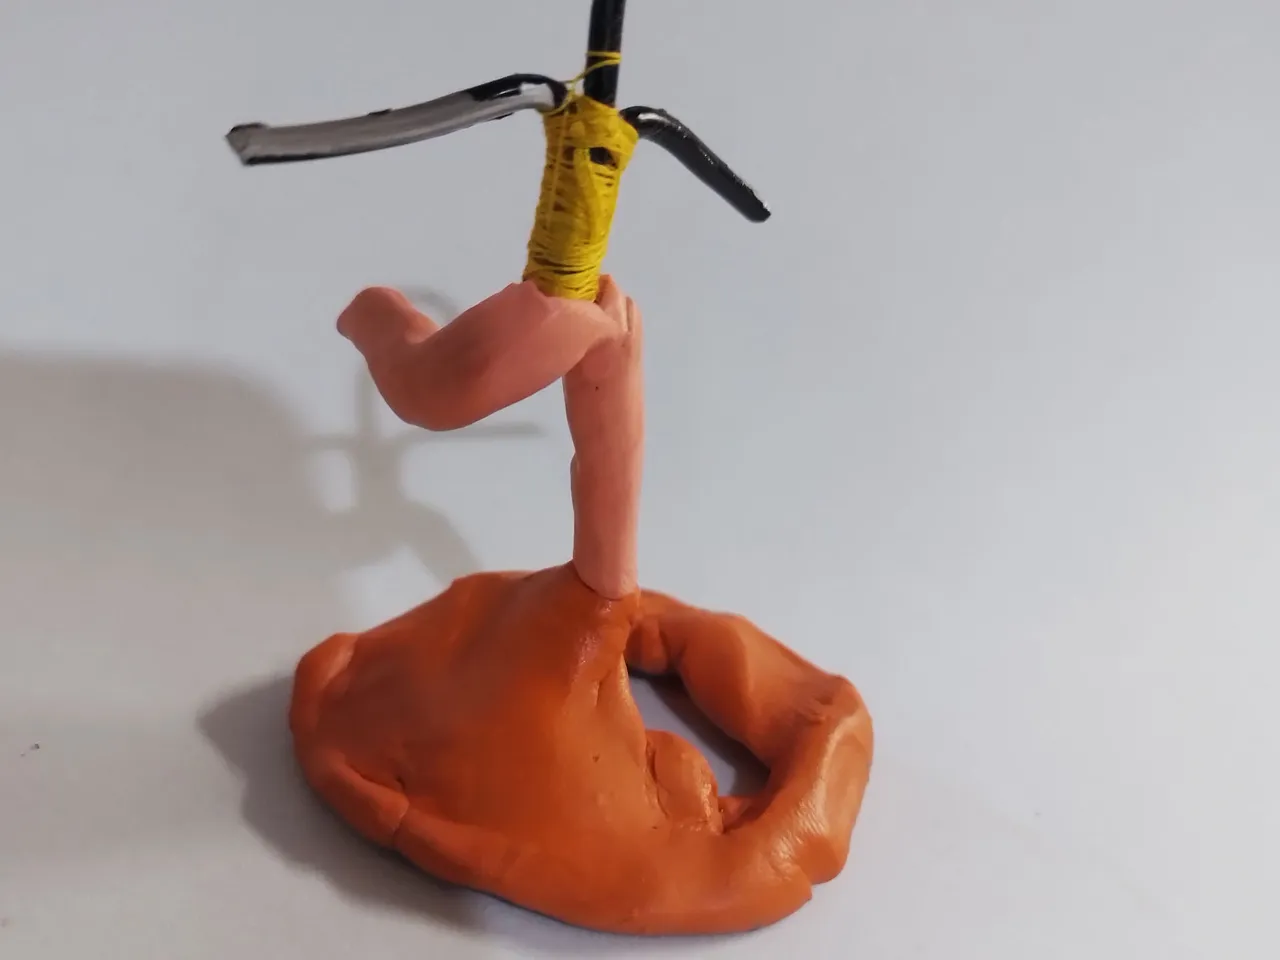
I immediately began to work on the base, as I would place the legs, which would be uncovered, on top of it. I made them of a light skin color, but with a bit of orange, as if they were tanned by the same sun of the beach.
As you can see, one leg is resting on the ground and the other one is raised, that's what I meant by a dynamic pose. This is the reason why it must have a wire skeleton, to keep this shape.
 |  |
|---|
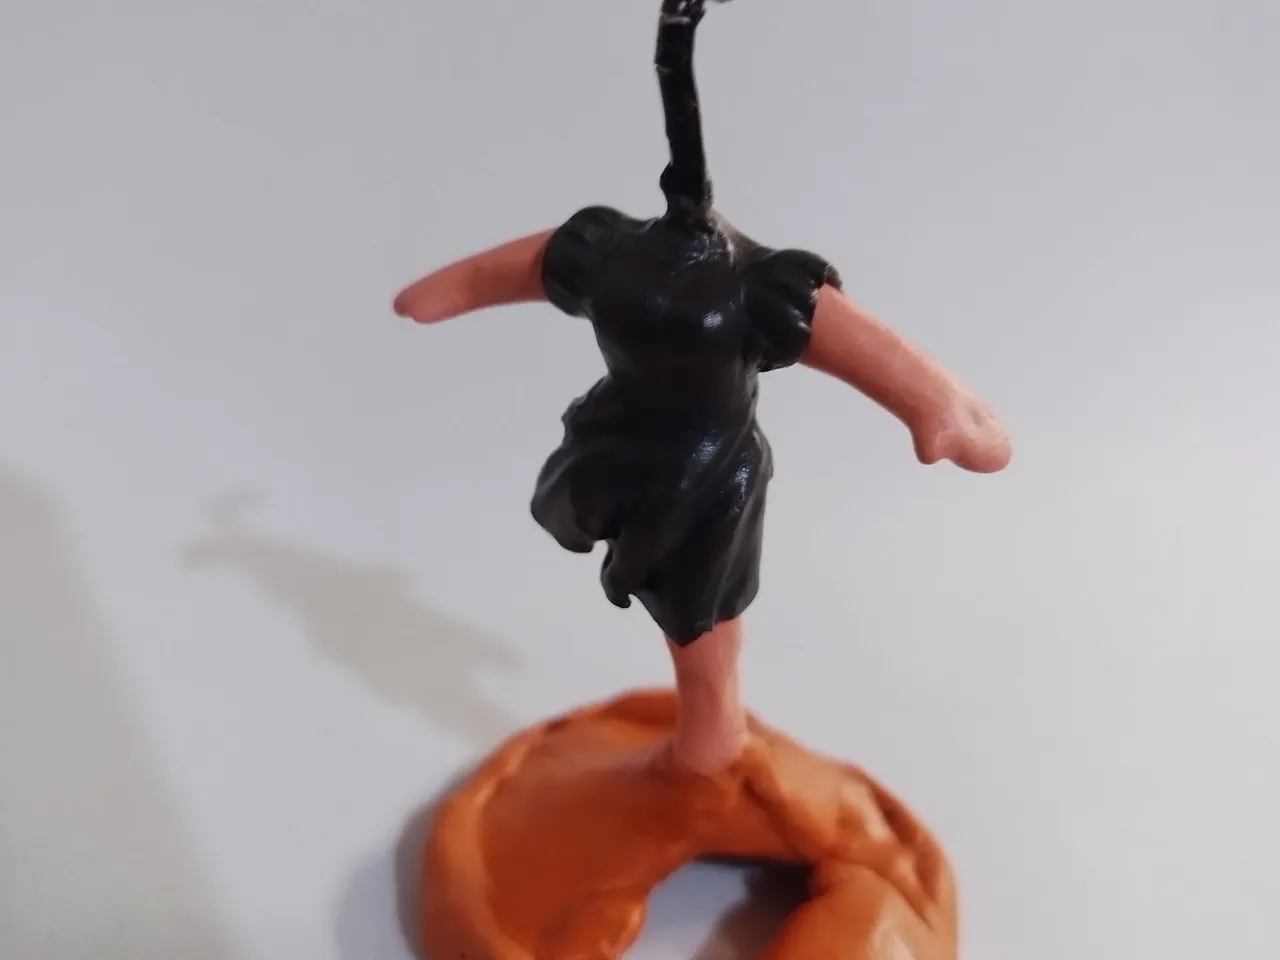
The next design I chose was a black swimsuit that, if you look at the cover image, I will paint later; however, here you can see the initial shape of the swimsuit, only the torso area and part of the waist.
Although it is a one-piece swimsuit, I made a sort of skirt to cover the waist a little and give more volume to this area, something very characteristic of the female form.
Although more than a swimsuit, it would be something more like a robe or a short garment of thin fabric, as you prefer to consider it. In any case, it's the outfit I thought of for the figurine. It should be noted that I also added some "fabric" on the shoulders when placing the little arms of the figurine.
In the image below you can see several things that I did not detail in the previous image.
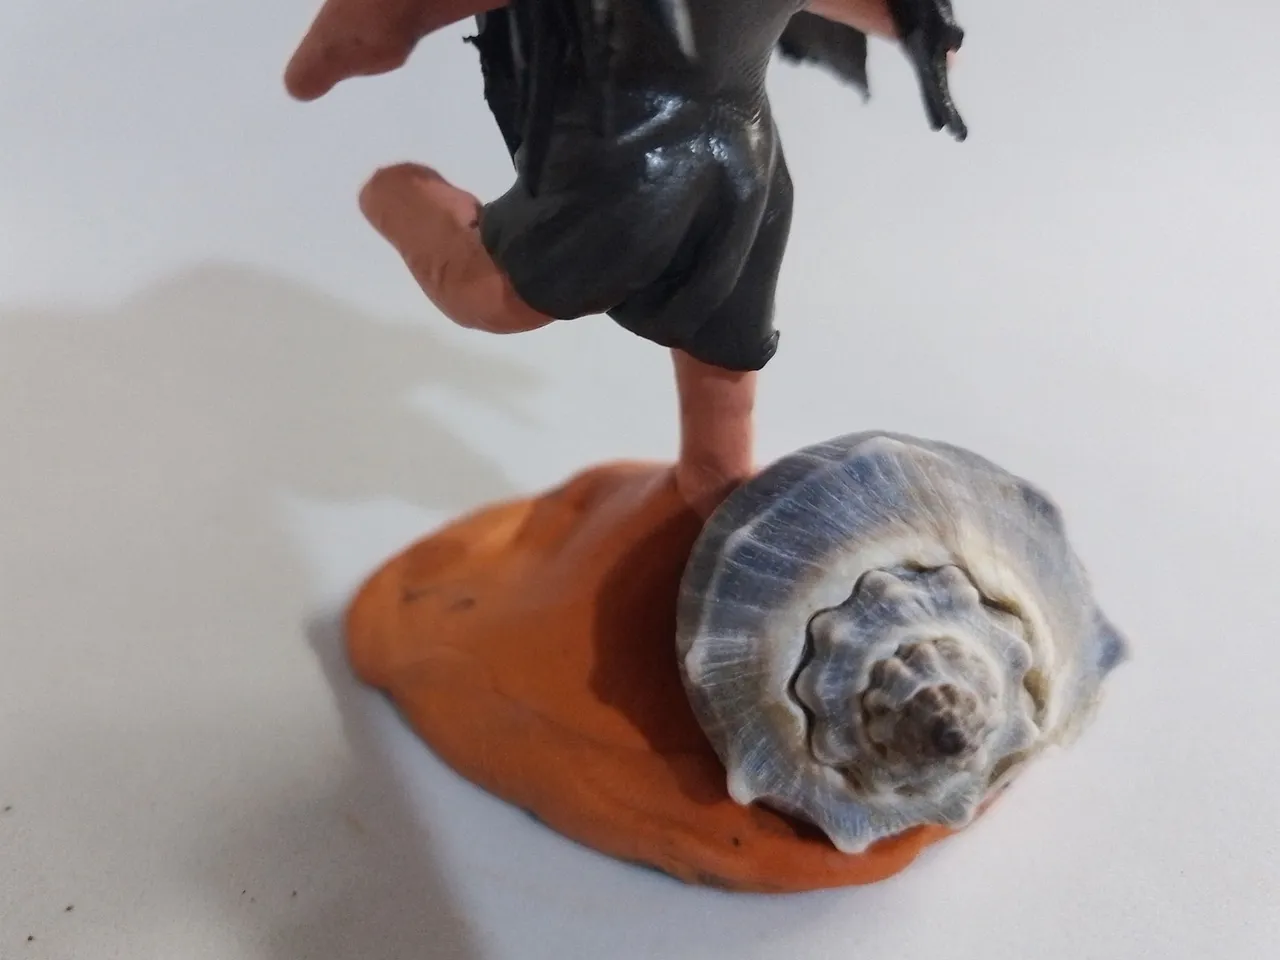
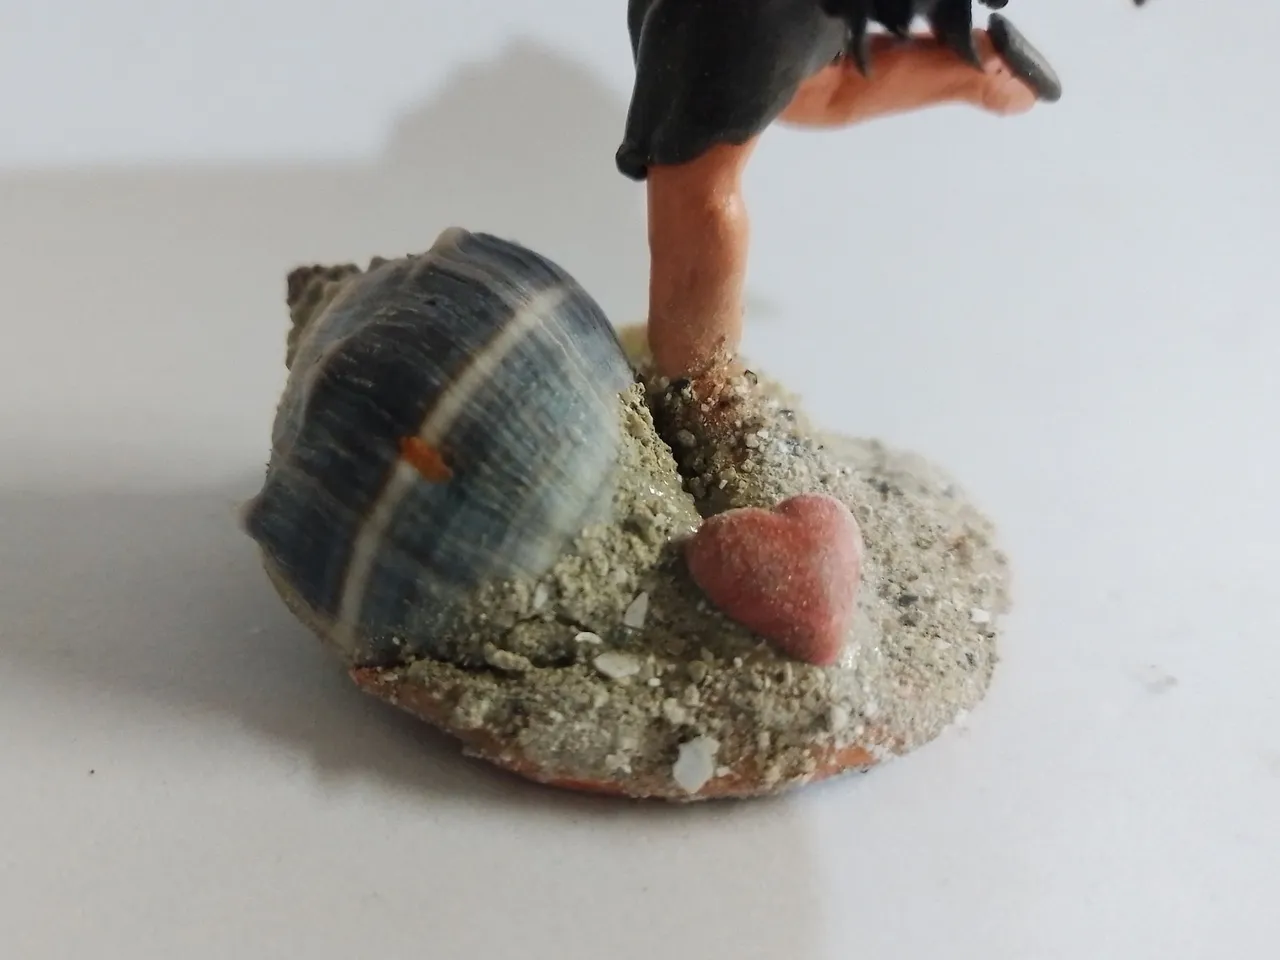
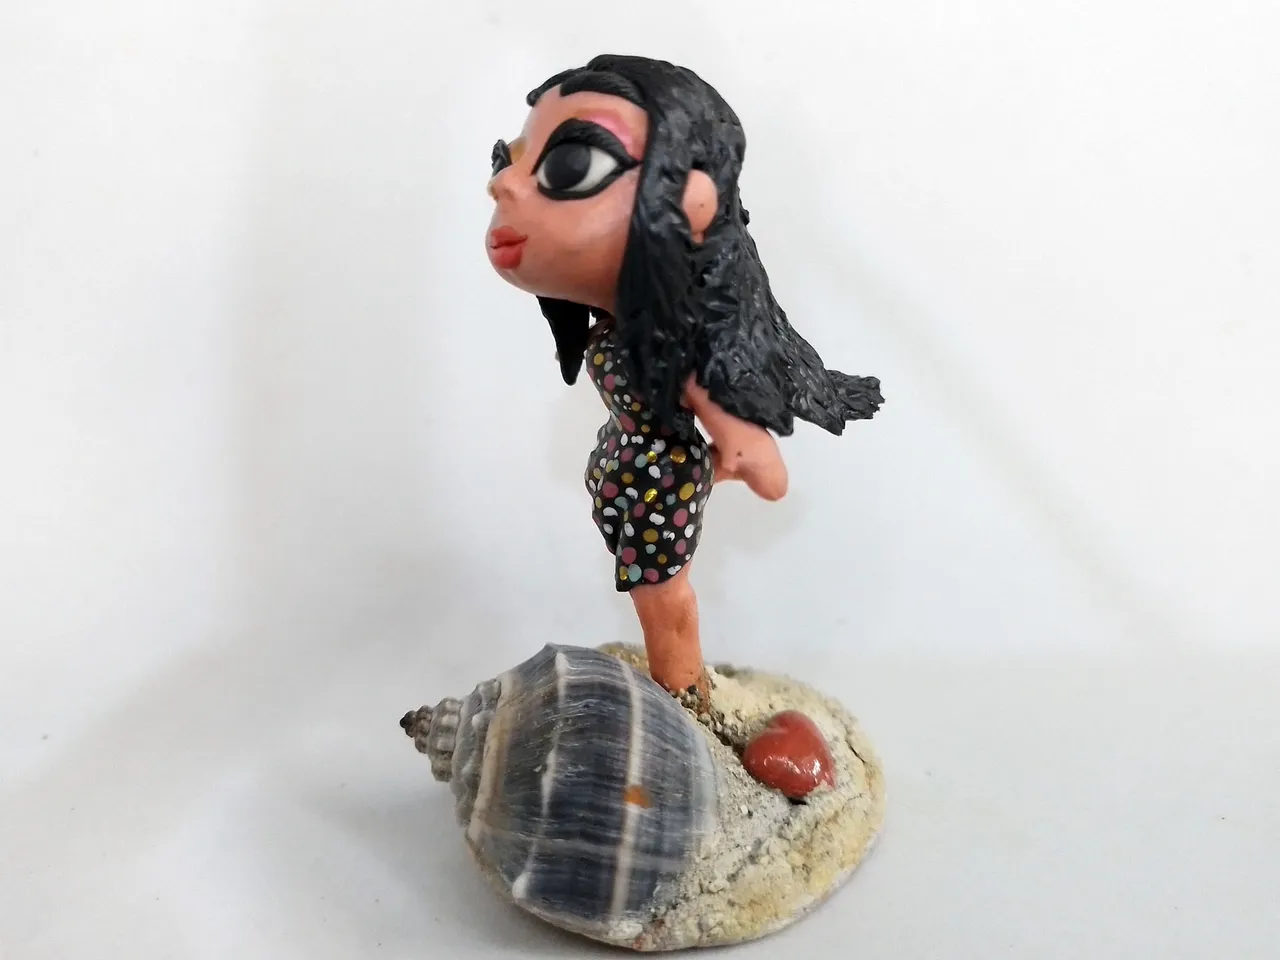
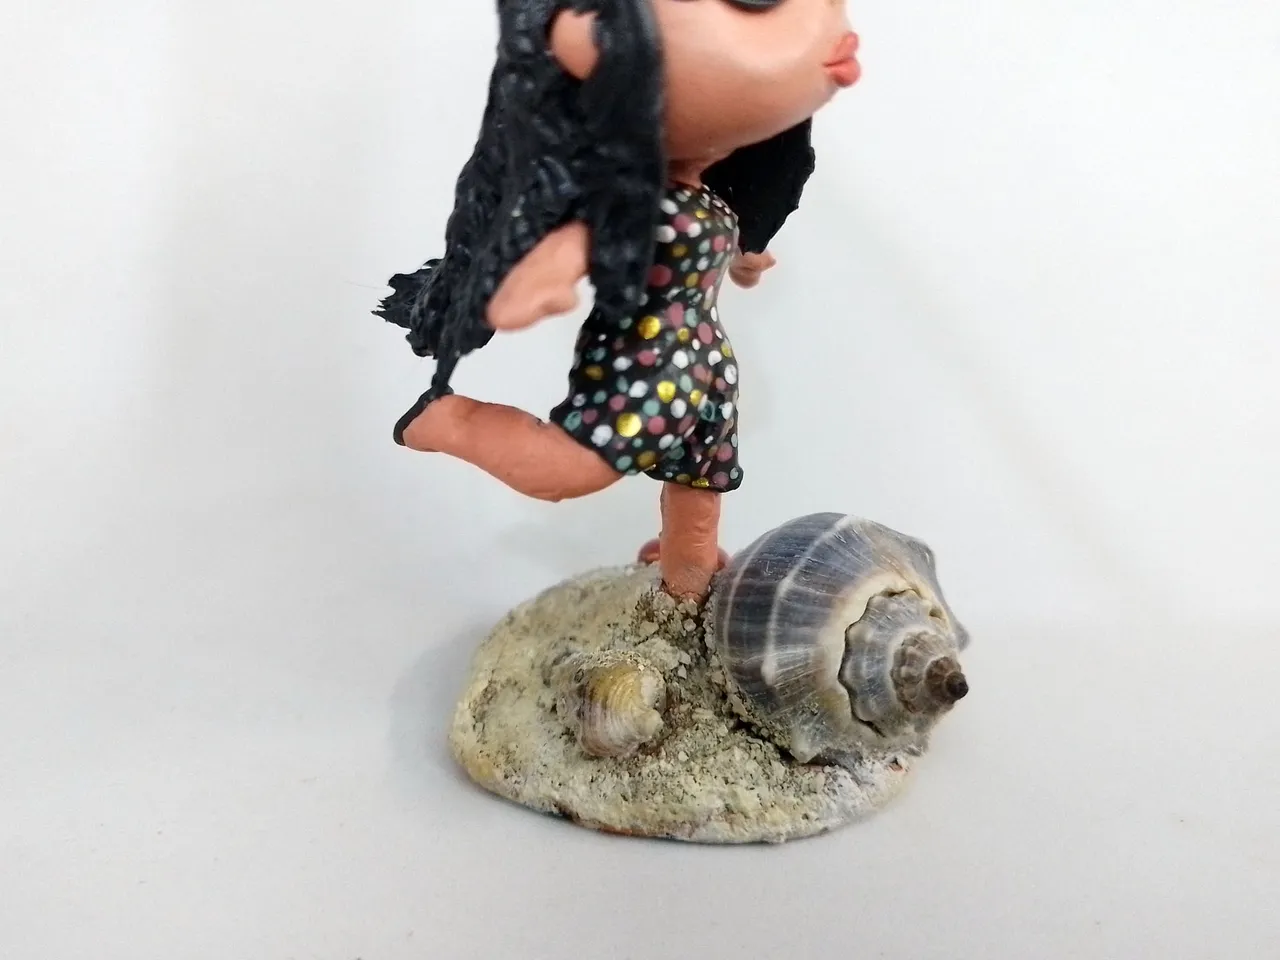
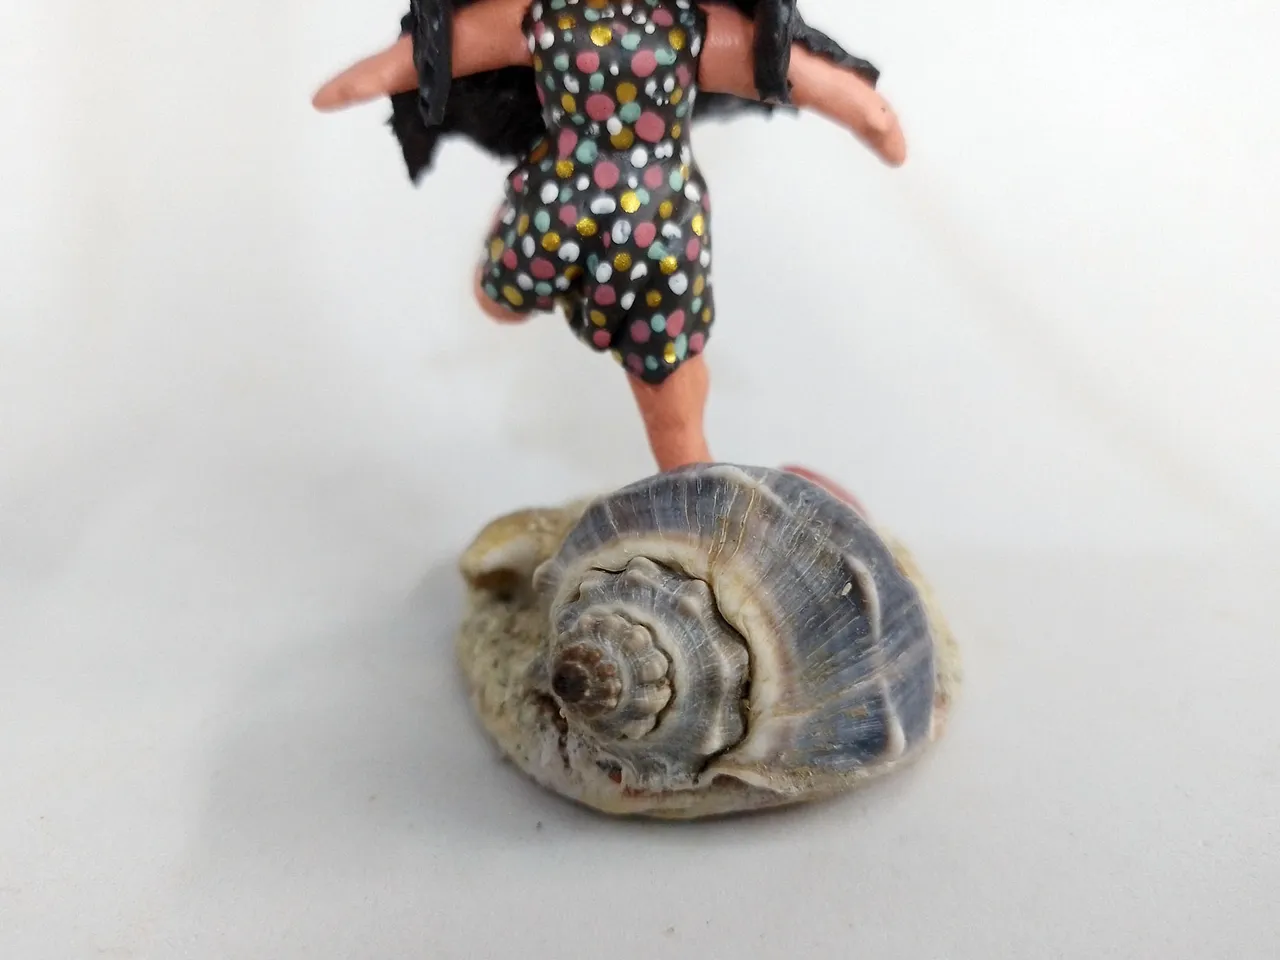
First of all, I incorporated what I had thought of this figure for, a beach snail. Although this snail is huge compared to the size of the figurine, it is a great detail that, despite being huge, does not stand out above the protagonist of the diorama.
On the other hand, in the image you can clearly appreciate the undulations of the dress, simulating the wind that must be in the place.
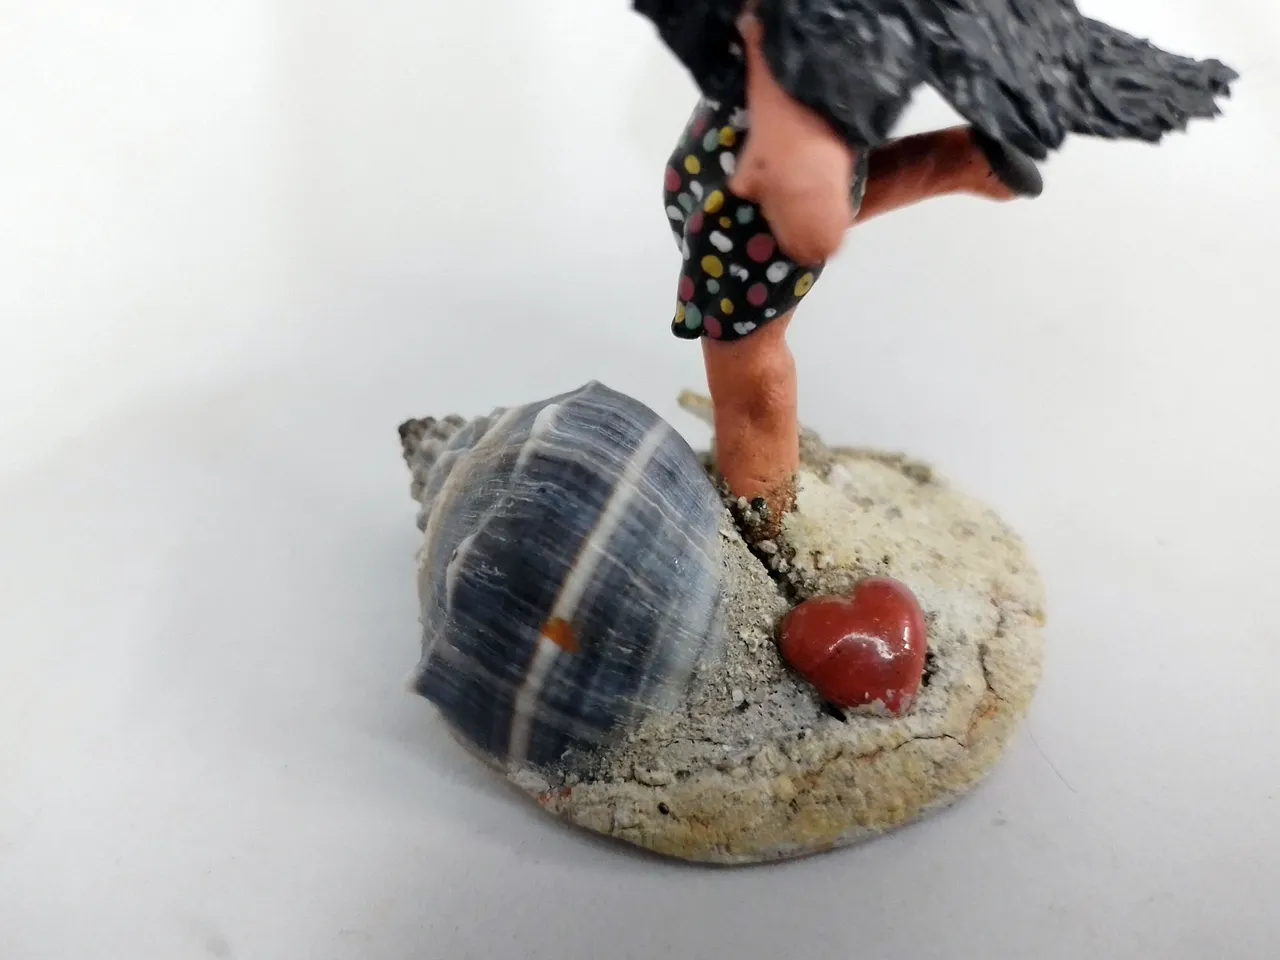
You may be wondering how I made the beach sand you see in the cover image, but I didn't use real beach sand if that's what you're thinking.
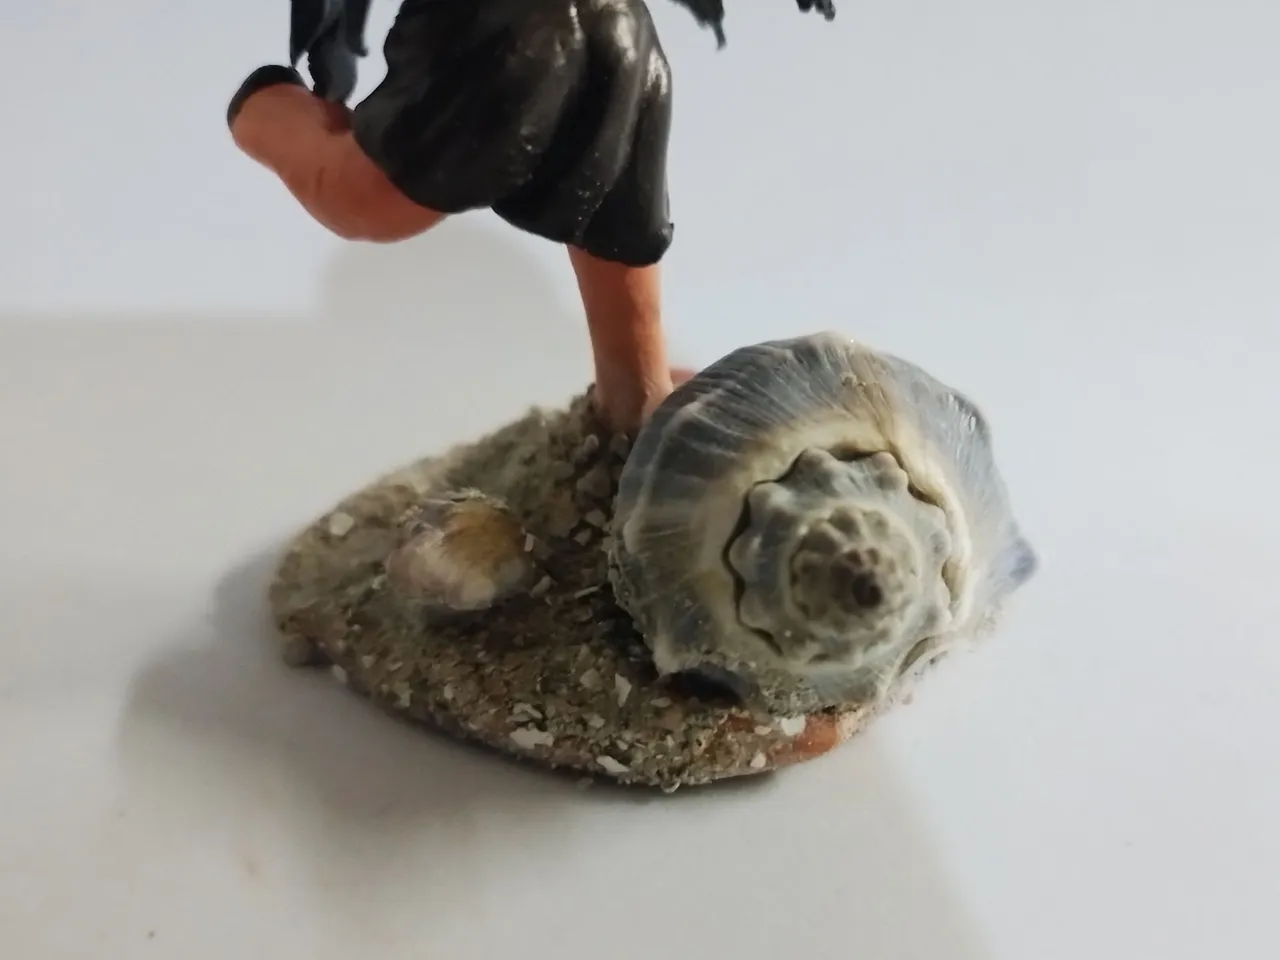
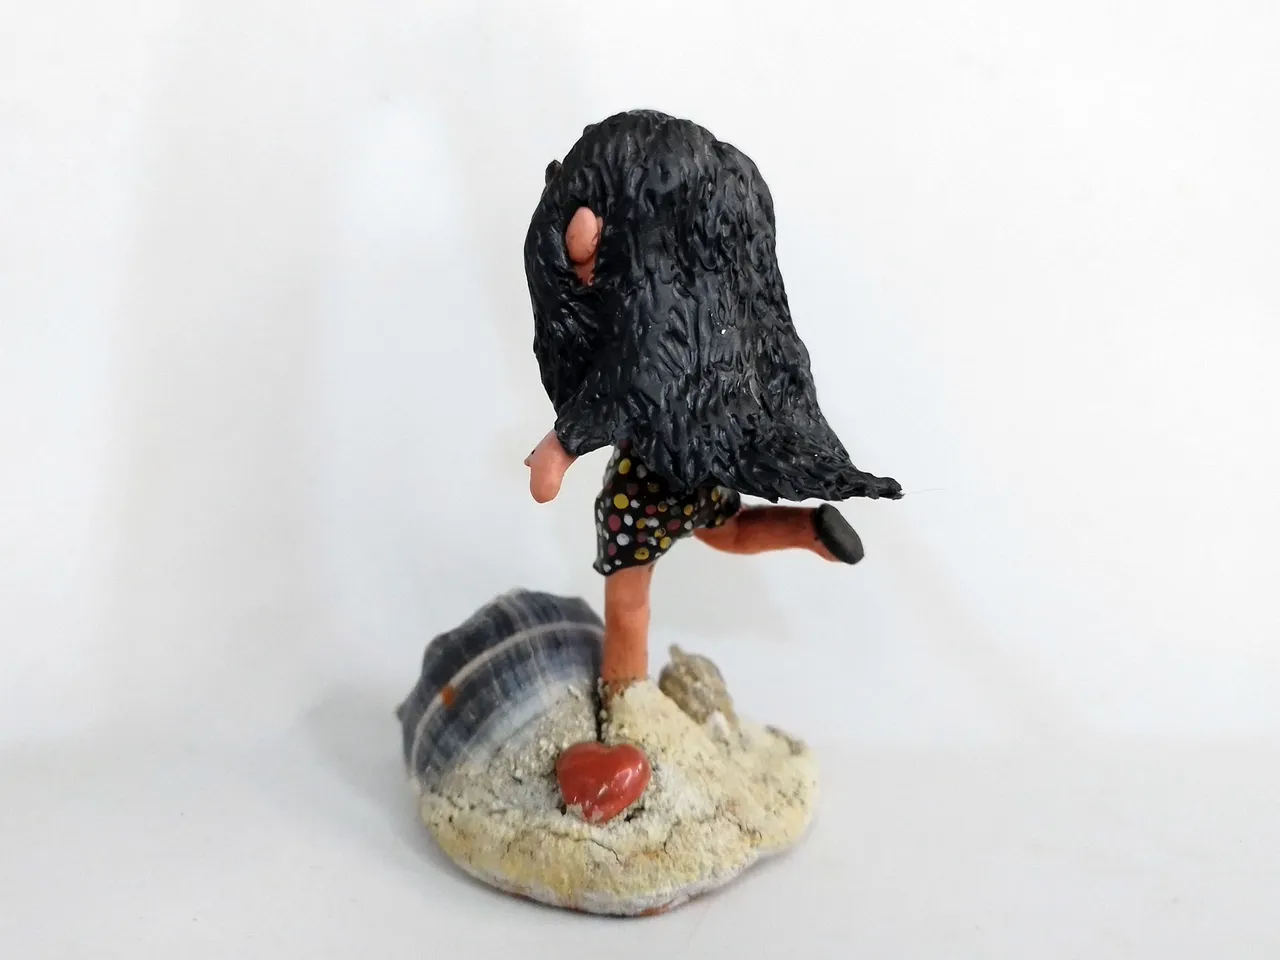
To add it to the figurine I first covered the entire area, including the bottom of the figurine's foot, with glue, lots of glue. Once I added the glue, I threw sand particles from my house all over the base.
I also added another small snail and once everything dried, the sand and the other snails were fixed. I also added a heart just for the heck of it.
 |  |
|---|
The body of the sculpture was almost ready. Now it was time for the head. For the design I decided on a style that mixed that Japanese chibi style and a doll called LOL, because I think they are very cute.
With the design clear in my mind, it was time to mold. I started with a small sphere, which I continued molding until I got the desired shape. Then I did the eyes, lips and expression lines.
Below you can see a before and after:
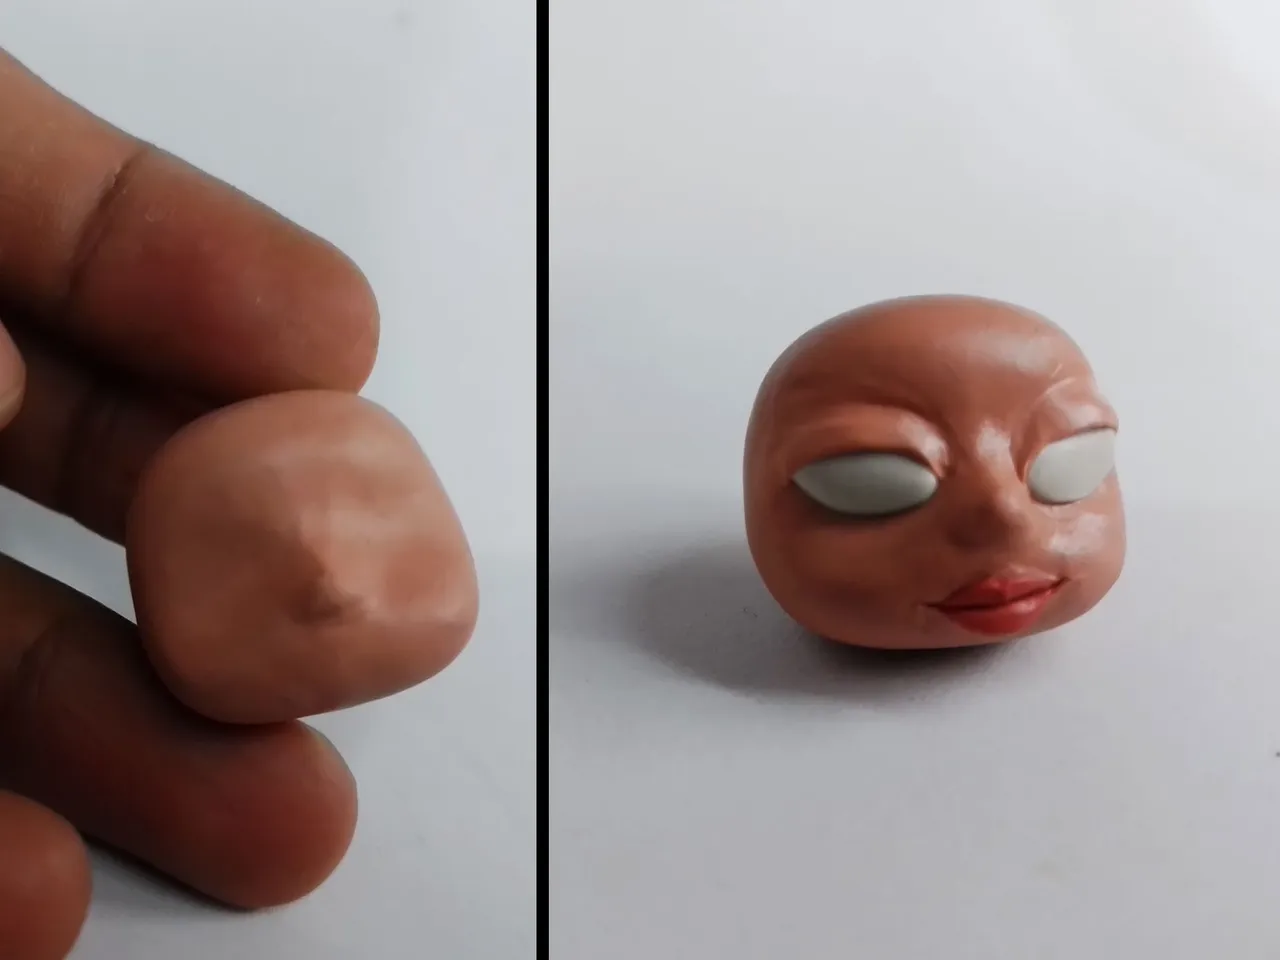
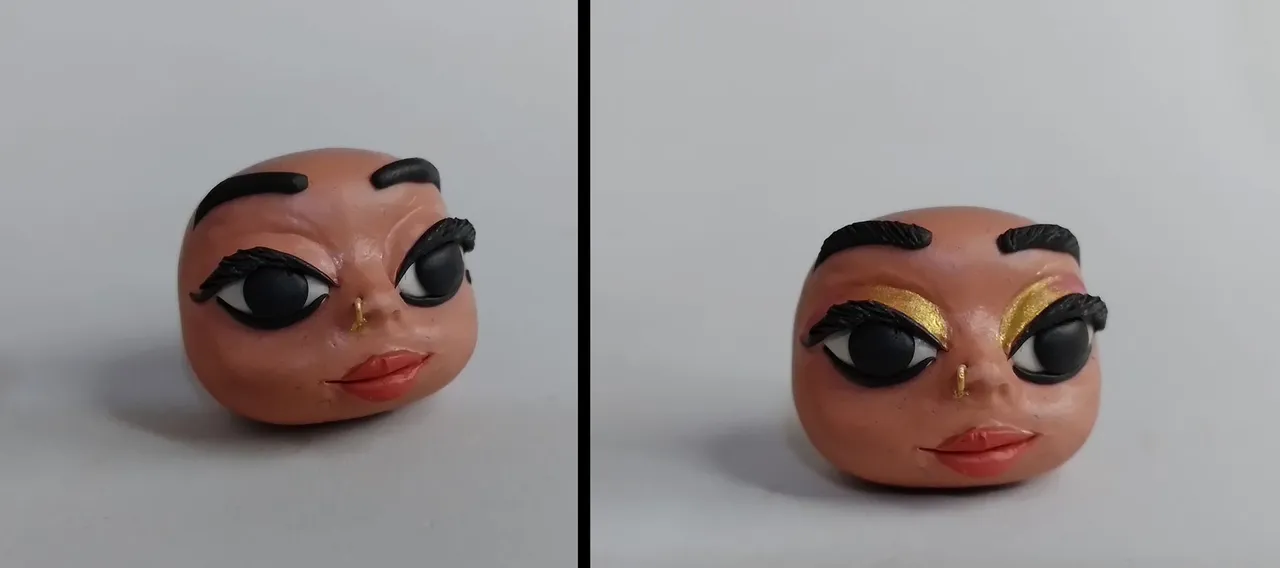
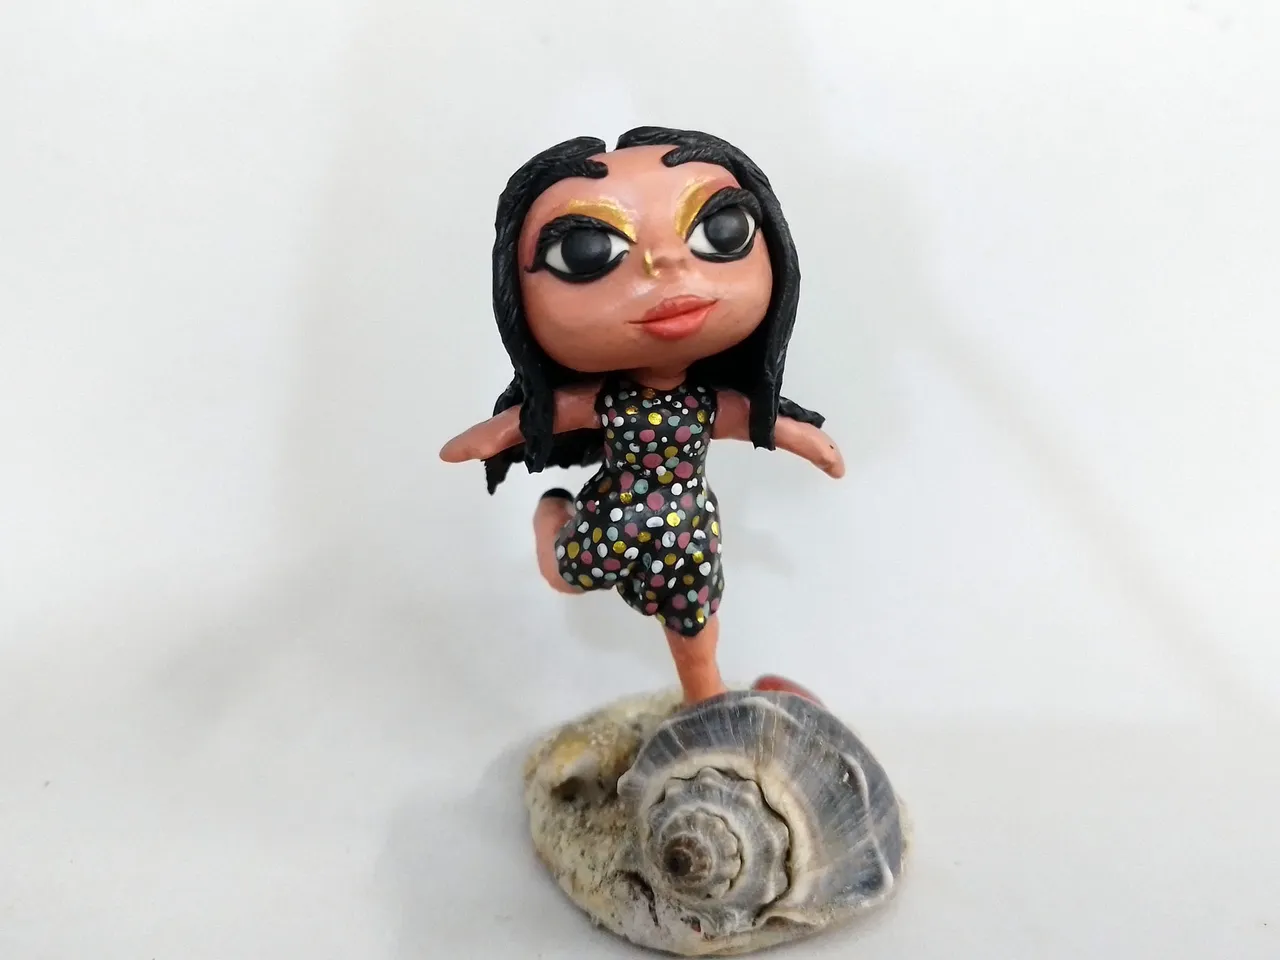
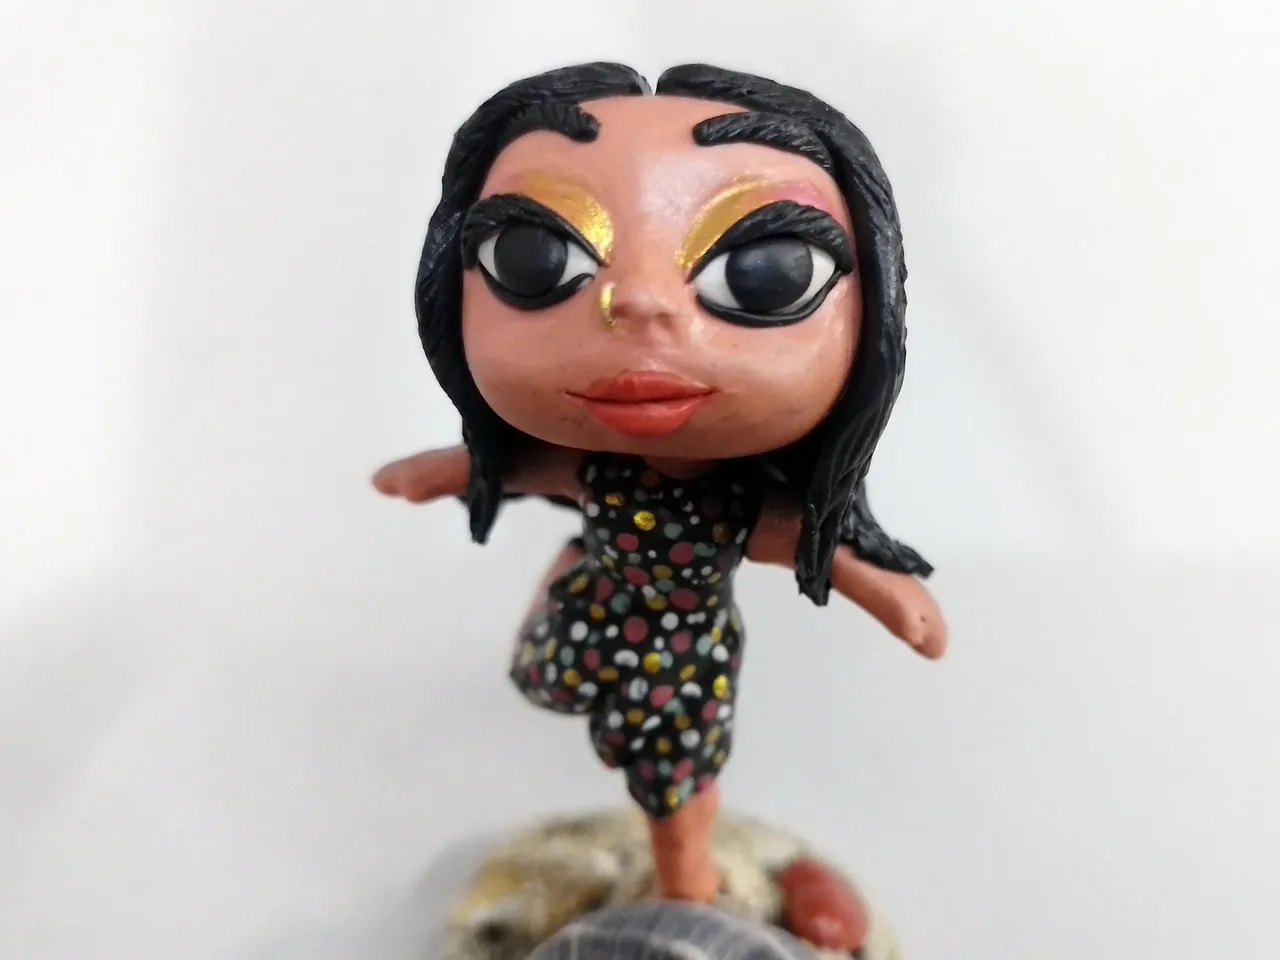
The previous face looks quite simple, but when I started to add the eyelashes, eyebrows and make-up, it took more life and color. I added a gold shadow on the upper eyelid, with a pink gradient and a nose piercing.
As I told you above, I painted the lady's dress. I used the pointillism technique and this is how it turned out, painted with polka dots of different colors.
Once the dress was painted, and after removing the excess of plasticine on the shoulders of the dress, I placed the head. As you can see, it looked great, only the hair is missing.
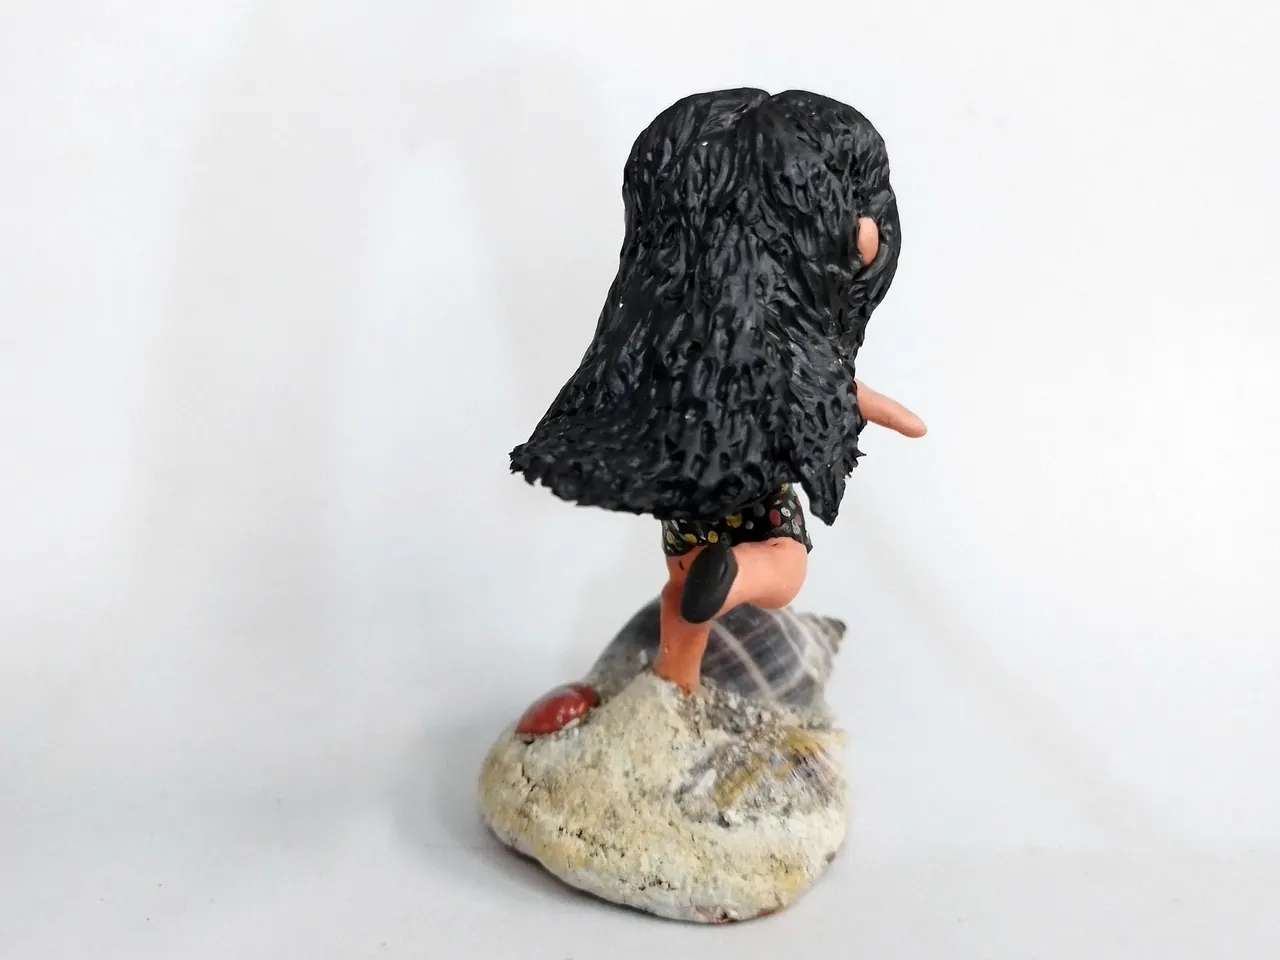
I must confess that the hair is not something that is particularly easy to do. In fact, it is one of the most complicated parts of a figurine, because everything is already ready and when placing the hair you can damage everything else.
Personally, I prefer to place it by parts; that is, I place pieces of hair one by one until I create the shape I want it to have, then, with the help of a wooden stick or my knitting needle, I start shaping it, creating waves and lines that can simulate hair.
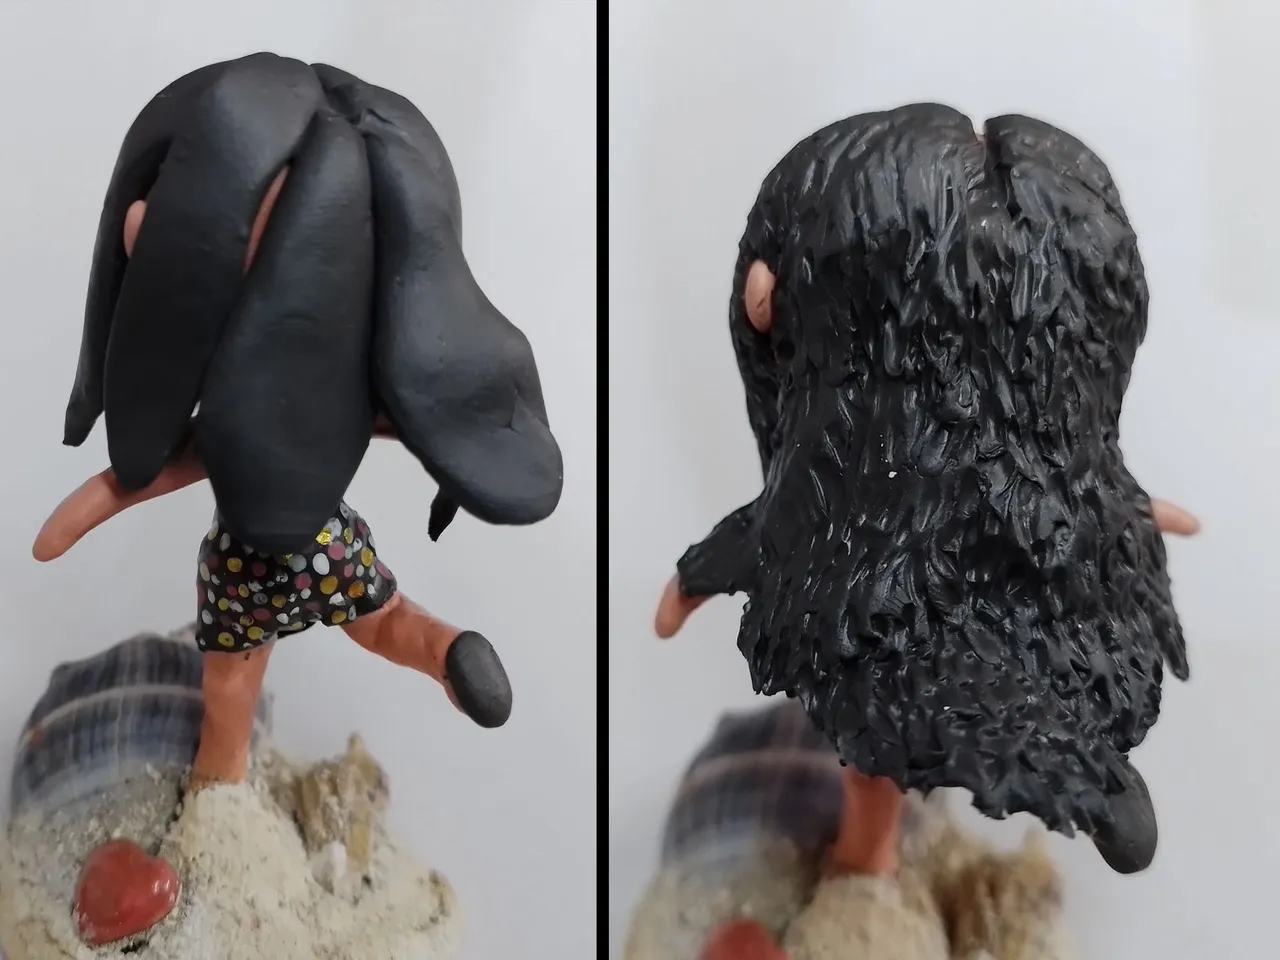
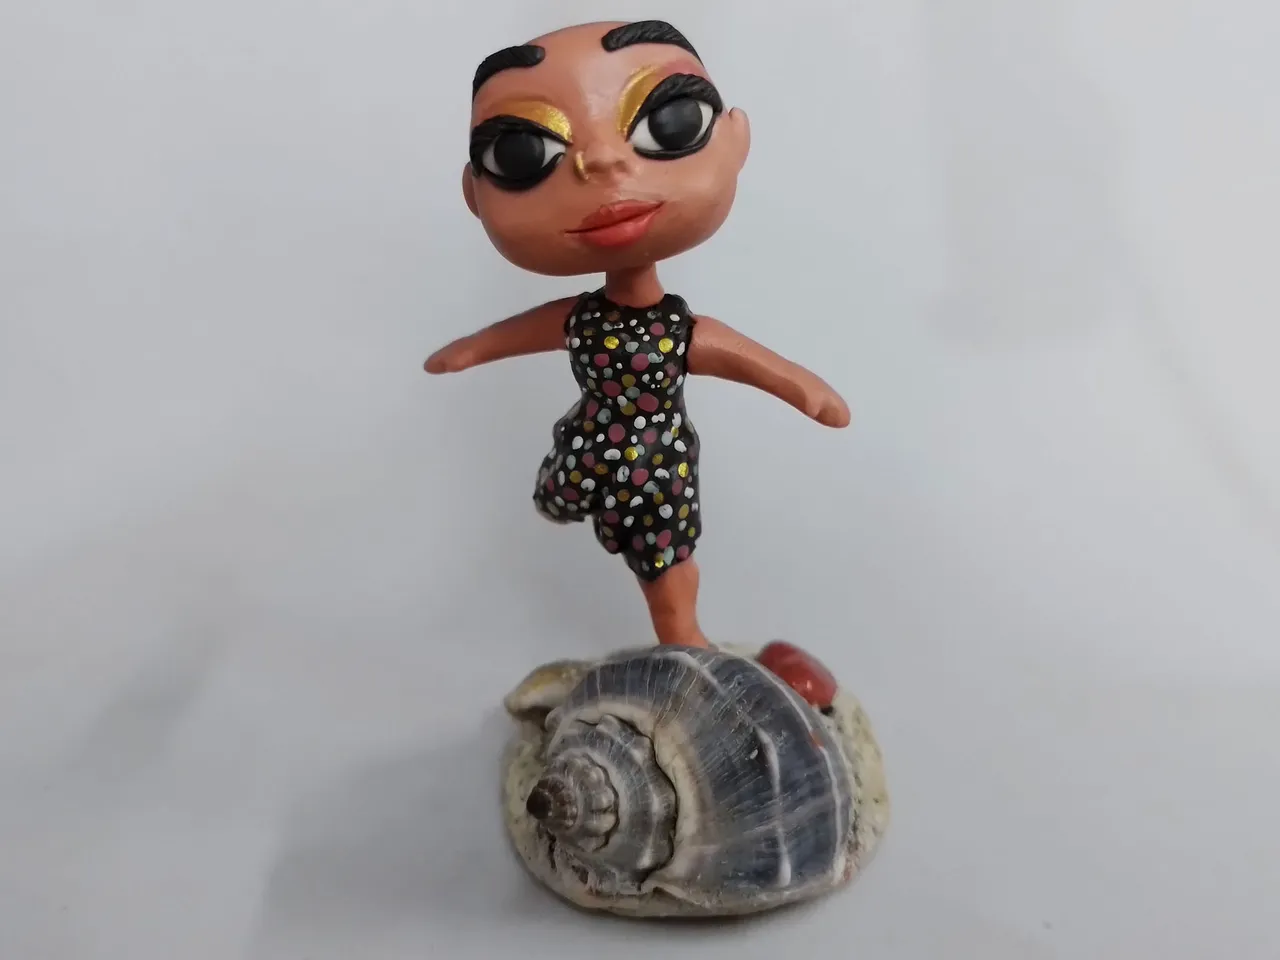
Once this is done, the figurine is finished. I mentioned everything I did to the figurine, the details and tips that I follow when molding.
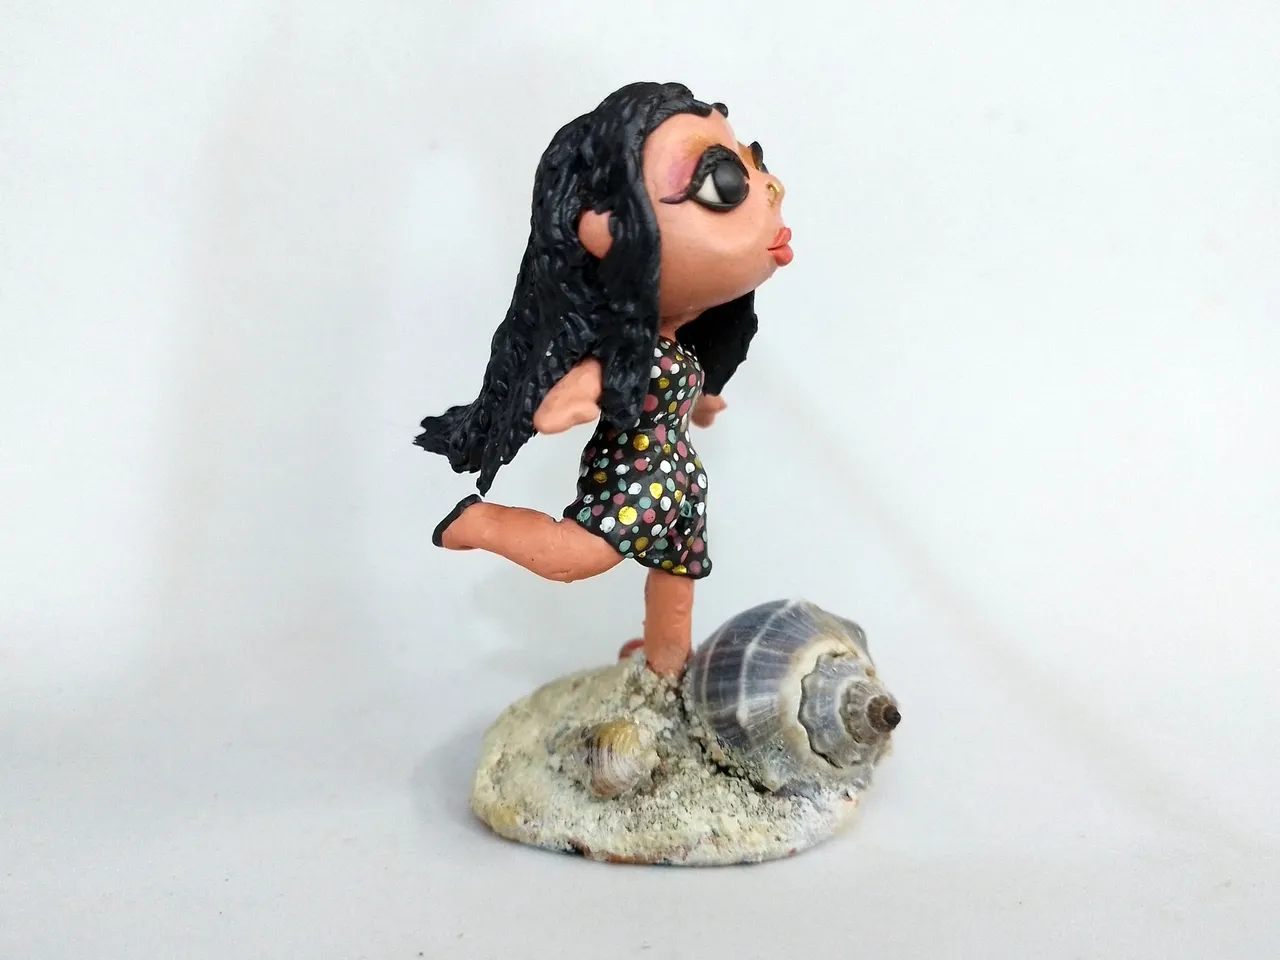
Next I show you a series of pictures with the final result:
 |  |
|---|
 |  |
|---|
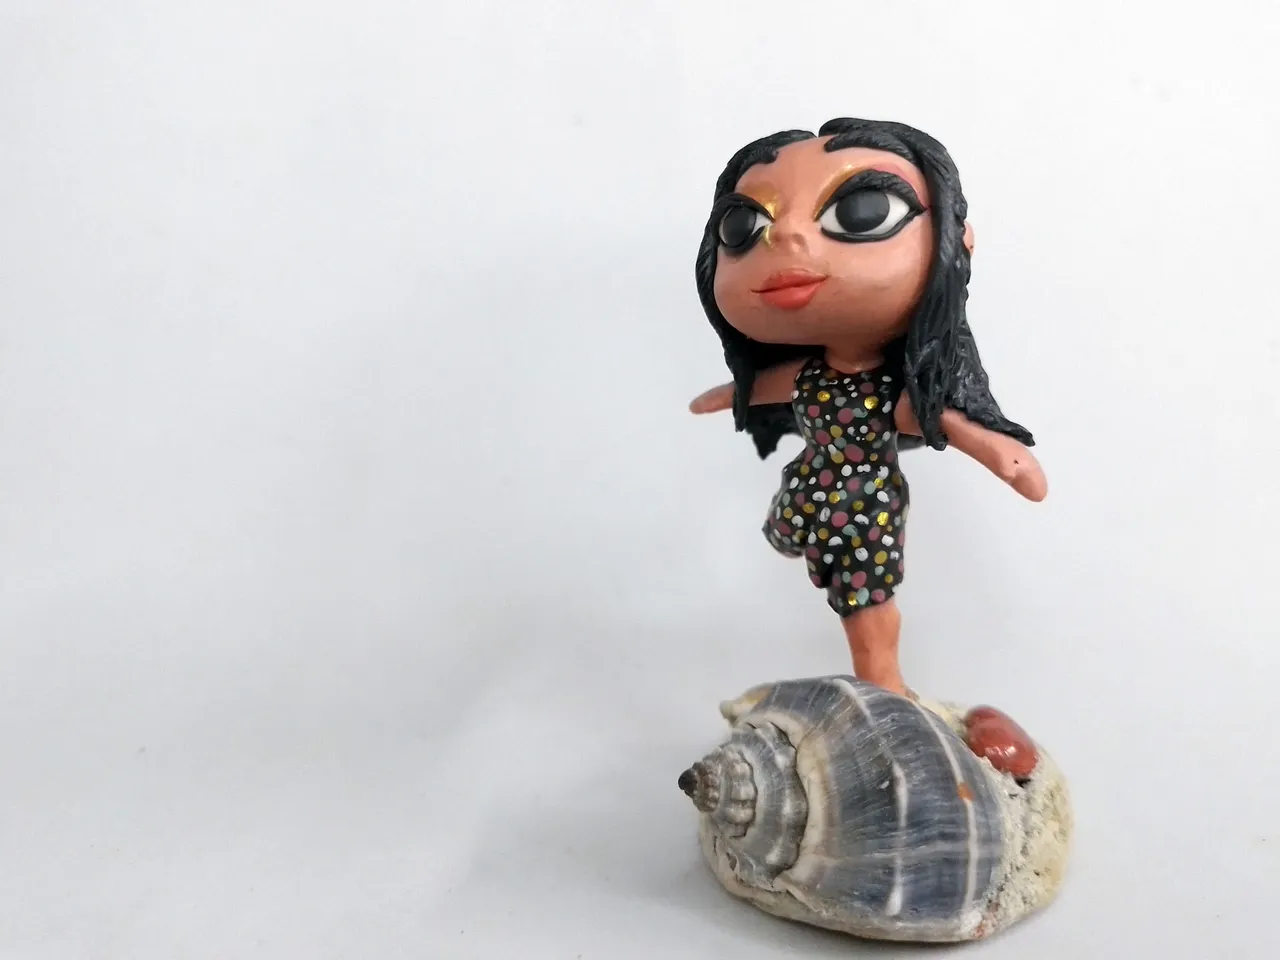
Well friends, that's all for now, what do you think of the figure? I loved it, as I have found a use for the snails I brought from the beach, instead of just having them sitting there on my shelf.
I would like to know your opinions about this work. You can leave it below in the comments, as always I will be happy to read them. With nothing more to add, I'll take my leave then...
See you next time!
Español
Hace un tiempo fui a la playa de vacaciones. La pasé genial y una de las cositas que traje como recuerdo fueron caracoles. Viéndolos allí, en el estante donde coloco estos recuerdos y figuritas, pensé en hacer algo con estos.
Tengo varios proyectos en mente, pero una de las cosas que se me ocurrió fue integrarlo en una escultura temática de la playa. Les presento pues, esta pequeña escultura de una Chica en la playa.
Como bien saben, este tipo de esculturas que hago suelen ir soportadas por un esqueleto de alambre. No siempre es así, pero esta necesitaba uno, pues era una escultura con una pose dinámica, es decir, una pose que simula movimiento.
Como pueden ver acá abajo, este fue el esqueleto que diseñé para la figurita. Está hecho con alambre de aluminio y sujeto con hilo, mucho hilo. Por el tamaño de la figurita no es necesario usar pegamento, el mismo hilo, junto con la misma fricción del alambre, será suficiente para sostenerlo:
De inmediato comencé a trabajar en la base, pues sobre esta colocaría las piernas, las cuales estarían descubiertas. Las hice de un color piel claro, pero con un poco de naranja, como si estuviese bronceada por el mismo sol de la playa.
Como pueden ver, una pierna está apoyada sobre el suelo y la otra levantada, a eso me refería con lo de una pose dinámica. Este es el motivo por el que debe tener un esqueleto de alambre, para mantener esta forma.
| |
|---|
El siguiente diseño que elegí fue el de un traje de baño negro que, si se fijan en la imagen de portada, más tarde pintaré; sin embargo, aquí pueden ver la forma inicial del traje de baño, solo el área del torso y una parte de la cintura.
Si bien es un traje de baño de una sola pieza, le hice una suerte de falda para cubrir un poco la cintura y darle más volumen a esta área, algo muy característico de la forma femenina.
Aunque más que un traje de baño, sería algo más parecido a una bata o una prenda corta de tela delgada, como prefieran considerarlo. En cualquier caso, es la vestimenta que pensé para la figurita. Cabe destacar que también agregué un poco de "tela" en los hombros al momento de colocar los bracitos de la figurita.
En la imagen que está un poco más abajo pueden apreciar varias cosas que no detallé en la imagen anterior.
En primer lugar, incorporé aquello por lo que había pensado en esta figura, un caracol de playa. Si bien este caracol es enorme, comparándolo con el tamaño de la figurita, es un gran detalle que, a pesar de ser enorme, no resalta por encima de la protagonista del diorama.
Por otra parte, en la imagen se puede apreciar claramente las ondulaciones del vestido, simulando el viento que debe haber en el lugar.
Quizás se esten preguntando cómo hice la arena de playa que ven en la imagen de portada, pero no usé arena de playa real si es lo que estan pensando.
Para agregarla a la figurita primero cubrí toda la zona, incluyendo la parte baja del pie de la figurita, con pegamento, mucho pegamento. Una vez que agregué el pegamento, lancé partículas de arena de mi casa en toda la base.
También agregué otro pequeño caracol y una vez que todo se secó, quedó fija la arena y los demás caracoles. También agregué un corazón porque sí.
| |
|---|
Así quedó casi listo el cuerpo de la escultura. Ahora era turno de la cabeza. Para el diseño me decidí por un estilo que mezclara ese estilo chibi japonés y el una muñecas llamadas LOL, pues me parecen muy bonitas.
Con el diseño claro en mi mente, era hora a moldear. Comencé con una pequeña esfera, la cual continué moldeando hasta lograr la forma deseada. Después le hice los ojos, los labios y las líneas de expresión.
A continuación pueden ver un antes y un después:
El rostro anterior pueden verlo bastante simplon, pero cuando comencé a agregar las pestañas, cejas y maquillaje, tomó más vida y color. Agregé una sombra dorada en el párpado superior, con degradado rosa y, además, un piercing en la nariz.
Como les dije más arriba, pinté el vestido de la señorita. Usé la técnica de puntillismo y así quedó, pintado con lunares de distintos colores.
Una vez pintado el vestido, y después de quitarle el exceso de plastilina en los hombros del vestido, le coloqué la cabeza. Como pueden ver, quedó genial, solo falta el cabello.
Debo confesar que el cabello no es algo que sea especialmente fácil de hacer. De hecho, es una de las partes más complicadas de una figurita, porque ya todo está listo y al colocar el cabello puedes dañar todo lo demás.
En lo personal prefiero colocarlo por partes; es decir, colocar piezas de cabello una por una hasta crear la forma que quiero que tenga, luego, con ayuda de un palillo de madera o mi aguja de tejer, comienzo a darle forma, creando ondulaciones y líneas que puedan simular el cabello.
Una vez hecho esto, está terminada la figurita. Les mencioné todos lo que le hice a la figurita, los detalles y tips que yo sigo a la hora de moldear.
A continuación les muestro una serie de fotografías con el resultado final:
| |
|---|
| |
|---|
Bien amigos, esto ha sido todo por ahora. ¿Qué les ha parecido la figura? A mi me ha encantado, pues le he encontrado una utilidad a los caracoles que traje de la playa, en lugar de solo tenerlos ahí sobre mi estante.
Me gustaría saber sus opiniones sobre este trabajo. La pueden dejar abajo en los comentarios, como siempre estaré encantado de leerlos. Sin más que agregar, me despido entonces...
¡Hasta la próxima!

Traducido con DeepL
Gabo Play: Wobble Up
Another Abandoned Cat
Black Adam Sculpture