
Feliz año nuevo 🥳 mis queridos amigos de Hive, les deseo que este, sea un año de abundantes bendiciones, mucha salud y felicidad para ustedes y sus seres queridos.
Como primera publicación de este 2024 quiero compartirles el paso a paso de como decorar y dar nueva vida a un cintillo, para ello utilicé un par de cintillos que ya estaban viejos, incluso uno era totalmente de plástico en color negro que se veia bastante simple.
Con estas ideas puedes mejorar mucho aquellos accesorios que tienes en tu casa y darle una segunda vida a ellos, agregando diferentes texturas y materiales que vayan con tu estilo.

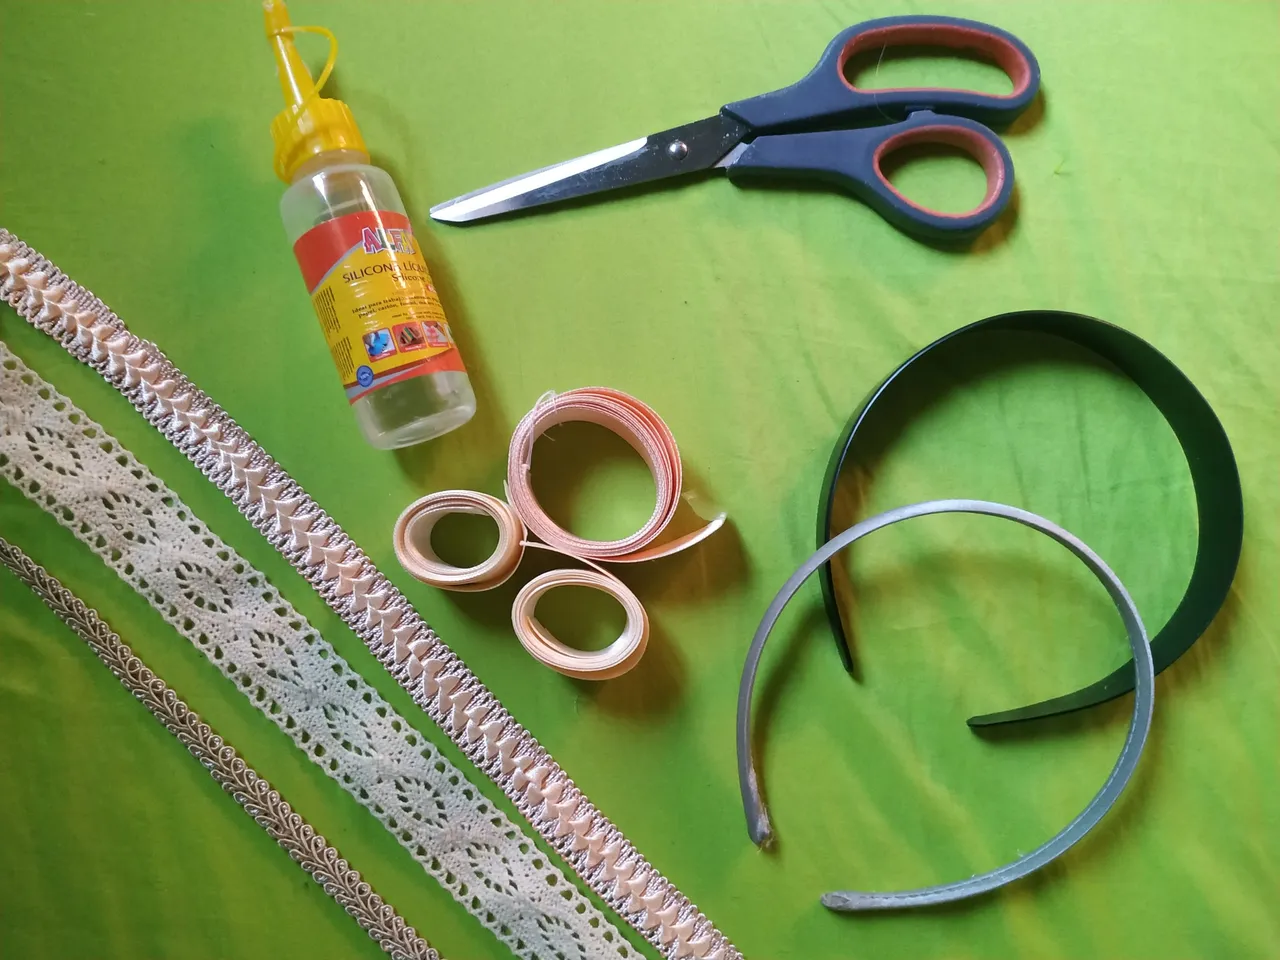
- Cintillo a decorar.
- Cinta Raso.
- Encaje.
- Silicon al frío.
- Tijeras.
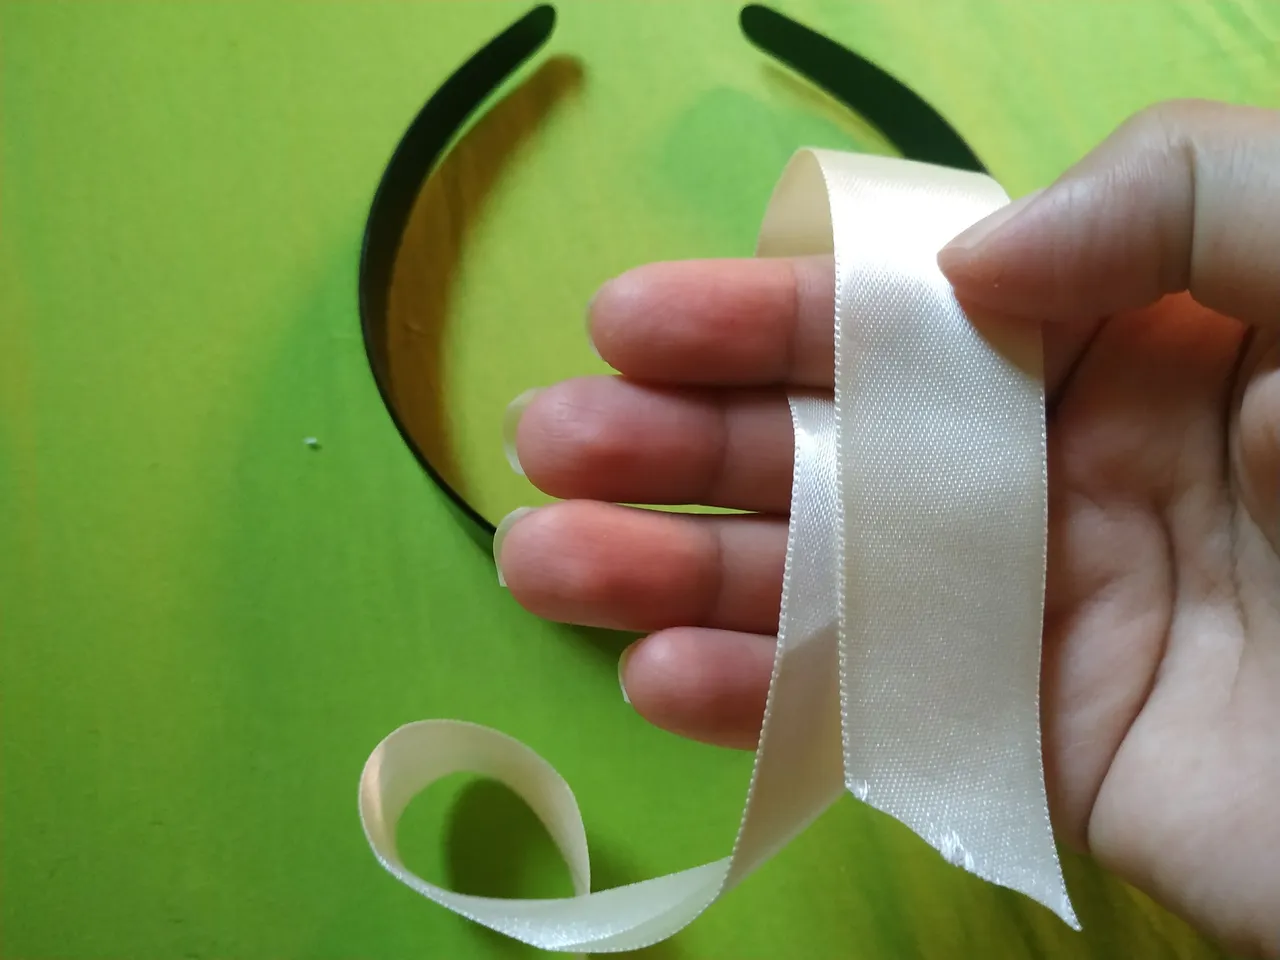
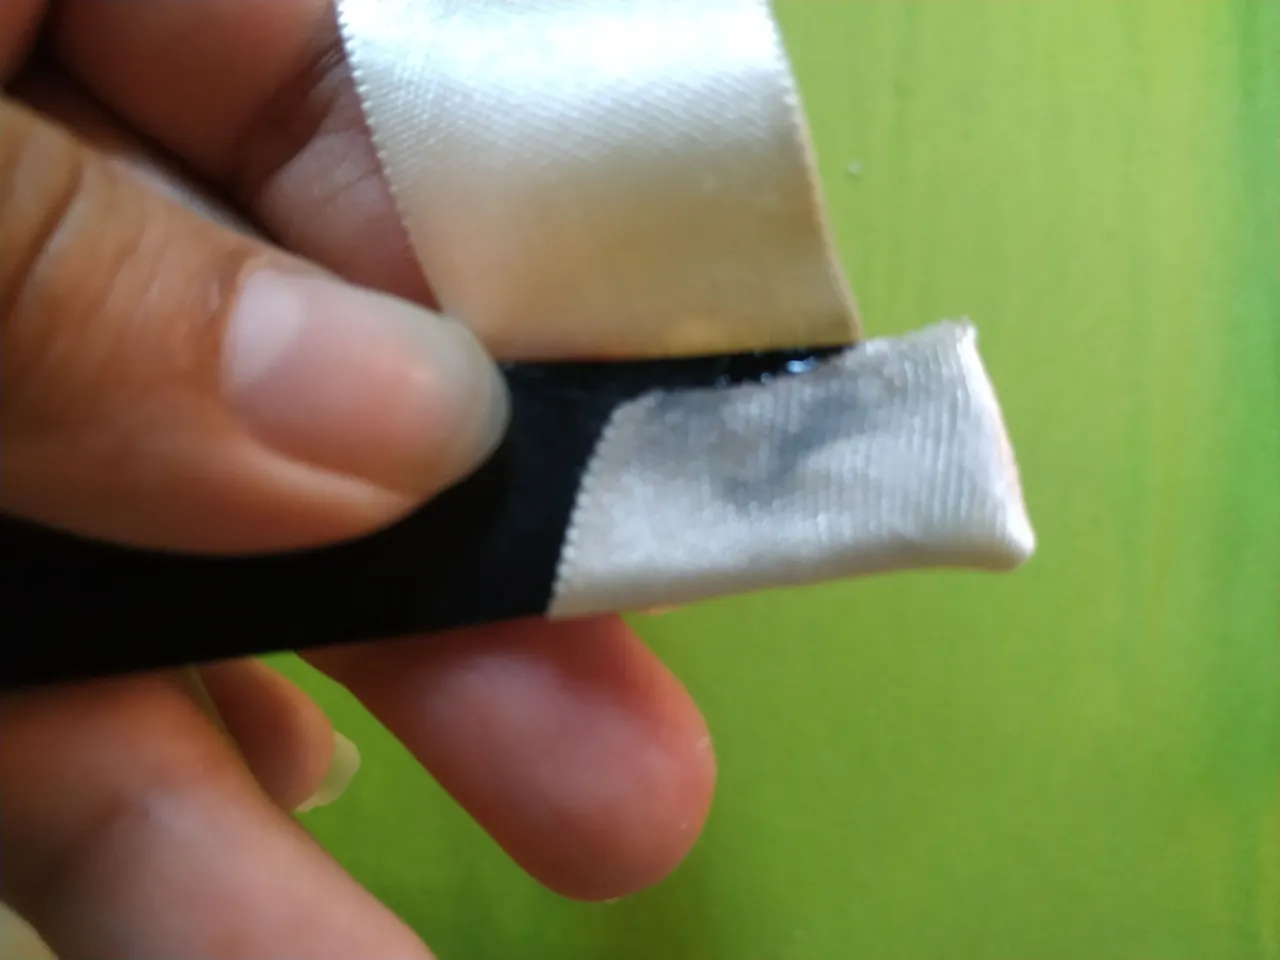
Como primer paso se debe tomar el cintillo con el que vamos a trabajar, en este caso y como les comente con anterioridad utilice uno totalmente de plástico en color negro, es bastante sencillo y como no tiene ninguna decoración o elemento adicional se puede comenzar a modificar.
Se toma la cinta raso que es de tres centímetros de ancho y se continúa pegando con ayuda del Silicon a uno de los laterales del cintillo, se debe de colocar la cinta diagonalmente para comenzar a forrar.
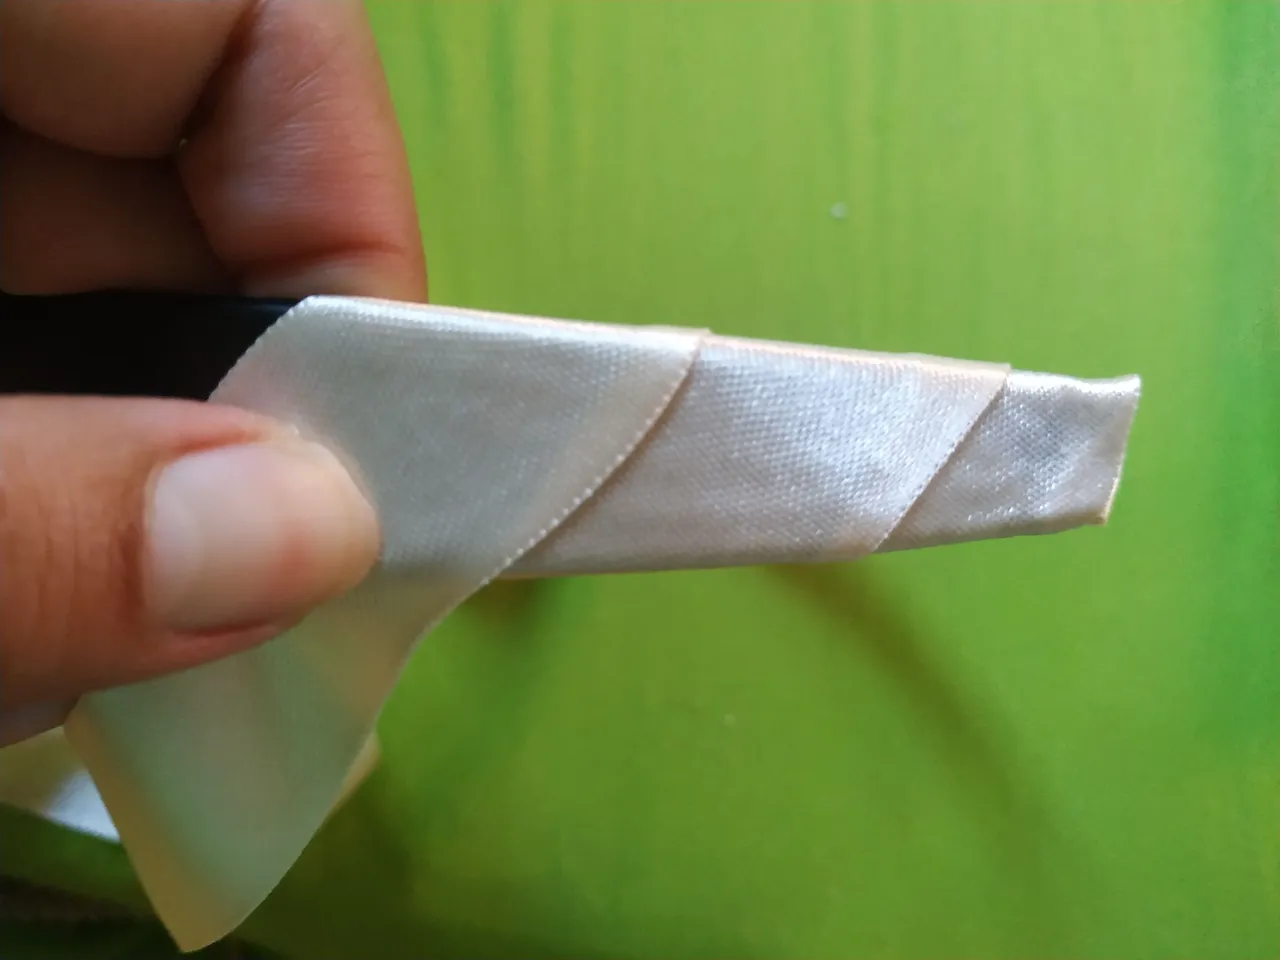
Damos vuelta a la cinta por el cintillo, sobreponiendo y halando con fuerza en cada vuelta, al pasar unas cinco vueltas agregamos un poco de silicon para pegar y asegurar. Continuamos hasta forrar por completo.
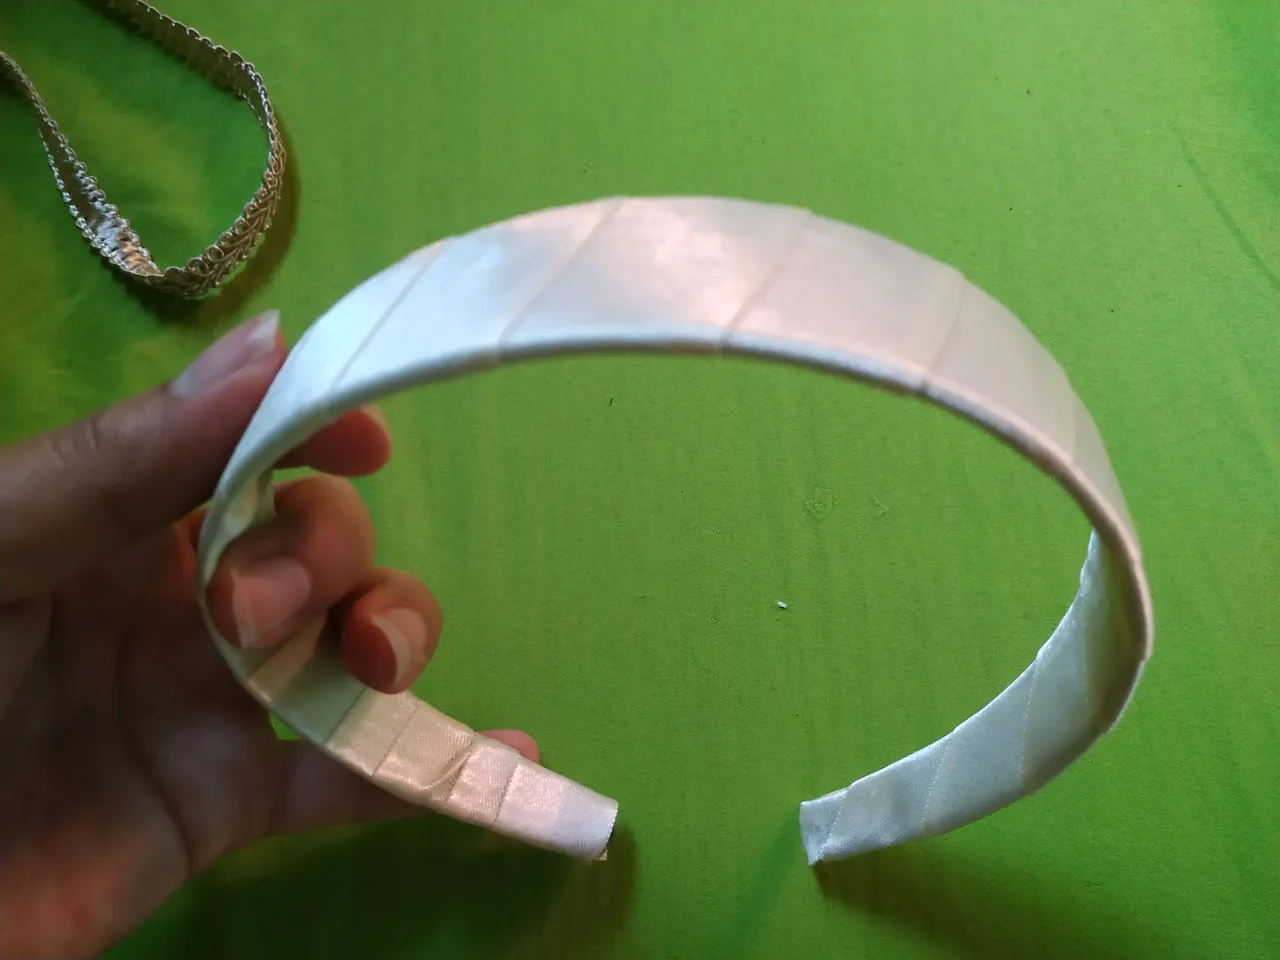
Dejamos secar y continuamos colocando el encaje.
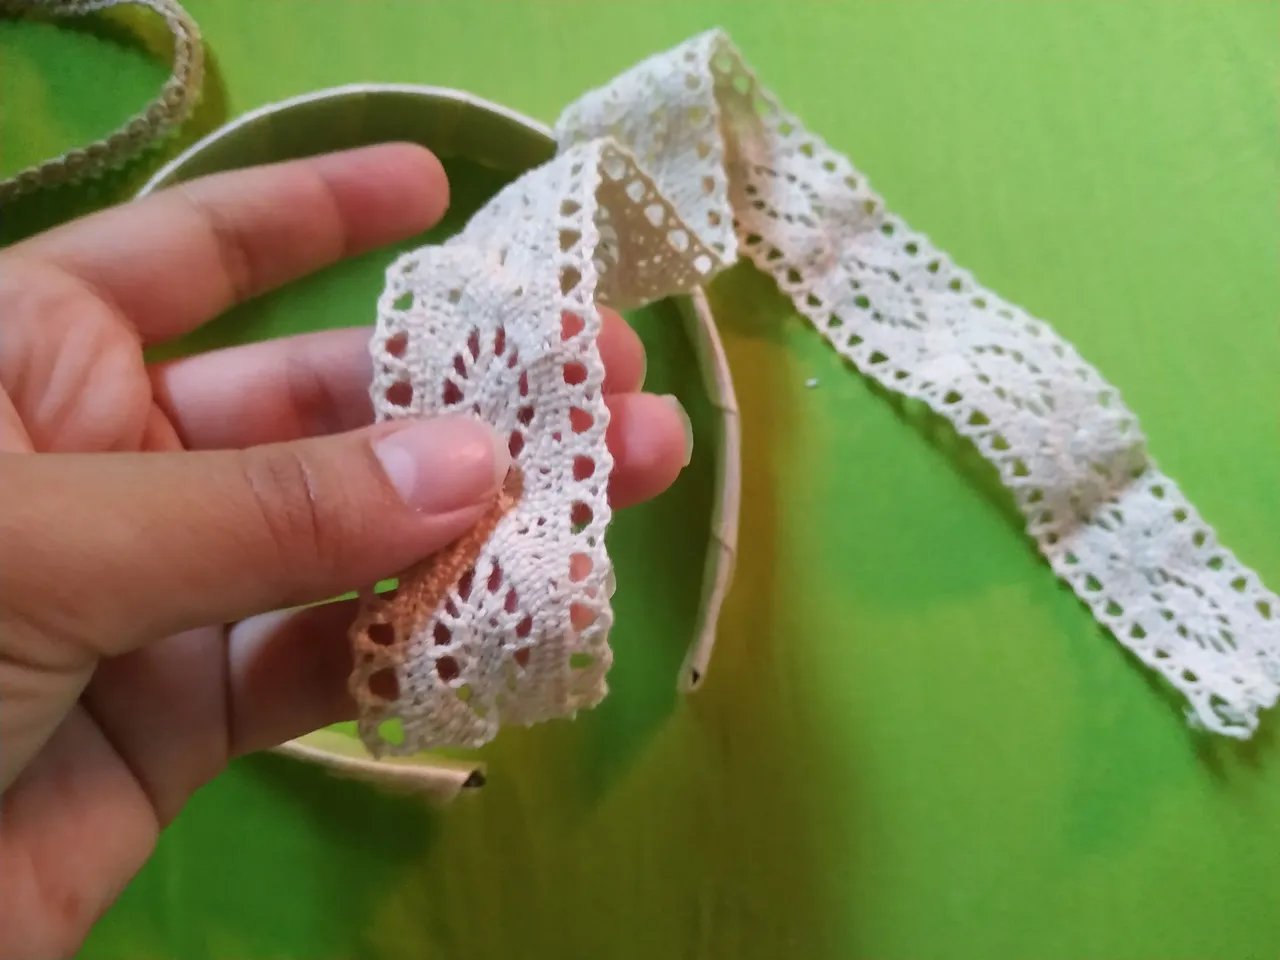
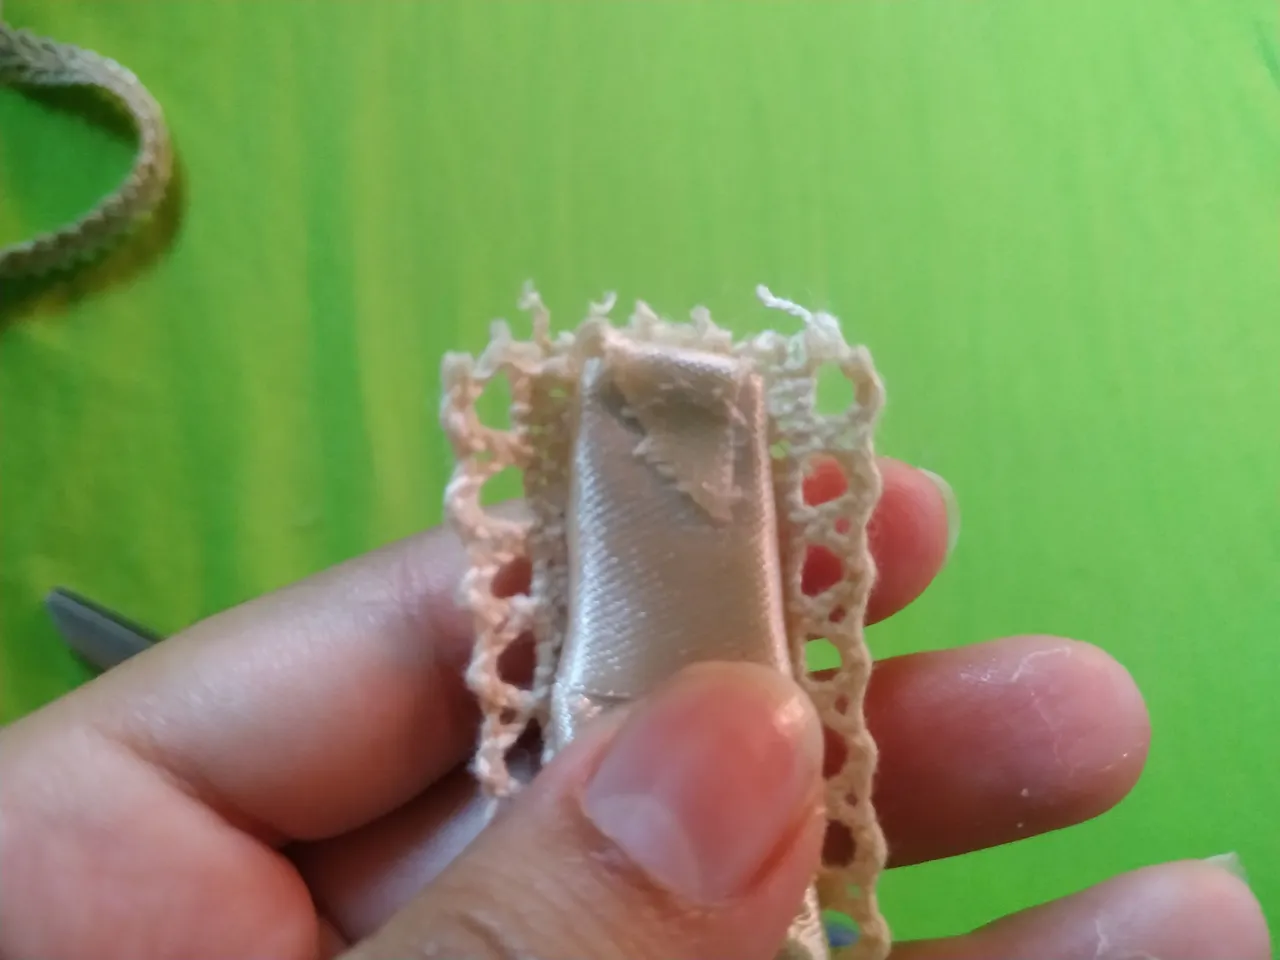
Se procede a medir el contorno del cintillo, y se corta la misma longitud del encaje para pegar de extremo a extremo con el Silicón frío.
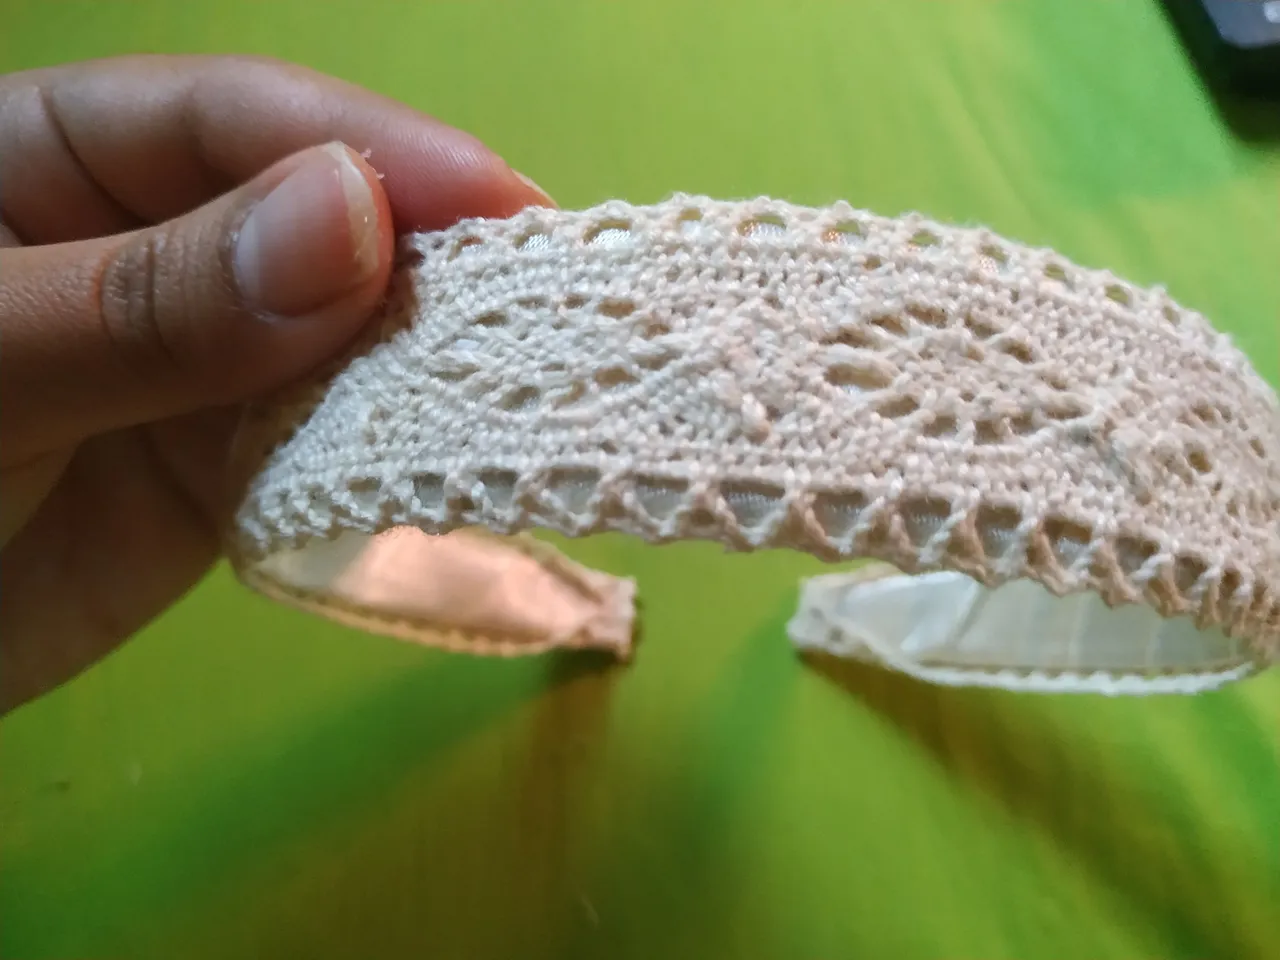
En las puntas del cintillo de debe cortar los excedentes que queden del encaje y luego pegar para que quede de esta manera.
Así se verá mucho más prolijo el acabado y además quedará mejor ajustado y tendrá más soporte ya que está es la parte del cintillo que queda más ajustada al usarlo.
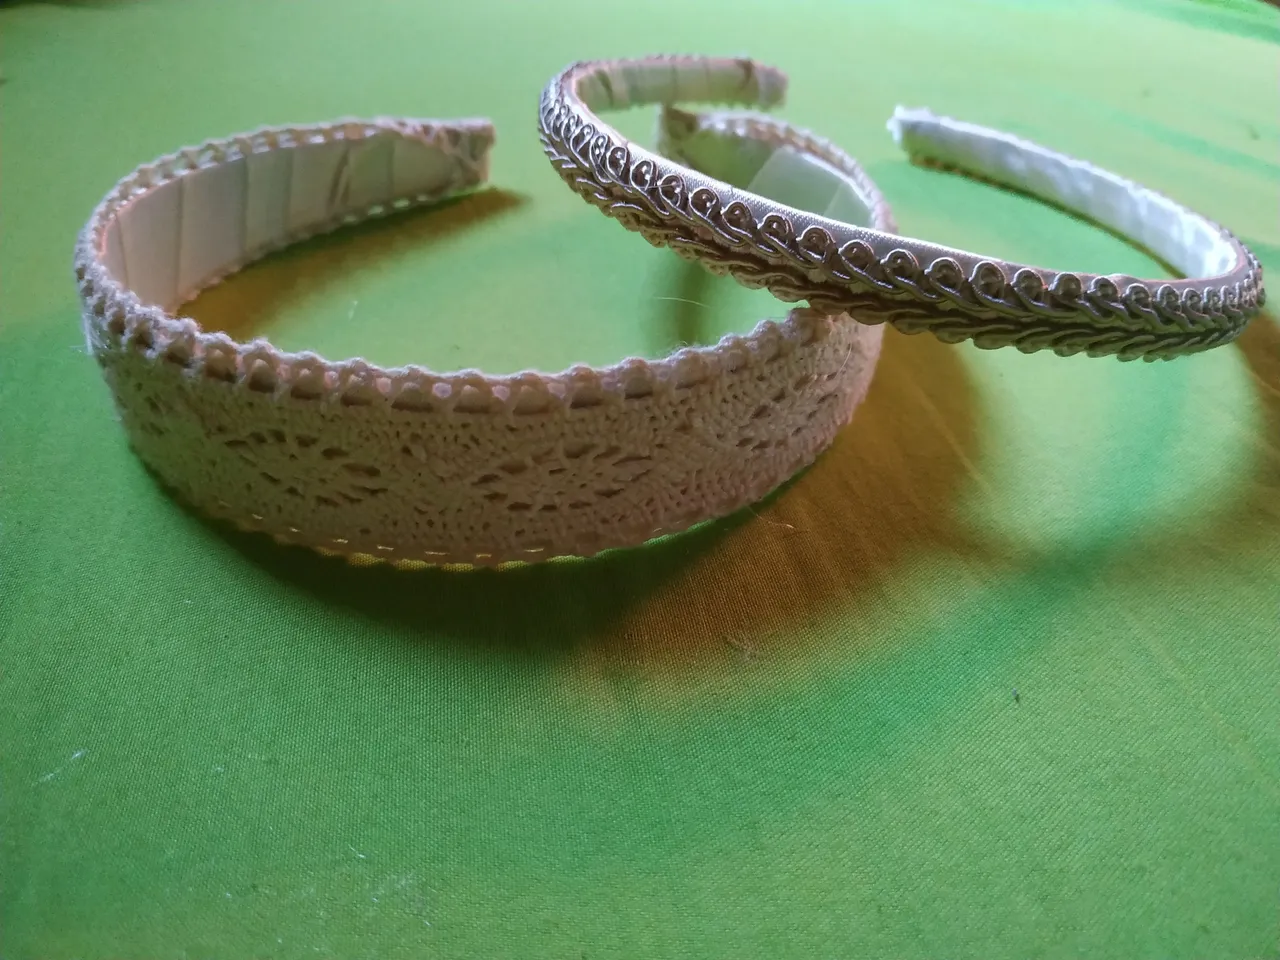
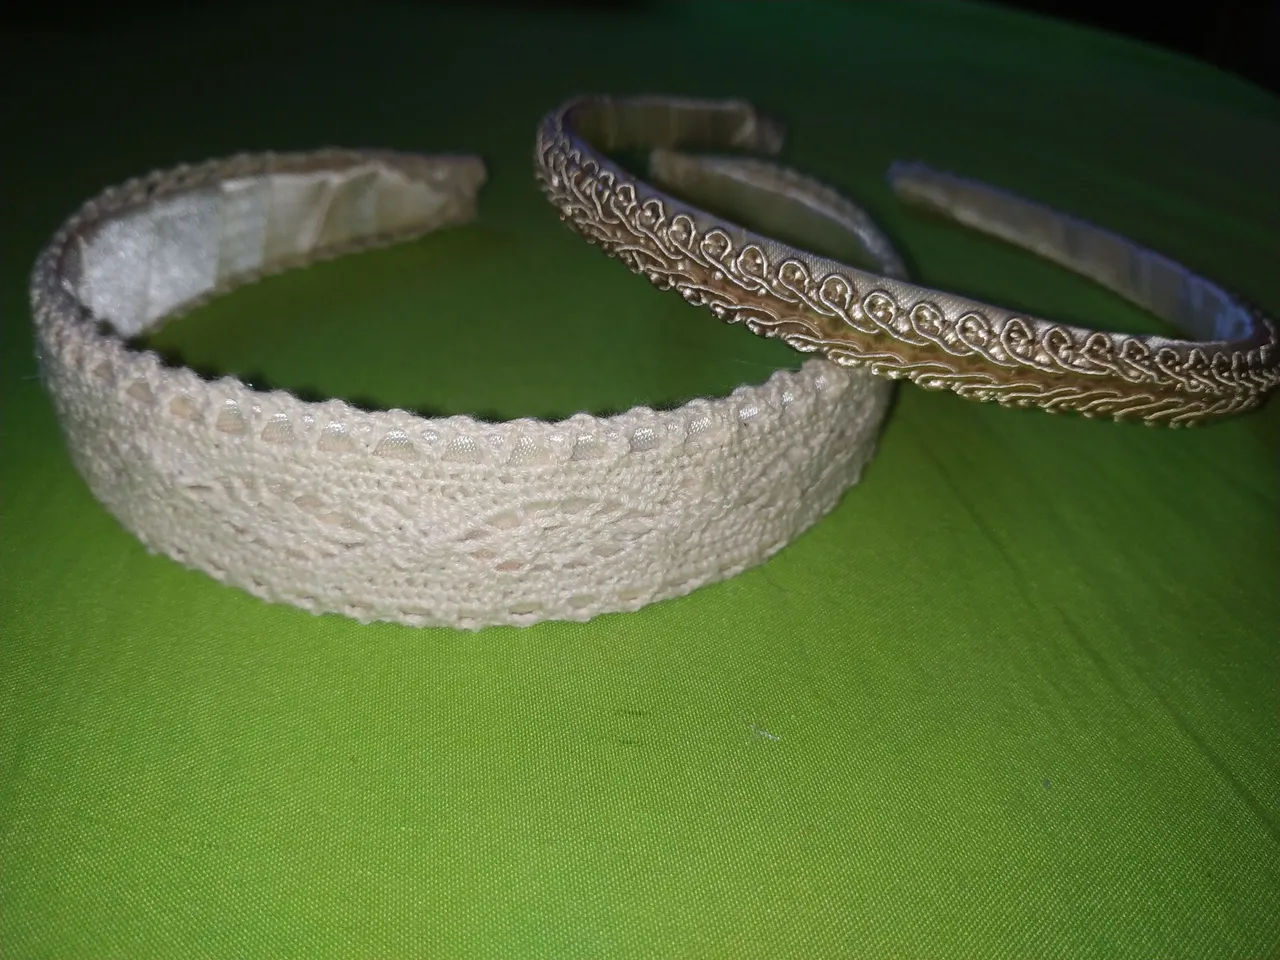
Al ver el resultado final decidí hacer otro, en este caso era un cintillo menos ancho por lo que solo coloque una cinta que decoraba muy bien la pieza, además con un color beige pero brillante que hacen que sea muy versátil y se pueda combinar con casi cualquier conjunto.
Hasta aquí mi publicación del día de hoy, espero les haya gustado mucho esta idea. Como siempre les agradezco que pasen por mi blog y les deseo que tengan un feliz día y noche.

Happy New Year 🥳 my dear friends of Hive, I wish you a year of abundant blessings, health and happiness for you and your loved ones.
As the first publication of this 2024 I want to share with you the step by step of how to decorate and give new life to a headband, for this I used a couple of headbands that were already old, even one was totally made of plastic in black color that looked quite simple.
With these ideas you can improve a lot those accessories you have at home and give them a second life, adding different textures and materials that go with your style.
- Headband to decorate.
- Satin ribbon.
- Lace.
- Cold silicon.
- Scissors.
The first step is to take the headband with which we are going to work, in this case and as I mentioned before, I used a plastic one in black color, it is quite simple and as it does not have any decoration or additional element you can start modifying it.
Take the satin ribbon that is three centimeters wide and continue gluing it with the help of the Silicon to one of the sides of the headband, you must place the ribbon diagonally to start lining the headband.
We turn the ribbon around the headband, overlapping and pulling it tightly in each turn, after about five turns we add a little silicone to glue and secure. Continue until the tape is completely covered.
Let dry and continue placing the lace.
Measure the outline of the headband, and cut the same length of the lace to glue from end to end with the cold Silicone.
At the ends of the headband, cut off the excess lace and then glue it so that it looks like this.
This will make the finish look much neater and it will also fit better and have more support since this is the part of the headband that is the tightest when worn.
When I saw the final result I decided to make another one, in this case it was a less wide headband so I only put a ribbon that decorated the piece very well, also with a beige but bright color that makes it very versatile and can be combined with almost any outfit.
So far my publication of today, I hope you liked this idea. As always I thank you for stopping by my blog and I wish you a happy day and night. 🌉
Fotos tomadas de mi teléfono Xiaomi Redmi Note 6 Pro || Photos taken from my Xiaomi Redmi Note 6 Pro phone.
Fuente del editor de imágenes || Image editor source