
Very good day and happy start to a new week and culminating another month, thanking God for all his blessings for all the good things and bad times we also go through, I mean when a very dear family member dies, in my case my brother older, maybe that's why I'm absent, but life goes on and we have to move on.
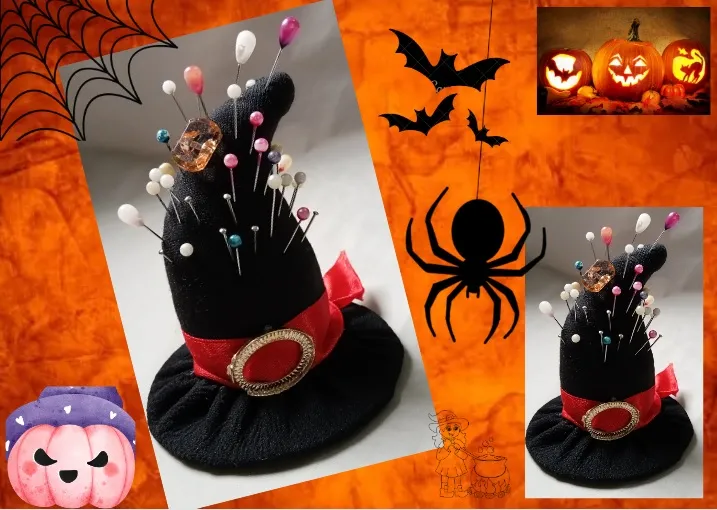
Today while showing something on the occasion of Halloween, I made a pincushion in the shape of a witch's hat, with recycled material, very easy to make, and the result was great. Now come and I'll explain my steps in this beautiful craft.
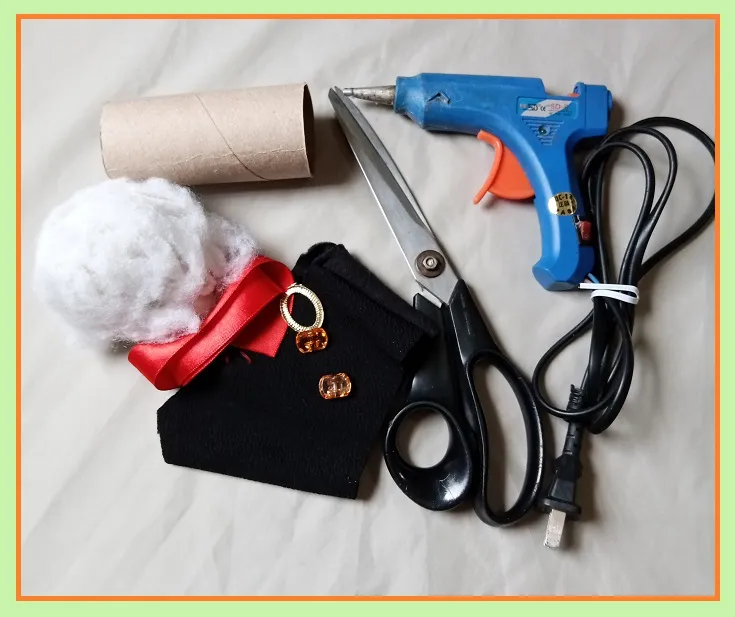
# My materials:
Scraps of black fabric.
A roll of toilet paper.
Filling cotton.
Red ribbon.
Ornament jewelry.
hot silicon.
Threads, needles, tape measure.
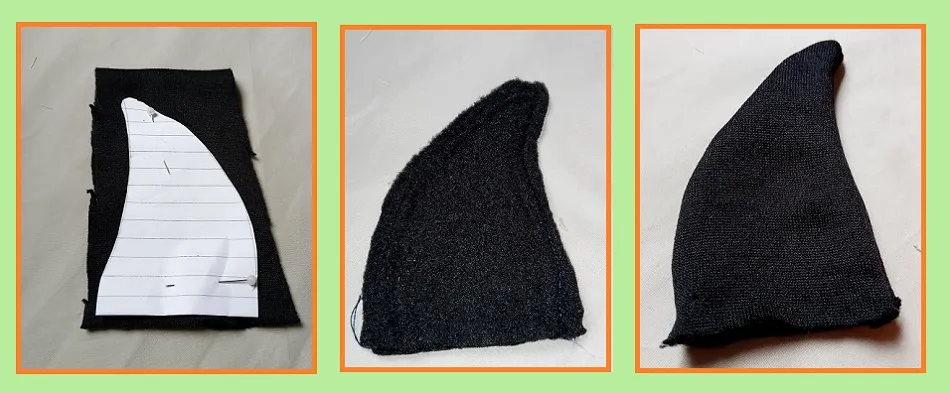
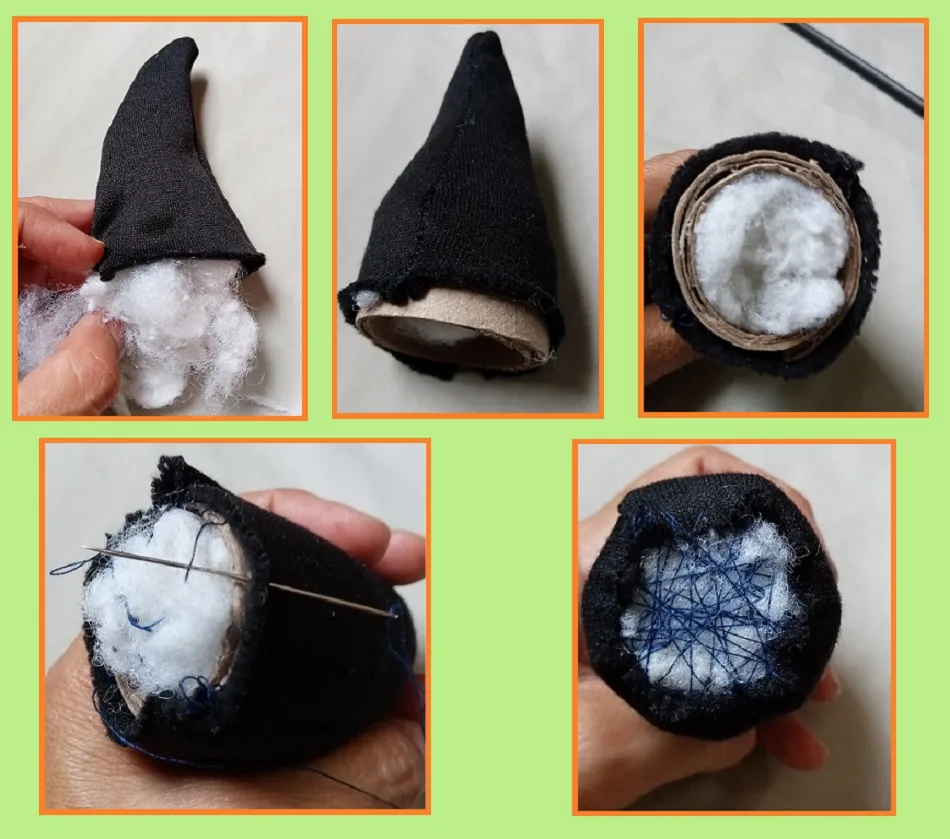
For the pattern I made it with a rectangle and I shaped it into a triangle but in the shape of a hat so that there was a little left on one side. Its measurements are 6cm wide by 10cm high.
From this I took two parts, which I sewed by machine, and I made some small cuts on the edge of the seam, then I turned and filled with cotton.

Before, with the cardboard roll I cut it to a height of 2.5cm, I made three parts of these, and in turn I made a cut on one side to be able to adapt it to the size or width of 5cm, in diameter, and I was gluing inside this circle several cartons so that this circle will be hard.
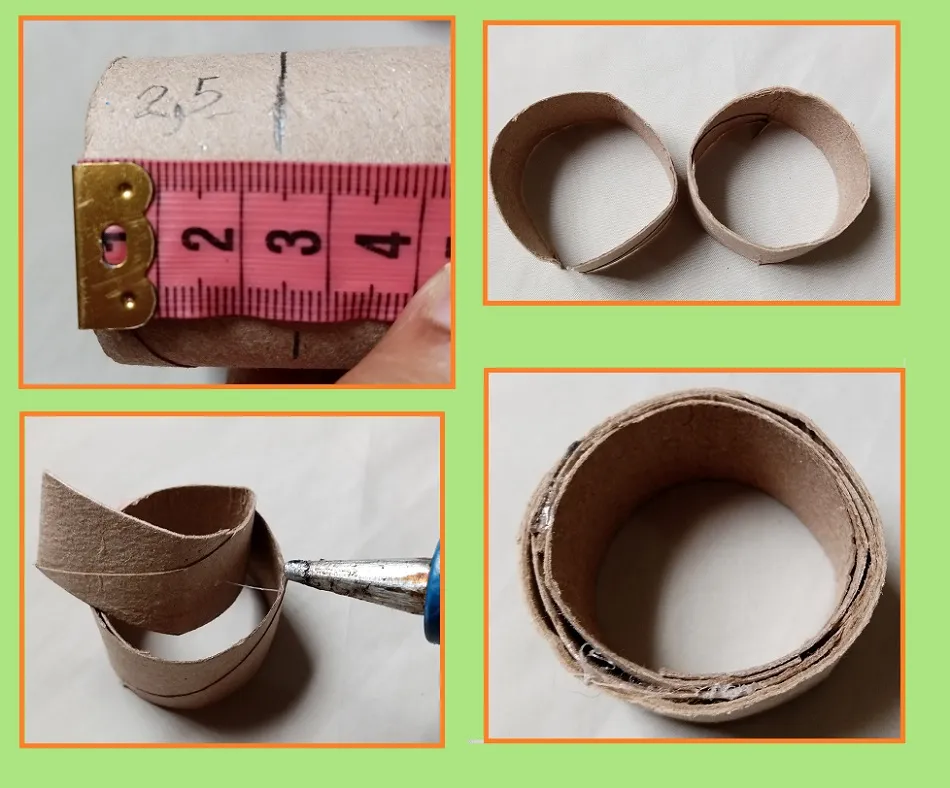
I introduce this cardboard base inside the hat and finish filling.
I placed this cardboard to give the hat firmness, when I finished filling, I sewed it by hand passing the thread in several directions so that it does not roll.
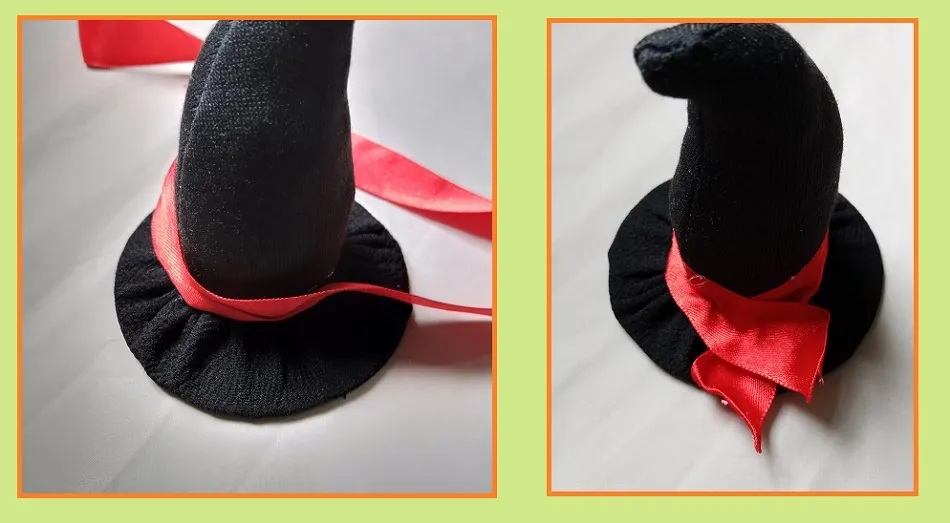
With another recycled cardboard I mark a circle of 9cm in diameter, and from there I place it on the fabric where I am going to cut it larger, to be able to cover this cardboard.
With a needle and thread, I pass a seam around its edge and then I close, I also adjusted very well.

Having these two parts ready, I join them with the glue gun, and stick it in the center.
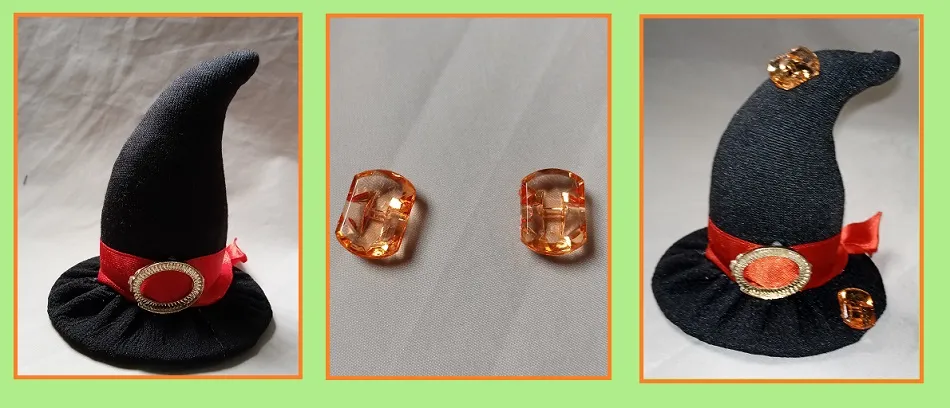
With the red tape, I placed it on the base and cut its ends and placed it one on top of the other. And with another golden adornment as if it were a buckle, stick it to the front of this pincushion, and as an adornment place some orange rectangular buttons.

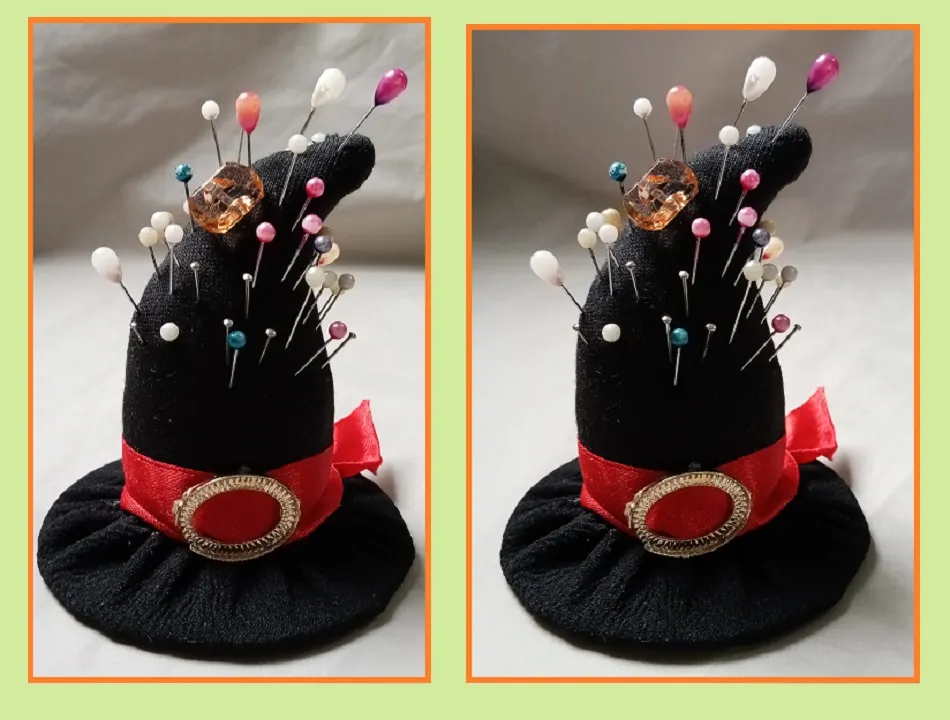
And so this pincushion in the form of a witch's hat was left, where I used blanket fabric, but any type of fabric works very well, as long as it is easy to place the pins.
Cans of food can also be used as a base, those that are small.

Thank you very much for your visit, I hope this presentation has been to your liking, until next time, bye!

The photos are my own, with my Tecno Spark go cell phone.
Translator deepl.
Canvas design.
The photos are my own, with my Tecno Spark go cell phone.
Translator deepl.
Canvas design.


Muy buen dia y feliz inicio de una nueva semana ya culminando otro mes, agradeciendo a Dios por todas sus bendiciones por todas las cosas buenas y malos momentos tambien por las cuales pasamos, me refiero cuando fallece un familiar muy querido, en mi caso mi hermano mayor, quizas por eso mi ausencia, pero la vida sigue y hay que seguir adelante.
Hoy sin dejar de mostrar algo con motivo de halloween, hice un alfiletero en forma de sombrero de bruja, con material reciclado, muy fácil de realizar, y el resultado quedó genial. Ahora ven y te explico mis pasos realizados en esta bella manualidad.
# Mis materiales:
Retazos de tela color negro.
Un rollo de papel higinico.
Algodon de relleno.
Cinta de color rojo.
Bisuteria de adorno.
Silicon caliente.
Hilos, agujas, cinta metrica.
Para el patron lo hice con un rectangulo y le fui dando forma de triangulo pero en forma de sombrero que quedara un poco de un lado. Sus medidas son 6cm de ancho por 10cm de alto.
De este saque dos parte, la cual cosi a maquina, y le hice unos pequeños cortes en en borde de la costura, luego volteo y voy rellenando con el algodon.
Antes, con el rollo de carton lo corté al alto de 2,5cm, hice tres partes de estas, y a su vez le hice un corte de un lado para poder adaptarlo a la medida o al ancho de 5cm, de diametro, y fui pegando dentro de este circulo varios cartones para que quedara dura esta circulo.
Esta base de carton la introduzco dentro del sombrero y termino de rellenar.
Coloque este carton es para darle firmeza al sombrero, al terminar de rellenar, lo cosi a mano pasando el hilo en varias direciones para que no se ruede.
Con otro carton reciclado marque un circulo de 9cm de diametro, y de ahi lo coloco en la tela de donde voy a cortar mas grande, para poder forrar este carton.
Con aguja e hilo, voy pasando una costura en todo su borde y luego voy cerrando, tambien ajusté muy bien.
Teniendo estas dos partes lista, las uno con la pistola de silicon, y pego que quede en el centro.
Con la cinta roja se la coloque en la base y corté sus puntas y la coloque una encima de la otra. Y con otro adorno dorado como si fuera una hebilla, se la pegue en el frente de este alfilietero, y de adorno coloque unos botones en forma rectangular de color naranja.
Y asi quedó este alfiletero en forma de sombrero de bruja, donde utilice tela de cobija, pero muy bien cualquier tipo de tela sirve, que sea fácil de colocar los alfileres.
Tambien se puede usar como base una latas de los alimentos, de esos que son pequeños.
Muchas gracias por su visita, espero hay sido de su agrado esta presentación, hasta la próxima, chau!

Las fotos son de mi autoria, con mi celular Tecno Spark go.
Traductor deepl.
Diseño canva.
The photos are my own, with my Tecno Spark go cell phone.
Translator deepl.
Canvas design.