
Buenas noches amigos que visitan mi blog.
Bienvenidos sean todos!
La verdad que me encantó y espero que sea también de tu agrado.
Así que nos los hago esperar más!.
Para comenzar tienes que utilizar lo siguiente:
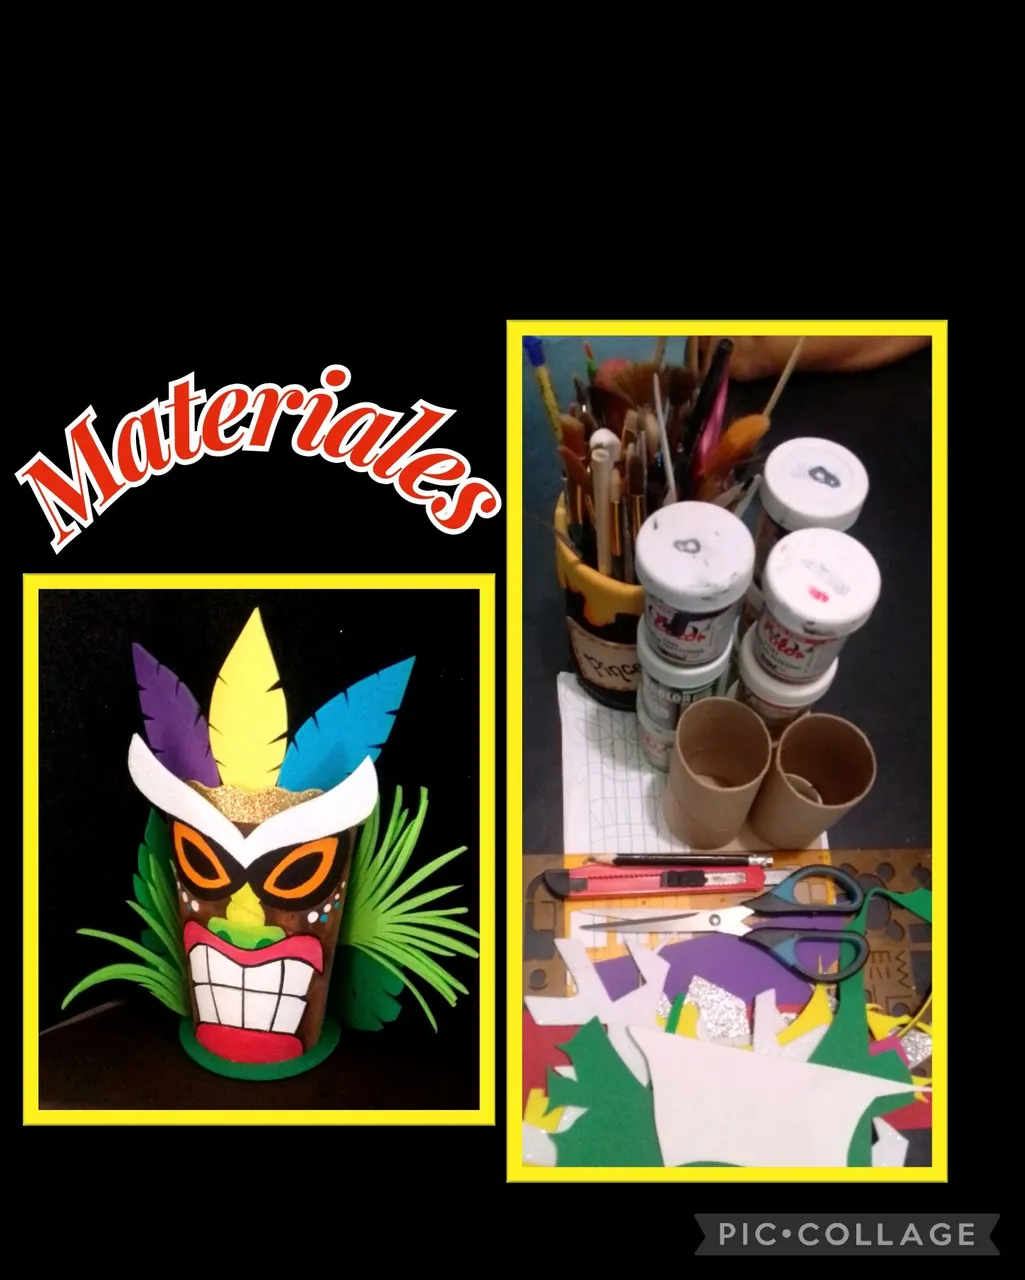
| Cartón de papel higiénico | Foami de colores |
|---|---|
| Pinturas al frío | Pinceles |
| Tijera | Lápiz |
| Silicón | Molde de máscara de tiki |
Ahora comencemos:
Paso 1:
![]()
- Dobla el tubo de cartón por toda la mitad en la parte superior, luego marca el dibujo sobre el cartón y comienza a pintar las partes claras con pintura blanca y deja secar.
- Pinta la boca y luego pinta la parte de arriba con amarillo y luego vas incorporando la verde y une para difuminar y deja secar.
Paso 2:
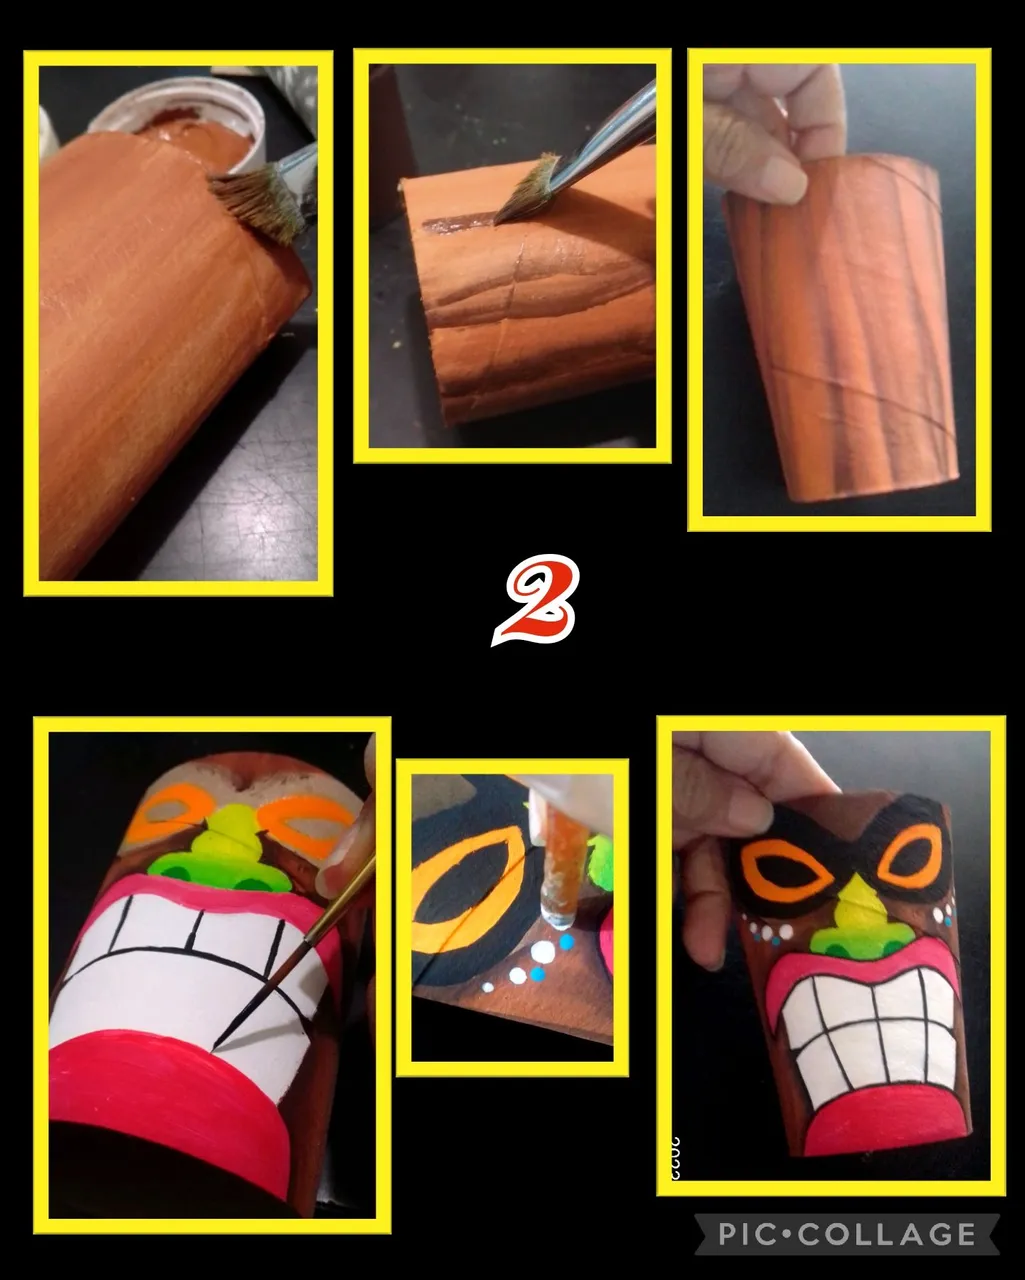
- Pinta los lados y la parte posterior del tubo de cartón con pintura marrón claro y aún húmeda comienza a hacer betas o líneas en color marrón oscuro semejando un tronco de madera y deja secar.
- Ahora toca delinear con pincel liner o marcador punta fina
los dientes y boca con pintura negra y rellena también la parte de los ojos y para terminar con la pintura moja la parte trasera del pincel y decora con puntos de distintos colores. (opcional) o pinta a tu gusto, en Google o pinterest, puedes conseguir infinidad de modelos o diseña uno a tu gusto.
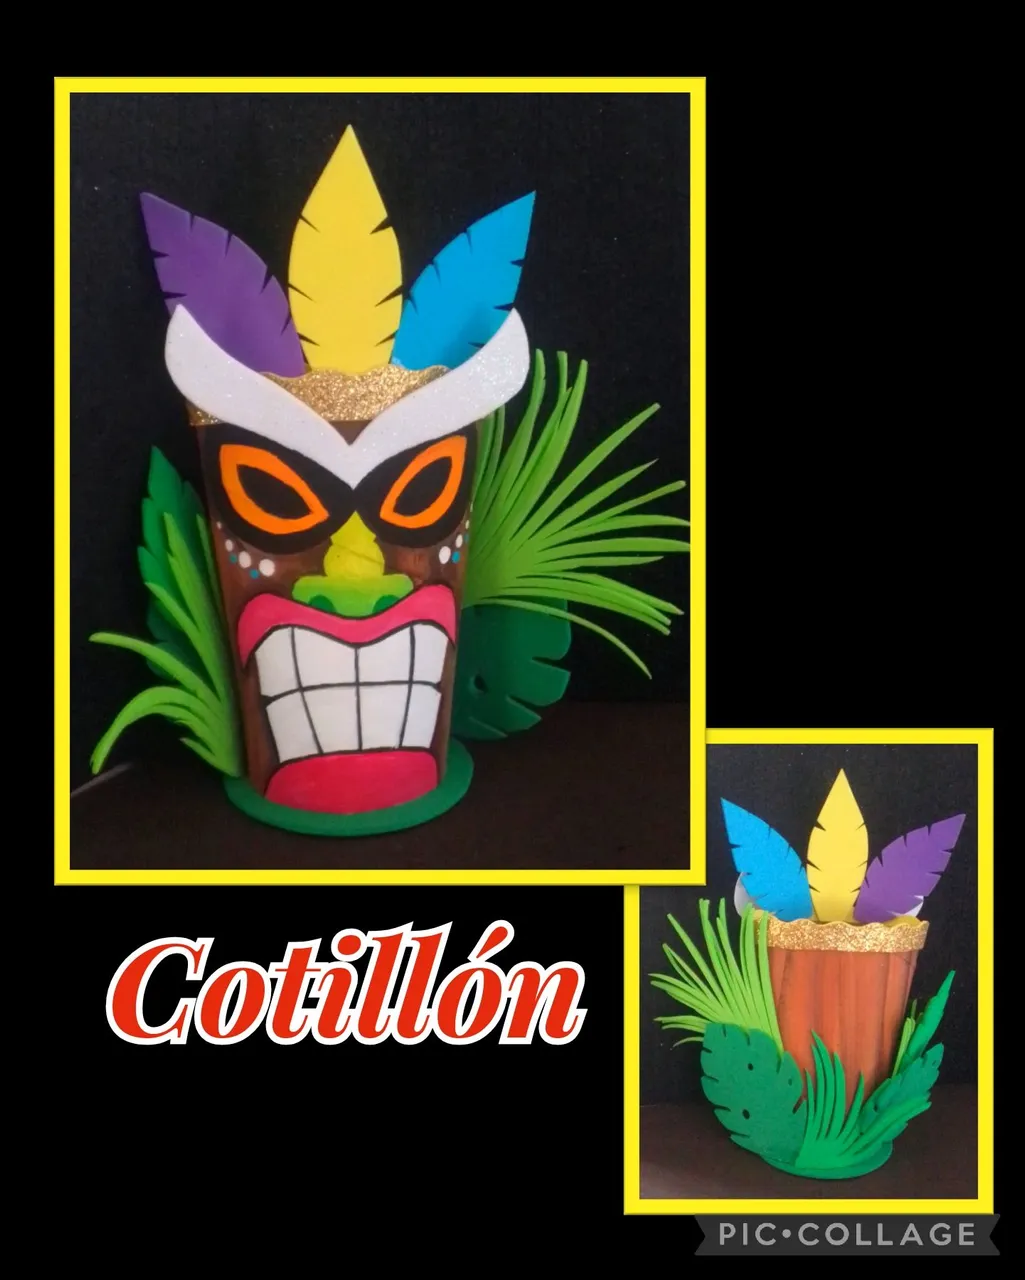
Paso 3:

- En este paso vas a recortar en foami hojas, plumas y detalles para decorar, ah y también un círculo de base, aplica silicón y pega primero la base y haz presión hasta que pegue bien, luego decora la parte de arriba con una tira dorada.
Paso 4:

- Por último pega las plumas y hojas a tu gusto.
Ya verás el resultado!

Etiquetas HTML
Teléfono: BLU G5
Editor de fotos: Pic Collage.
Me despido feliz de haber compartido con ustedes este paso a paso y esperando les sea de utilidad.
Gracias por leerme y apoyarme.
Saludos.
English:
Good evening friends who visit my blog.
Welcome everyone!
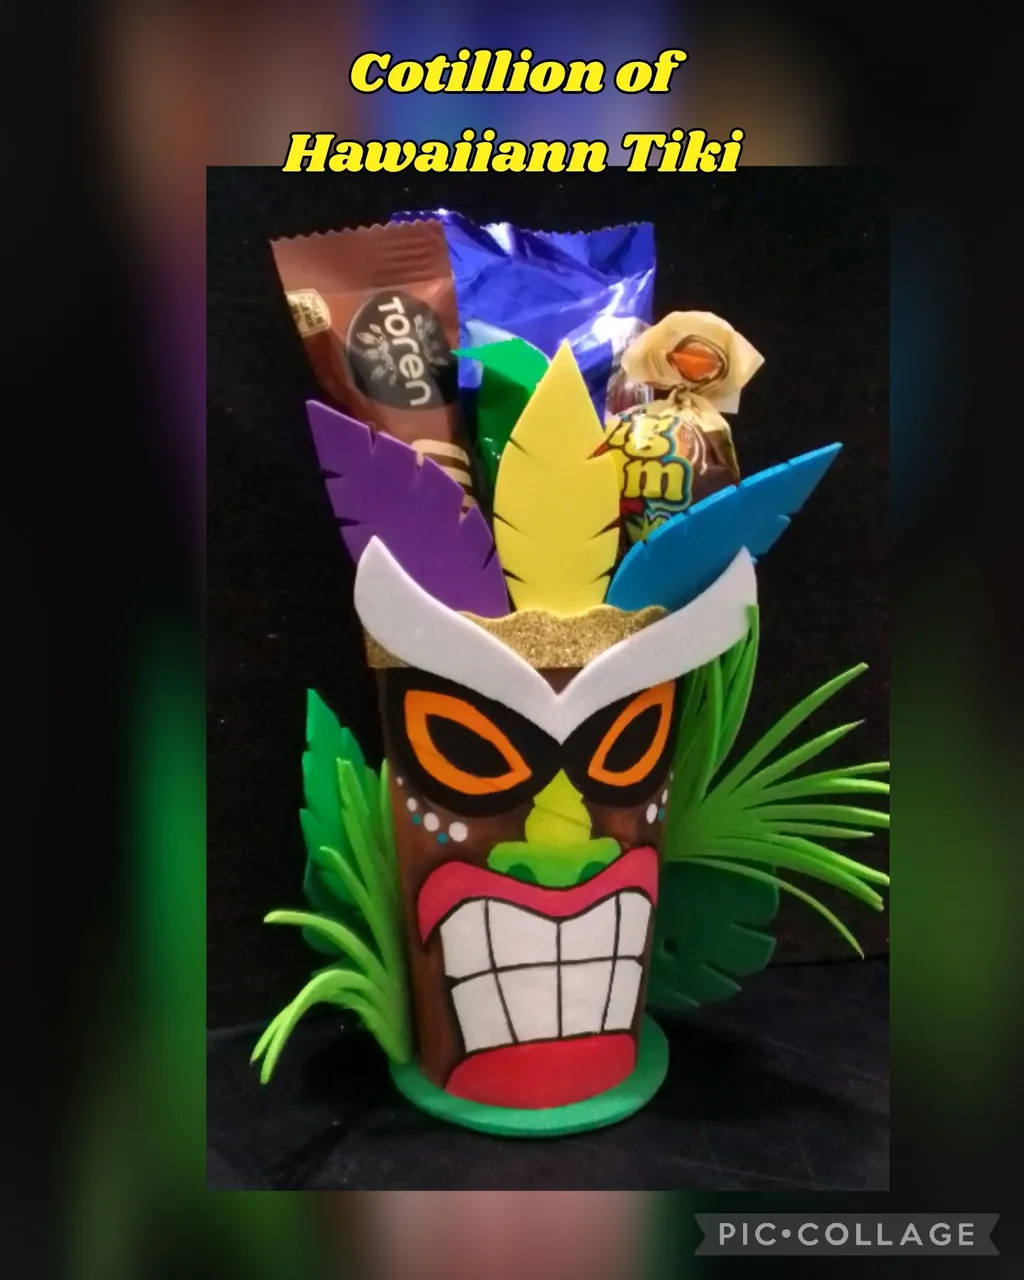
Today I come to share with you a tutorial where I will show you how to transform a toilet paper tube into a beautiful Hawaiian style cotillion, in an easy way and using inexpensive materials.
These cotillions you can give and decorate, on a table, you can also make them bigger as centerpieces and even the piñata, of course using cardboard piñatas or boxes, (recycling).
I really loved it and I hope you like it too.
So I won't keep you waiting any longer!
To start you have to use the following:
| toilet paper carton | colored Foami |
|---|---|
| Cold paints | Paint brushes |
| Scissors | Pencil |
| Silicone | Tiki mask mold |
Now let's get started:
Step 1:
![]()
- Fold the cardboard tube all the way in half at the top, then mark the drawing on the cardboard and start painting the light parts with white paint and let dry.
- Paint the mouth and then paint the top part with yellow and then incorporate the green and blend to blur and let dry.
Step 2:
- Paint the sides and the back of the cardboard tube with light brown paint and while still wet, begin to make dark brown strokes or lines resembling a wooden trunk and let dry.
- Now it's time to outline with liner brush or fine tip marker the teeth and mouth with black paint.
the teeth and mouth with black paint and fill also the part of the eyes and to finish with the paint wet the back of the brush and decorate with dots of different colors (optional) or paint to your liking, on Google or pinterest, you can get plenty of models or design one to your liking.
Step 3:
- In this step you are going to cut in foami leaves, feathers and details to decorate, ah and also a circle base, apply silicone and paste the base first and make pressure until it sticks well, then decorate the top with a gold strip.
Step 4:
- Finally glue the feathers and leaves to your liking.
You will see the result!
HTML Tags
Phone: BLU G5
Photo Editor: Pic Collage
I say goodbye happy to have shared with you this step by step and hoping you like it and it will be useful.
Thank you for reading and supporting me.
Greetings.