Buenas noches a todos mis queridos amigos de esta linda comunidad.
En este tutorial es un poco largo porque te mostraré como hacer cada detalle, pero estoy segura que te gustará y que tú la podrás realizar.
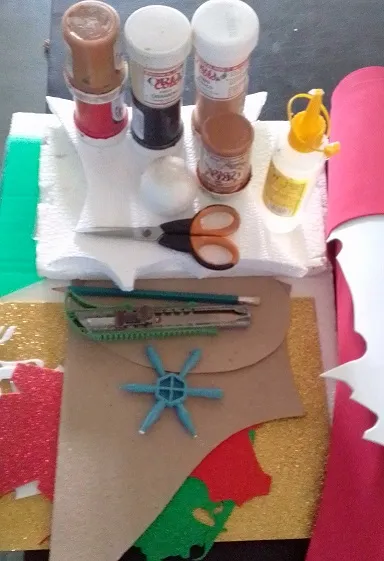
Ahora te muestro los materiales que vas a necesitar:
| Anime | Foami |
|---|---|
| Pinturas al frío | Pinceles |
| Silicón | Cartón grueso |
| Cuchilla | Lápiz |
| Plancha eléctrica para ropa |
Dicho esto comenzaremos el Procedimiento:
Como hacer la esfera de anime:
- Algunas veces no tenemos en casa una esfera de anime así que ya te digo como la puedes hacer:
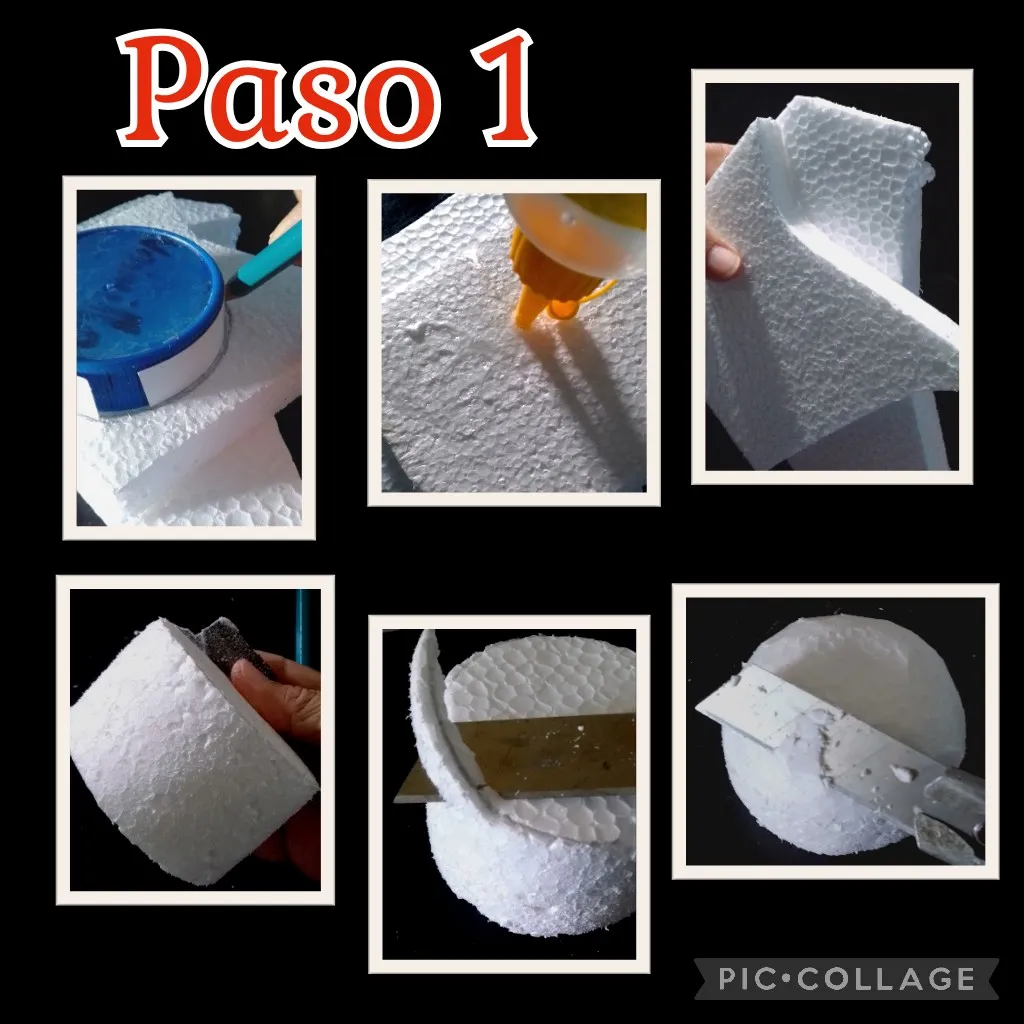
- Marca una circunferencia del tamaño deseado sobre un pedazo de anime, yo utilicé una tapa plástica, luego aplica silicón y pega otro pedazo de anime y deja secar.
- Ahora recorta con una cuchilla o exacto el círculo marcado y lija todo el borde para emparejar, luego con la cuchilla comienza quitando el filo y recorta del centro hacia abajo redondeando la pieza de anime dando la forma de media esfera.. Ver foto.
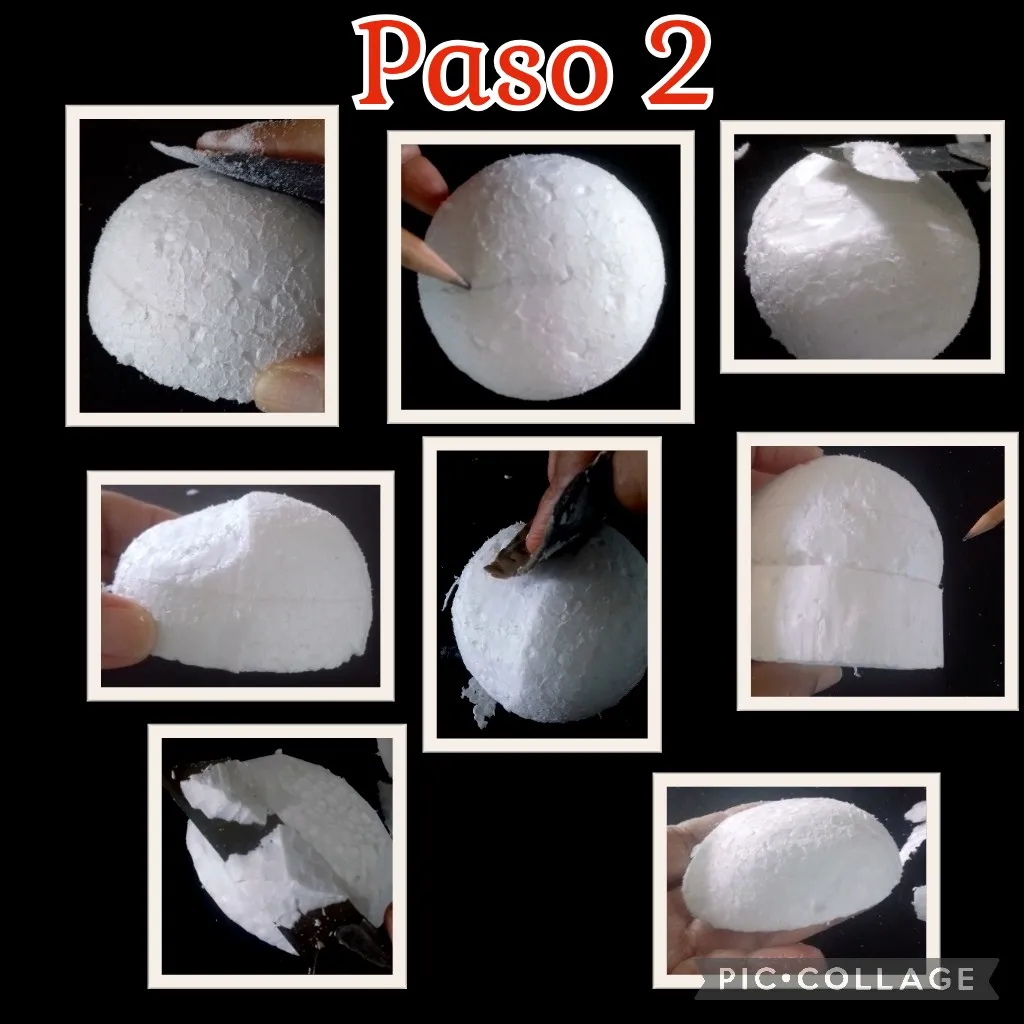
- Ahora comienza a lijar hasta redondear bien, como puedes ver es muy fácil.
- Si quieres darle forma a la esfera para hacer una carita, marca una línea por la mitad de la esfera y rebaja con la cuchilla desde el centro hacia arriba y rematas con la lija.
- Para hacer la otra mitad de la esfera, marca sobre el anime y repite los mismos pasos.

Como hacer Moldes para termoformar esferas:
- Terminadas las dos caras, coloca media esfera y marca sobre un pedazo de cartón, recorta sacando el orificio y lija el borde para quitar imperfecciones del corte, luego vuelve a marcar sobre otro pedazo de cartón y repite el procedimiento.
- Ahora aplica silicón sobre el cartón y une al otro, luego grapa ambos cartones, esto es para que quede más fuerte o duro.
- Luego pasa el cartón por la esfera y asegúrate que quede unos milímetros más ancho para que a la hora de poner el foami caliente sobre la esfera, pase completo hasta abajo.
De igual manera harás otro molde para la parte trasera de la esfera.
Termoformado:
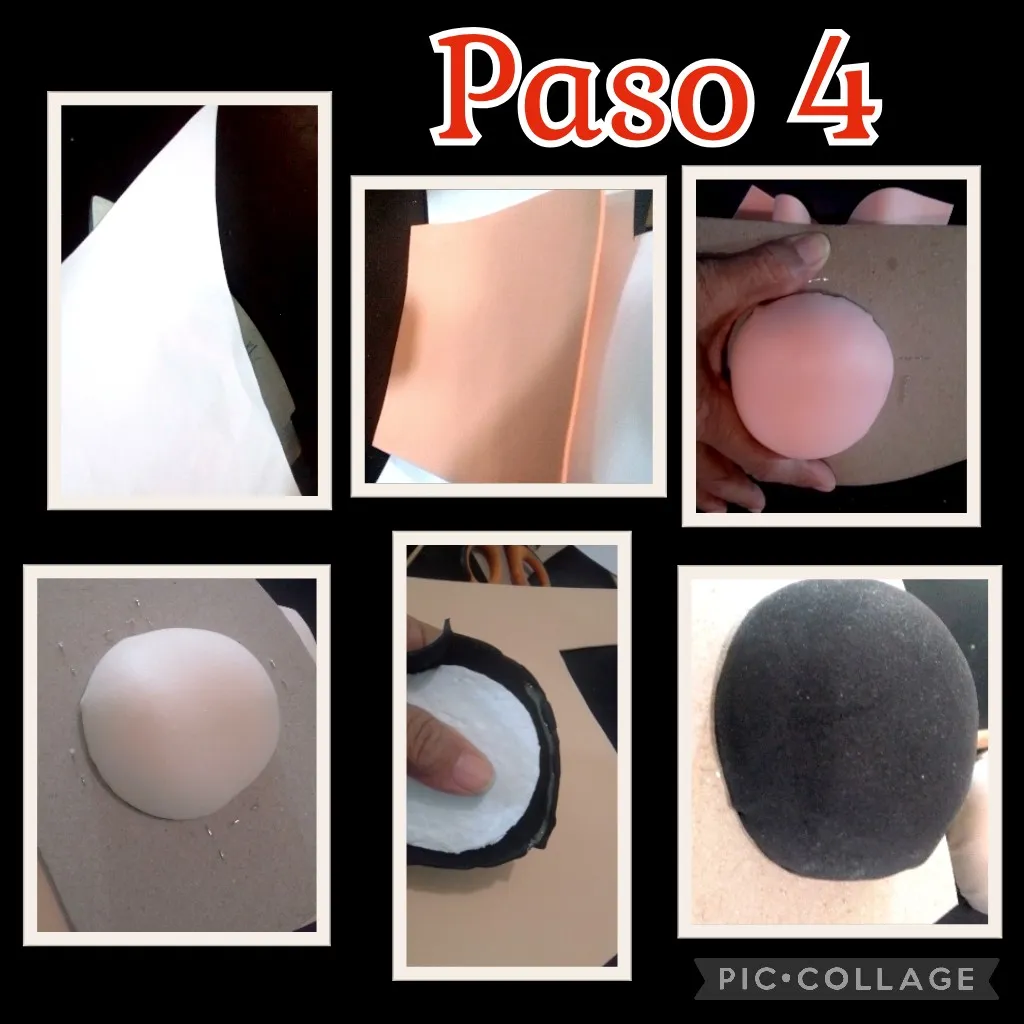
- Coloca un papel sobre la plancha caliente y encima coloca el foami, esto se hace porque hay algunos foami que se pegan o derriten con el calor, luego de asegurarte que esté caliente el pedazo de foami, coloca sobre la mitad de la esfera y pasa el cartón para que toma la forma de la carita, y repite el procedimiento con la parte de atrás que la puedes hacer del color del cabello que quieras para tu muñeca, luego aplica silicón caliente por la orilla del foami y recorta el sobrante.
- Ahora aplica silicón y pega las dos caras.
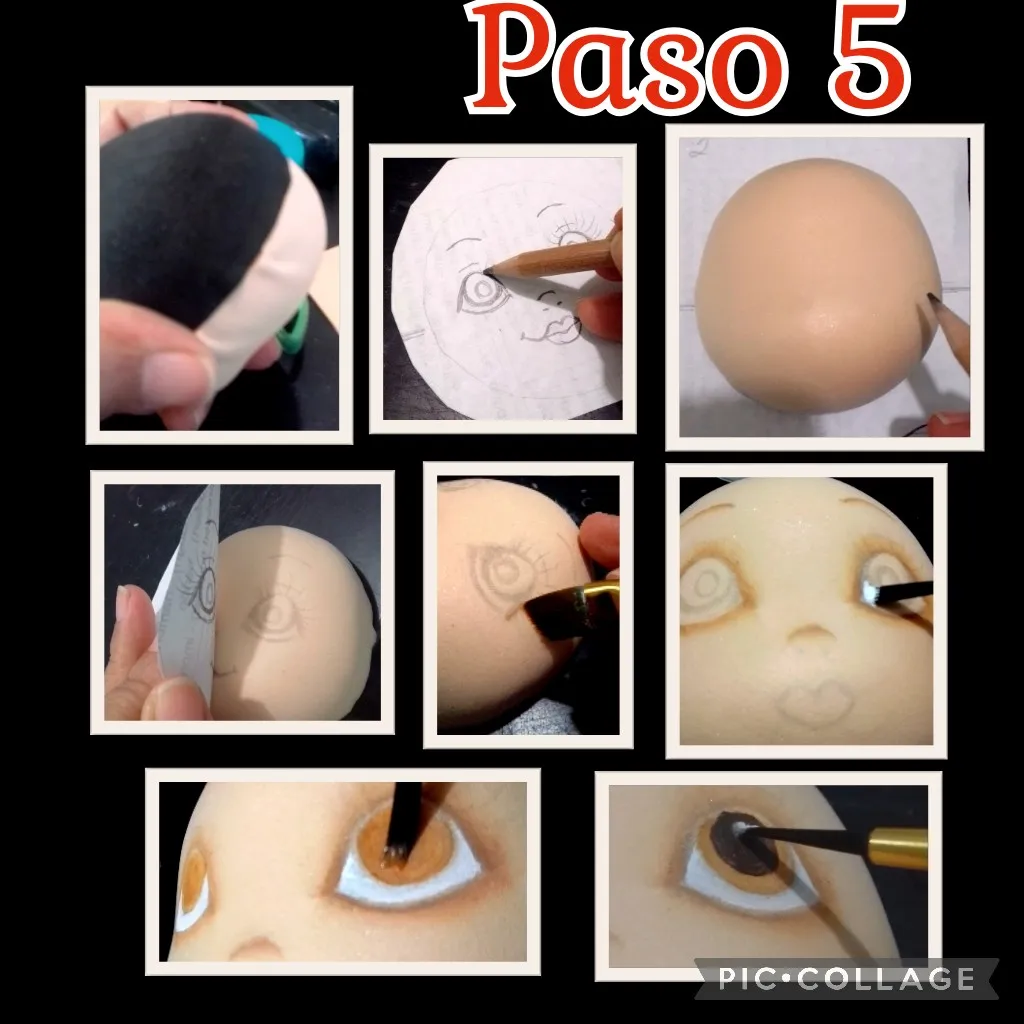
- Aparte en un papel marca la forma de la cara usando el molde de cartón, luego divídela a la mitad y comienza a dibujar de la mitad hacia arriba los ojos, cejas y pestañas, y de la mitad hacia abajo la nariz y boca, si no sabes dibujar puedes imprimir una carita, la remarcas con un lápiz de mina blanda y transfieres al foami haciendo presión para que se marque, esto con mucho cuidado sin dejar mover el papel para que no se distorsione la imagen.
- Luego moja el pincel en agua, secas dejando húmedo y mojas la punta del pincel en pintura marrón y pasa por todo el borde de los ojos, nariz y cejas, dejas secar y rellena los ojos con los colores de tu preferencia.
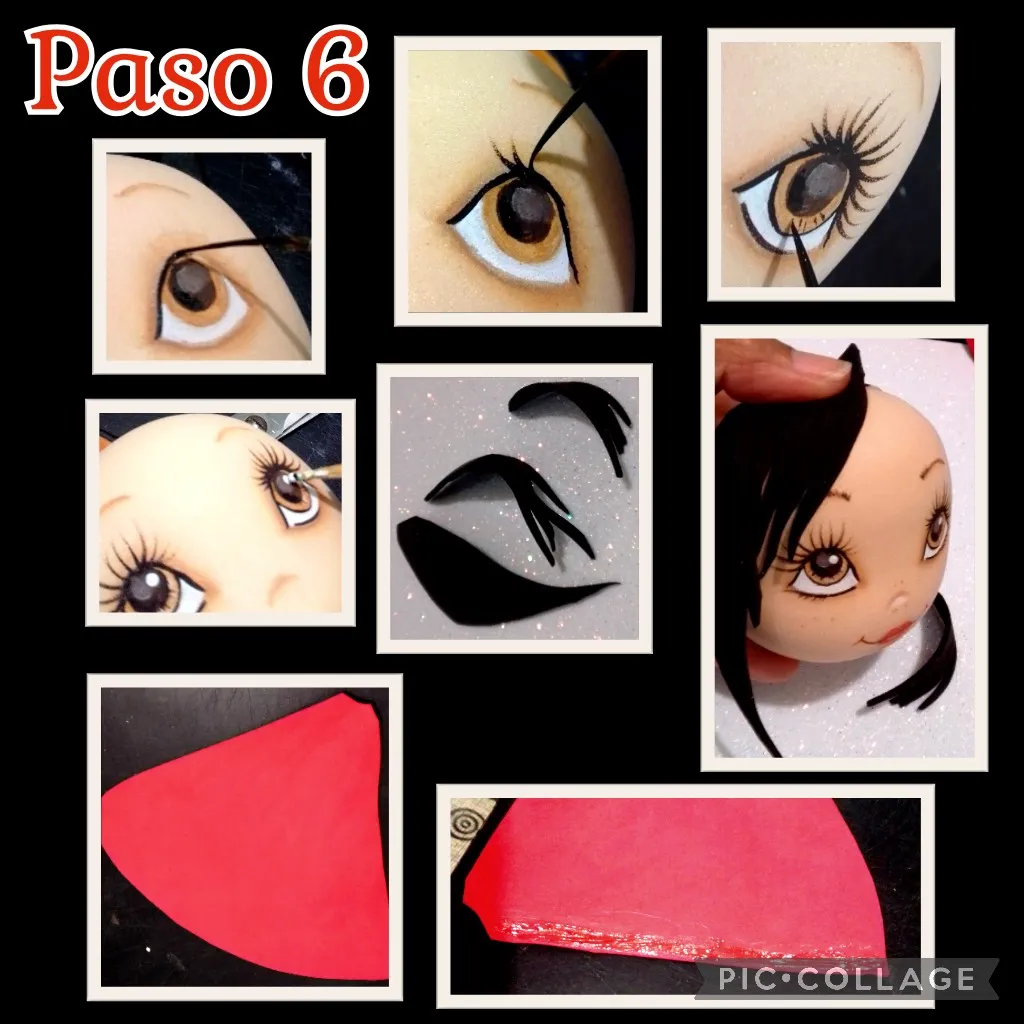
- En este paso vamos a delinear los ojos, pestañas, cejas, pon los puntos de luz y pintas la boca.
- Recorta en foami la forma que quieras para el cabello de tu muñeca, calienta, da forma y pega.
- Aparte mide el contorno de la cabeza y recorta un cono con esas medidas y la altura que deseas y aplica silicón en una de las
orillas.
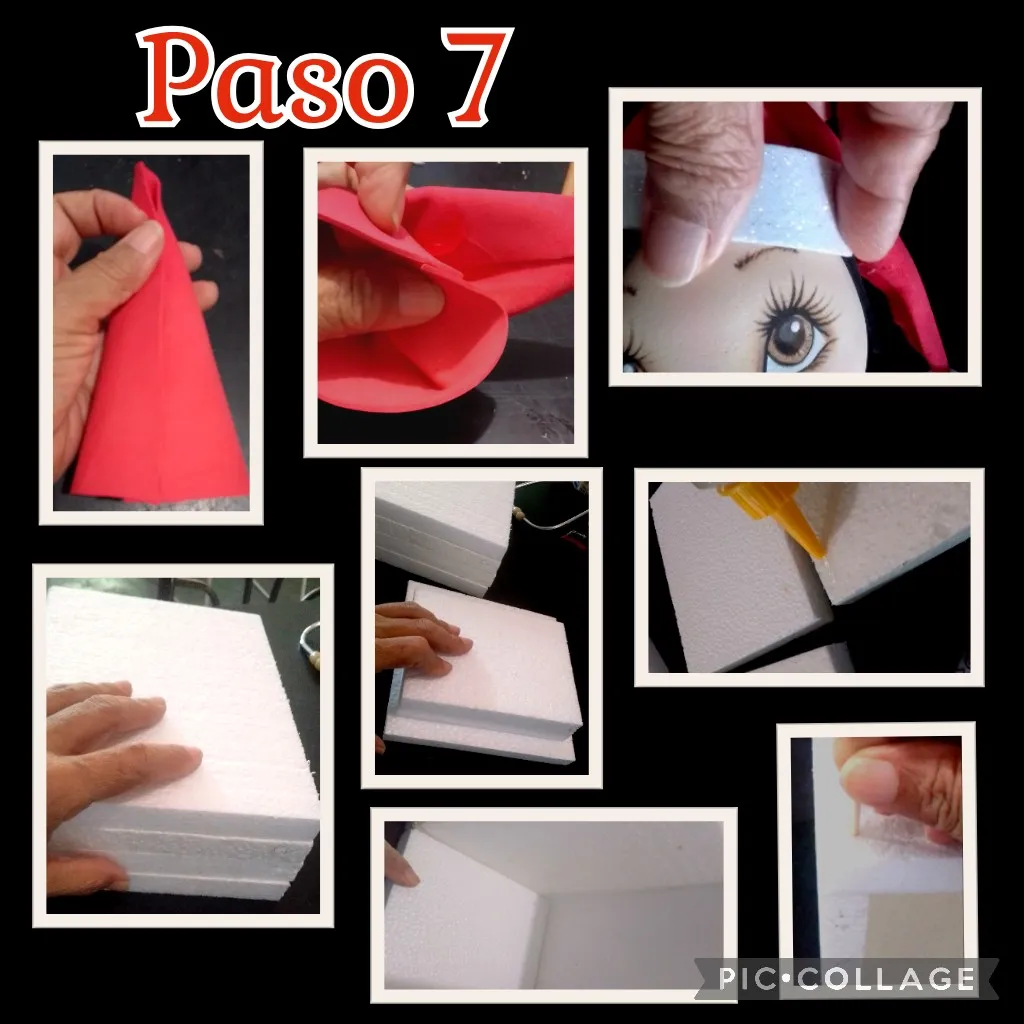
- Pega el cono, luego calienta con la plancha o secador y le das la forma deseada, recorta una tira blanca en foami y pega en el borde, aplicas silicón y pega a la cabeza, haciendo presión hasta que pegue bien.
Caja:
Recorta:
2 piezas de 17 x 12 cms (delantera y trasera) 2 " de 14 x 12 cms (laterales) 1 " de 14 x 10,5cms (base caja) 1 " de 13.5x 10 cms (base tapa) 1 " de 15 x 18 cms (tapa)- Aplica silicón en los laterales de la base de la caja y comienza a armar pegando cada una de las piezas y fija con palillos de madera en los extremos.
- Luego pega la parte interna de la tapa, a la tapa.
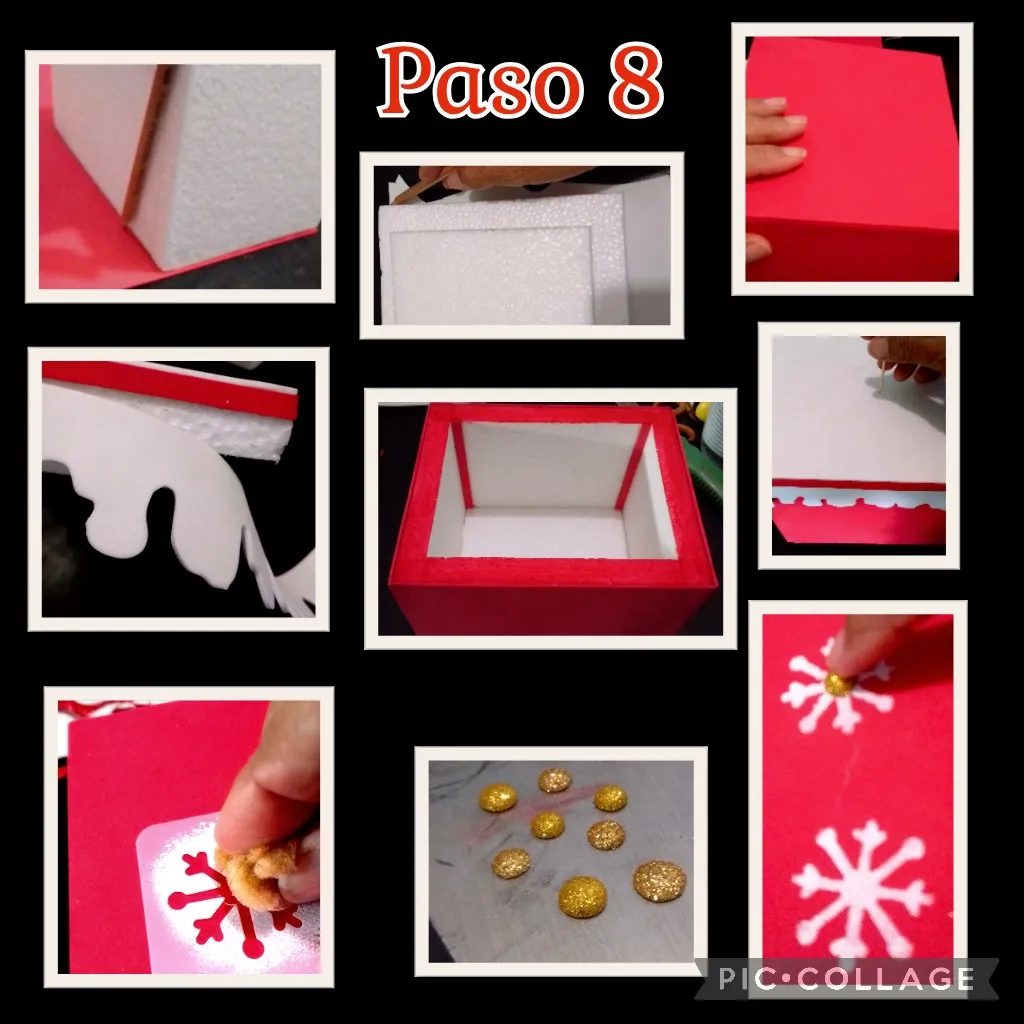
Ahora nos toca forrar la caja.
- Coloca la caja sobre el foami y marca todo el contorno de cada uno de los lados, recorta uno a uno y vas pegando hasta cubrirla toda igual que a la tapa.
- Aparte recorta una tira larga en foami rojo delgada y otra en foami blanco a esta le das forma de nieve y pega en todo el borde de la tapa.
- Ahora pinta el borde de la caja con pintura roja y rematas por dentro con tiritas rojas para tapar los imperfectos.
Siempre es bueno rematar bien todas las piezas que realizamos. - Luego con un palito de madera haremos un orificio en el centro de la caja.
- Ahora decoramos el frente pintando con un esténcil unos copos y también puedes recortar unos círculos y da forma con la plancha y pega en los copos.

- Para hacer el lazo, recorta 4 tiras de foami, doblas a la mitad y aplicas silicón y armas 2 cruces y luego pegas formando como un asterisco y dejas secar, aparte recorta dos círculos das forma y unes rematando con una tirita de foami y pegas al gorro.
- Aparte marcas una flor de 6 pétalos y das forma en las puntas con el calor de la plancha y luego pegarás a la cabeza de la muñeca.
- Ahora haz un orificio en el centro del lazo.
![]()
- Ya para terminar aplica silicón y pega el lazo metiendo el palito en el orificio de la tapa, luego el cuello verde y por último pega la cabeza.
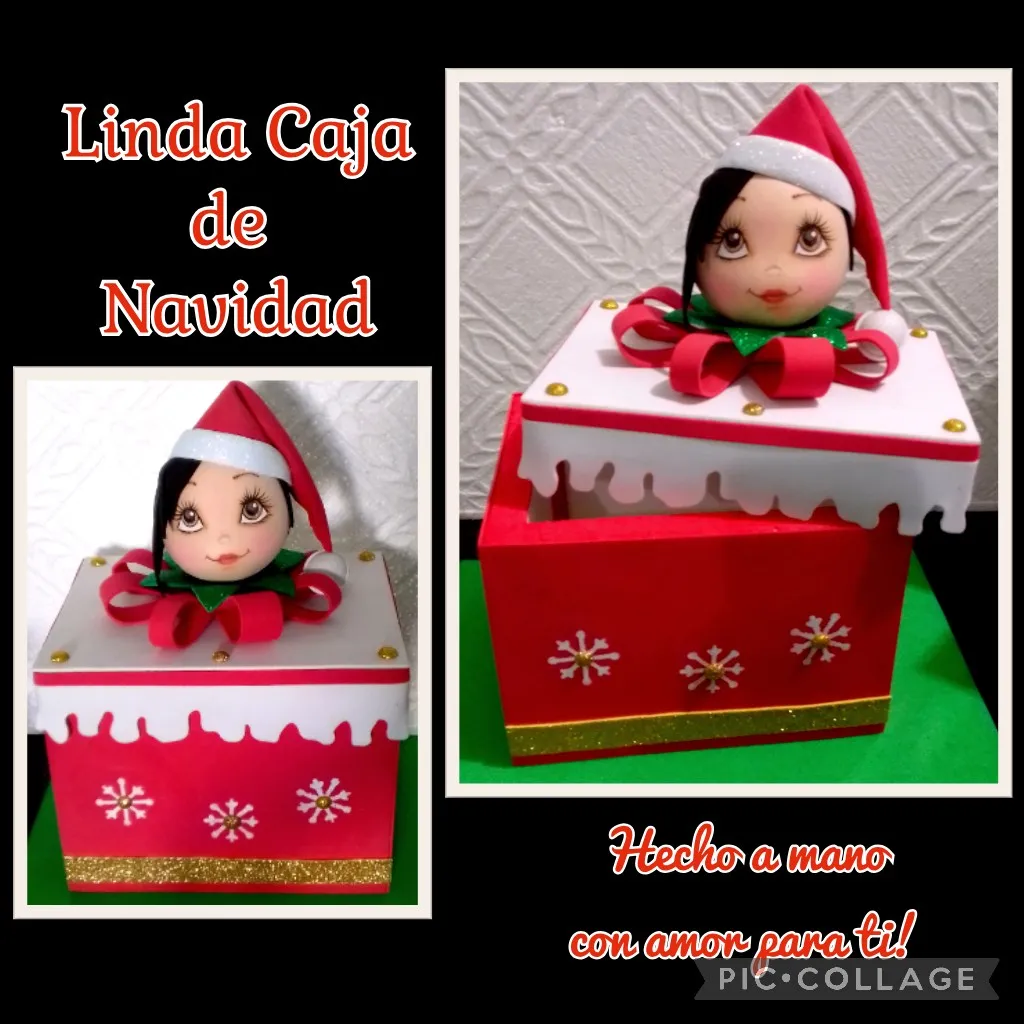
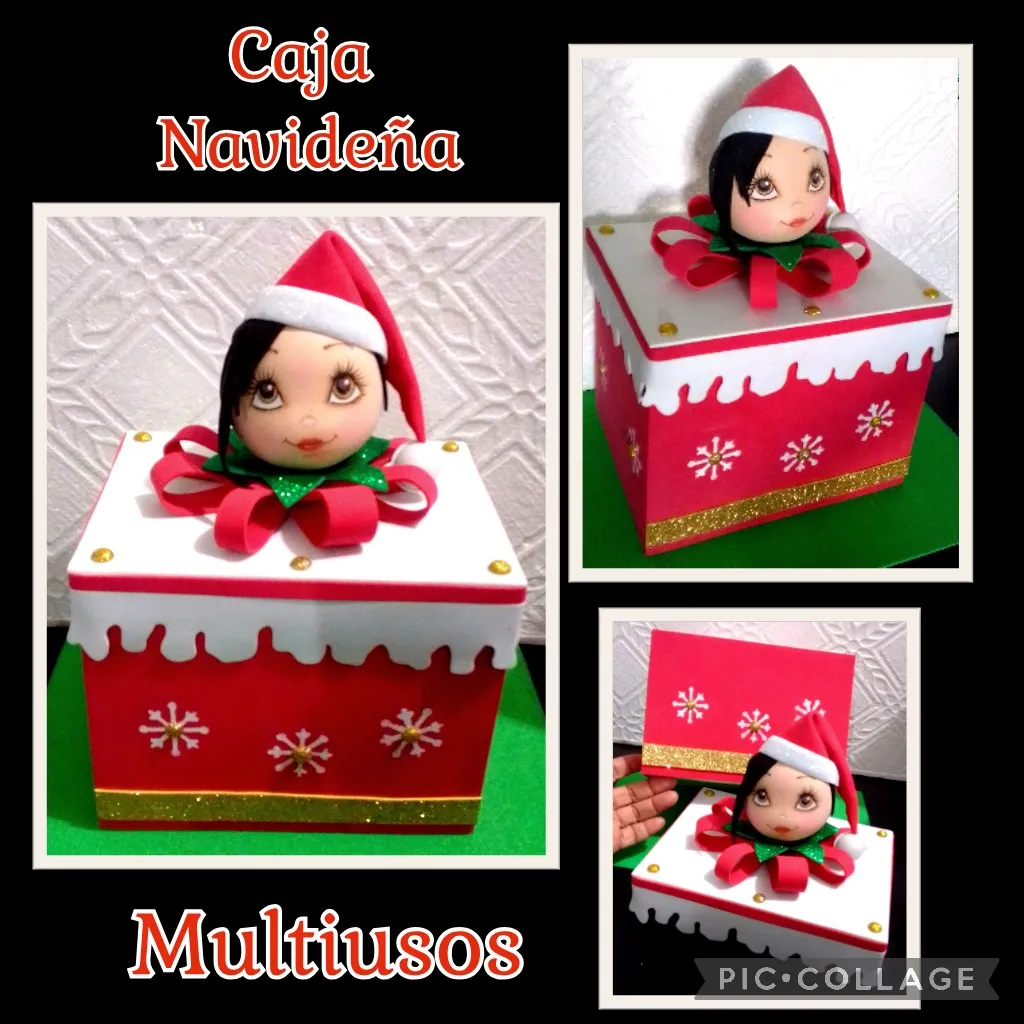
Así queda terminada este Linda Caja Navideña que le puedes dar el uso que quieras.

Ahora si, termino mi tutorial, esperando te sea útil y lo que más me agradaría, es que con el hayas aprendido.
Mi publicación esta editada con etiquetas HTML, traducida con DeepL, las fotos tomadas con mi teléfono Blu G5 editadas con Pic Collage.
Fuente:
https://www.manualidadesapasos.com/moldes-caseros-para-termoformar-goma-eva-o-foamy/
Me despido esperando te haya gustado mi tutorial.
Muchas gracias por el comentario, por tu visita y apoyo.
Saludos.
English*
Good evening to all my dear friends of this beautiful community.
Welcome to my favorite space, where I always share my crafts and today I am very happy to participate in the Foami & Anime Fusion Contest, with a step by step, where you will learn how to make and decorate a beautiful box, with anime and decorated with foami with Christmas motif.This tutorial is a little long because I will show you how to do every detail, but I am sure you will like it and that you will be able to make it.
Now I'll show you the materials you'll need:
| Anime | Foami |
|---|---|
| Cold paints | Brushes |
| Silicone | Thick cardboard |
| Knife | Pencil |
| Electric clothes iron |
With that said we will begin the Procedure:
How to make the anime sphere:
- Sometimes we don't have an anime sphere at home so I'll tell you how to make it:
- Mark a circumference of the desired size on a piece of anime, I used a plastic lid, then apply silicone and glue another piece of anime and let it dry.
- Now cut with a blade or exacto the marked circle and sand the entire edge to match, then with the blade start removing the edge and cut from the center down rounding the piece of anime giving the shape of a half sphere. See photo.
- Now start sanding until rounding well, as you can see it is very easy.
- If you want to shape the sphere to make a face, mark a line down the middle of the sphere and cut with the blade from the center upwards and finish it off with the sandpaper.
- To make the other half of the sphere, mark on the anime and repeat the same steps.
How to make thermoforming molds for spheres:
- Once the two sides are finished, place half a sphere and mark on a piece of cardboard, cut out the hole and sand the edge to remove imperfections from the cut, then mark again on another piece of cardboard and repeat the procedure.
- Now apply silicone on the cardboard and attach it to the other one, then staple both pieces of cardboard together, this is to make it stronger or harder.
- Then pass the cardboard through the sphere and make sure it is a few millimeters wider so that when it is time to put the hot foami on the sphere, it will go all the way down.
In the same way you will make another mold for the back of the sphere.
Thermoforming:
- Place a piece of paper over the hot iron and place the foami on top, this is done because there are some foami that stick or melt with the heat, after making sure that the piece of foami is hot, place it on the middle of the sphere and pass the cardboard to take the shape of the face, and repeat the procedure with the back that you can do the color of the hair you want for your doll, then apply hot silicone around the edge of the foami and trim the excess.
- Now apply silicone and glue the two sides together.
- Separately on a piece of paper mark the shape of the face using the cardboard mold, then divide it in half and start drawing from the middle up the eyes, eyebrows and eyelashes, and from the middle down the nose and mouth, if you do not know how to draw you can print a face, mark it with a soft lead pencil and transfer it to the foami making pressure to mark it, this very carefully without moving the paper so as not to distort the image.
- Then dip the brush in water, dry leaving it wet and dip the tip of the brush in brown paint and go around the edge of the eyes, nose and eyebrows, let it dry and fill in the eyes with the colors of your choice.
- In this step we will outline the eyes, eyelashes, eyebrows, put the points of light and paint the mouth.
- Cut in foami the shape you want for your doll's hair, heat, shape and glue.
- Measure the contour of the head and cut out a cone with those measurements and the height you want and apply silicone on one of the edges.
edges.
- Glue the cone, then heat with the iron or hair dryer and give it the desired shape, cut a white strip in foami and glue on the edge, apply silicone and glue to the head, pressing until it sticks well.
Box:
Cut out:
2 pieces of 17 x 12 cms (front and back). 2 " of 14 x 12 cms (sides) 1 " of 14 x 10.5cms (box base) 1 " of 13.5x 10 cms (lid base) 1 " of 15 x 18 cms (lid)- Apply silicone on the sides of the base of the box and start assembling by gluing each of the pieces and fix with wooden sticks at the ends.
- Then glue the inner part of the lid to the lid.
Now it's time to line the box.
- Place the box on the foami and mark all the outline of each of the sides, cut one by one and glue until you cover it all the same as the lid.
- Cut a long strip in thin red foami and another in white foami and glue it in the shape of snow and glue all around the edge of the lid.
- Now paint the edge of the box with red paint and finish it inside with red strips to cover the imperfections.
It is always good to finish off all the pieces we make. - Then with a wooden stick we will make a hole in the center of the box.
- Now we decorate the front painting with a stencil some flakes and you can also cut out some circles and give shape with the iron and glue on the flakes.
- To make the bow, cut out 4 strips of foami, fold in half, apply silicone and make 2 crosses then glue forming an asterisk and let dry, then cut out two circles, shape and join them together with a strip of foami and glue to the hat.
- Then mark a flower with 6 petals and shape the ends with the heat of the iron and then glue it to the doll's head.
- Now make a hole in the center of the bow.
![]()
- To finish, apply silicone and glue the bow by putting the stick in the hole in the lid, then the green neck and finally glue the head.
This is how this cute Christmas box is finished and you can use it for whatever you want.
Now I finish my tutorial, I hope you find it useful and what would please me the most, is that you have learned from it.
My publication is edited with HTML tags, translated with DeepL, photos taken with my Blu G5 phone edited with Pic Collage.
Source:
https://www.manualidadesapasos.com/moldes-caseros-para-termoformar-goma-eva-o-foamy/
I say goodbye hoping you liked my tutorial.
Thank you very much for the comment, for your visit and support.
Regards.