

Buenas noches queridos amigos y creadores que me visitan.
Bienvenidos a mi espacio preferido
Así que acompáñame a ver y aprender como se hace.
Los materiales que vas a usar son:

| Retazos de tela | Algodón de relleno |
|---|---|
| Tijera | hilos y agujas |
| Shakiras | Cinta de tela |
| Argolla de llavero | Palito |

Comencemos:
Paso 1:
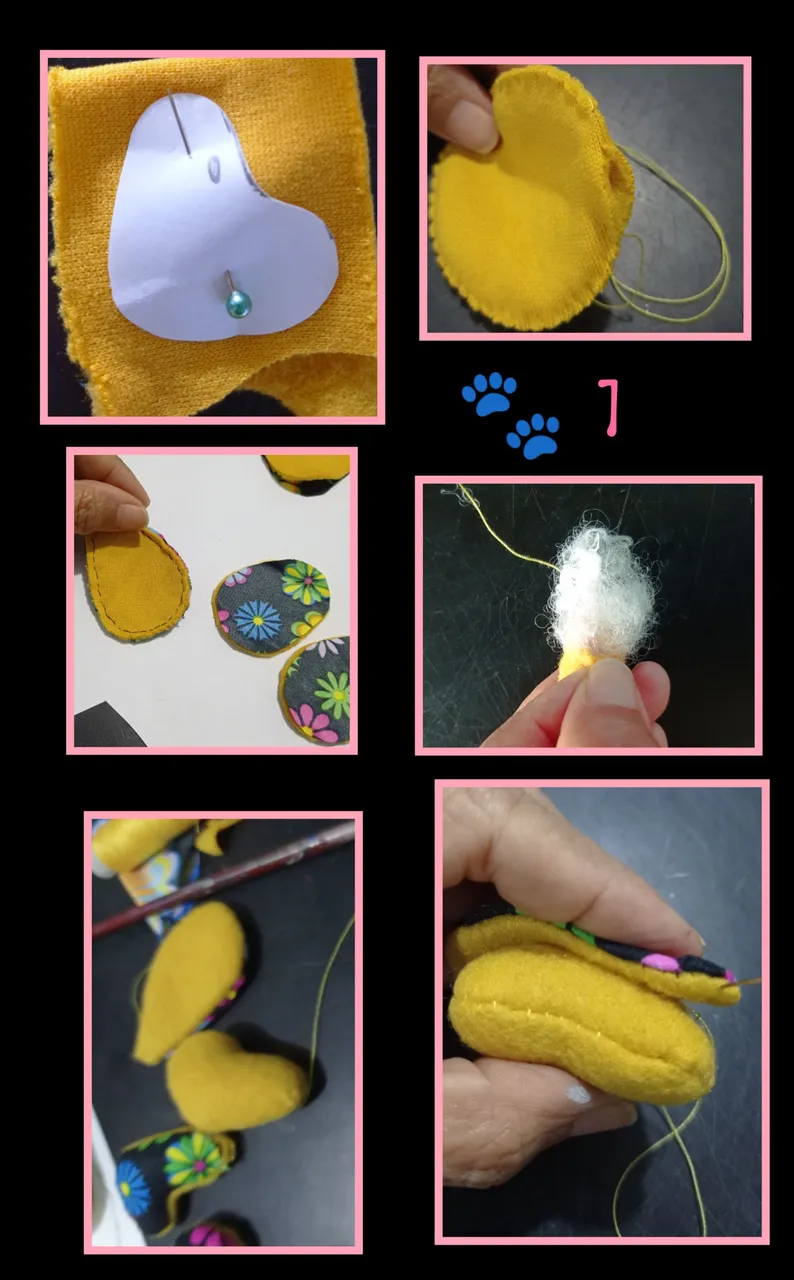
- Recorta las piezas de los moldes y coloca sobre la tela fijando con un alfiler para luego recortar, así harás con cada una.
-Luego cose por todo el borde cada una de las piezas y deja una pequeña abertura para voltear, si tienes máquina de coser puedes hacerlo aunque es un poco difícil por lo pequeño de las piezas. - Ahora rellena con algodón y cierra las aberturas.
- Luego comenzaremos a coser y armar, comenzamos por la cabeza a la que le pagaremos las orejas.
Paso 2:
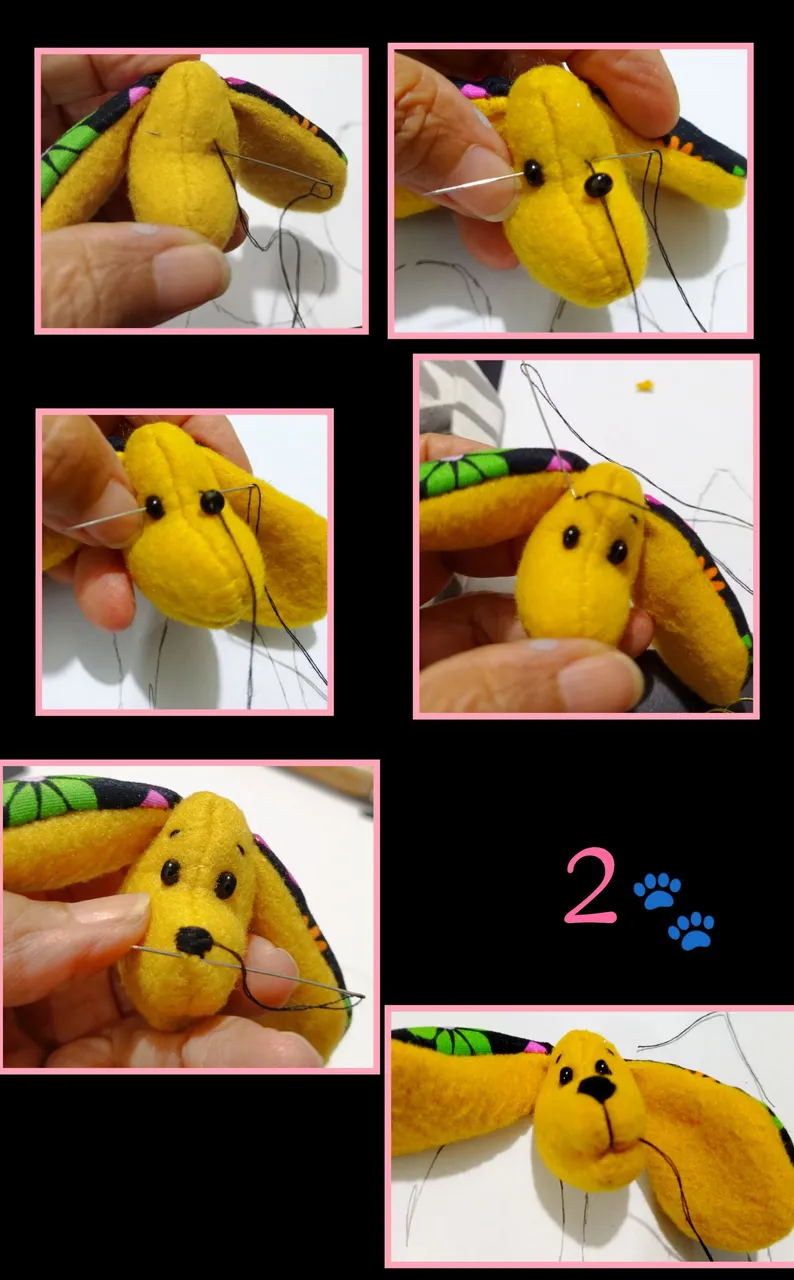
- Ahora con una aguja con hilo negro comenzaremos haciendo una puntada a cada lado para marcar donde coser los ojos, luego has varias puntadas para asegurarlos bien.
- Luego haz dos puntadas en la parte frontal para las cejas.
- Ahora borda la nariz haciendo puntadas de un lado a otro y disminuyendo tratando quede como un triángulo, después haz una puntada larga hacia abajo para hacer la boca.
Paso 3:

- Mira como va quedando!
Paso 4:

Cose la cabeza a la parte superior del cuerpo asegurando con varias puntadas, luego cose patas delanteras y traseras y por último cose la cola.
Luego pasa una cinta por la argolla del llavero y fija al cuello.
Paso 5:

- Ahora con hilo rojo borda la boca y saca el hilo por la parte baja de la cabeza.
- Luego haz un lazo y cose o pega en el centro de la cabeza.
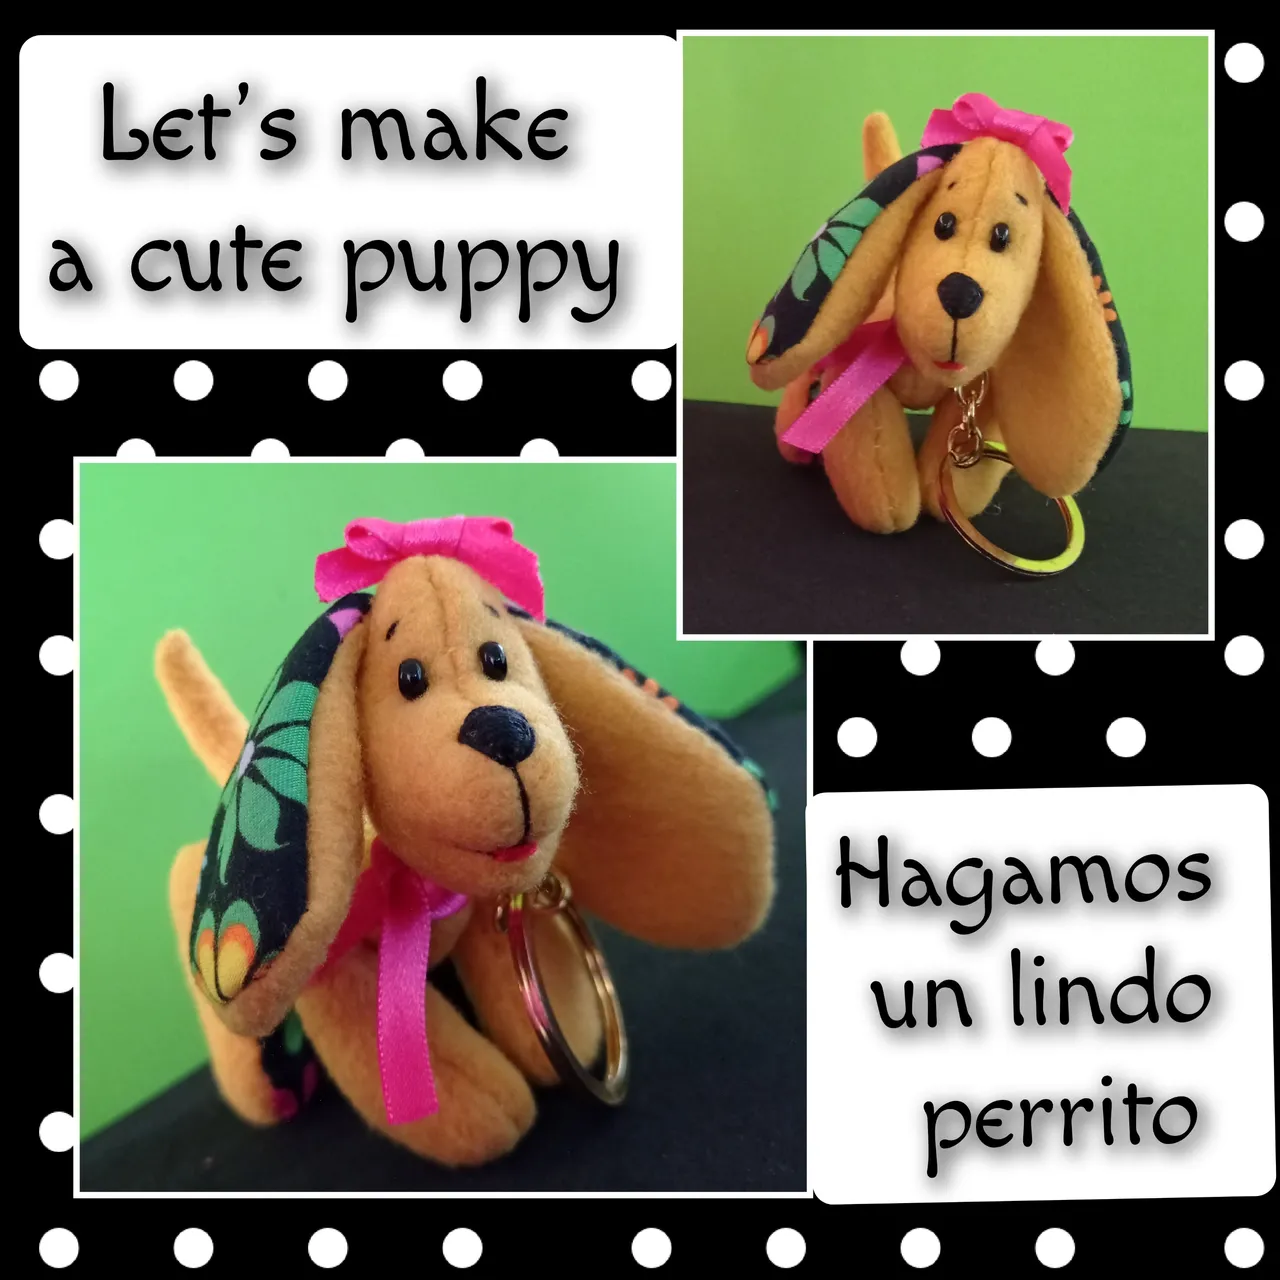
- Así de lindo se ve este pequeño perrito!
Ahora te mostraré unas fotos de mi trabajo el cual espero te haya gustado.


Traductor: DeepL
Editor de fotos: GridArt
Teléfono: Redmi Note 9
Ahora me despido esperando que te haya gustado mi tutorial.
Deseo que te animes y lo realices.
Saludos y hasta una nueva oportunidad.
English:
Good evening dear friends and creators who visit me.
Welcome to my favorite space
So join me to see and learn how it's done.
The materials you will use are:
| Cloth scraps | Cotton stuffing |
|---|---|
| scissors | threads and needles |
| Shakiras | Cloth ribbon |
| Key ring | Stick |
Let's get started:
Step 1:
- Cut out the pieces from the molds and place them on the fabric fixing them with a pin and then cut them out, this is how you will do with each one.
-Then sew all around the edge of each of the pieces and leave a small opening to turn over, if you have a sewing machine you can do it although it is a little difficult because of the small pieces. - Now stuff with cotton and close the openings.
- Then we will begin to sew and assemble, we start with the head to which we will pay the ears.
Step 2:
- Now with a needle with black thread we will start by making a stitch on each side to mark where to sew the eyes, then make several stitches to secure them well.
- Then make two stitches on the front for the eyebrows.
- Now embroider the nose making stitches from one side to the other and decreasing trying to make a triangle, then make a long stitch downwards to make the mouth.
Step 3:
- Look how it's coming along!
Step 4:
Sew the head to the upper part of the body securing with several stitches, then sew front and back legs and finally sew the tail.
Then thread a ribbon through the key ring and attach to the neck.
Step 5:
- Now with red thread embroider the mouth and pull the thread through the lower part of the head.
- Then make a loop and sew or glue in the center of the head.
- This is how cute this little doggie looks!
Now I will show you some pictures of my work which I hope you liked.
Translator: DeepL
Photo Editor: GridArt
Phone: Redmi Note 9
Now I say goodbye hoping you liked my tutorial.
I hope you are encouraged and you realize it.
Greetings and until a new opportunity.