Buenas noches y bienvenidos sean todos a este mi Blog, por aquí feliz de recibirlos.
Ahora te invito a que me acompañes y veas como se hace, estoy segura que este paso a paso te será útil en cualquier momento.
Vas a necesitar:
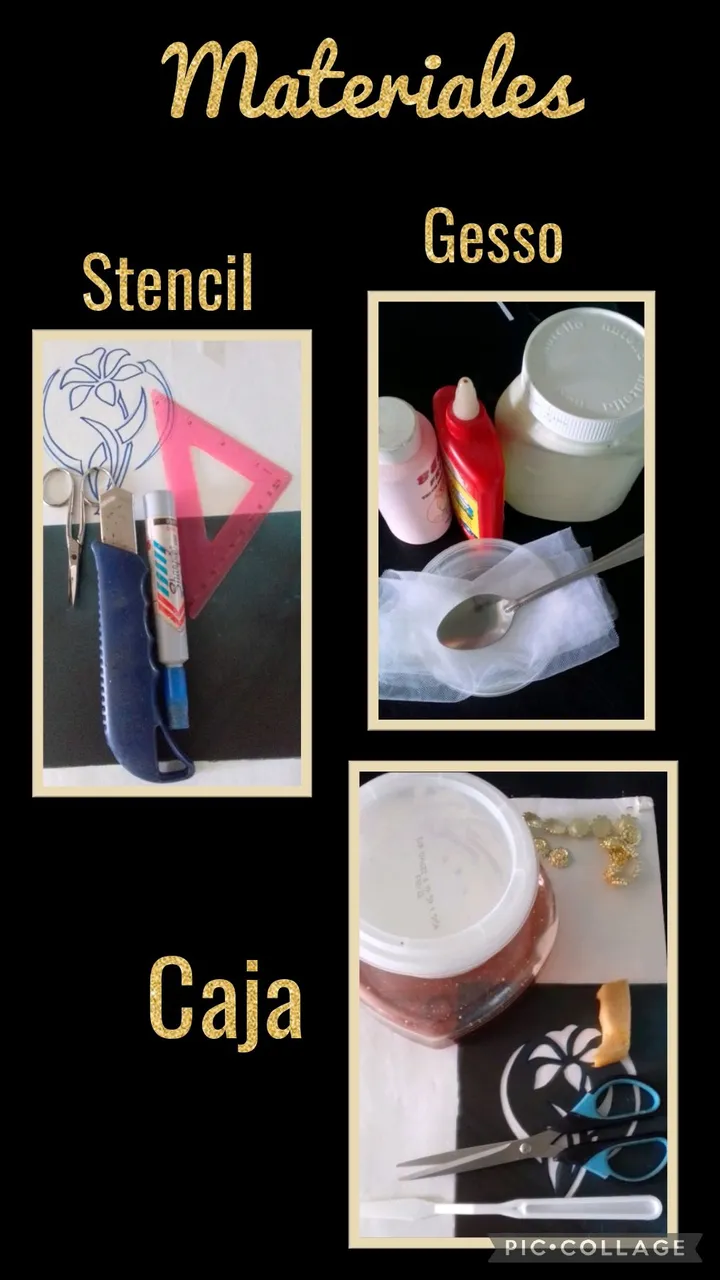
Para el stencil:
| Dibujo o impresión | Lámina de radiografía o acetato |
|---|---|
| Regla | Marcador |
| Cuchilla | Tijera |
Para el gesso:
| Talco | Yeso |
|---|---|
| Cola blanca | Pintura acrílica |
| Colador o tul | Cucharilla |
| Envase con tapa |
Para la caja:
| Caja plástica de bombones | Gesso |
|---|---|
| Stencil o plantilla | Tijera |
| Goma espuma | Espátula |
| Adorno dorado | Silicón líquido |
| Pinturas y pinceles | Lija |
Comencemos:
Paso 1:
Hacer stencil o plantilla.
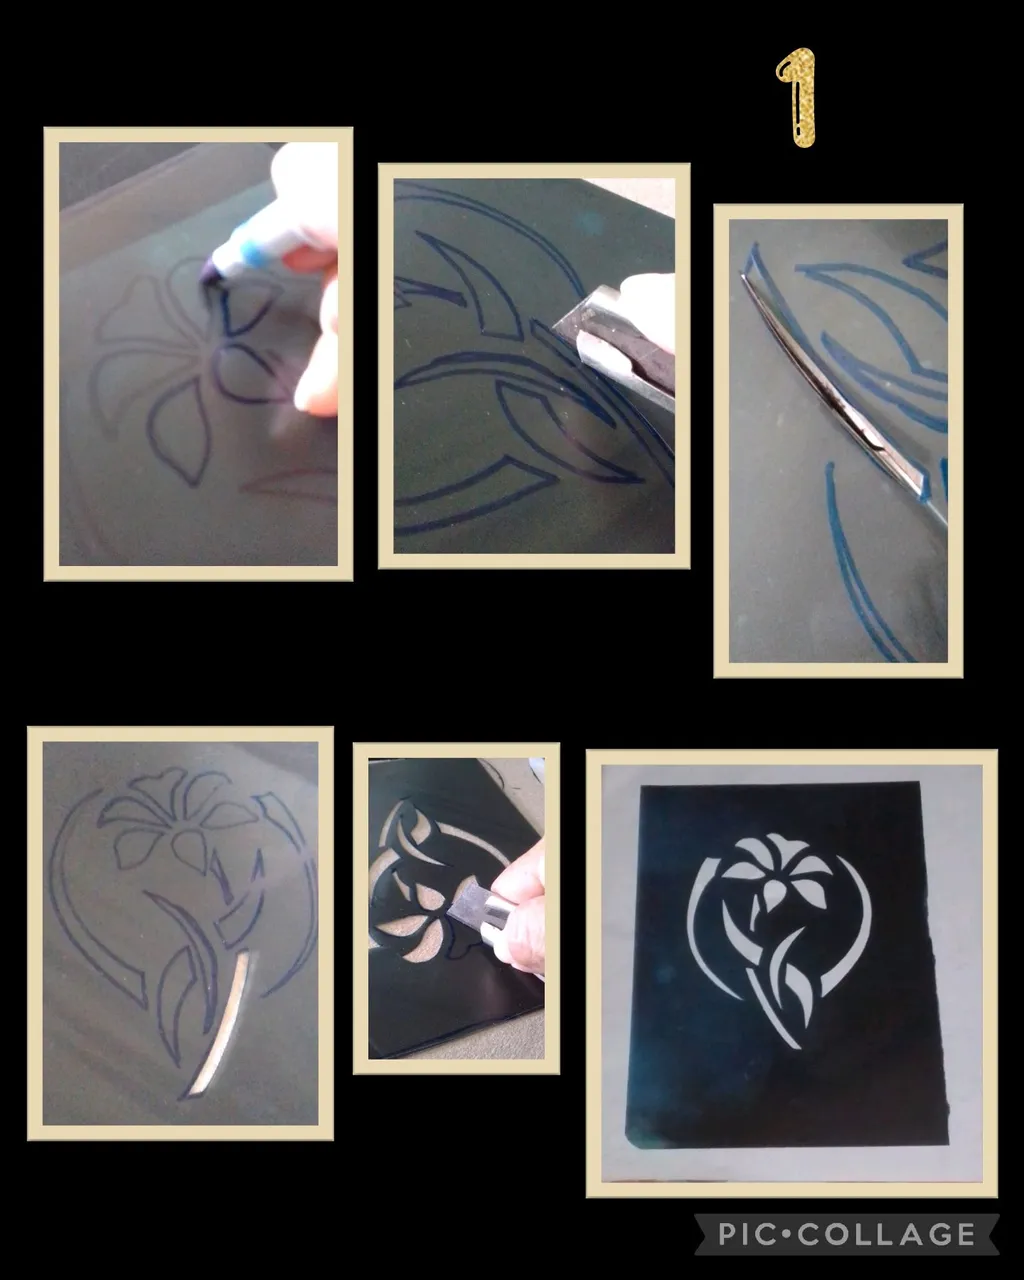
- Remarca el dibujo con marcador, luego coloca el cuadro de la radiografía y calca con el marcador.
- Ahora comienza a pasar la cuchilla por las líneas calcadas haciendo presión hasta que haga el corte, luego termina de recortar cada forma con la tijera.
Así ya estará lista para usar.
Recuerda hacer los cortes con mucho cuidado y exactos.
Paso 2:
Preparar el gesso:

Usarás 1 cucharada de talco.
1 cucharada de pintura acrílica.
1 cucharada de cola blanca.
- Coloca un colador en el envase y tamiza el talco por si hay grumos, luego añade la pintura y por último la cola blanca y une hasta formar una crema espesa.
Paso 3:
Pintar o texturizar con goma espuma.

- Ahora moja un pedacito de esponja en la preparación y comienza a pintar la tapa de la caja moteando o dando golpecitos hasta pintarla toda, deja secar y repite para dar otra capa, si la quieres más gruesa puedes repetir el procedimiento, también si quieres puedes lijar para quitar o rebajar el texturizado
particularmente a mi me gusta sin lijar.
Paso 4:
Plasmar el dibujo con gesso.
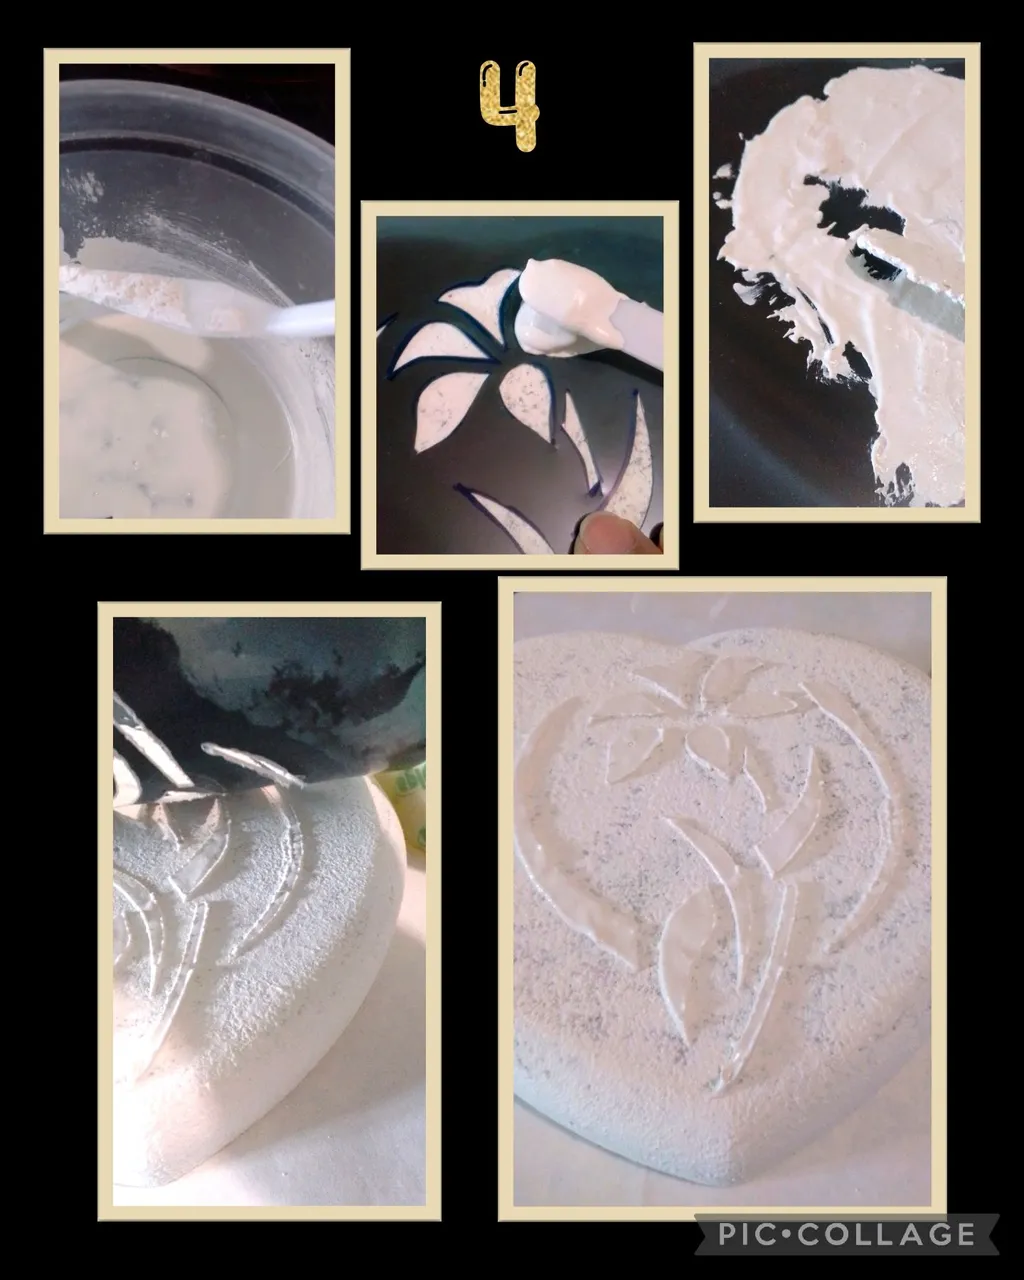
- Para hacer el dibujo al relieve, agrega 1/2 cucharada de yeso a la mezcla y une hasta que hagas una mezcla gruesa.
- Coloca la plantilla sobre la tapa ya seca y con la ayuda de una espátula riega la mezcla hasta cubrir todo el dibujo e inmediatamente levanta la plantilla con cuidado.
Así quedará el dibujo sobre la tapa, deja secar bien por 1 ó 2 horas.
Paso 5:
Lijar y pintar.

- Ya seca la caja, pasa una lija 360 para quitar imperfectos y alizar bordes del dibujo en la pieza.
- Ahora aplica una mano con pintura acrílica por toda la pieza, deja secar bien y da otra capa de pintura y deja secar.
Paso 6:
Pintar la flor:
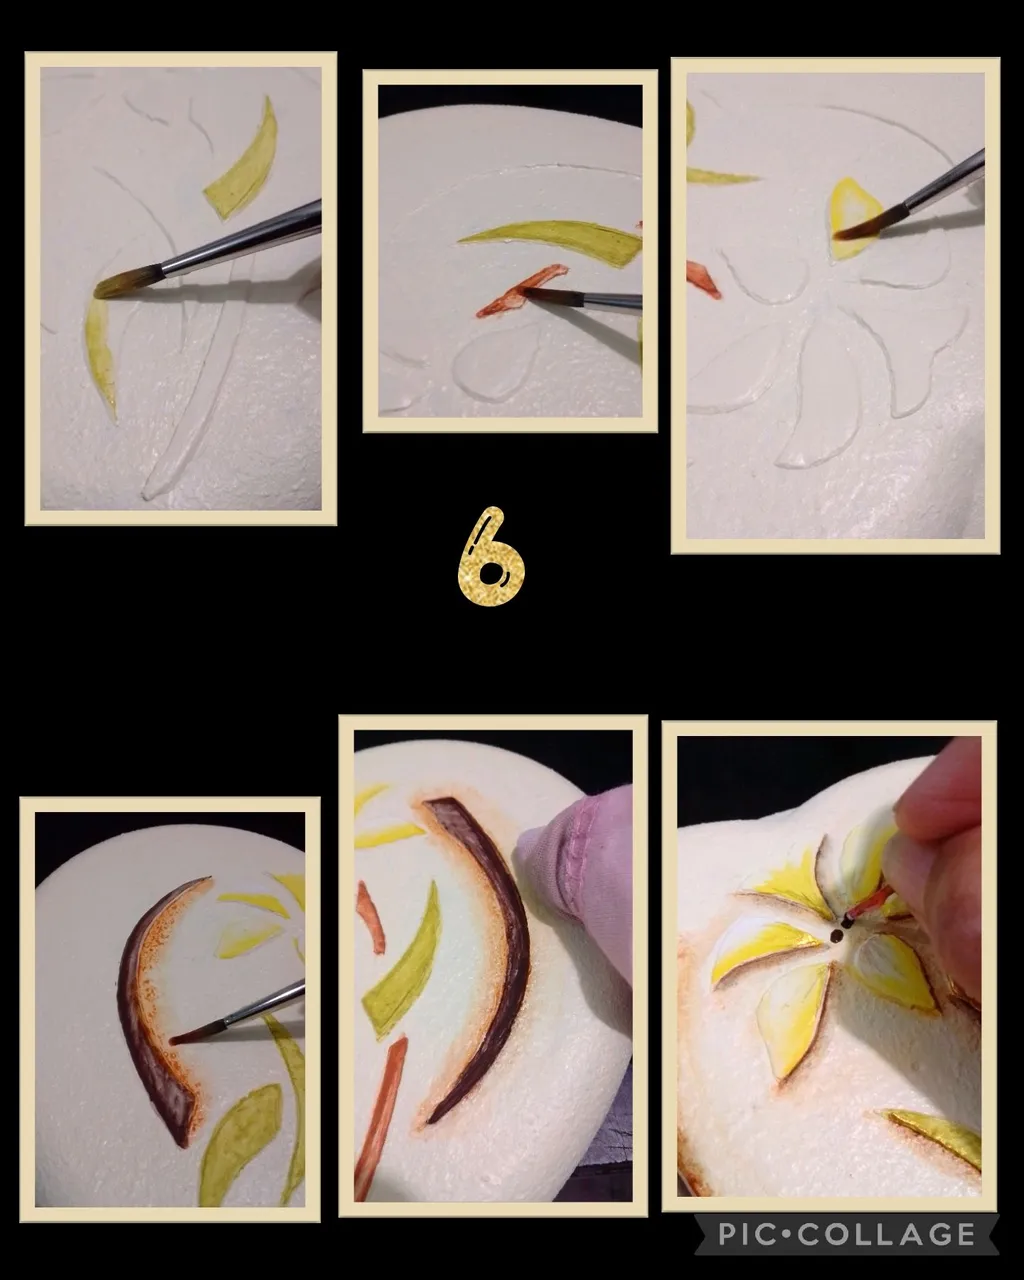
- Ahora mezcla pintura verde con agua y pinta las hojas, luego repite los pasos con las demás pinturas y aplica el color correspondiente a la figura.
- Aparte es un aguado con marrón y aplica en los bordes para envejecer y con un pañito húmedo retira muy suavemente y después con un palito pon puntos en el centro de la flor.
Paso 7:
Pegar adorno o pasamanería.

- Para terminar con la pintura, aplica toques con color dorado luego aplica silicón liquido en un extremo del adorno dorado y pega por el contorno de la tapa.
Paso 8:

- Une las puntas del adorno y así quedará lista y decorada la tapa de la caja.


Fuentes:
https://es.wikipedia.org/wiki/Estarcido
https://es.wikipedia.org/wiki/Gesso

Ahora toca despedirme y espero que mi publicación te sea útil y de tu agrado.
Muchas gracias por el apoyo!
Saludos
English:
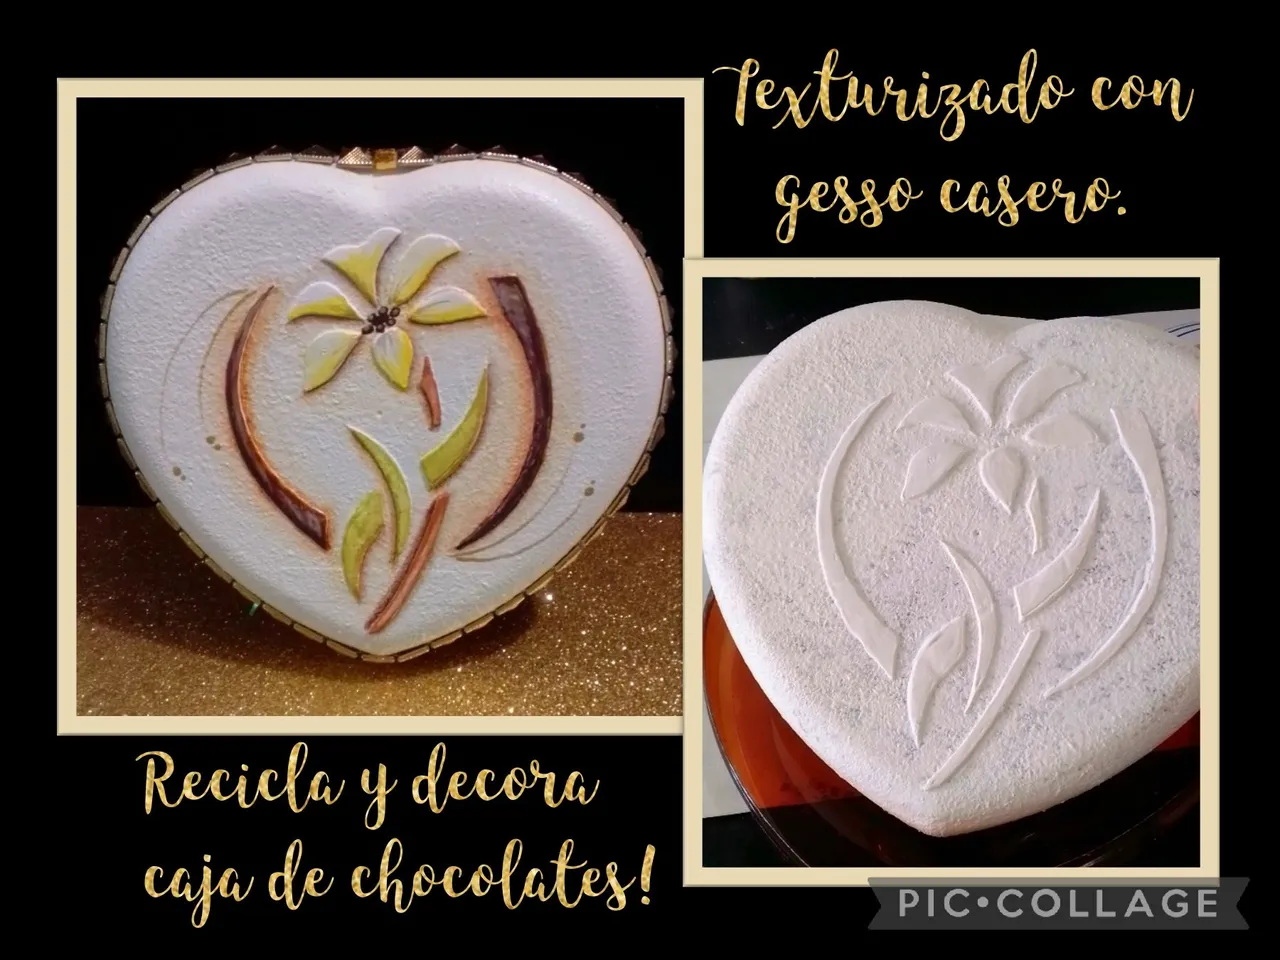
Today I have a three in one...hahaha... I will share with you a tutorial where I show you how to make a stencil made with an x-ray film.
A stencil is a stencil with a cut out drawing that is used to reproduce the image several times, sometimes to paint but, in this case you will give it another use, I will explain you later.
I will also teach you how to prepare homemade gesso, which we will use to give base and decorate texturing the box.
Gesso is a preparation that is also used as a base to seal surfaces such as canvas, styrofoam, wood, etc.
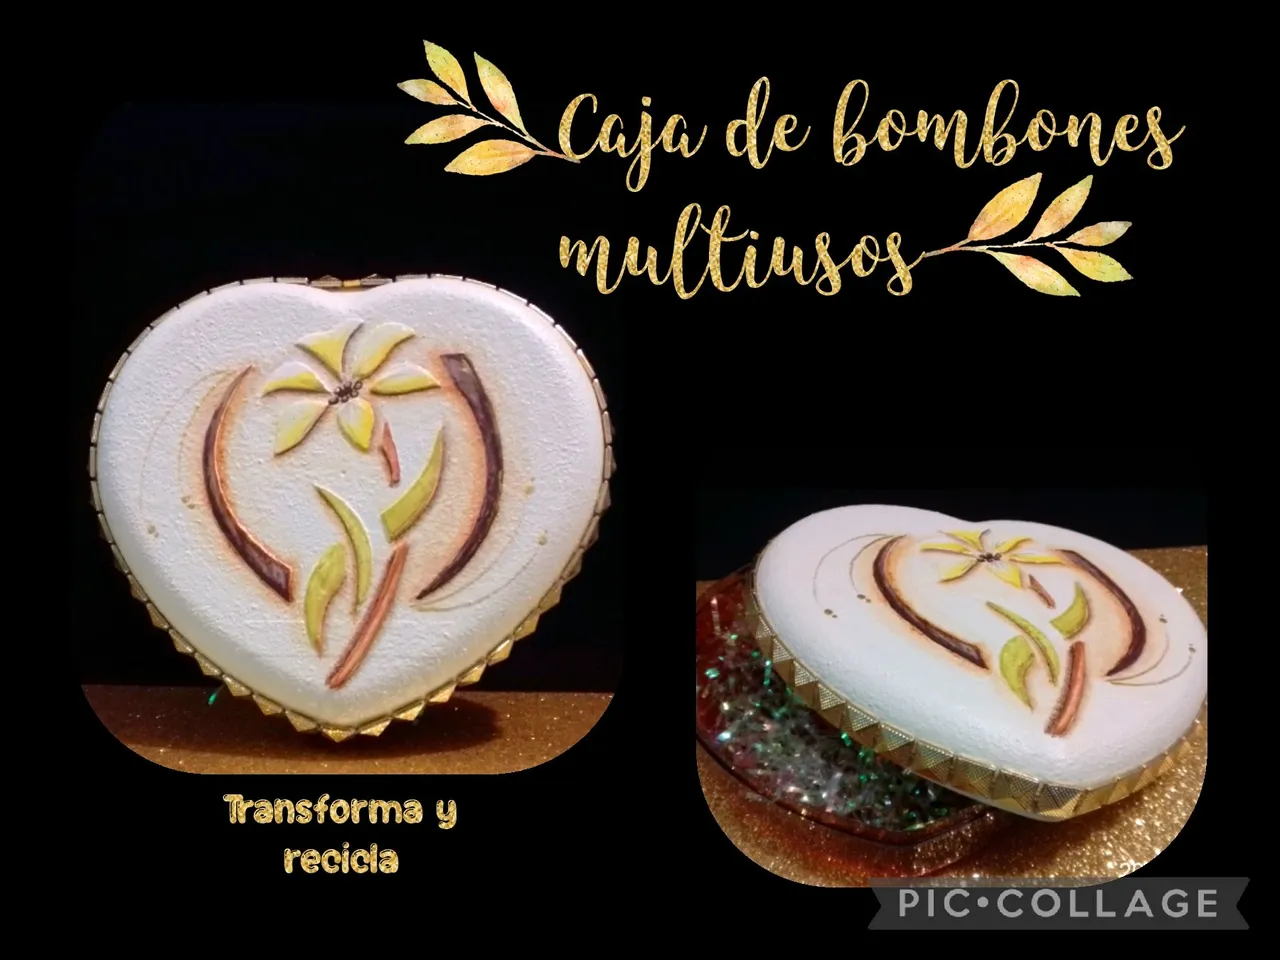
And finally you will see how we can recycle and transform a box of chocolates using the stencil and gesso.
Now I invite you to join me and see how it's done, I'm sure this step by step will be useful to you at any time.
You will need:
For the stencil:
| Drawing or printing | X-ray film or acetate |
|---|---|
| Ruler | Marker |
| Knife | Scissors |
For gesso:
| Talk | Plaster |
|---|---|
| White glue | Acrylic paint |
| Colador or tulle | Spoon |
| Container with lid |
For the box:
| Plastic box for chocolates | Gesso |
|---|---|
| Stencil or stencil | Scissors |
| Foam rubber | Spatula |
| Golden ornament | Liquid silicone |
| Paints and brushes | Sandpaper |
Let's get started:
Step 1:
Make stencil
- Outline the drawing with a marker, then place the x-ray picture and trace it with the marker.
- Now start to pass the blade along the traced lines making pressure until it makes the cut, then finish cutting out each shape with the scissors.
It is now ready to use.
Remember to make the cuts very carefully and accurately.
Step 2:
Prepare the gesso:
You will use 1 tablespoon of talcum powder.
1 tablespoon of acrylic paint.
1 tablespoon of white glue.
- Place a sieve in the container and sift the talc in case there are lumps, then add the paint and finally the white glue and unite until it forms a thick cream.
Step 3:
Paint or texture with foam rubber.
- Now dip a small piece of sponge in the preparation and begin to paint the lid of the box by dabbing or tapping to paint it all, let dry and repeat to give another layer, if you want it thicker you can repeat the procedure, also if you want you can sand to remove or reduce the texturing.
I particularly like it without sanding.
Step 4:
Plasticize the drawing with gesso.
- To make the relief drawing, add 1/2 tablespoon of gesso to the mixture and mix until you make a thick mixture.
- Place the stencil on the dry lid and with the help of a spatula sprinkle the mixture until it covers the entire drawing and immediately lift the stencil carefully.
This is how the drawing will look on the lid, let it dry well for 1 or 2 hours.
Step 5:
Sand and paint.
- Once the box is dry, sand with 360 grit sandpaper to remove imperfections and smooth the edges of the drawing on the piece.
- Now apply a coat of acrylic paint all over the piece, let it dry well and give another coat of paint and let it dry.
Step 6:
Paint the flower:
- Now mix green paint with water and paint the leaves, then repeat the steps with the other paints and apply the corresponding color to the figure.
- Apart is a watered down with brown and apply on the edges to age and with a damp cloth remove very gently and then with a stick put dots in the center of the flower.
Step 7:
Attach trim or trimmings.
- To finish with the painting, apply touches of gold color then apply liquid silicone on one end of the gold trim and glue around the contour of the lid.
Step 8:
- Join the ends of the ornament and the lid of the box will be ready and decorated.
Sources:
https://es.wikipedia.org/wiki/Estarcido
https://es.wikipedia.org/wiki/Gesso
Now it's time to say goodbye and I hope you find my post useful and to your liking.
Thank you very much for your support!
Greetings