Good evening, my friends, I hope you are well and that you have had a very productive day, once again I want to present a craft work how is the elaboration of a beautiful Christmas basket that will allow us to decorate our dinner table during the Christmas holidays, with this craft we can incorporate candies, fruits, cookies or anything else you consider convenient, join me during the development of this publication.
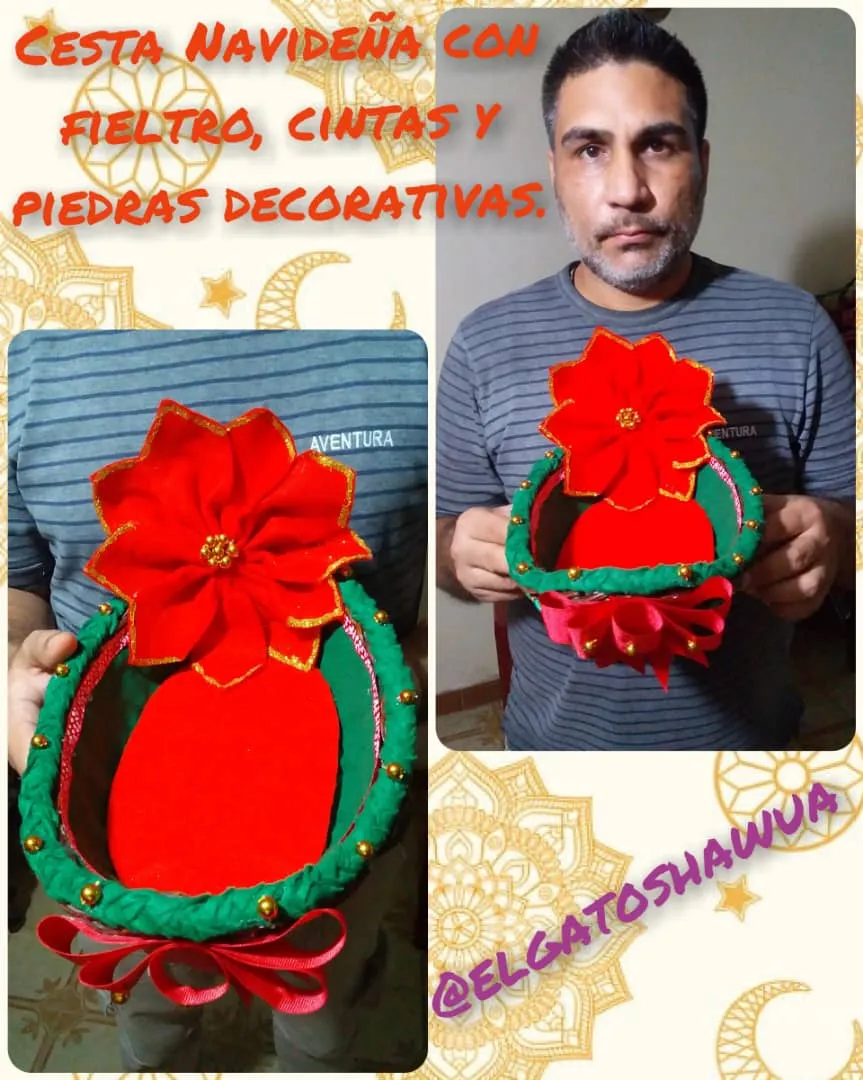
Buenas noches mis panitas espero quédese encuentren bien y que hayan tenido un día muy productivo, una vez más quiero presentar un trabajo de manualidades cómo es la elaboración de una bonita cesta navideña qué nos va a permitir decorar la mesa de nuestra cena en las festividades decembrinas, con esta manualidad podemos incorporarle caramelos frutas, galletas o cualquier otra cosa que usted considere conveniente, acompáñenme durante el desarrollo de esta publicación.
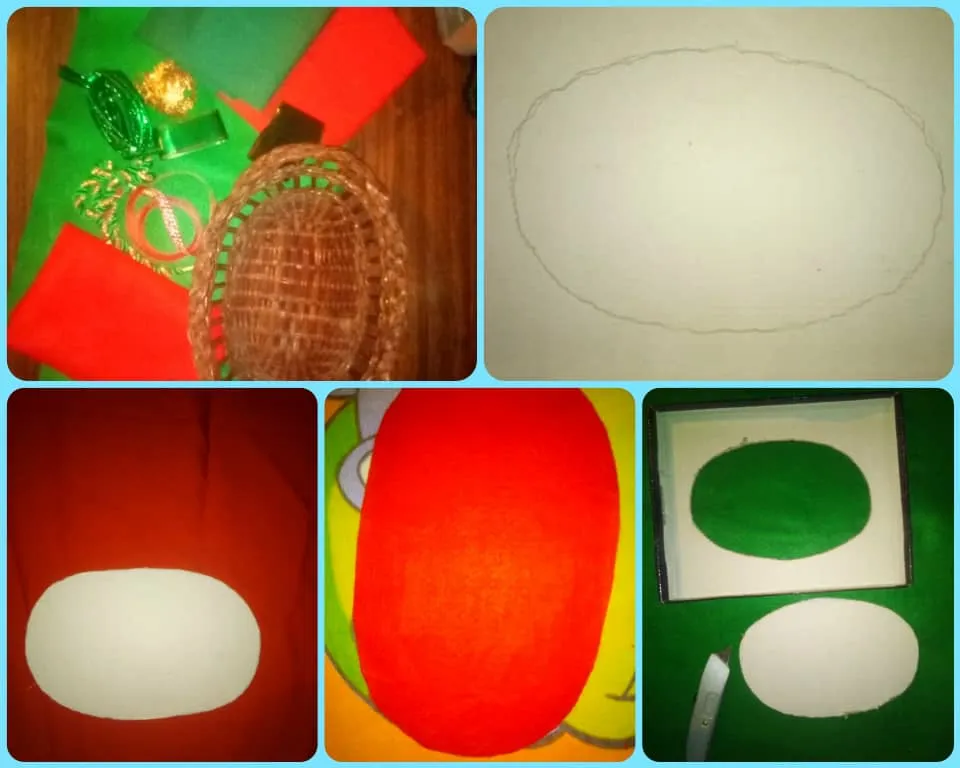
Materials:
Woven basket, red/green felt, thick red and thin printed ribbons, green cord with gold and red, green decorative ribbon, gold rhinestones, scissors, silicone, gold frosting, cardboard and pencil.
Materiales:
Cesta tejida, fieltro rojo/ verde, cintas roja gruesa y estampada finita, cordón verde con dorado y rojo, cinta decorativa verde, pedrería dorada, tijera, silicón, escarcha dorada, cartón y lápiz.
Step by step:
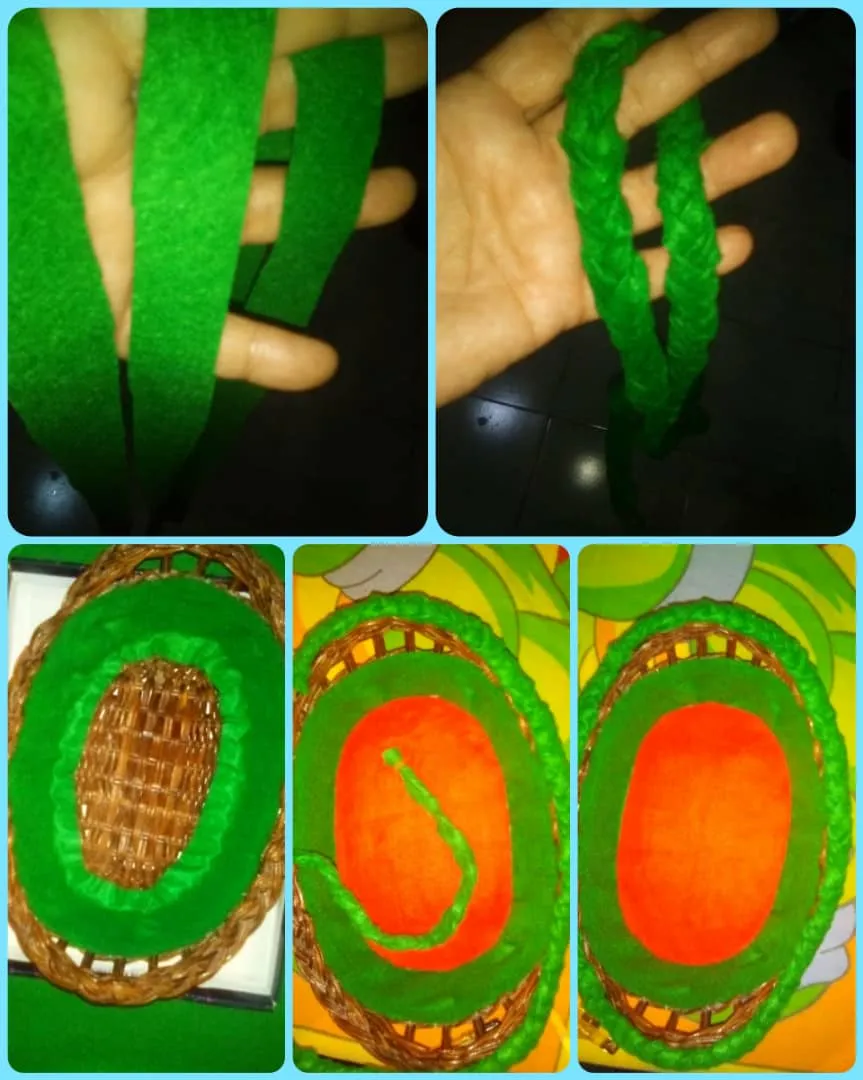
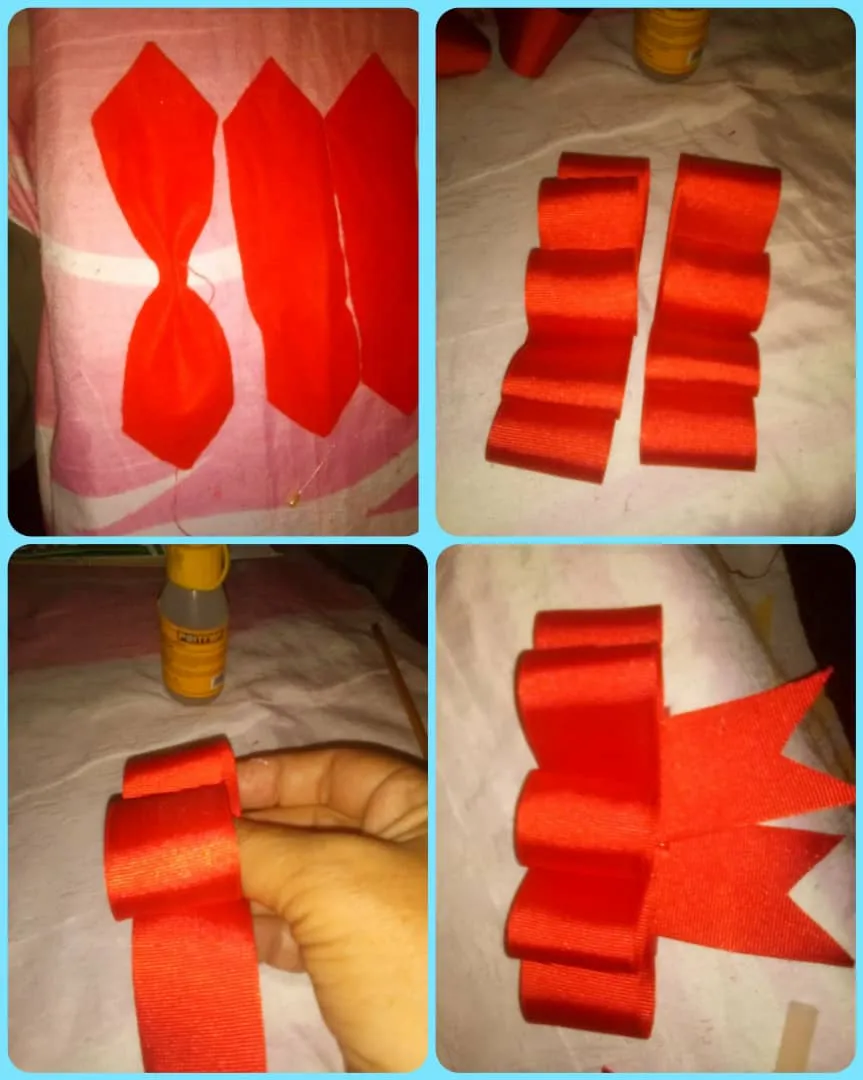
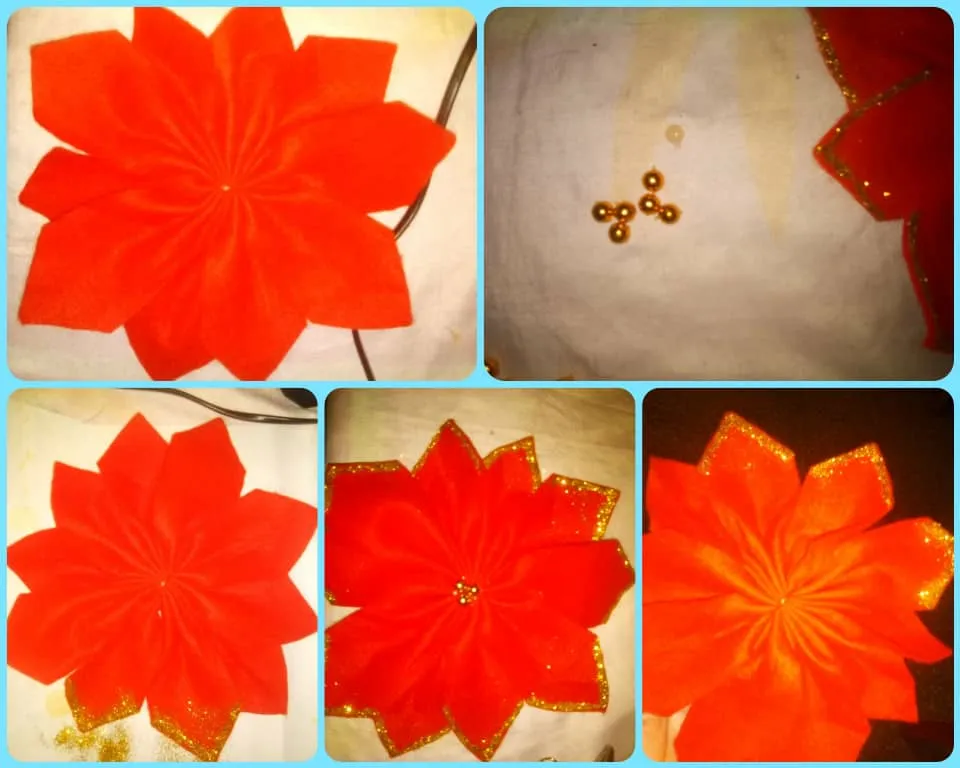
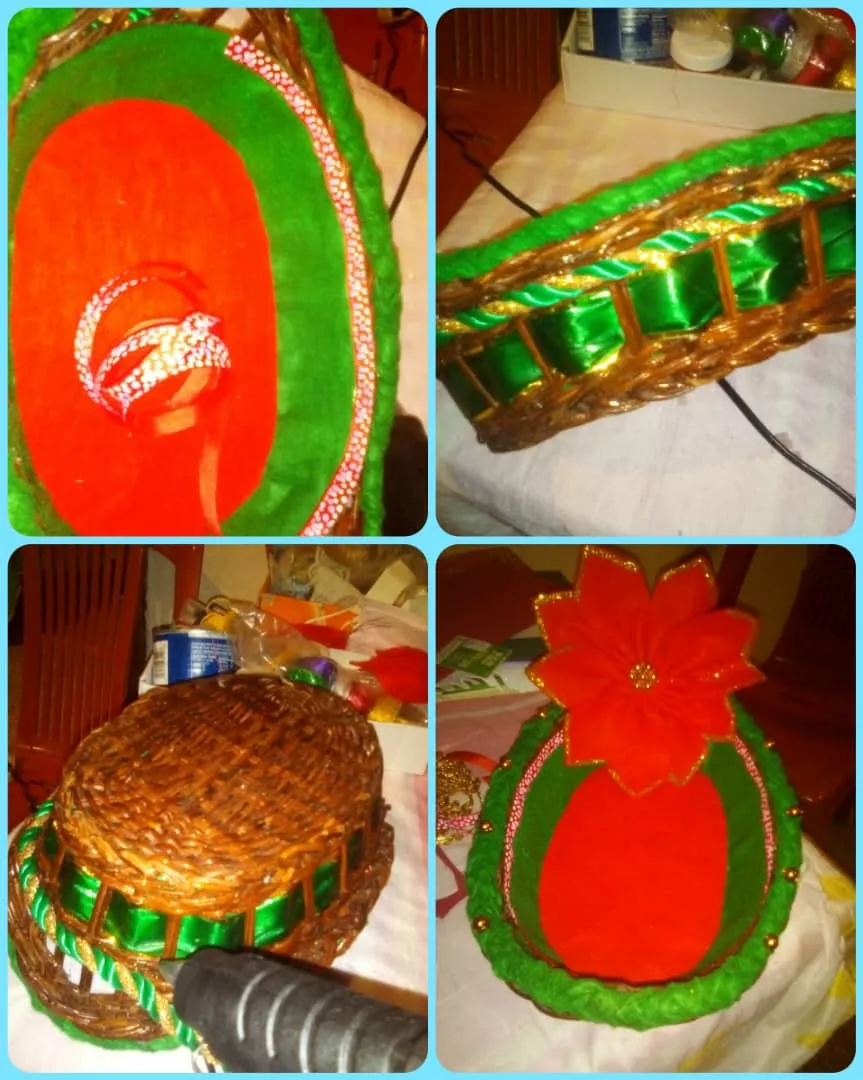
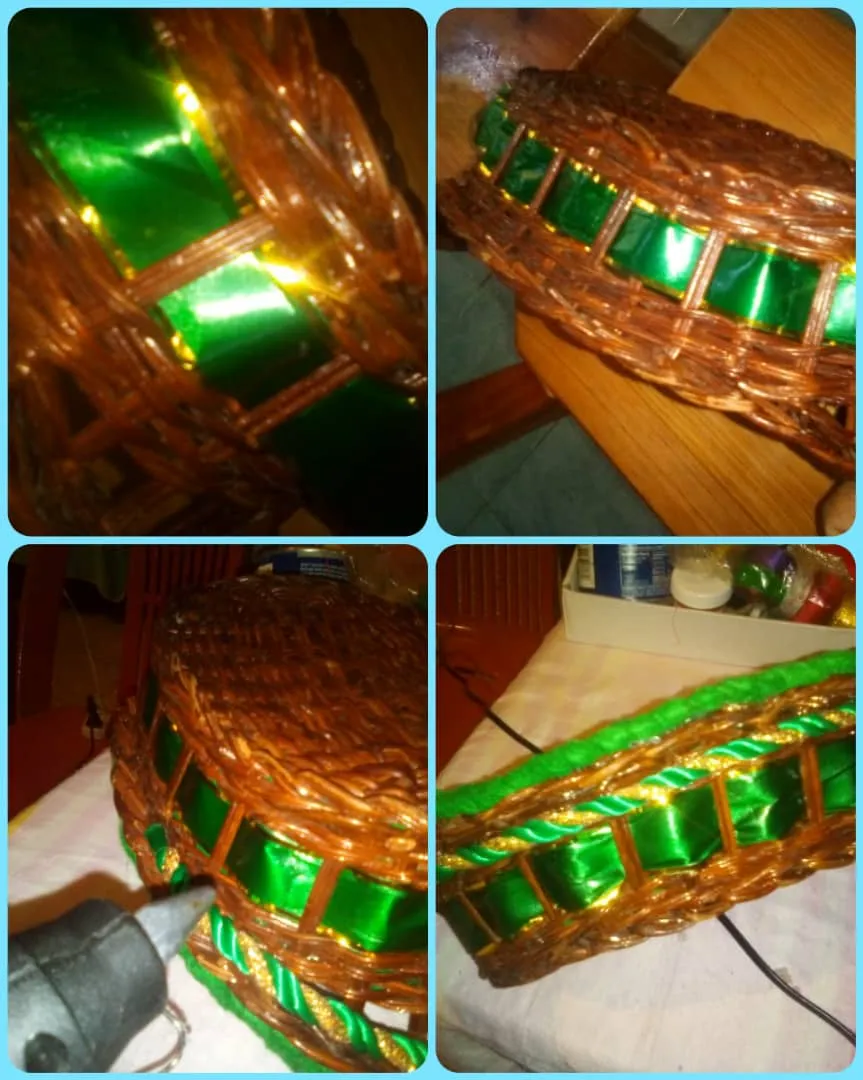
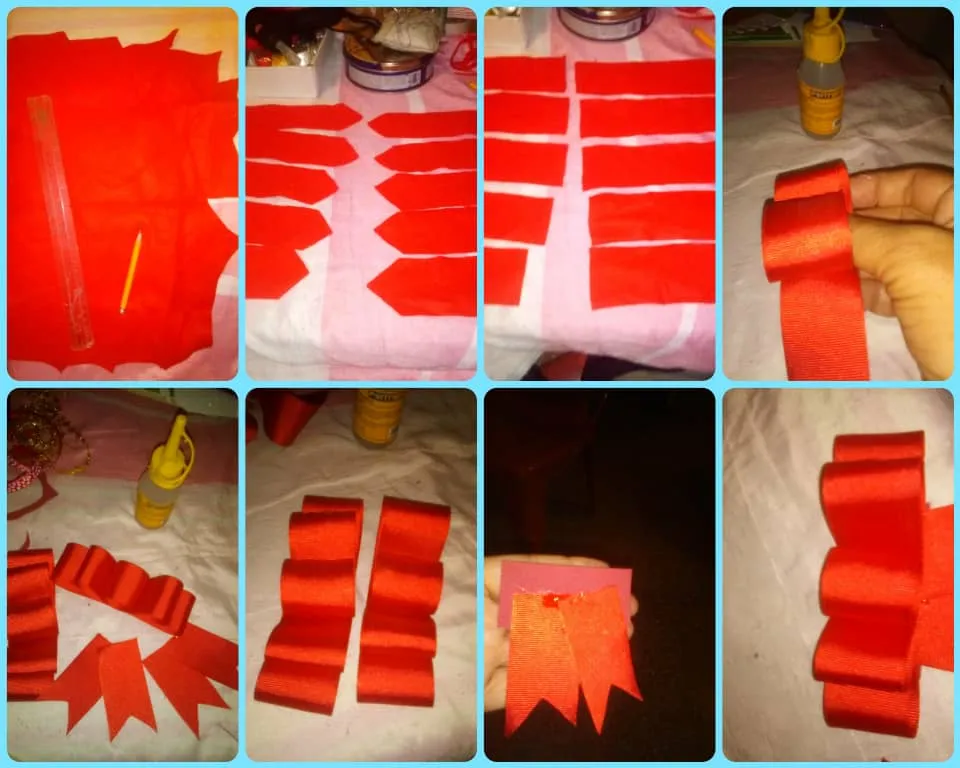
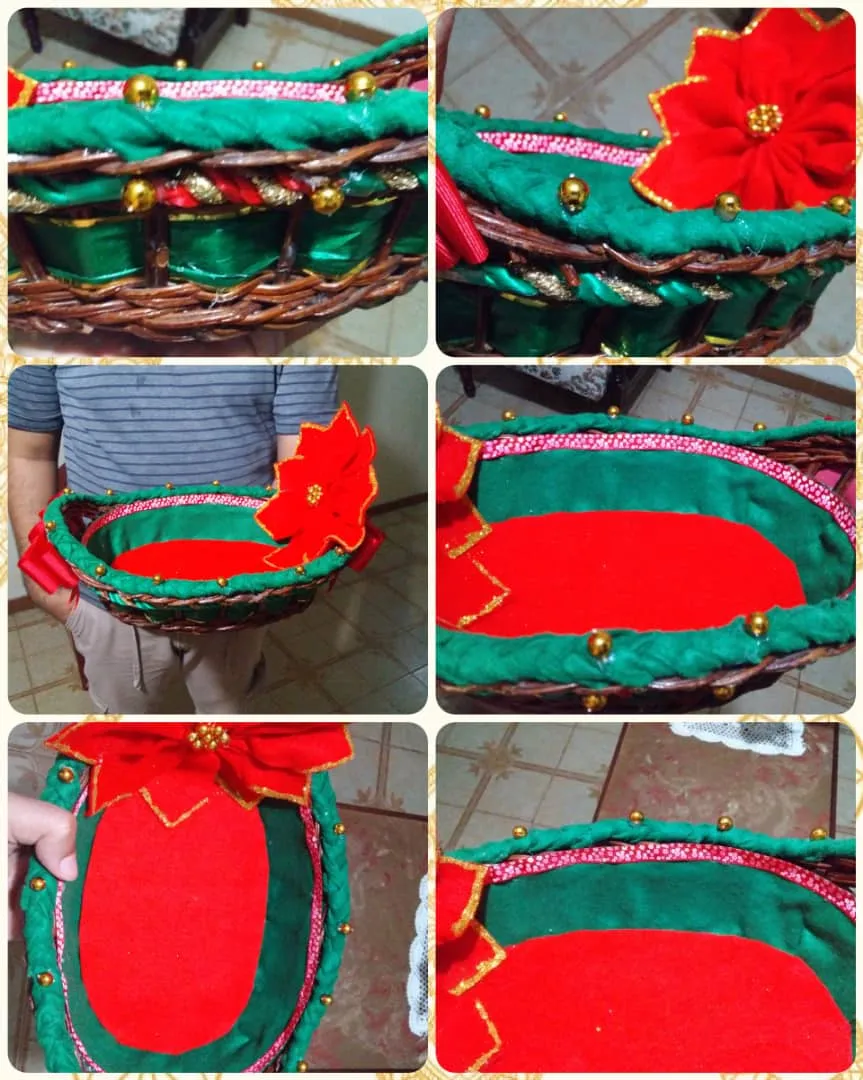
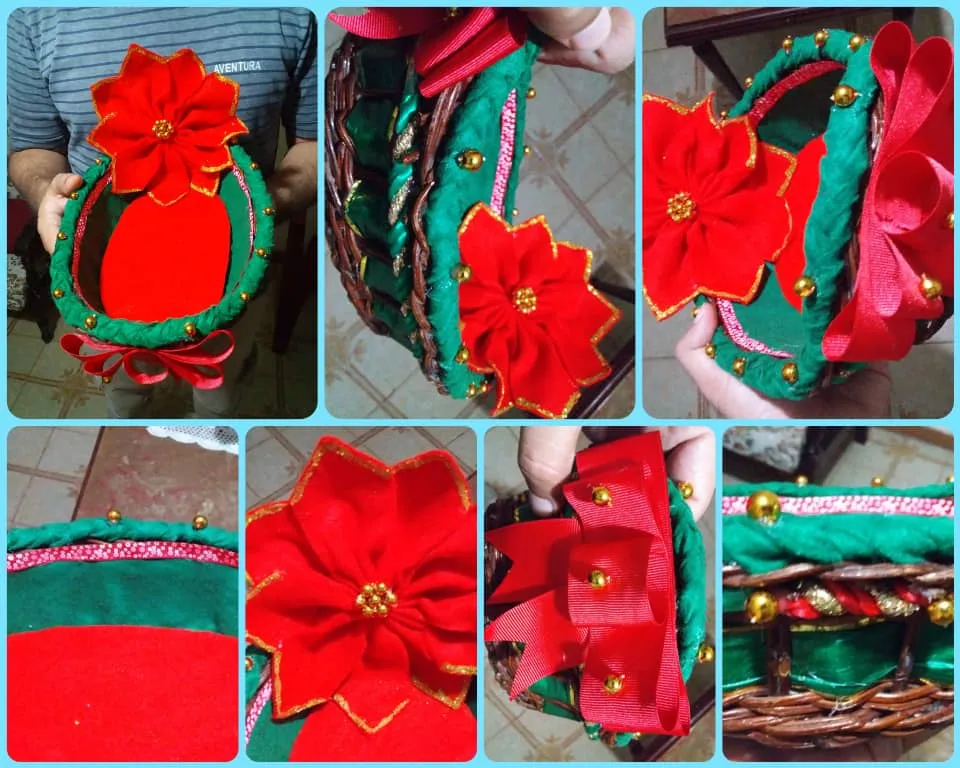
We begin this work by marking on the cardboard a circle then we mark and remove the same mold on the red filter then with the green felt we will line the inside of the basket and at the bottom we will paste the piece of red felt previously worked continuing we will introduce in zigzag form introduction to or by each of the wooden rods the green ribbon in turn we will paste the green cord with gold and the applique of two golden stones we will also remember several. We will make a weave and we will place it in the upper part of the whole edge of the basket with its respective golden stones just like the thin ribbon stamped in the upper inner part then in the outer part with the thick red ribbon we will make two loops that will take off golden stones and we will place in each of the ends on each side finally we will build a flower with the red felt we will cut out each of the petals, We will glue an internal part and on the sides on each edge of the petals we will put glue with frost and to finish we will glue golden stones in the center and when we have this flower ready we will glue it to one end of our basket, as shown in the pictures.
Paso a paso:
Iniciamos este trabajo marcando en el cartón un círculo luego marcamos y sacamos el mismo molde en el filtro rojo después con el fieltro verde vamos a forrar la parte interna de la cesta y en el fondo pegaremos la pieza de fieltro rojo antes trabajada continuando vamos a introducir en forma de zigzag introducción al o por cada una de las varillas de madera la cinta verde a su vez pegaremos el cordón verde con dorado y el aplique de dos piedras doradas también recordaremos varios listones despierto verde haremos un tejido y lo colocaremos en la parte superior de todo el borde de la cesta con sus respectivas piedras doradas igualmente que la cinta delgada estampadas en la parte interna superior después en la parte de afuera con la cinta roja gruesa vamos a laborar dos lazos que se despegara piedras doradas y colocaremos en cada uno de los extremos a cada lado por último vamos a construir una flor con el fieltro rojo recortaremos cada uno de los pétalos, pegaremos una parte interna y a los lados en cada borde de los pétalos echaremos pega con escarcha y para finalizar a pegaremos piedritas doradas en el centro y al tener esta flor lista la vamos a pegar a un extremo de nuestra cesta, quedando así como muestran las fotos.
Photos by me @elgatoshawua.
Translated by DeepL.
Fotos de mi autoría @elgatoshawua.
Traducido por DeepL