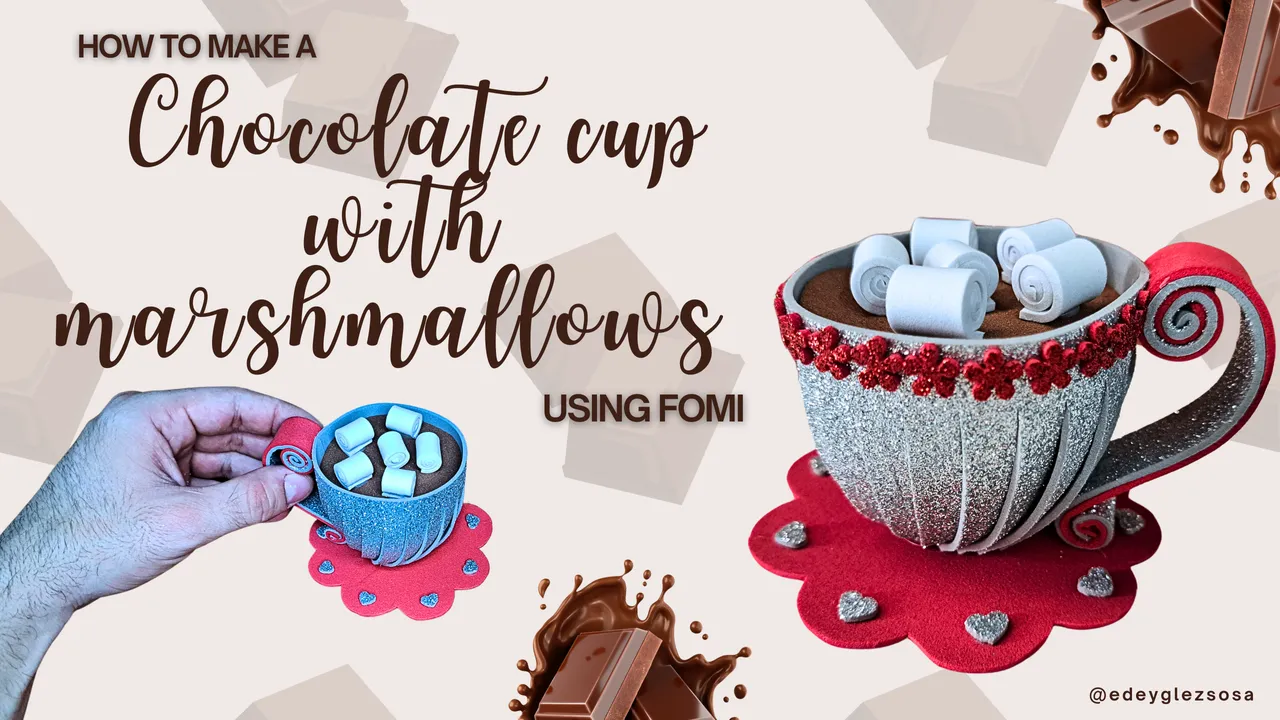
Greetings, dear friends of the community, September is coming to an end, which means that winter is coming with all its festivities and cold, very cold. Taking advantage of the winter season theme, I decided to create a small ornament inspired by something very common for these dates. And yes, I'm talking about a cup of chocolate with marshmallows, because who doesn't crave one when it's cold?
The mug is made in a smaller size than normal and I used brightly colored fomi to make it look more beautiful. If you find this little ornament interesting, I invite you to join me in the following tutorial.
Saludos, queridos amigos de la comunidad, está finalizando el mes de septiembre, lo cual significa que se avecina el invierno, con todas sus festividades y frío, mucho frío. Aprovechando la temática de la estación invernal, decidí crear un pequeño adorno inspirado en algo muy común para estas fechas. Y sí, me refiero a una taza de chocolate con malvaviscos, porque a quien, cuando hay frío no se le antoja una.
La taza está elaborada a un tamaño más pequeño que el normal y utilicé fomi de colores llamativos y brillantes para que luzca más hermosa. Si te parece interesante, este pequeño adorno te invito a acompañarme en el siguiente tutorial.
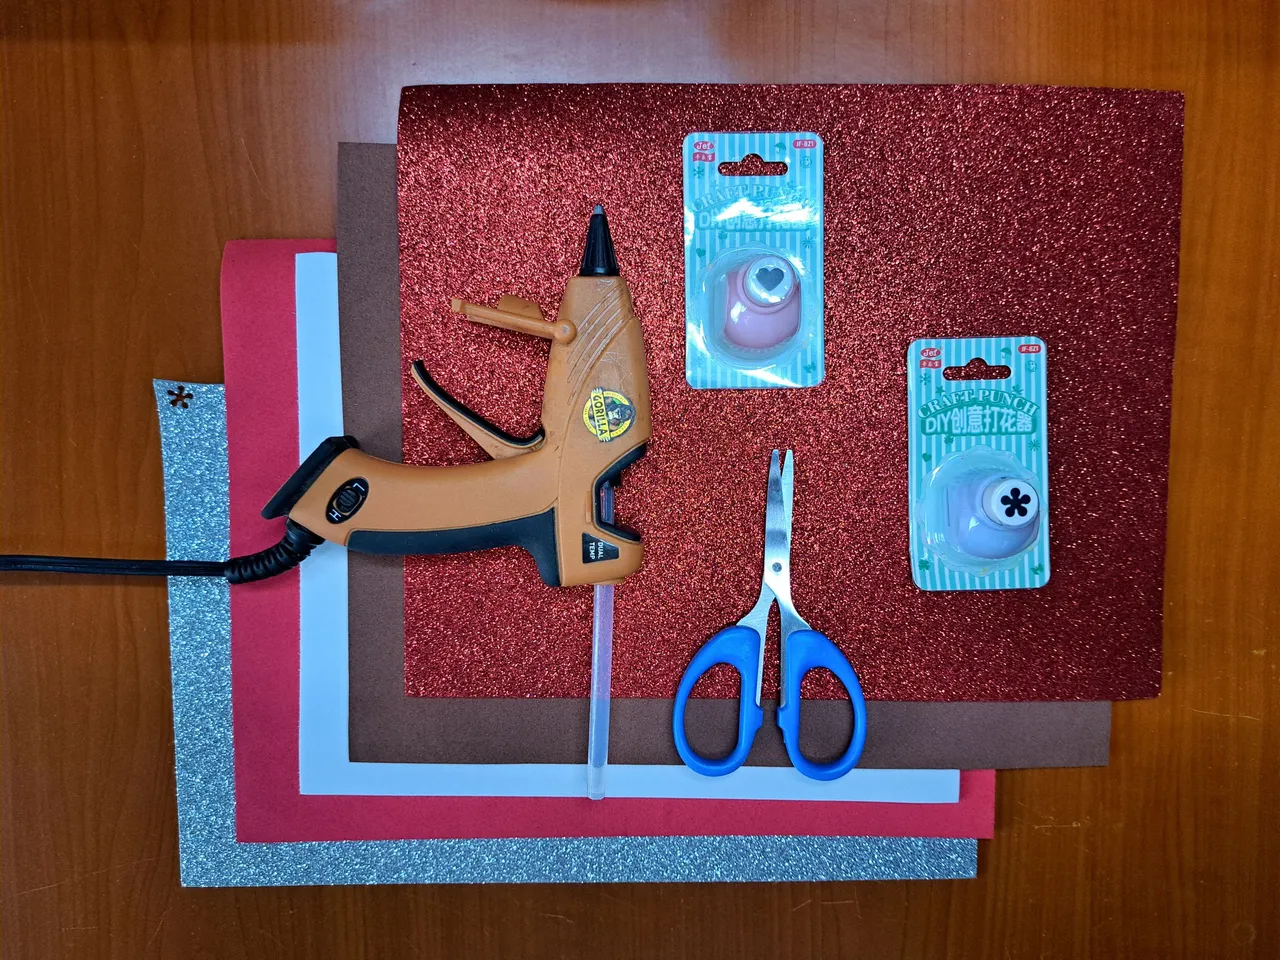
Materials // Materiales
| ✔️ Red, white and carmelite plain fomi | ✔️ Fomi Liso rojo, blanco y carmelita |
| ✔️ Silver and red frosted fomi | ✔️ Fomi escarchado plateado y rojo |
| ✔️ Heart-shaped hole punch | ✔️ Perforadora con forma de corazón |
| ✔️ Flower-shaped hole punch | ✔️ Perforadora con forma de flor |
| ✔️ Scissors | ✔️ Tijeras |
| ✔️ Hot silicone | ✔️ Silicona caliente |
Step by step // Paso a paso
1️⃣ To begin, cut out a 25x7 cm silver frosted fomi lead and make small cuts on one of its sides separated by 1 cm from each other. Glue the cut sides together to narrow the base of the cup. Glue one side end to the other to finish the shape.
Para empezar, recorta una la mina de fomi escarchado plateado de 25x7 cm y hazle pequeños cortes en uno de sus lados separados entre sí por 1 cm. Pega los lados recortados para estrechar la base de copa. Pega un extremo lateral con el otro para terminar de darle forma.
 |
 |  |  |
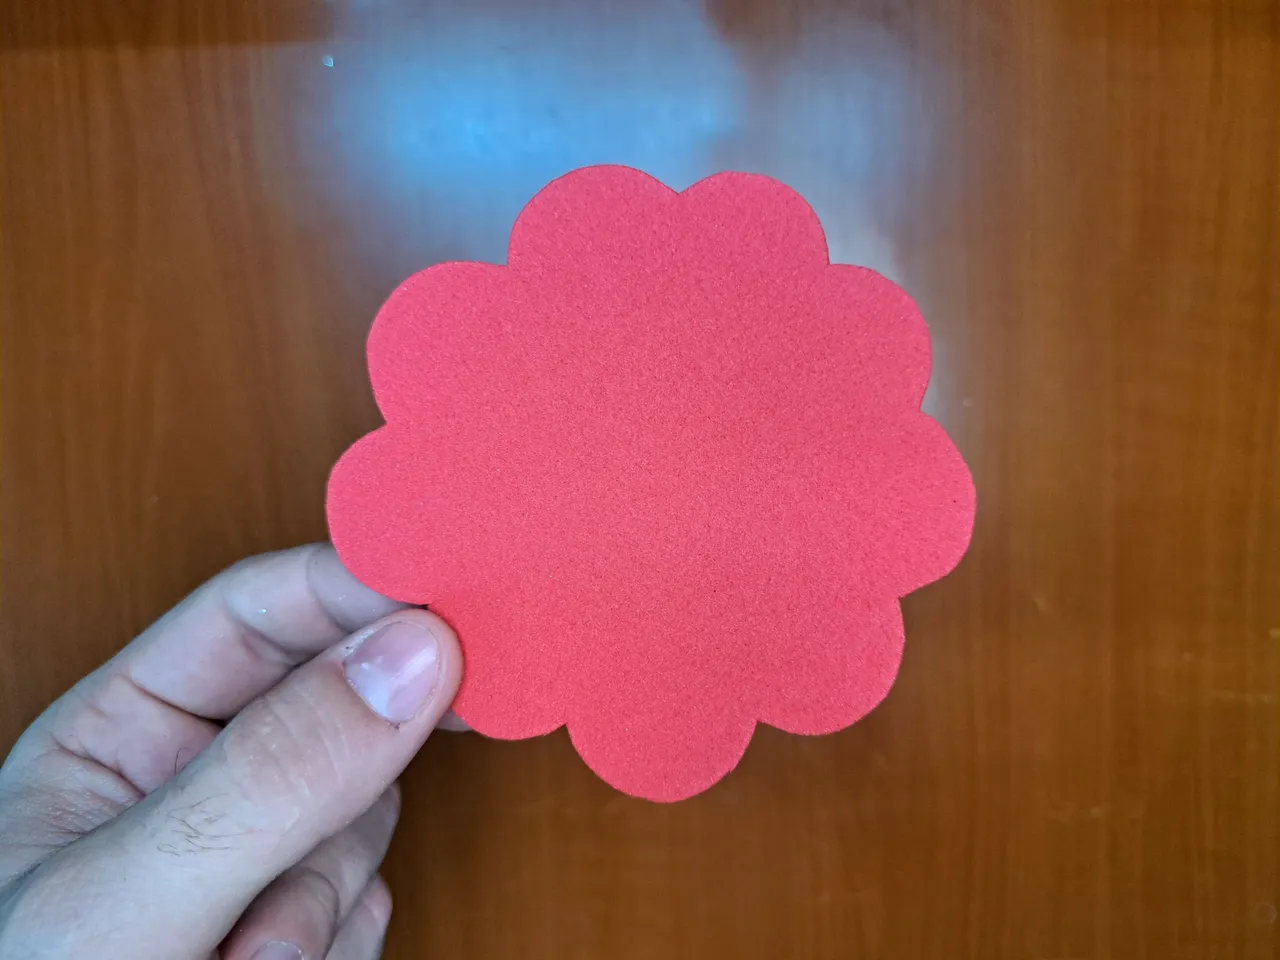
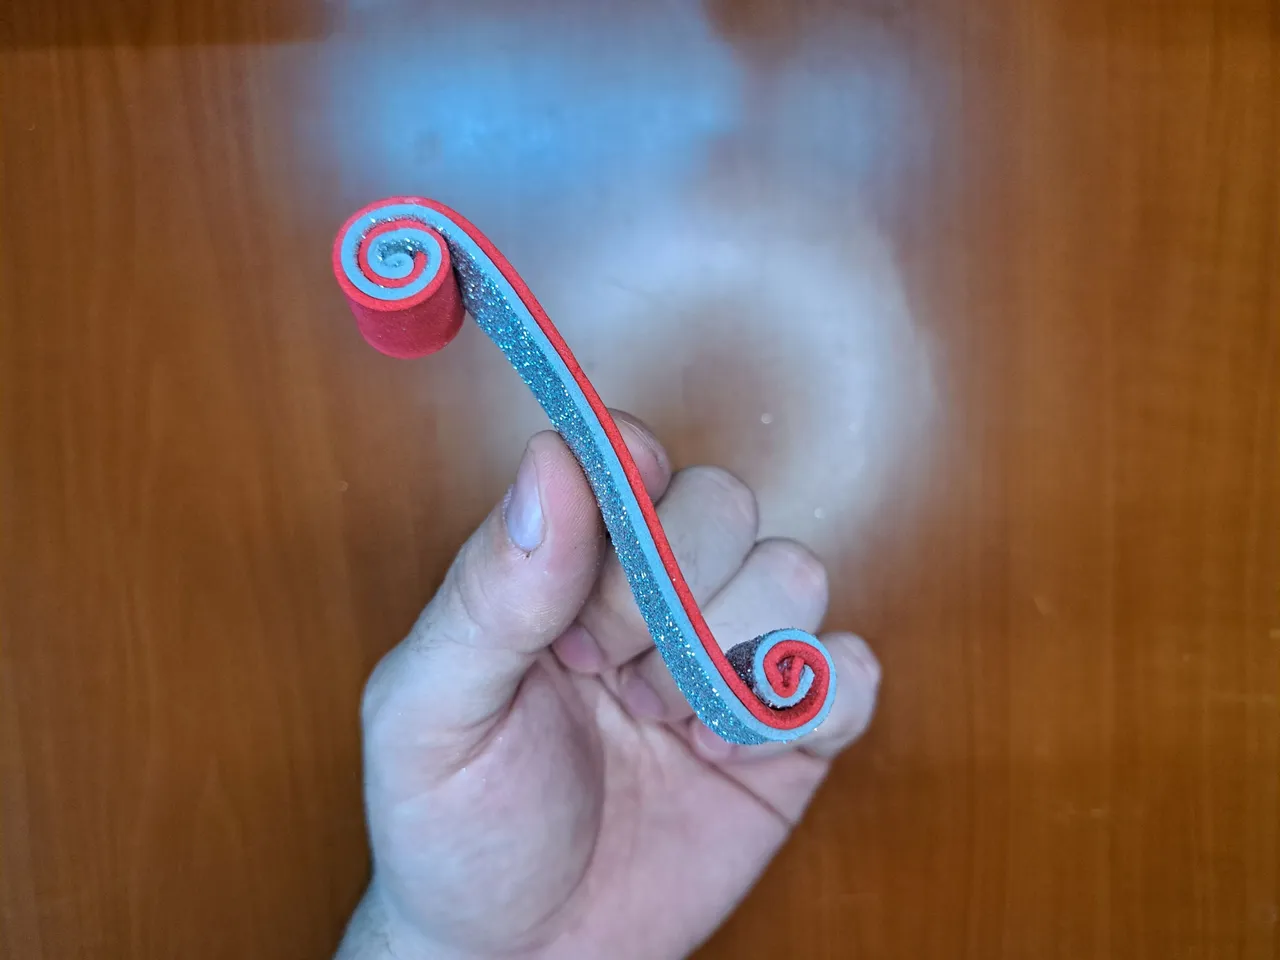
2️⃣ On a piece of plain red fomi, mark and cut out the surface of the palm tree where the cup will be glued. On the edges of the base, mark and trim them in the shape of ripples. Cut out a strip of silver frosted and a strip of red plain fomi, both 2 cm wide, glue them together and wrap them at the ends to form the handle of the cup.
En una pieza de fomi liso rojo marca y recorta la superficie del palto donde irá pegada la taza. A los bordes de la base, márcale y recórtales en forma de ondulaciones. Recorta una tira de fomi plateado escarchado y otra de fomi rojo liso, ambas de 2 cm de ancho, pégalas entre sí y envuélvelas en los extremos para conformar el asa de la taza.
 |  |
 |  |  |
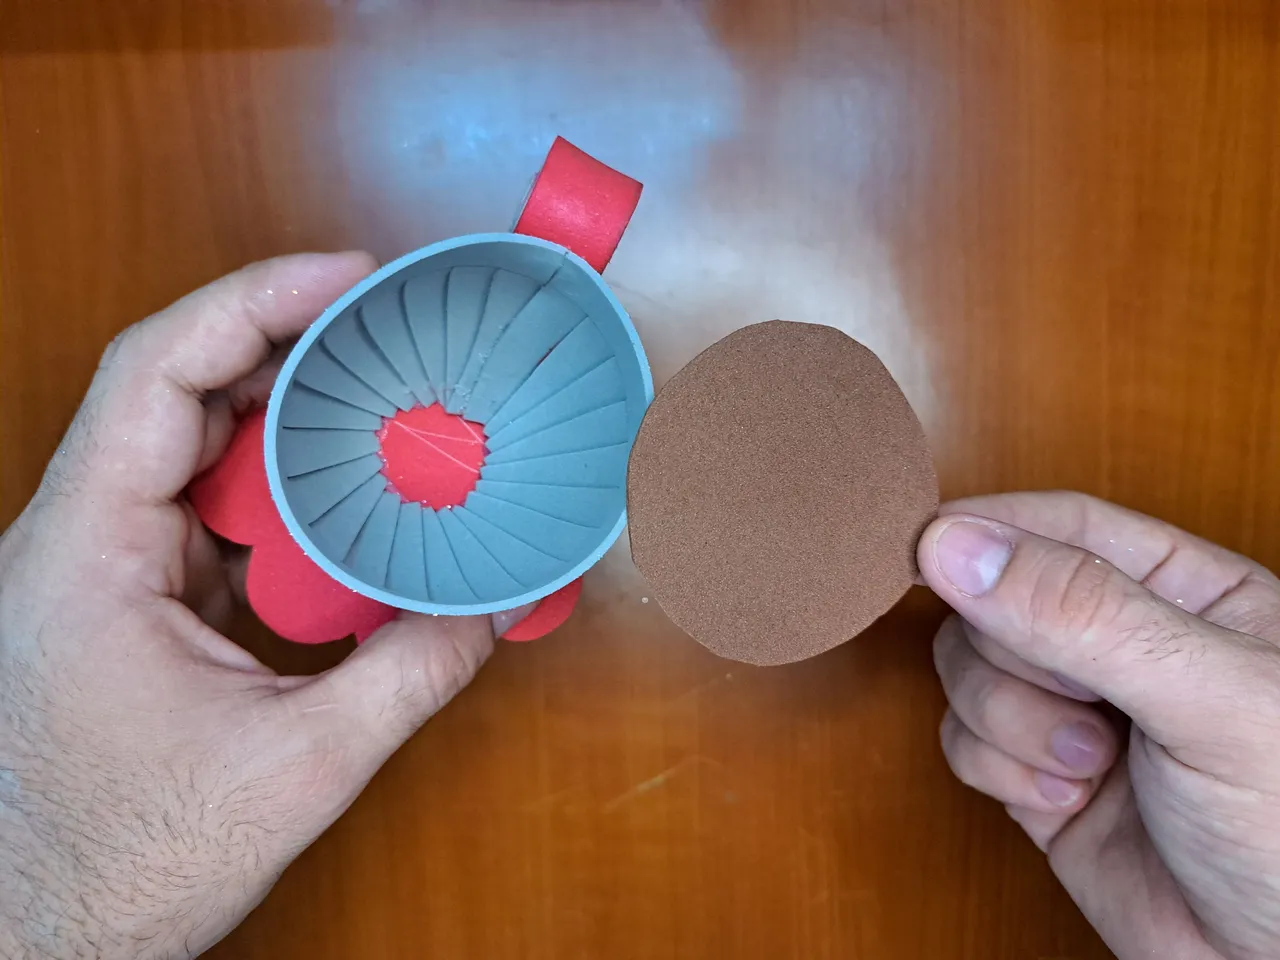
3️⃣ Cut out a circular piece of brown fomi and glue it to the top of the cup, but not on the very edge; glue it a little further in. Cut several 1.5 cm strips of white fomi and wrap them to form the marshmallows, then glue them on top of the circular piece of brown fomi.
Recorta una pieza circular de fomi carmelita y pégala en la parte superior de la taza, pero no en el mismo borde; hazlo un poco más adentro. Recorta varias tiras de fomi blanco de 1,5 cm y envuélvelas para formar los malvaviscos, posteriormente pégalas encima de la pieza circular de fomi café.
 |  |
 |  |  |
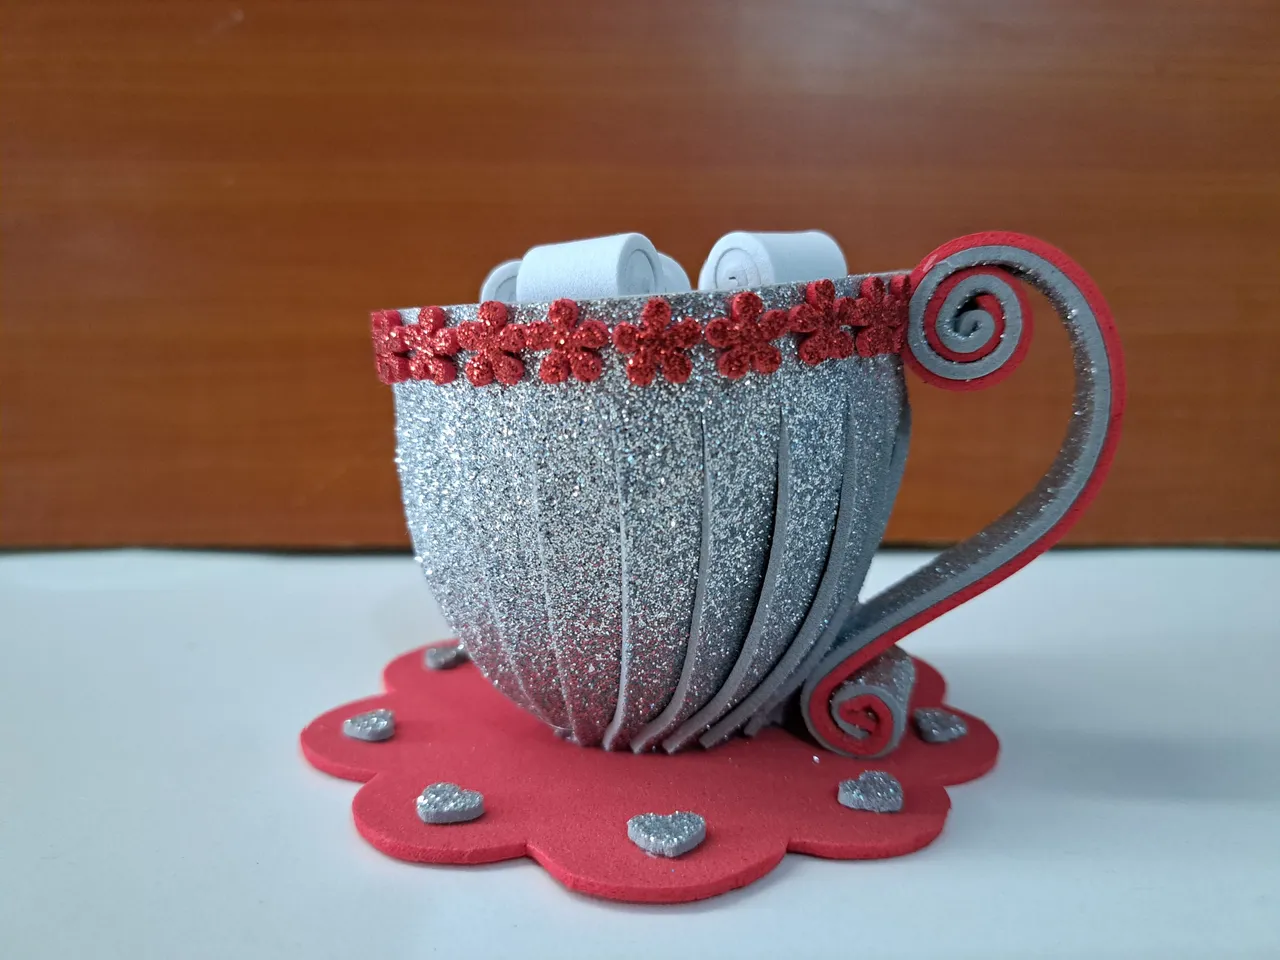
4️⃣ To finish, decorate the base with small silver hearts and the rim of the cup with plain red fomi flowers. Both the flowers and the hearts can be cut out by hand, but for convenience I used a hole punch. The red flowers will be placed tightly against each other, while the hearts will be placed one in each undulation of the base.
Para finalizar, decora la base con pequeños corazones plateados y el borde de la taza con flores de fomi rojo liso. Tanto las flores como los corazones pueden ser recortados a manos, pero por comodidad utilicé unas perforadoras. Las flores rojas se colocarán bien pegadas unas con otras, mientras que los corazones se colocarán uno en cada ondulación de la base.
 |  |  |
 |  |
Finished Work // Trabajo Terminado
This is how this little ornament is finished. I hope you liked it and that you are encouraged to make one to give as a gift to a loved one or a special person. Without more to add, I say goodbye, but not before reminding you that you can leave me in the comments section any suggestions or questions regarding the tutorial, because I, as always, I will be happy to read and answer them.
De esta forma quedaría terminado este pequeño adorno. Espero que les haya gustado y que se animen a confeccionar uno para regalarlo a algún ser querido o alguna persona especial. Sin más que agregar, me despido, no si antes recordarles que me pueden dejar en la sección de comentarios cualquier sugerencia o duda respecto al tutorial, pues yo, como siempre, estaré encantado de leerles y responderles.
 |  |

Thank you very much for reading my post. If you liked it, please leave a comment and consider following me so you don't miss my next posts. I'd love to know your opinion and your thoughts about the topic I discussed in this post, see you in the next one!
Credits and Resources // Créditos y Recursos
Cover page created in Canva
Translated by DeepL
Images captured with my Samsung Galaxy A53


Cover page created in Canva
Translated by DeepL
Images captured with my Samsung Galaxy A53