
Greetings, crafting friends. Lately, I've been very busy and I haven't had much time to make some crafts, but I'm now a little more free and little by little I'll bring you more creations as I did regularly.
Today I want to share with you a tutorial that will serve as a guide to make a decorated magnet in the shape of an intellectual bee or bee with mirrors, whatever you prefer to call it. I will be using fomi as the main material and to give the touches of depth and illumination in the fomi I will use markers of different colors.
Saludos, amigos artesanos. Últimamente, he estado muy ocupado y no he tenido casi tiempo para hacer alguna que otra manualidad, pero ya estoy un poco más liberado y poco a poco volveré a traerles más creaciones como hacía regularmente.
El día de hoy quiero compartirles un tutorial que les servirá como guía para elaborar un imán decorado con forma de abejita intelectual o abejita con espejuelos, como prefieran llamarla. Estaré utilizando fomi como material principal y para dar los toques de profundidad e iluminación en el fomi utilizaré marcadores de diferentes colores.
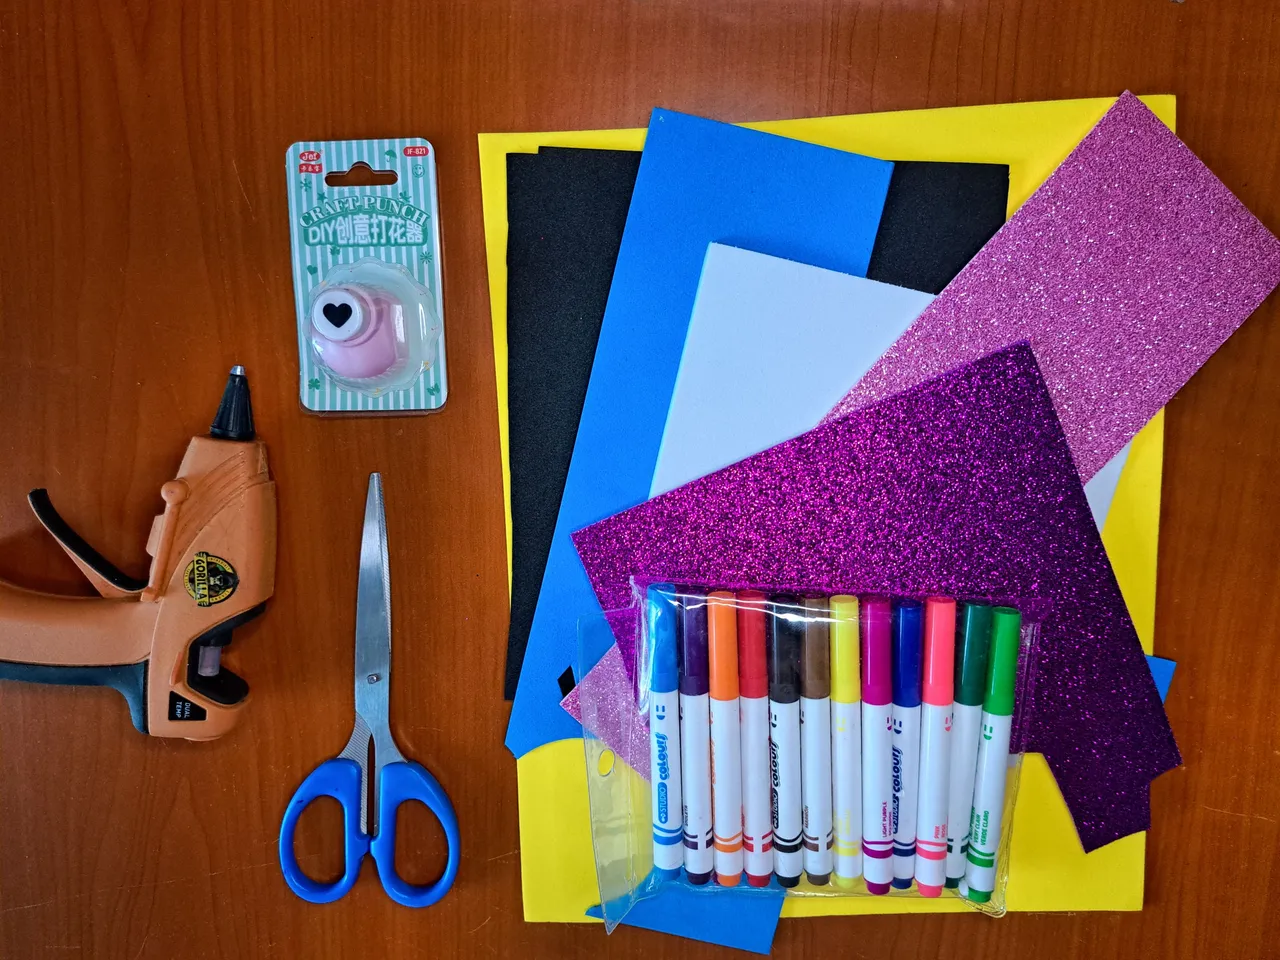
Materials // Materiales
| ✔️ White, black, yellow, yellow and blue plain fomi | ✔️ Fomi liso blanco, negro, amarillo y azul |
| ✔️ Pink and purple frosted fomi | ✔️ Fomi escarchado rosado y morado |
| ✔️ Scissors | ✔️ Tijeras |
| ✔️ Markers of different colors | ✔️ Marcadores de diferentes colores |
| ✔️ Hot Silicone | ✔️ Silicona Caliente |
| ✔️ Heart-shaped hole punch | ✔️ Perforadora con forma de corazón |
Step by step // Paso a paso
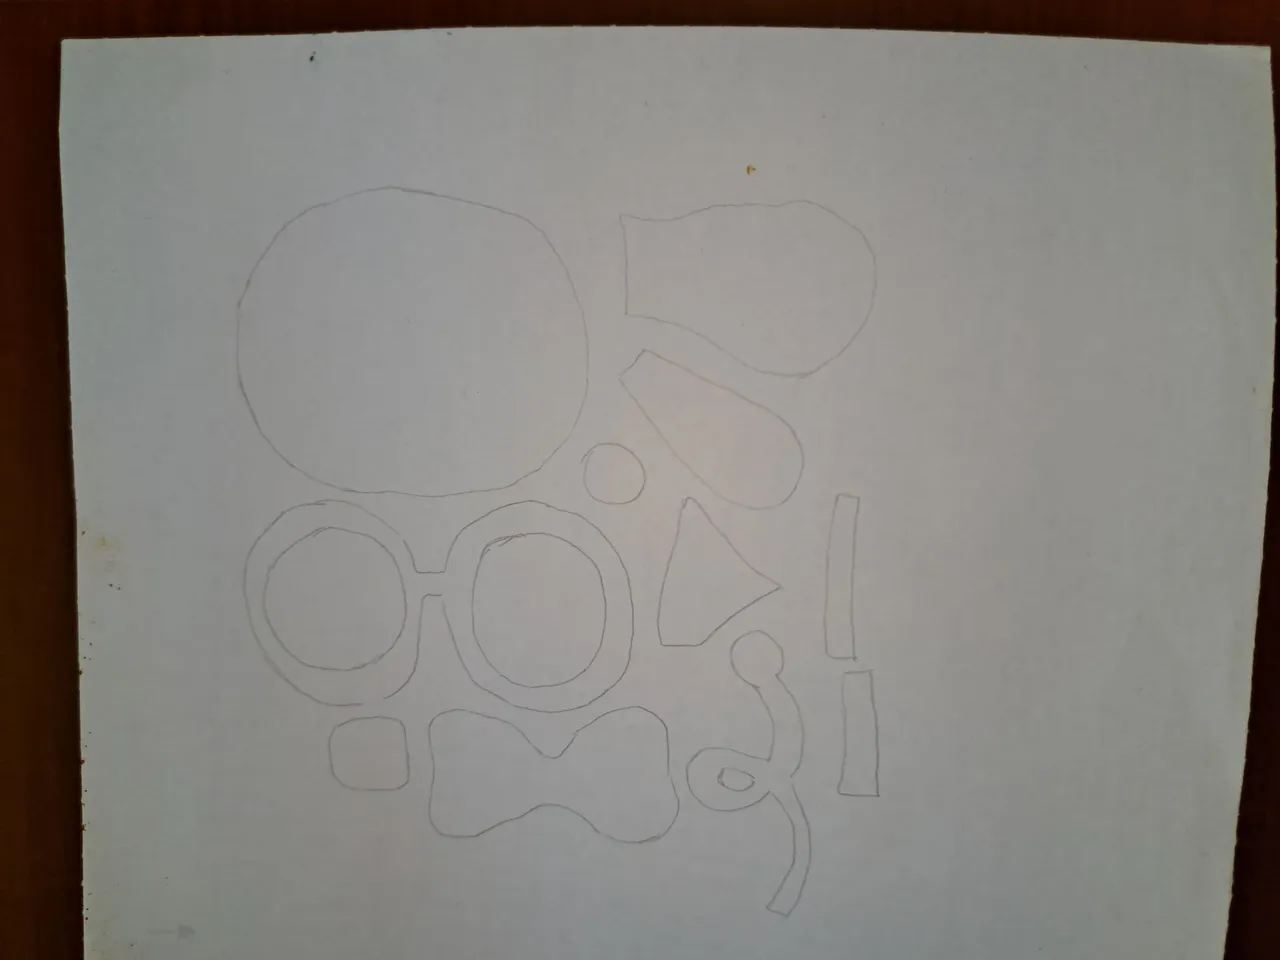
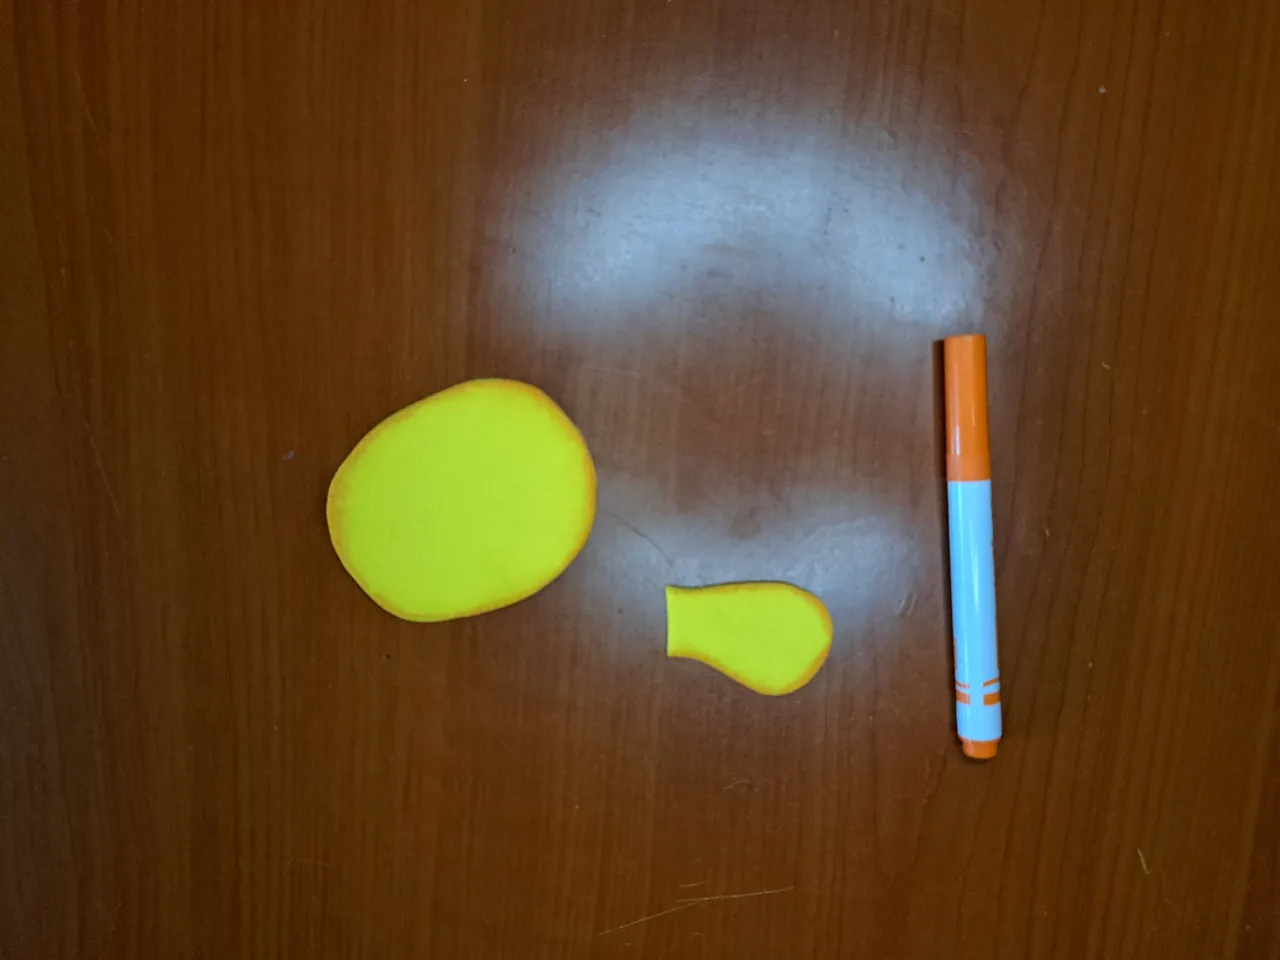
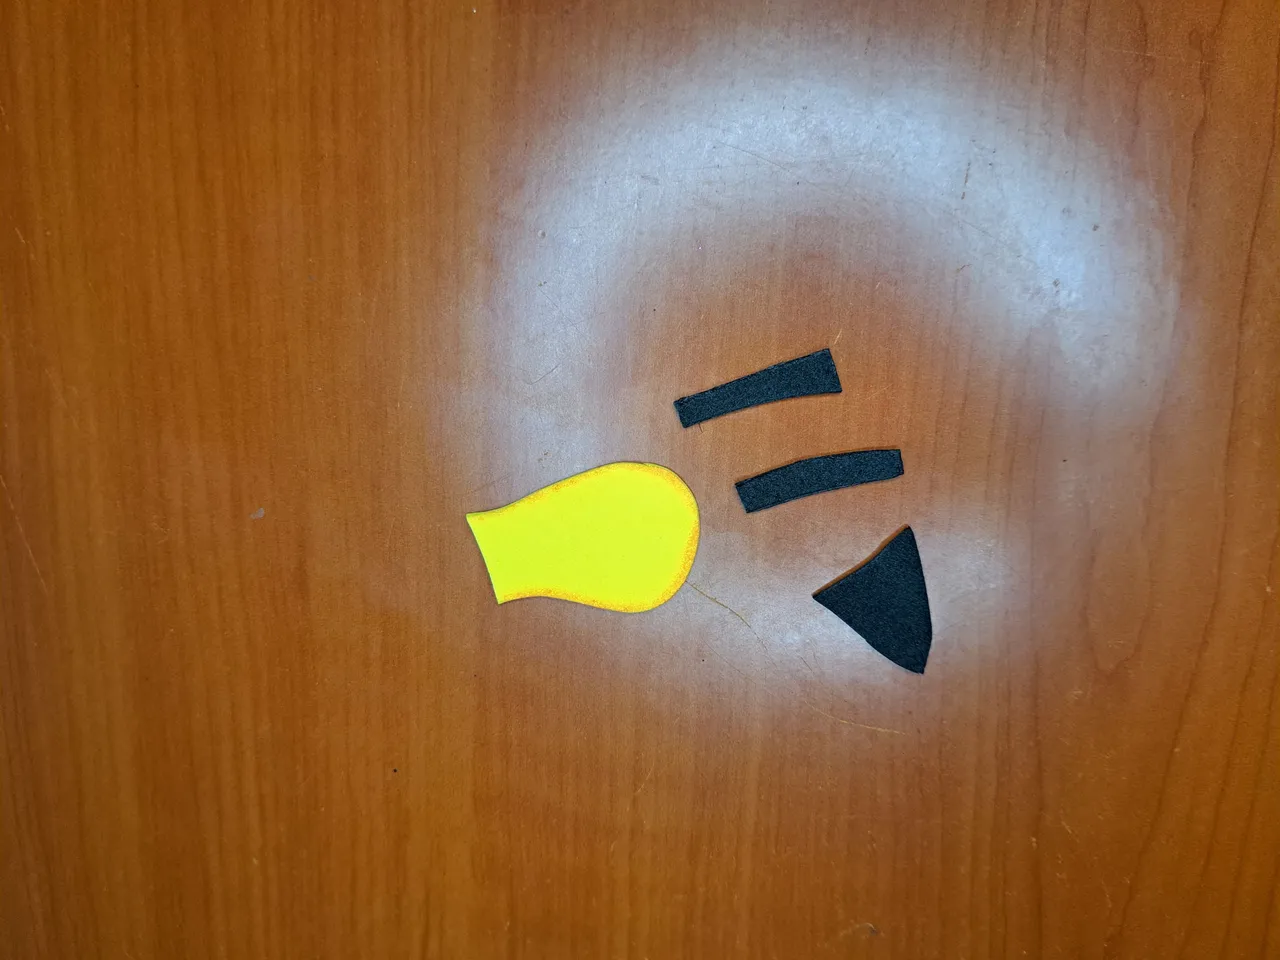
1️⃣ The first thing to do is to draw the shapes of the different parts of the body and here are the designs to guide you. After cutting out the designs on paper, use the head and body design to mark them and cut them out on yellow fomi and, at the end, paint a blurred border using an orange marker.
Lo primero será dibujar las formas de las distintas partes del cuerpo y para ello, a continuación te dejo los diseños para que te puedas guiar. Luego de recortar los diseños en papel, utiliza el diseño de la cabeza y el cuerpo para marcarlos y recortarlos en fomi amarillo y, al final, píntale un borde difuminado utilizando un marcador naranja.
 |  |
 |  |
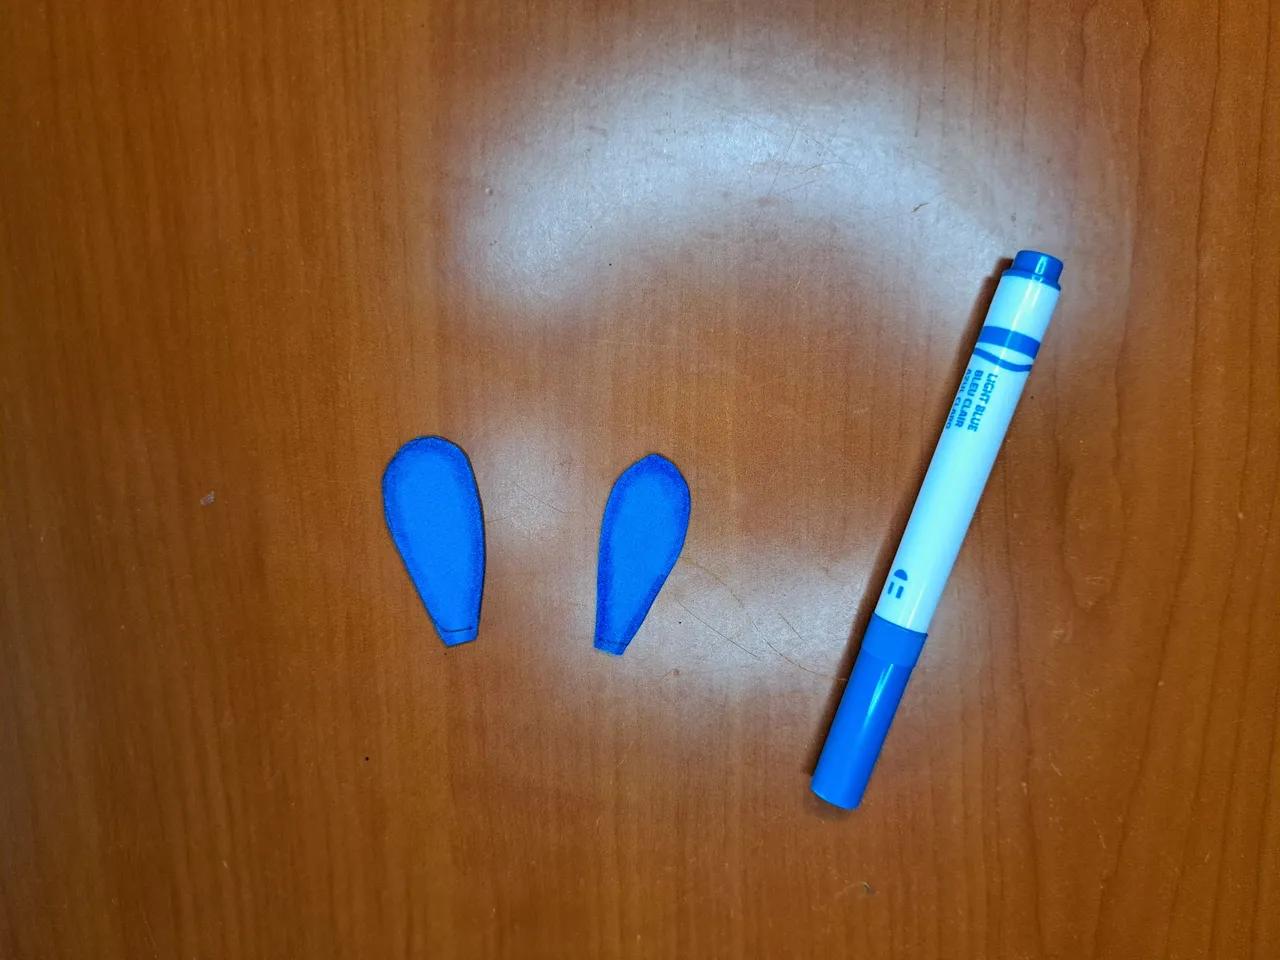
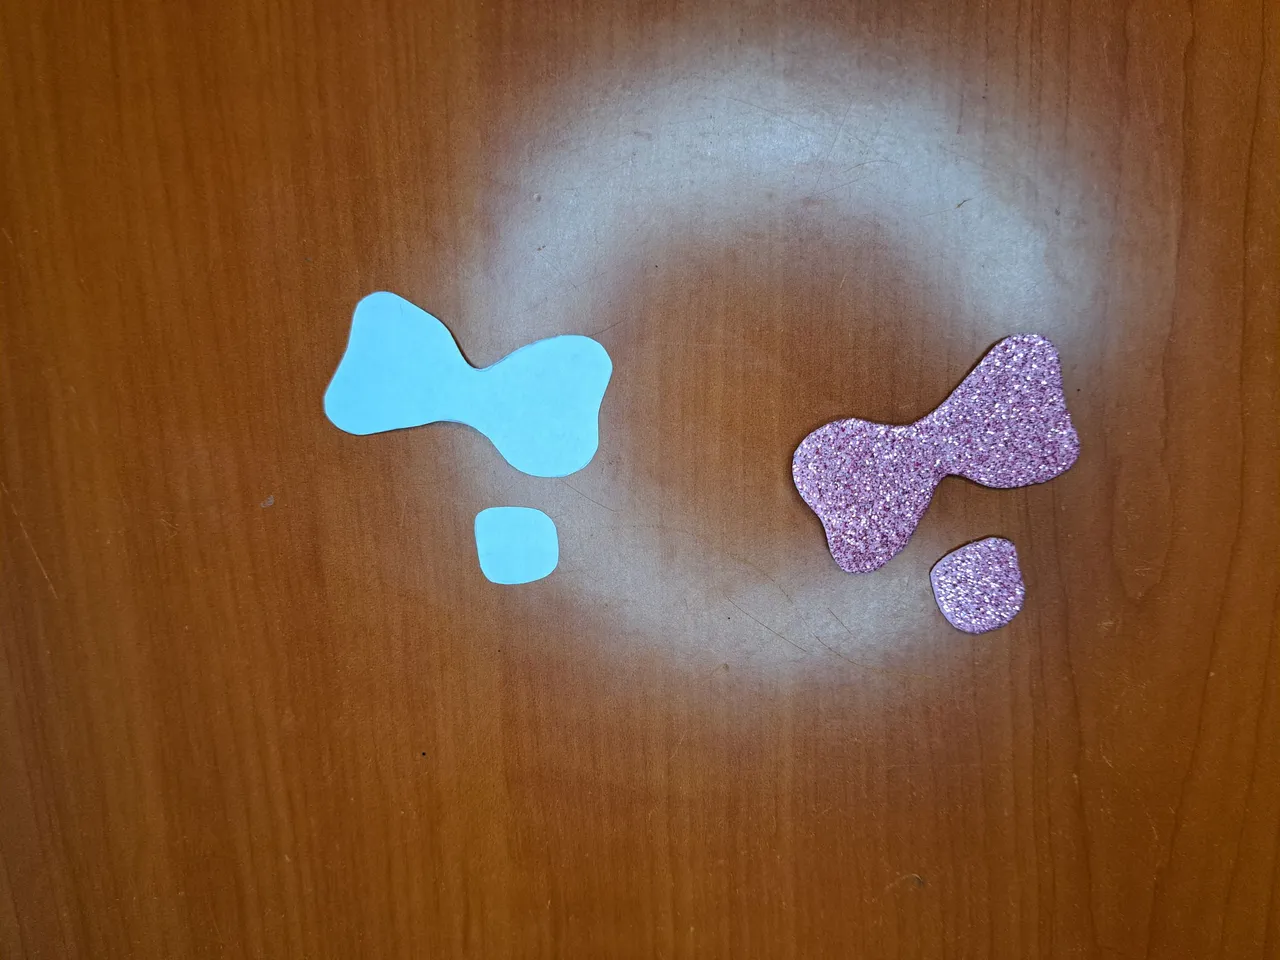
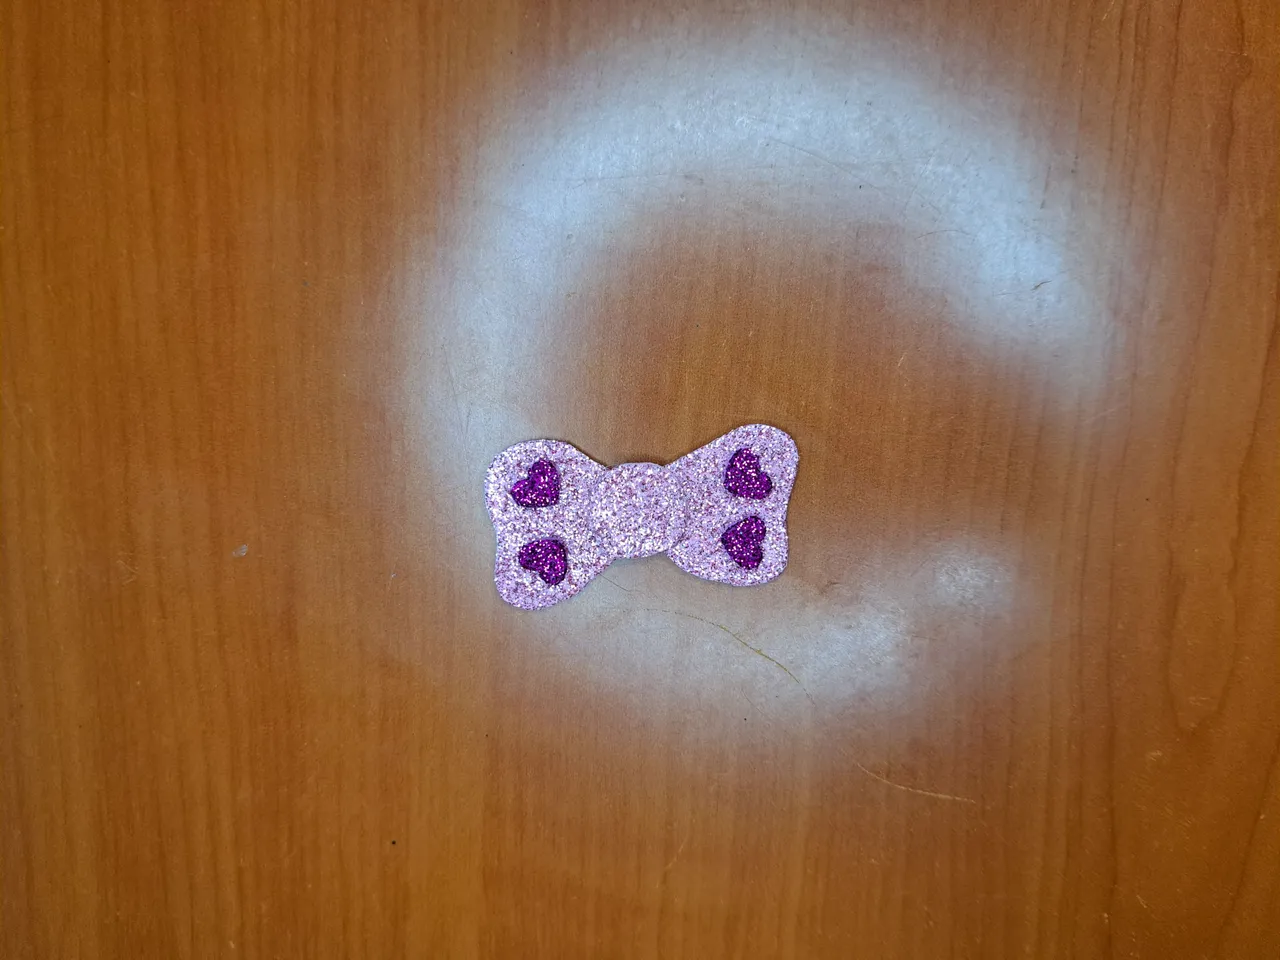
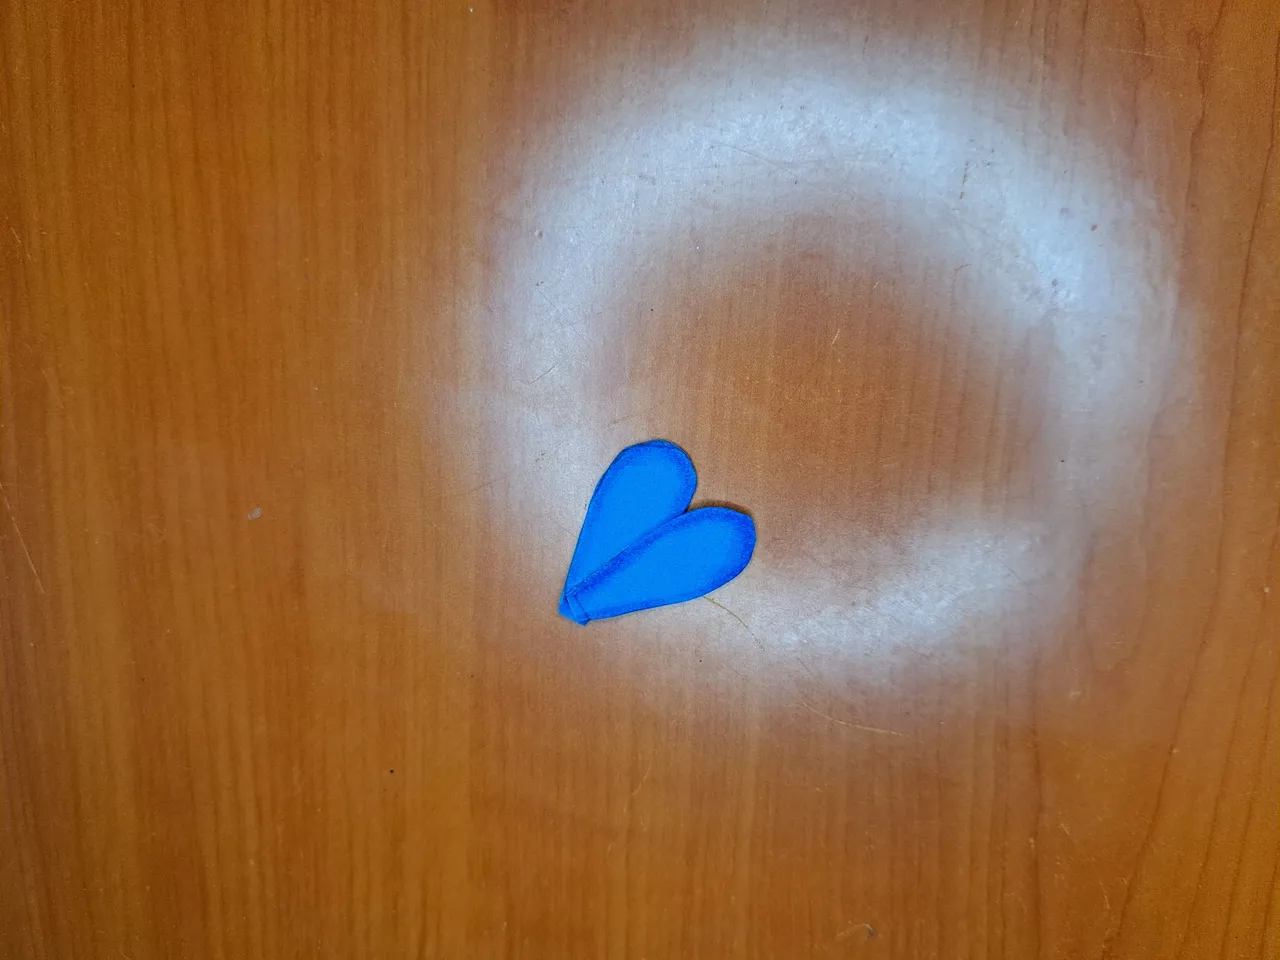
2️⃣ Cut out the wings out of blue fomi and the bow out of frosted pink fomi. Use a dark blue marker and draw a faded border on the wings.
Recorta las alas en fomi azul y el moño en fomi rosado escarchado. Utiliza un marcador azul oscuro y dibuja un borde difuminado en las alas.
 |  |
 |  |
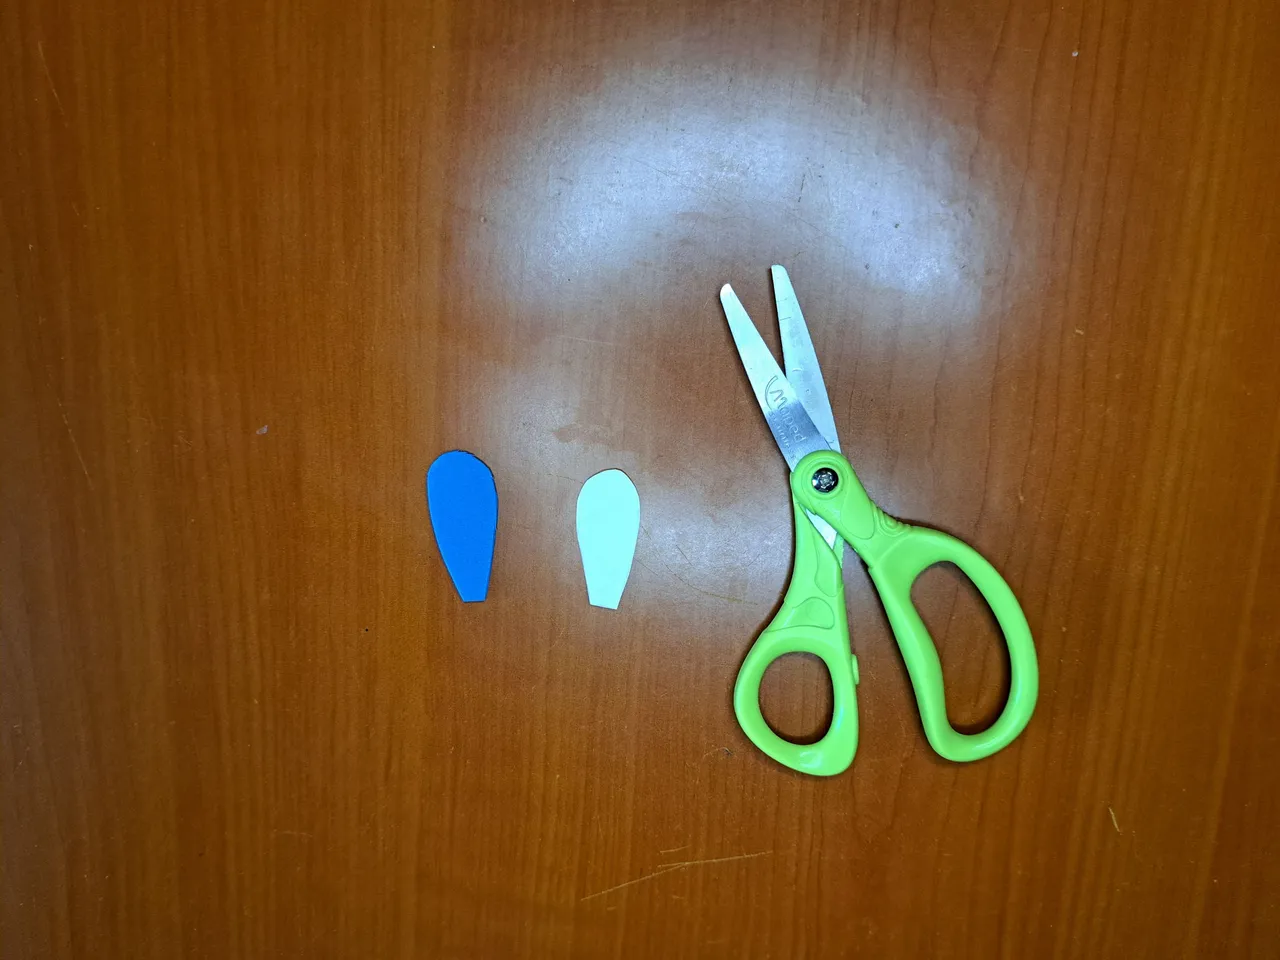
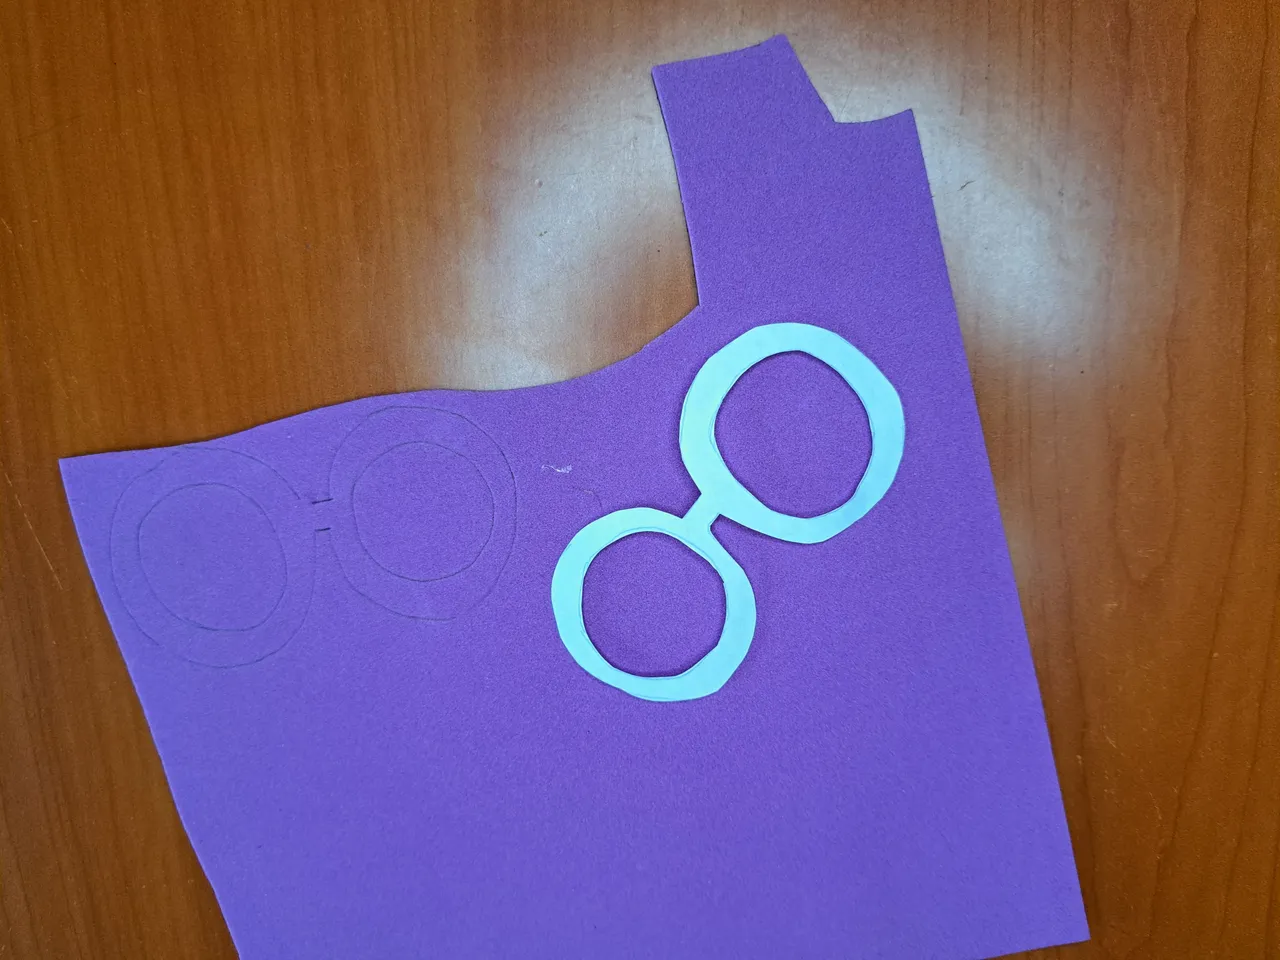
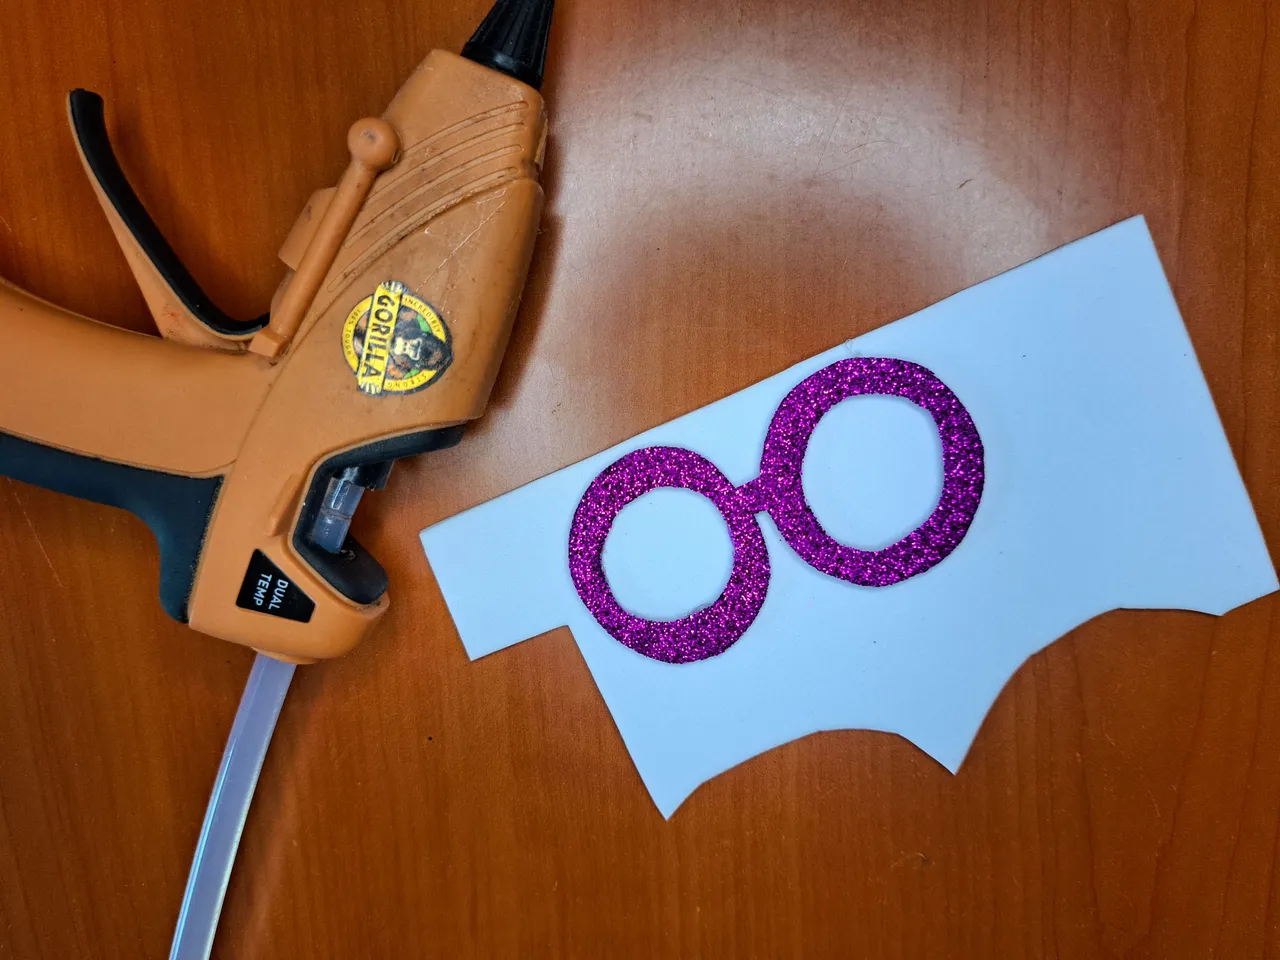
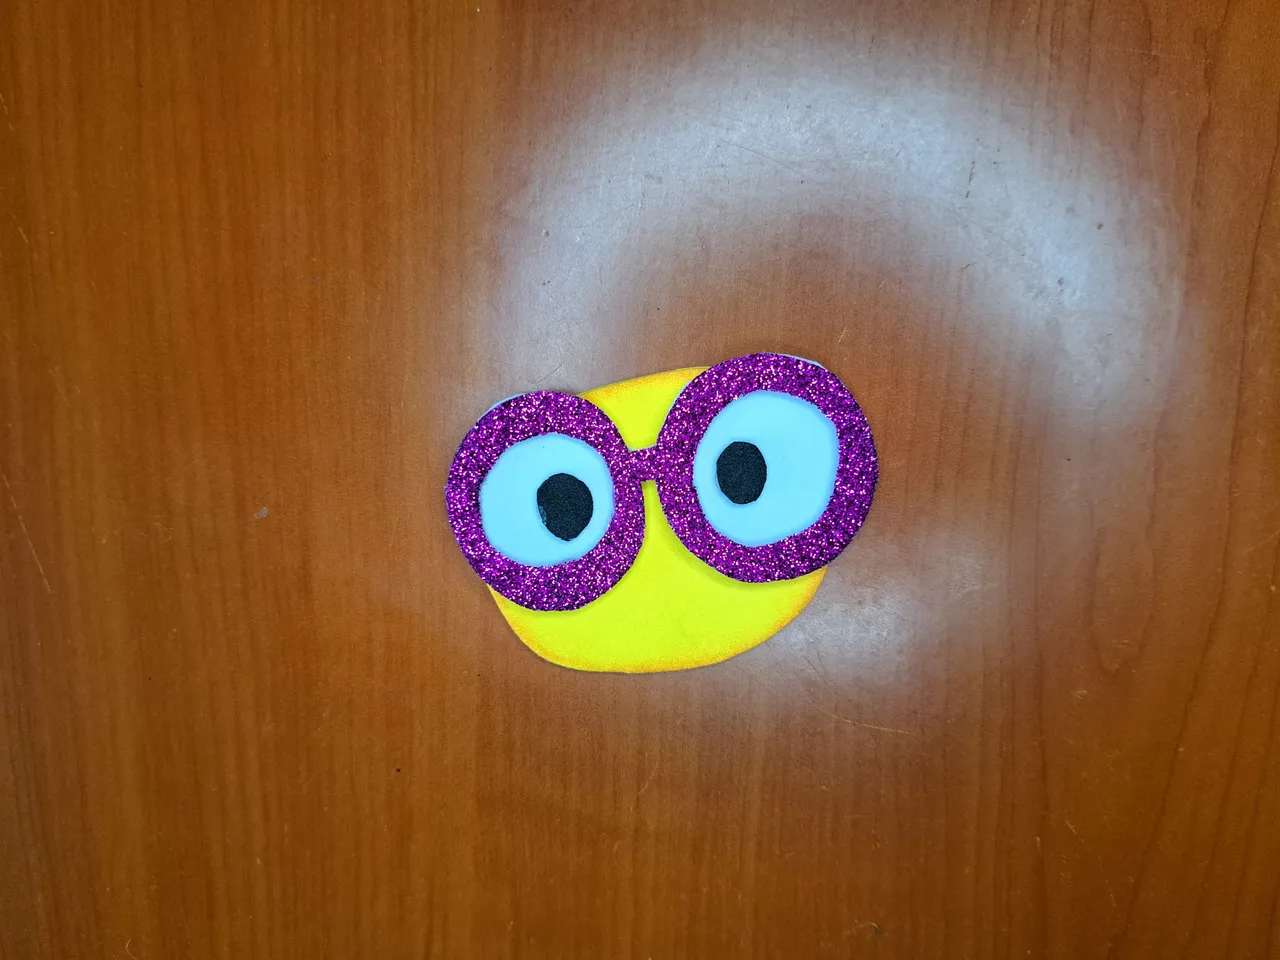
3️⃣ Mark and cut out the mirror design on frosted purple fomi. Glue the design onto white fabric and cut them out. Also cut out all the parts of the design in black fomi, as this is where the eyes are, which you will glue on the inside of the mirror design with the white background.
Marca y recorta el diseño de los espejuelos en fomi morado escarchado. Pega el diseño en fomi blanco y recórtalos. También recorta todas las partes del diseño en fomi negro, ya que ahí están los ojos, los cuales pegarás en el interior del diseño de los espejuelos con el fondo blanco.
 |  |  |
 |  |
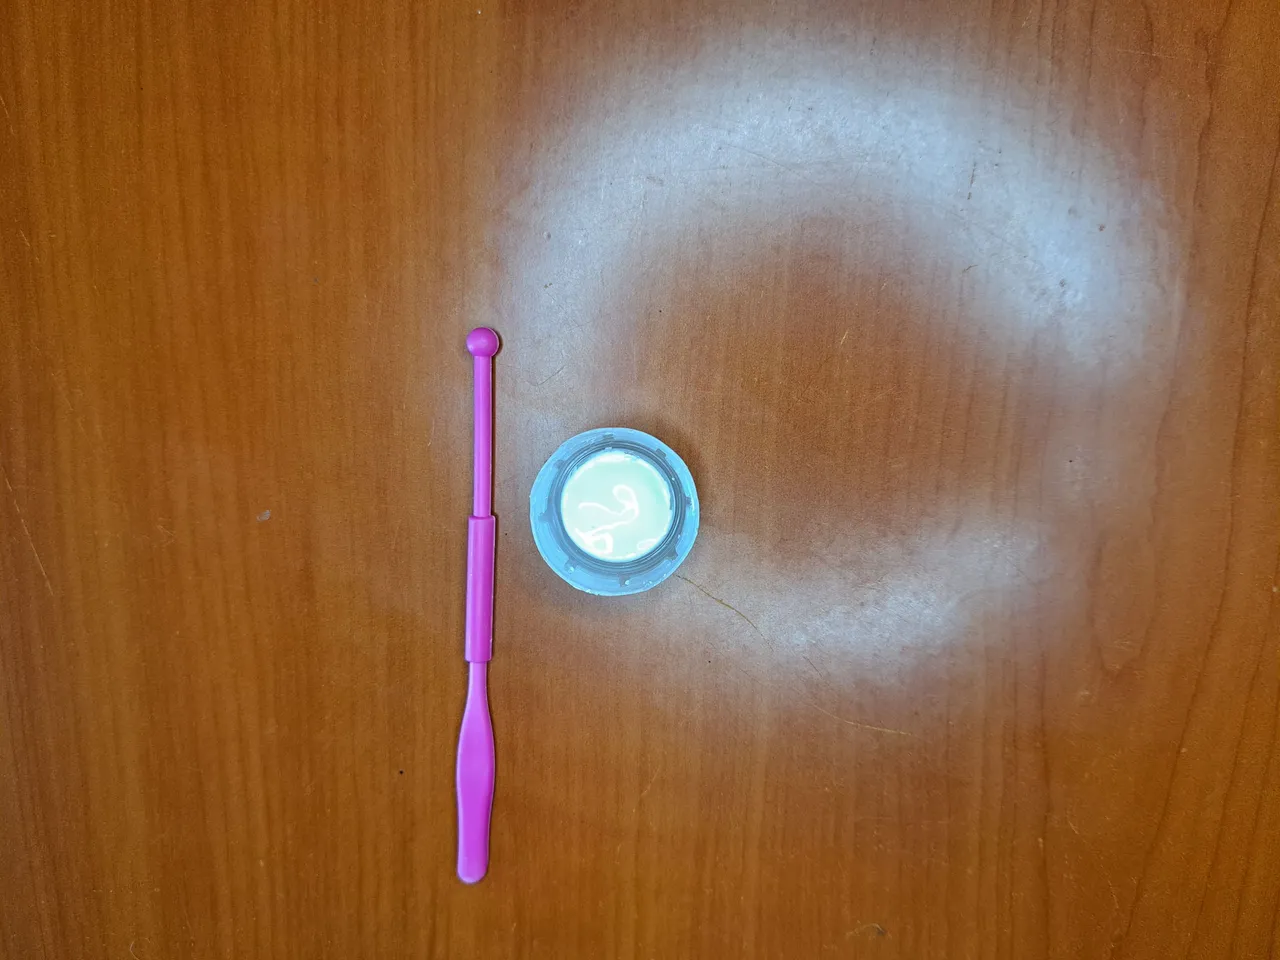
4️⃣ Use the hole punch to create 4 hearts, which you will glue to the inside corners of the mobile after having assembled its two parts.
Utiliza la perforadora para crear 4 corazones, los cuales pegarás en las esquinas interiores del móvil luego de haber ensamblado sus dos partes.
 |  |
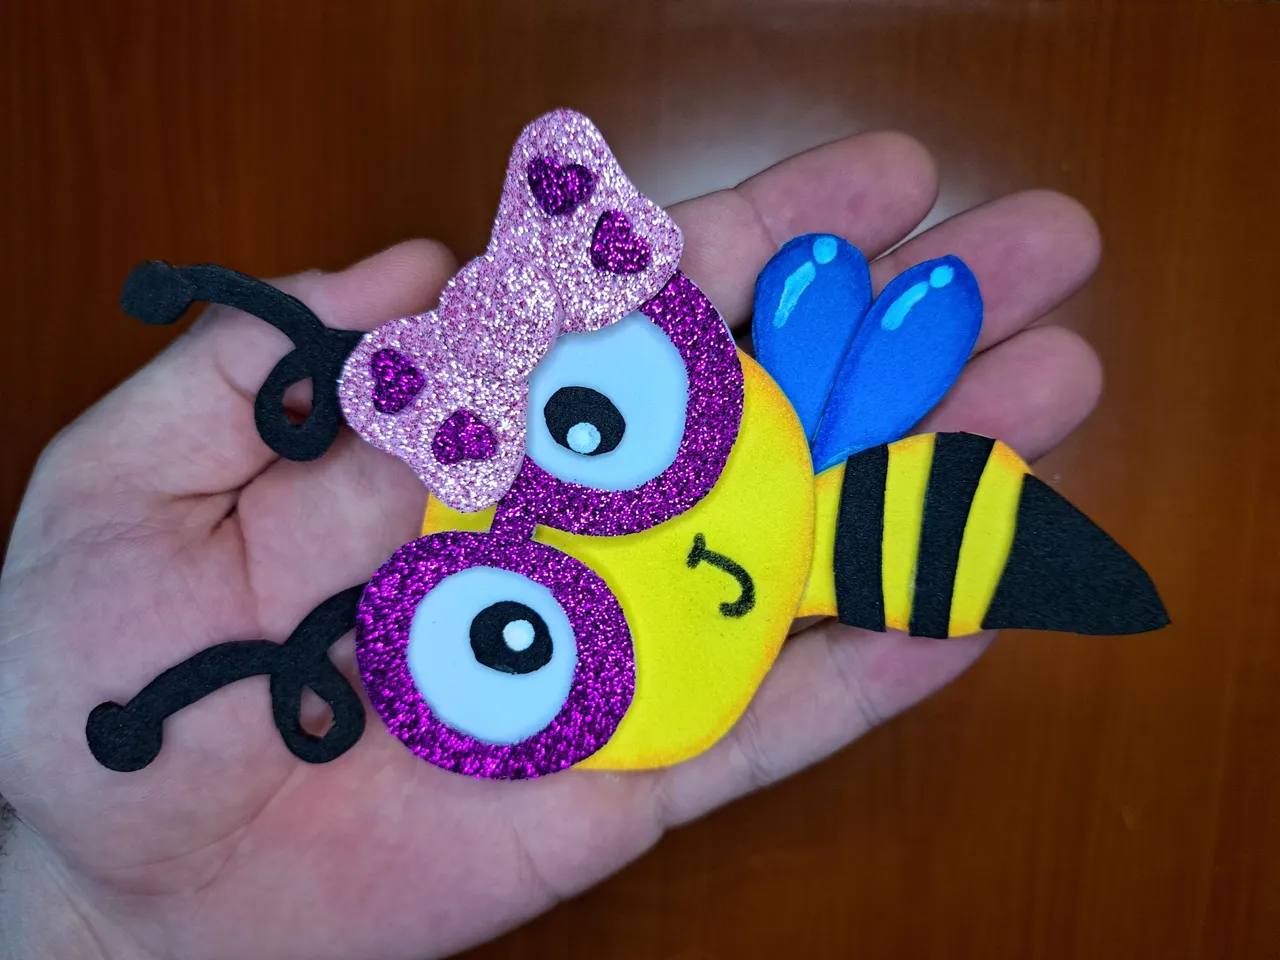
5️⃣ Glue the glasses with the eyes on the head. Then add the bow on the upper left side.
Pega los lentes con los ojos en la cabeza. Posteriormente, agrega el moño en la parte superior izquierda.
 |  |
 |  |
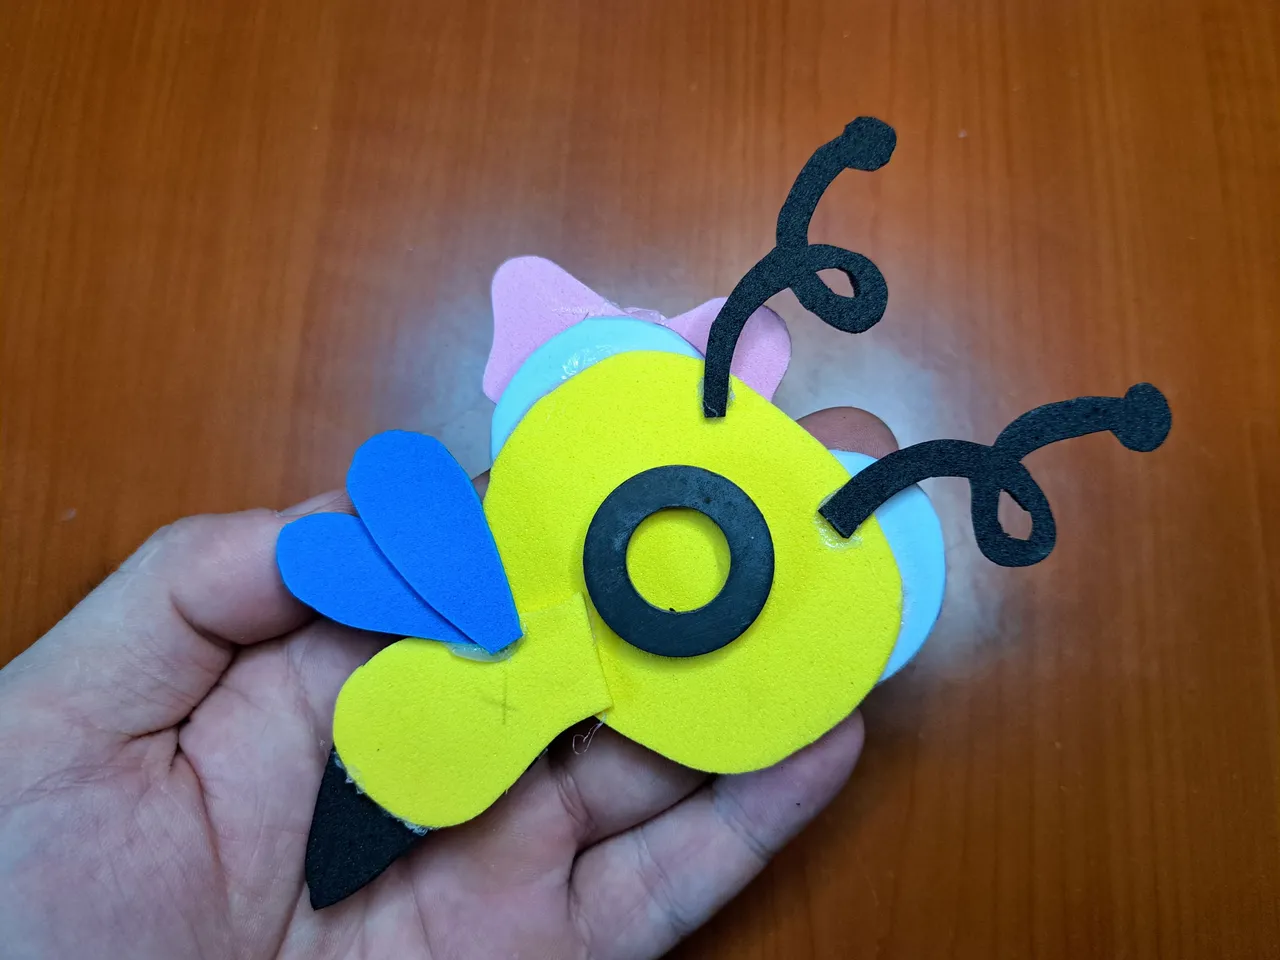
6️⃣ Glue the stinger and stripes to the body. Join the wings at the lower end and glue them together with the body to the lower part of the head.
Pega el aguijón y las rayas al cuerpo. Une las alas por el extremo inferior y pégalas junto con el cuerpo a la parte inferior de la cabeza.
 |  |
 |  |
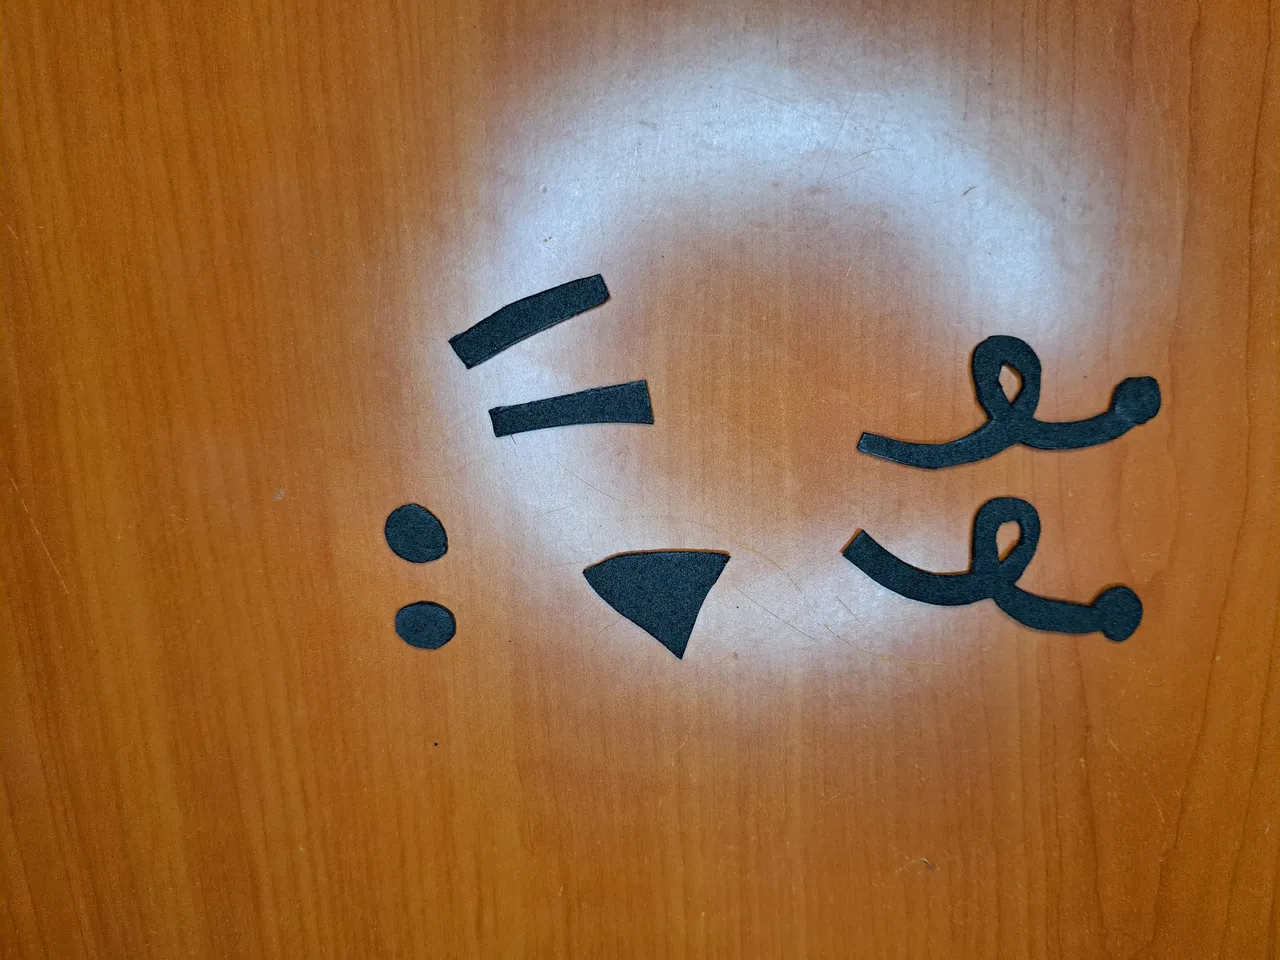
7️⃣ Draw a smile on the bee's mouth using a black marker. If you find this too difficult, draw an inverted capital J. Next, use a white marker to draw some reflective details on the wings.
Dibuja una sonrisa en la boca de la abeja utilizando un marcador negro. Si se te hace muy difícil, dibuja una letra J mayúscula invertida. A continuación, utiliza un marcador blanco para dibujar unos detalles de reflejos en las alas.
 |  |
 |  |
8️⃣ Finally, place a magnet on the back of the head and it is ready to be placed on any metal surface.
Para finalizar, coloca un imán en la parte trasera de la cabeza y ya estaría lista para colocarla en cualquier superficie metálica.
 |  |
Finished Work // Trabajo Terminado
And this way we would reach the end of the tutorial. I hope you liked the process of creating this intellectual bee, which can not only become a decorated magnet, as you can choose to paste it directly on a non-metallic surface. And for now I say goodbye, but I'm looking forward to be here again to share with you another of my creations.
Y de esta forma llegaríamos al final del tutorial. Espero que les haya gustado el proceso de creación de esta abeja intelectual, la cual no solo puede llegar a ser un imán decorado, ya que pueden optar por pegarla directamente en una superficie no metálica. Y por ahora me despido, pero estoy deseando poder estar nuevamente por aquí compartiendo con ustedes otra de mis creaciones.
 |  |
 |  |

Thank you very much for reading my post. If you liked it, please leave a comment and consider following me so you don't miss my next posts. I'd love to know your opinion and your thoughts about the topic I discussed in this post, see you in the next one!
Credits and Resources // Créditos y Recursos
Cover page created in Canva Pro
Translated by DeepL
Images captured with my Samsung Galaxy A53

Cover page created in Canva Pro
Translated by DeepL
Images captured with my Samsung Galaxy A53