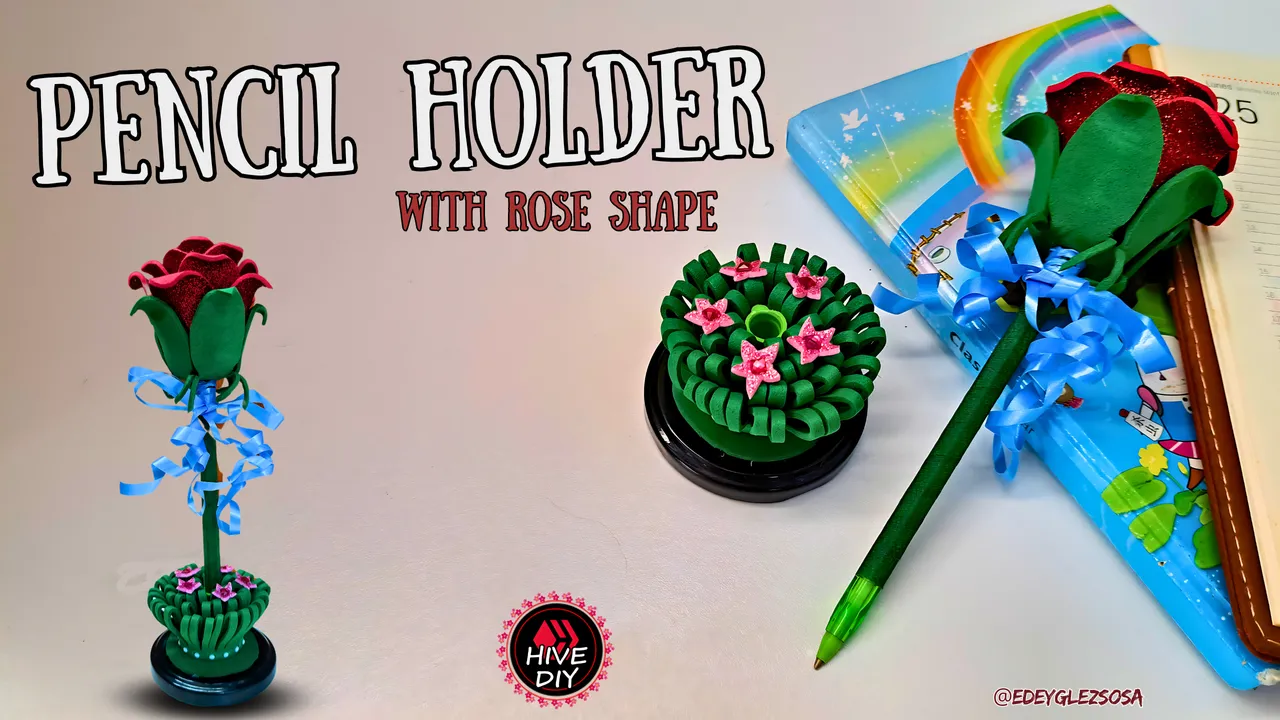
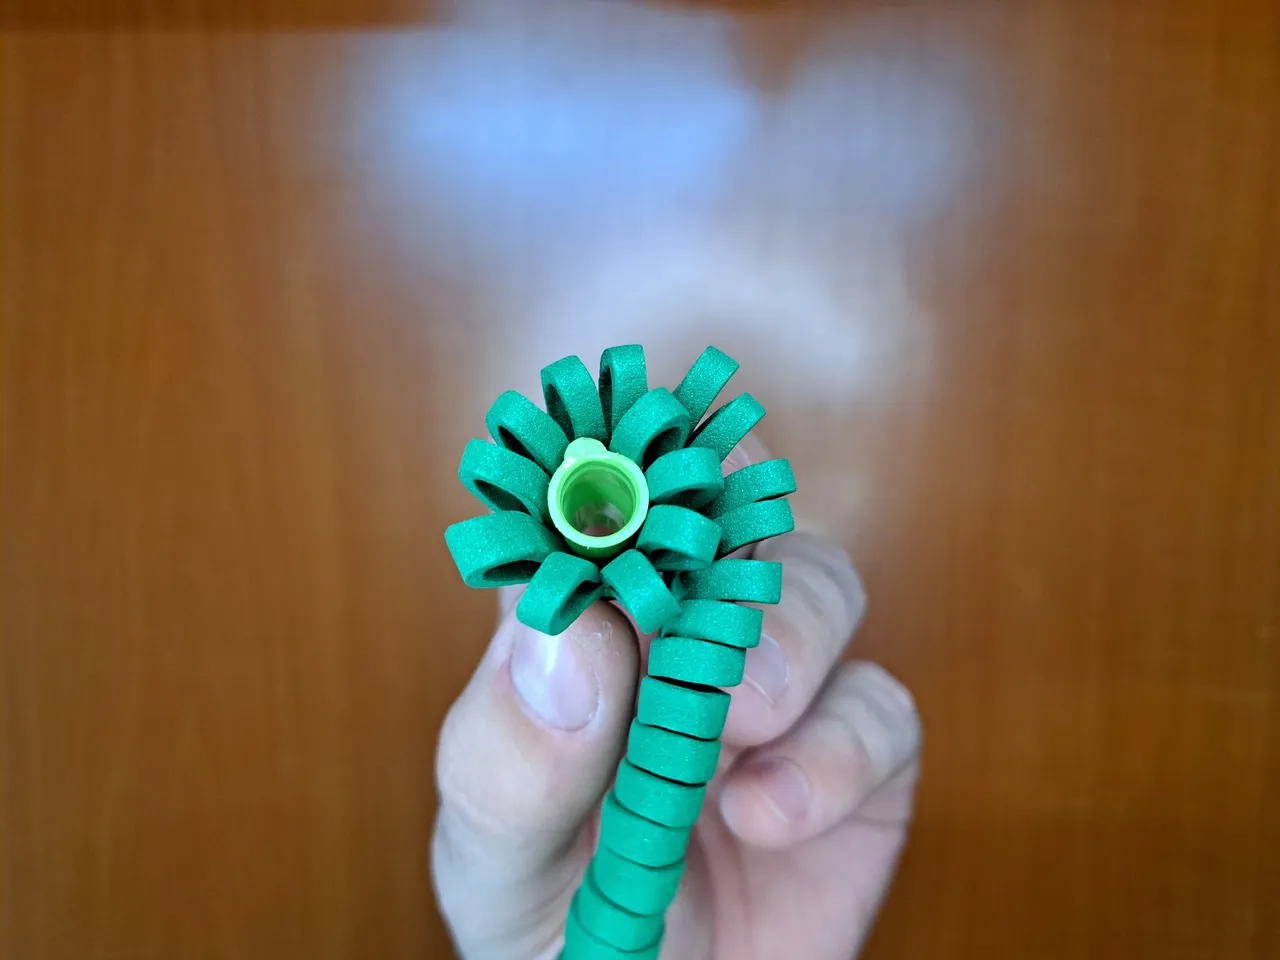
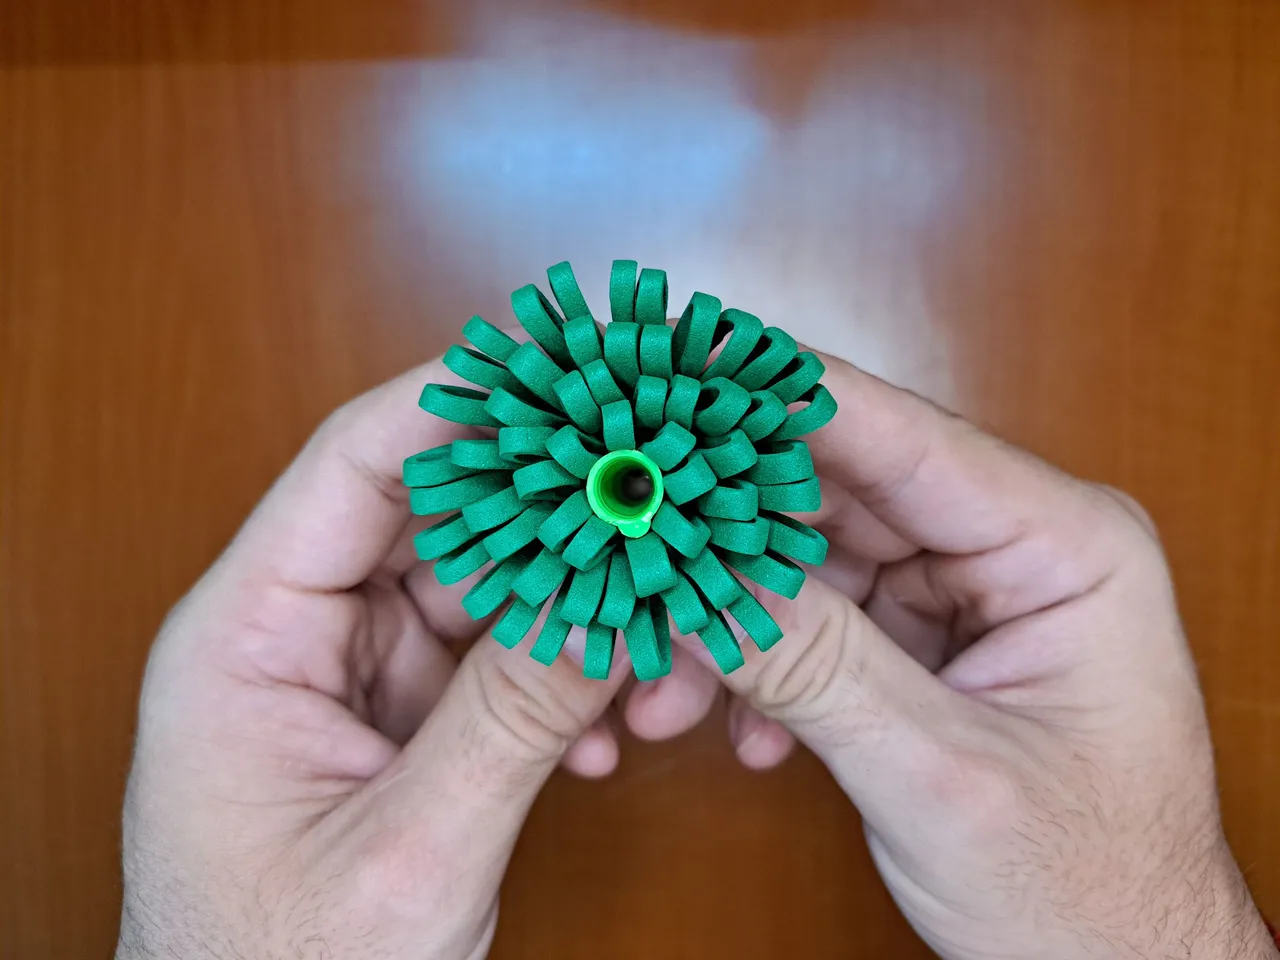
Greetings friends of the #hivediy community. What an immense pleasure to be here again sharing another of my creations! Today I bring you a tutorial where I will show you step by step how to make a pencil holder in the shape of a flower. This craft is not only very simple, but it is also a perfect decoration for any office desk, since from afar no one would imagine that there is a pen hidden inside the flower. What's more, it would be amazing to see the face of the other coworkers when they see from afar how you write with a rose in your hand 😄.
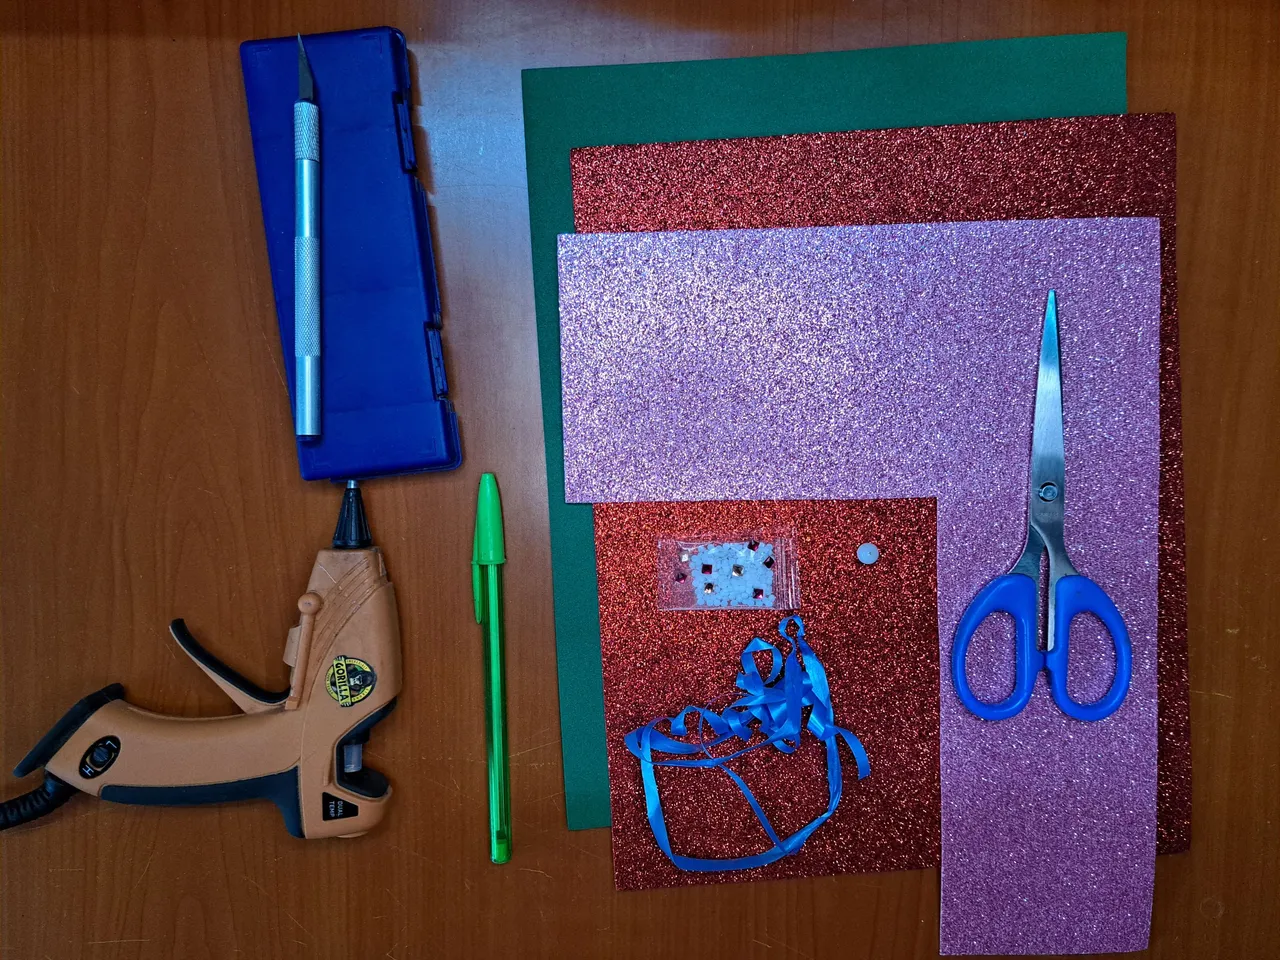
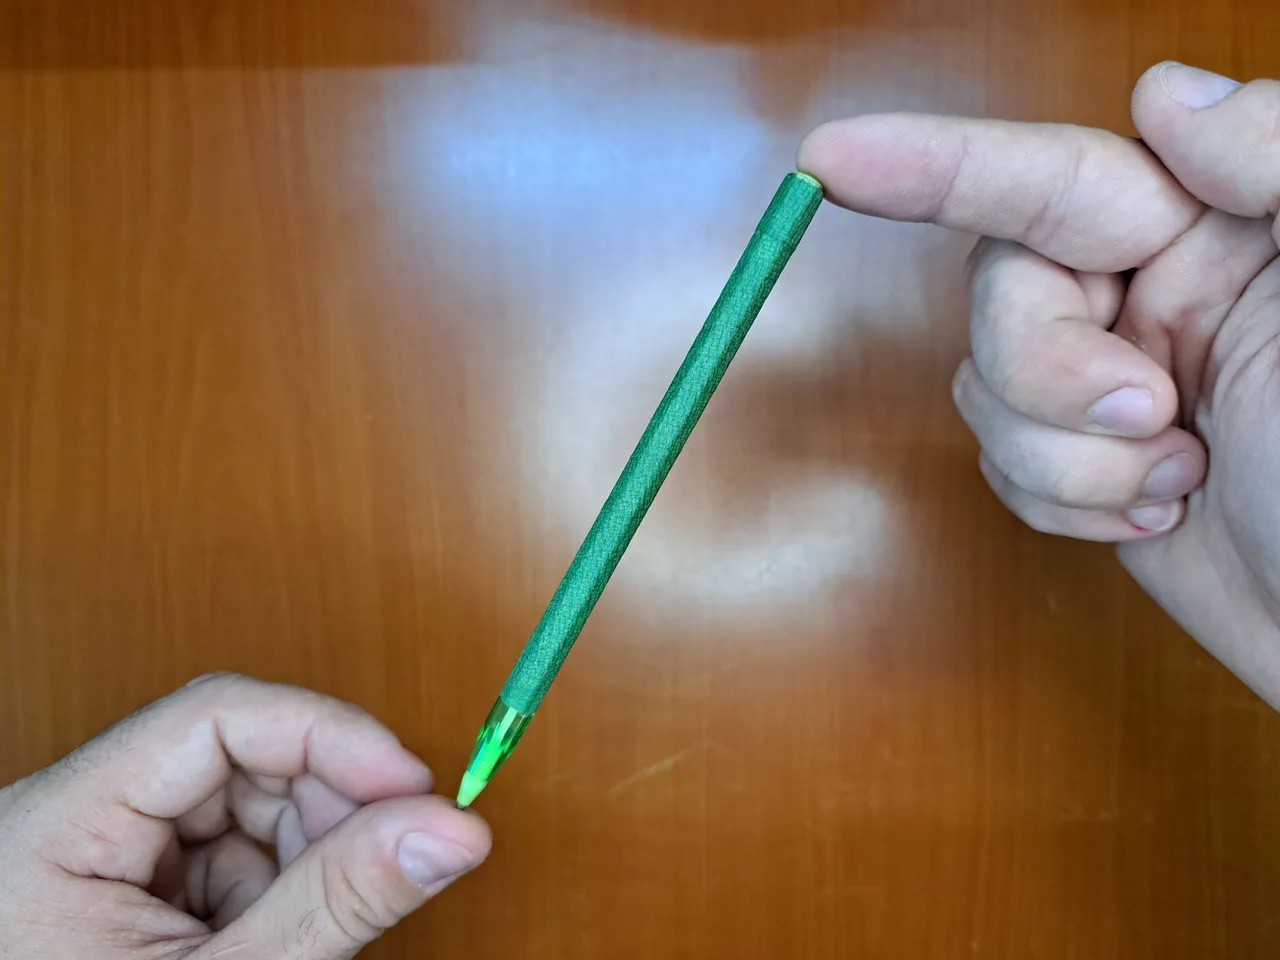
For the making of this pencil holder, fomi was used as the main material and one of the main requirements to make this craft is that the pen used has a cap, since this will be the base of the structure. So, without further ado, let's start with the tutorial...
Saludos amigos de la comunidad #hivediy. ¡Qué inmenso placer estar nuevamente por aquí compartiendo otra de mis creaciones! El día de hoy les traigo un tutorial donde les mostraré paso a paso cómo confeccionar un portalápiz con forma de flor. Esta manualidad no solo es muy sencilla, sino que también es un adorno perfecto para cualquier escritorio de oficina, ya que desde lejos nadie se imaginaría que hay un bolígrafo oculto dentro de la flor. Es más, sería increíble ver la cara de los demás compañeros de trabajo al ver desde lejos cómo escribes con una rosa en la mano 😄.
Para la confección de este portalápiz se utilizó como material principal el fomi y uno de los requisitos principales para realizar esta manualidad es que el bolígrafo utilizado tenga tapa, ya que esta será la base de la estructura. Así que, sin más preámbulos, comencemos con el tutorial…
Materials // Materiales
| ✔️ Smooth green Fomi | ✔️ Fomi liso verde |
| ✔️ Red and pink frosted fomi | ✔️ Fomi escarchado rojo y rosado |
| ✔️ Ballpoint pen with cap | ✔️ Bolígrafo con tapa |
| ✔️ Scissors | ✔️ Tijeras |
| ✔️ Cutting and milling set | ✔️ Set de corte y tallado |
| ✔️ Hot Silicone | ✔️ Silicona Caliente |
| ✔️ White Pearl | ✔️ Perla Blanca |
| ✔️ Small white semi-pearls | ✔️ Semiperlas blancas pequeñas |
| ✔️ Blue ribbon for bows | ✔️ Cinta azul para lazos |
| ✔️ Floral ribbon | ✔️ Cinta floral |
Step by step // Paso a paso
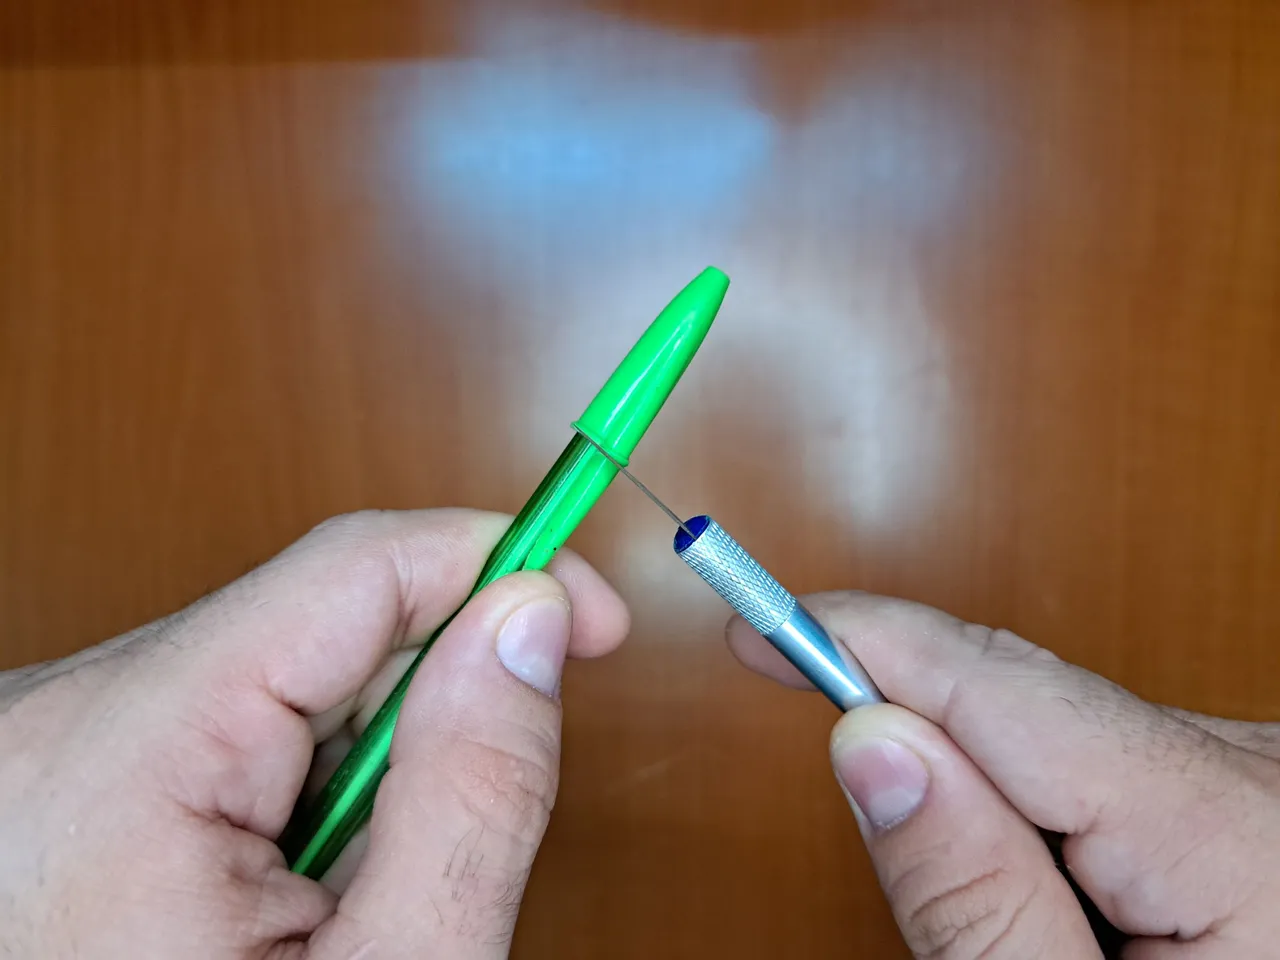
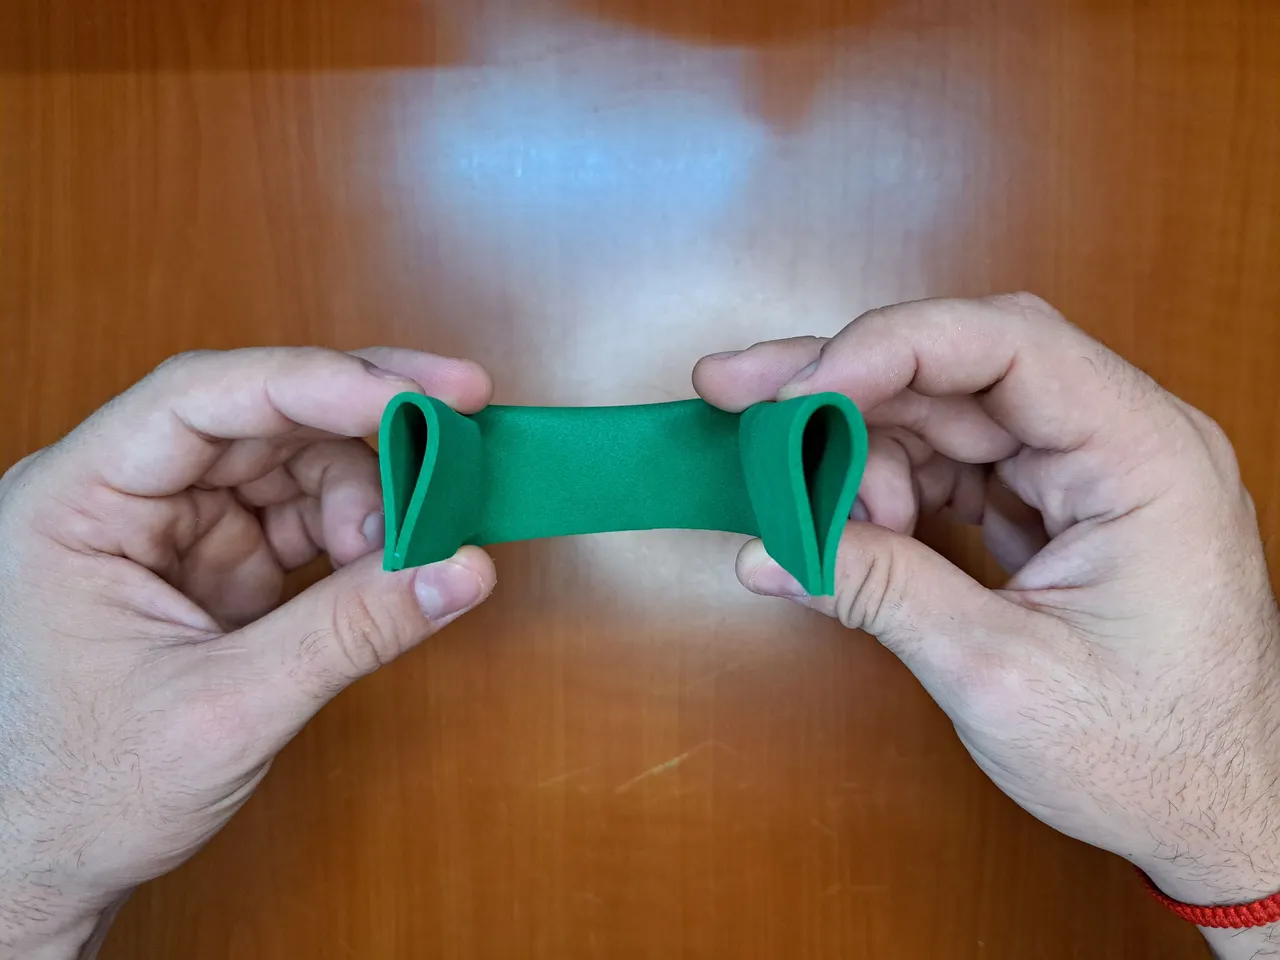
1️⃣ We will start by cutting off the top end of the pen cap that is used to attach the pen. We will measure the length of the pen cap and cut a fomi ribbon that is twice that diameter. Glue the ribbon lengthwise and make cuts on the end opposite to the side we glued. After making the cuts, glue the ribbon around the pen cap.
Comenzaremos cortando el extremo superior de la tapa del bolígrafo que se utiliza para engancharlo. Mediremos el largo de la tapa del bolígrafo y cortaremos un listón de fomi que sea del doble de ese diámetro. Pegaremos el listón a lo largo y haremos cortes por el extremo opuesto al lado que pegamos. Luego de realizados los cortes, pegaremos el listón alrededor de la tapa del bolígrafo.
 |  |
 |  |  |
 |  |
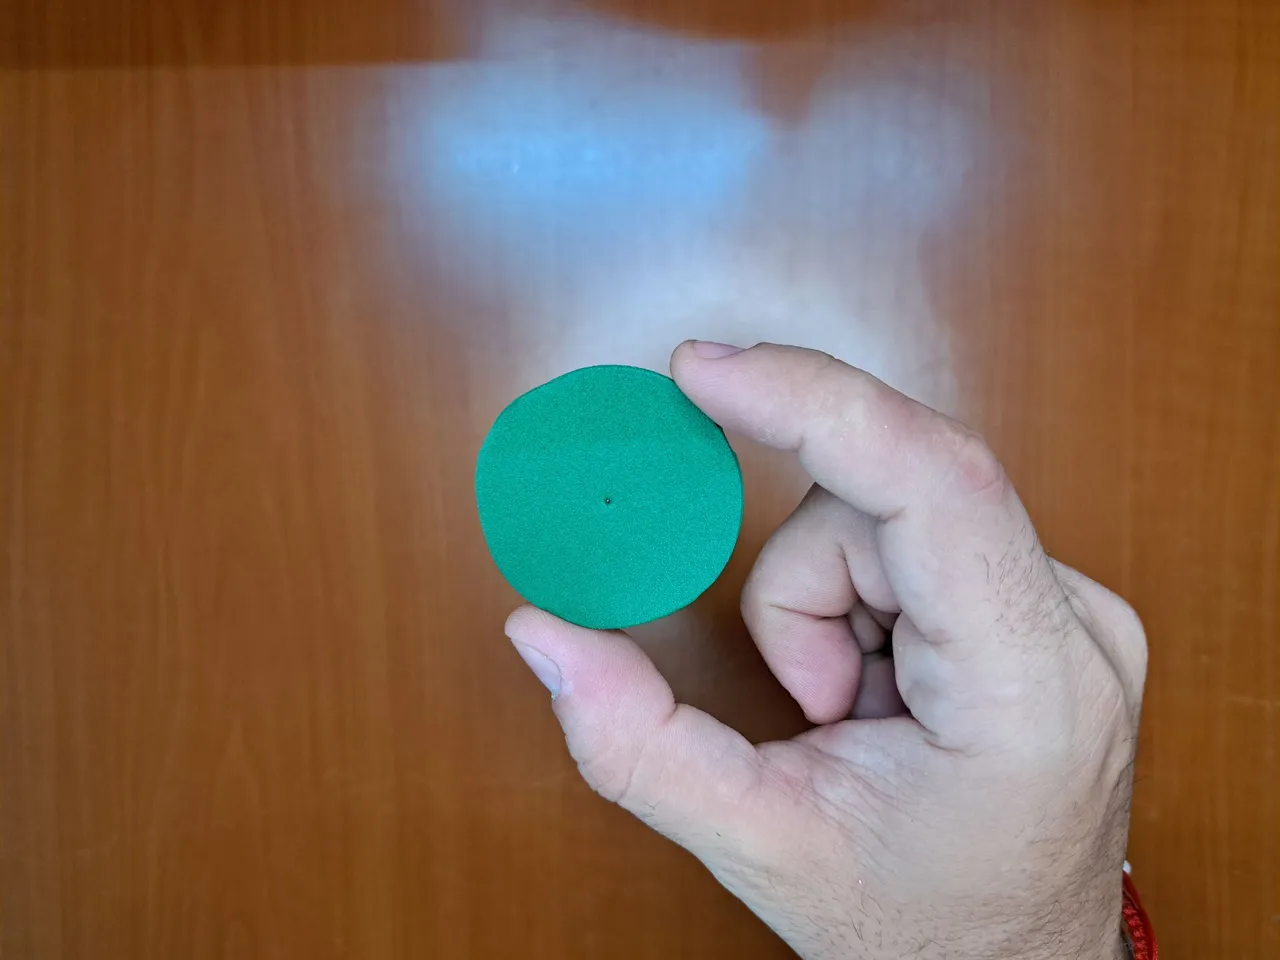
2️⃣ Next, we will wrap floral tape around the pen, starting from the exact point where the cap arrives. After wrapping the pen, we will place it on the lid and cut out a circle of green fomi, which we will glue on the base.
A continuación, envolveremos cinta floral en el bolígrafo, partiendo del punto exacto donde llega la tapa. Después de envolver el bolígrafo, lo colocaremos en la tapa y recortaremos un círculo de fomi verde, el cual pegaremos en la base.
 |  |
 |  |  |
3️⃣ On a piece of frosted pink fomi, we will draw and cut out small flowers with five petals, which we will thermoform using the same silicone gun, and then glue a pink stone in the center of each one. Next, we will glue the little flowers on top of the green base around the stem and at the bottom we will place a row of white semi-pearls.
En un pedazo de fomi rosa escarchado, dibujaremos y recortaremos pequeñas florecitas de cinco pétalos, las cuales termoformaremos utilizando la misma pistola de silicona, para luego pegarles en el centro una piedra rosada a cada una. Seguidamente, pegaremos las florecitas encima de la base verde alrededor del tallo y en la parte inferior colocaremos una hilera de semiperlas blancas.
 |  |  |
 |  |
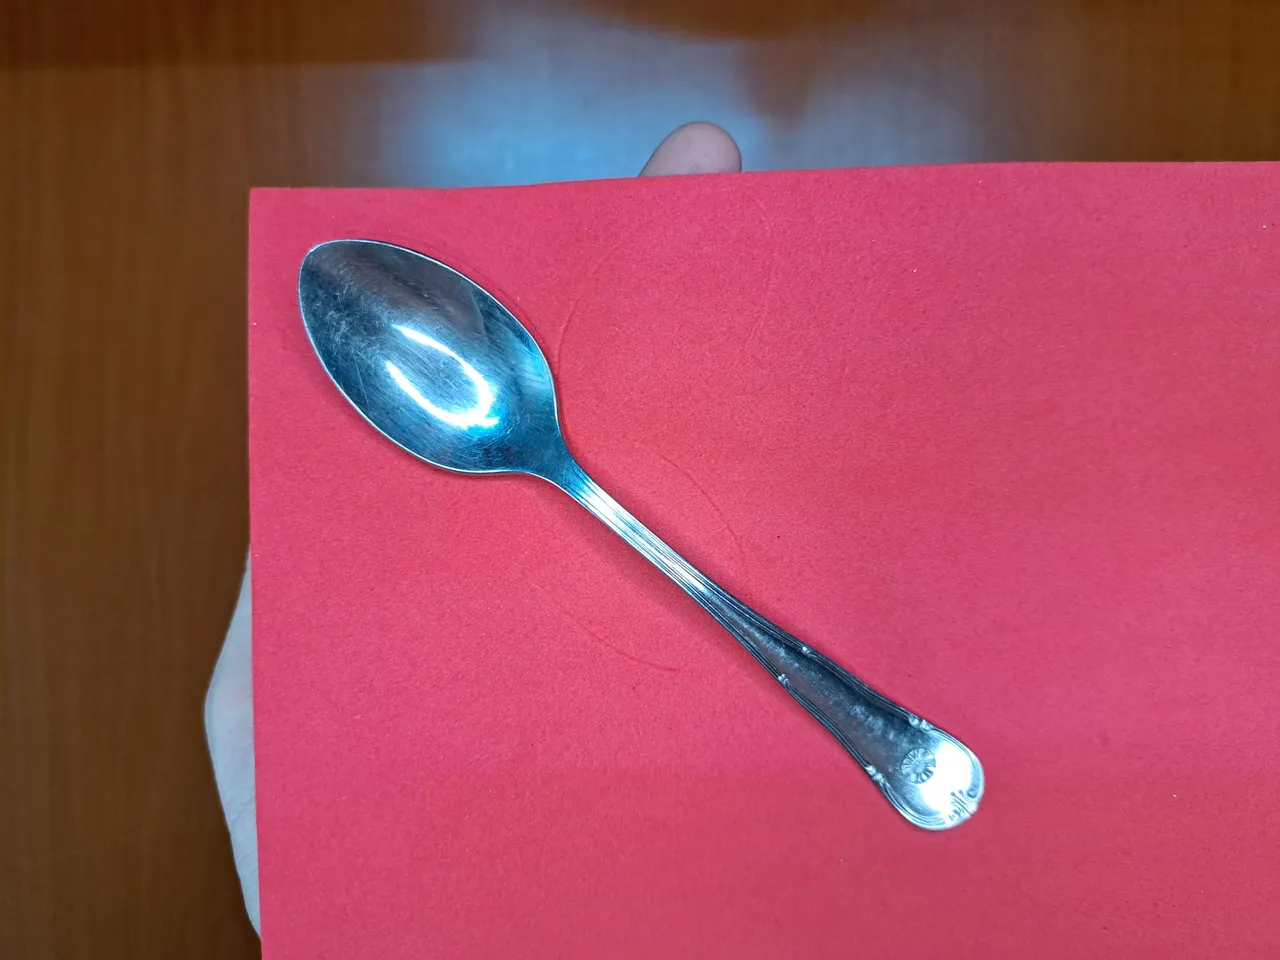
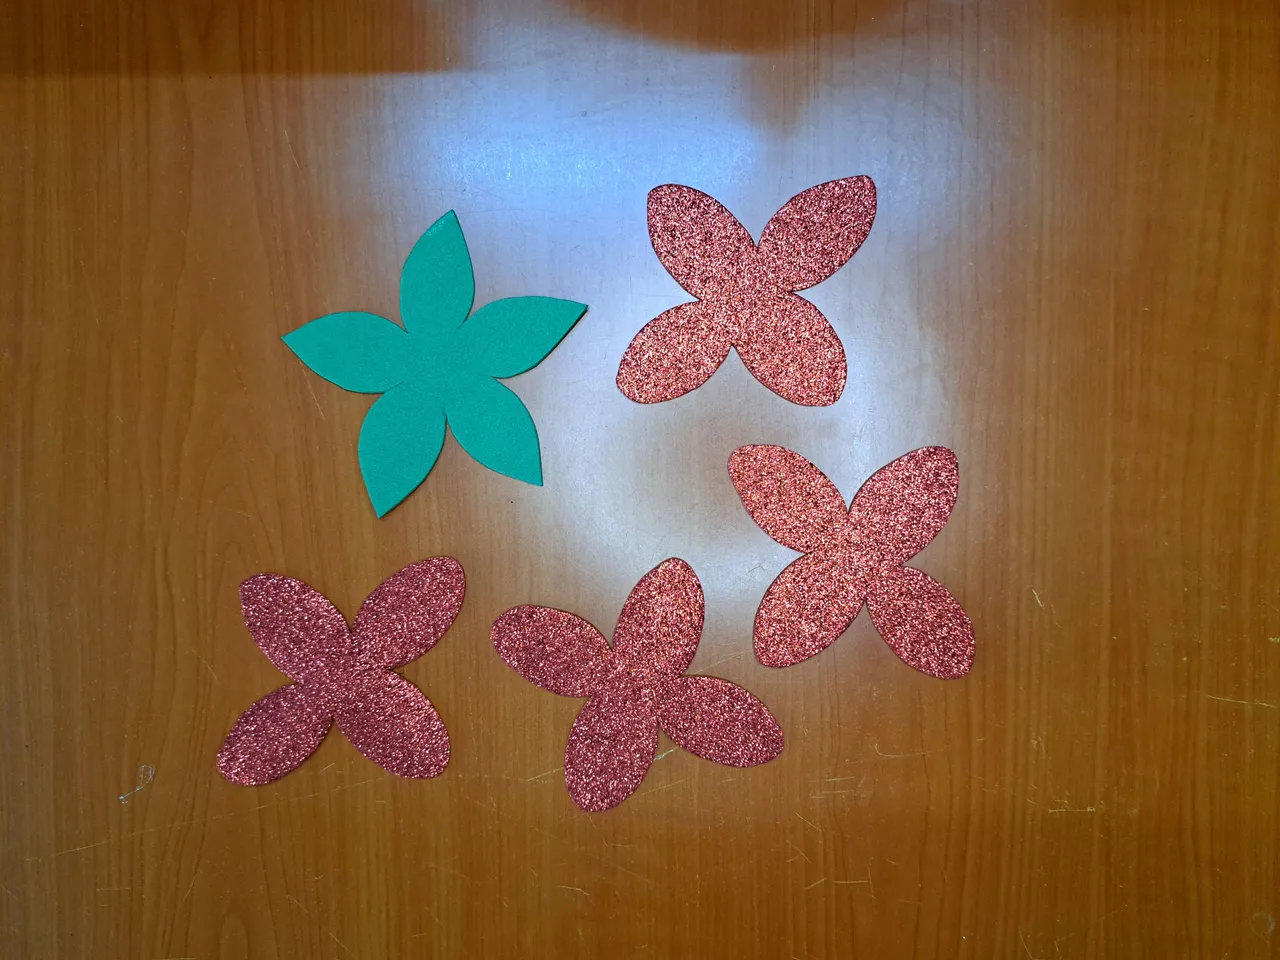
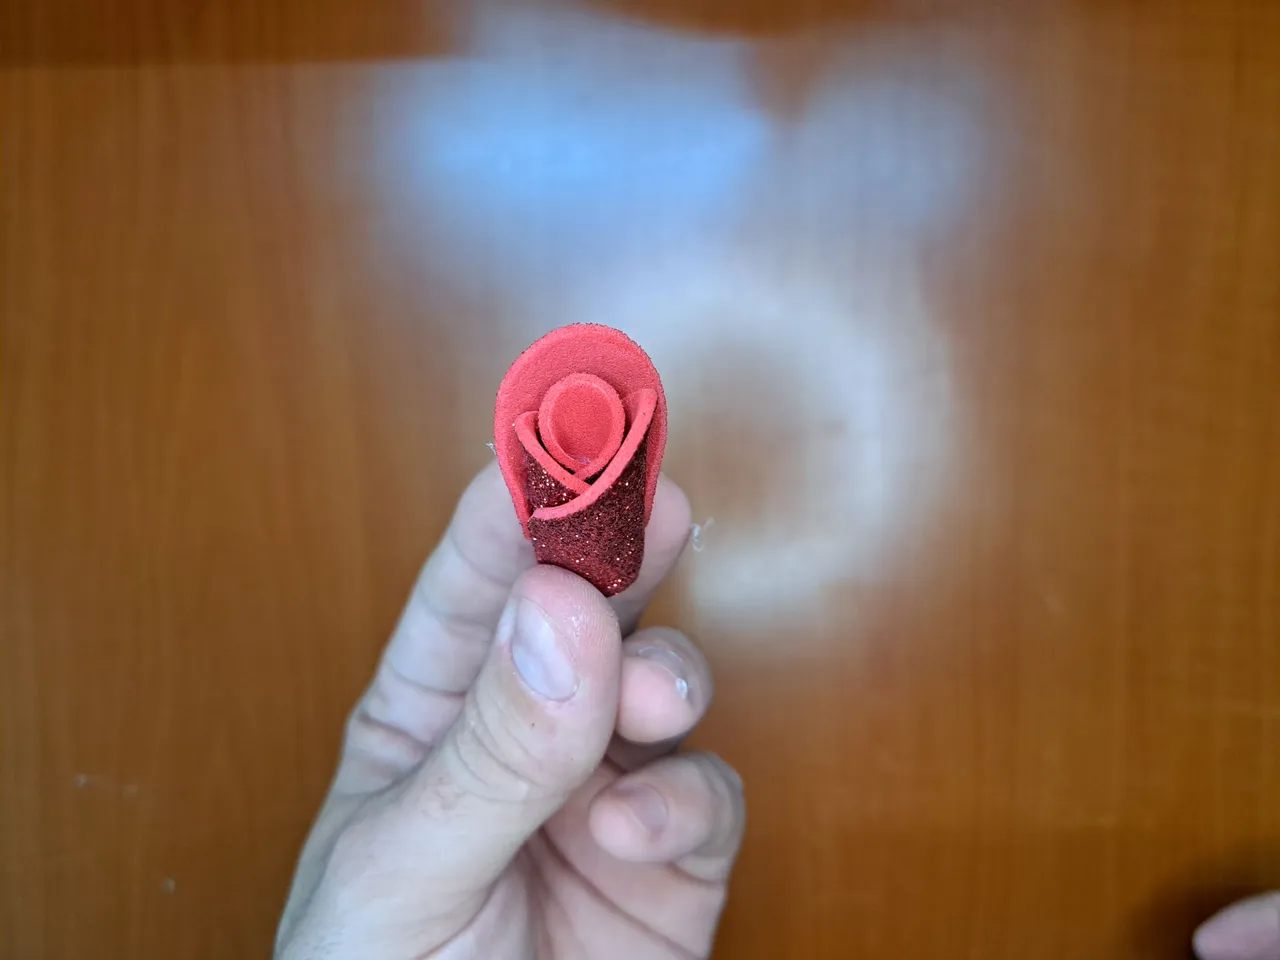
4️⃣ Freehand or using a spoon, we will draw the four-petal pattern of the flower and a five-part pattern for the sepal. Then, we will cut out the patterns and start assembling the flower. Finally, after placing all the petals, we will glue the green sepal pattern.
A mano alzada o utilizando una cuchara, dibujaremos el patrón de cuatro pétalos de la flor y un patrón de cinco partes para el sépalo. Luego, recortaremos los patrones y comenzaremos a montar la flor. Finalmente, después de colocar todos los pétalos, pegaremos el patrón de sépalos verdes.
 |  |
 |  |  |
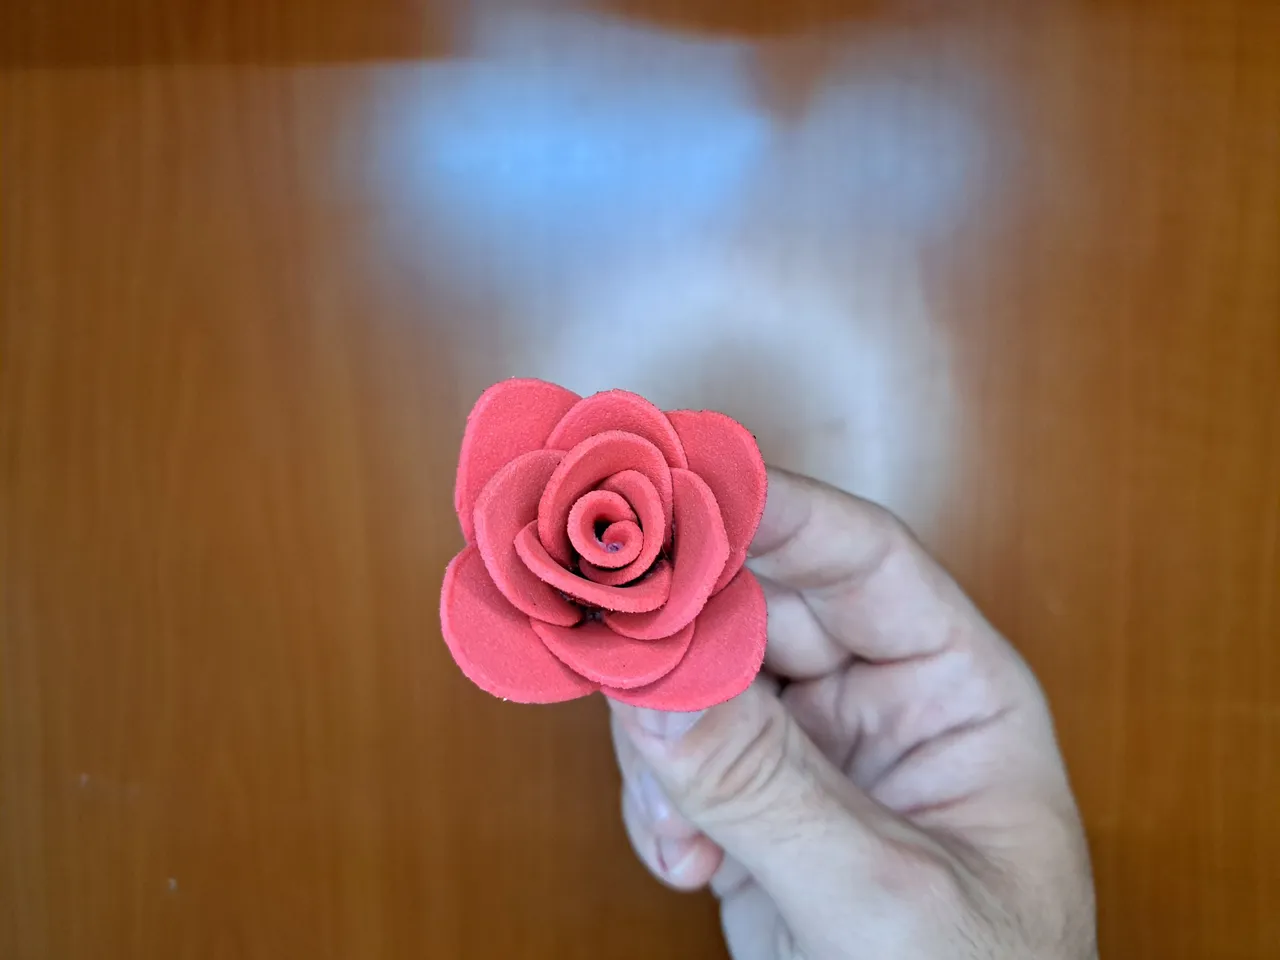 |  |
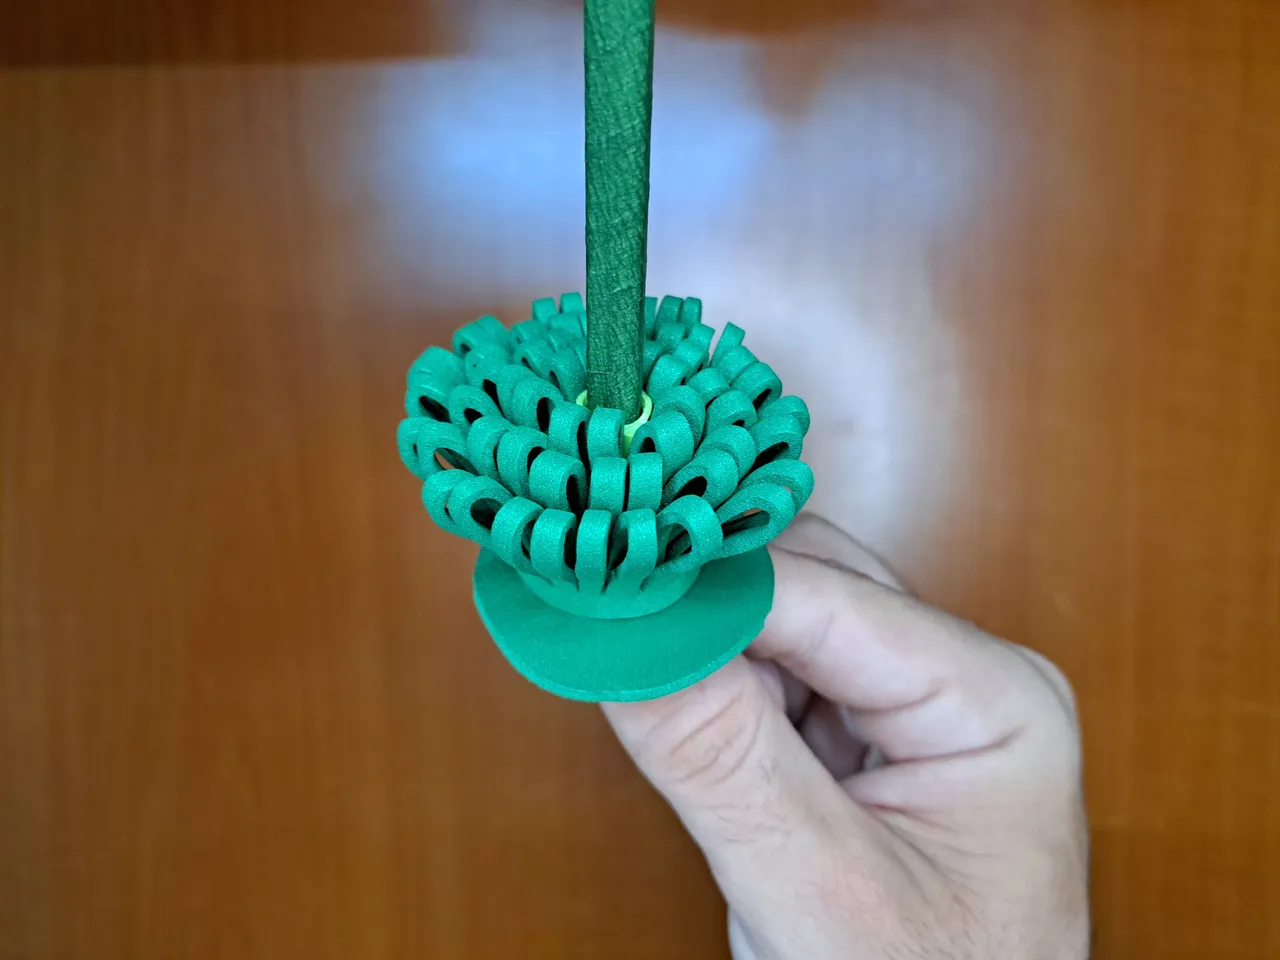
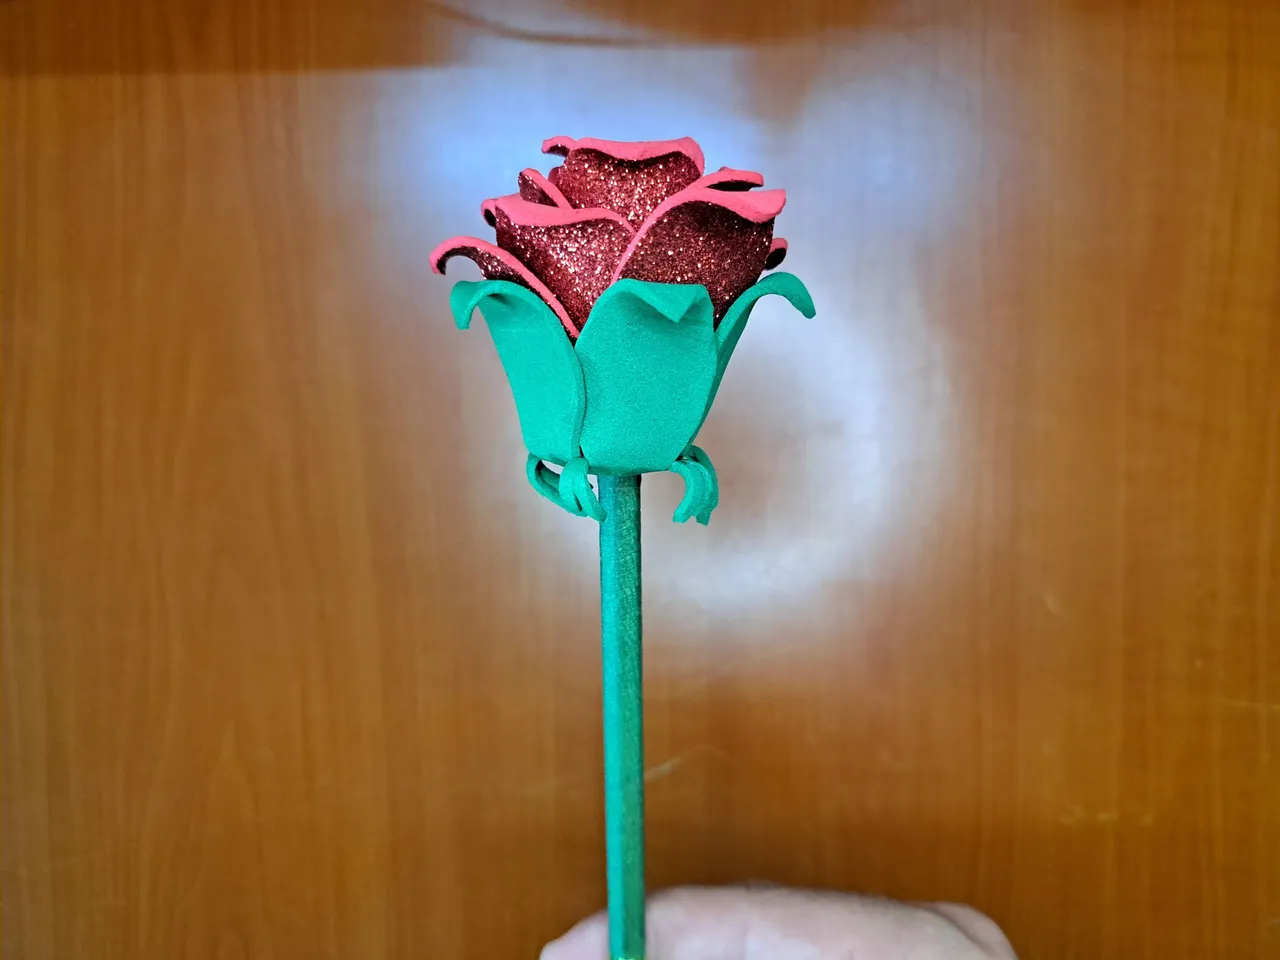
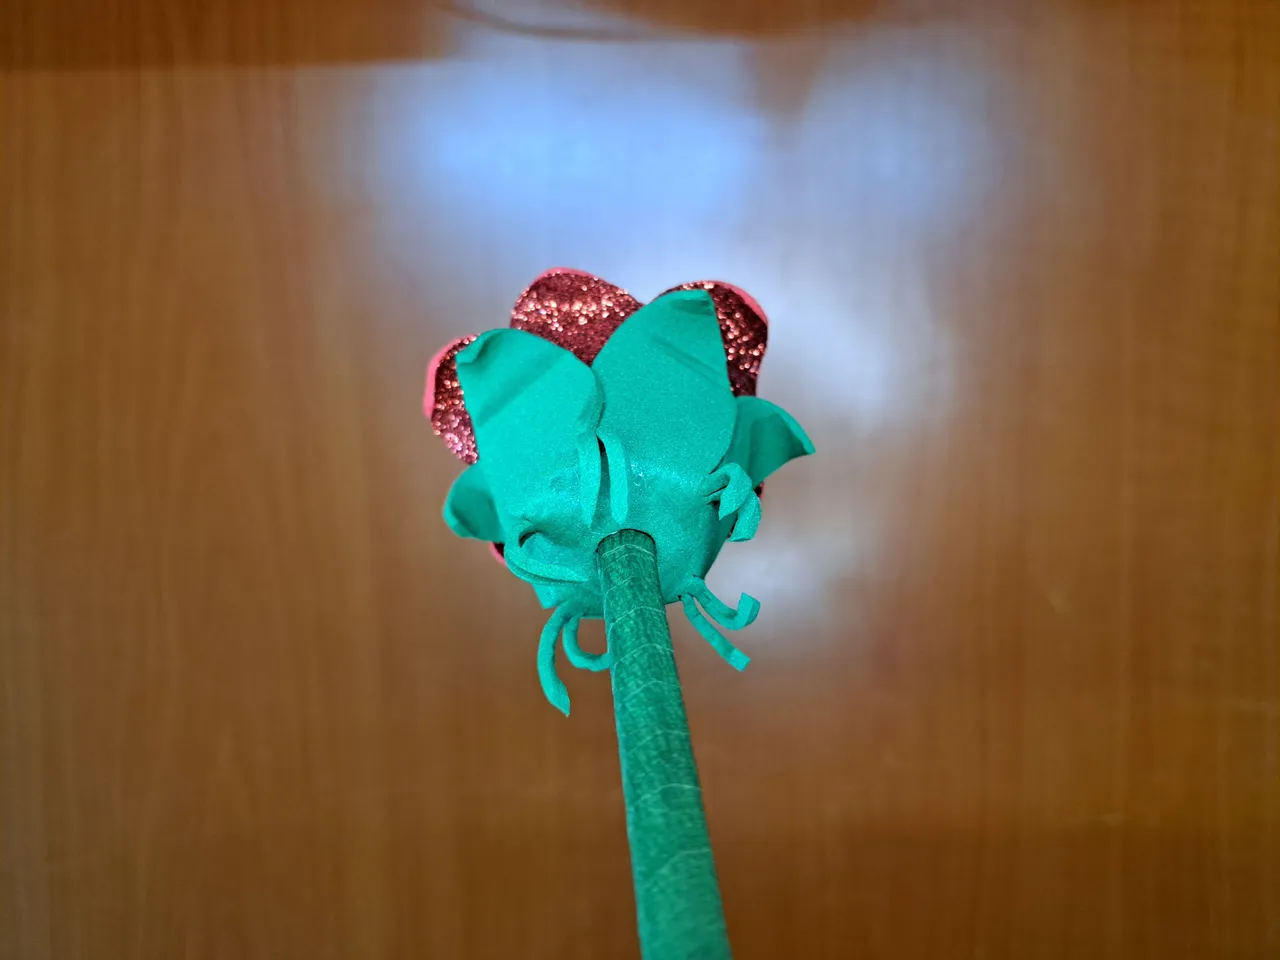
5️⃣ Once the flower is created, we will use the tip of the silicone gun to heat and bend the edges of some petals and also the tips of the sepals. In the same way, we will also heat and roll the spirals of the petals. After shaping the flower, we will glue the pearl on top and use scissors to pierce the bottom part and glue it on top of the stem (the pen).
Una vez creada la flor, utilizaremos la punta de la pistola de silicona para calentar y doblar los bordes de algunos pétalos y también las puntas de los sépalos. De igual manera, también calentaremos y enrollaremos las espirales de los pétalos. Luego de dar forma a la flor pegaremos la perla en la parte superior y utilizaremos unas tijeras para agujerear la parte inferior y pegarla encima del tallo (el bolígrafo).
 |  |  |
 |  |
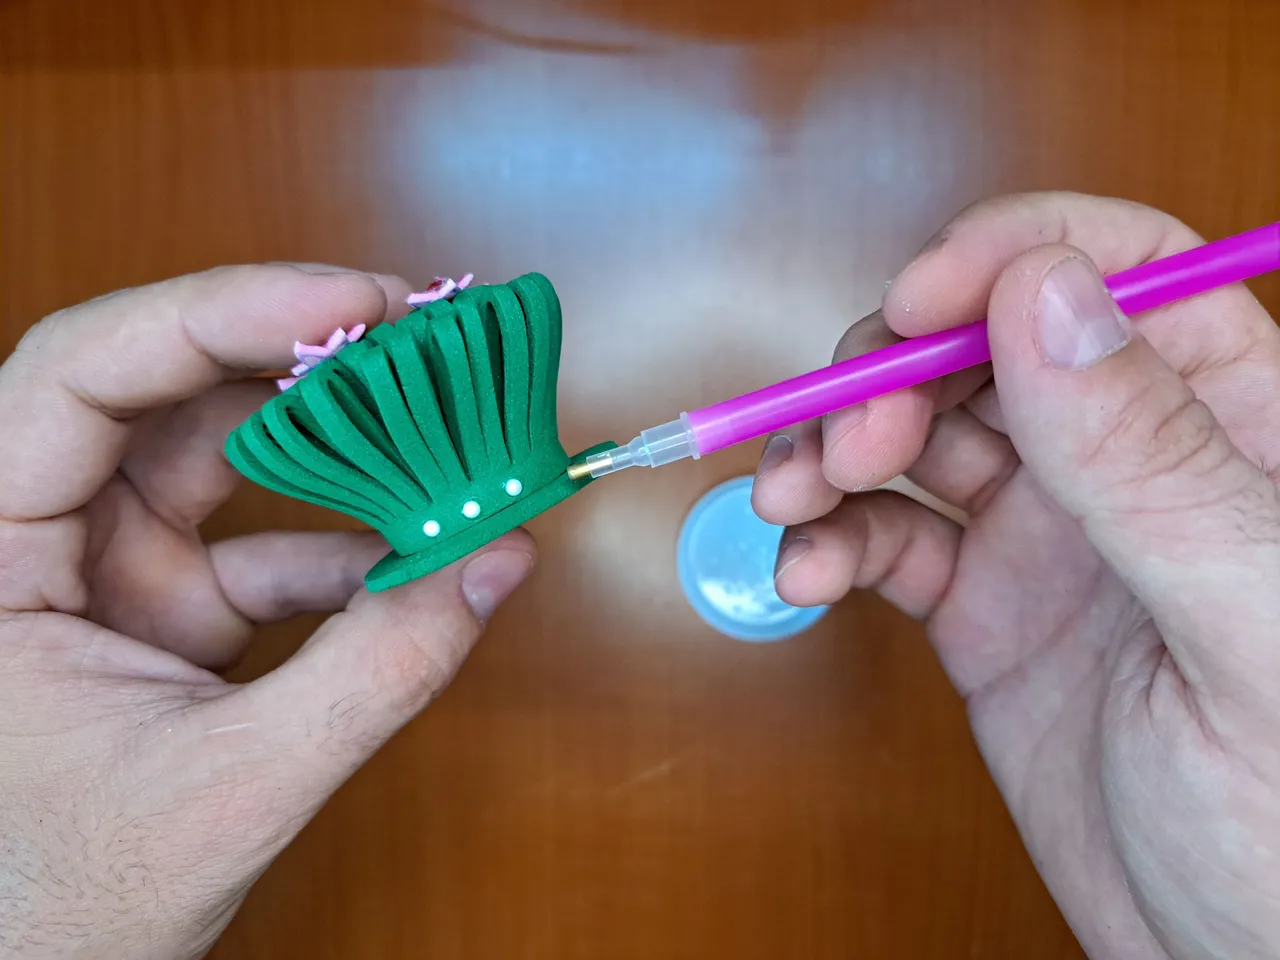
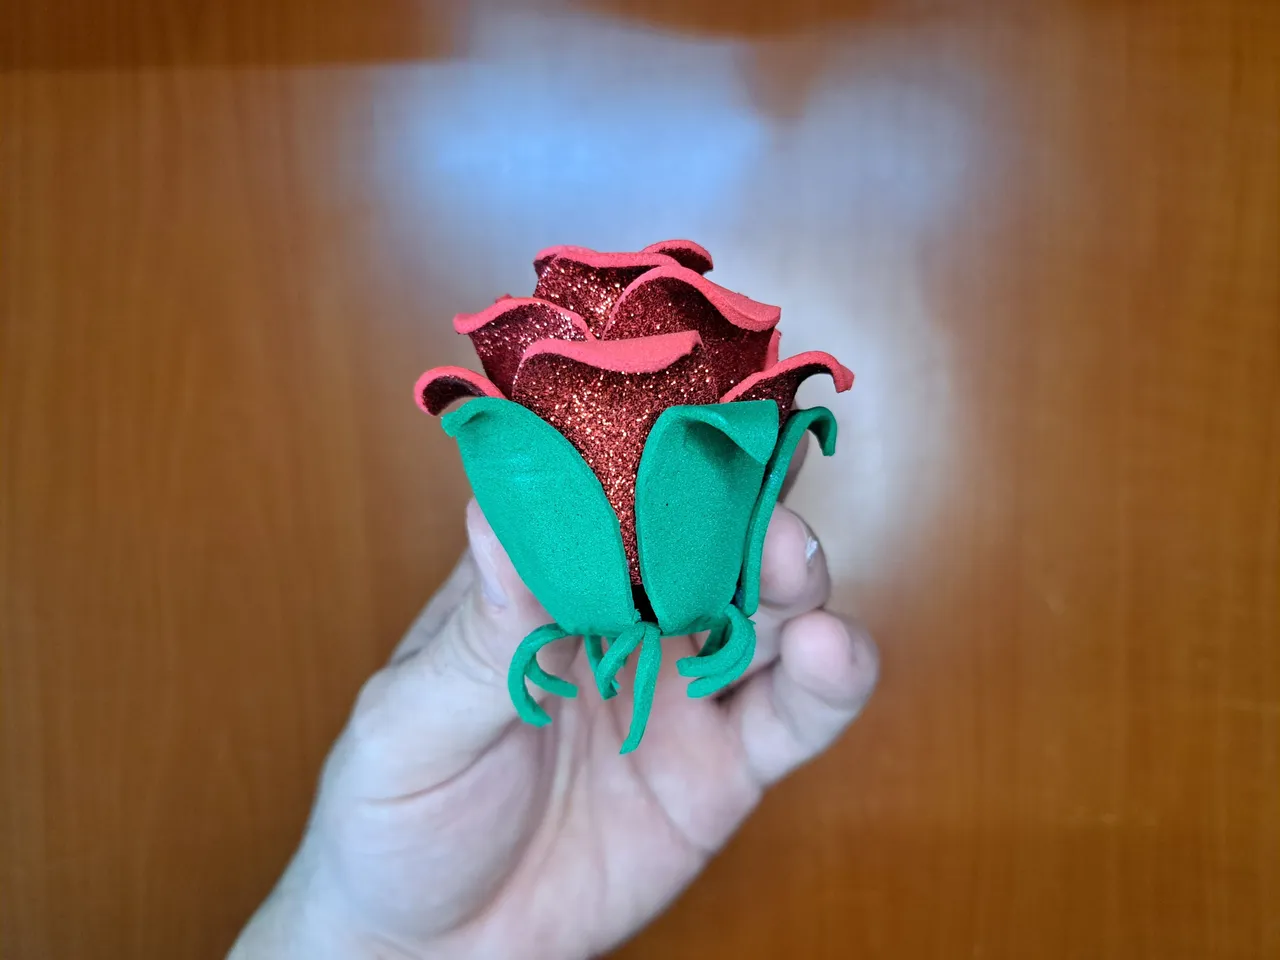
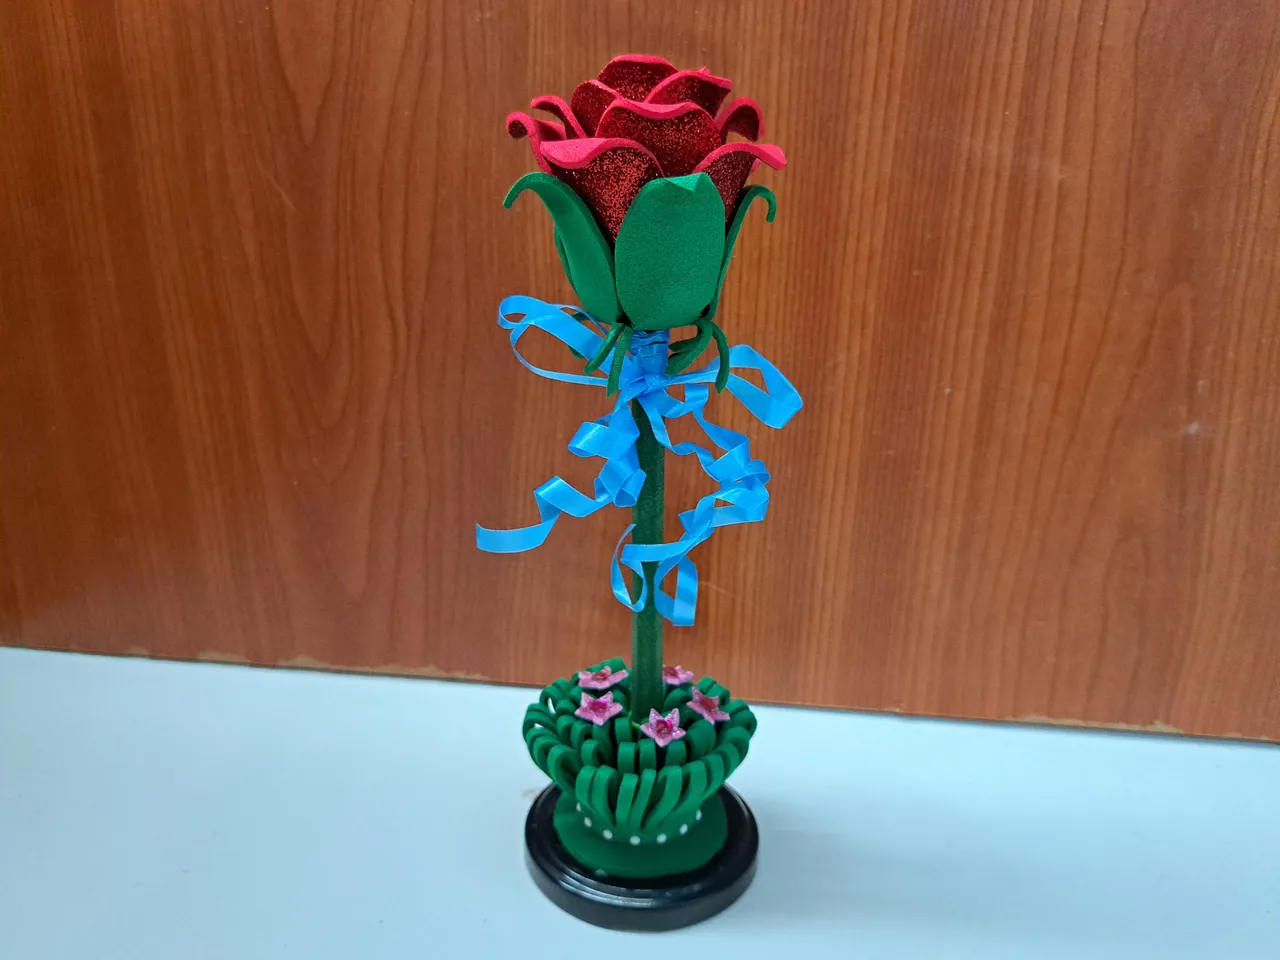
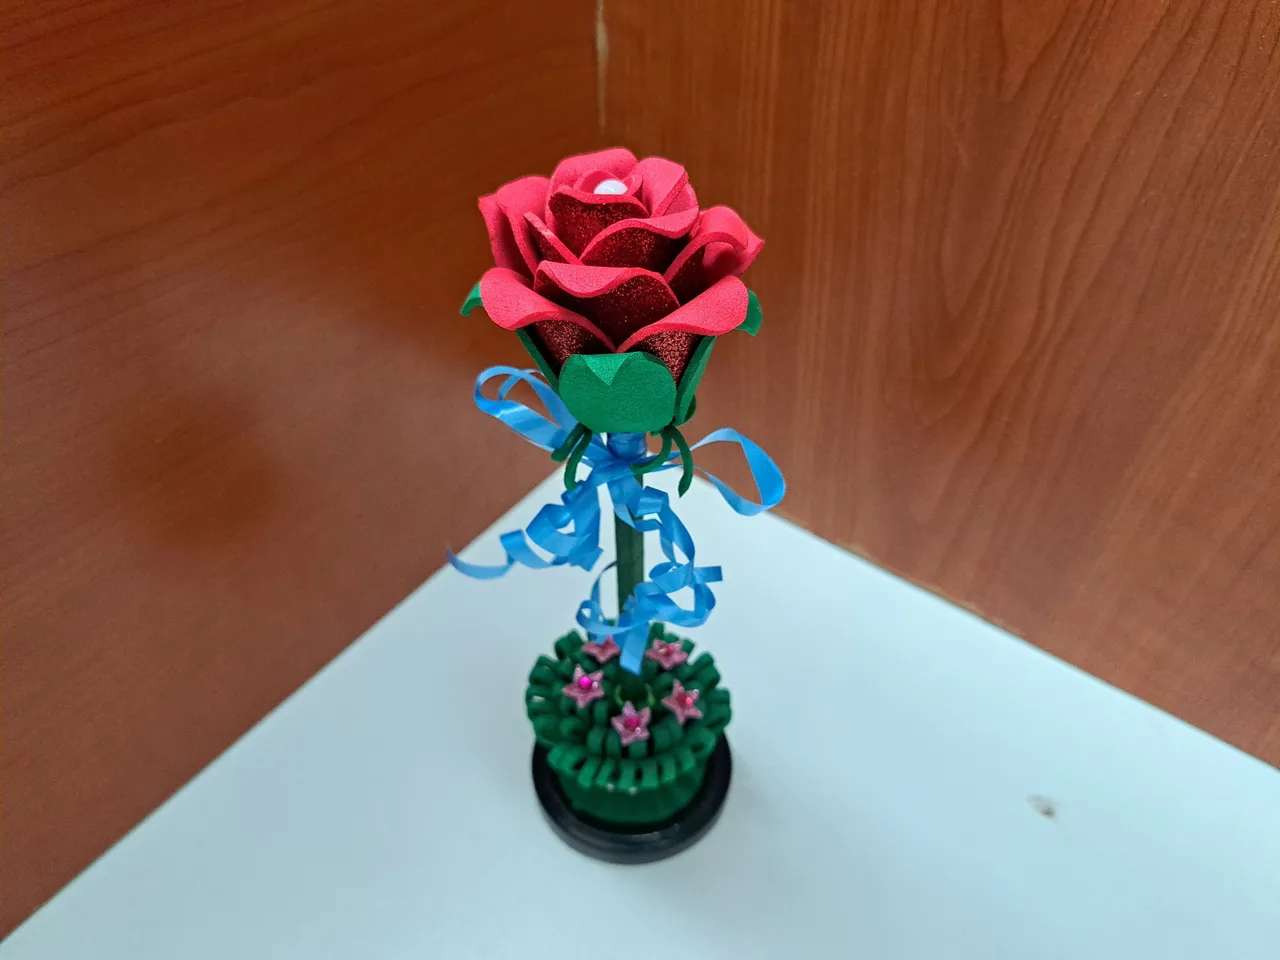
6️⃣ Finally, we will make sure that the flower is properly attached to the stem and that it is straight, and then add a blue ribbon just at the junction of the stem and the flower.
Para finalizar, nos aseguraremos de que la flor esté correctamente pegada al tallo y que haya quedado derecha, para luego agregarle un listón azul justo en la unión del tallo y la flor.
 |  |
Finished Work // Trabajo Terminado
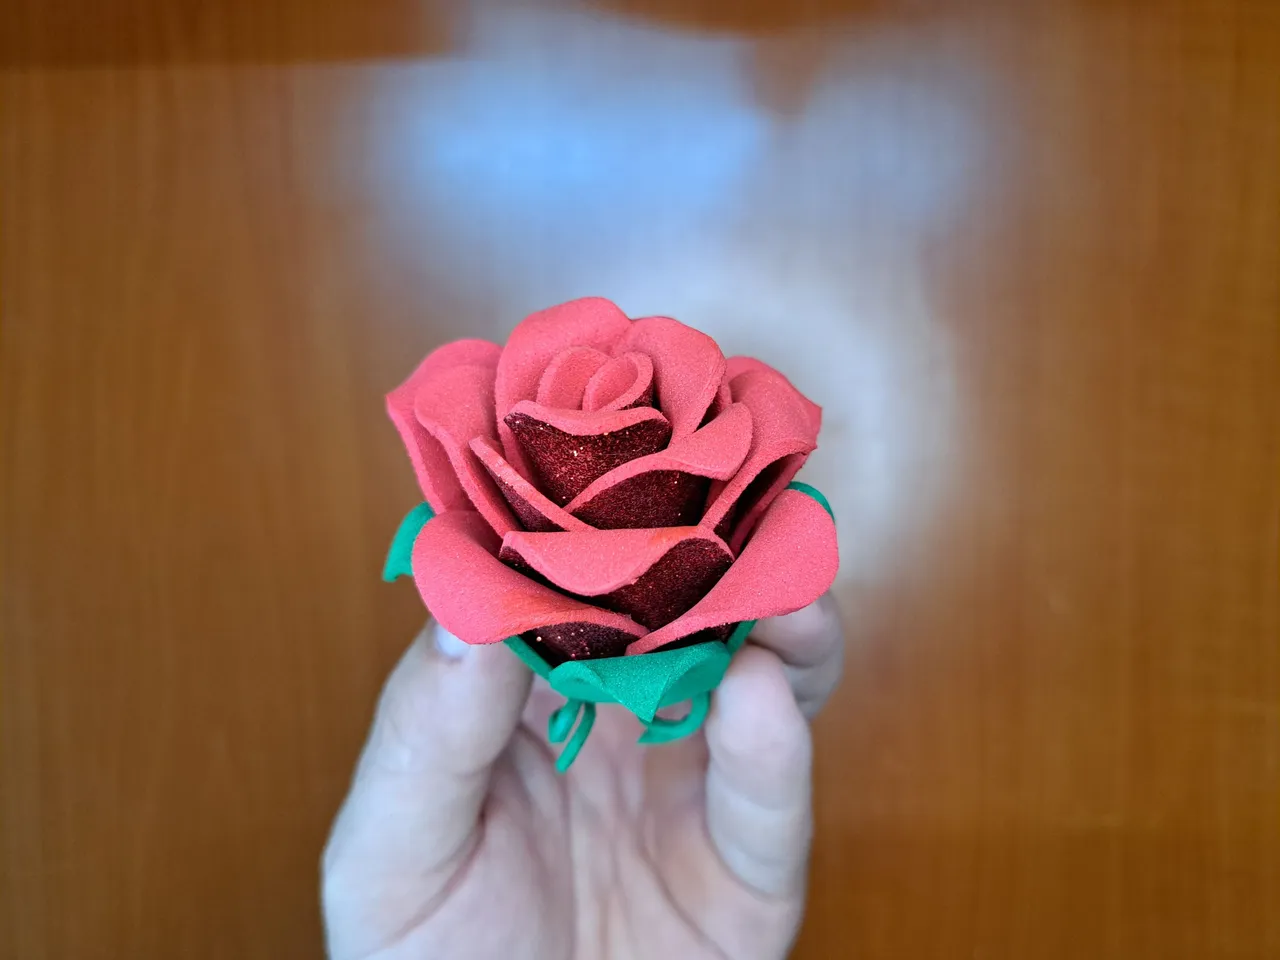
This way this flower-shaped pencil holder is ready. I hope you liked it and I encourage you to create your own to decorate your workplace or that of a loved one. For now I say goodbye, but not before inviting you to leave me in the comments any suggestions or questions about the tutorial, as I will be happy to read them and answer them.
De esta forma quedaría listo este portalápiz con forma de flor. Espero que les haya gustado y se animen a crear el suyo propio para adornar su puesto de trabajo o el de algún ser querido. Por ahora me despido, no sin antes invitarlos a dejarme en los comentarios cualquier sugerencia o duda sobre el tutorial, ya que estaré encantado de leerlos y responderles.
 |  |
 |  |  |

Thank you very much for reading my post. If you liked it, please leave a comment and consider following me so you don't miss my next posts. I'd love to know your opinion and your thoughts about the topic I discussed in this post, see you in the next one!
Credits and Resources // Créditos y Recursos
Cover page created in Canva
Translated by DeepL
Images captured with my Samsung Galaxy A53


Cover page created in Canva
Translated by DeepL
Images captured with my Samsung Galaxy A53