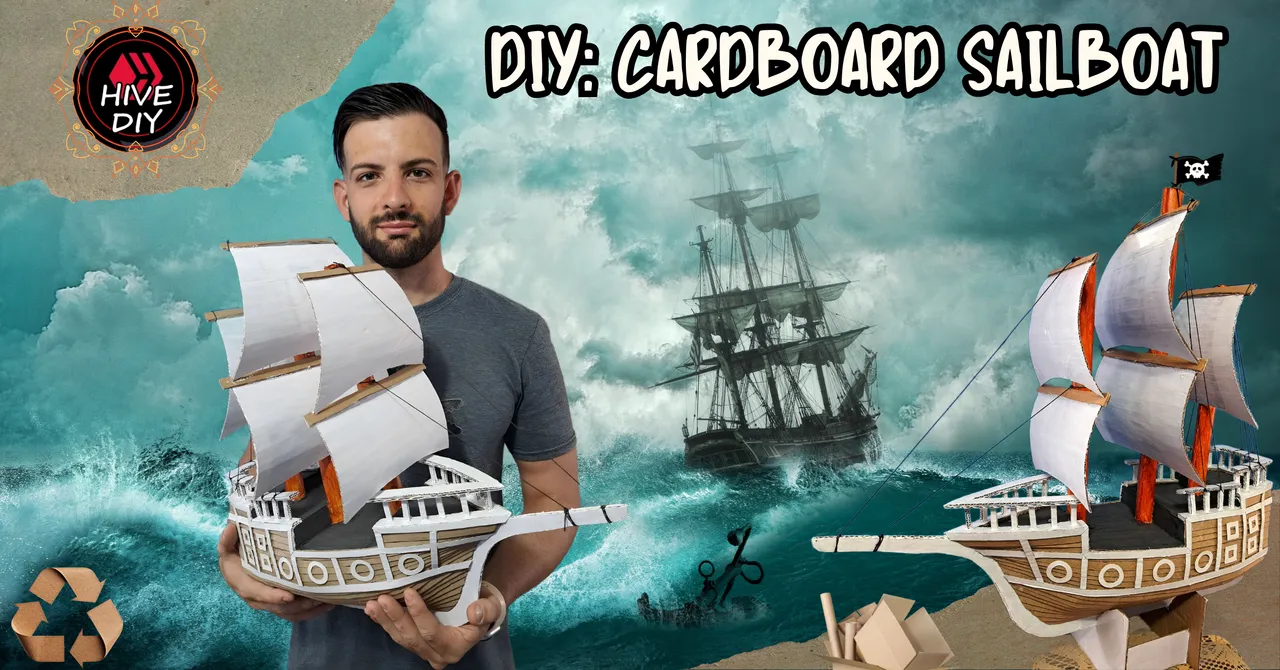
Anchors aweigh and hoist the sails, my creative crew, for we are on a mission to make our own boat. And yes, as you can see, today I bring you a tutorial on how to make a sailboat out of recycled cardboard ♻️.
I would be lying to you if I told you that this is an easy task, because even though no maritime carpentry skills are required, it can become somewhat complicated. But fear not, your captain will teach you step by step everything you need to know in order to create your own cardboard boat.
! [Spanish Version Here]
Levad anclas e izad las velas, mi tripulación creativa, pues tenemos la misión de confeccionar nuestro propio barco. Y si como pueden ver el día de hoy les traigo un tutorial para que puedan hacer un barco velero con cartón reciclado ♻️.Les mentiría si les dijera que es una tarea fácil, pues a pesar de que no se requieren habilidades de carpintería marítima, puede llegar a ser algo complicado. Pero no temáis que su capitán les enseñará paso a paso todo lo que necesitan saber para poder crear su propio barco cartón.

|
|
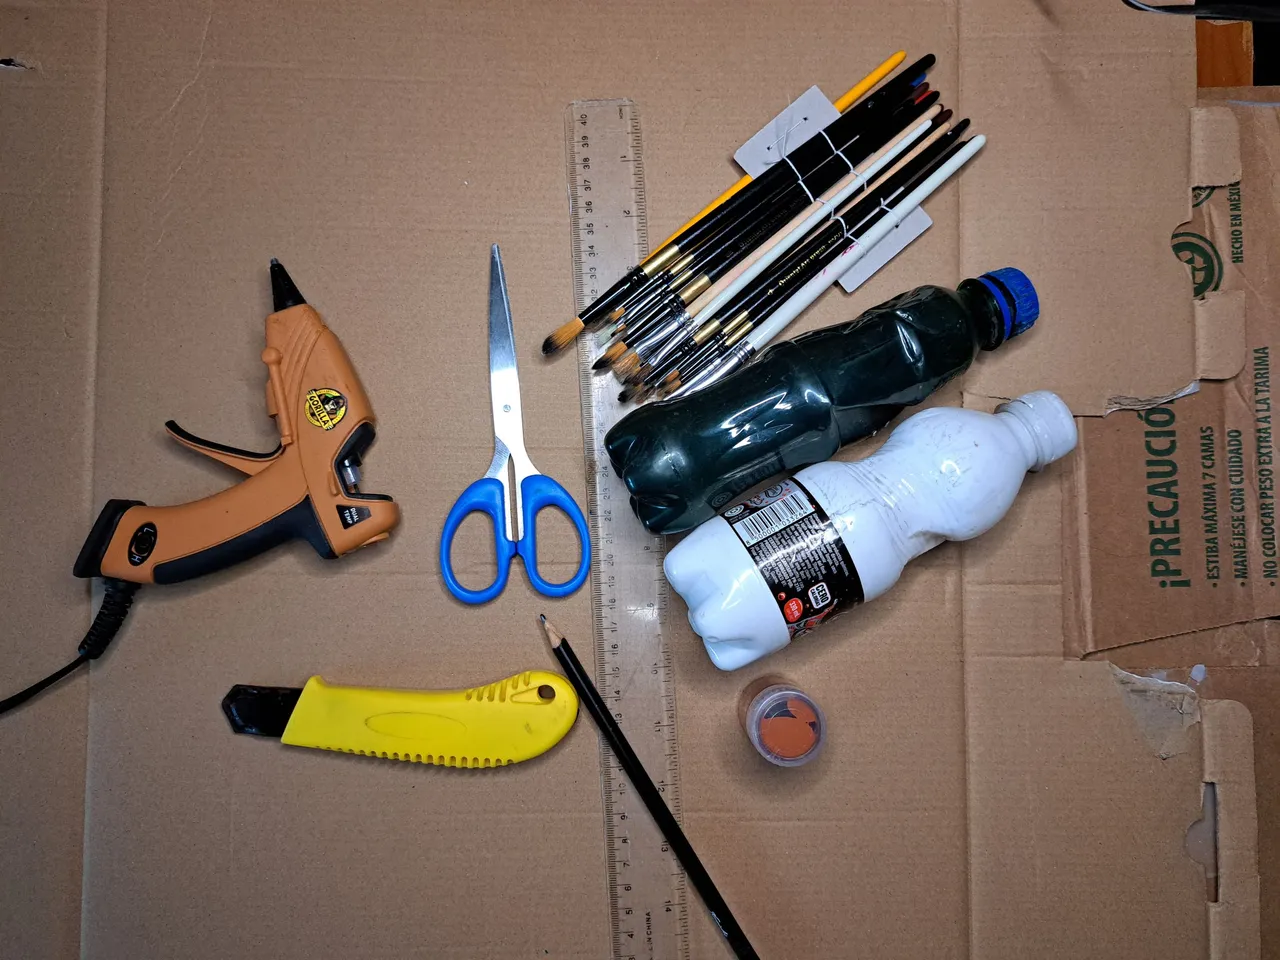
✂️ Materials // Materiales ✂️
| ✔️ Cardboard | ✔️ Cartón |
| ✔️ Scissors and cutter | ✔️ Tijeras y cútter |
| ✔️ Marker or pencil | ✔️ Marcador o lápiz |
| ✔️ Rule | ✔️ Regla |
| ✔️ Hot glue | ✔️ Silicona caliente |
| ✔️ Paintbrushes | ✔️ Pinceles |
| ✔️ White, black, and brown paint | ✔️ Pintura blanca, negra y café |
| ✔️ Piece of Styrofoam | ✔️ Pedazo de poliespán |
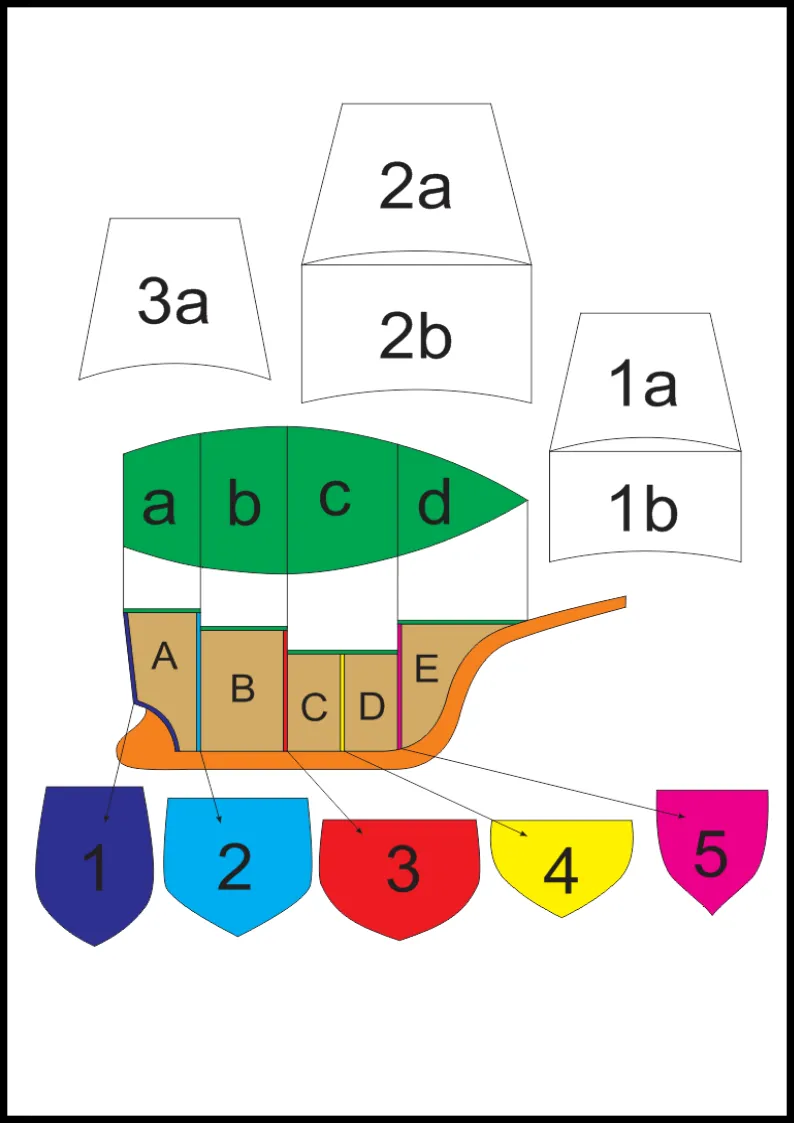
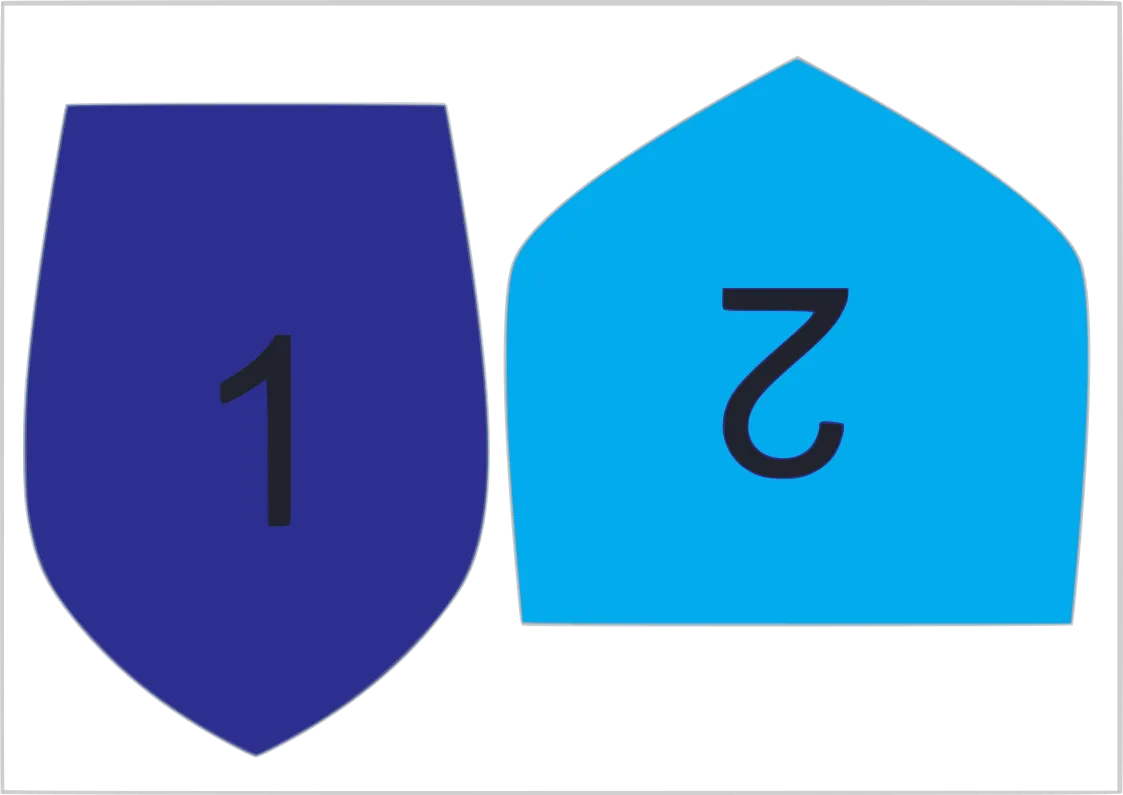
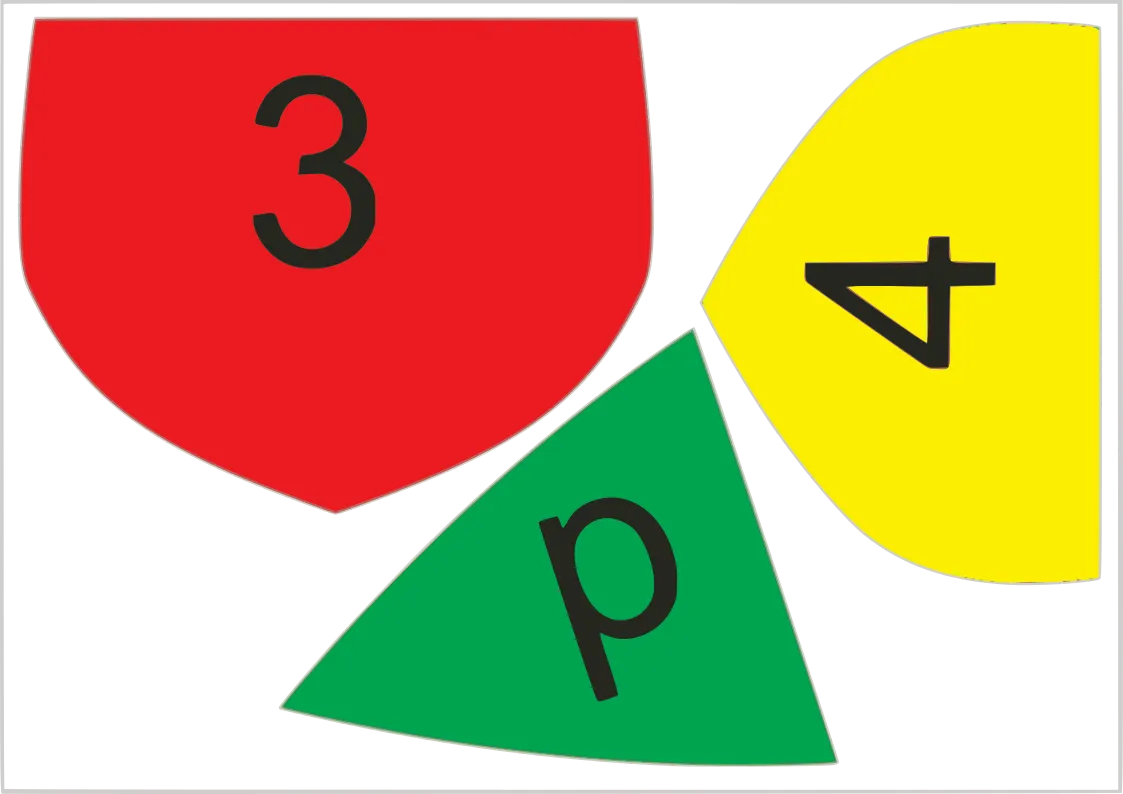
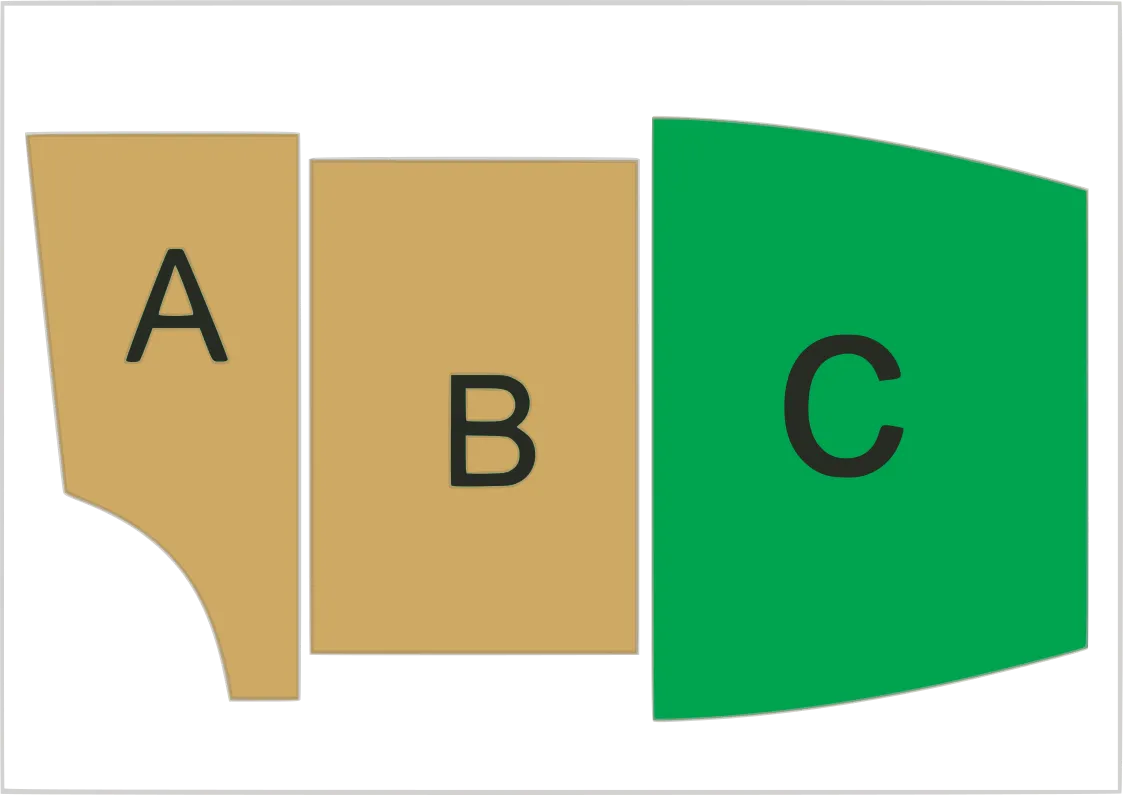
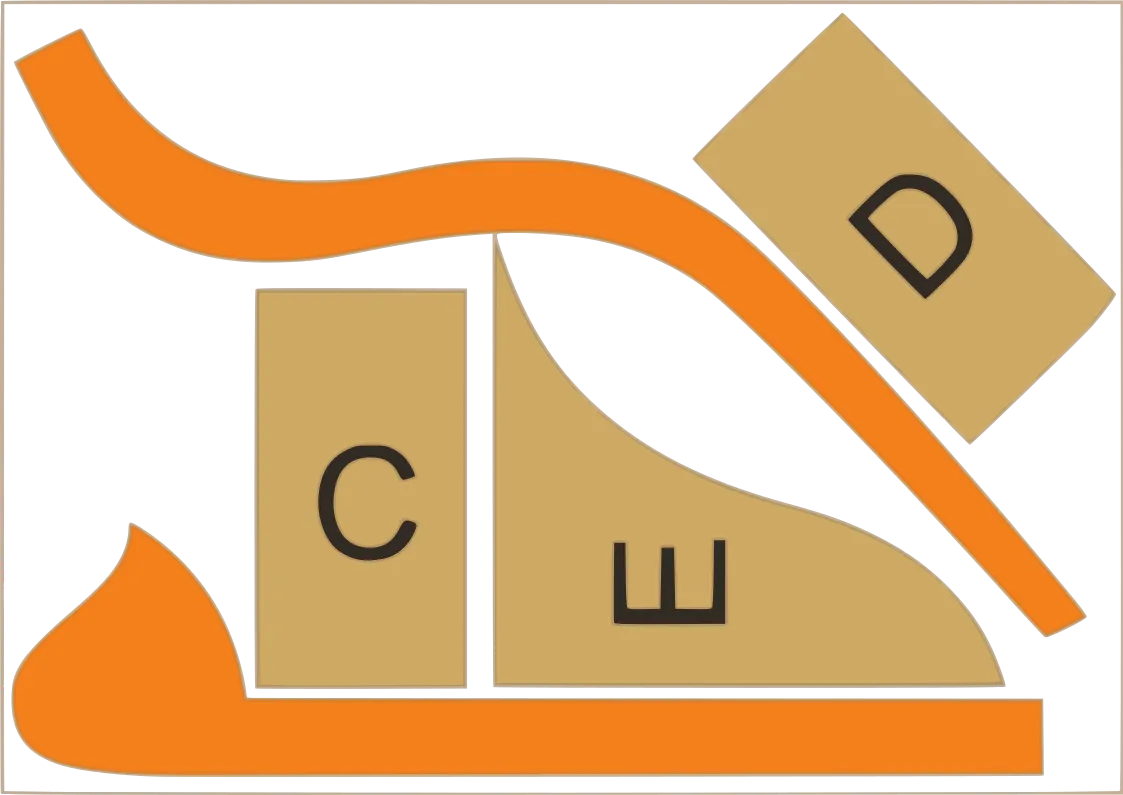
Once we know the materials and tools we are ready to start, but first it is important that you have at hand the molds of the boat that I will leave below. I recommend this because the boat will be assembled in parts and I will be referring to those parts according to the numbering of the molds.
! [Spanish Version Here]
Una vez conocidos los materiales y herramientas estamos listos para comenzar, pero antes es importante que tengan a mano los moldes de la embarcación que les dejaré a continuación. Les recomiendo esto porque el barco se armará por partes y me estaré refiriendo a esas partes según la numeración de los moldes.
|
|
|

|
|
|

|
|

|
|
📋 Step by step // Paso a paso 📋
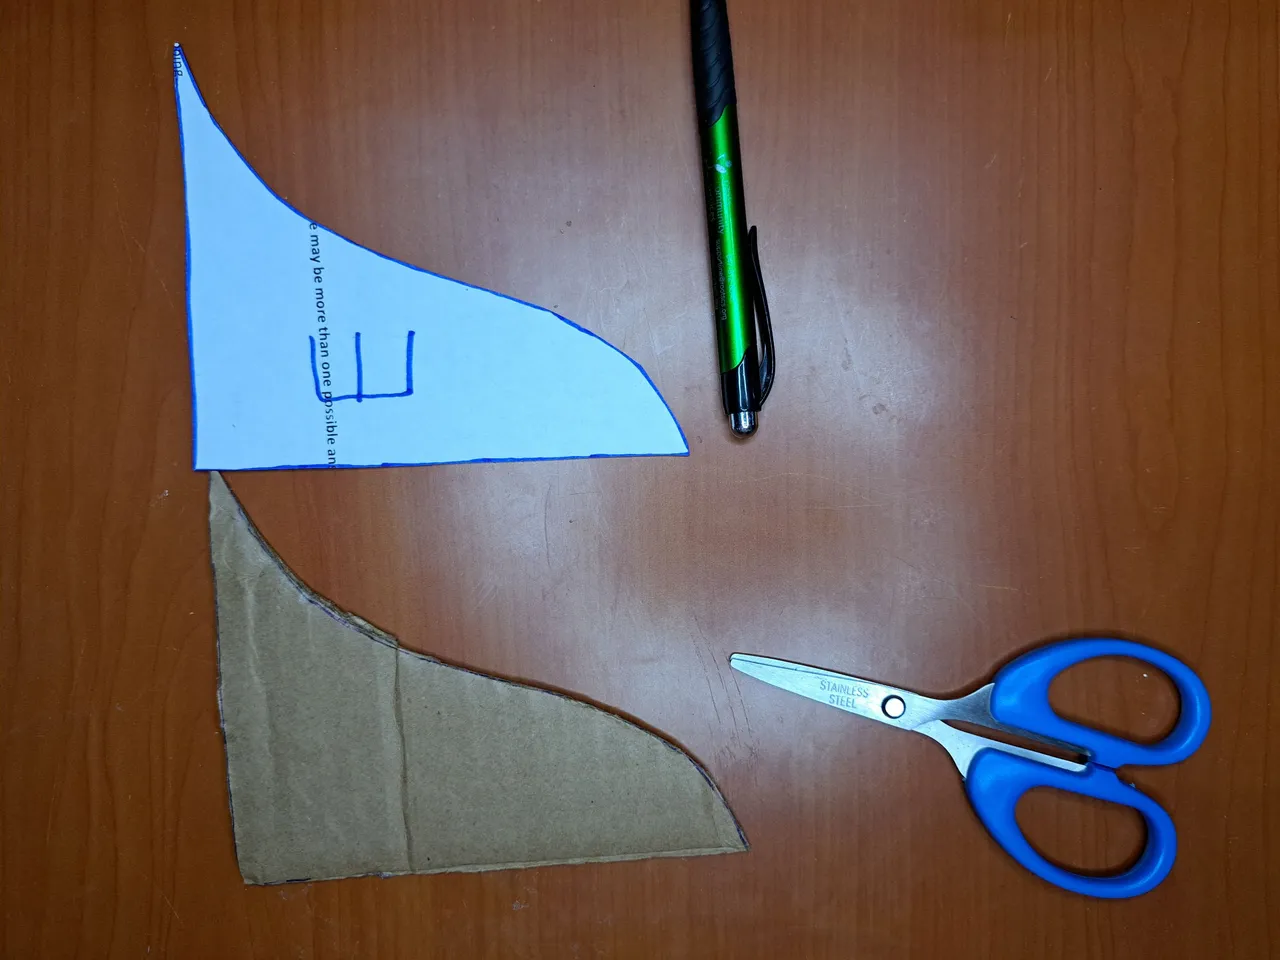
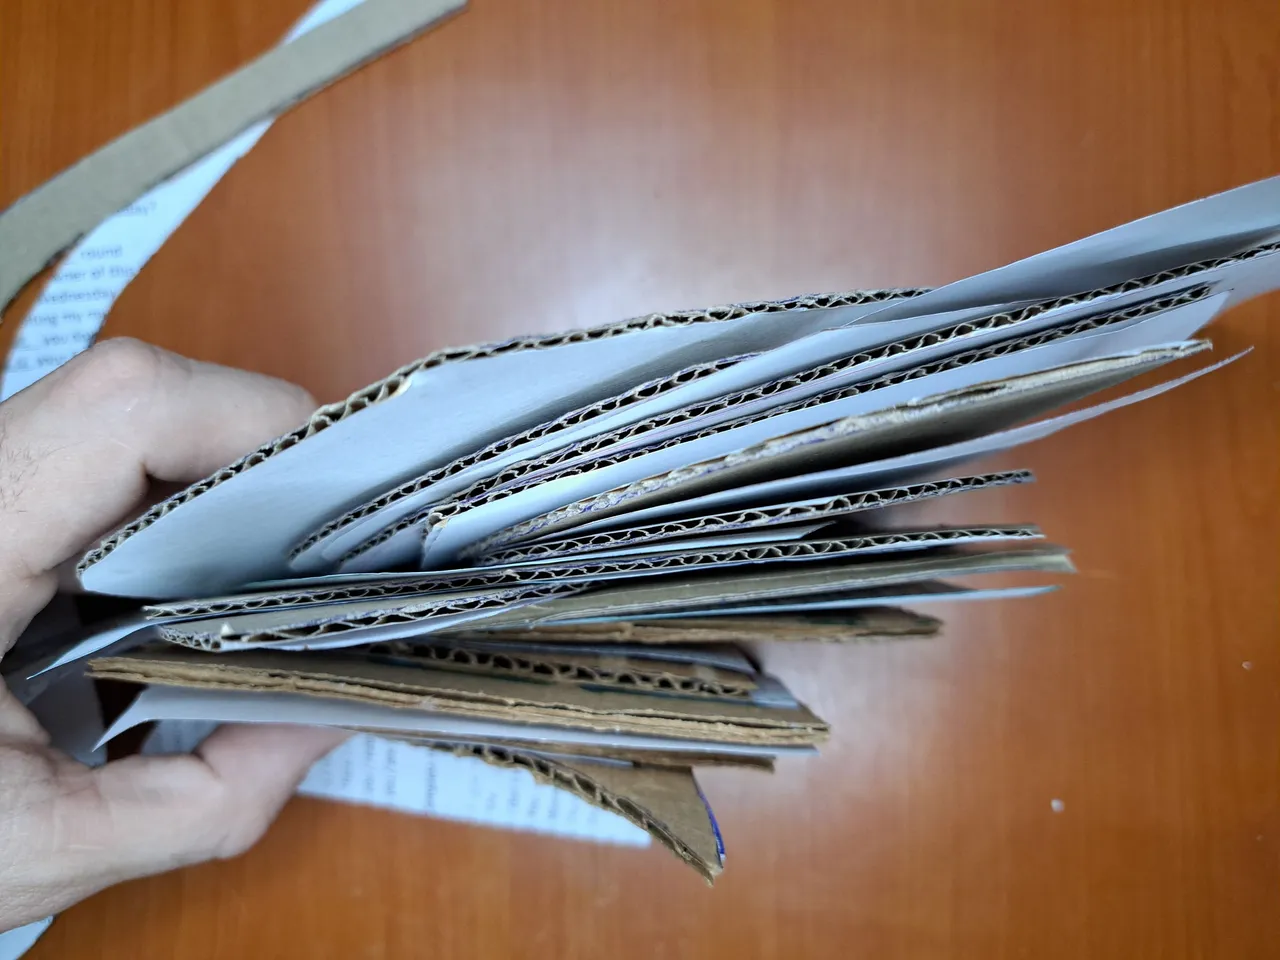
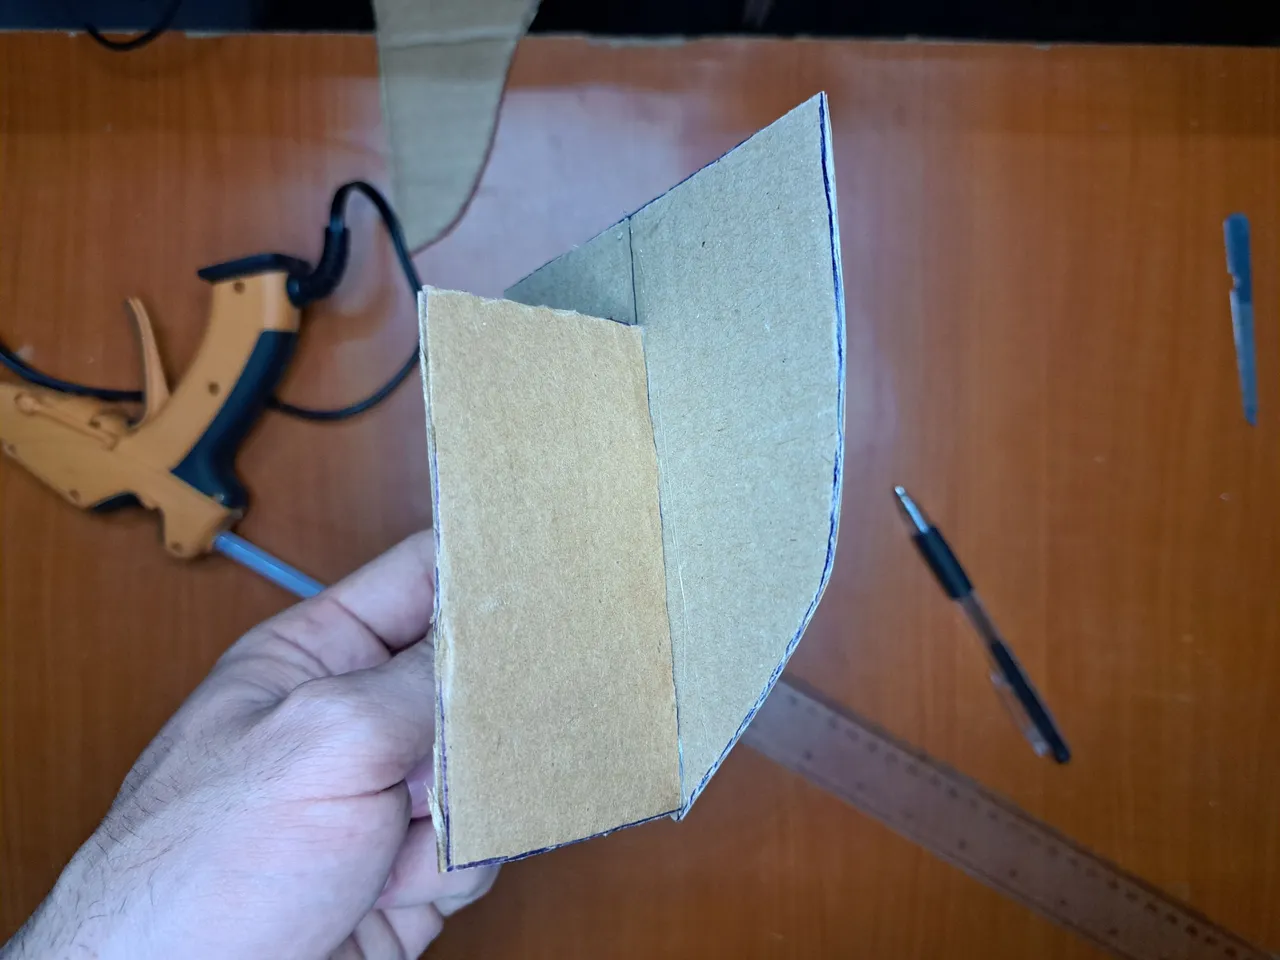
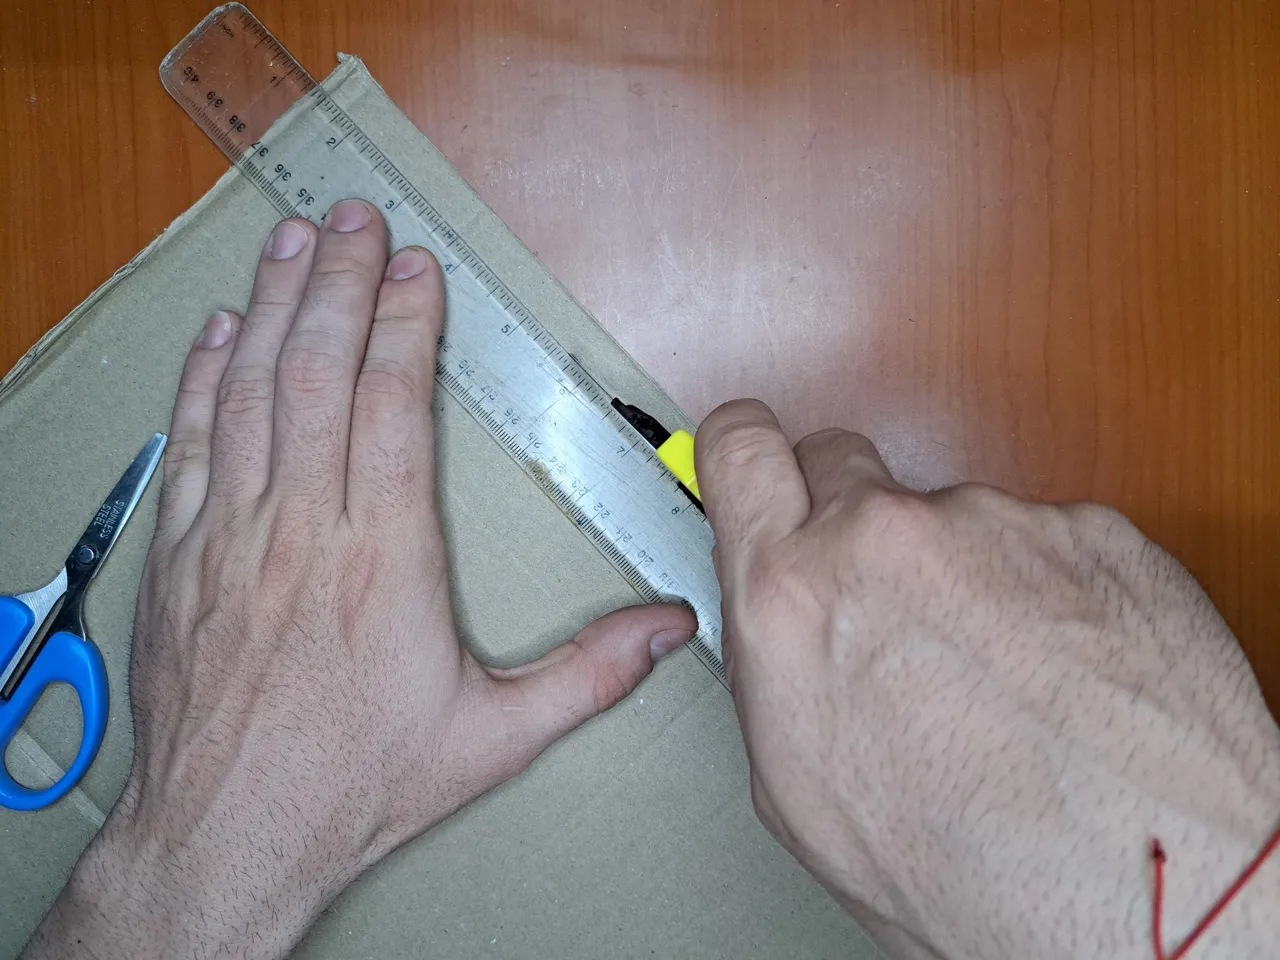
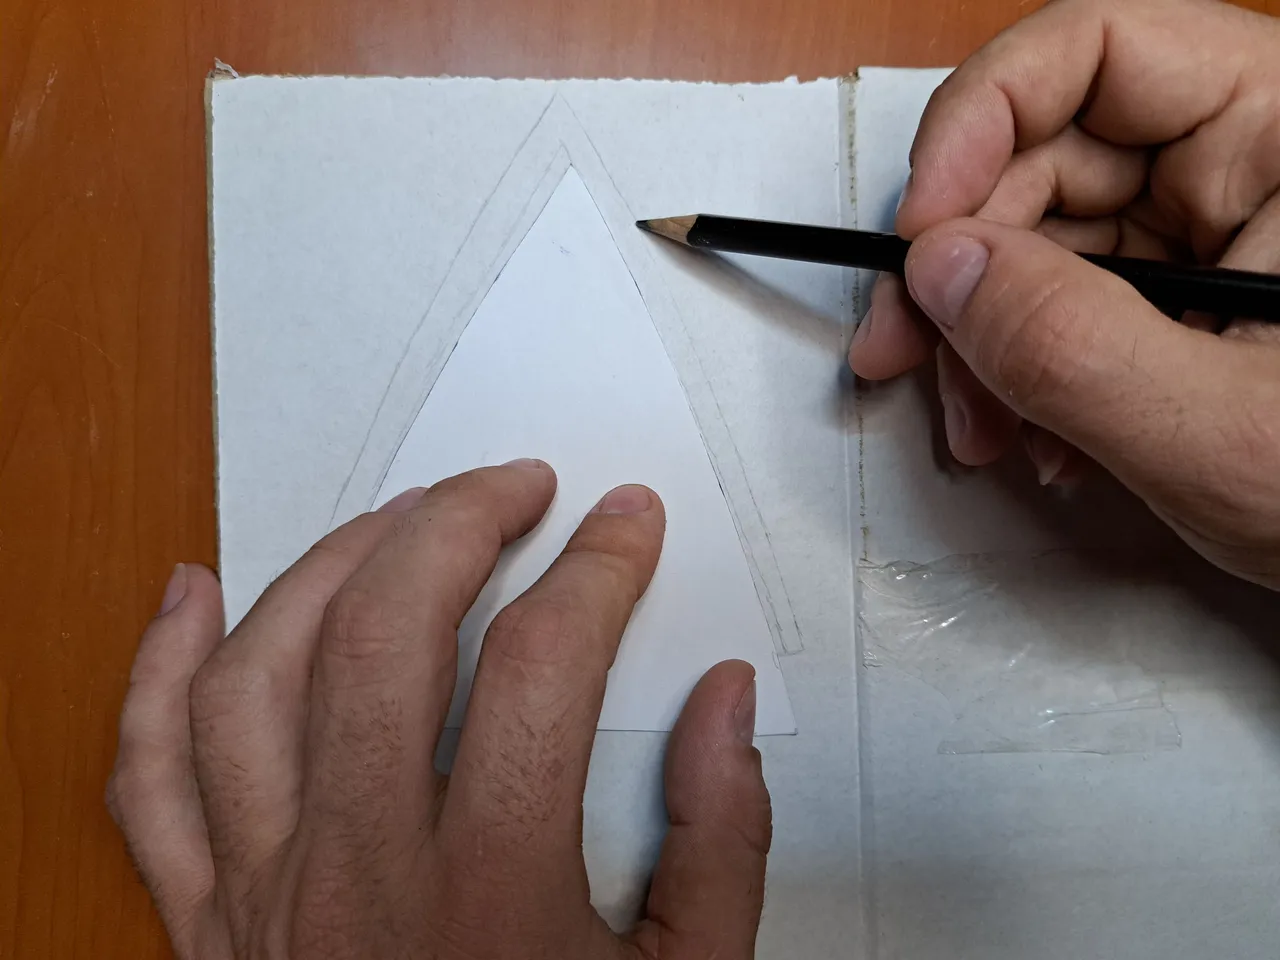
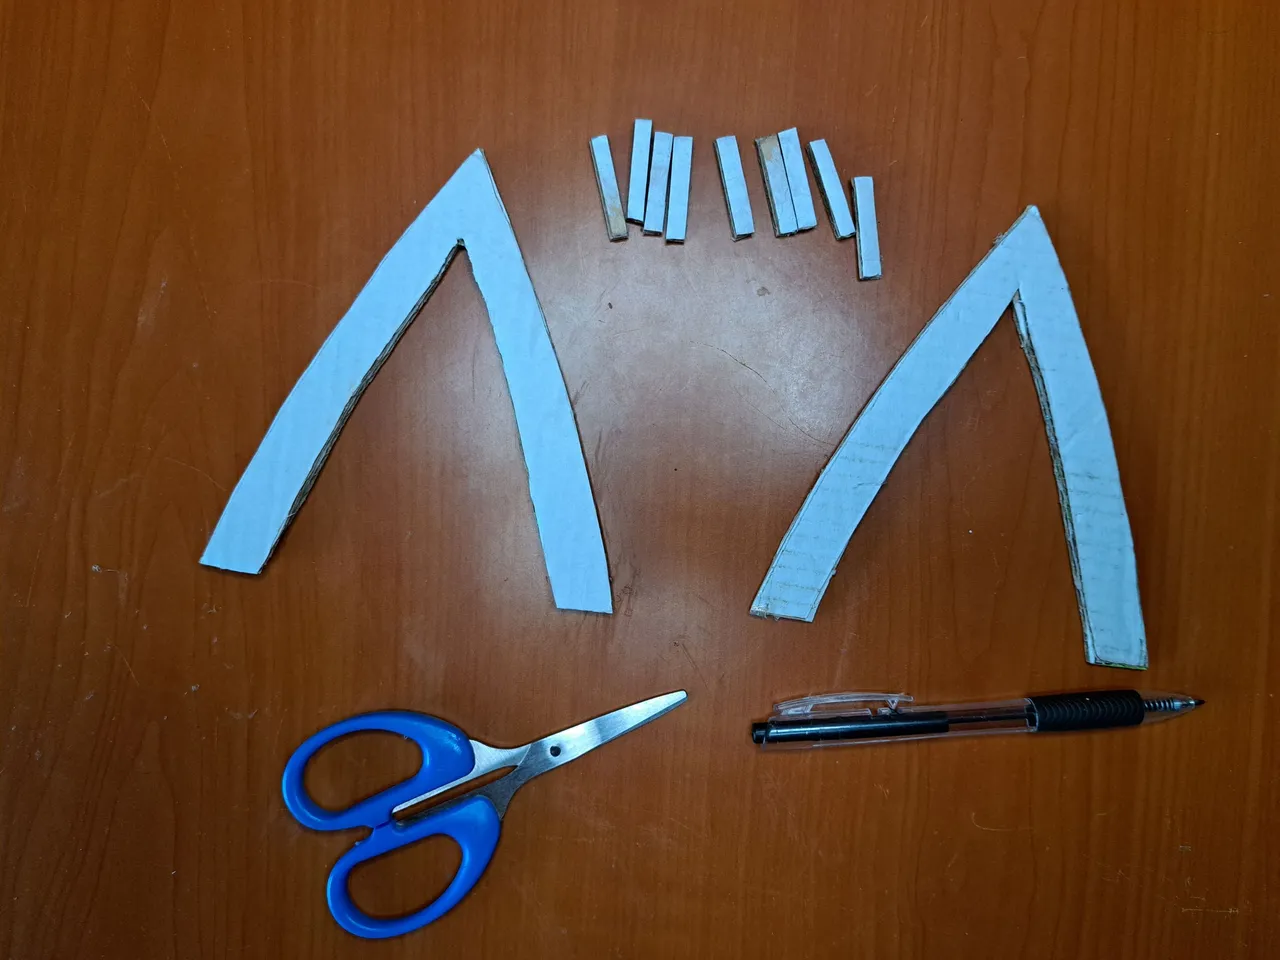
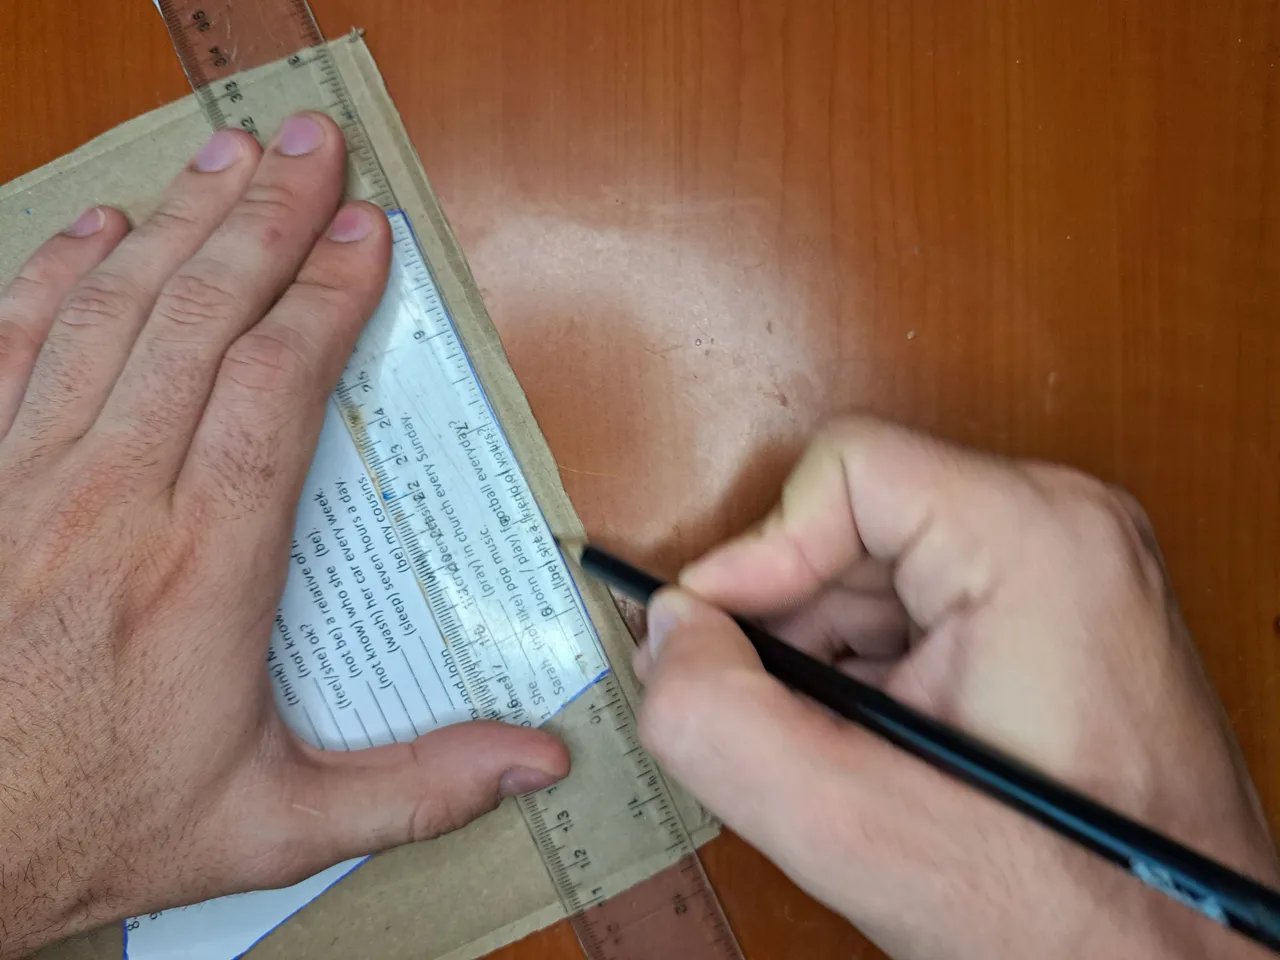
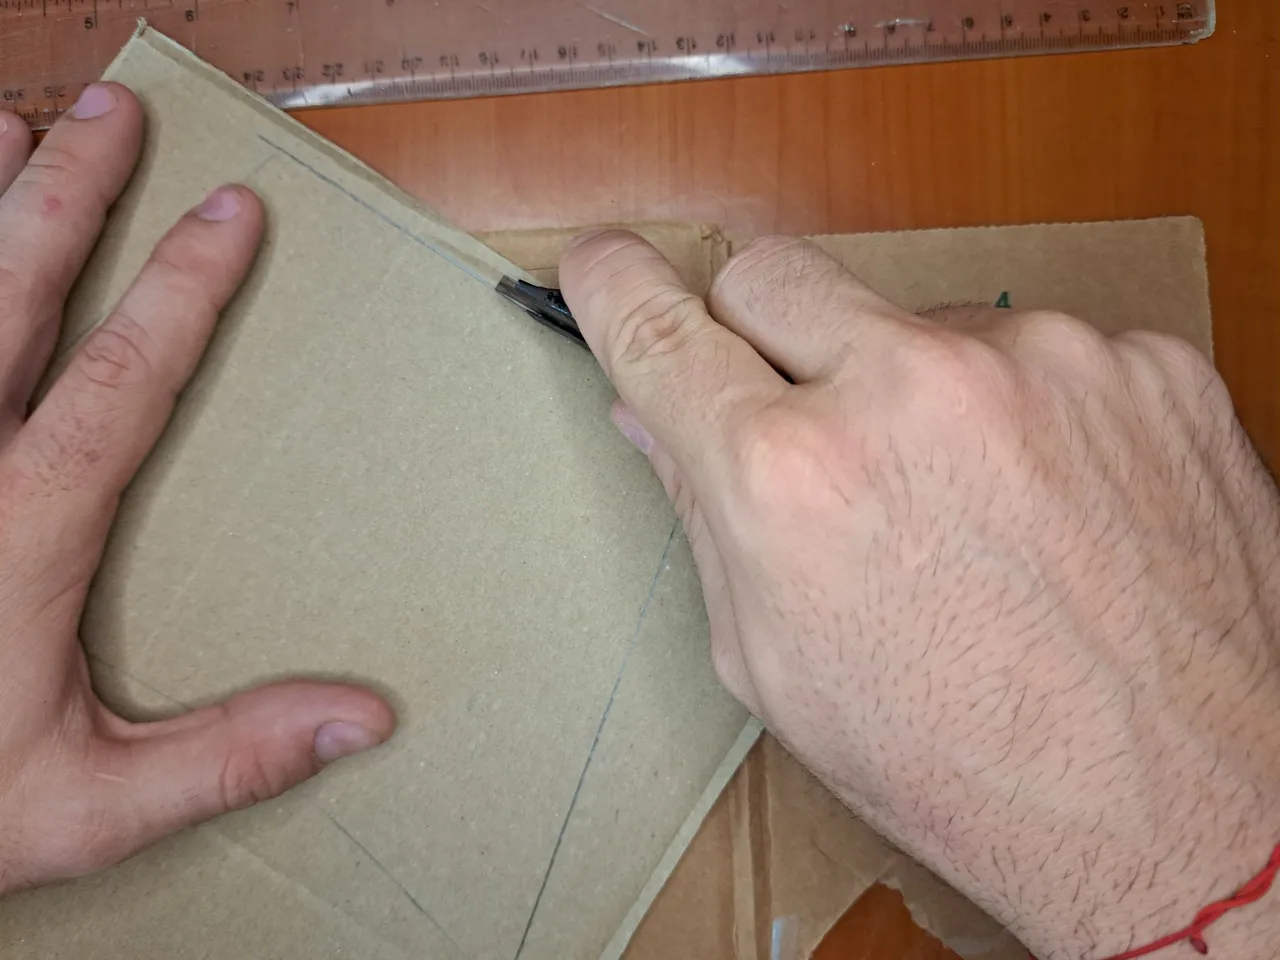
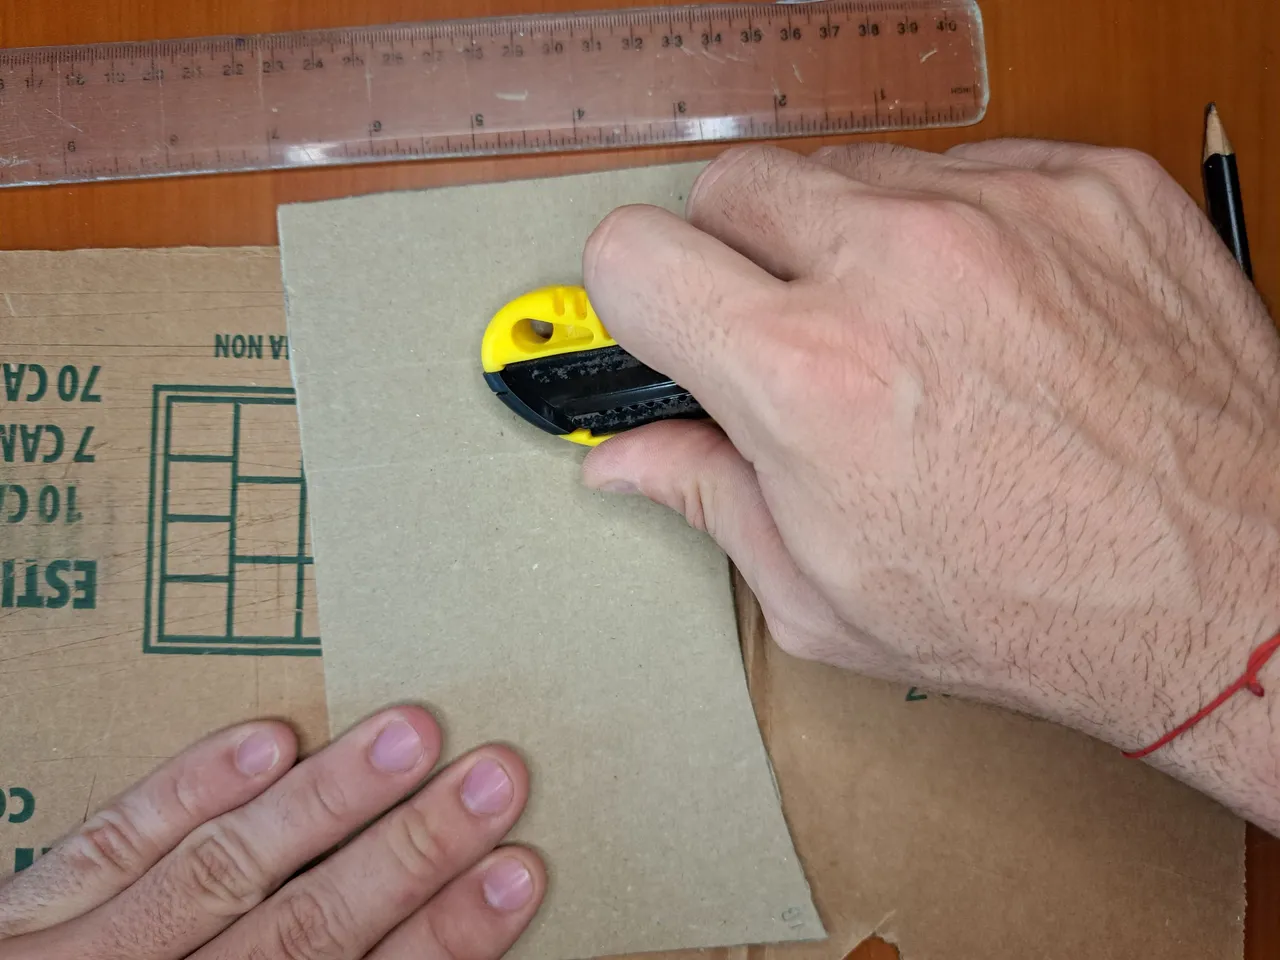
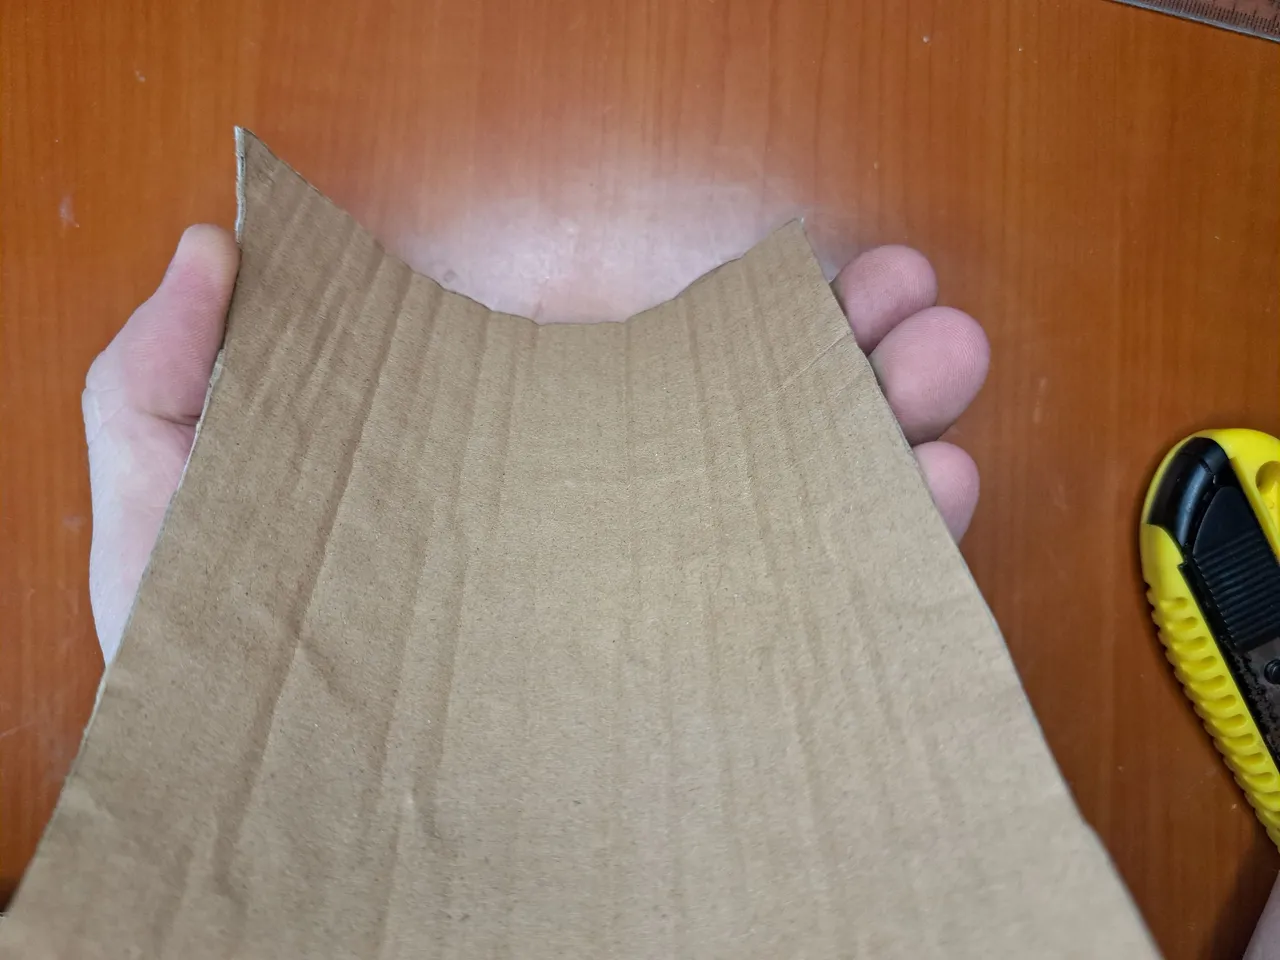
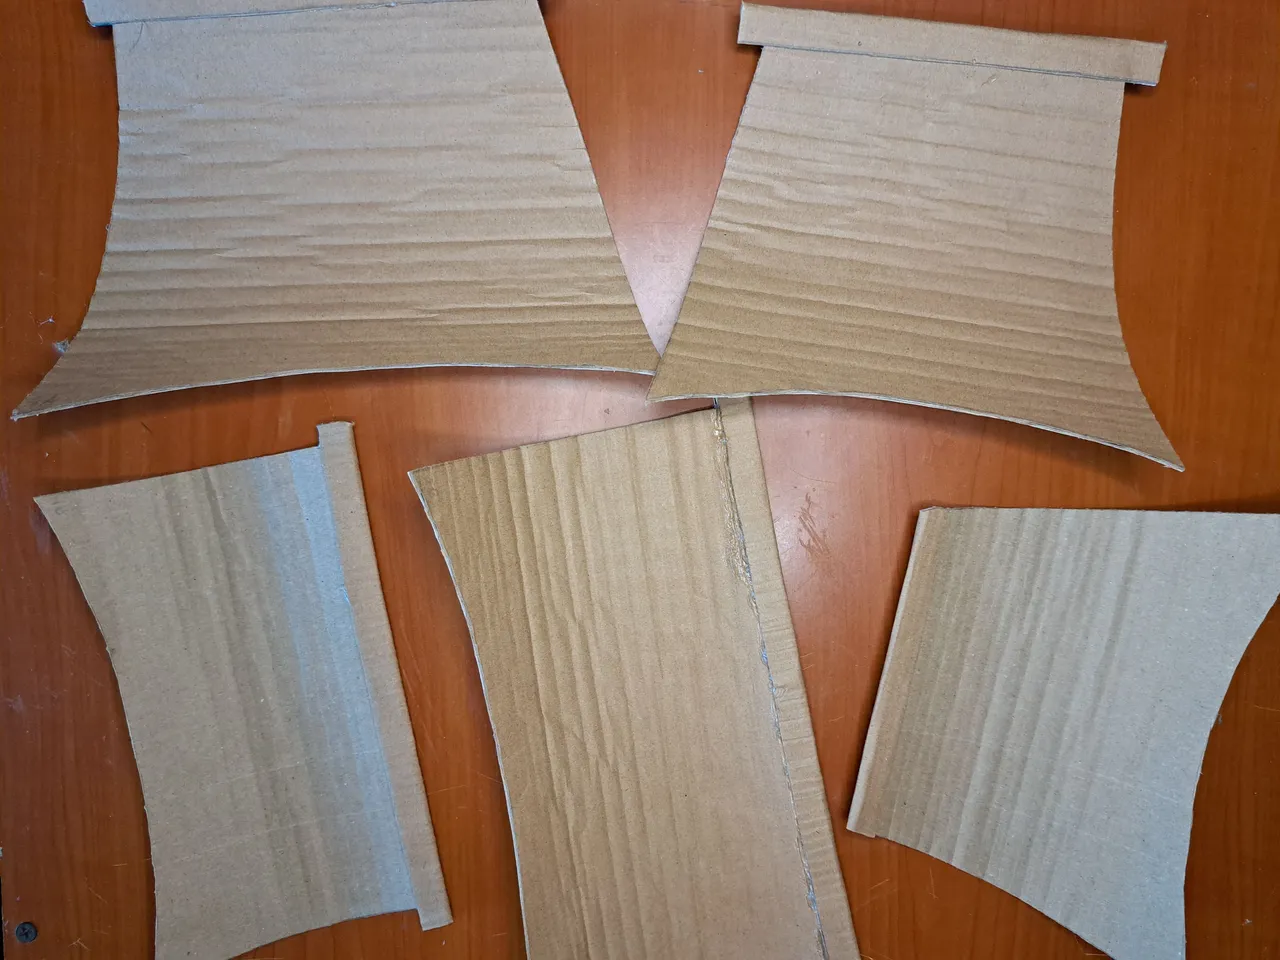
1️⃣ To begin with, we mark and cut out the cardboard molds to form all the necessary pieces of the boat structure. Here it is important to take into account the type of cardboard, as I recommend that it should not be too thick, but not too soft either. Additionally, it is advisable to number the cardboard pieces with the same numbering as the molds.
! [Spanish Version Here]
1️⃣ Para empezar marcamos y recortamos los moldes en cartón para conformar todas las piezas necesarias de la estructura del barco. Aquí es importante tener en cuenta el tipo de cartón, ya que recomiendo que no sea muy grueso, pero tampoco tan blando. Adicionalmente, es aconsejable enumerar las piezas de cartón con la misma numeración que tienen los moldes.
 |
 |
 |
 |
 |
 |
 |
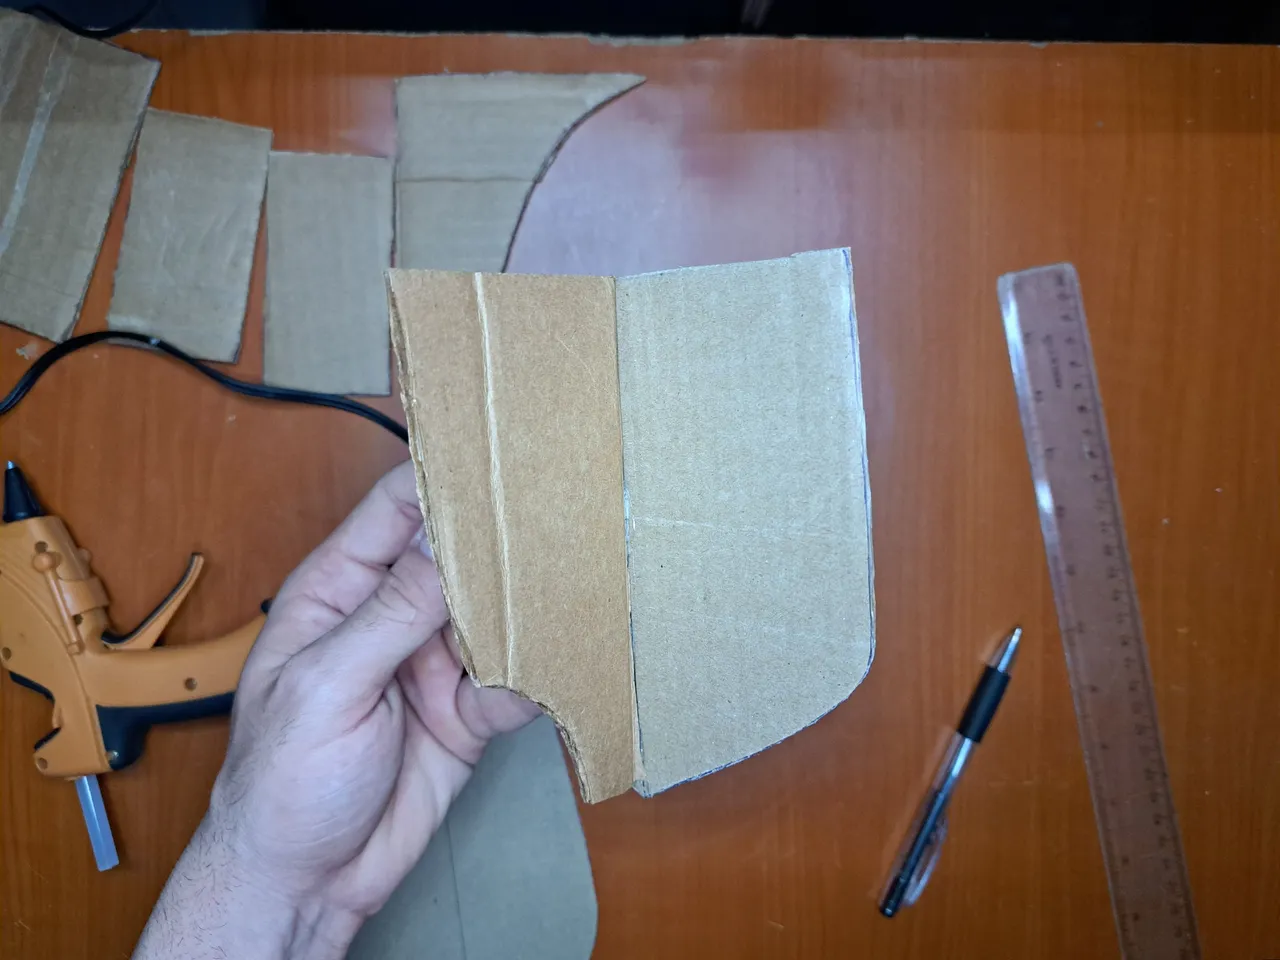
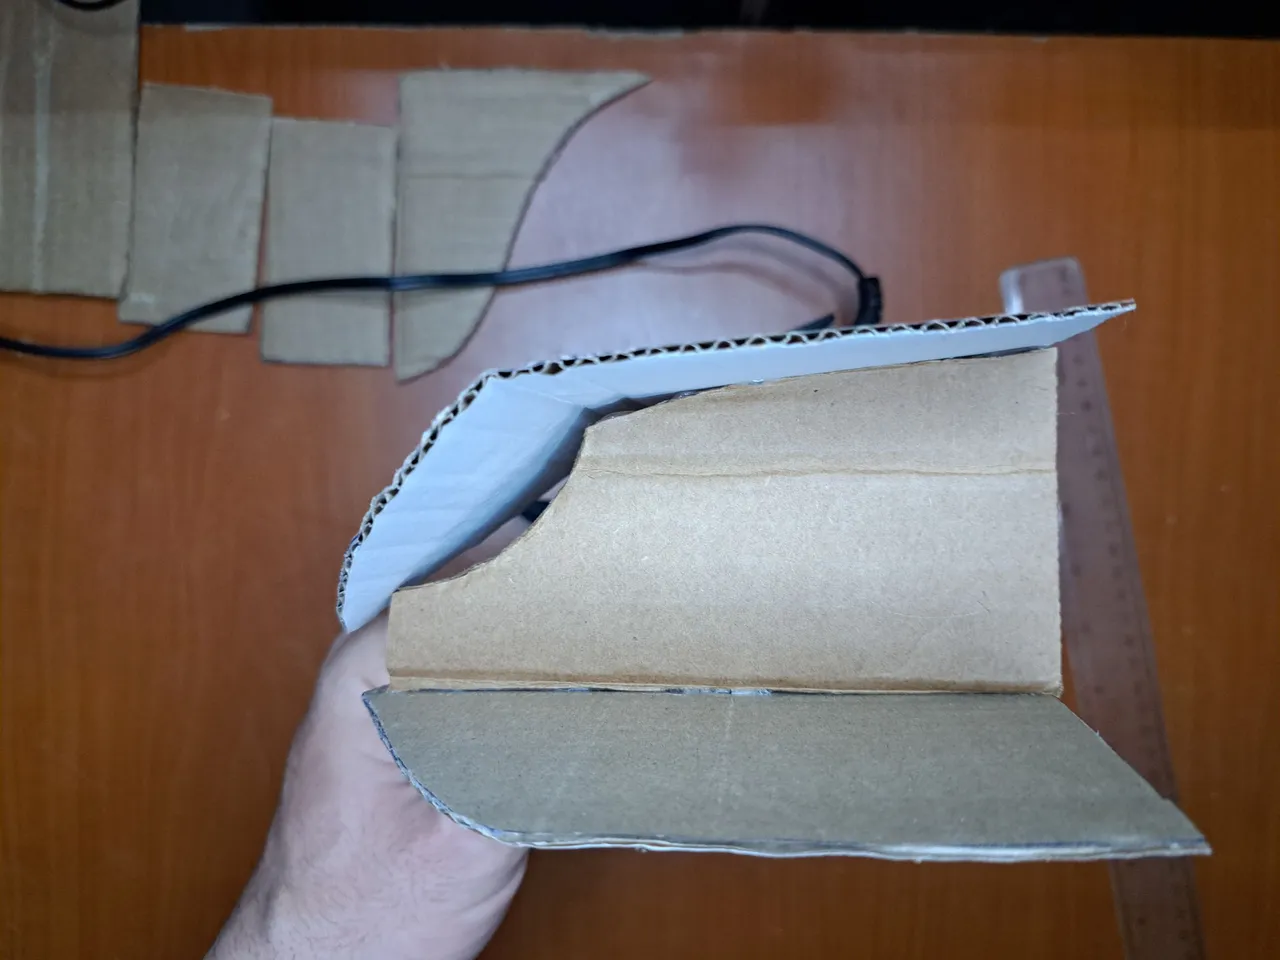
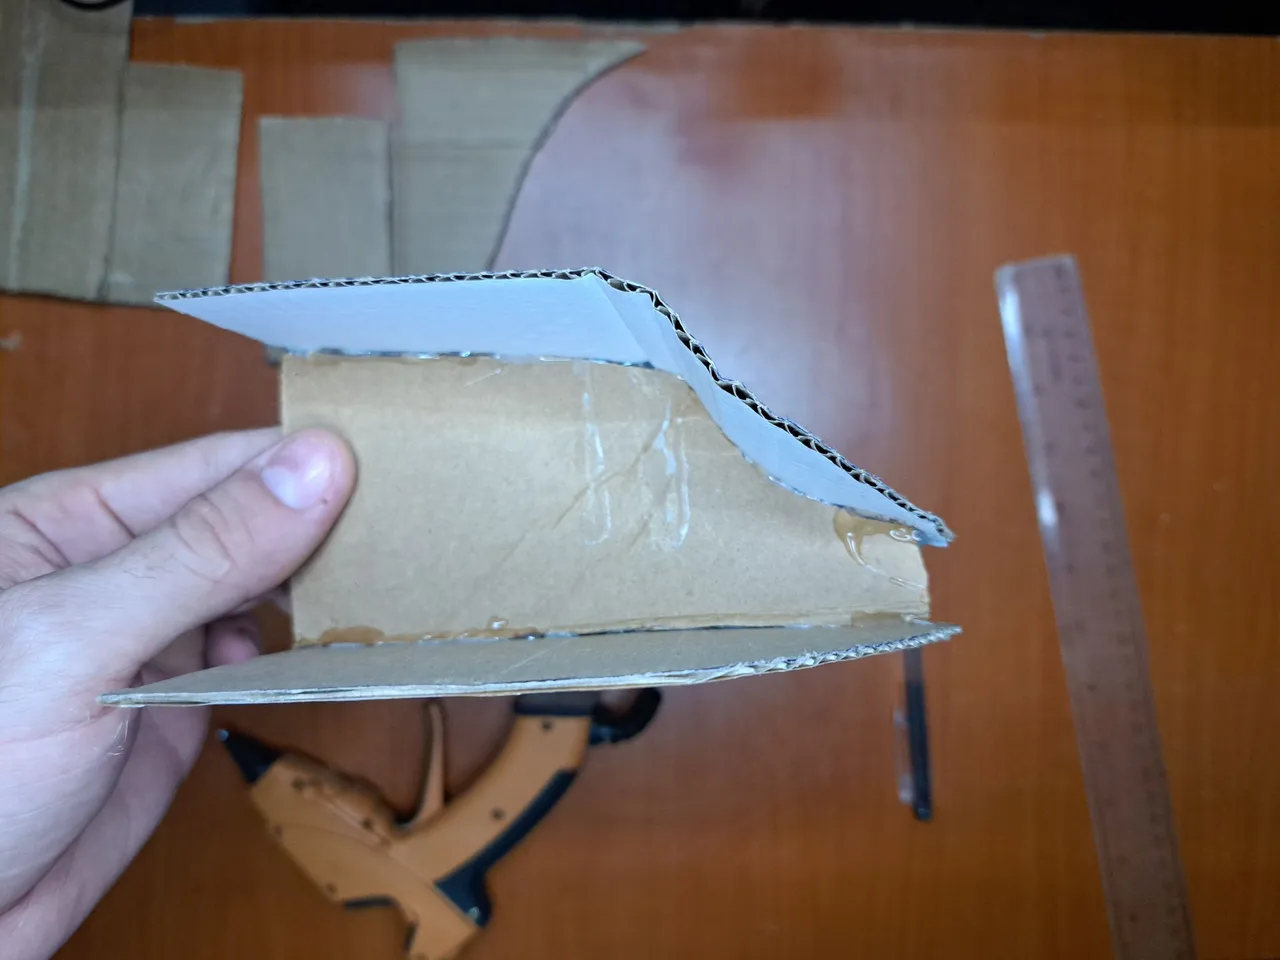
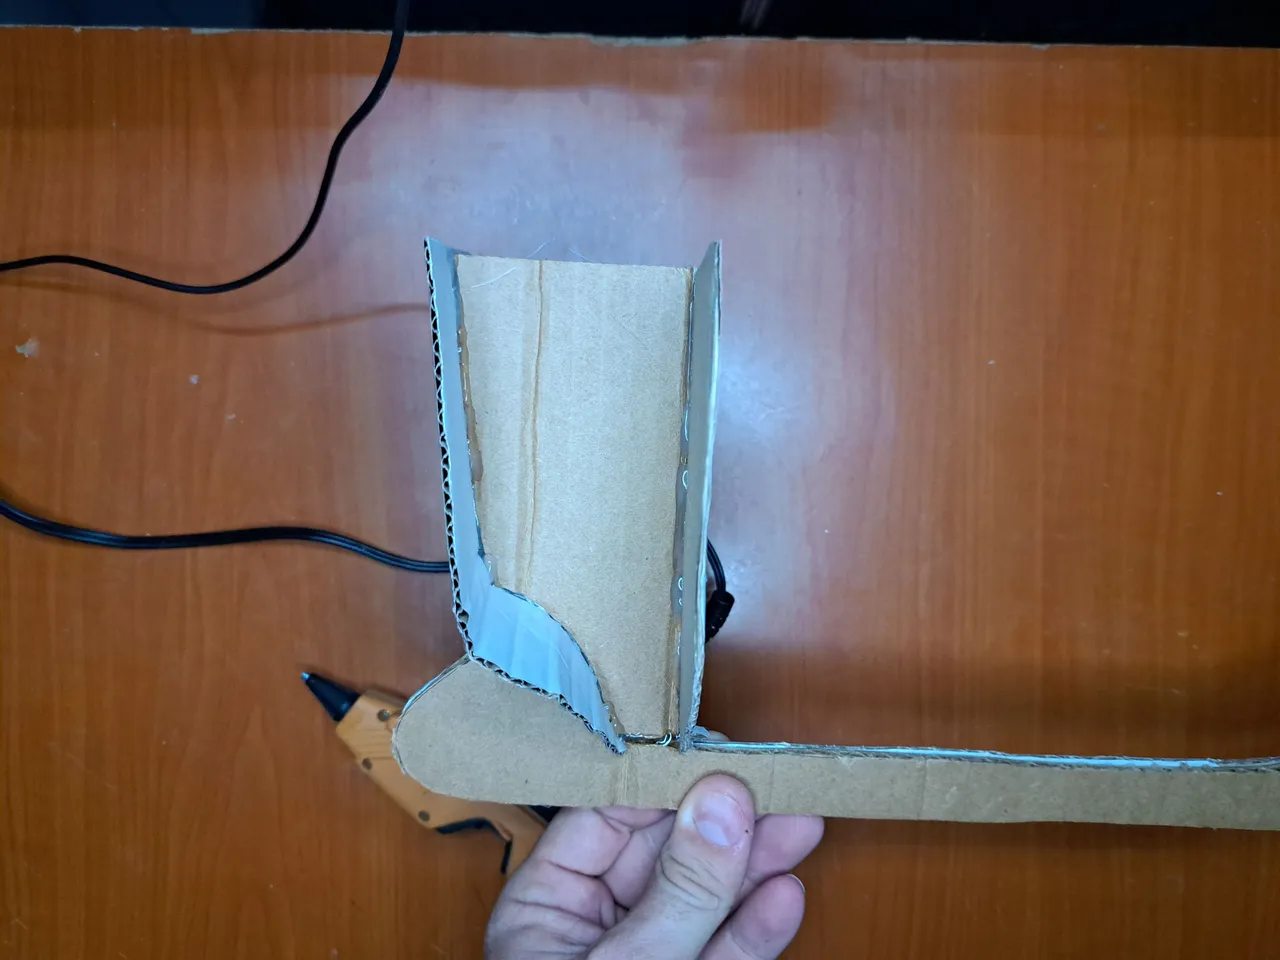
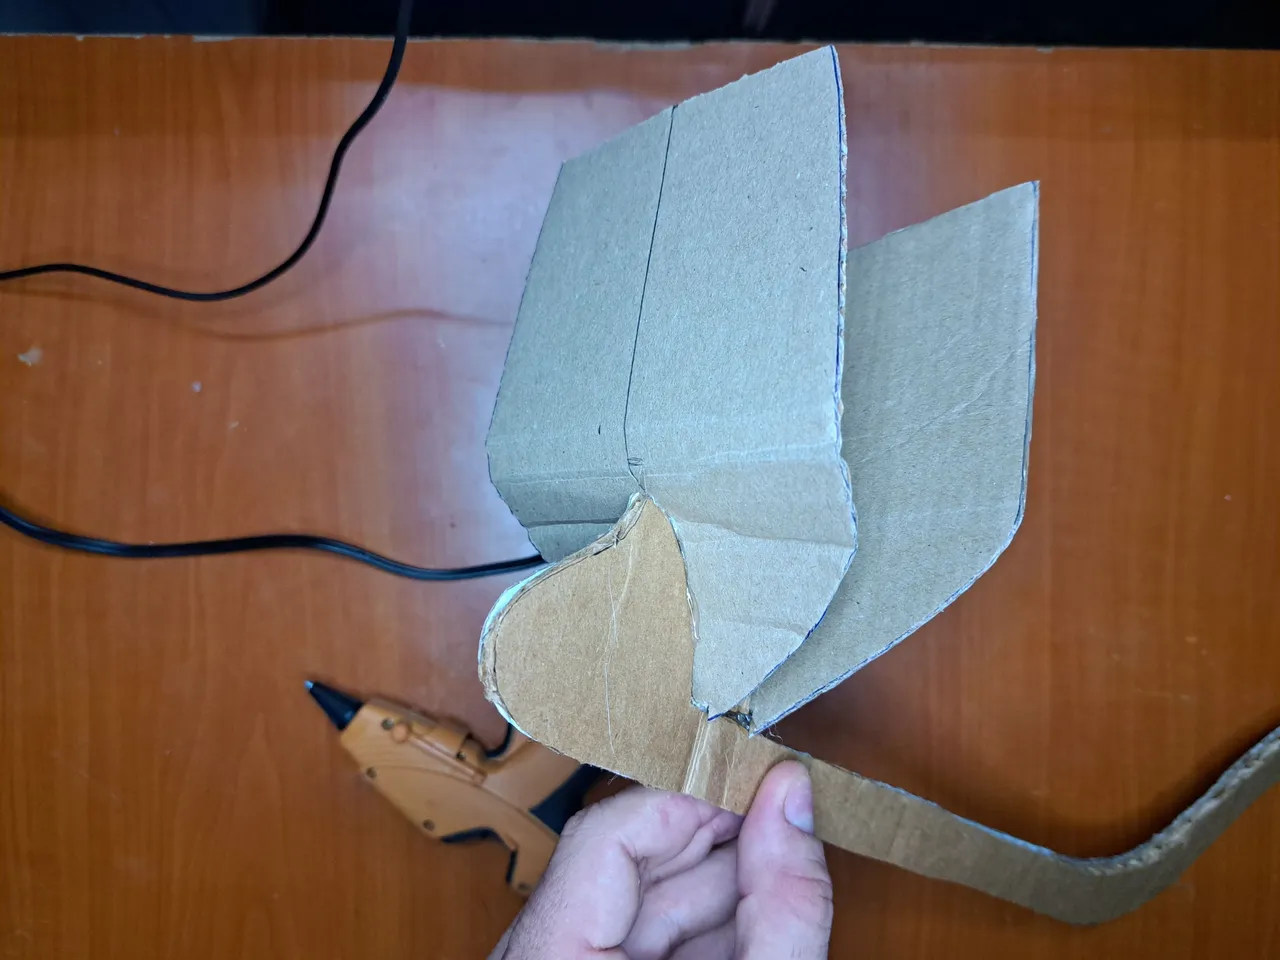
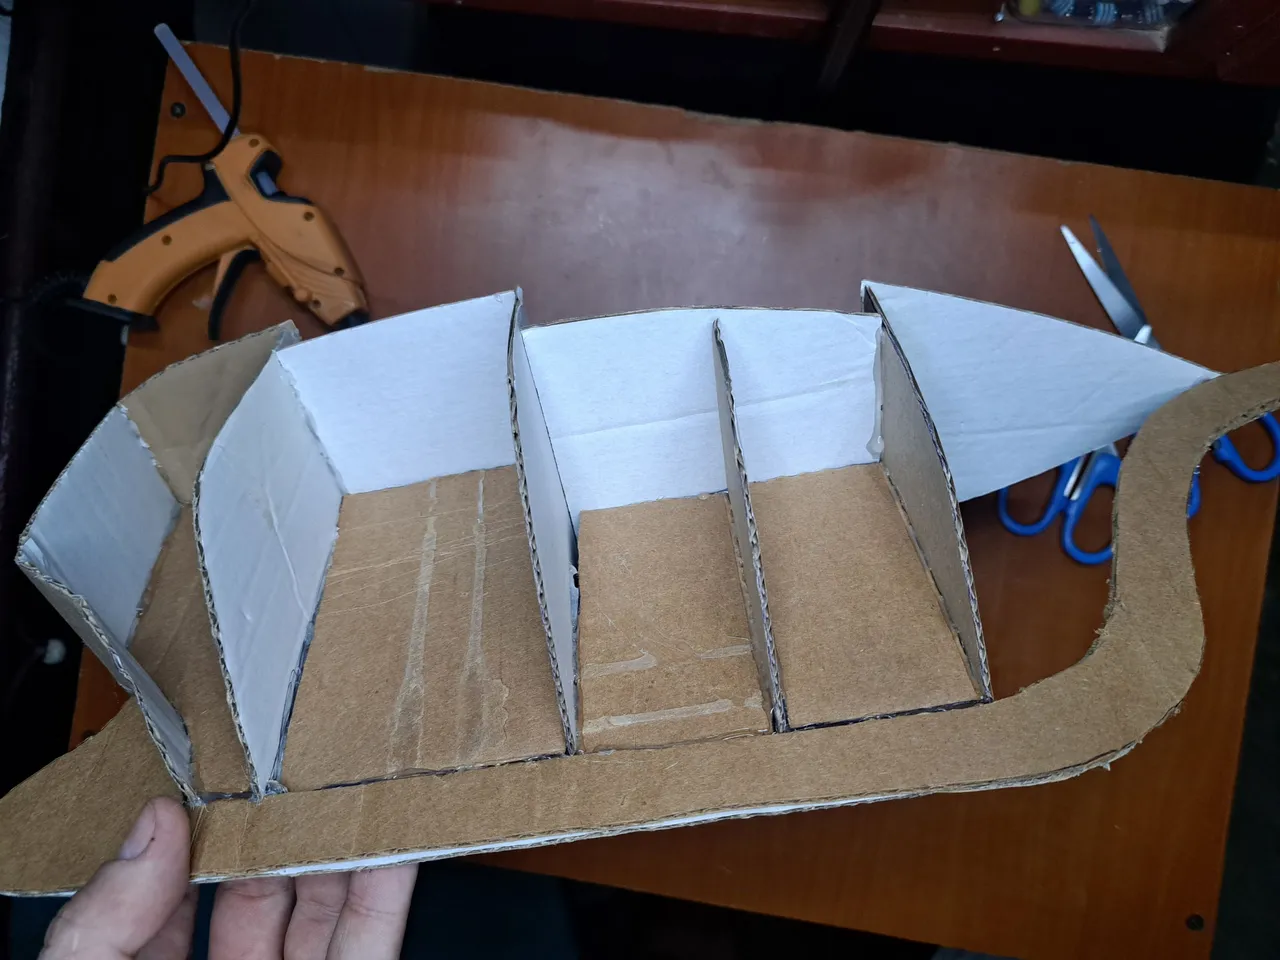
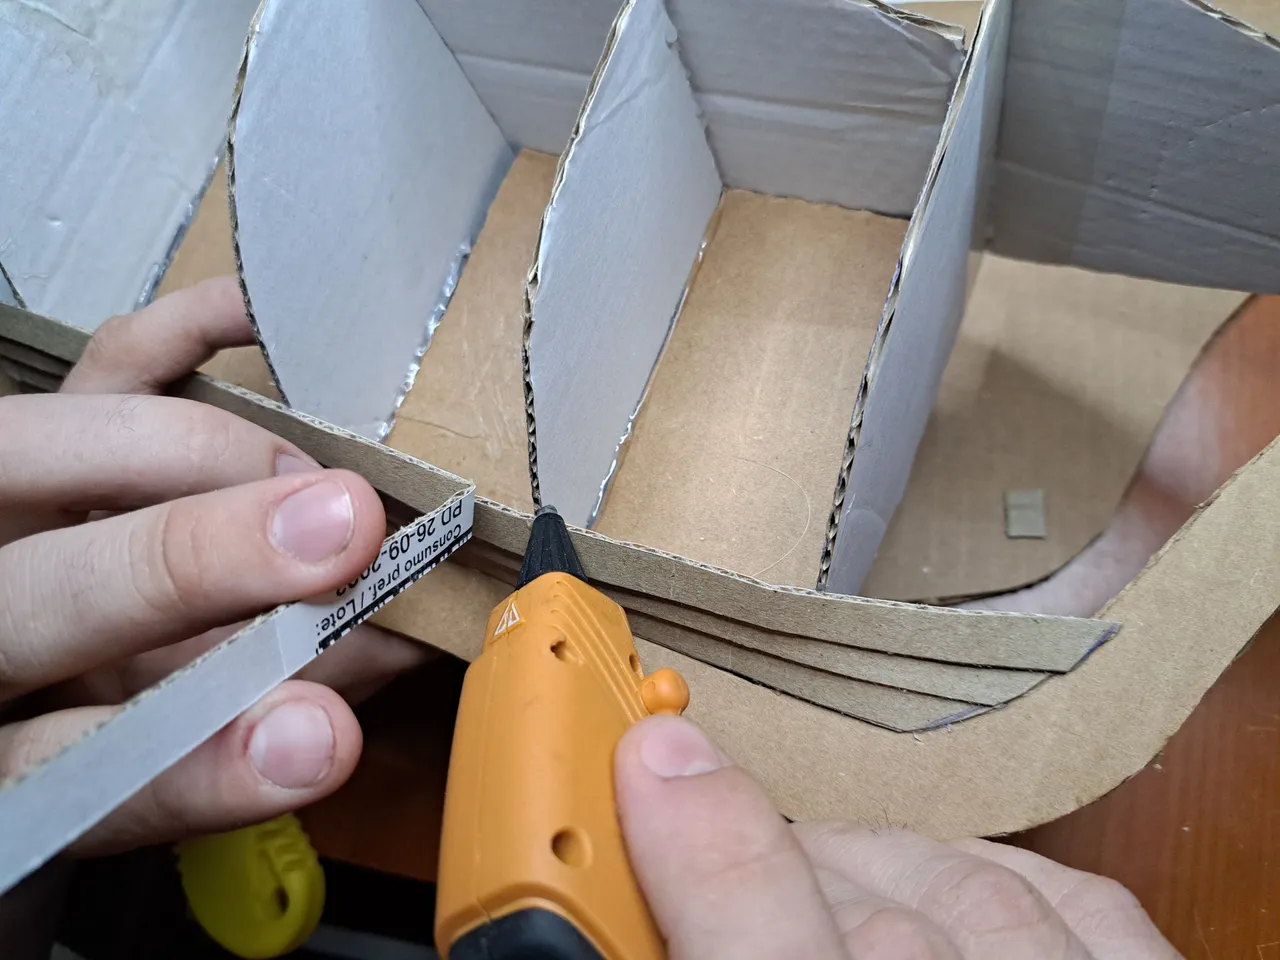
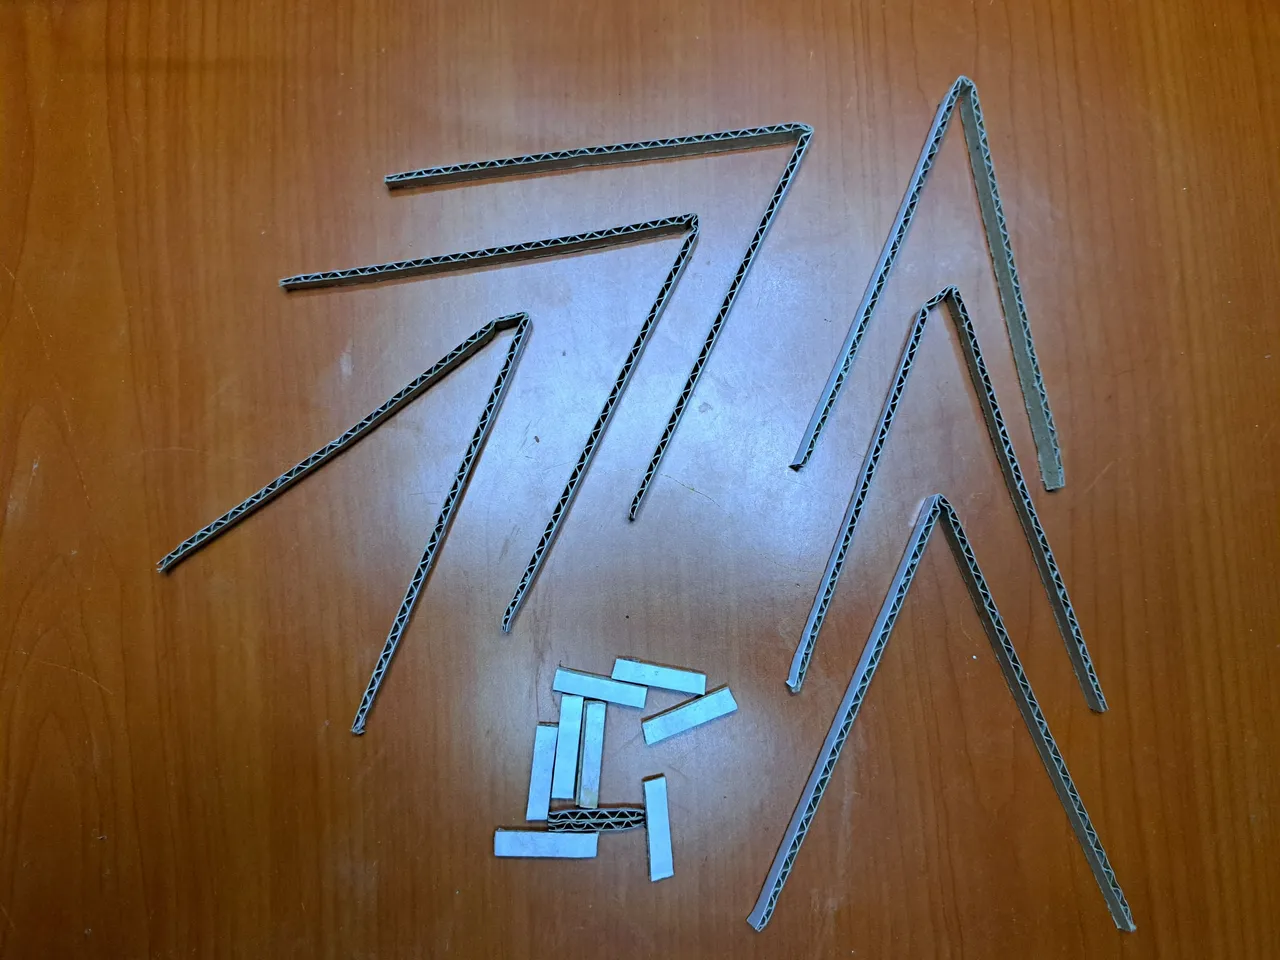
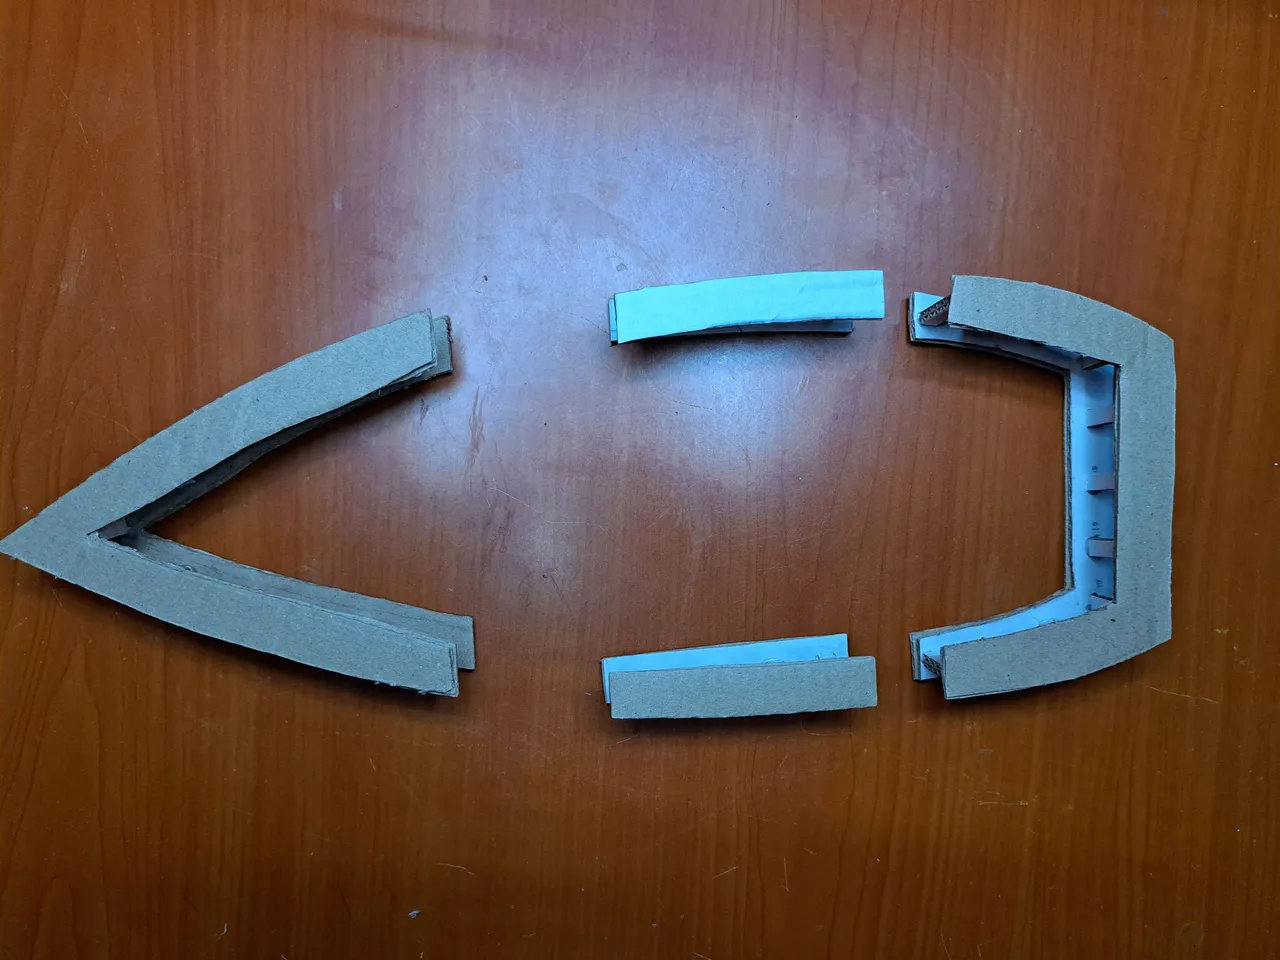
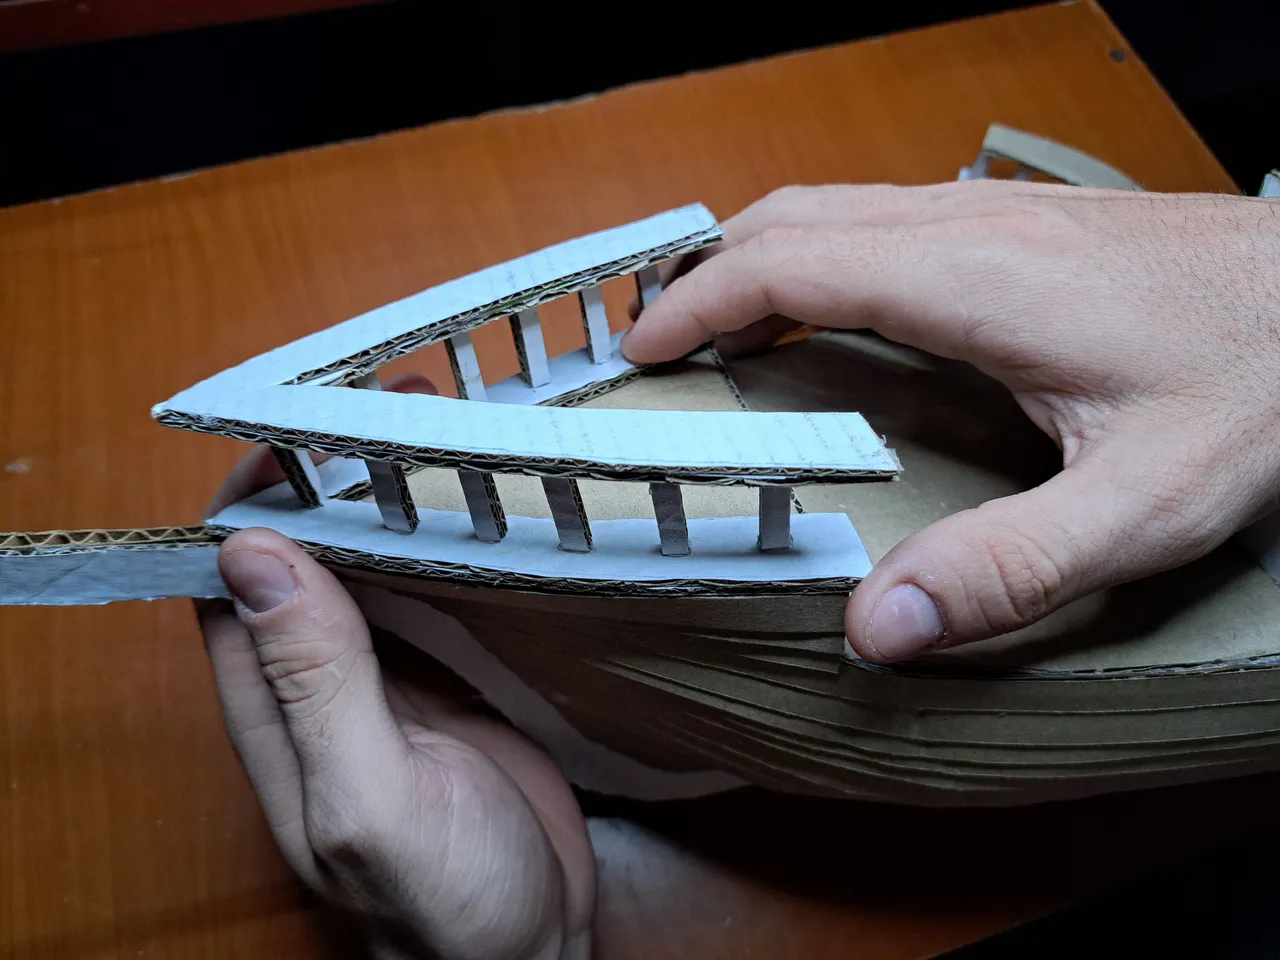
2️⃣ This second step is perhaps the most difficult in terms of order, since we must glue each piece in its place following the logical order of numbering. We start by gluing "1" to "A", then "2" to "B" and so on. Then we glue everything to the keel of the boat to later glue the upper part which are the pieces numbered with lowercase letters. Here again I emphasize the importance of the first diagram that I shared with the molds. Besides pointing out that the piece "1A" should be bent at the bottom so that it adopts the curved shape of the back of the keel.
! [Spanish Version Here]
2️⃣ Este segundo paso es quizás el más difícil en cuanto al orden, ya que debemos pegar cada pieza en su lugar siguiendo el orden lógico de numeración. Comenzamos pegando “1” a “A”, luego “2” a “B” y así sucesivamente. Luego pegamos todo a la quilla del barco para posteriormente pegarle la parte superior que son las piezas numeradas con letras minúsculas. Aquí nuevamente hago hincapié en la importancia del primer diagrama que compartí junto a los moldes. Además de señalar que la pieza “1A” se debe doblar en la parte inferior para que adopte la forma curva de la parte trasera de la quilla.
 |
 |
 |
 |
 |
 |
 |
 |
 |
 |
 |
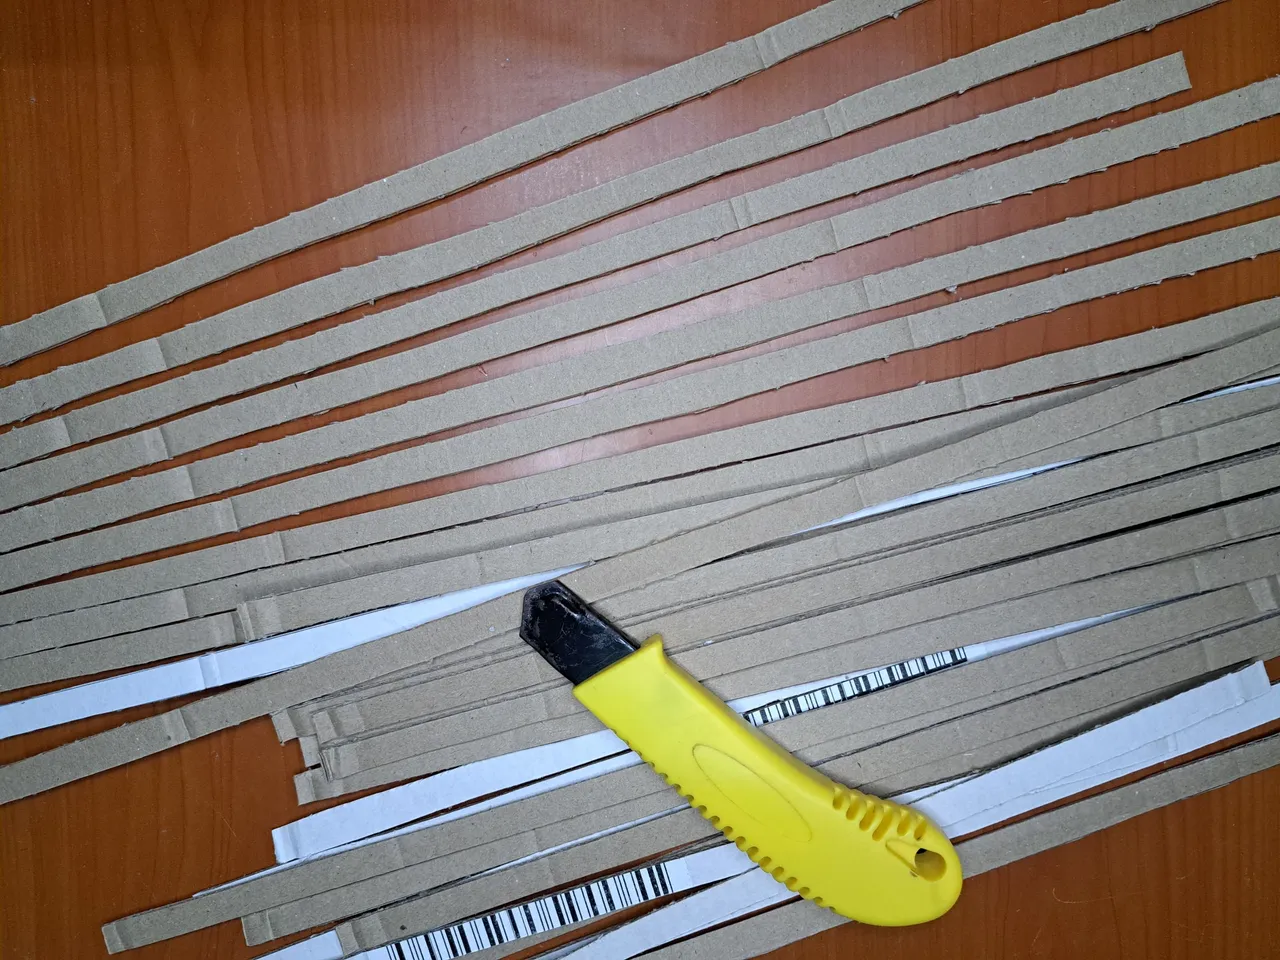
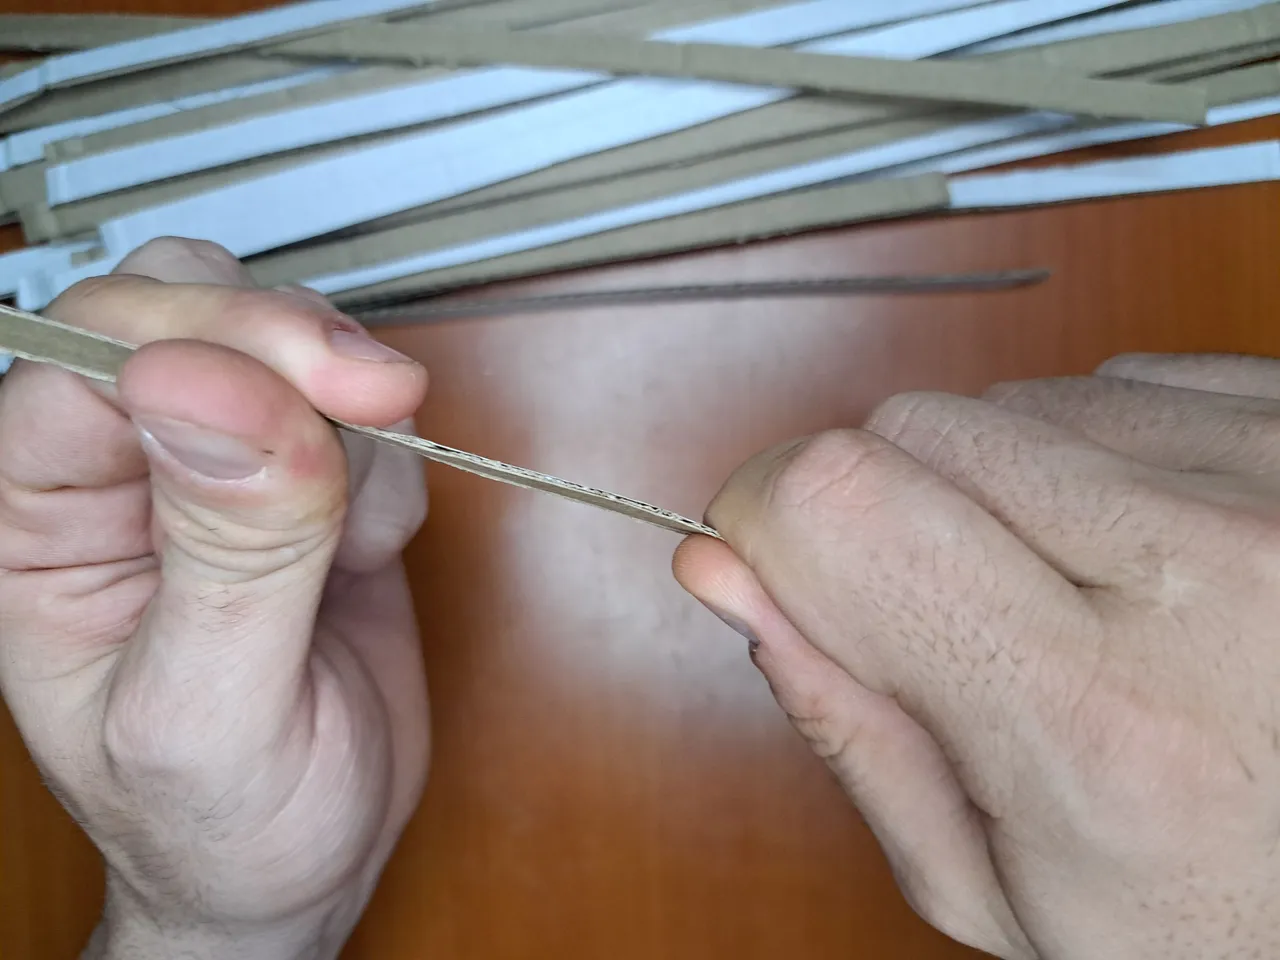
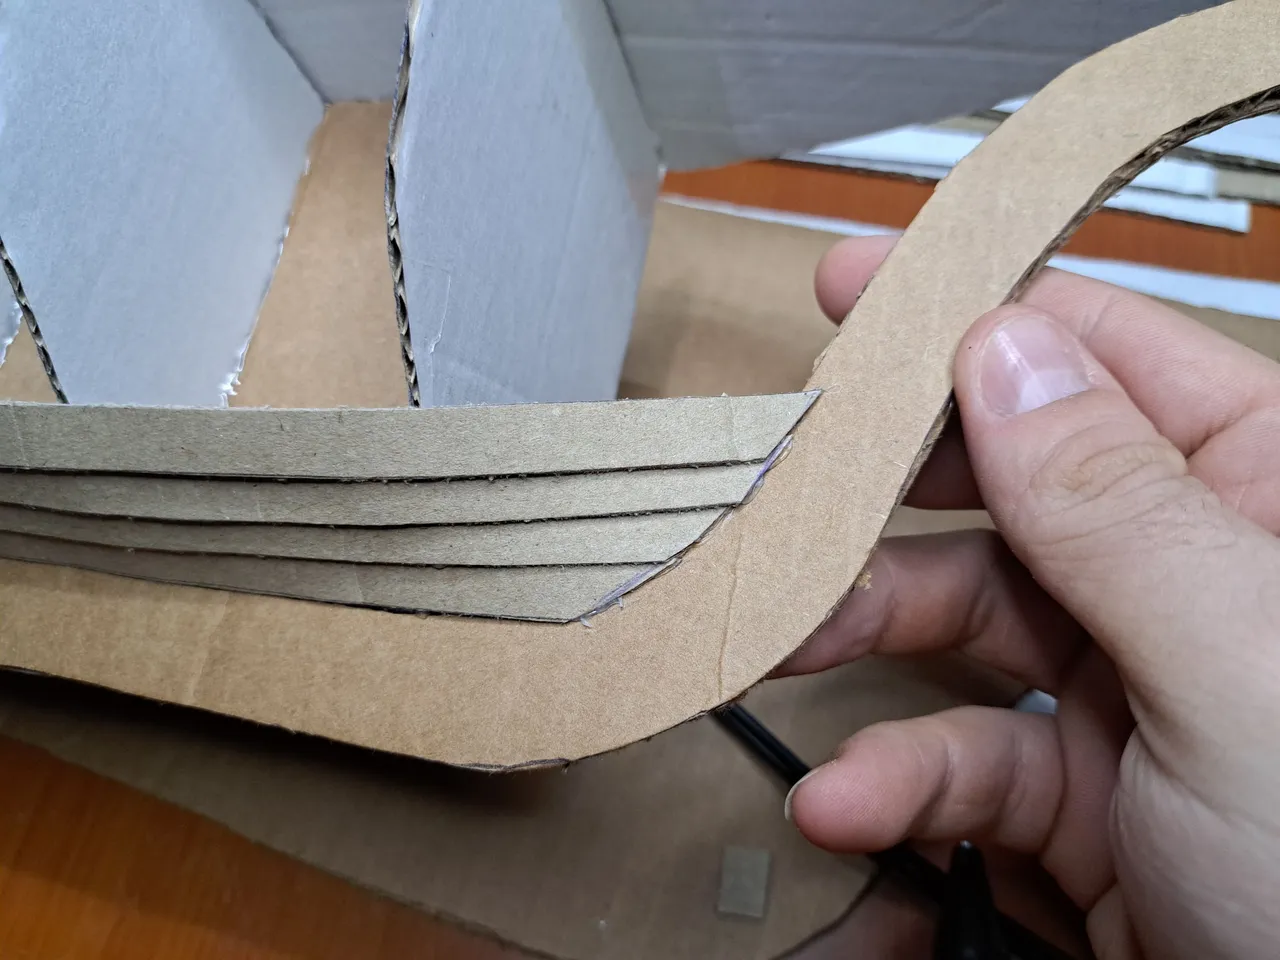
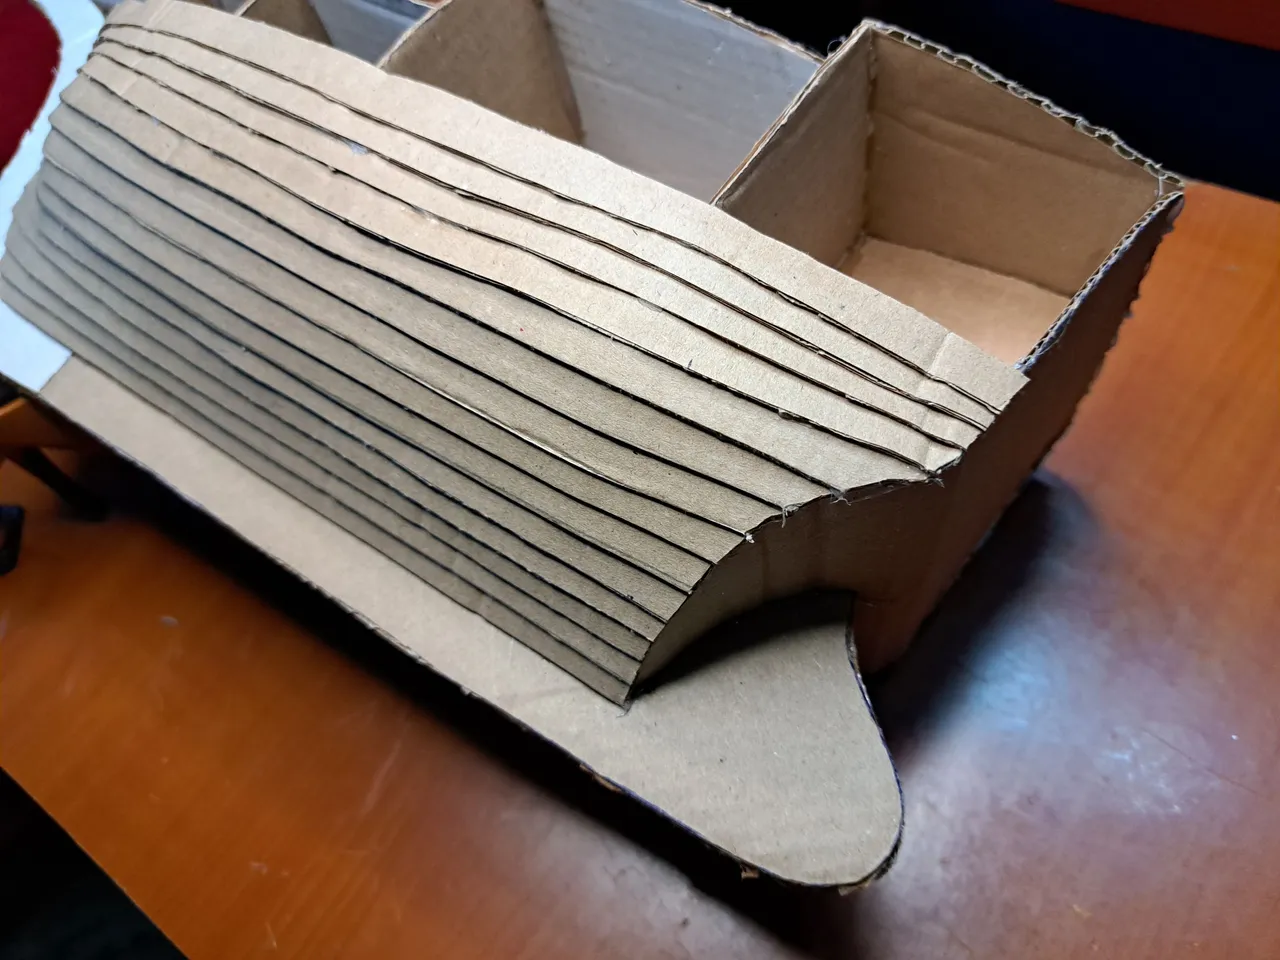
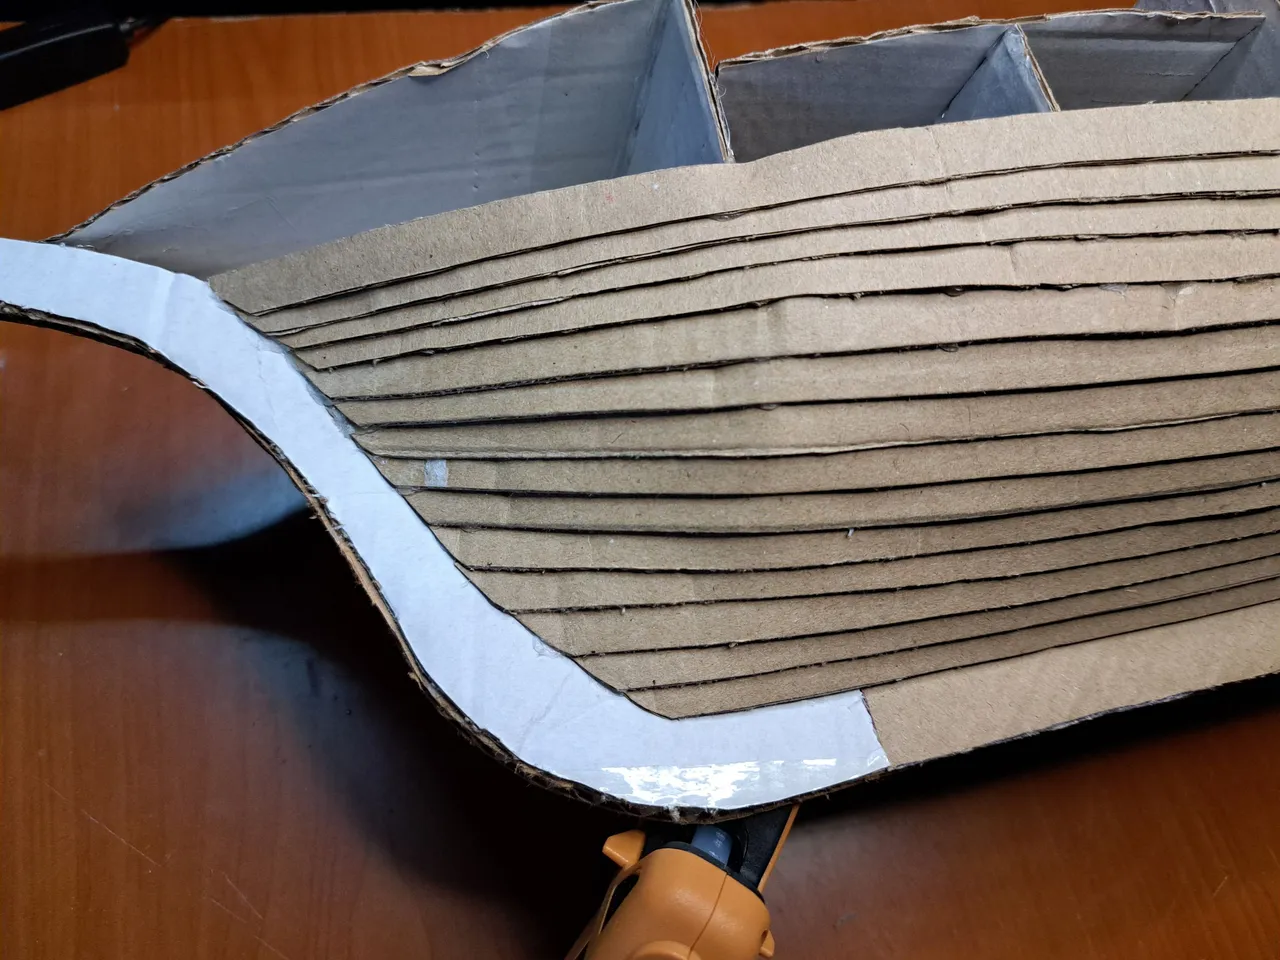
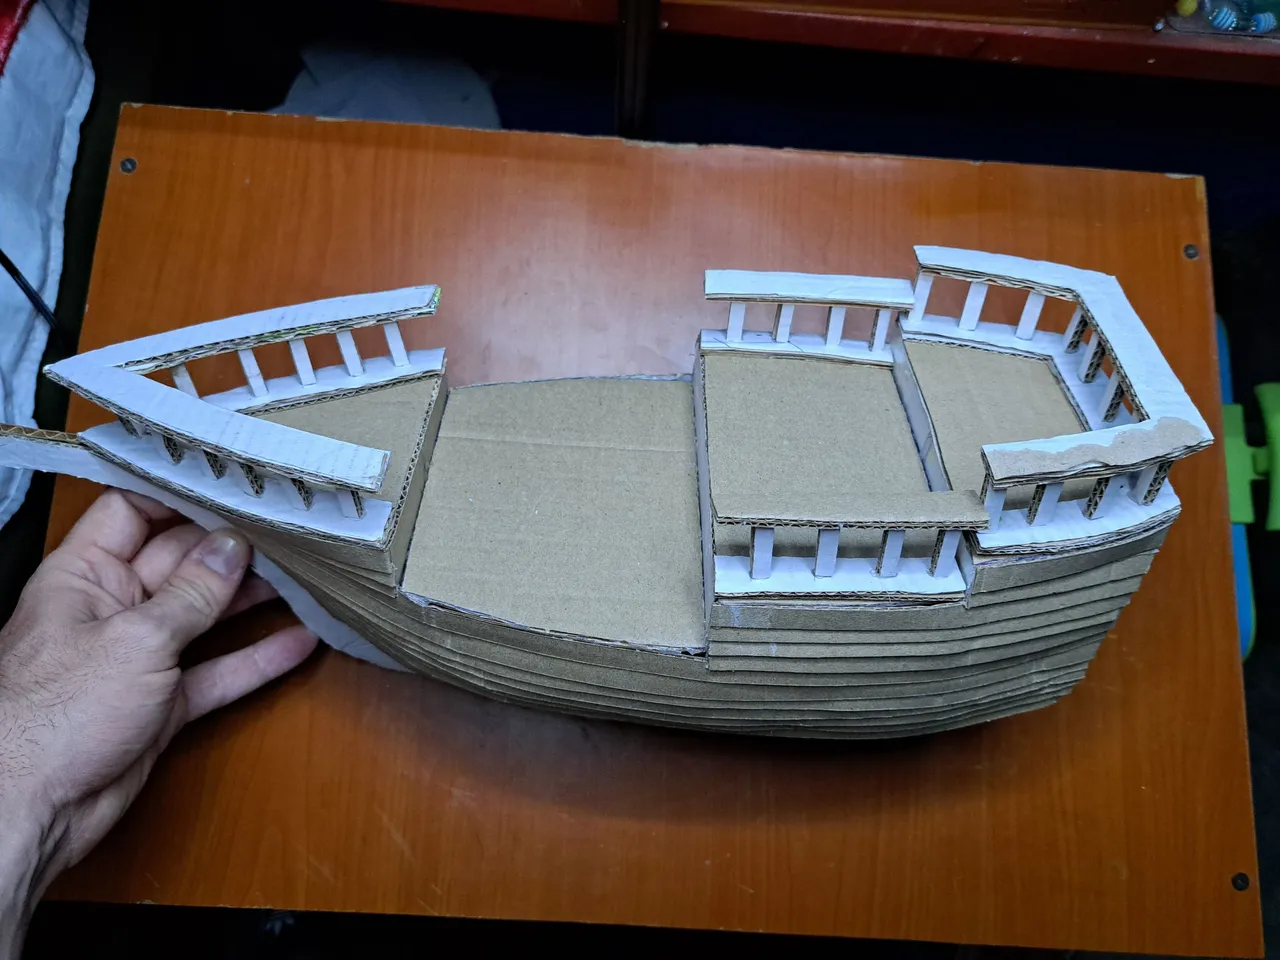
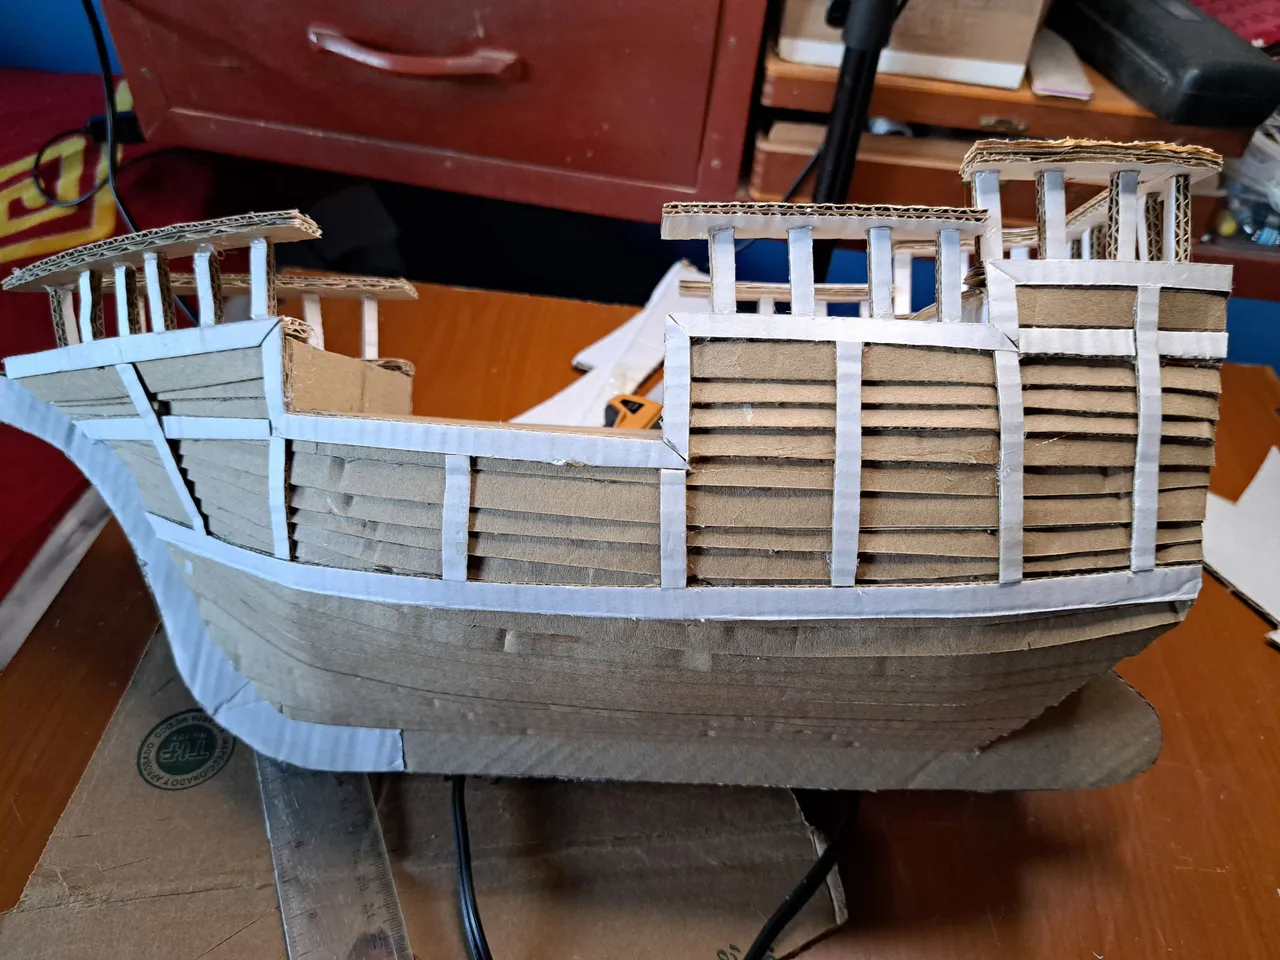
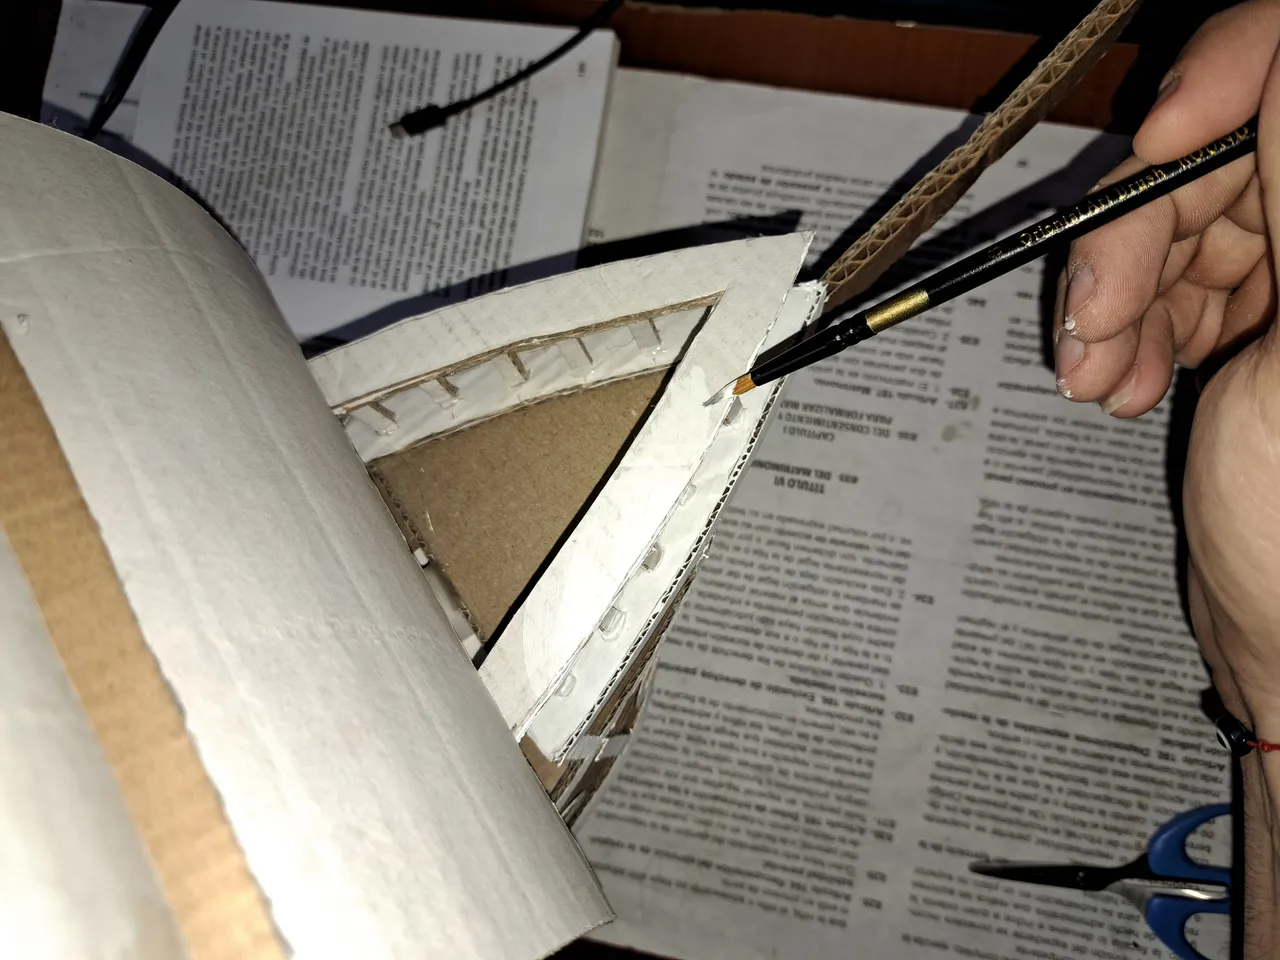
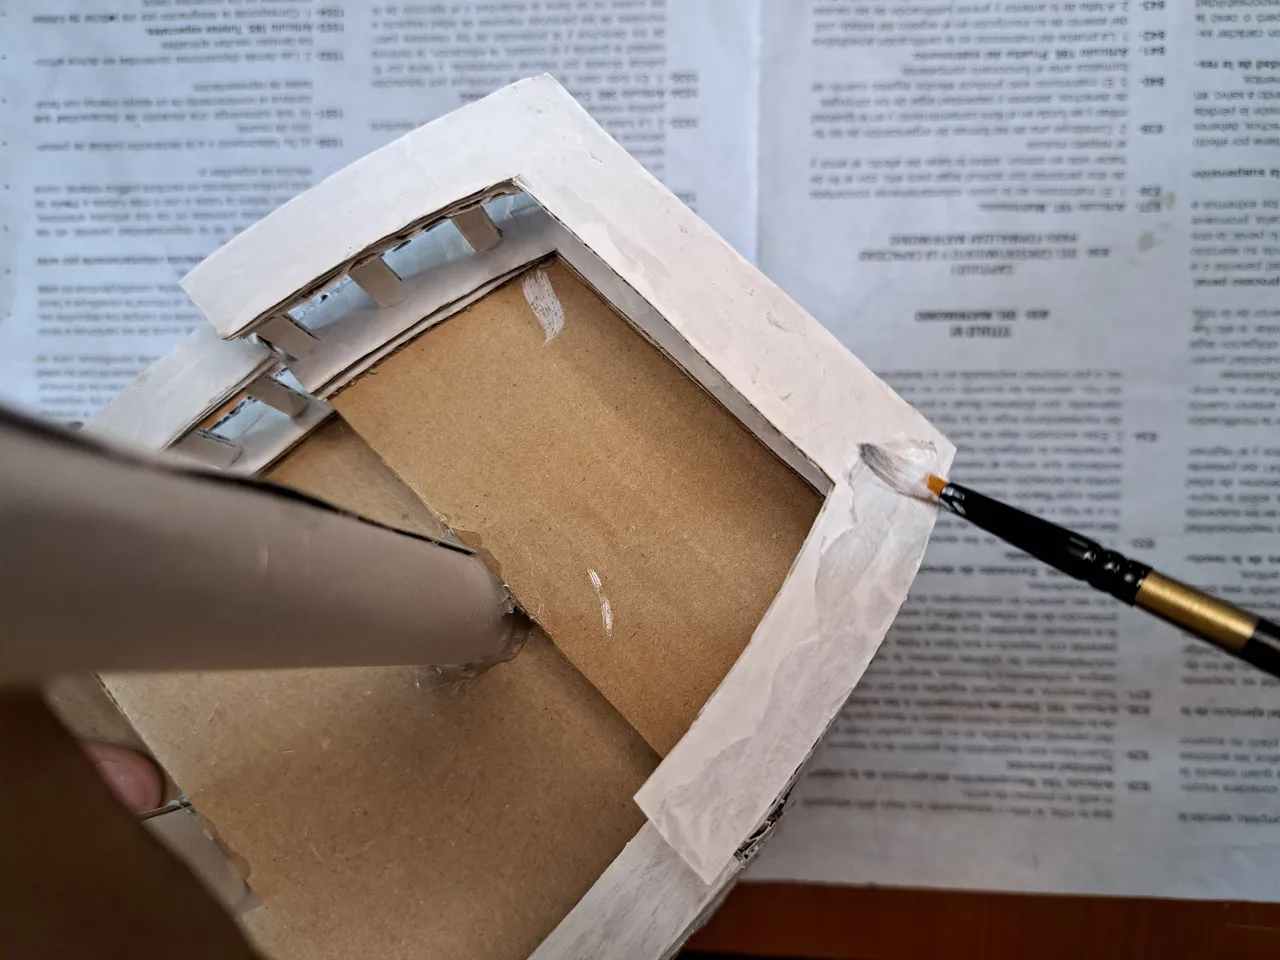
3️⃣ Once we complete the internal structure of the boat, we move on to the decking or lining of the deck. To do this we must cut several strips of cardboard 1 cm wide, which we will glue from the bottom up. The cardboard strips simulate a decking by which they are glued together. In this step, from my own experience I tell you not to press too hard on the cardboard strips that you are gluing, as they tend to sink. You should also be very careful, since the natural shape of the boat makes the decking widen.
! [Spanish Version Here]
3️⃣ Una vez completemos la estructura interna del barco, pasamos al entablado o forrado de la cubierta. Para ello debemos cortar varias tiras de cartón de 1 cm de ancho, las cuales iremos pegando de abajo hacia arriba. Las tiras de cartón simulan un entablado por la cual se pegan montadas unas con otras. En este paso por experiencia propia les digo que no presionen muy fuerte las tiras de cartón que van pegando, ya que tienden a hundirse. También deben tener mucho cuidado, puesto que la forma natural del barco hace que el entablado se ensanche.
 |
 |
 |
 |
 |
 |
 |
 |
 |
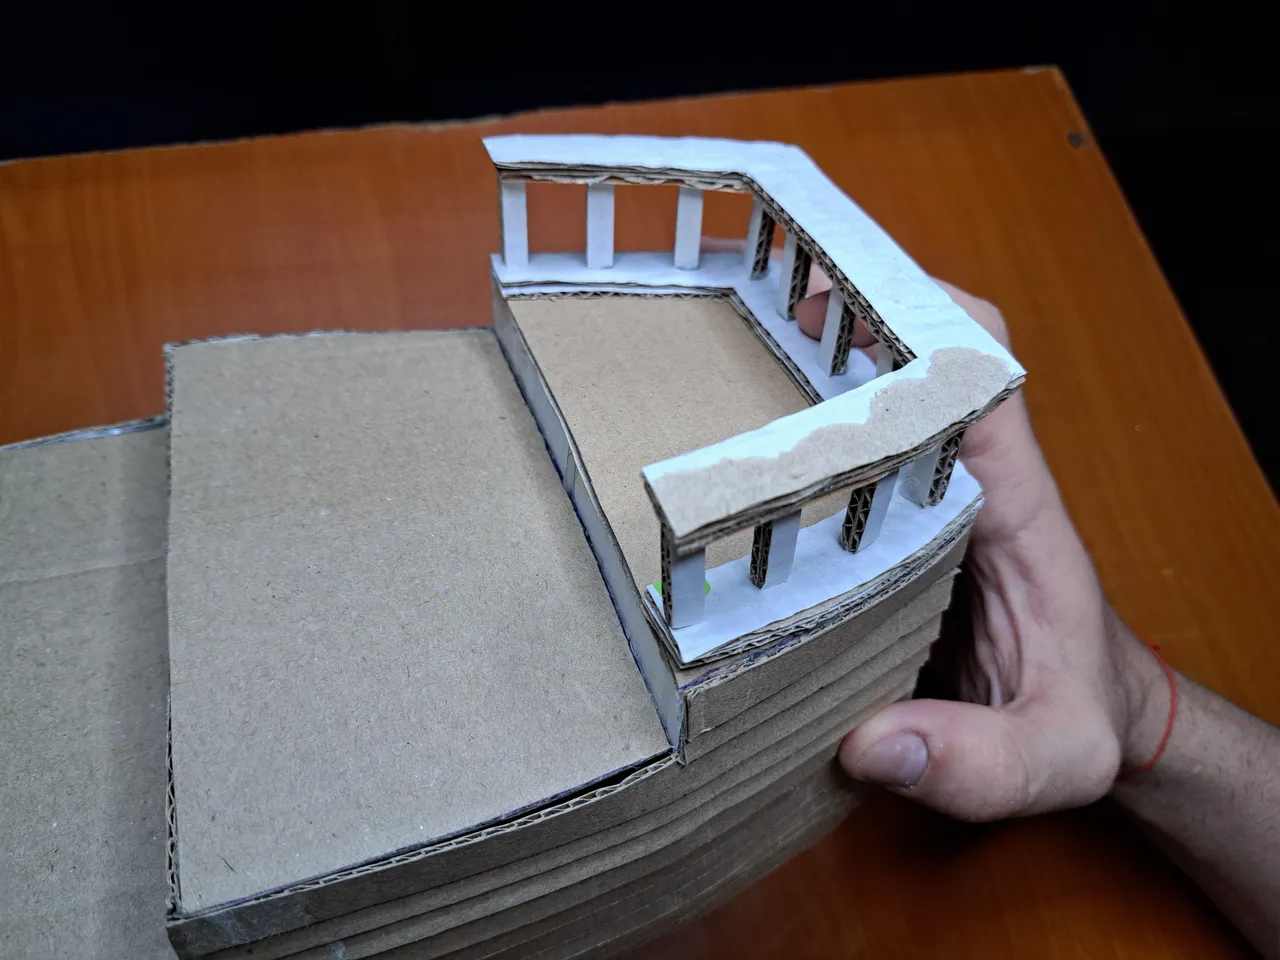
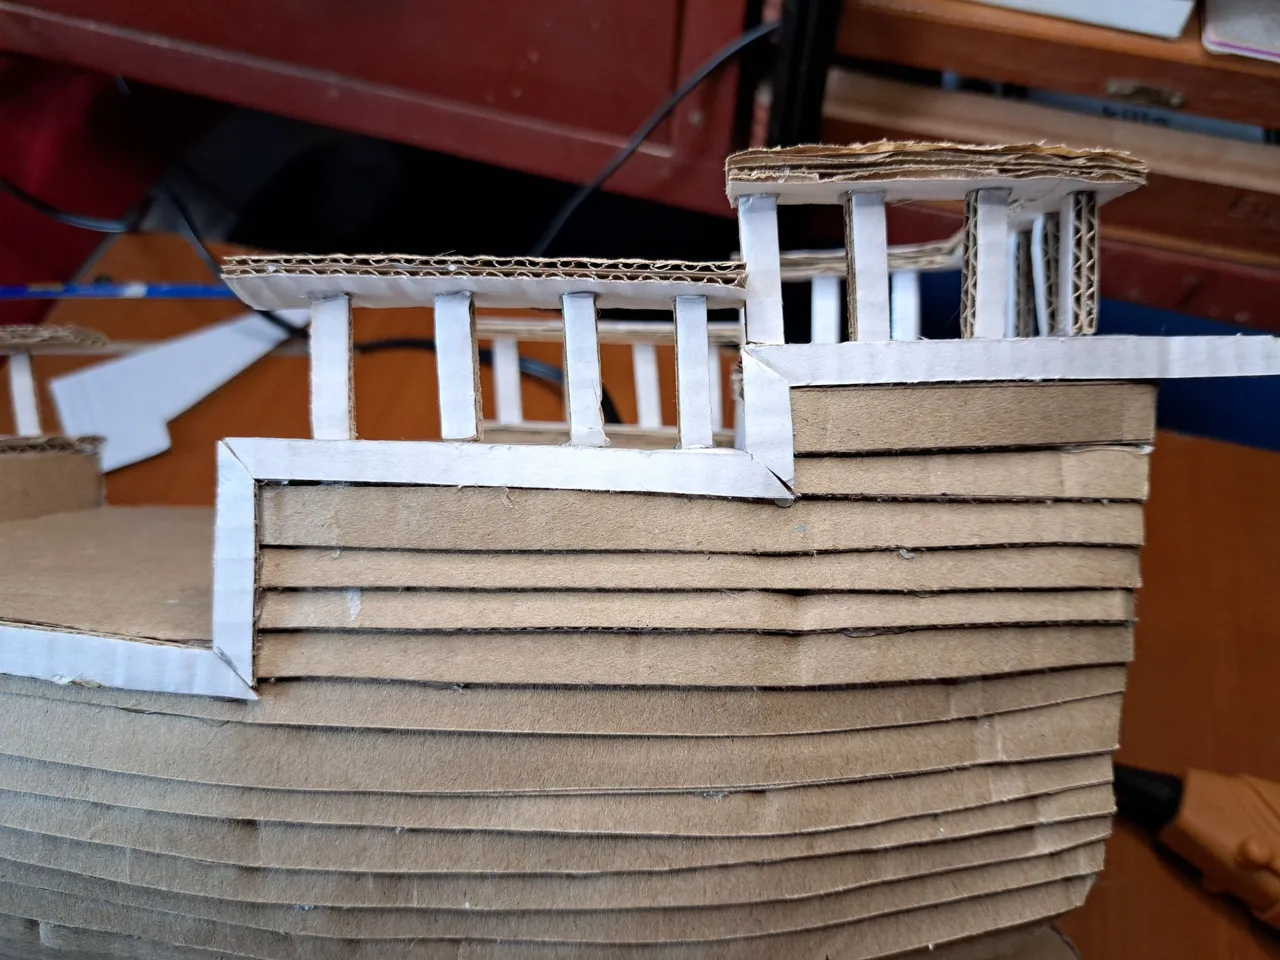
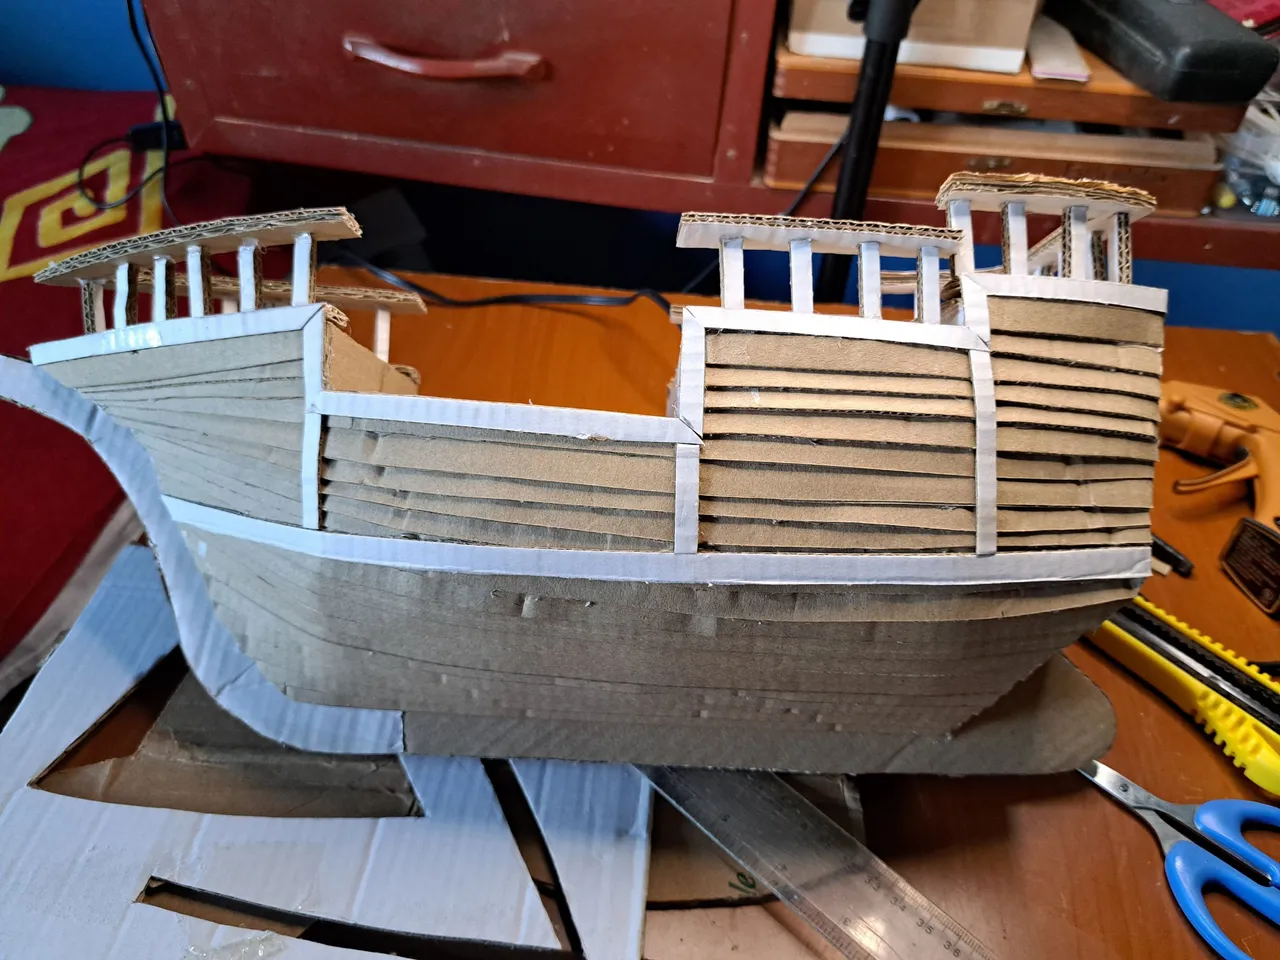
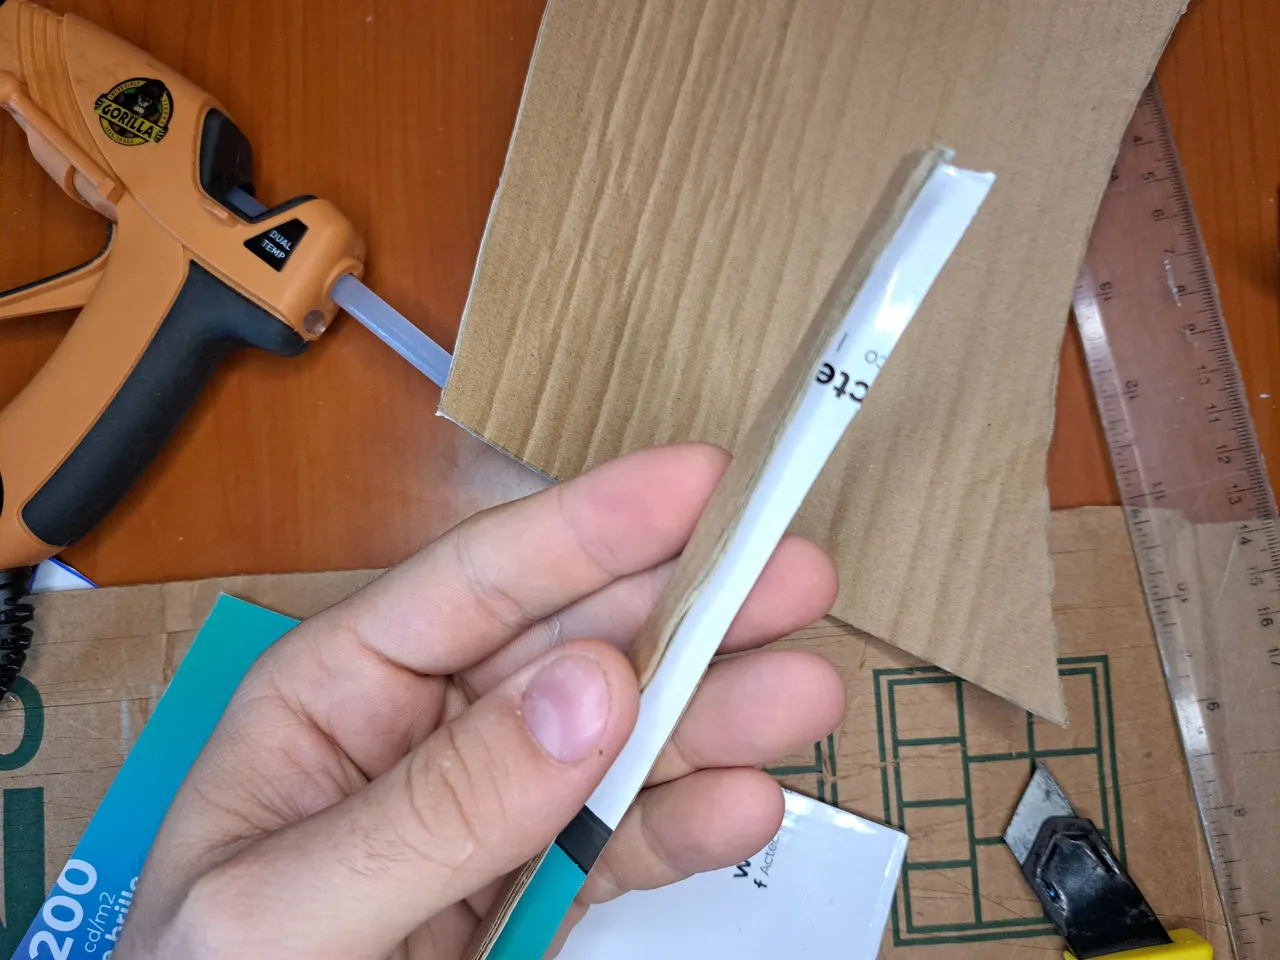
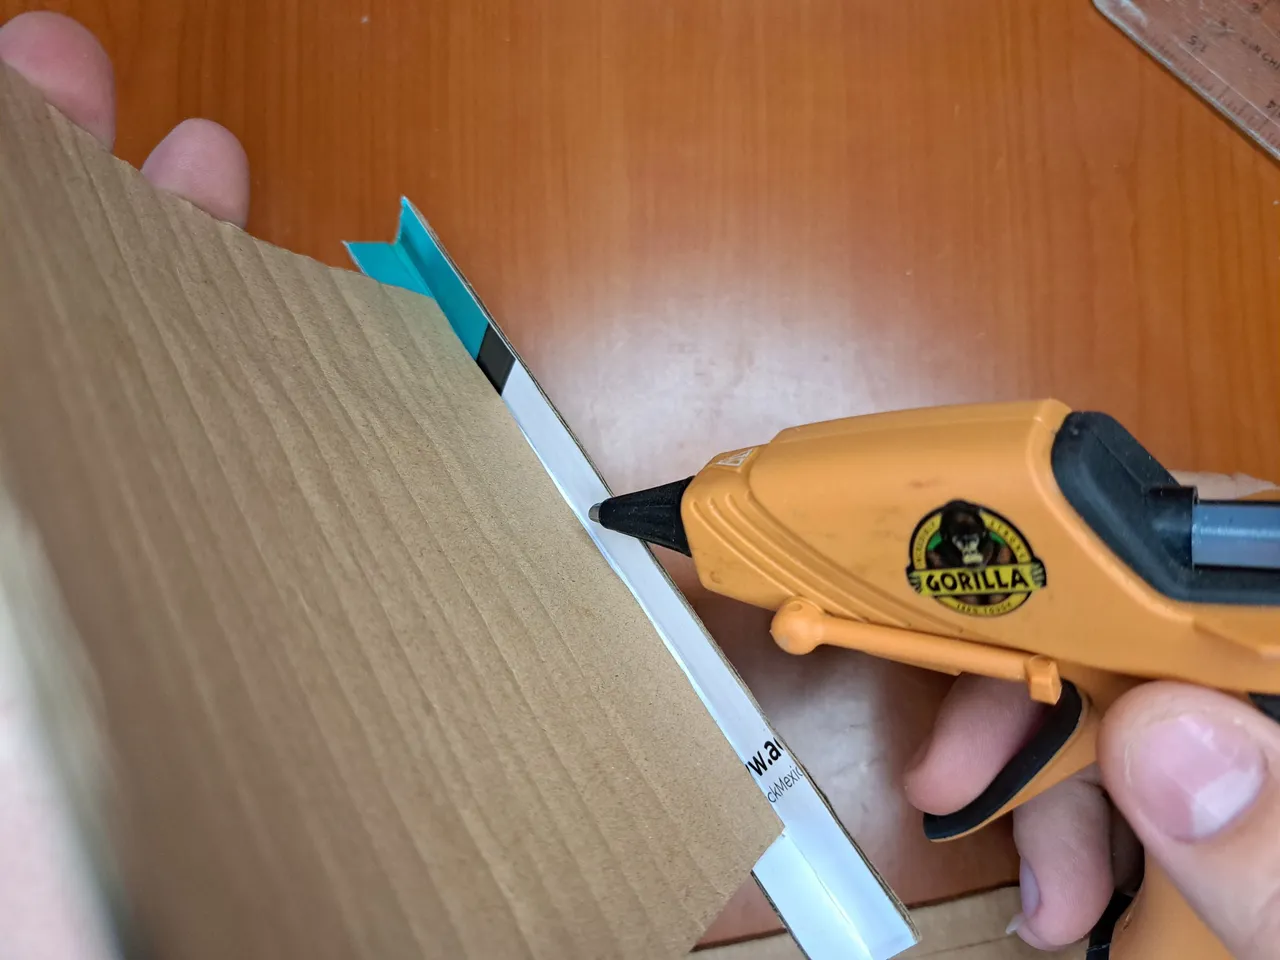
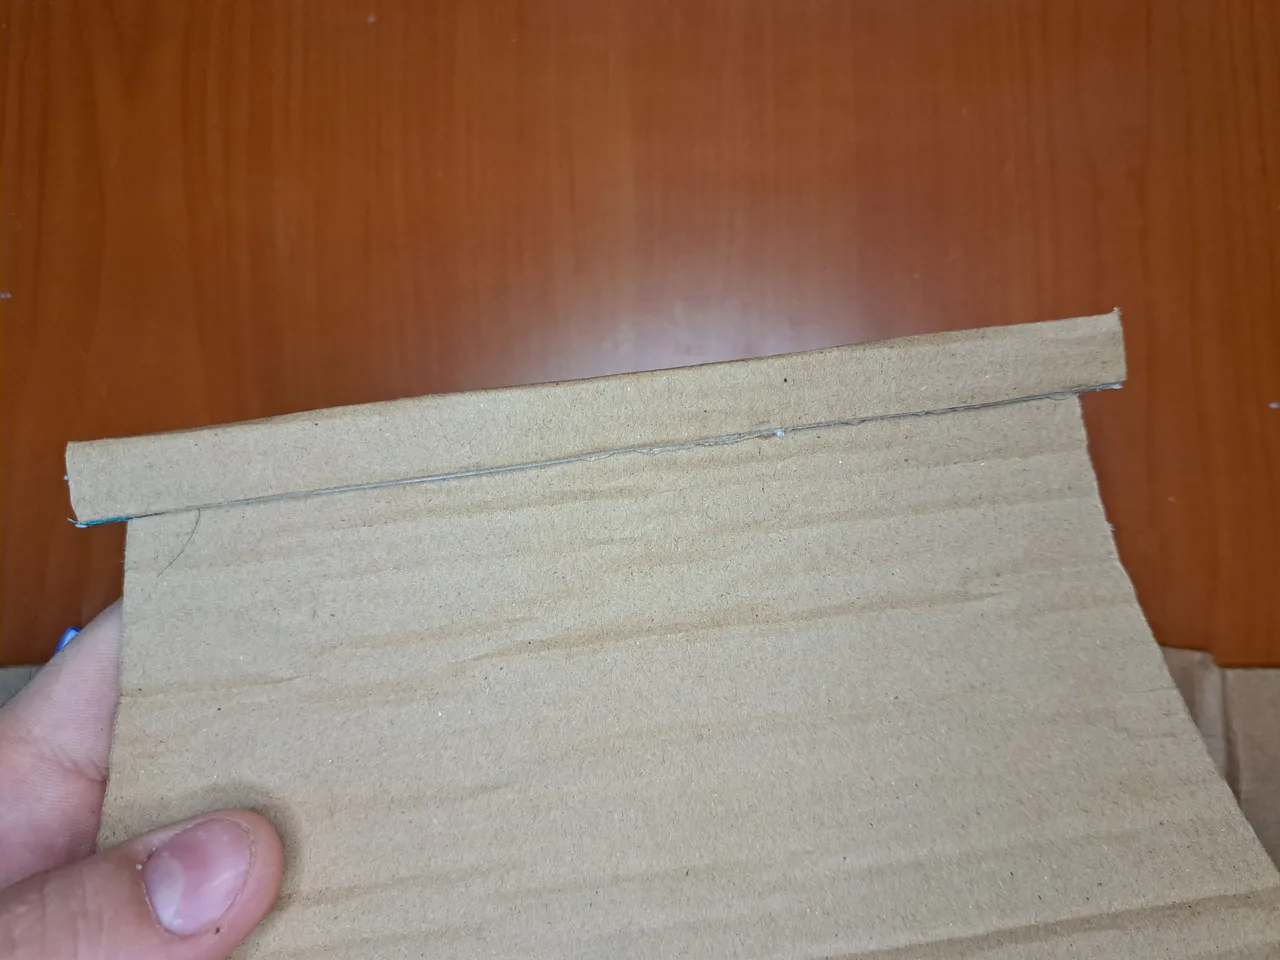
4️⃣ With the bottom of the boat ready, we will start working on the first details. First, using the molds with lowercase letters, we will outline the structure of the railings on the deck. These railings will be approximately 1.5 cm wide and will have thin inner stakes of 2.5 cm long. These railings can be made from cardboard of any color, as they will be painted later. In my case, I decided to use white cardboard so that they would stand out. Once the railings are ready, we glue them in their respective places.
! [Spanish Version Here]
4️⃣ Con la parte inferior del barco lista comenzaremos a trabajar en los primeros detalles. Primeramente, haciendo uso de los moldes con leras minúsculas, trazaremos la estructura de las barandas de la borda. Estas barandas tendrán 1.5 cm de ancho aproximadamente y contarán con unos pilotes interiores finos de 2.5 cm de largo. Etas barandas pueden hacerse con cartón de cualquier color, ya que luego se pintaran, en mi caso decidí utilizar un cartón blanco para que se diferenciaran bien. Una vez que las barandas estén listas, las pegamos en sus respectivos lugares.
 |
 |
 |
 |
 |
 |
 |
 |
 |
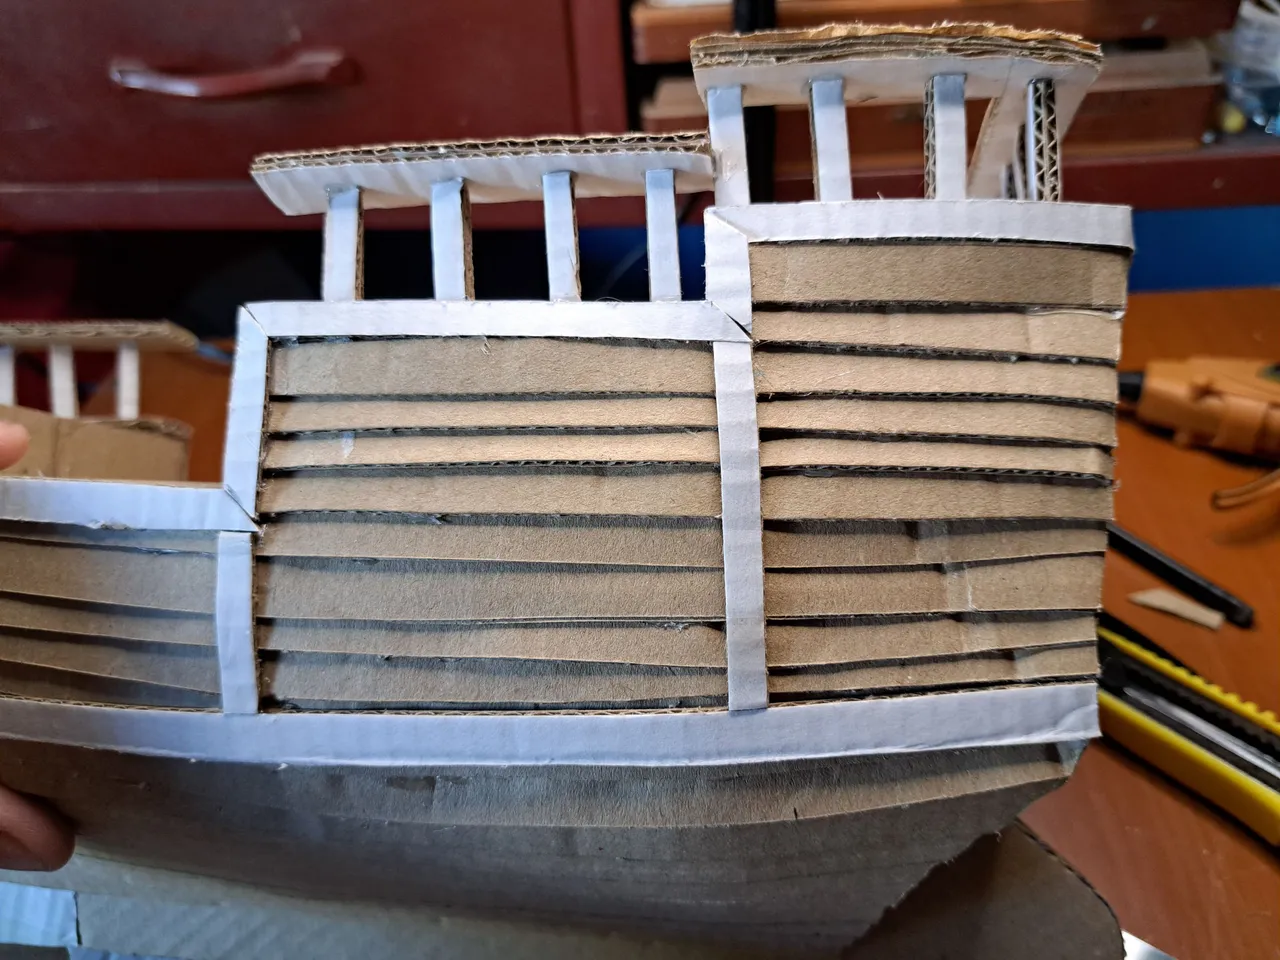
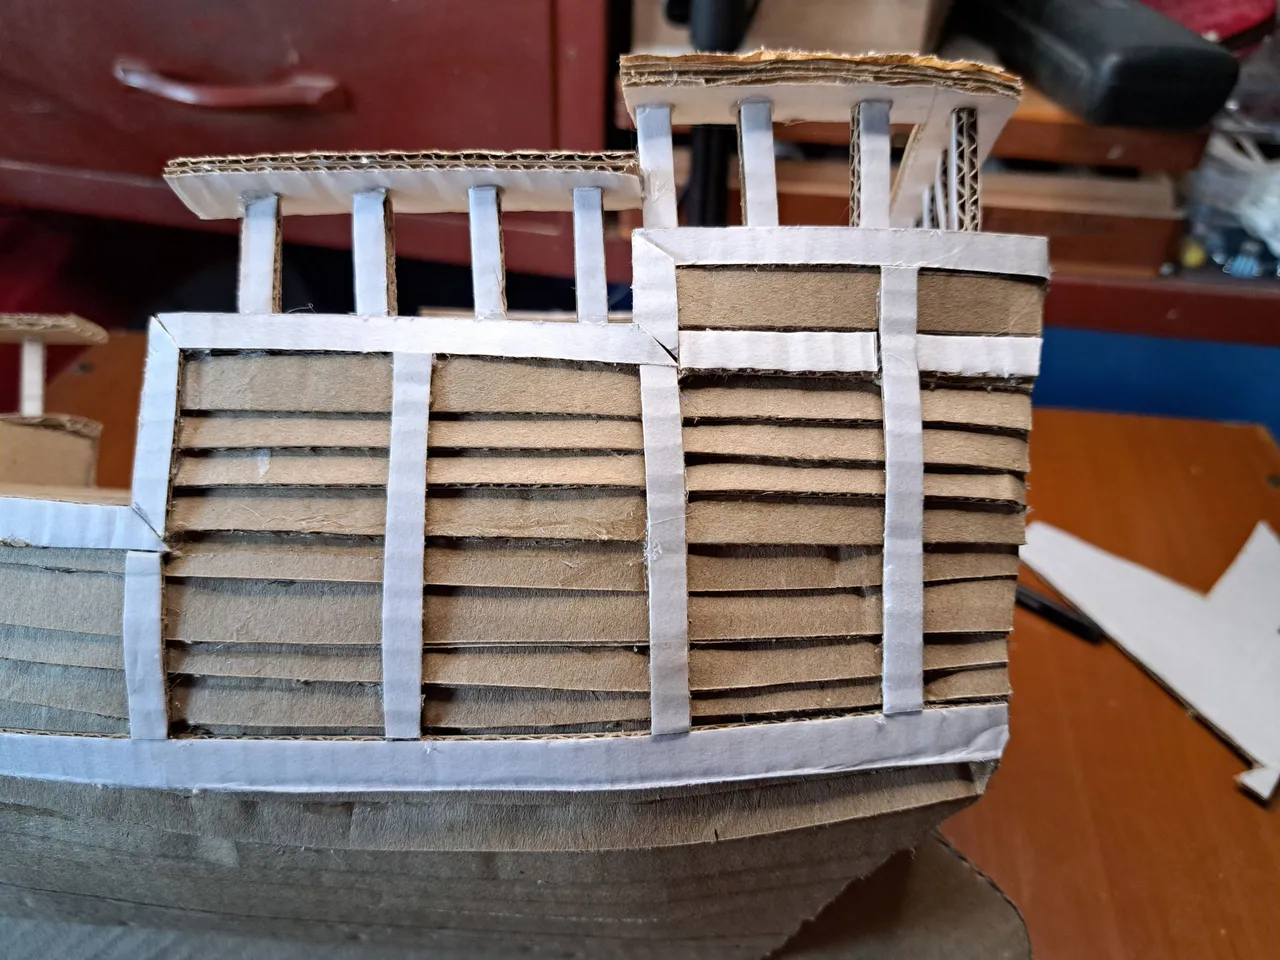
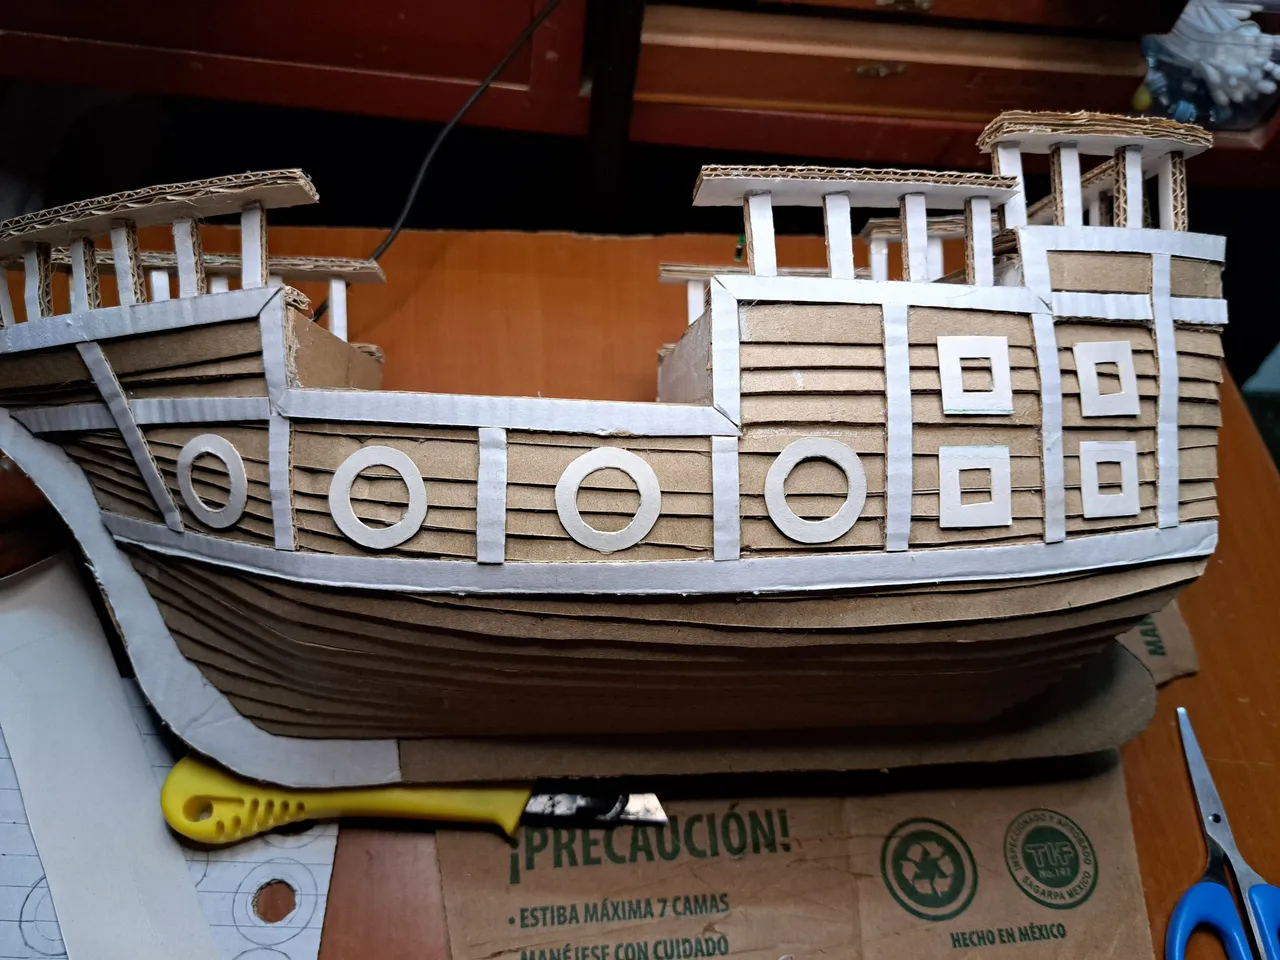
5️⃣ Next, we will cut strips that are 0.5 cm wide and use them to make a border decking or what is known as slats. The first slat will run the entire structure of the boat as if it were part of the decking. The rest of the slats will be placed as shown in the images. When it is necessary to join two slats that are perpendicular, it will be done by making diagonal cuts at the ends so that when they come together, they form a 90° angle.
! [Spanish Version Here]
5️⃣ A continuación recortaremos listones de 0.5 cm de ancho y los usaremos para hacer un entablado de bordes o lo que se conoce como cintillos. El primer cintillo recorrerá toda la estructura del barco como si fuese parte del entablado. El resto de cintillos será colocado como se muestra en las imágenes. Cuando sea necesario unir dos cintillos que se encuentran perpendicularmente, se hará realizando cortes diagonales en los extremos para que al juntarse formen un ángulo de 90°.
 |  |
 |  |  |
 |  |
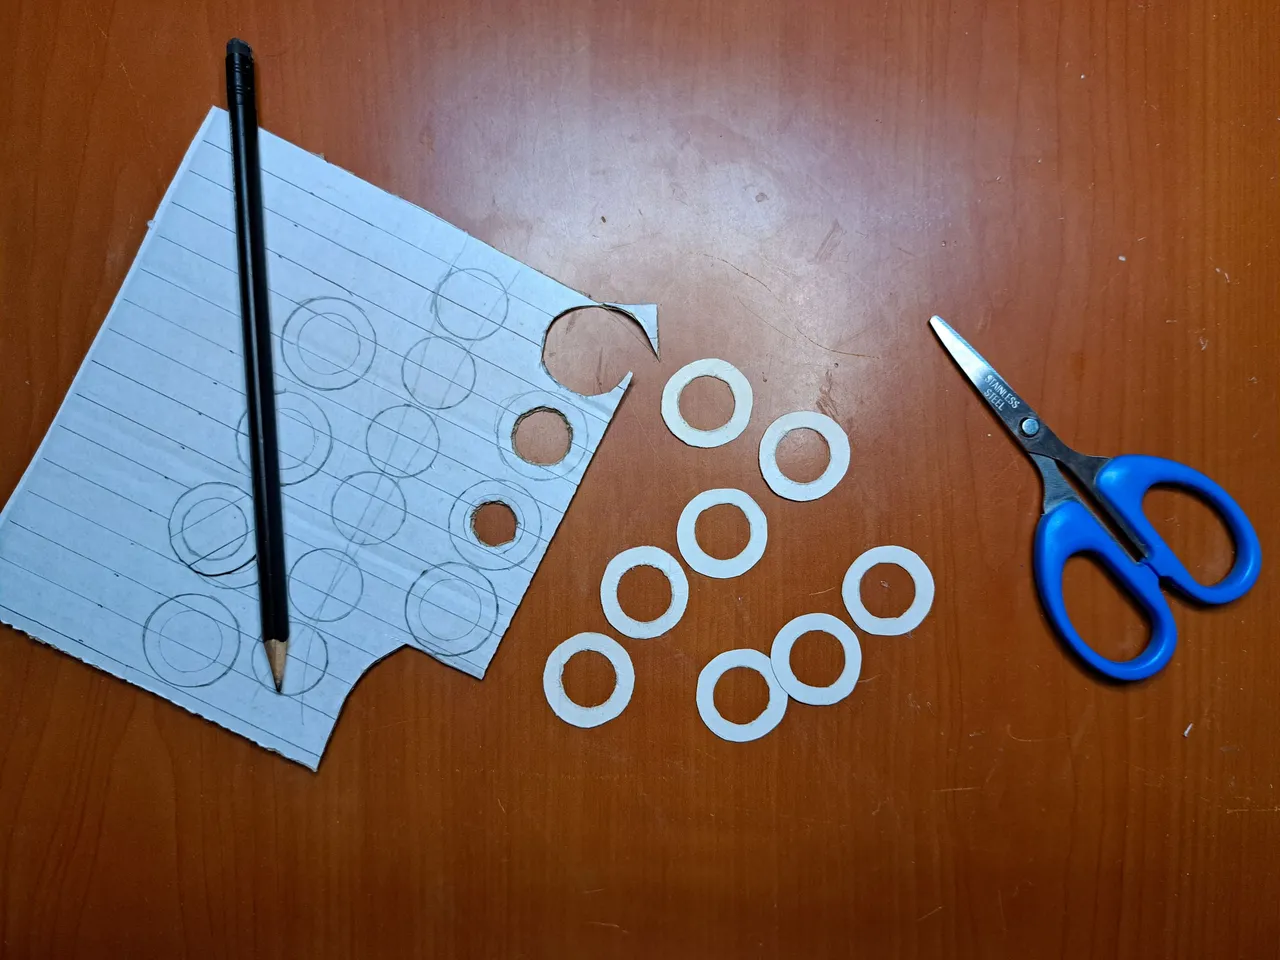
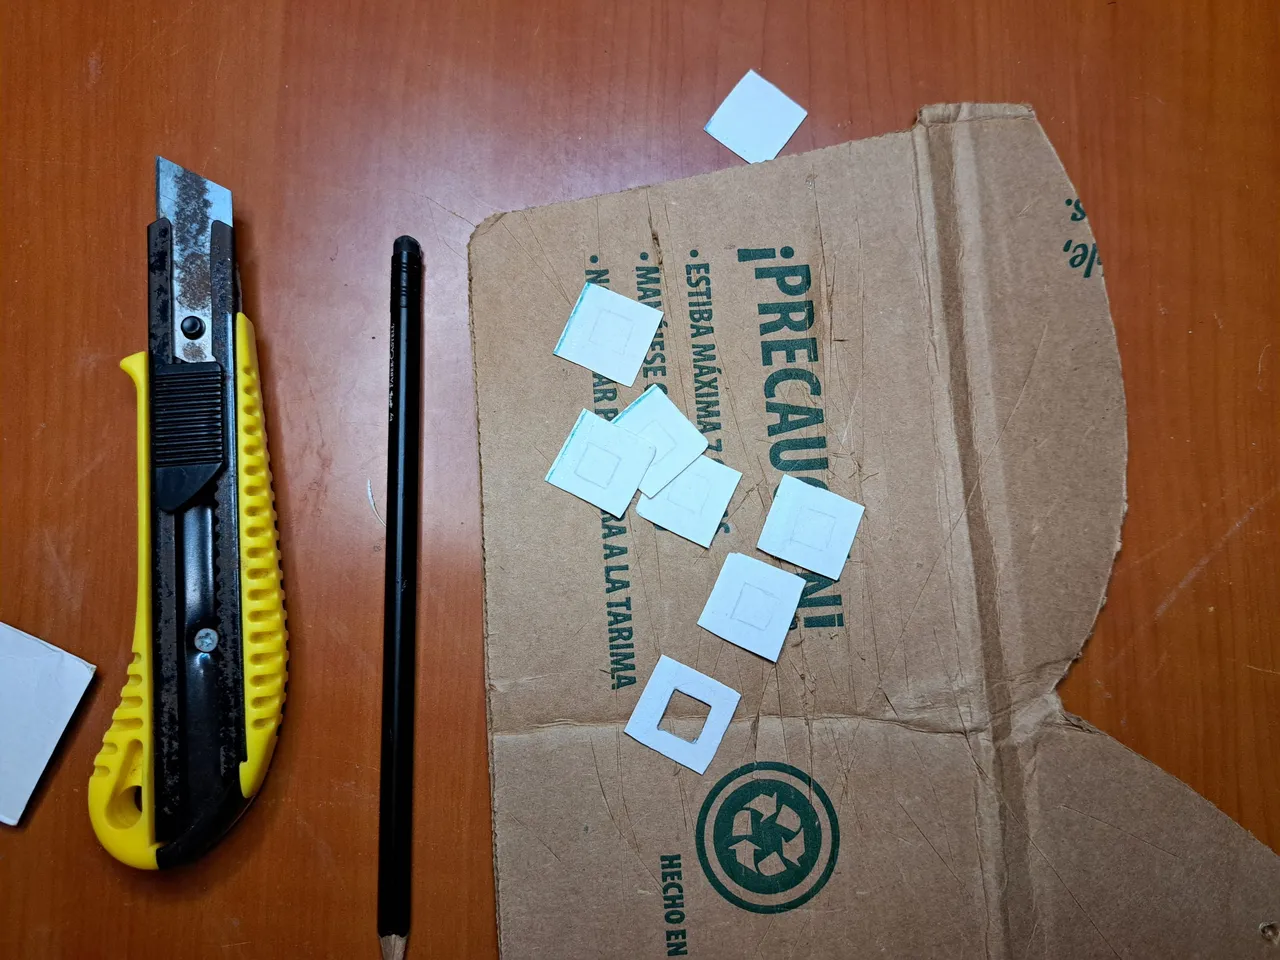
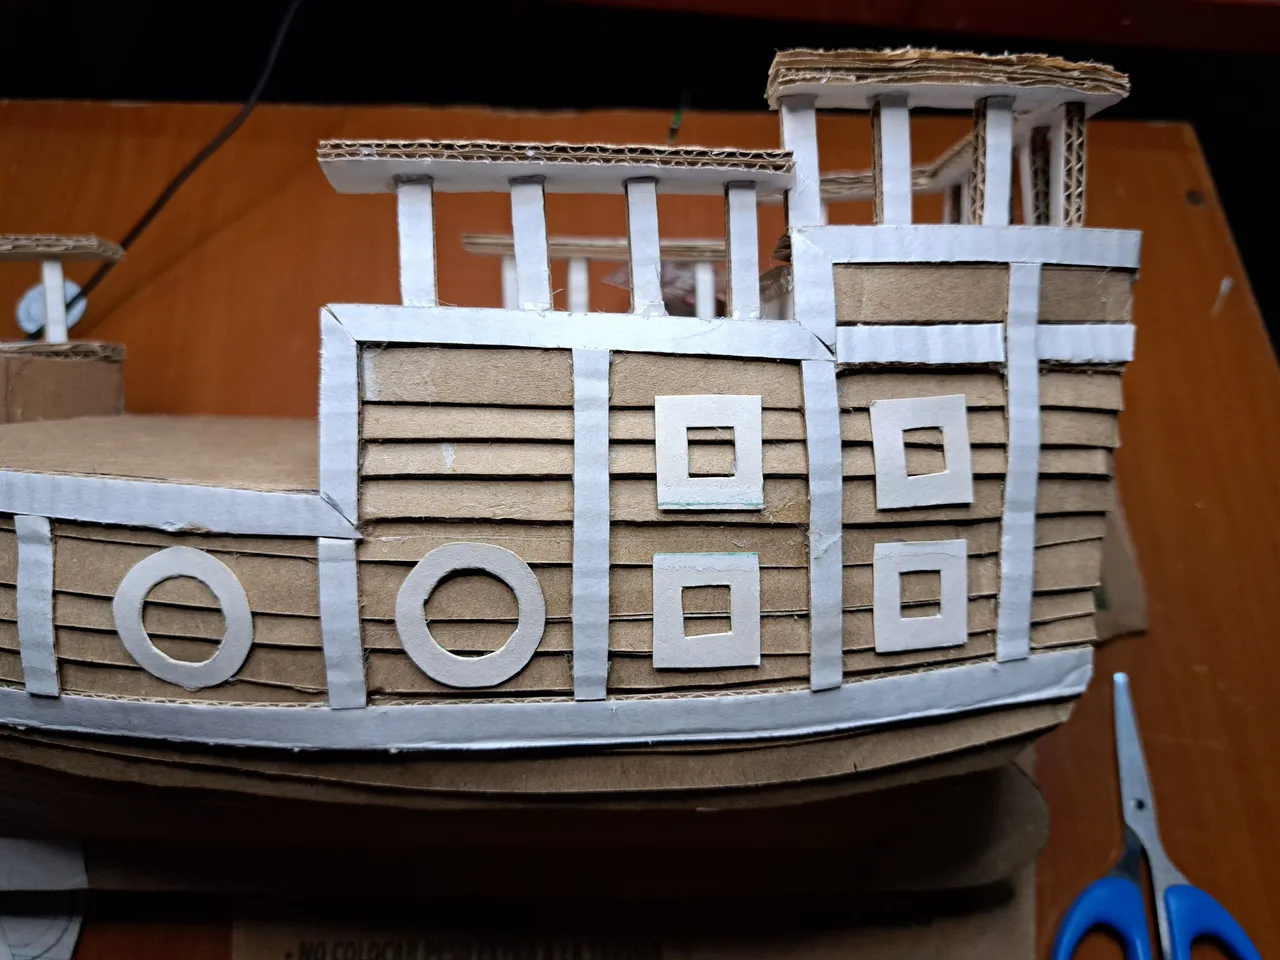
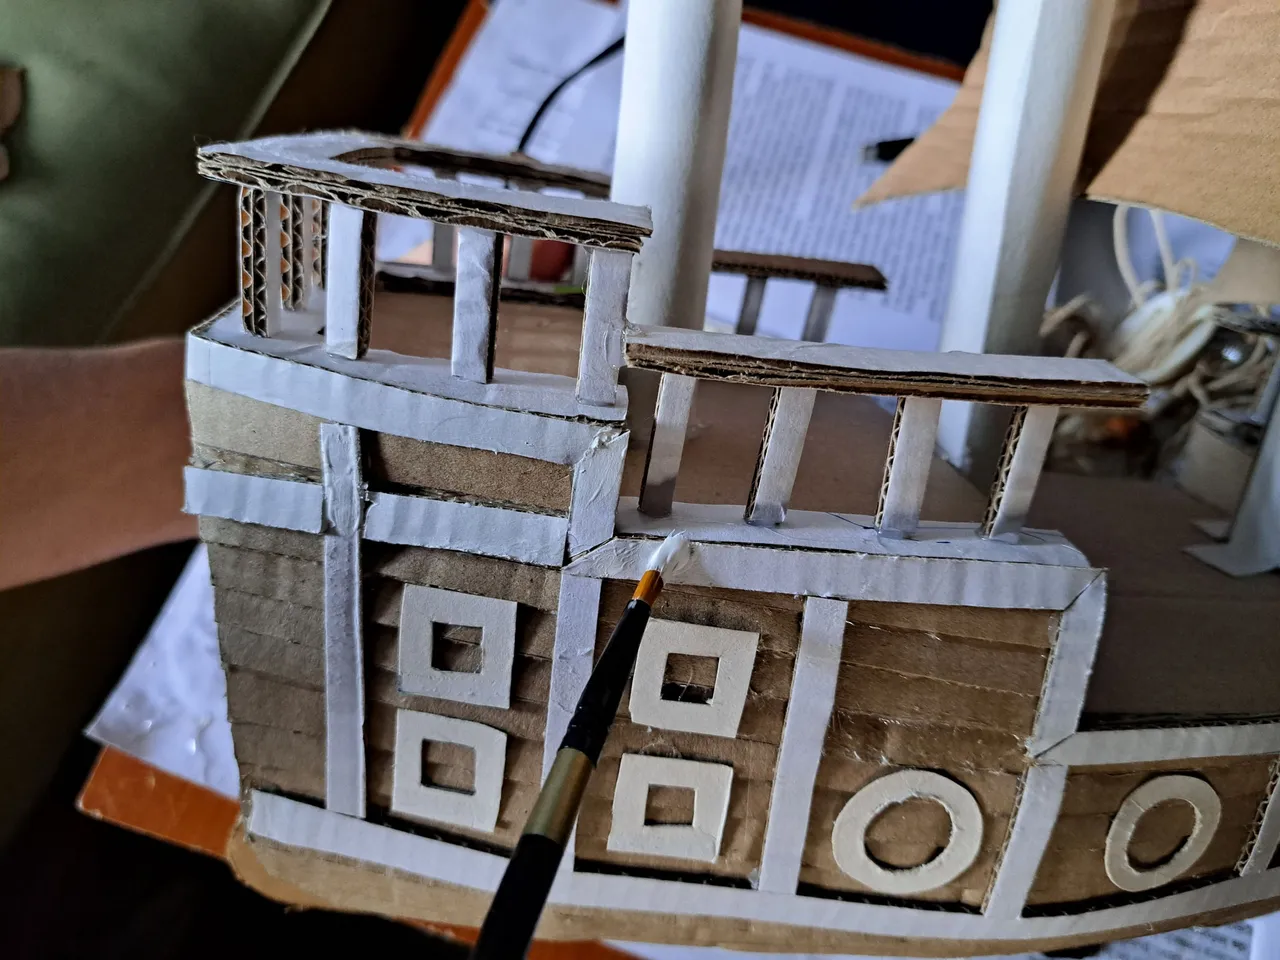
6️⃣ When the straps are in place, we will move on to the hatches. The hatches will be of two types. There will be round hatches for the cannons and square hatches for the cabin windows. In the case of the hatches for the cannons, you can use a coin to make the circular outline perfect.
! [Spanish Version Here]
6️⃣ Cuando los cintillos estén colocados, pasaremos a las escotillas. Las escotillas serán de dos tipos. Habrá escotillas redondas para los cañones y escotillas cuadradas para las ventanas de los camarotes. En el caso de las escotillas de los cañones pueden auxiliarse de una moneda para que les quede perfecto el trazo circular.
 |  |
 |  |
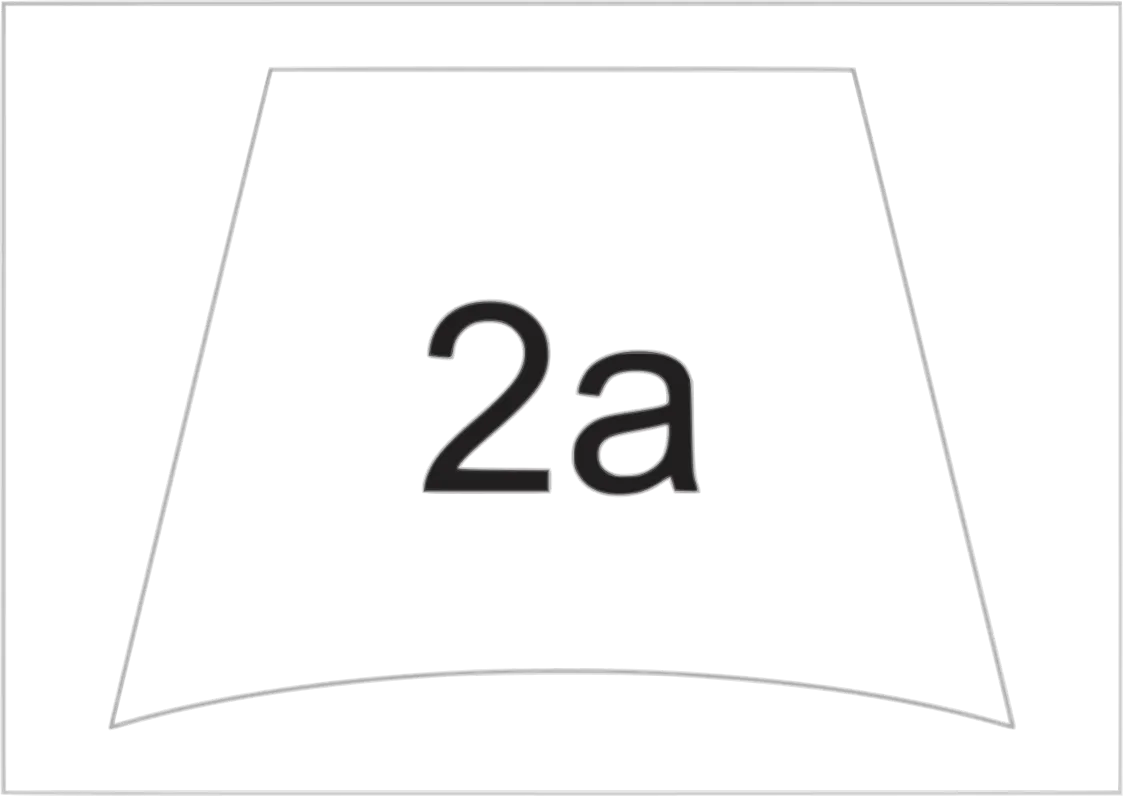
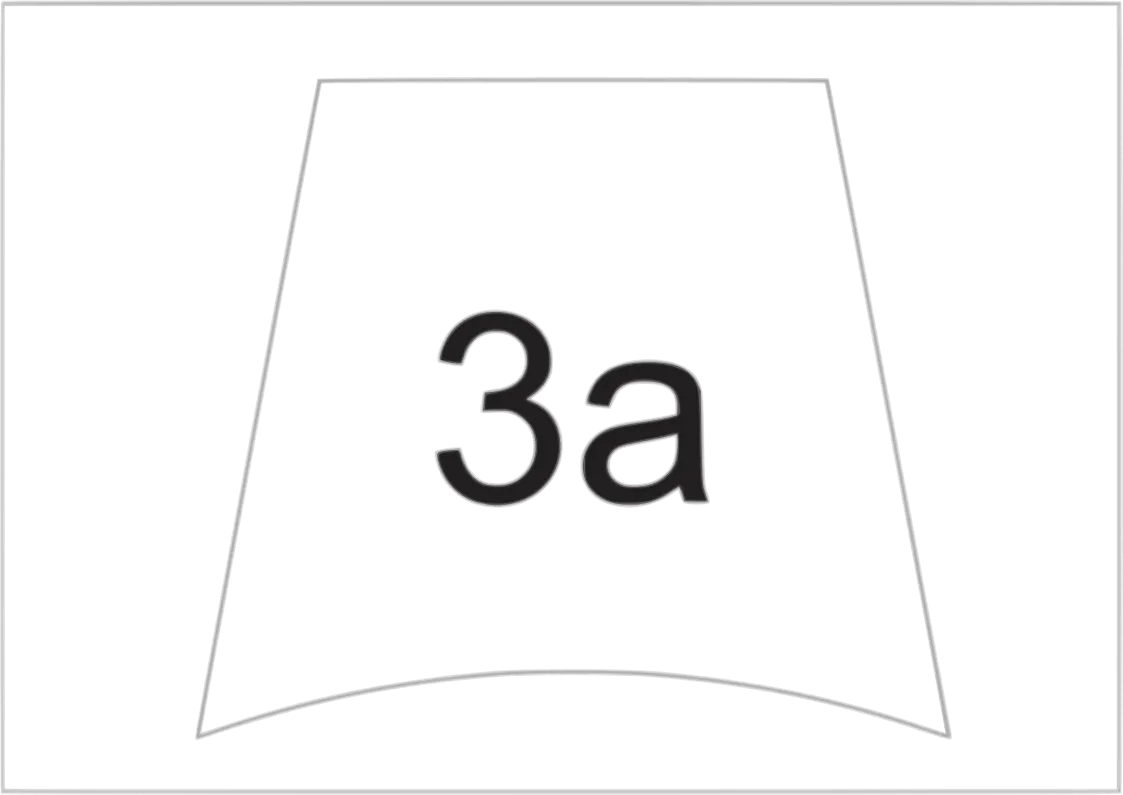
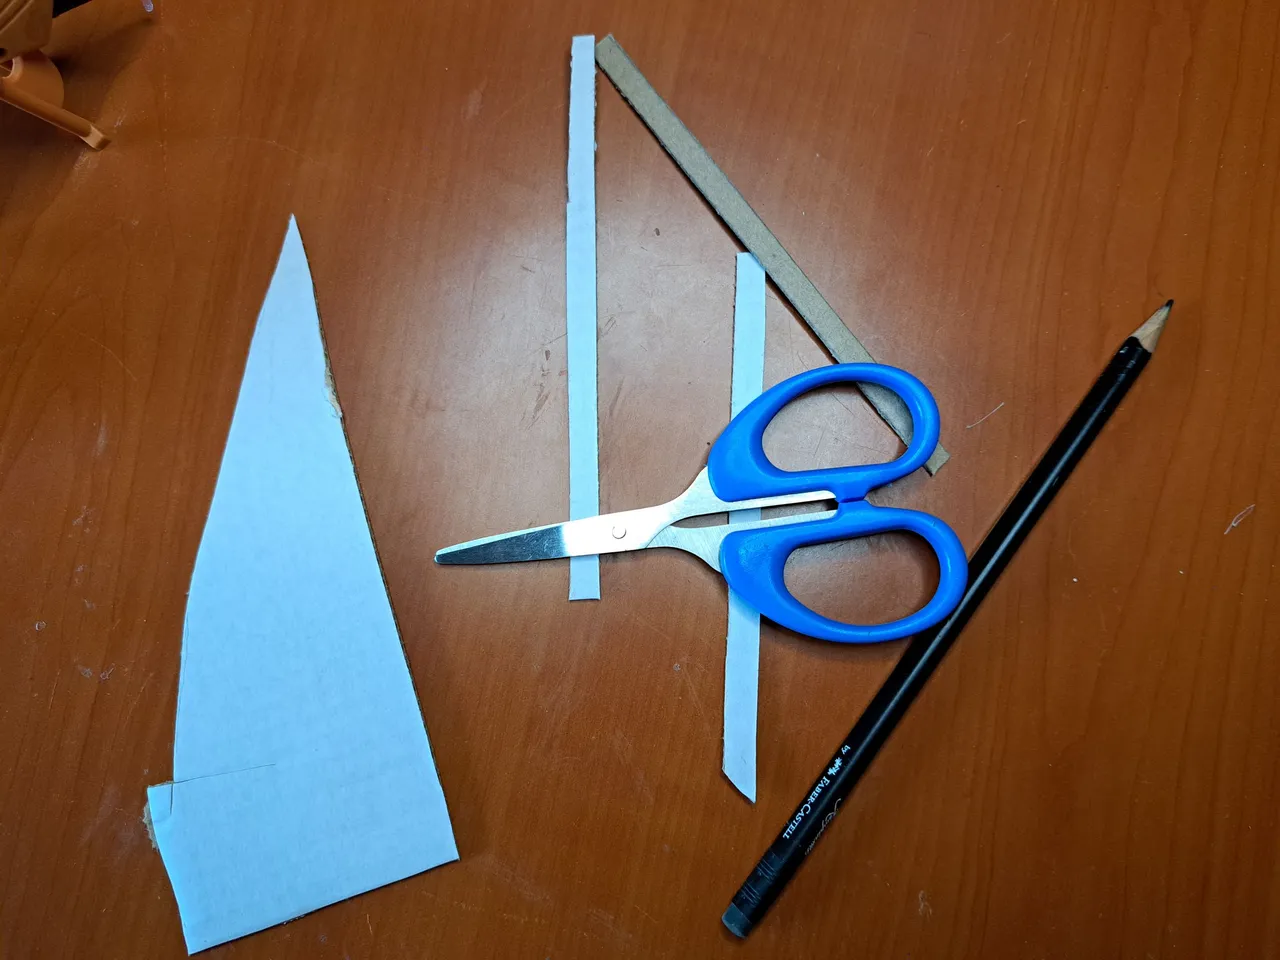
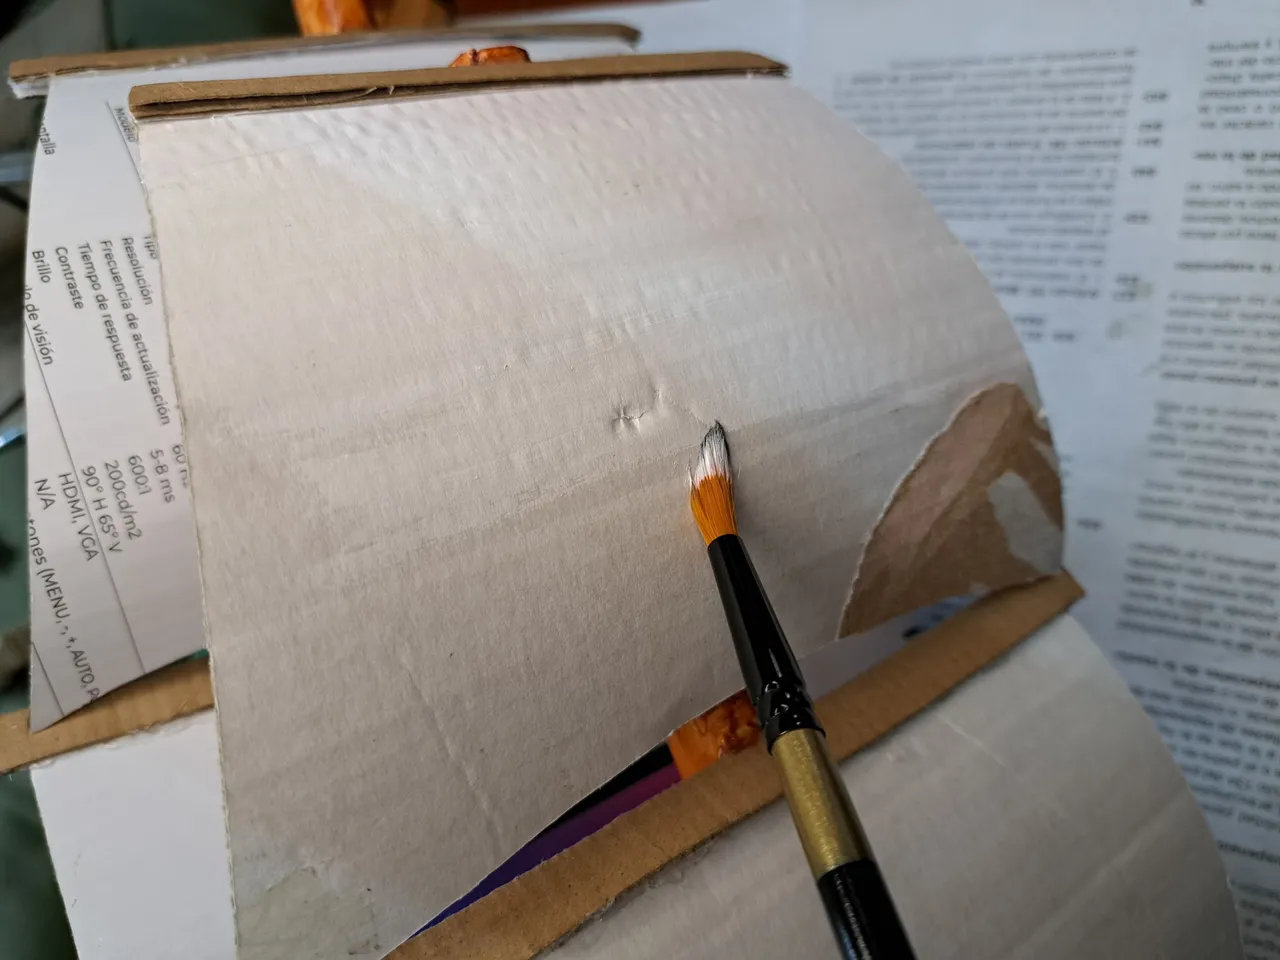
7️⃣ Next we will move on to the candles, which once marked and cut out must be flattened. To flatten the candles we can use the end of a cutter or some other hard object, but that does not damage the cardboard. Once the candles are flattened, bend them and glue a 3 cm wide strip of cardboard to the top of each one. These cardboard strips will help us to glue the sails to the masts.
! [Spanish Version Here]
7️⃣ Seguidamente pasaremos a las velas, las cuales una vez marcadas y recortadas debeos aplanarlas. Para aplanar las velas podemos utilizar el cabo de un cutter o algún otro objeto duro, pero que no dañe el cartón. Una vez alisadas las velas las curvamos y en el extremo superior de cada una pegamos una tira de cartón de 3 cm de ancho. Estas tiras de cartón nos ayudarán a pegar las velas a los mástiles.
 |  |  |
 |  |  |  |
 |  |  |
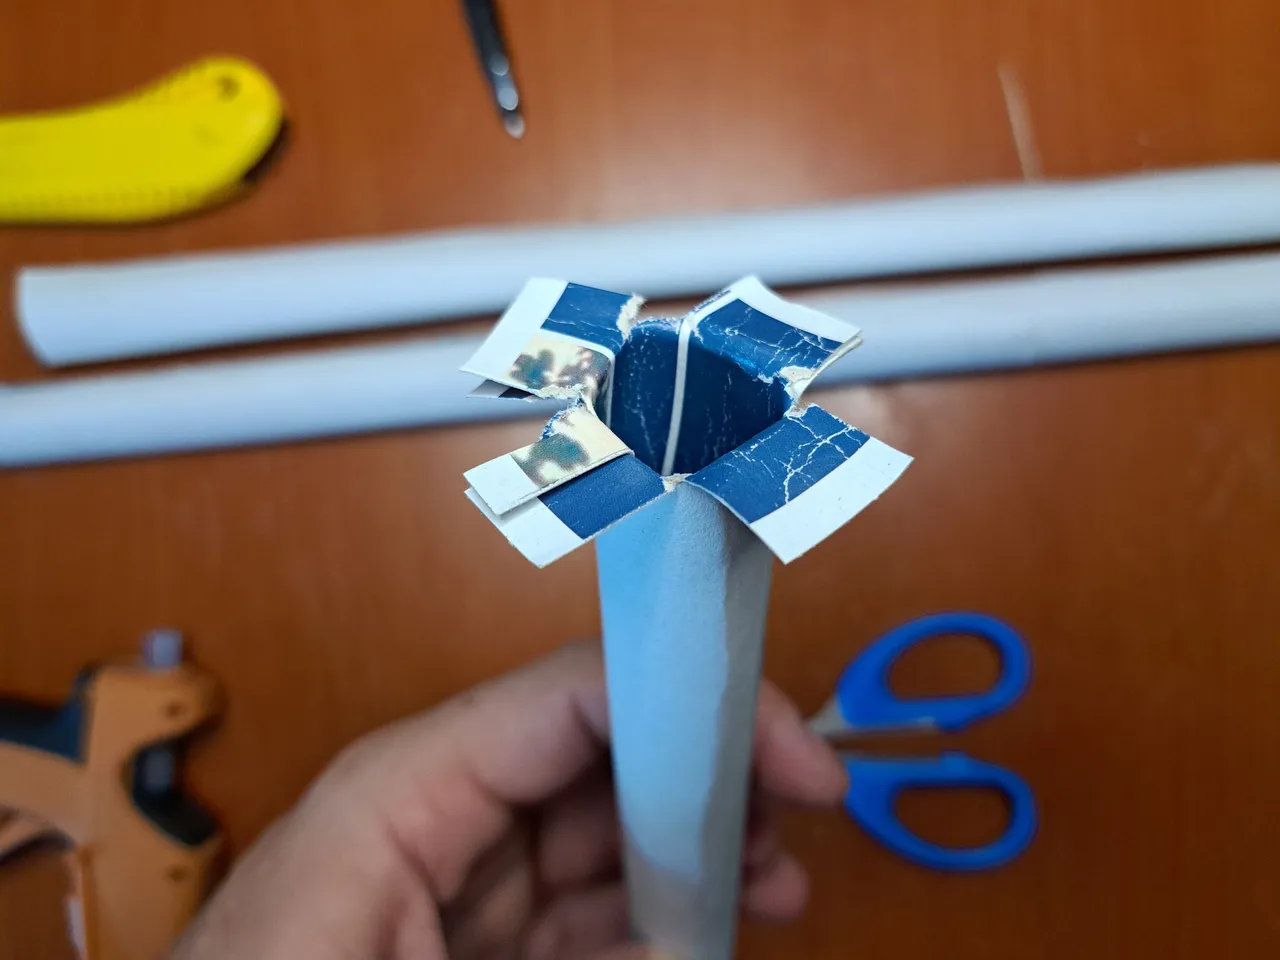
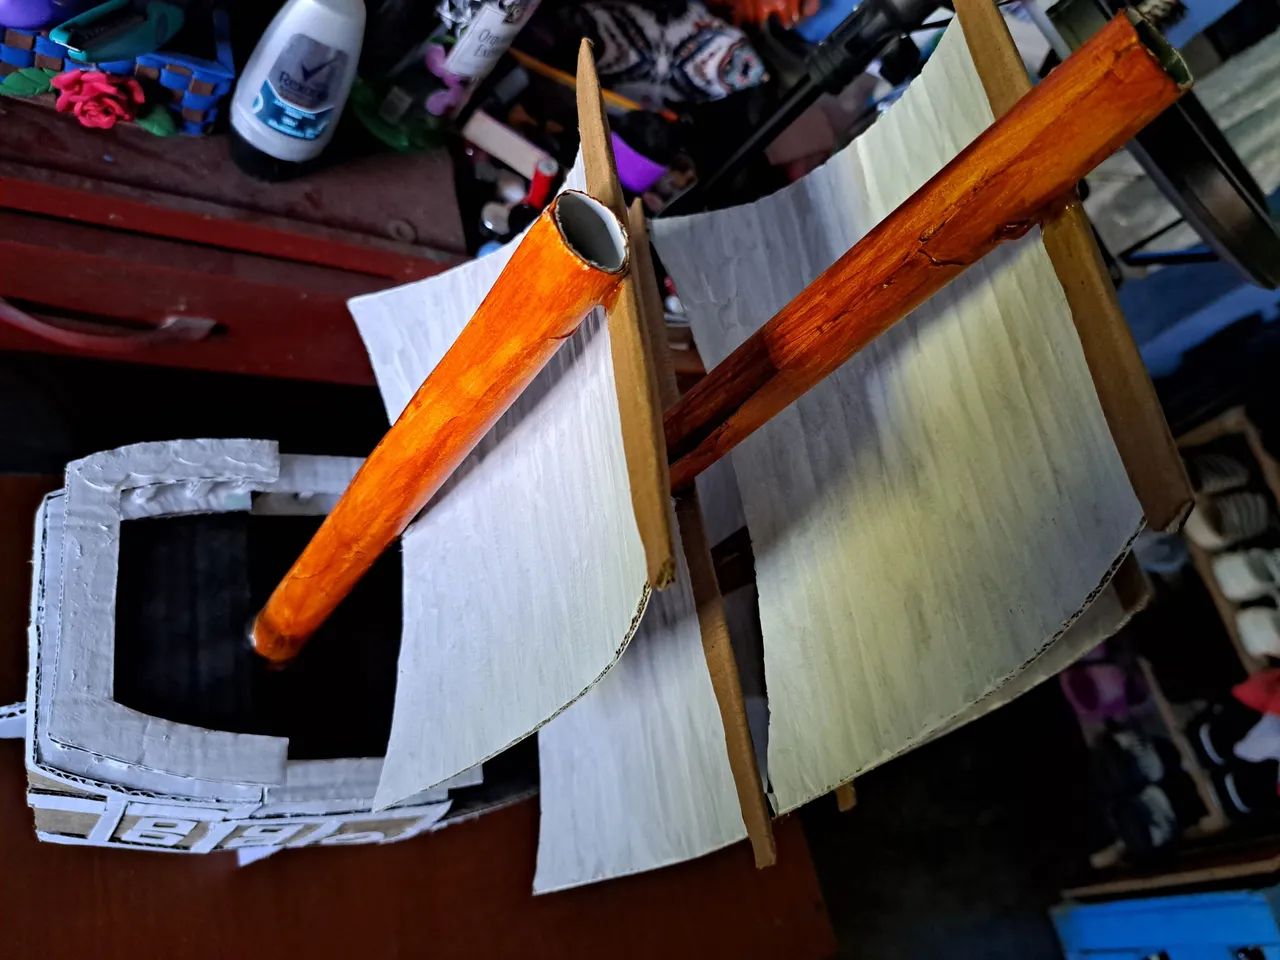
8️⃣ And speaking of masts, it is time to make the three masts of our boat. To make the masts we must roll cardboard or cardboard to form a thin cylinder as long as possible, since the masts of this boat measure the first 30 cm, the middle one 38 cm and the third and last one measures 25 cm. Once the cylinders are made, we glue them to the ship's gunwale in the location shown in the pictures. If it is difficult to glue, the masts can be divided into four parts, which will give them more contact surface to glue them.
Additionally, when the masts are in place, we proceed to glue the sails on each of them, being the sails "1a" and "1b" those that would go on the first mast, "2a" and "2b" on the second mast and "3a" that would go on the third mast.
! [Spanish Version Here]
8️⃣ Y hablando de mástiles llegó la hora de hacer los tres de nuestro barco. Para hacer los mástiles debemos enrollar cartón o cartulina para formar un cilindro fino lo as largo posible, ya que los mástiles de este barco miden el primero 30 cm, el del medio 38 cm y el tercero y último mide 25 cm. Una vez hecho los cilindros los pegamos en la borda del barco en la ubicación que se muestra en las imágenes. En caso de presentar dificulta a la hora de pegar, los mástiles pueden dividir la punta de estos en cuatro partes, lo cual les dará mayor superficie de contacto para pegarlos.Adicionalmente, cuando los mástiles estén en su lugar, procedemos a pegar las velas en cada uno de ellos, siendo las velas “1a” y “1b” las que irían en el primer mástil, “2a” y “2b” en el segundo y quedaría “3a” que iría en el tercero.
 |  |
 |  |
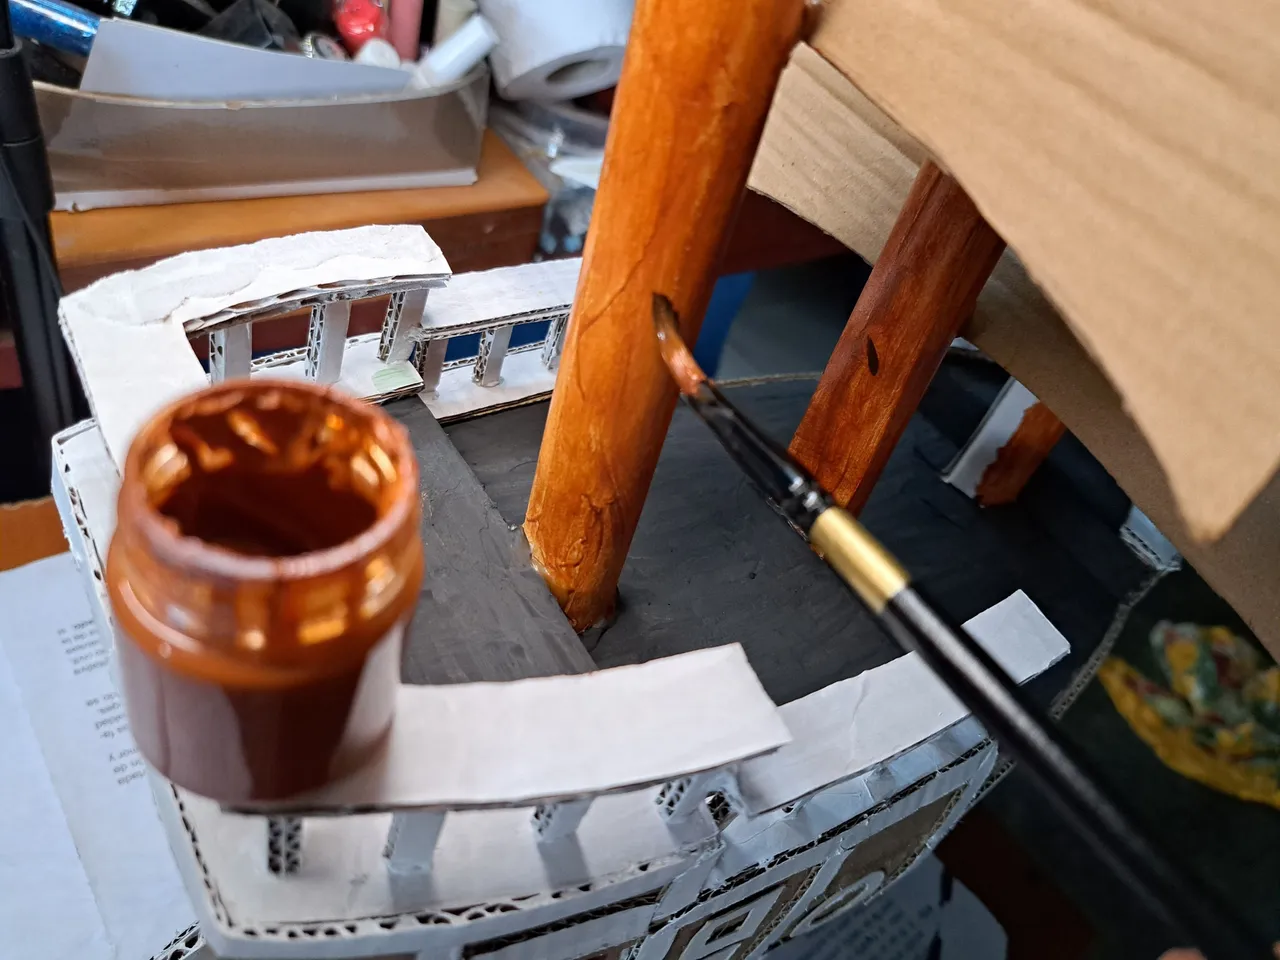
9️⃣ At this point, we would definitely have something that really looks like a boat, but I think a little color would be nice. We'll start by painting the side strakes, railings, keel and sails white. Then we will paint the top of the gunwale matte black and finish by painting the three masts brown.
When we paint the masts white, we will also paint the hatches white, and when we paint the railings, we will also paint the intermediate buttons.
! [Spanish Version Here]
9️⃣ Llegados a este punto, definitivamente tendríamos algo que realmente parece un barco, pero creo que un poco de color no le vendría mal. Comenzaremos pintando de blanco los cintillos laterales, los barandales, la quilla y las velas. Después, pintaremos la parte superior de la borda de negro mate y finalizaremos pintando los tres mástiles de color café.Al pintar de blanco los cintillos, también lo haremos con las escotillas, al igual que al pintar las barandas, también pintaremos los botones intermedios.
 |  |  |
 |  |  |
 |  |  |
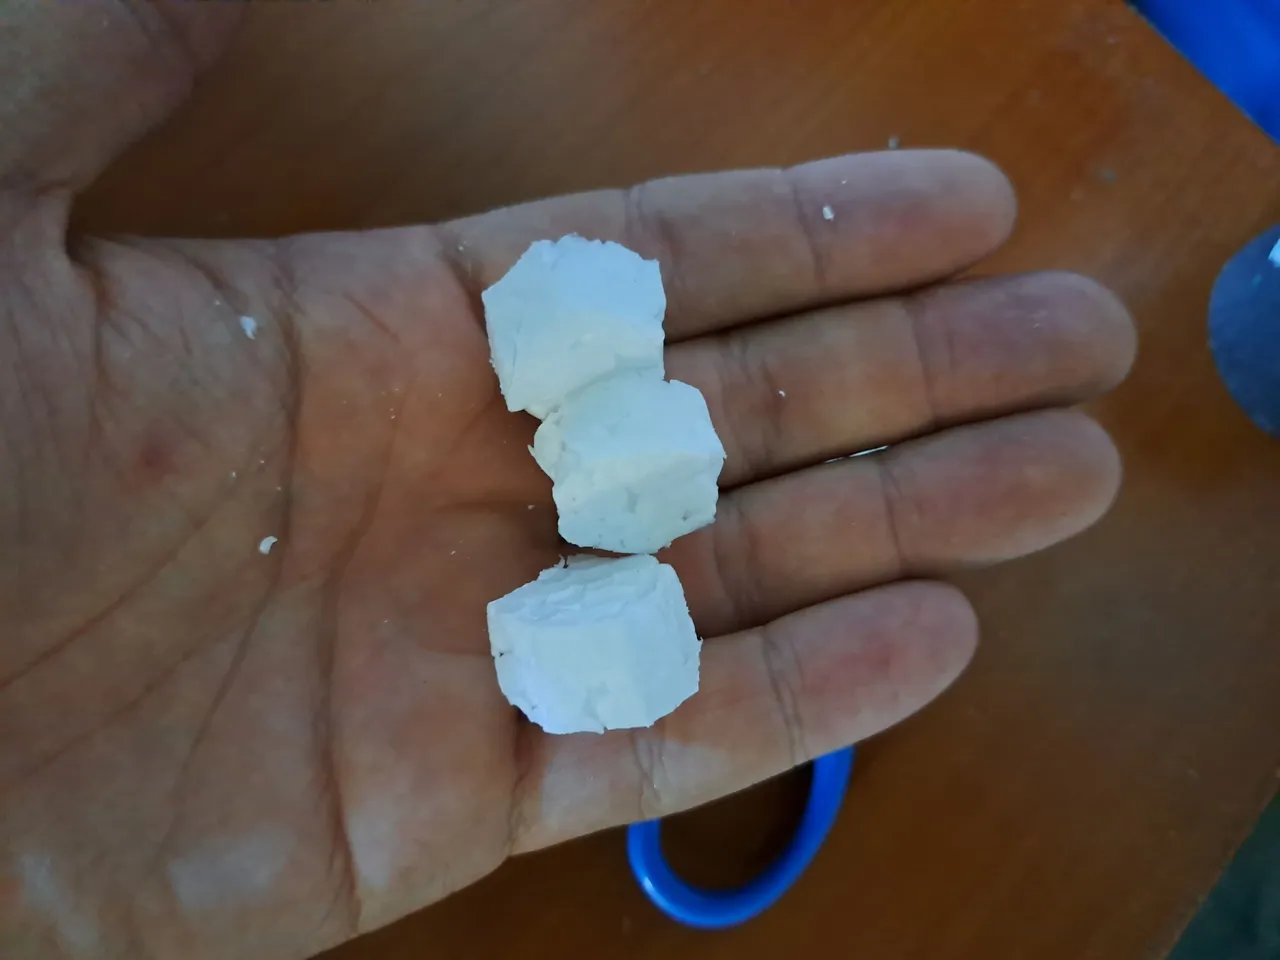
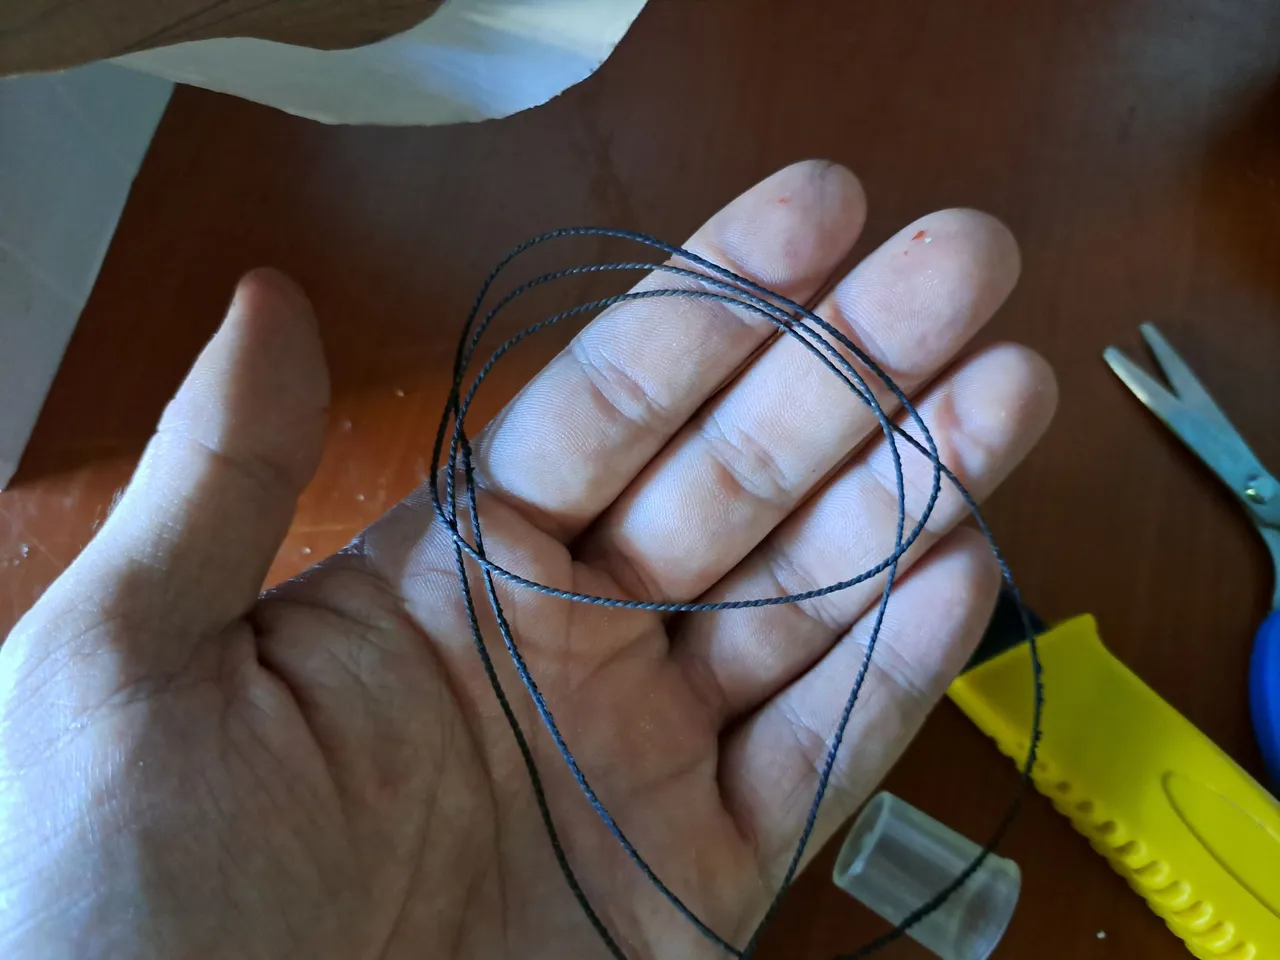
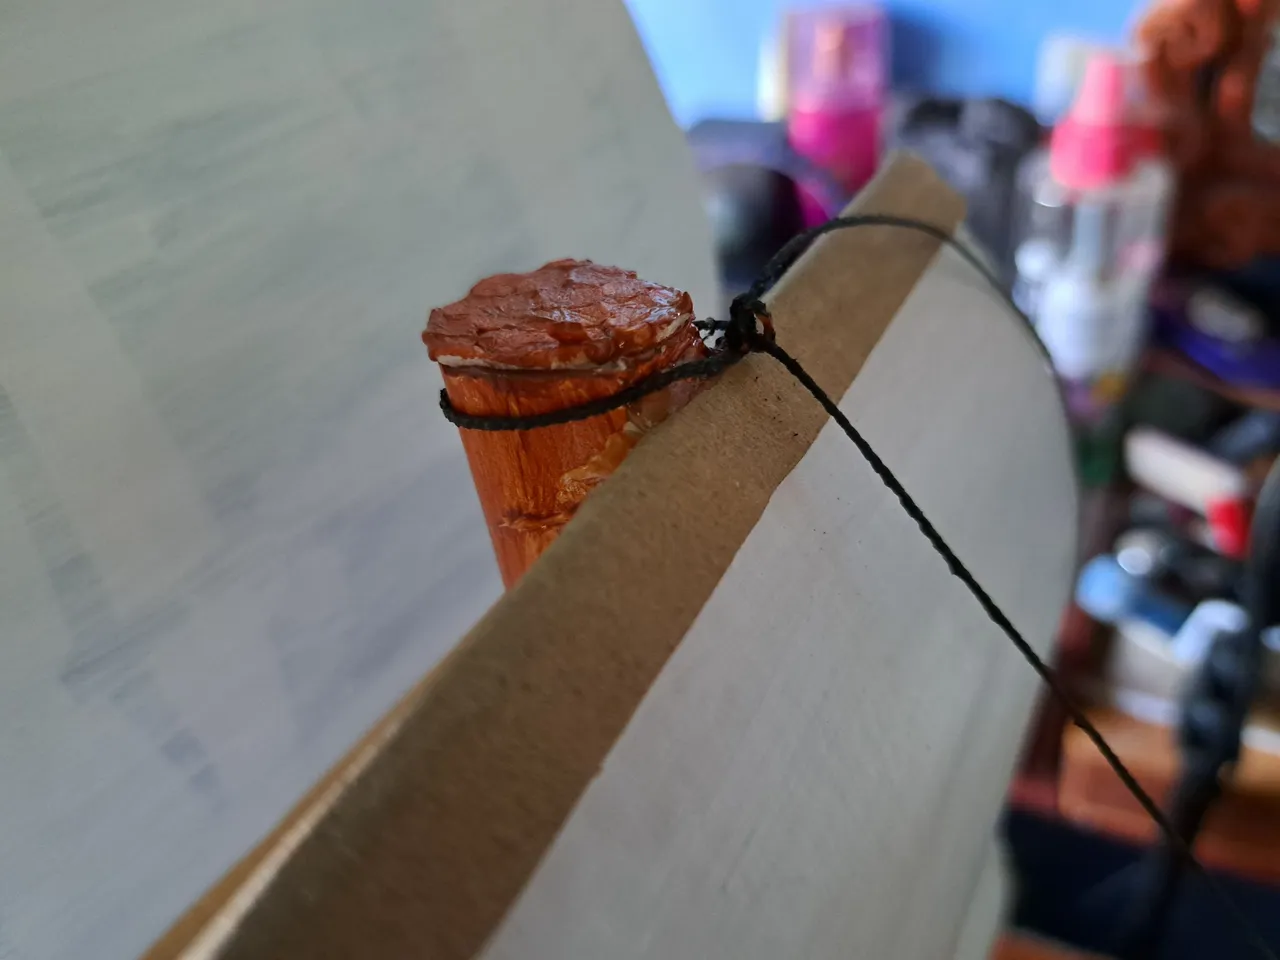
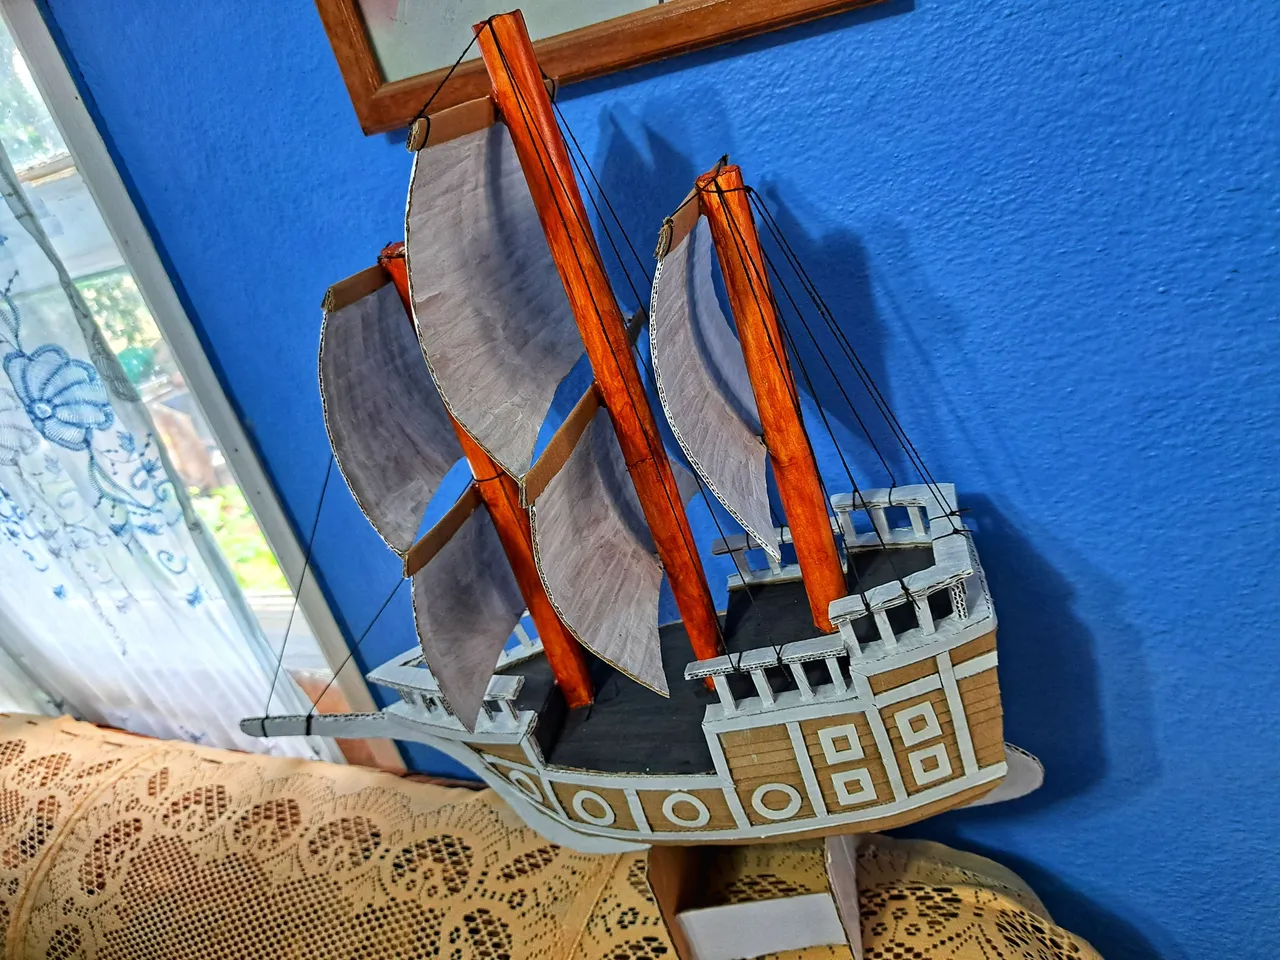
🔟 Finally, we will cut out three polystyrene circles and place them at the top of each mast, since they are hollow. Optionally, we can add some ropes running from the masts to the railings. Although this is completely optional, it is true that it gives an extra touch of realism to the boat.
! [Spanish Version Here]
🔟 Finalmente, recortaremos tres círculos de poliespán y los colocaremos en la parte superior de cada mástil, ya que son huecos. Opcionalmente, podemos agregar algunas cuerdas que vayan desde los mástiles hasta las barandas. Aunque esto es completamente opcional, es cierto que le da un toque extra de realismo al barco.
 |
 |
 |
 |
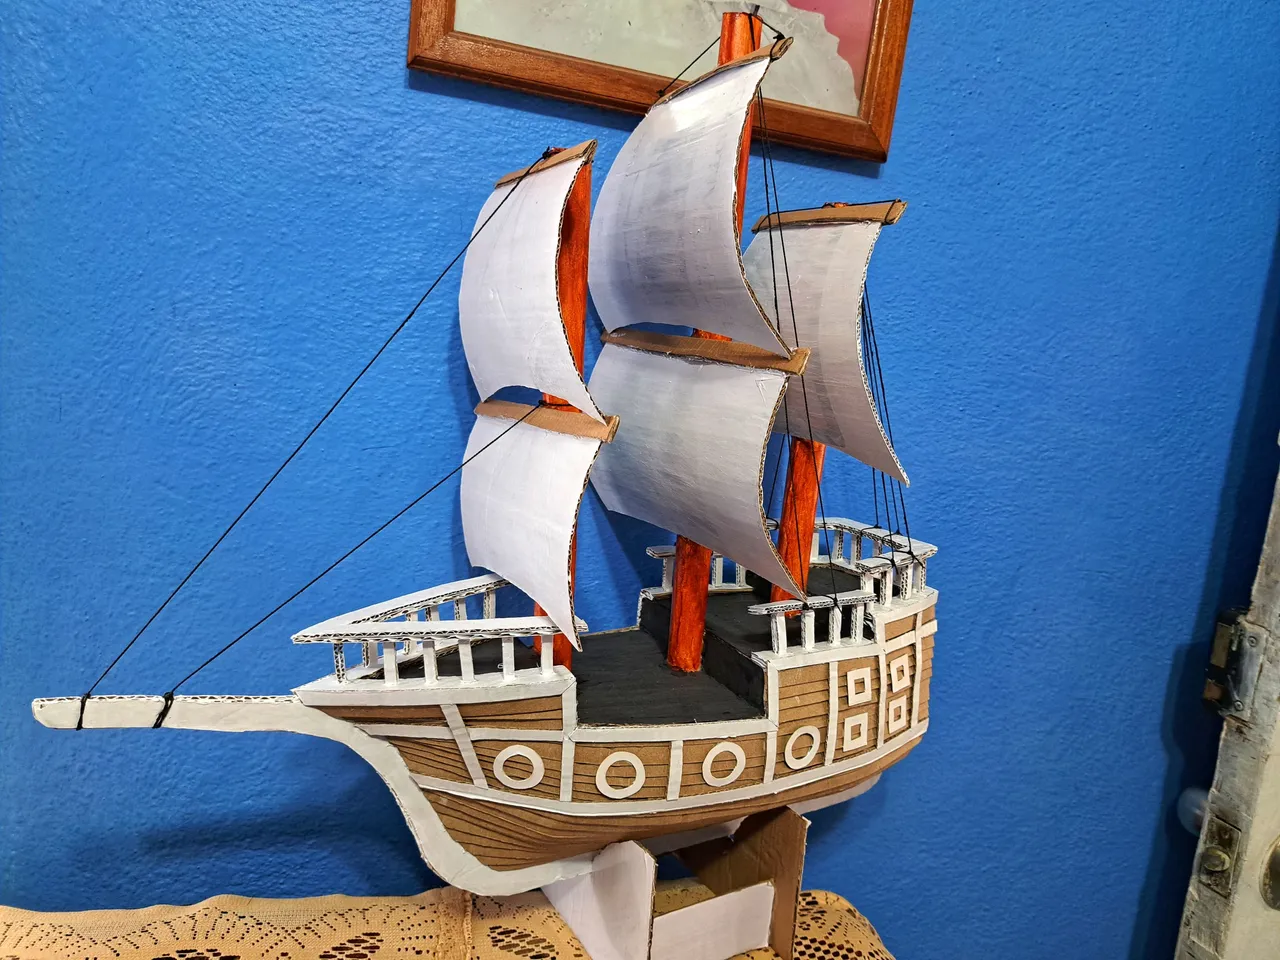
And so we come to the end my dear grumetes, I hope that the tutorial has been to your liking and that you are encouraged to build your own boat so you can become real sailors. As always it has been a pleasure for me to bring you tutorials about my crafts and without further ado I say goodbye until next time.
! [Spanish Version Here]
Y de esta manera llegamos al final mis queridos grumetes, espero que el tutorial haya sido de su agrado y que se animen a construir su propio barco para que puedan llegar a ser marineros de verdad. Como siempre ha sido un placer para mí traerles tutoriales sobre mis manualidades y sin más que decir me despido hasta la próxima.
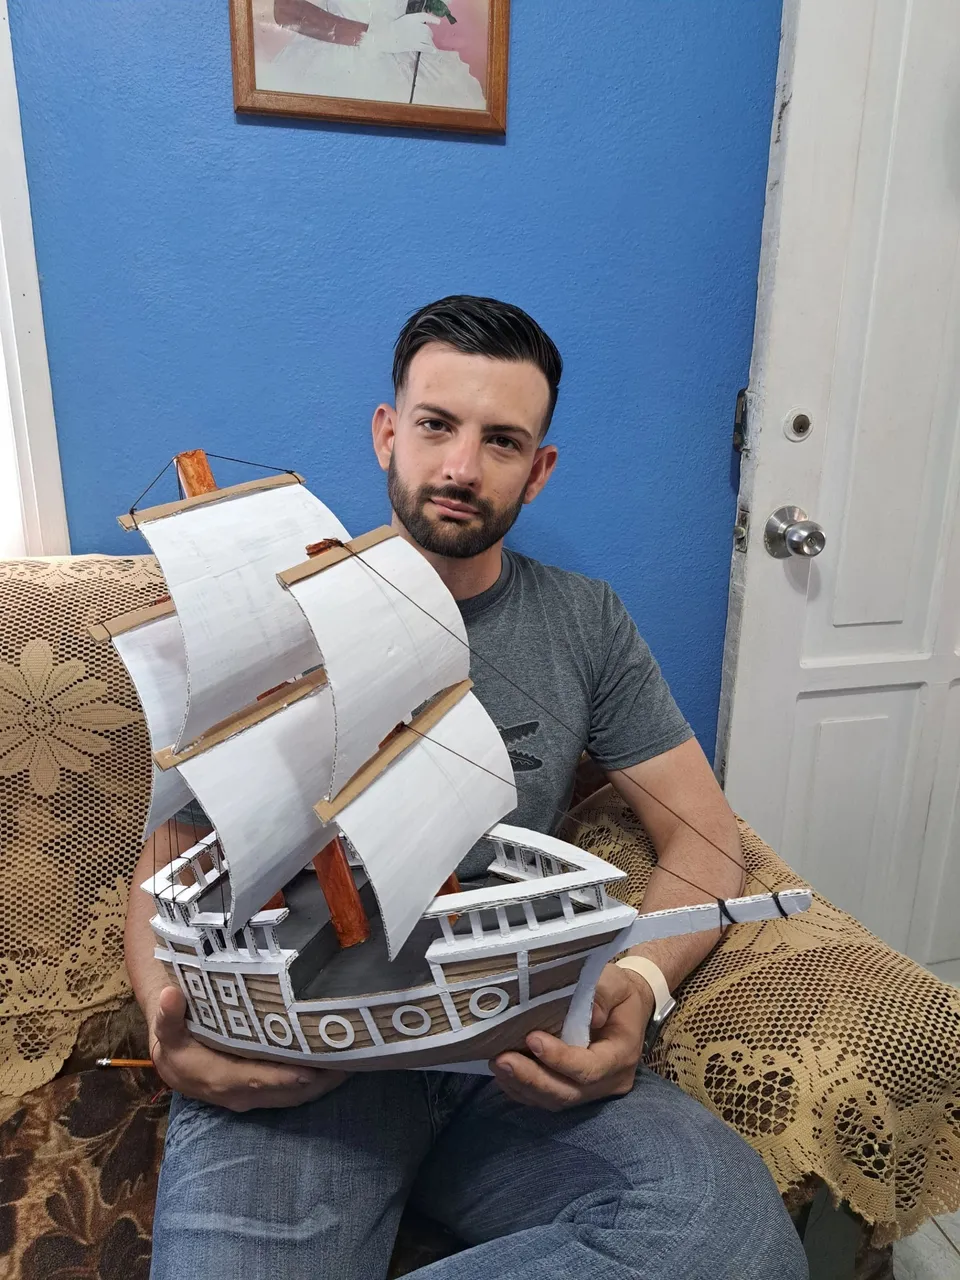
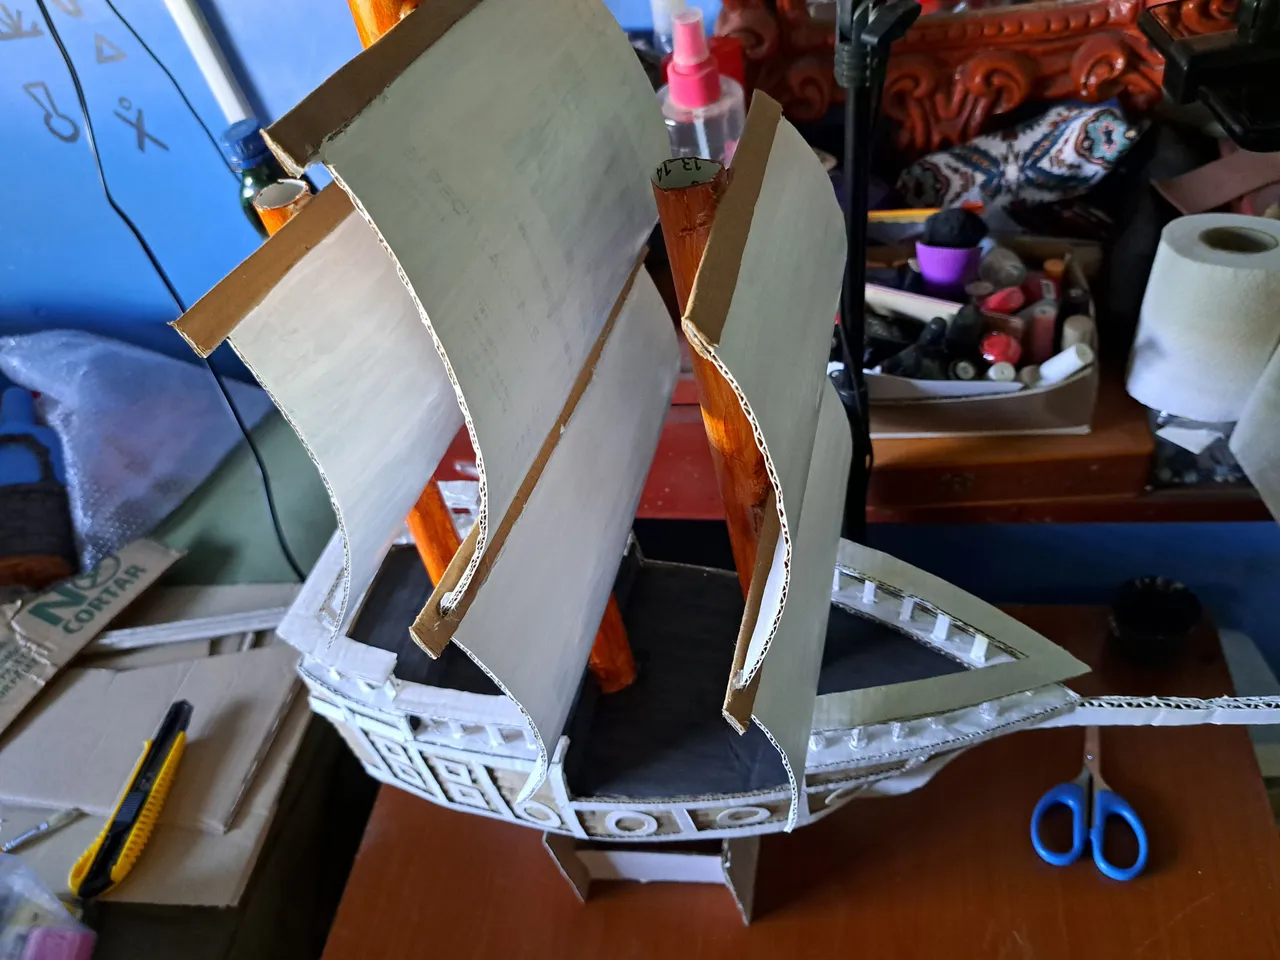
⚜️ Final Result // Resultado Final ⚜️
 |
 |
 |
 |

Thank you very much for reading my post. If you liked it, please leave a comment and consider following me so you don't miss my next posts. I'd love to know your opinion and your thoughts about the topic I discussed in this post, see you in the next one!
Muchas gracias por leer mi post. Si te gustó, por favor deja un comentario y considera seguirme para no perderte mis próximas publicaciones. Me encantaría saber tu opinión y tus ideas sobre el tema que traté en este post. ¡Nos vemos en el próximo!
Source of the Templates here
Cover page created in Canva Pro
Translated by DeepL