There are many ways to place a TV in a room. One of the attractive options is the manufacture of a drywall niche. This option will not only perfectly complement the design, but also allow you to hide all the cords leading to the TV inside the box.
Hay muchas maneras de colocar un televisor en una habitación. Una de las opciones atractivas es la fabricación de un nicho de paneles de yeso. Esta opción no solo complementará perfectamente el diseño, sino que también le permitirá ocultar todos los cables que conducen al televisor dentro de la caja.
Making a drywall box
First you need to decide on the size of the niche, and also think about where it will be located. In addition, you must first carry out an electrician. The cord must be brought out in the inside of the box for installing sockets. Since the box will be lined with laminate from the front, the width can be calculated so that the laminate does not have to be cut along. The length of the entire niche is the size of two strips of laminate, so as not to cut it across. The size of the niche is calculated exclusively for the size of the TV.Therefore, before you start assembling the box, it is important to already know which TV will be fixed inside. The thickness of the niche also depends on the thickness of the TV.
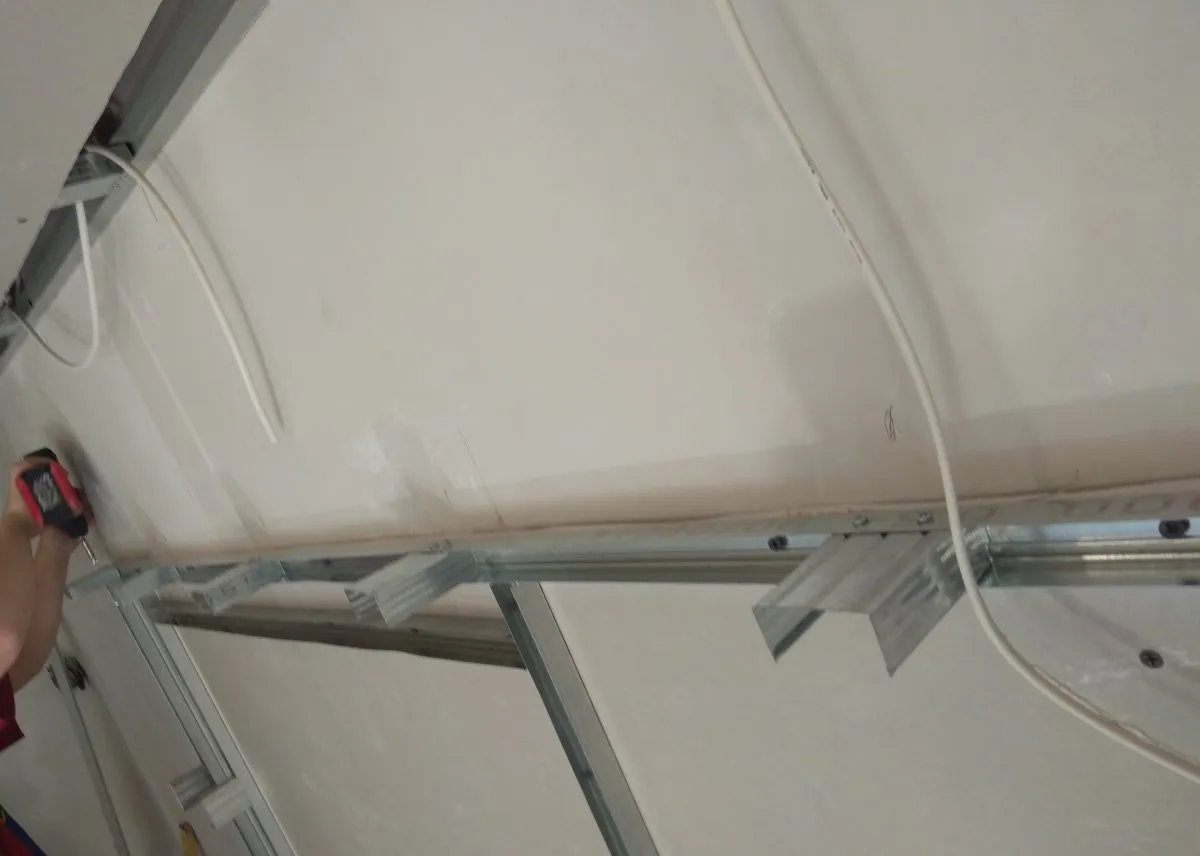
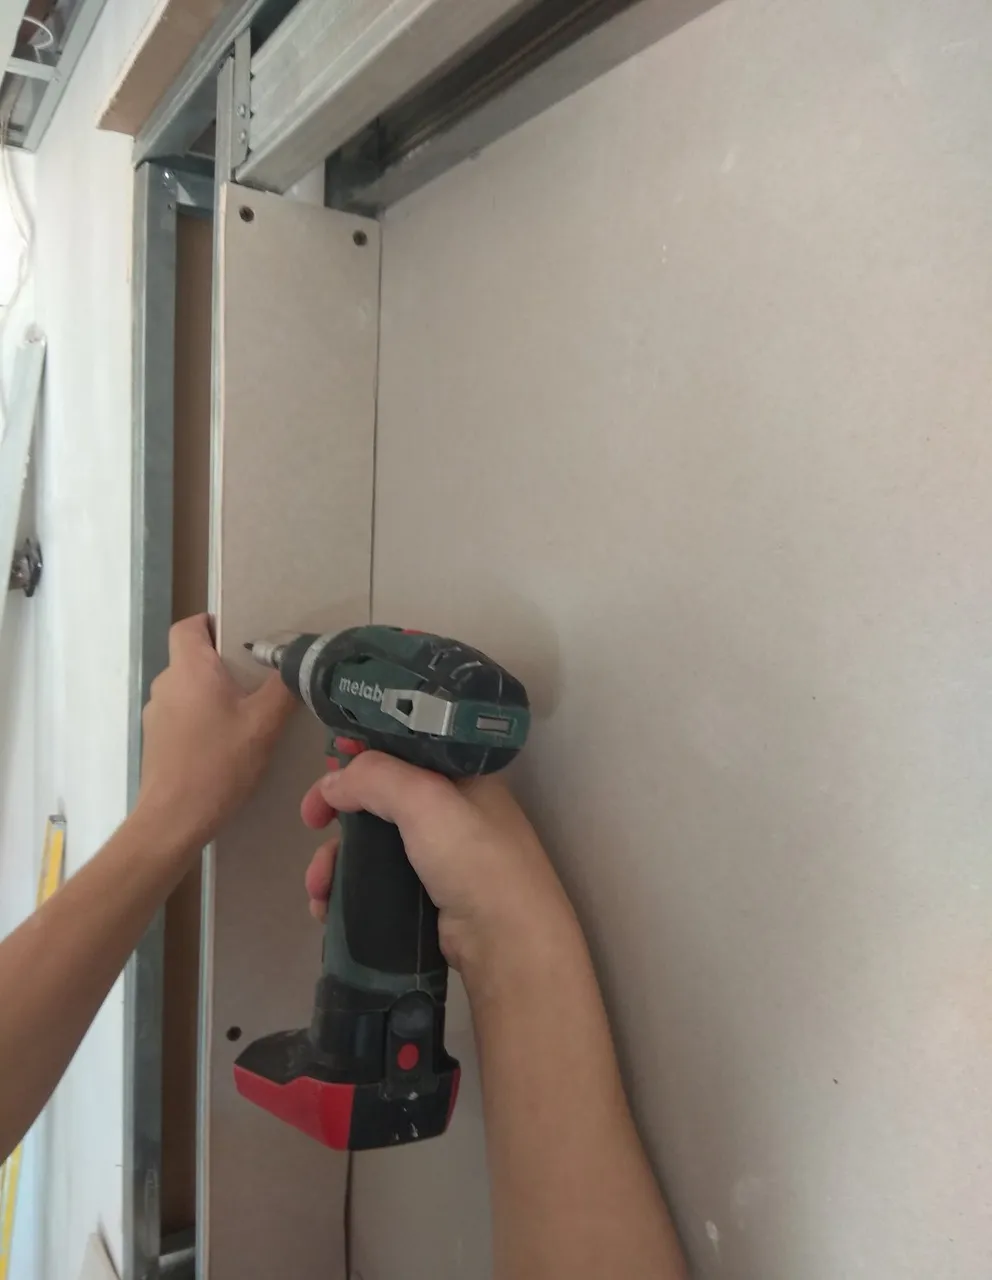
The assembly begins with the contours of the niche. To do this, you can use a metal UD profile, which is attached to the wall with self-tapping screws.
Haciendo una caja de paneles de yeso
Primero debe decidir el tamaño del nicho y también pensar dónde se ubicará. Además, primero debe llevar a cabo un electricista. El cable debe salir por el interior de la caja para instalar las tomas. Dado que la caja estará revestida con laminado desde el frente, se puede calcular el ancho para que no sea necesario cortar el laminado. La longitud de todo el nicho es del tamaño de dos tiras de laminado, para no cortarlo. El tamaño del nicho se calcula exclusivamente para el tamaño del televisor.
Por lo tanto, antes de comenzar a armar la caja, es importante saber qué televisor se fijará en el interior. El grosor del nicho también depende del grosor del televisor. El montaje comienza con los contornos del nicho. Para hacer esto, puede usar un perfil UD de metal, que se fija a la pared con tornillos autorroscantes.
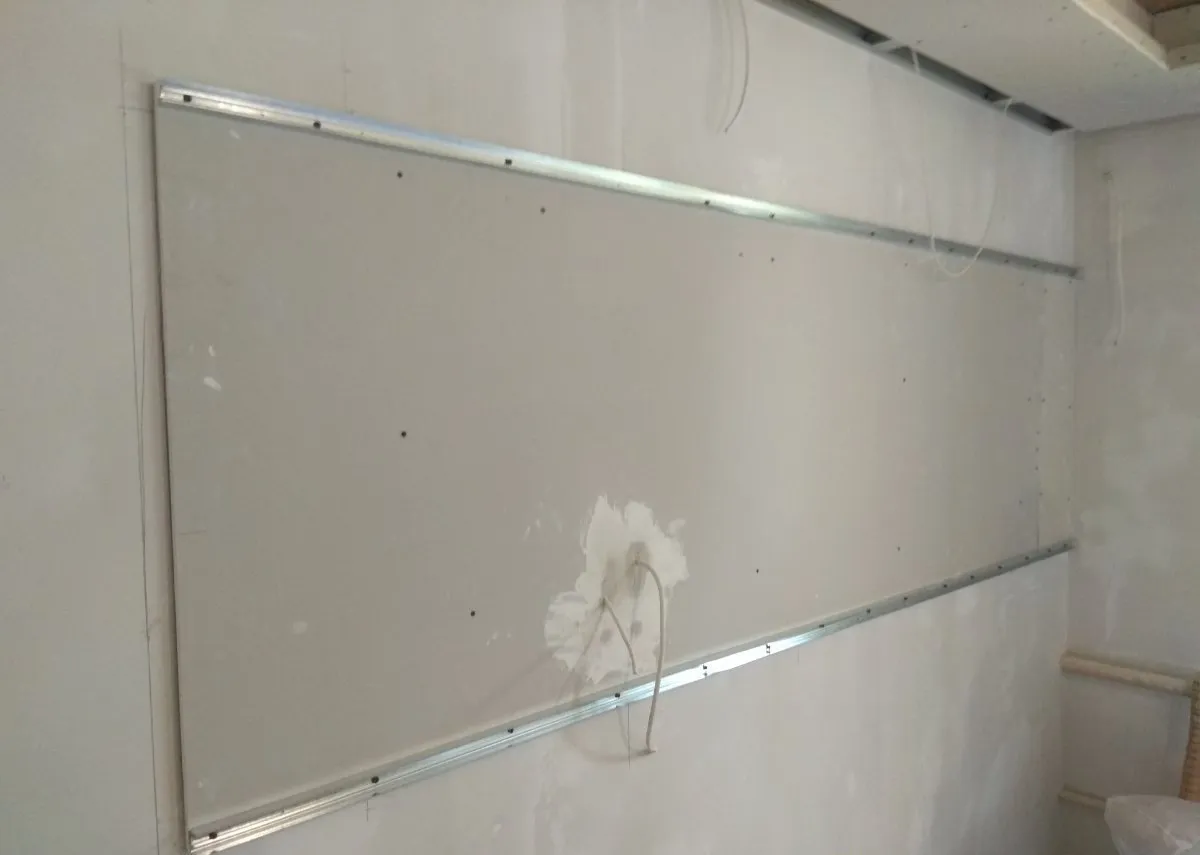
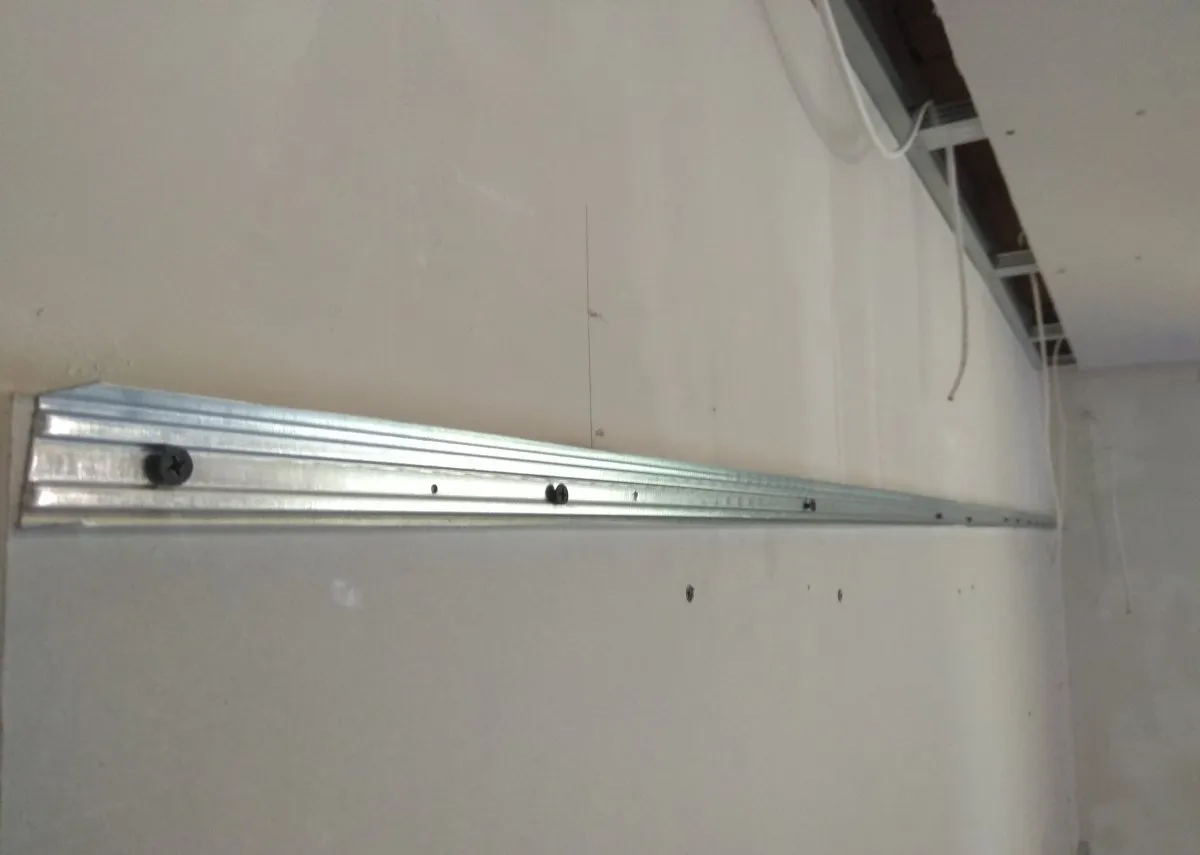
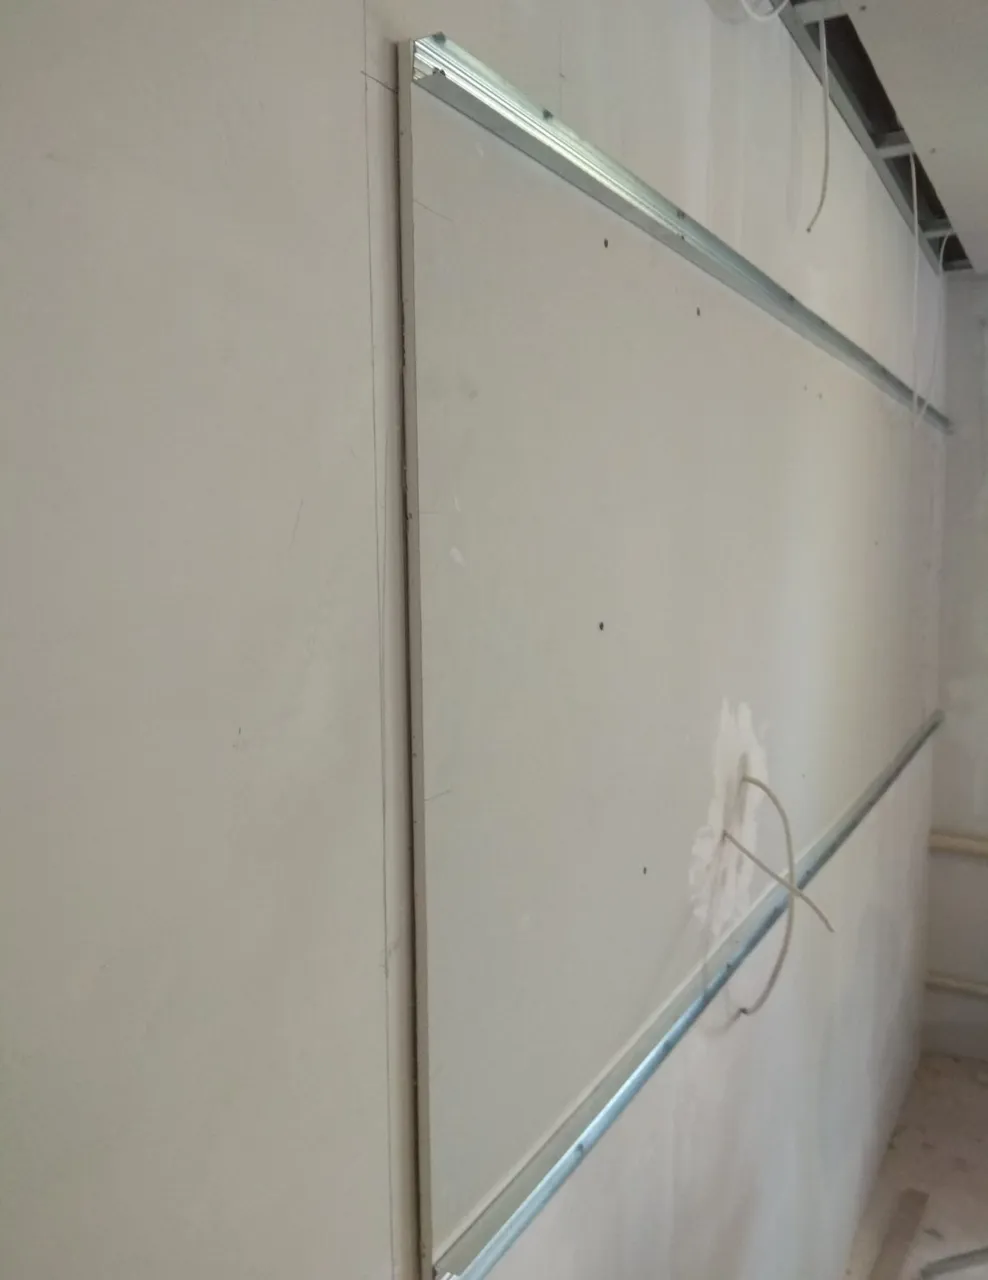
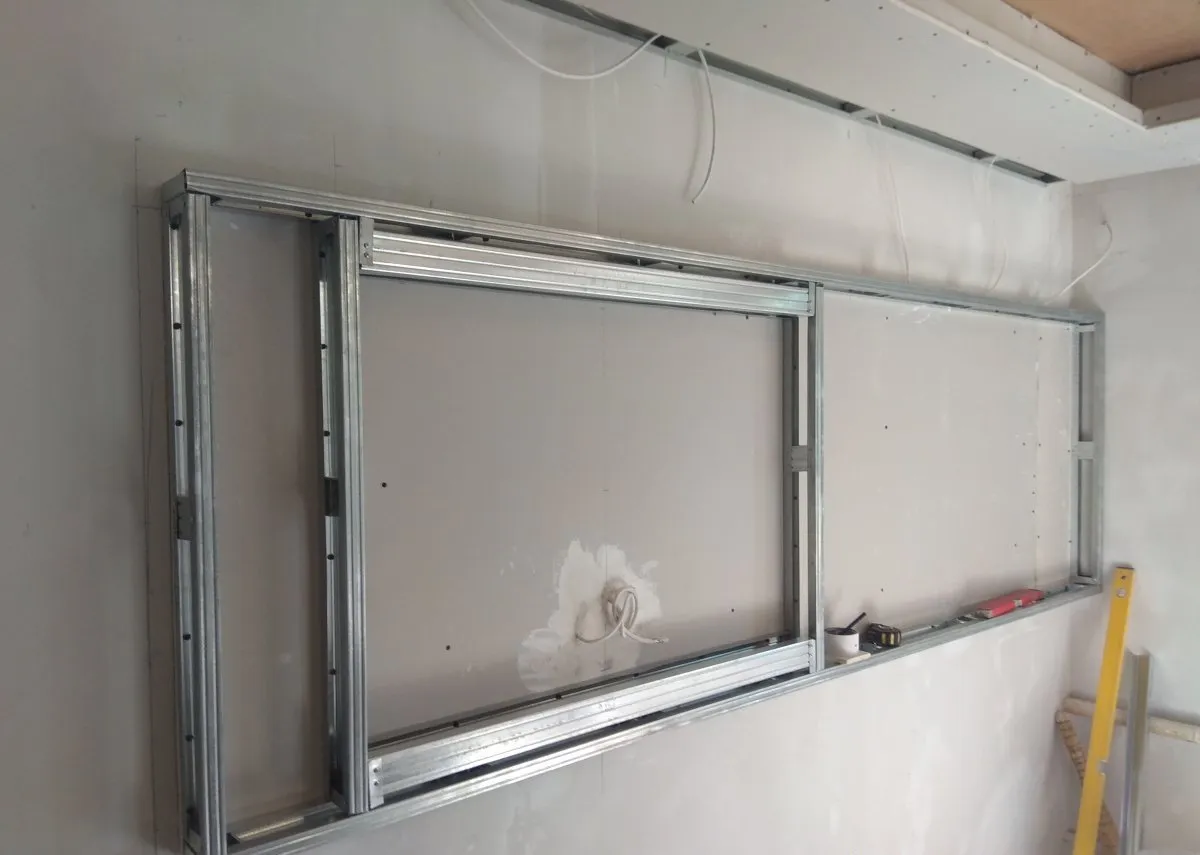
When mounting the profile, it is important to adhere to the horizontal level. Further, the partition for the TV is indicated, the horizontal fastening of the profile.
Al montar el perfil, es importante adherirse al nivel horizontal. Además, se indica la partición para el televisor, la fijación horizontal del perfil.
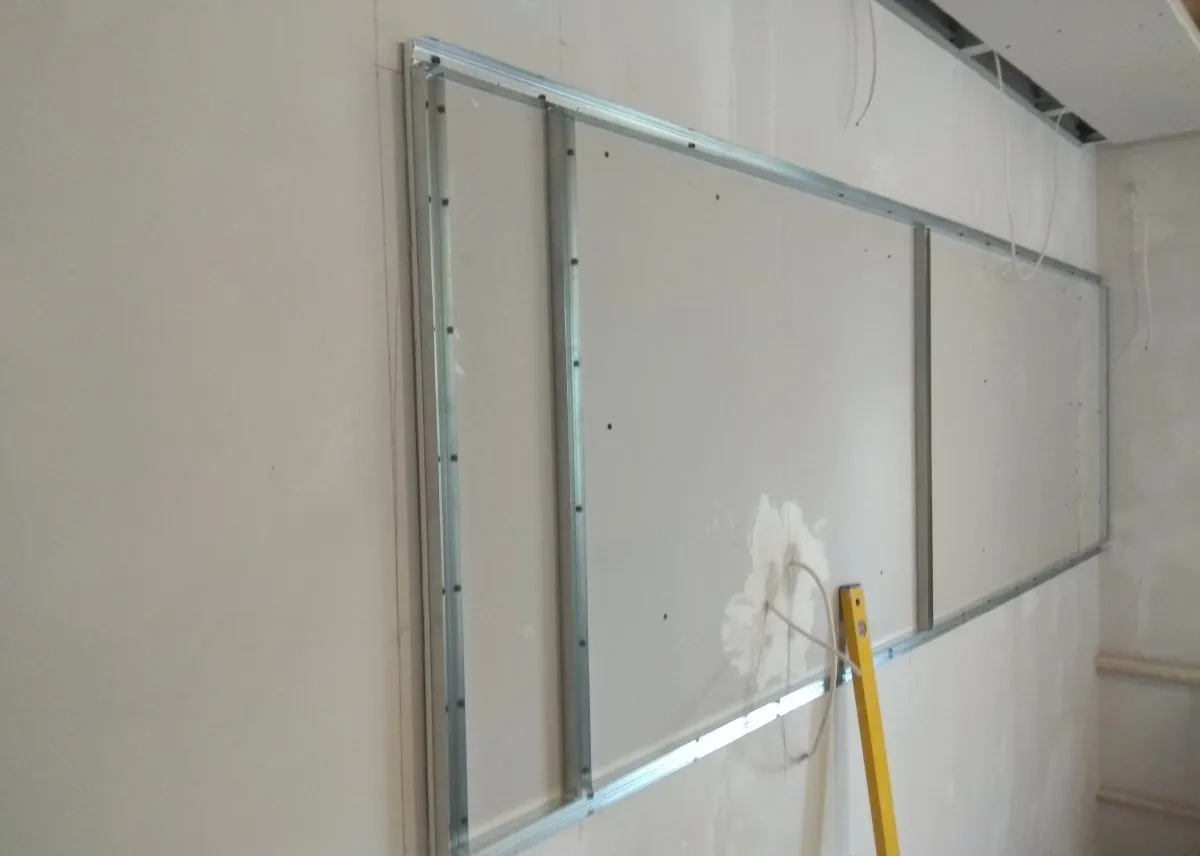
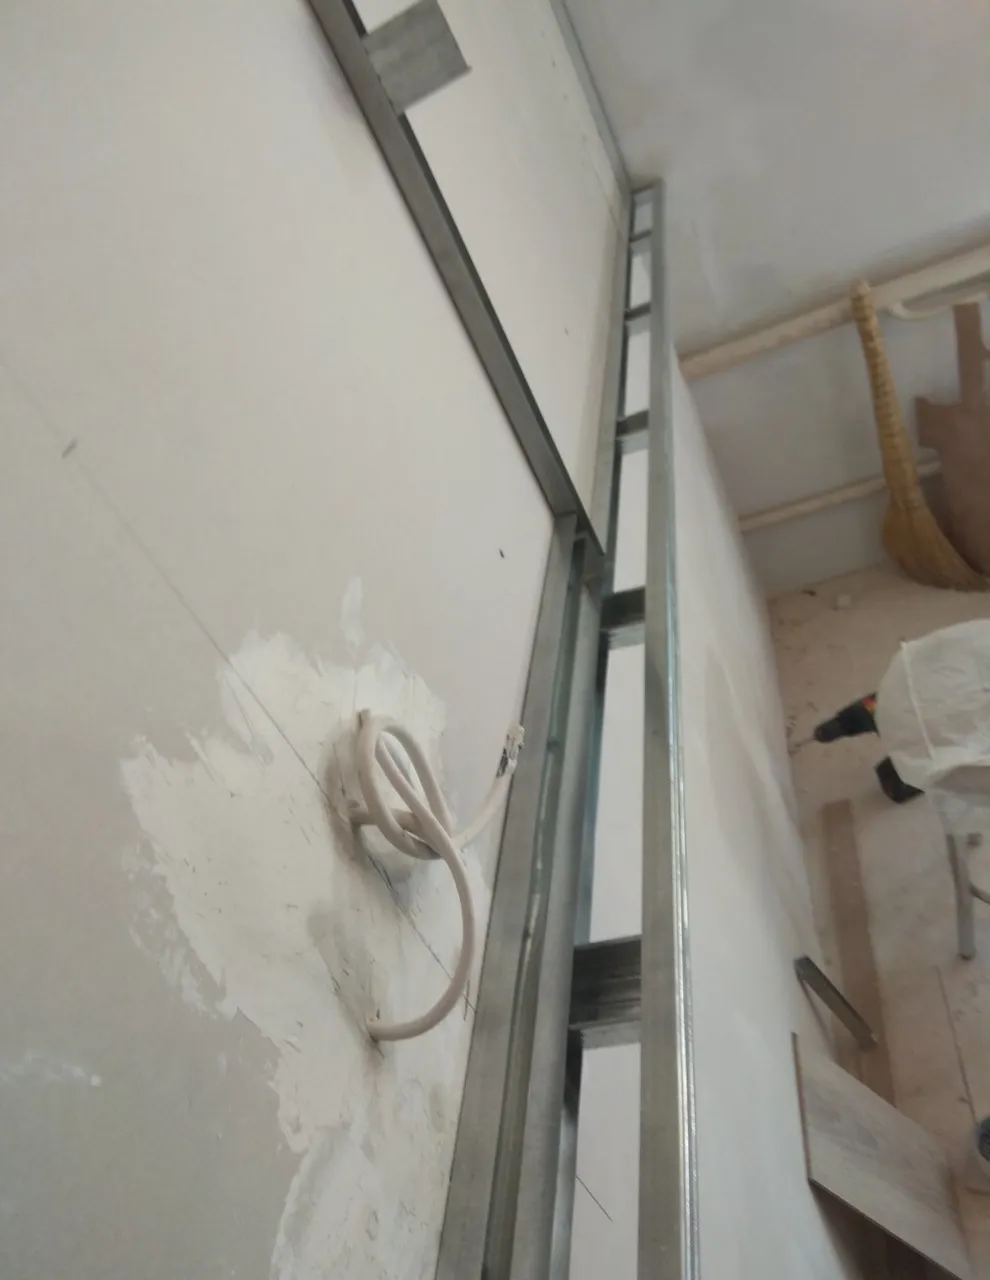
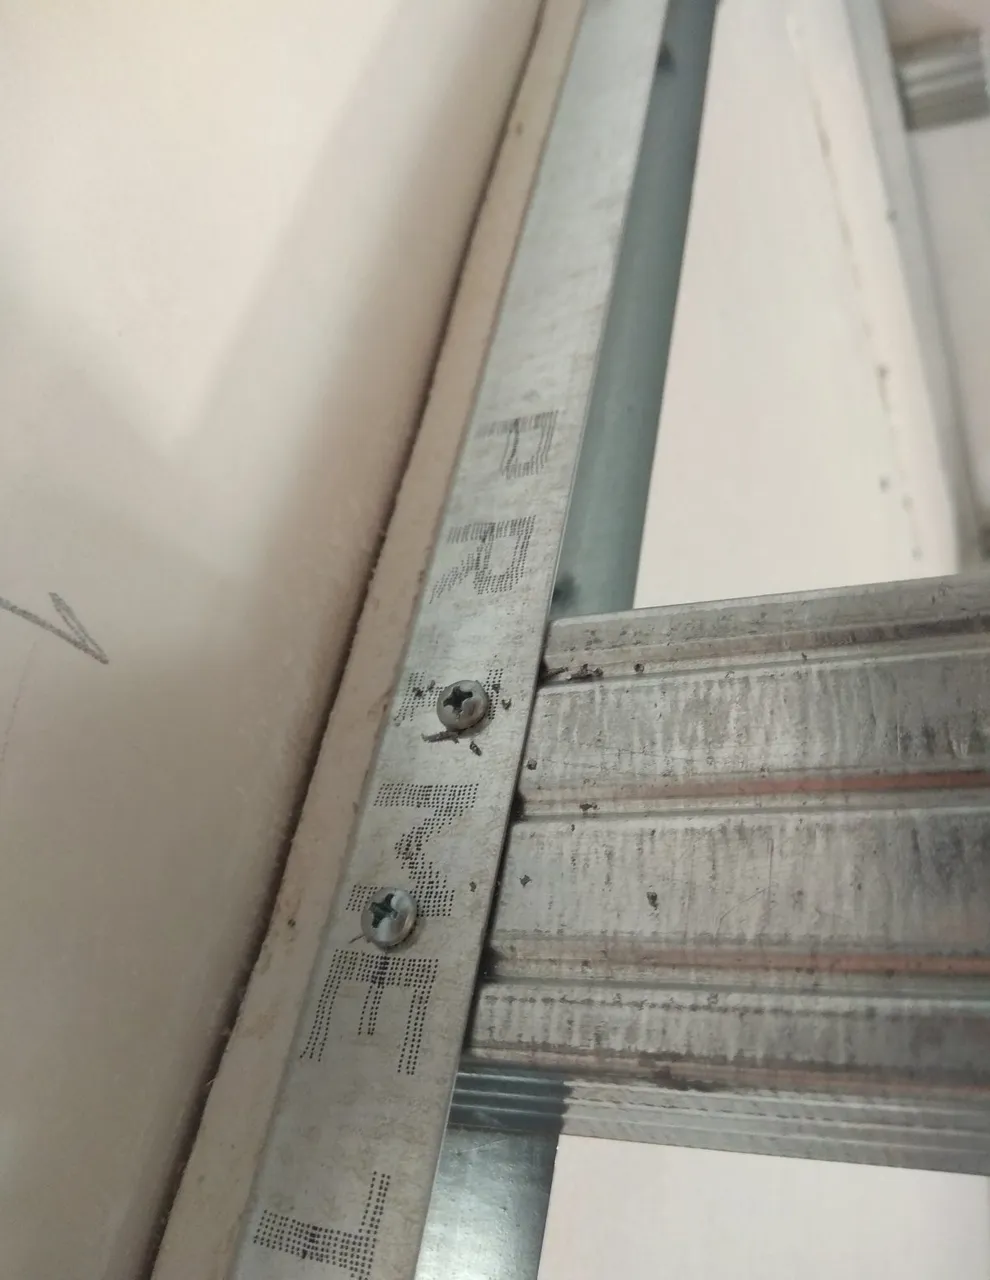
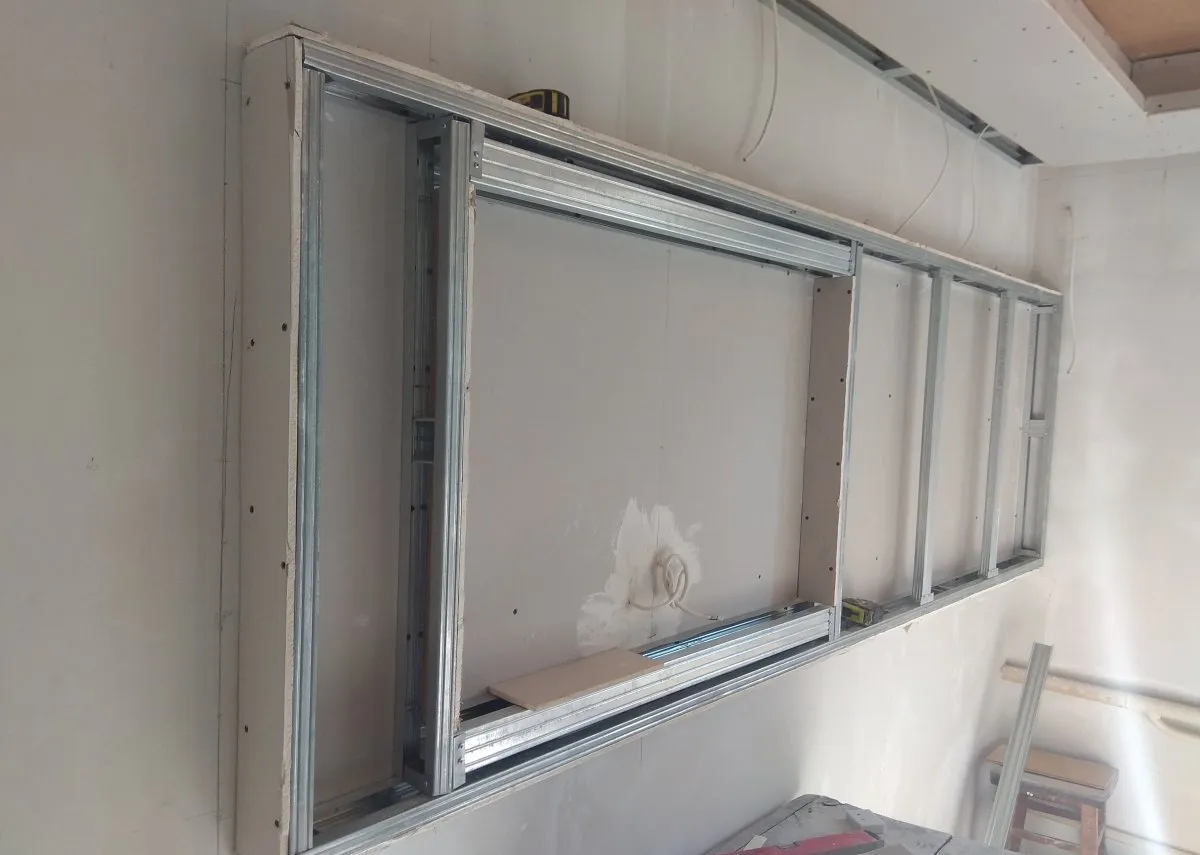
The size of the inner niche for the TV should be 1 - 1.5 cm larger than the TV itself, so that there is a gap between them. After you have drawn the outline of the entire niche, you can proceed with the installation of the box itself. To do this, use a CD profile 10 cm long. Insert it into the groove of the UD profile with an indent of 30 - 40 cm. On the reverse side, also fix the strip of the UD profile. The profile is fastened to each other with the help of self-tapping screws for metal LM.
El tamaño del nicho interior para el televisor debe ser de 1 a 1,5 cm más grande que el propio televisor, de modo que haya un espacio entre ellos. Una vez que haya dibujado el contorno de todo el nicho, puede continuar con la instalación de la caja. Para hacer esto, use un perfil de CD de 10 cm de largo. Insértelo en la ranura del perfil UD con una muesca de 30 - 40 cm. En el reverso, fije también la tira del perfil UD. El perfil se sujeta entre sí con la ayuda de tornillos autorroscantes para metal LM.
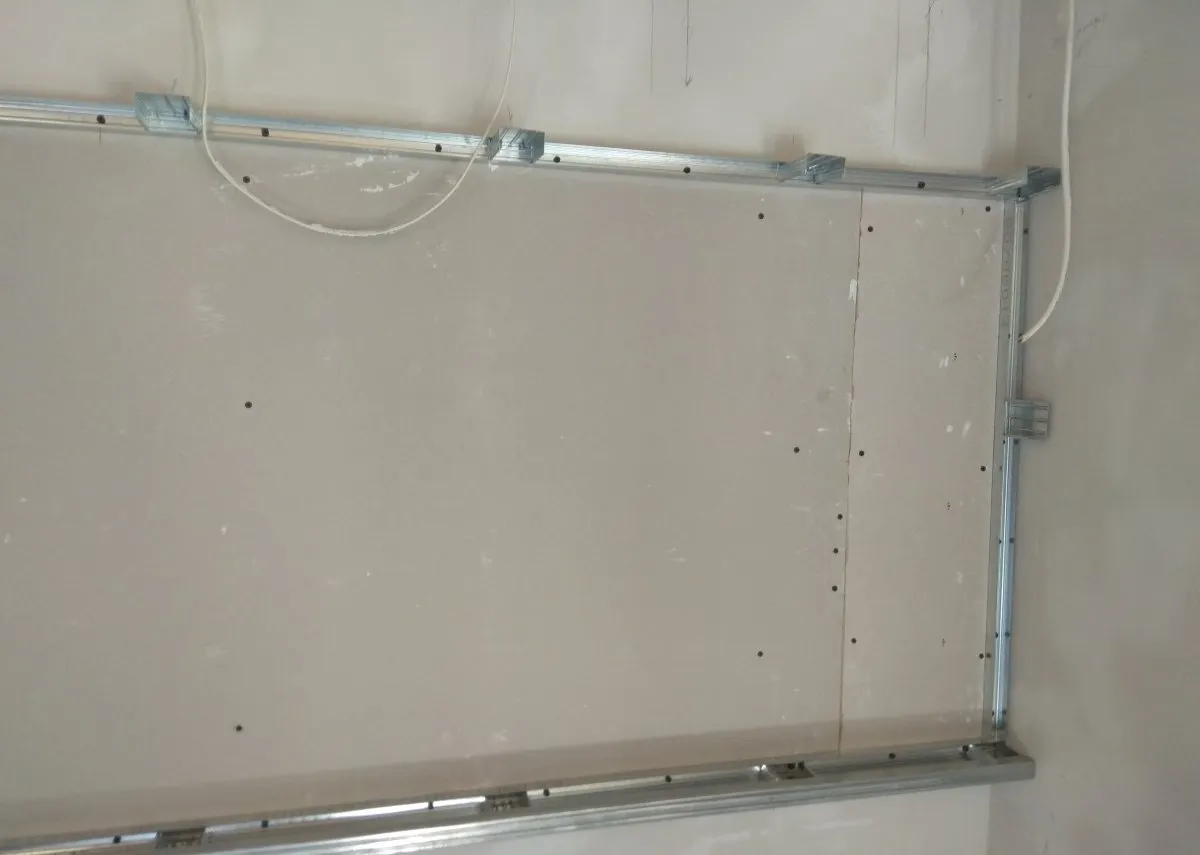
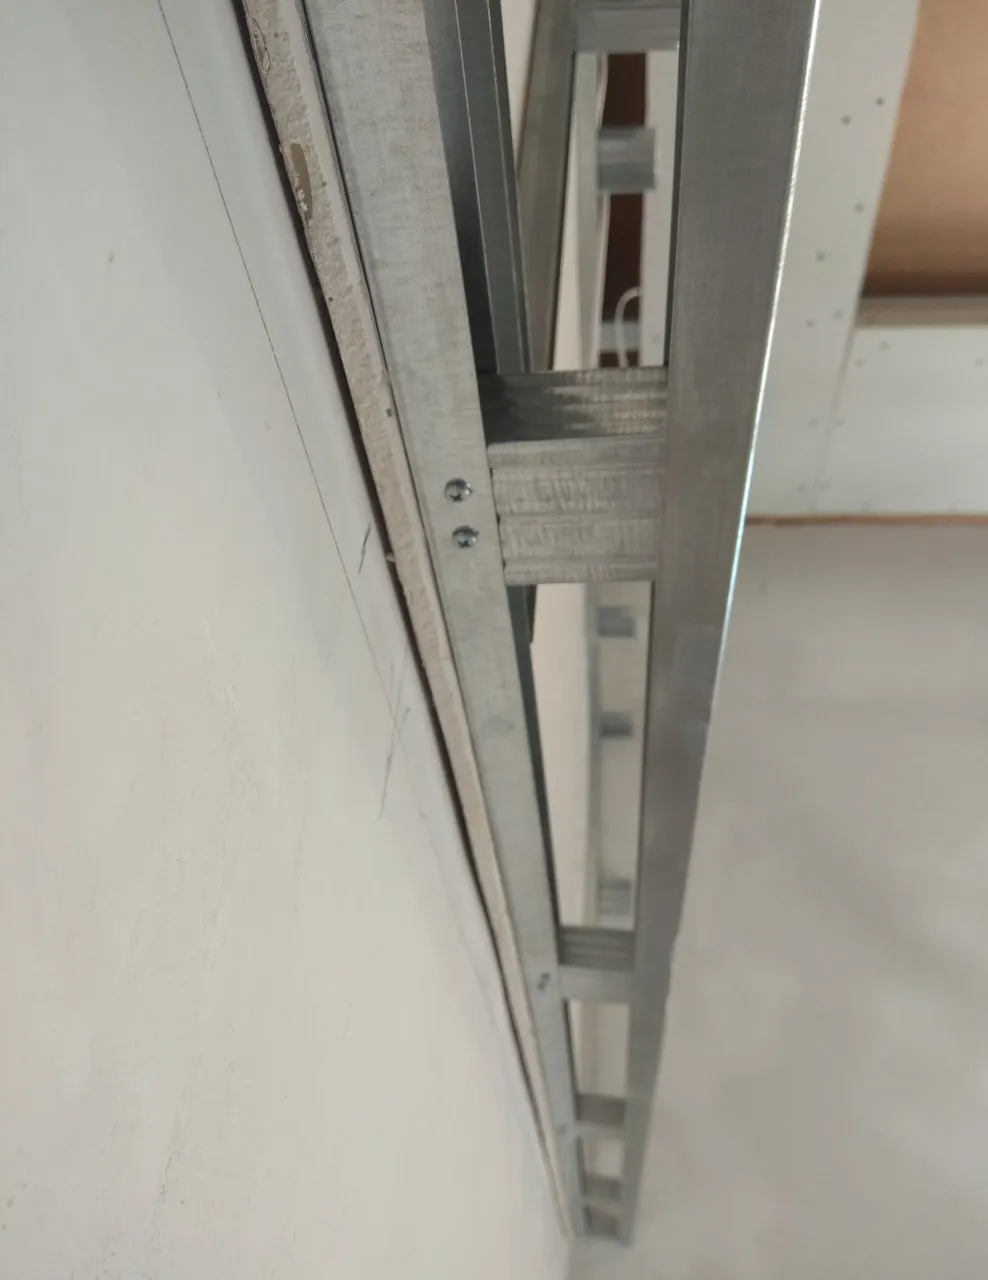
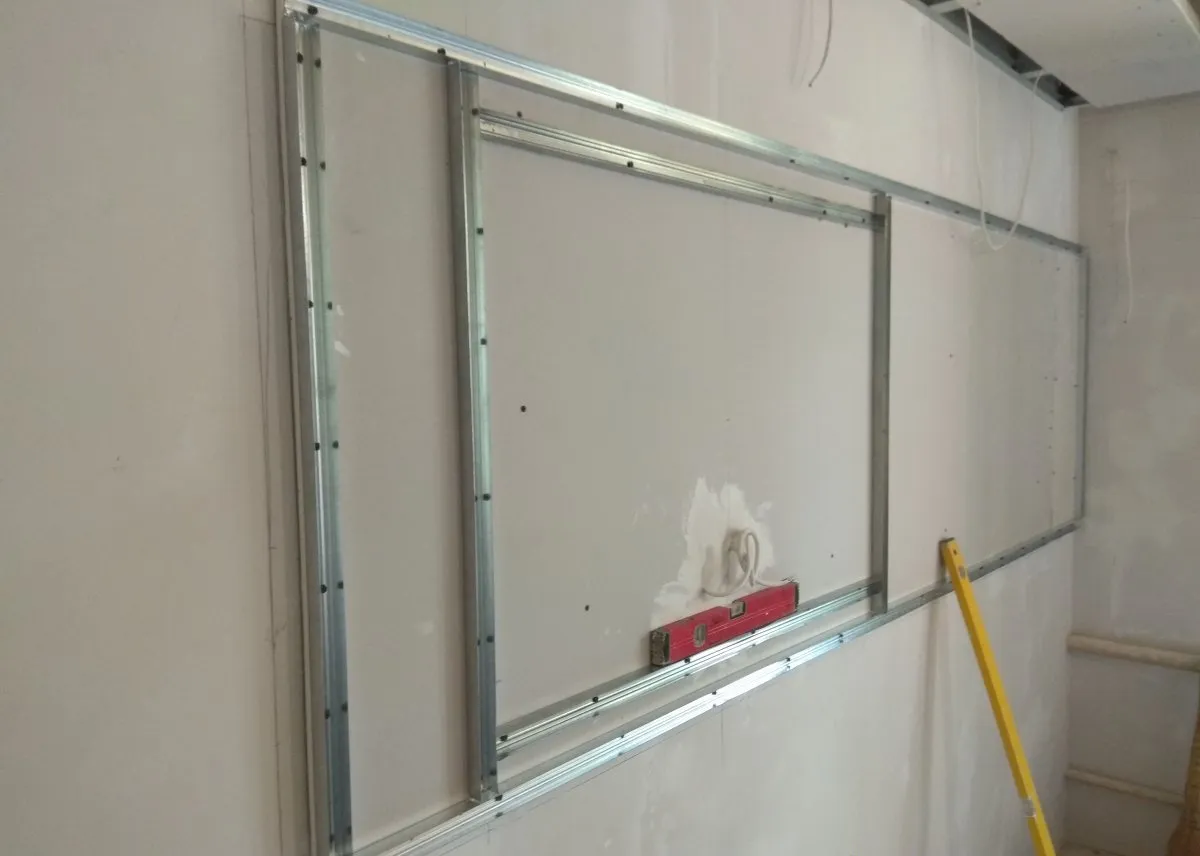
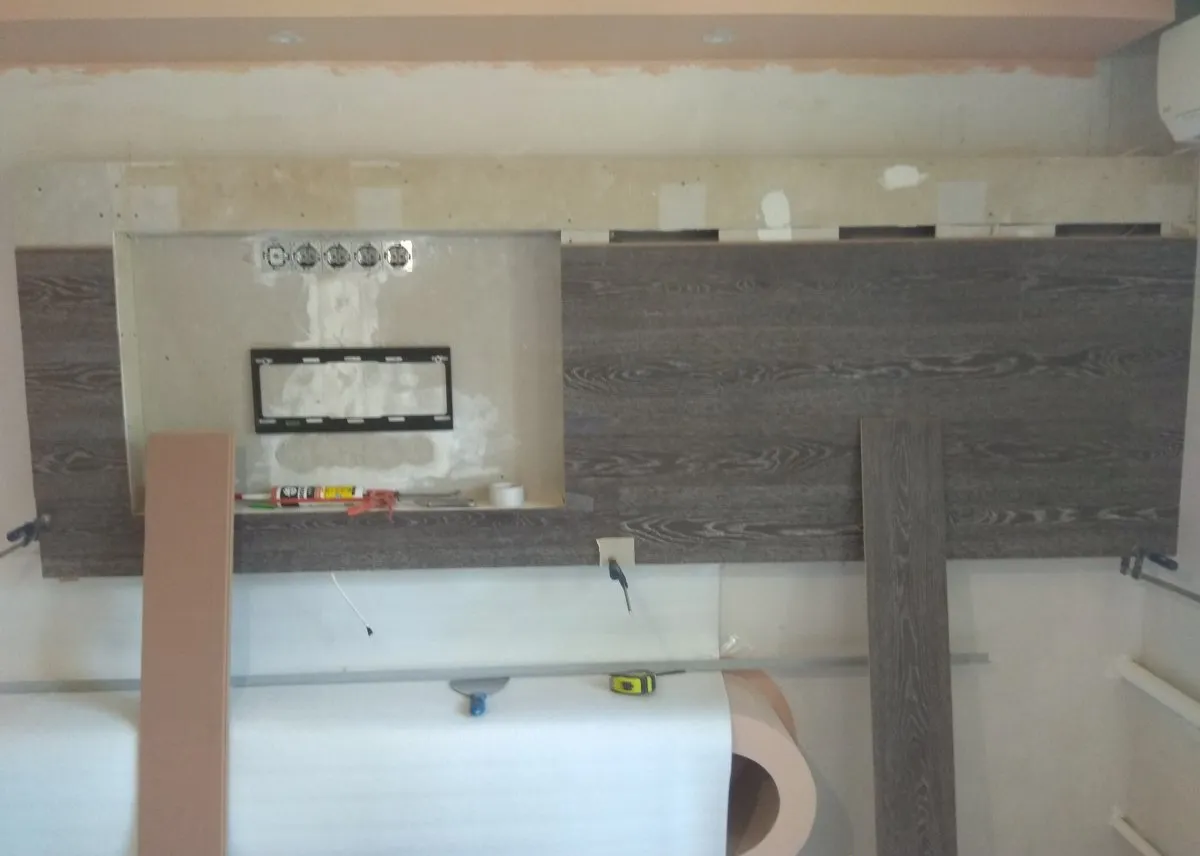
On the right side of the box, two CD profiles must be fixed vertically for rigidity. After that, you can sew up the niche with drywall on the sides. From the front side, the drywall should protrude 5 cm on all sides, and not be flush with the profile
En el lado derecho de la caja, dos perfiles de CD deben fijarse verticalmente para mayor rigidez. Después de eso, puede coser el nicho con paneles de yeso a los lados. Desde el lado frontal, el panel de yeso debe sobresalir 5 cm en todos los lados y no estar al ras con el perfil
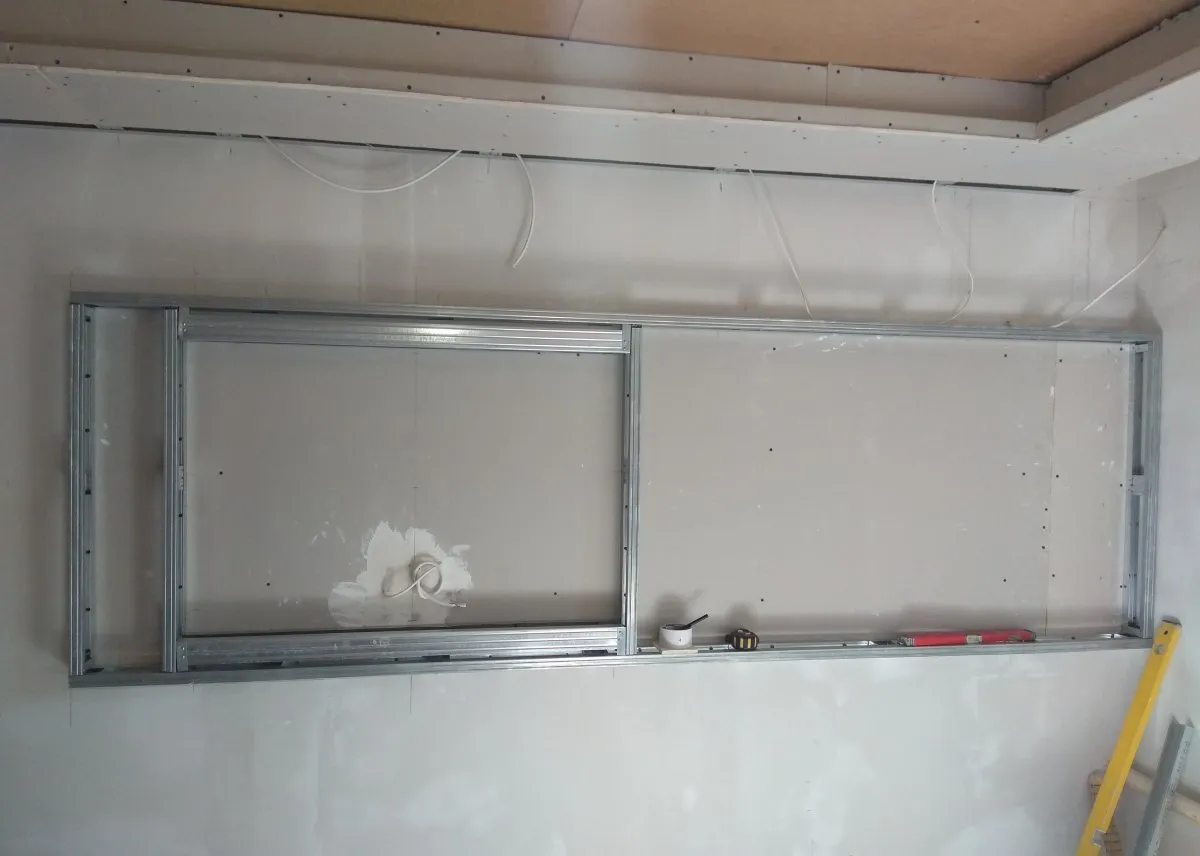
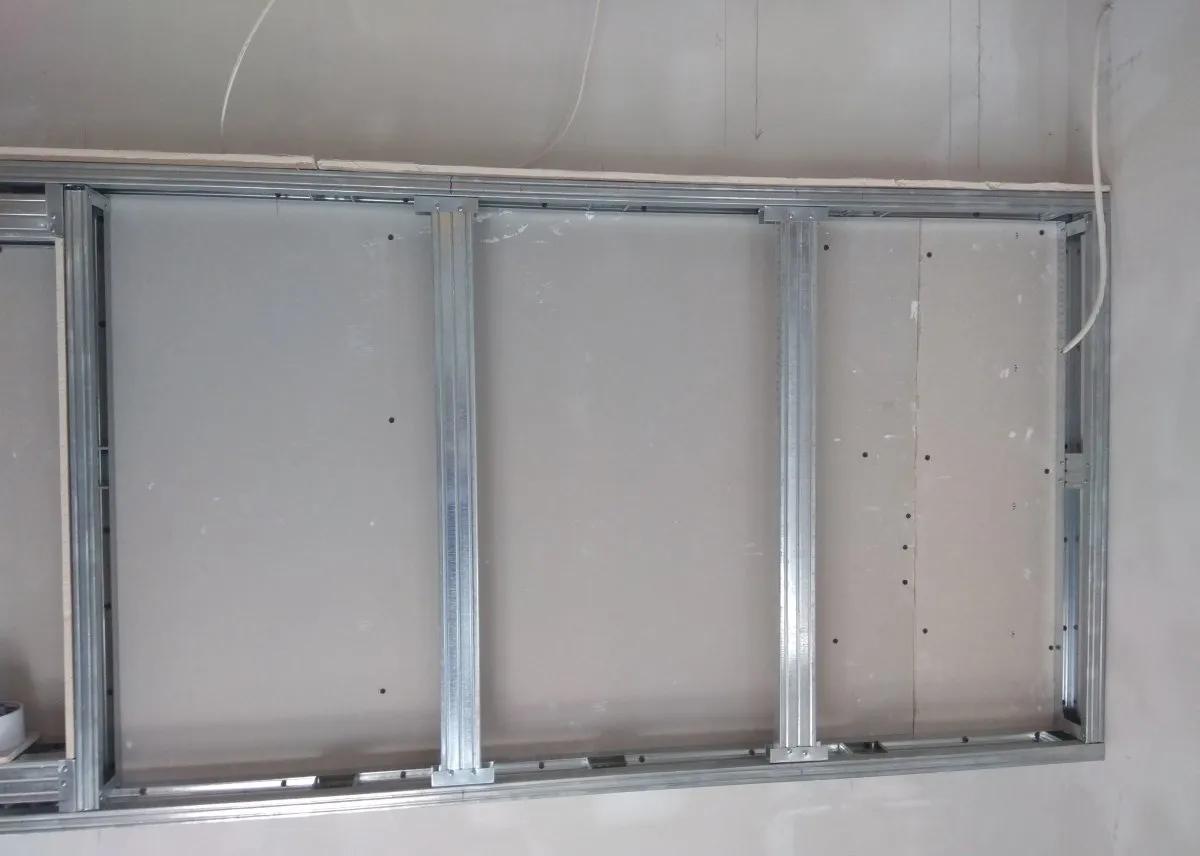

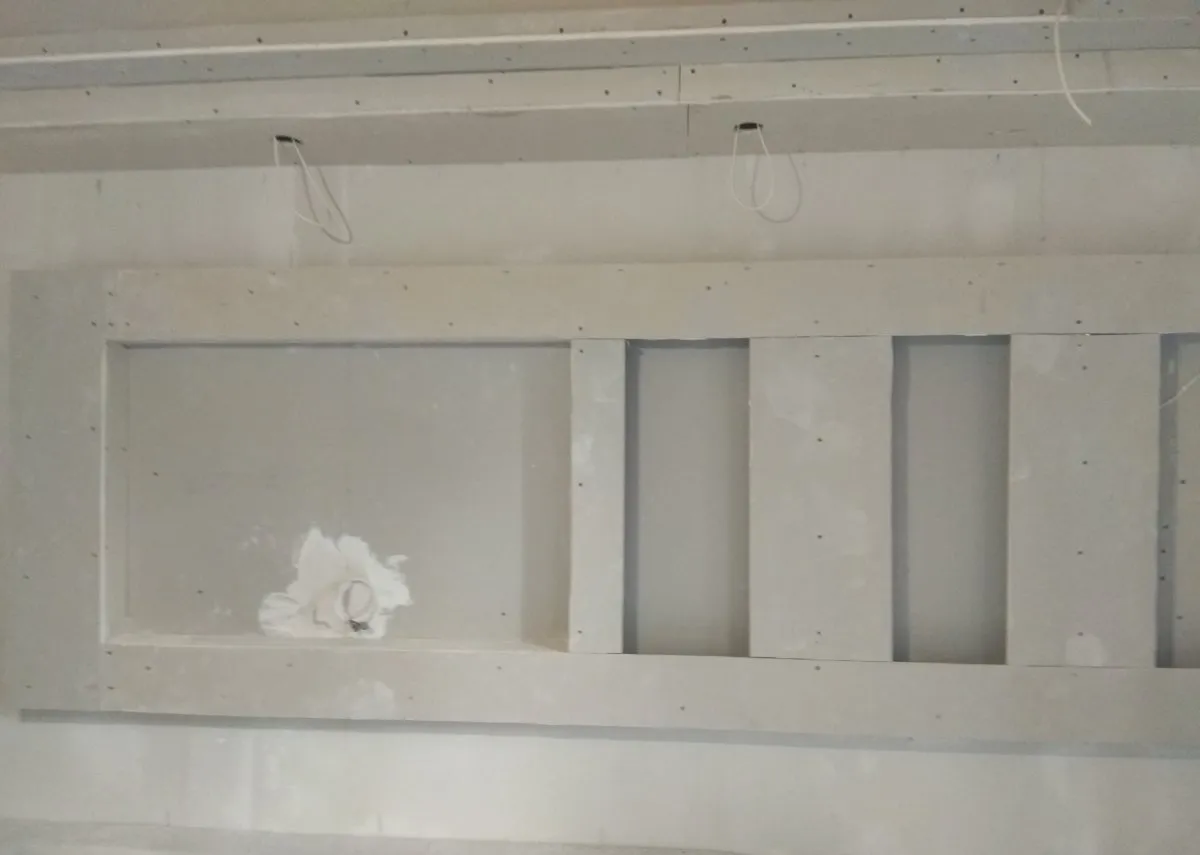
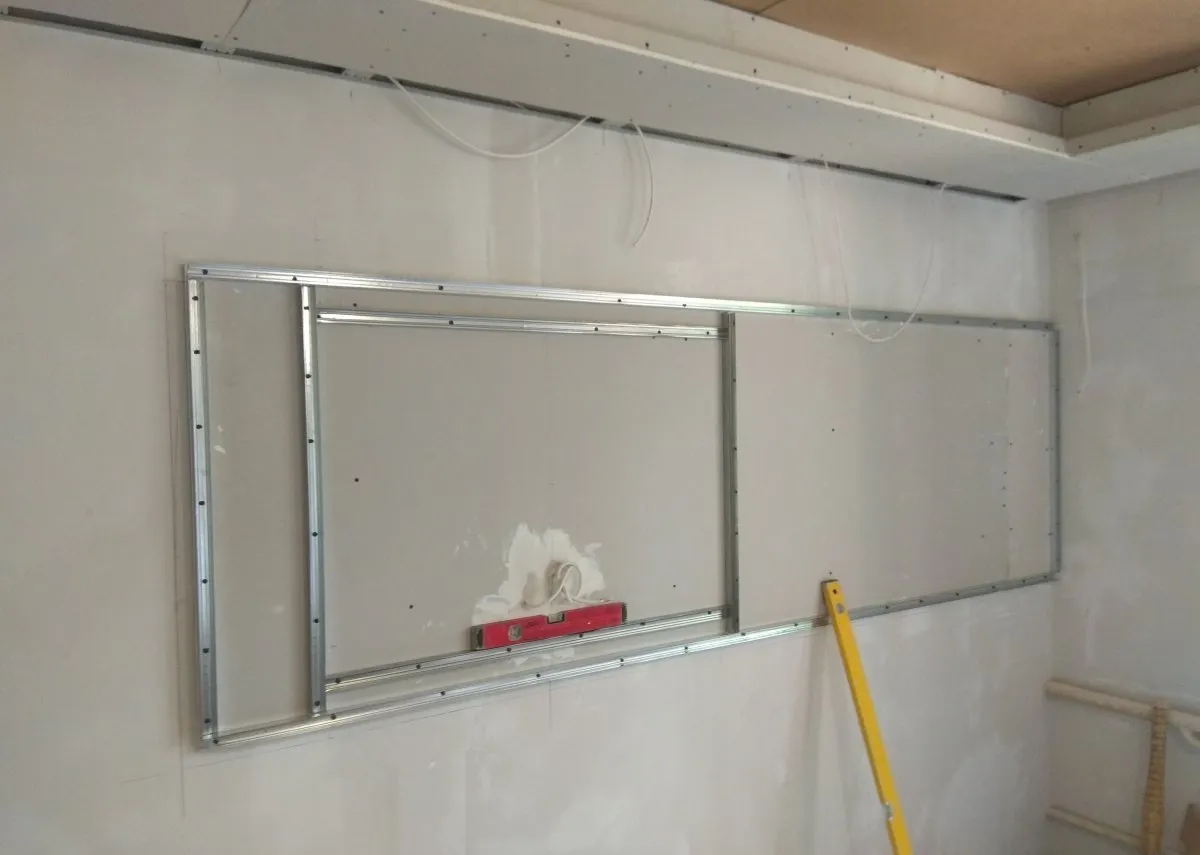
If you wish, you can later attach an LED strip behind the exposed drywall. On the right side, you can completely sew up the box with drywall, or, to save money, fasten segments to the profile.
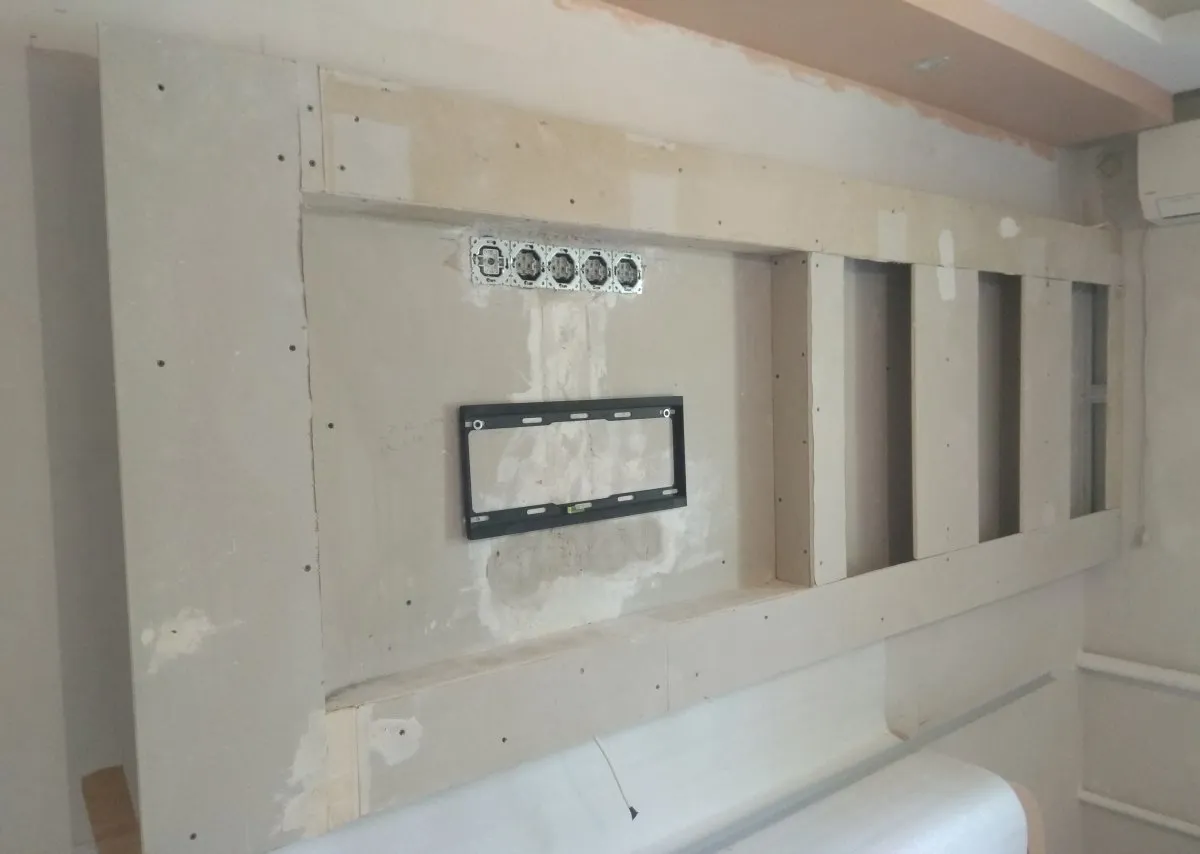
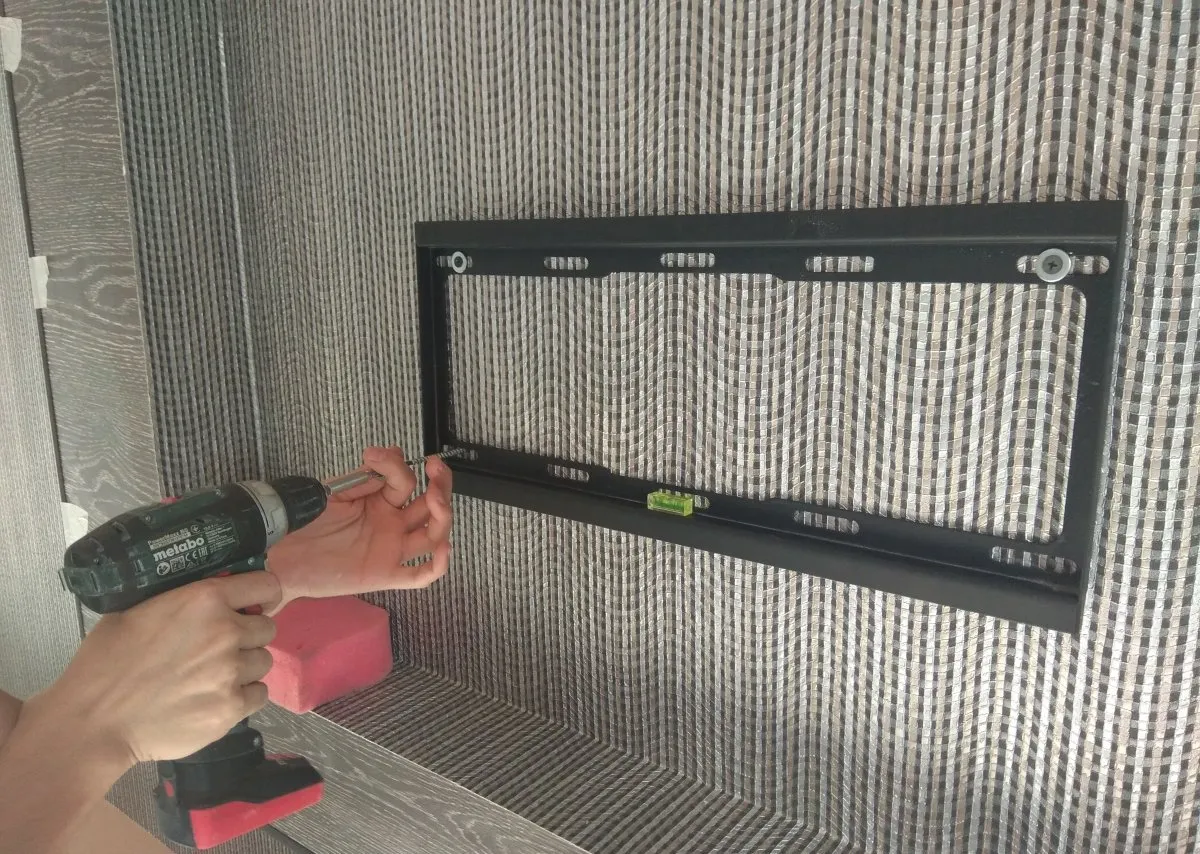
At this stage, it would be wise to hang up the TV mount, and once again check if you made a mistake with the dimensions? You can hang the TV to make sure it fits well into the inner box. It will also allow you to determine the exact location for installing outlets.
Si lo desea, luego puede colocar una tira de LED detrás del panel de yeso expuesto. En el lado derecho, puede coser completamente la caja con paneles de yeso o, para ahorrar dinero, sujetar segmentos al perfil.
En esta etapa, sería prudente colgar el soporte del televisor y, una vez más, verificar si cometió un error con las dimensiones. Puede colgar el televisor para asegurarse de que encaje bien en la caja interior. También le permitirá determinar la ubicación exacta para instalar puntos de venta.
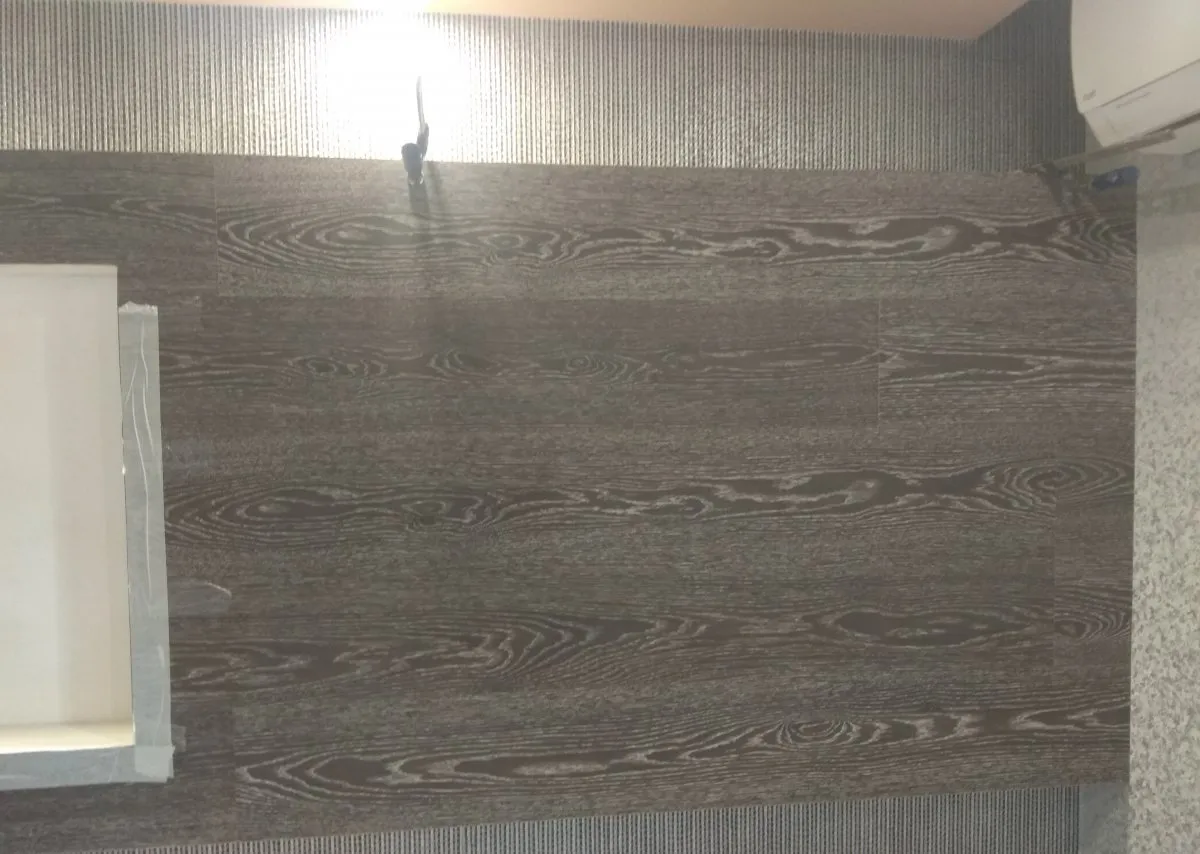
The next step is lining the niche with laminate. Of course, natural wood will look rich and beautiful, but a simpler and more economical option is a laminate. You can fix the laminate with liquid nails, applying glue with a syringe to the laminate or directly to the box.
El siguiente paso es revestir el nicho con laminado. Por supuesto, la madera natural se verá rica y hermosa, pero una opción más simple y económica es un laminado. Puede fijar el laminado con clavos líquidos, aplicando pegamento con una jeringa al laminado o directamente a la caja.
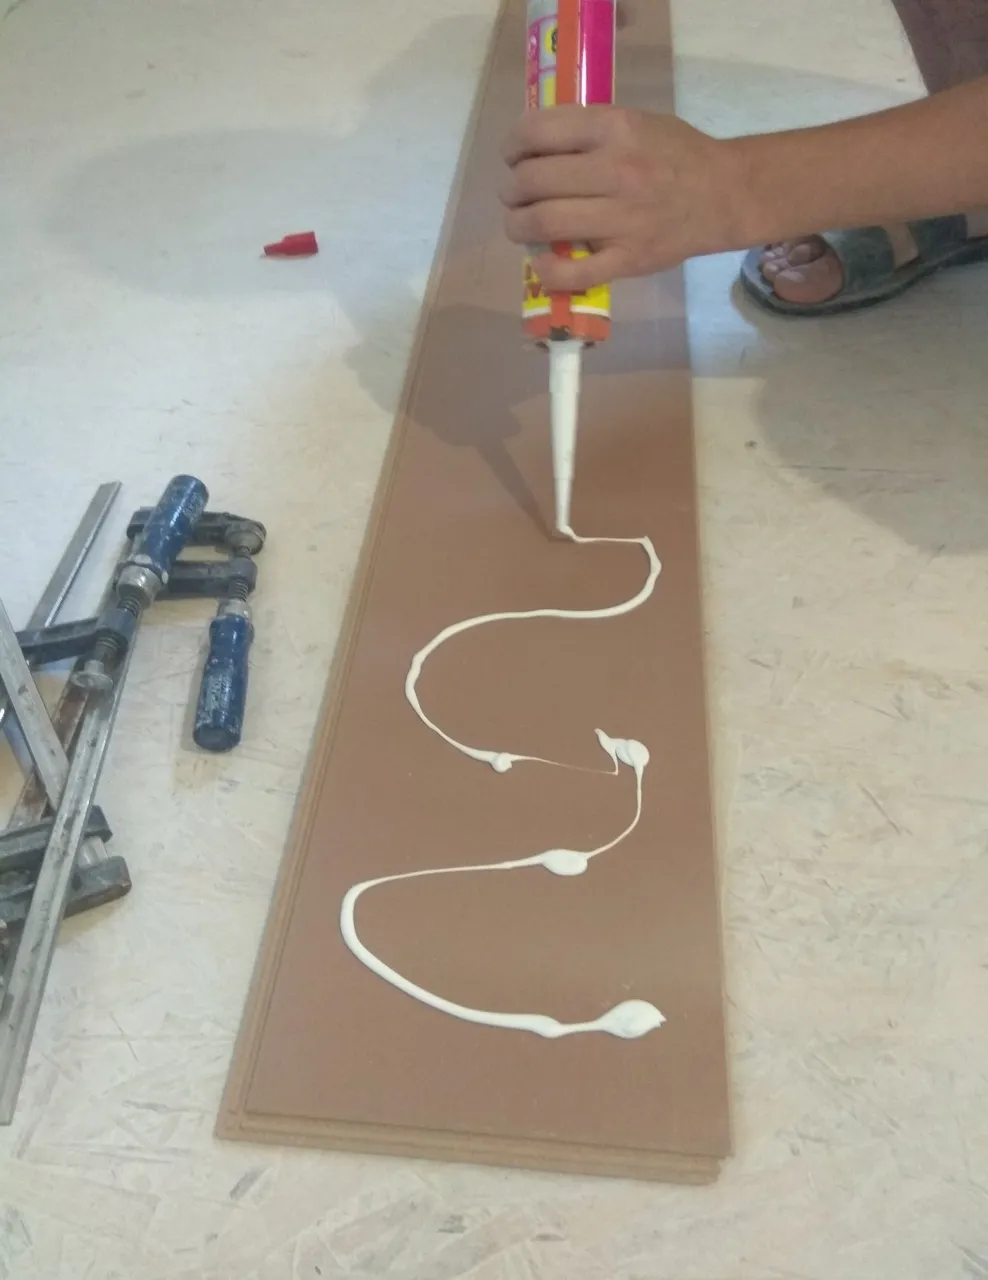
First, the bottom strip is attached. From the side parts of the right and left strip of the laminate, you must first cut off the locks. You will need a jigsaw in order to trim the left side of the niche. Use clamps to secure the laminate to the drywall well. You should not proceed with the installation of the following strips until the first lower strip is securely fastened.
Primero, se adjunta la tira inferior. De las partes laterales de la tira derecha e izquierda del laminado, primero debe cortar las cerraduras. Necesitará una sierra de vaivén para recortar el lado izquierdo del nicho. Use abrazaderas para asegurar el laminado al pozo de paneles de yeso. No debe continuar con la instalación de las siguientes tiras hasta que la primera tira inferior esté bien sujeta.
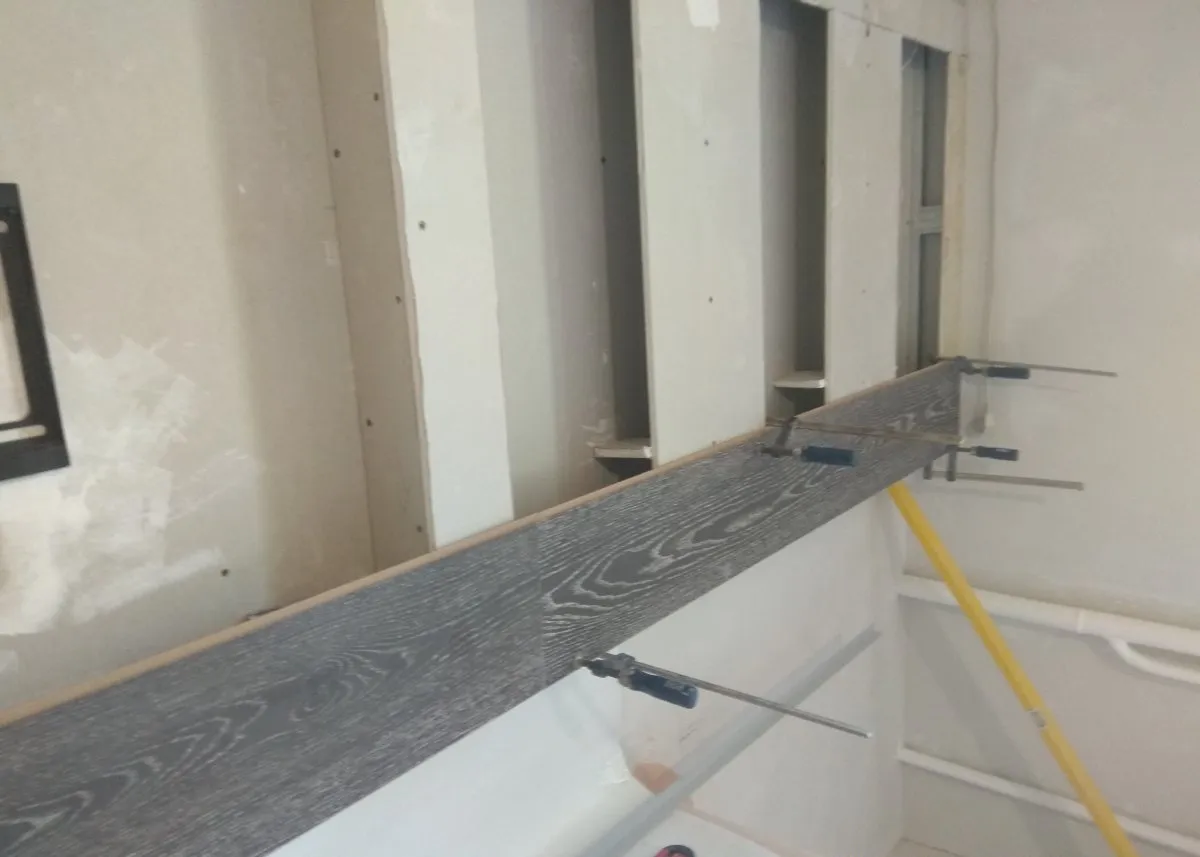
As a rule, liquid nails set quickly, so you have to wait 15 to 20 minutes. Then you can type the laminate further.
Como regla general, las uñas líquidas se endurecen rápidamente, por lo que debe esperar de 15 a 20 minutos. Luego puede escribir más el laminado.
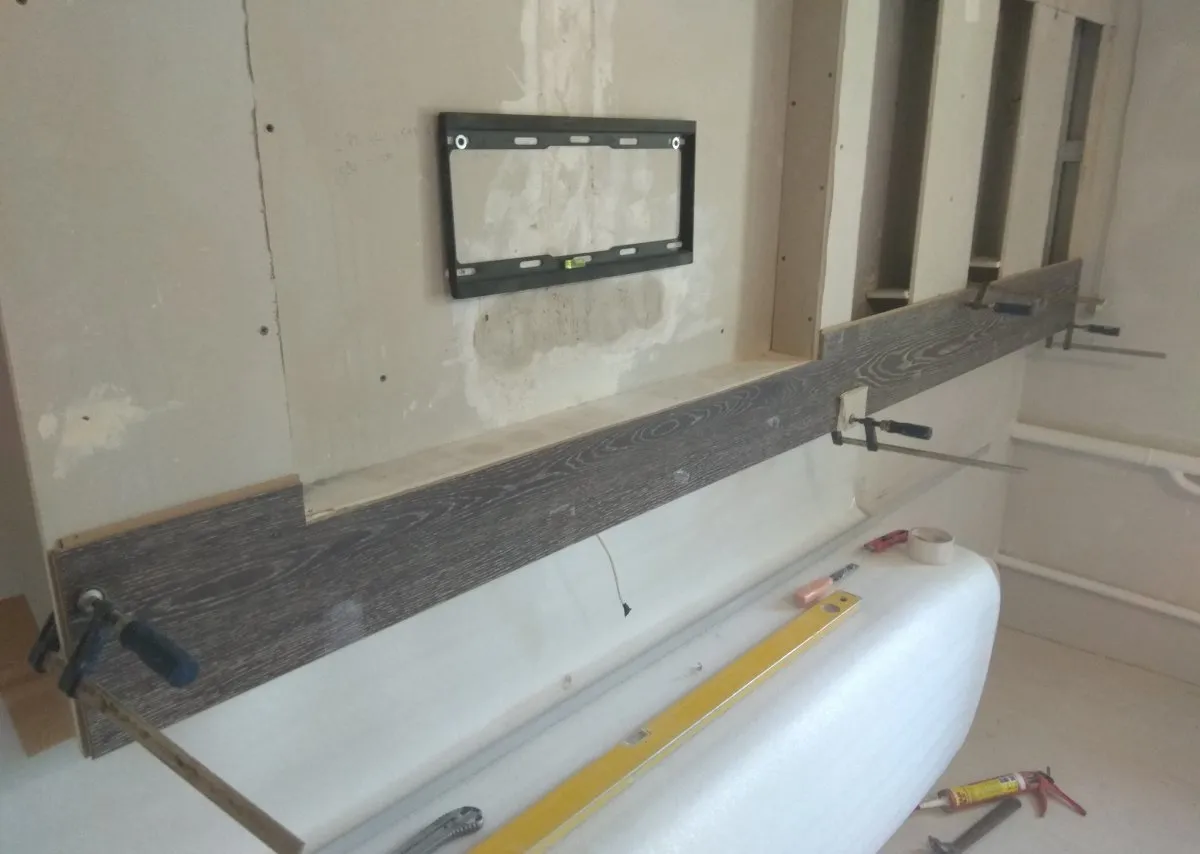
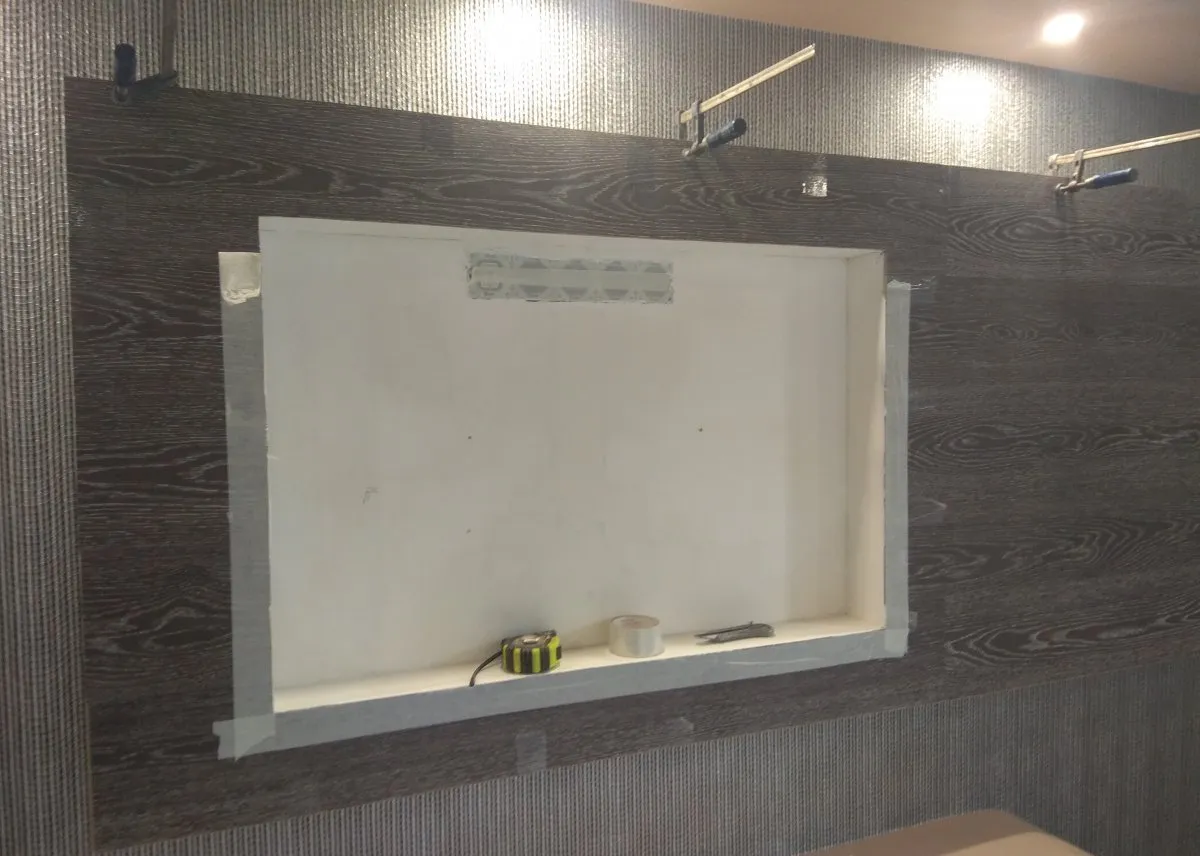
On all laminate strips, the side seams on the left and right must be cut off. When installing the top two strips of laminate, you must first cut off the top lock from them, as well as fix them with clamps.
En todas las tiras de laminado, se deben cortar las costuras laterales a la izquierda y a la derecha. Al instalar las dos tiras superiores de laminado, primero debe cortarles la cerradura superior y fijarlas con abrazaderas.
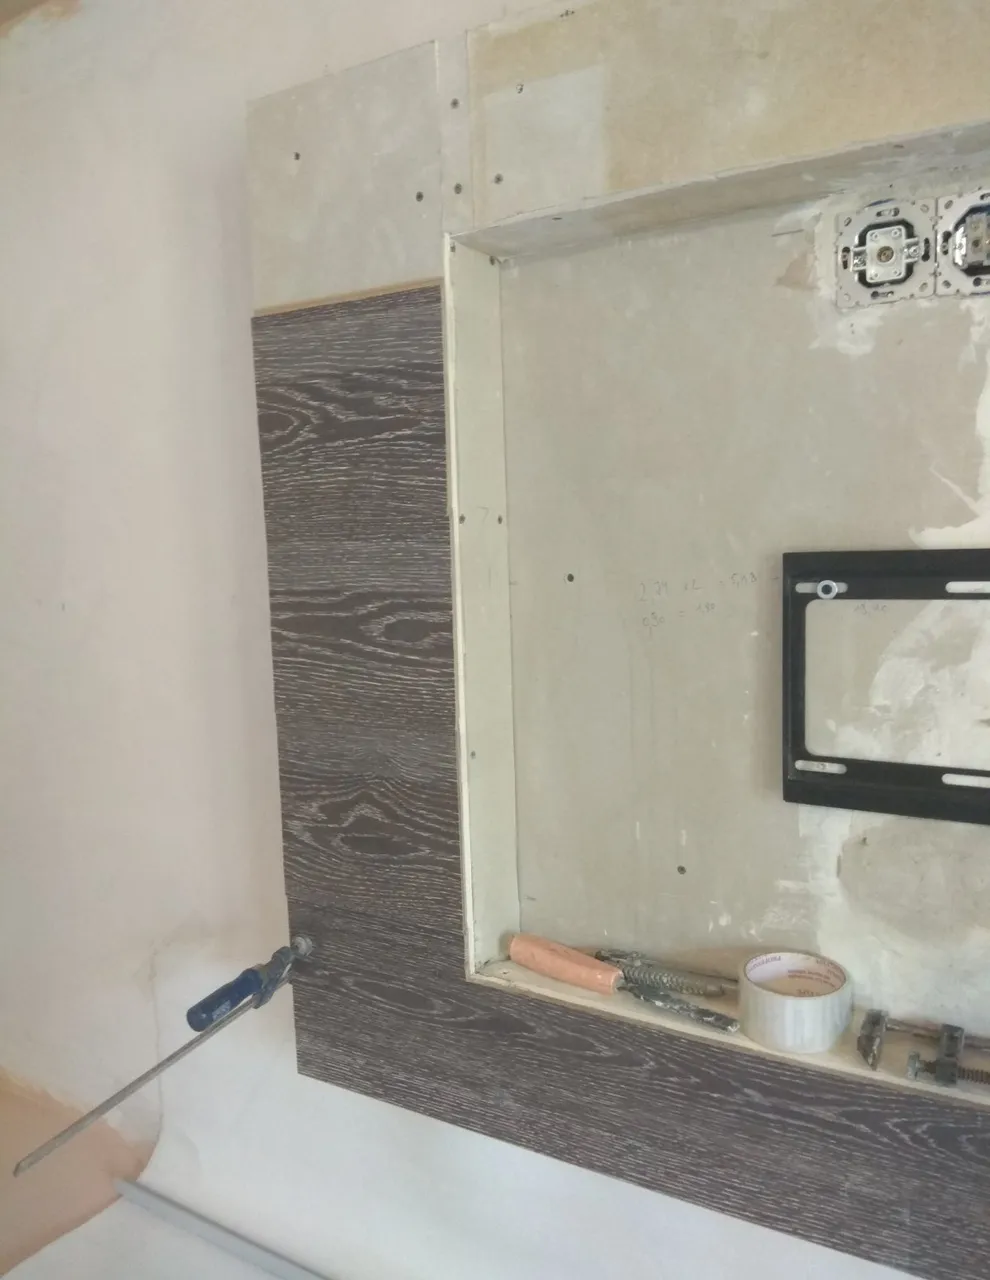
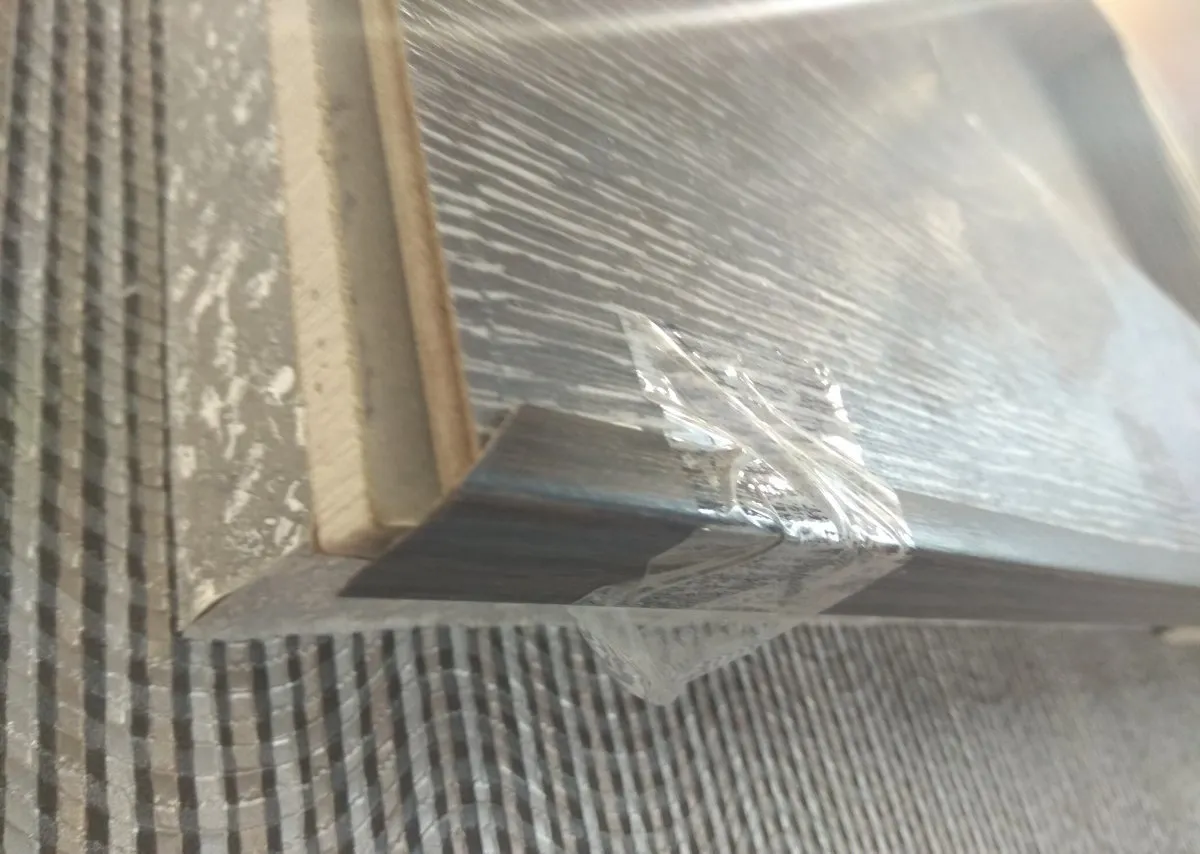
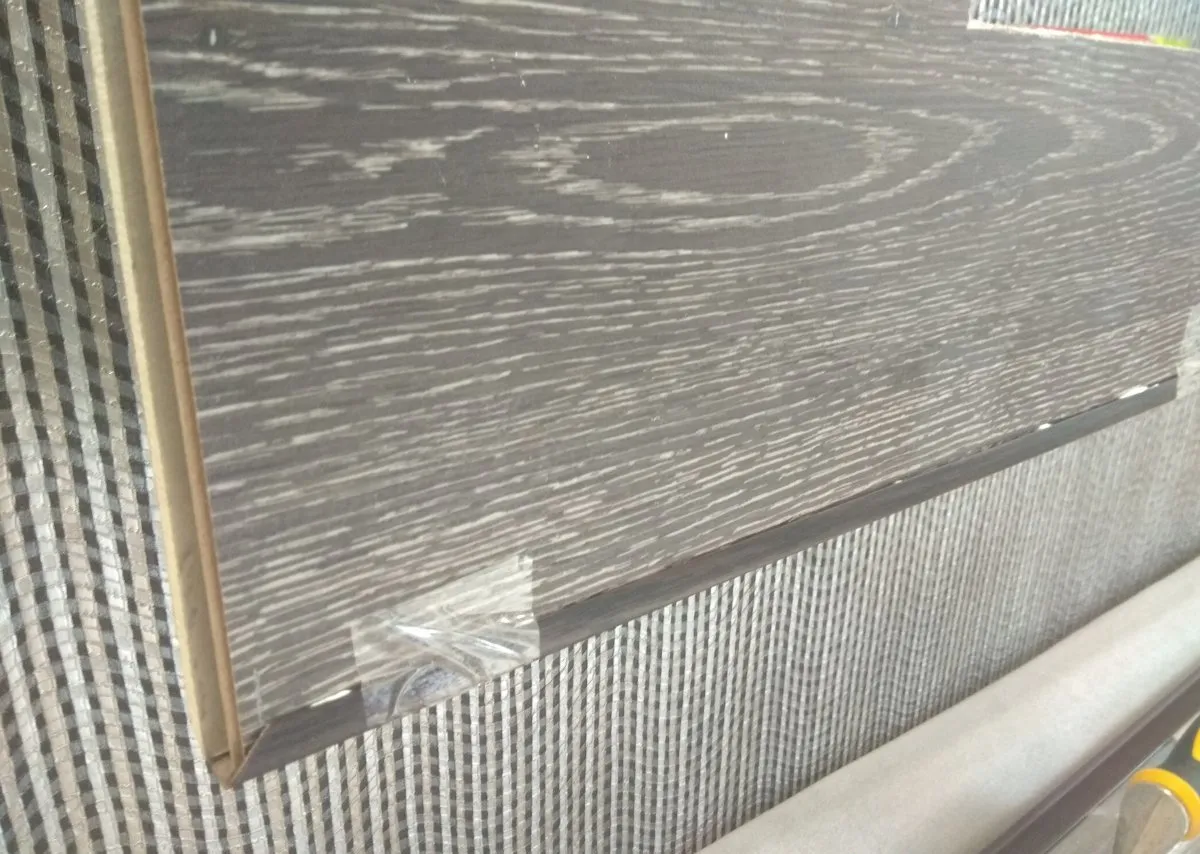
To hide the uneven trimmed corners of the laminate, you can also fix a decorative corner on the liquid nails to match the tone of the laminate. To fix the corner until it sticks together, use tape.
Para ocultar las esquinas recortadas irregulares del laminado, también puede colocar una esquina decorativa en las uñas líquidas para que coincida con el tono del laminado. Para arreglar la esquina hasta que se pegue, use cinta adhesiva.
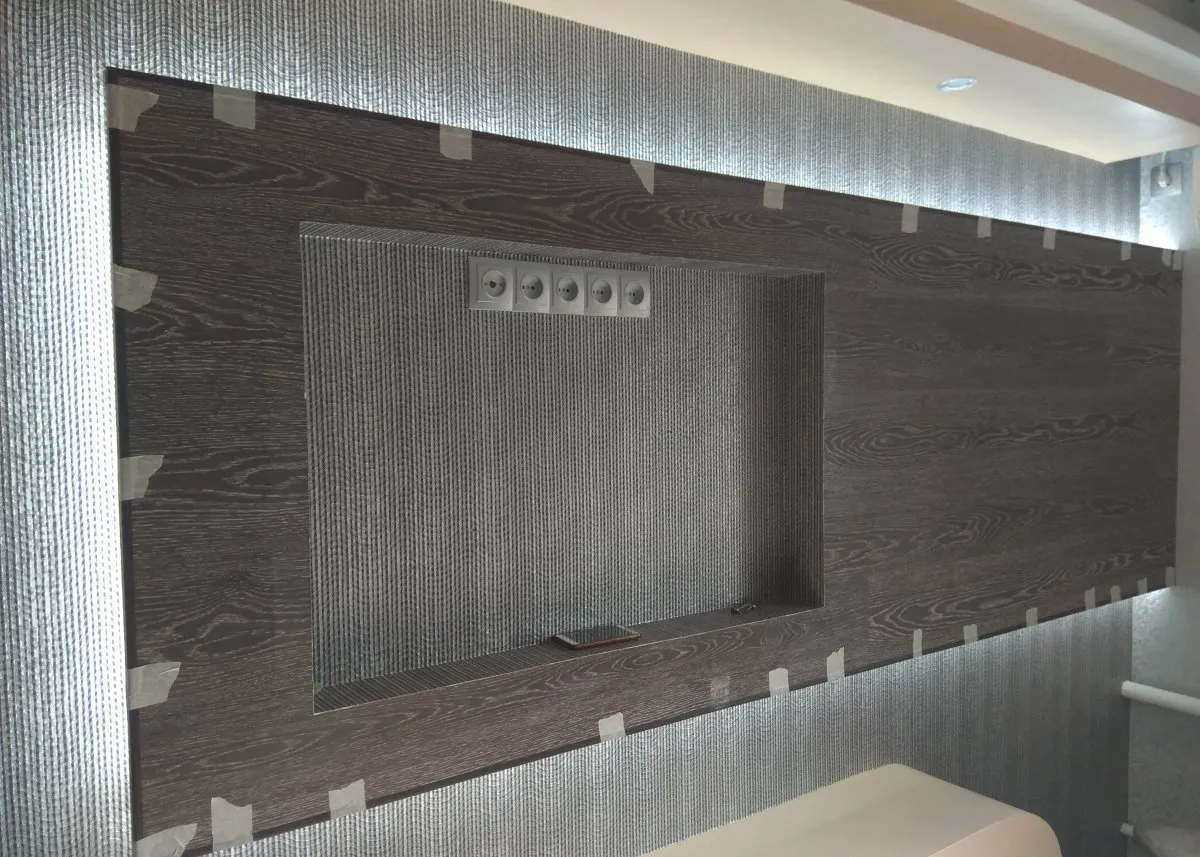
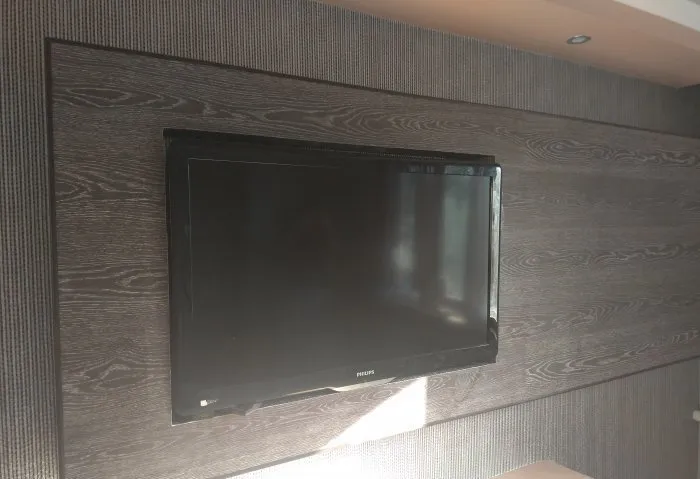
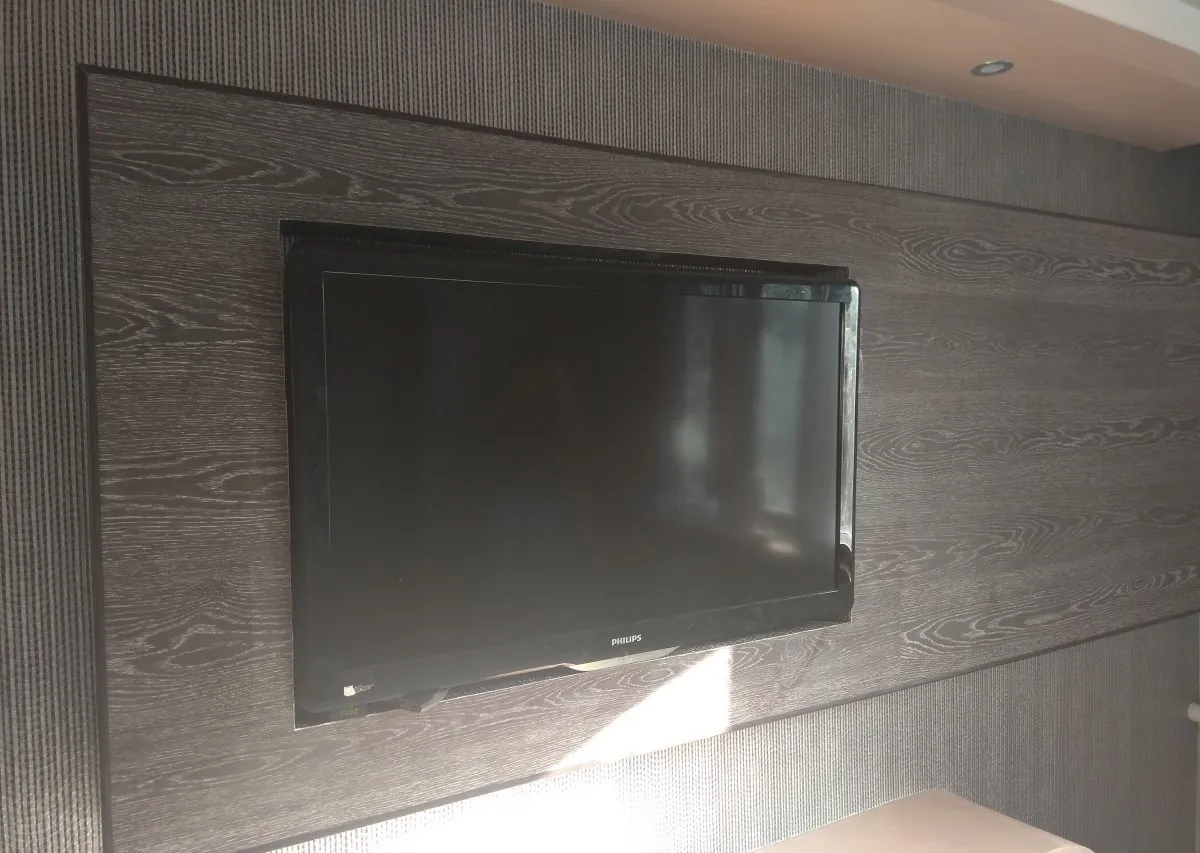
Further, in the inner part of the niche, you can putty the surface, and glue the same wallpaper there as around the entire structure. It is also necessary to fix the sockets, and the TV mount by level. Then, along the edges of the box, you can glue the LED strip on all sides. The final stage of work is fixing the TV in the mount.
Además, en la parte interna del nicho, puede poner masilla en la superficie y pegar el mismo papel tapiz que alrededor de toda la estructura. También es necesario arreglar los enchufes y el soporte de TV por nivel. Luego, a lo largo de los bordes de la caja, puede pegar la tira de LED en todos los lados. La etapa final del trabajo es arreglar el televisor en el soporte.
Final result.
Resultado final.