Hello everyone... ✨
Hello to my dear Hivers and the beloved community of artists HiveDIY, as always very pleased and excited to be here again, showing you my work made with love and especially for you.
Greetings to the Splinterland community, and everyone who lives there, I am pleased to be here to participate in the Splinterlands Art Contest Week 258.
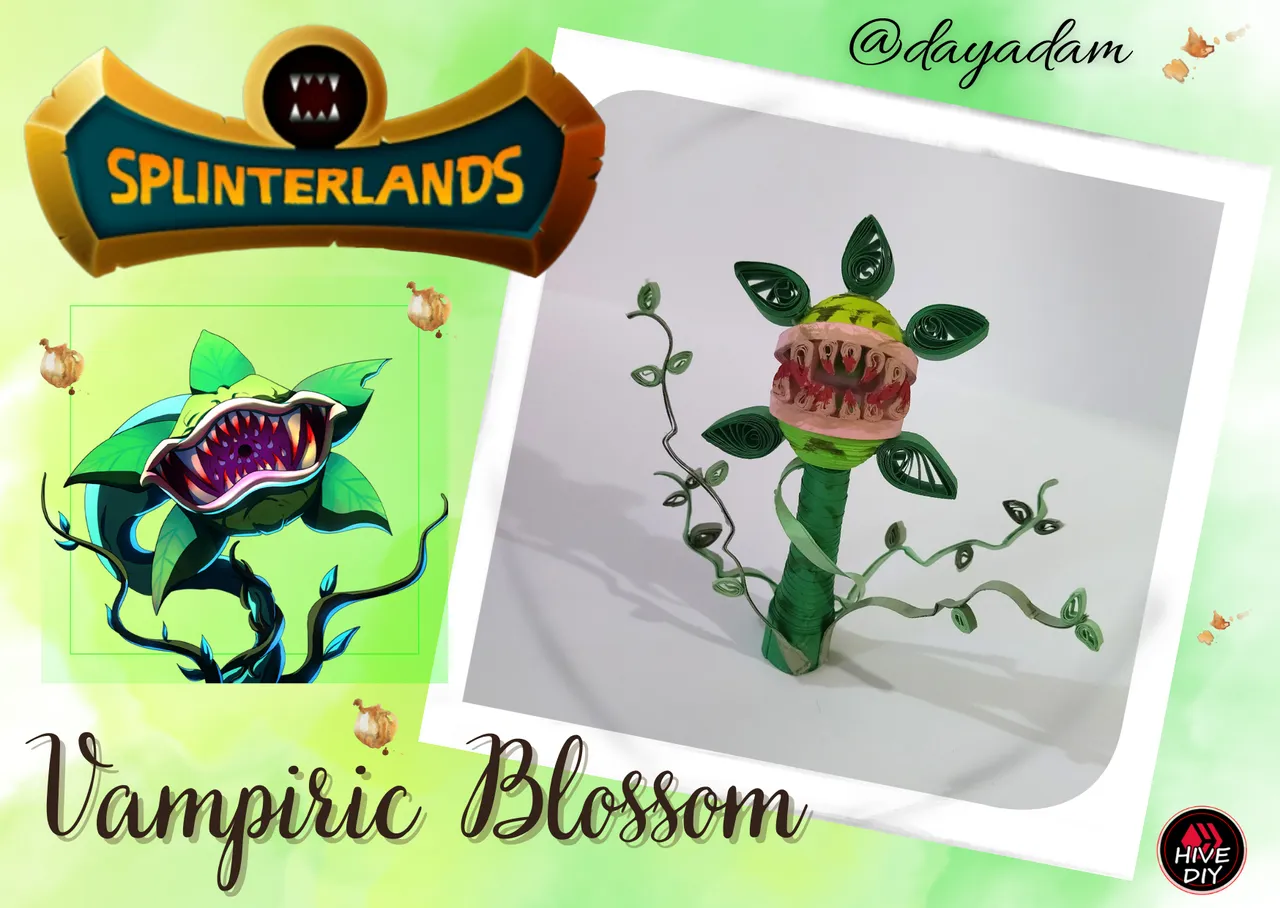
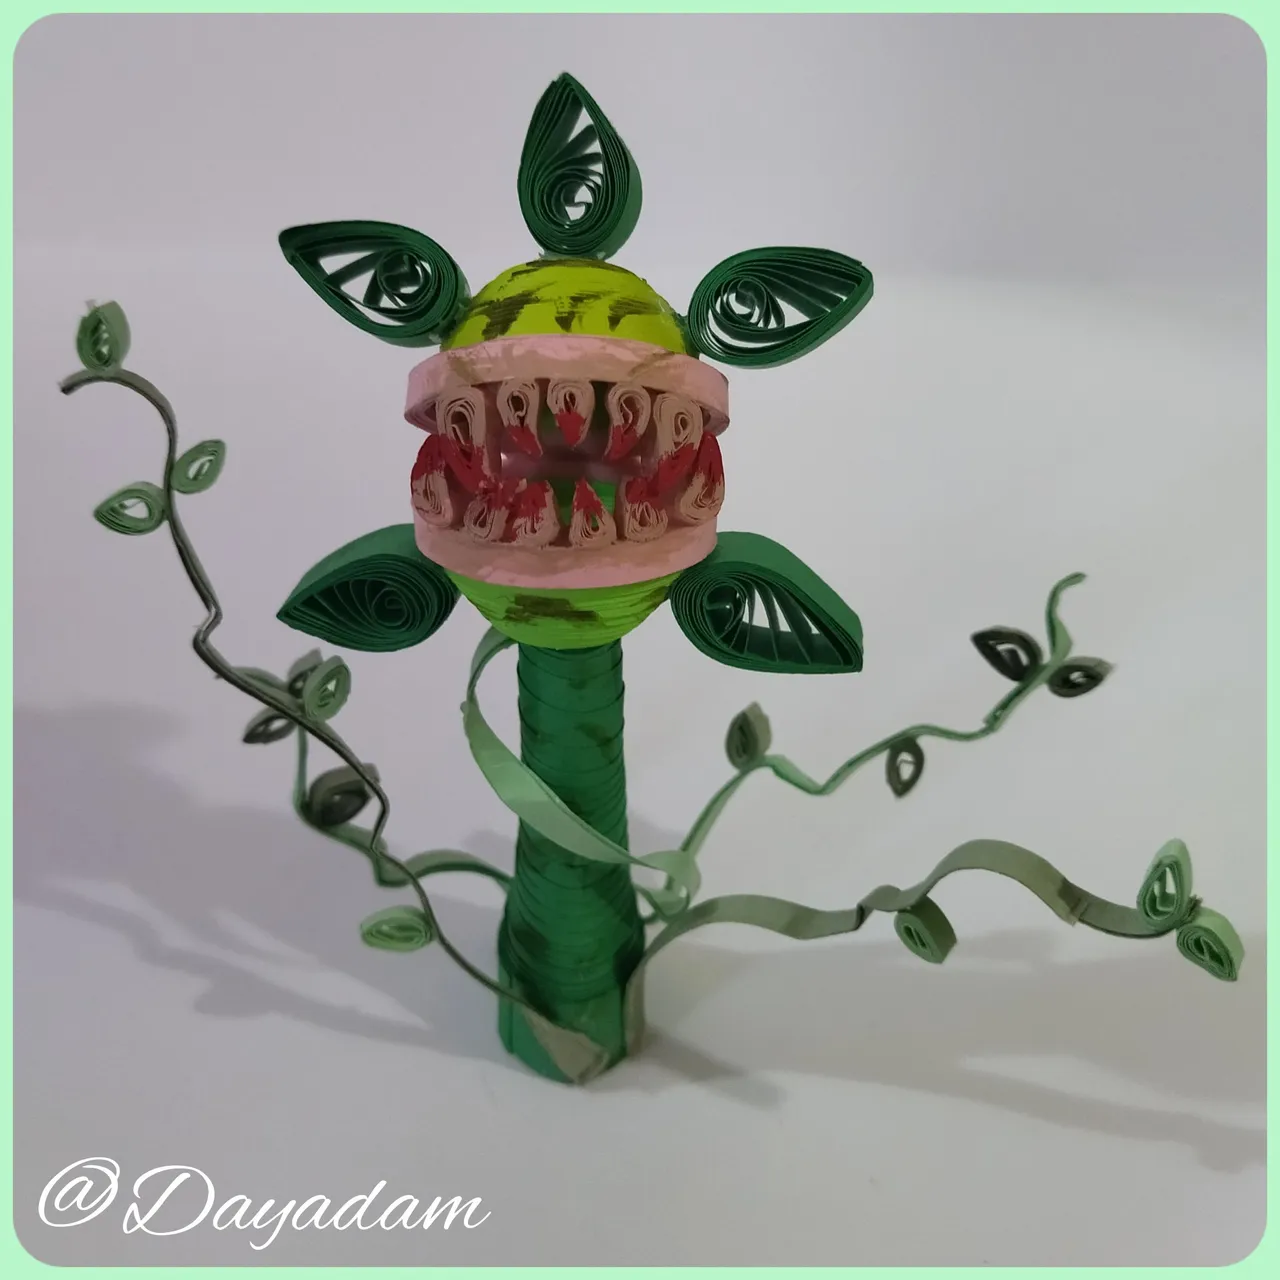
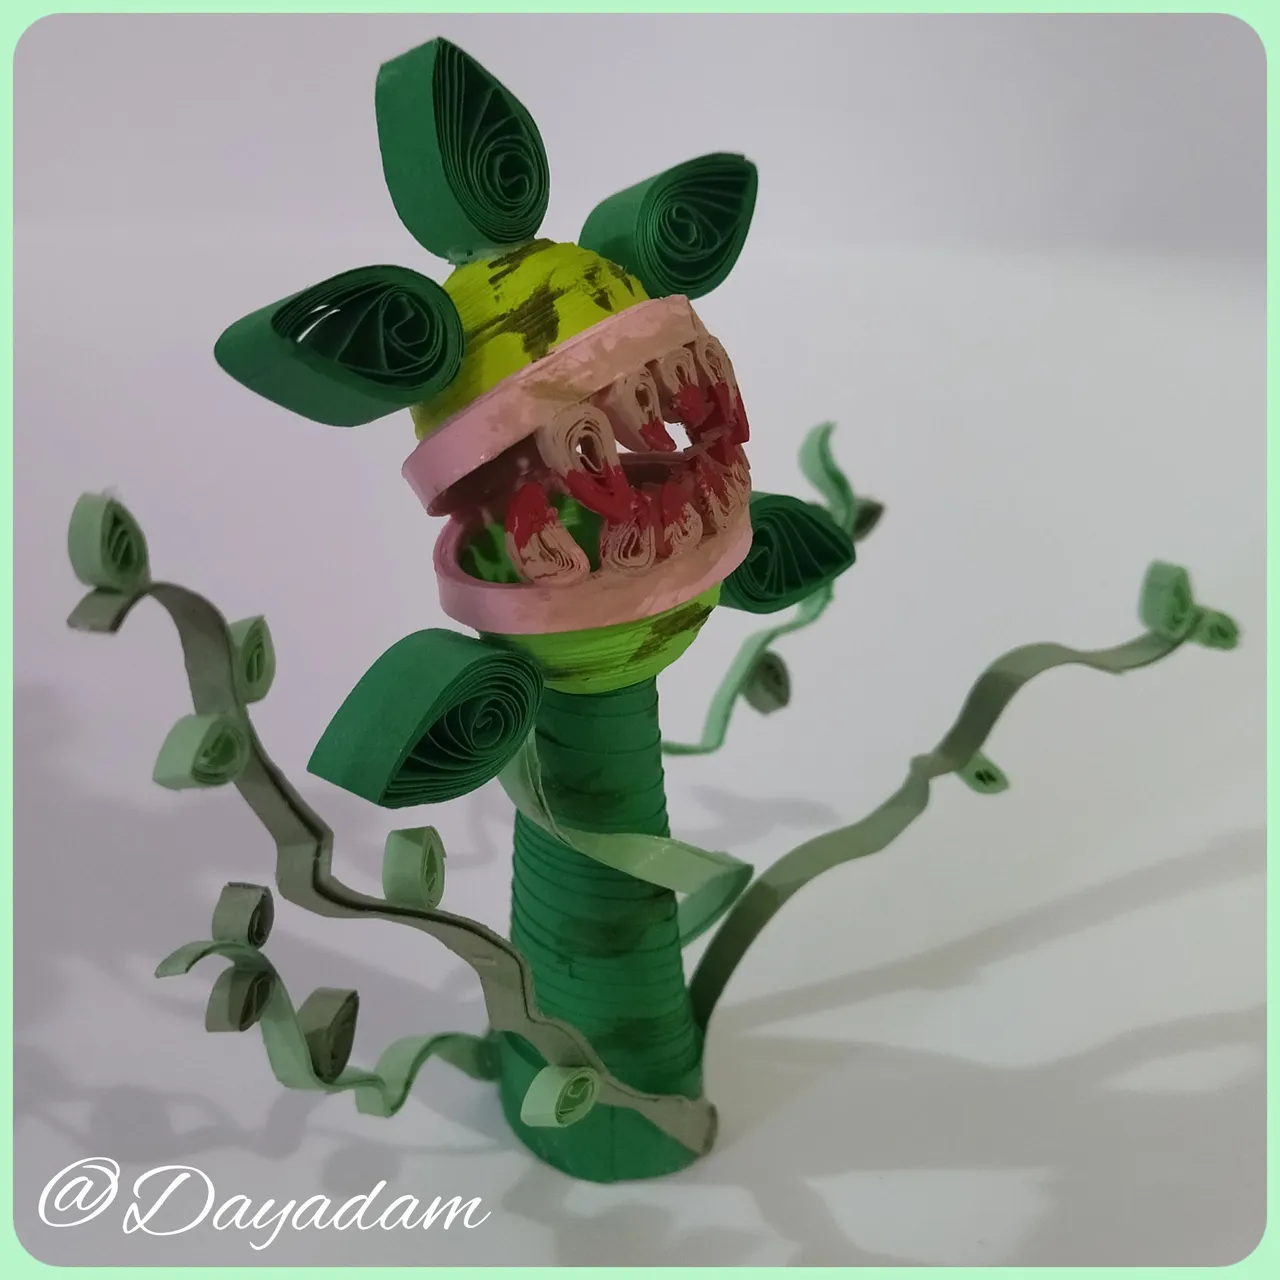
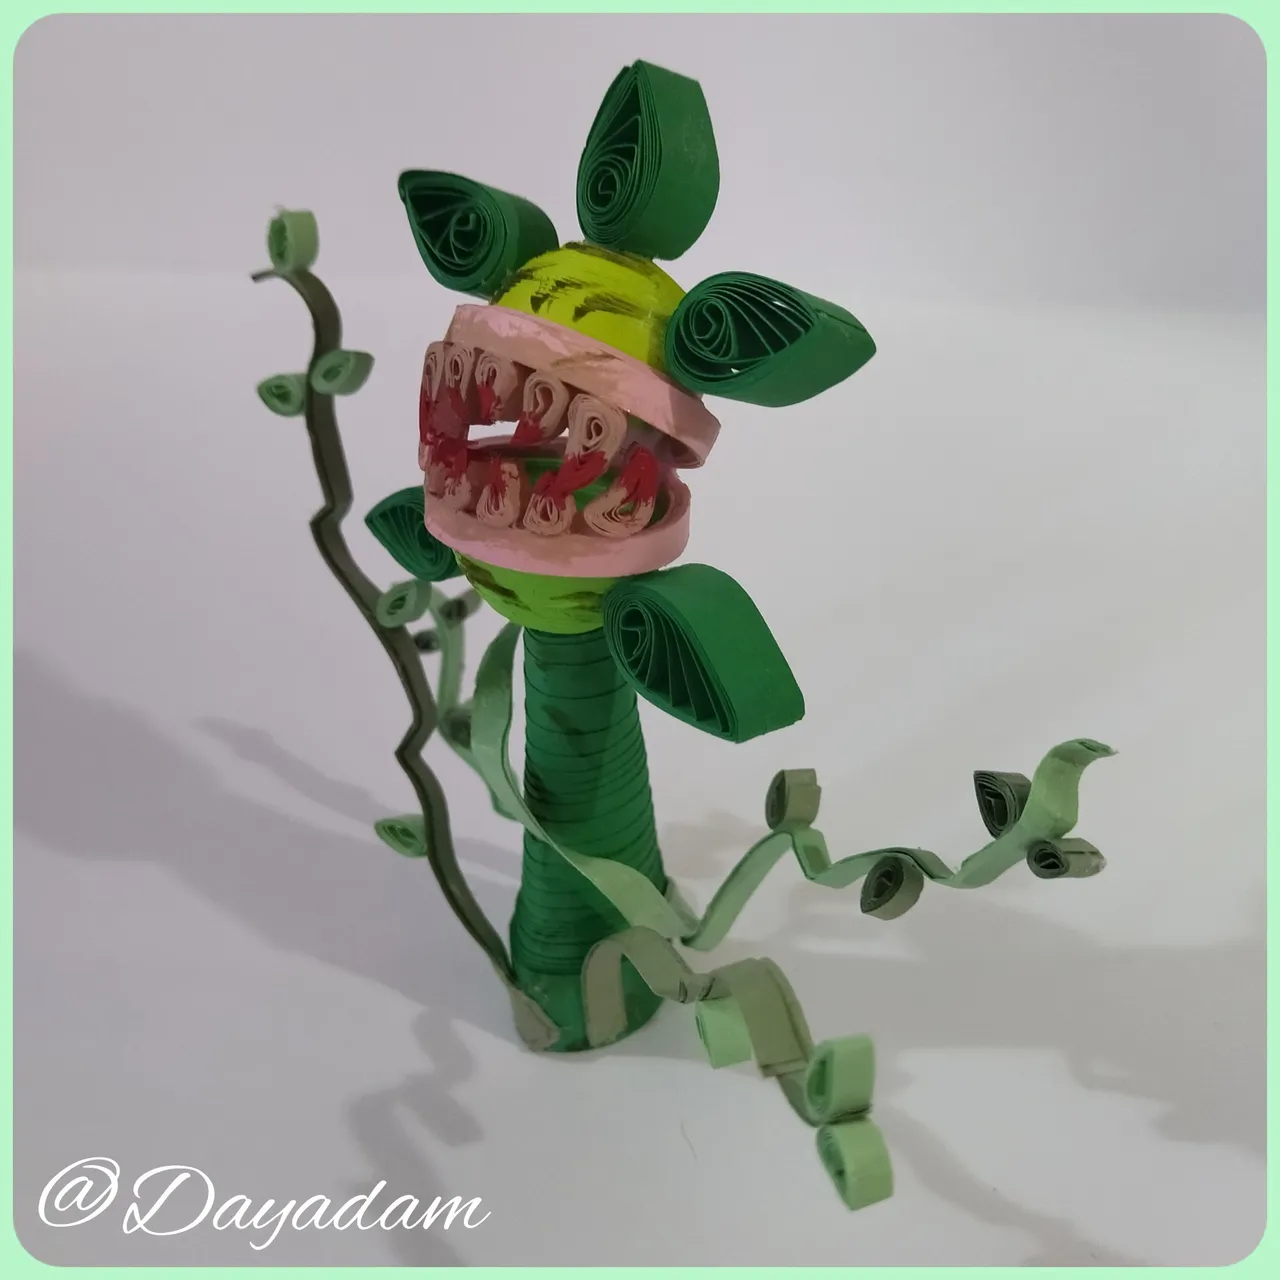
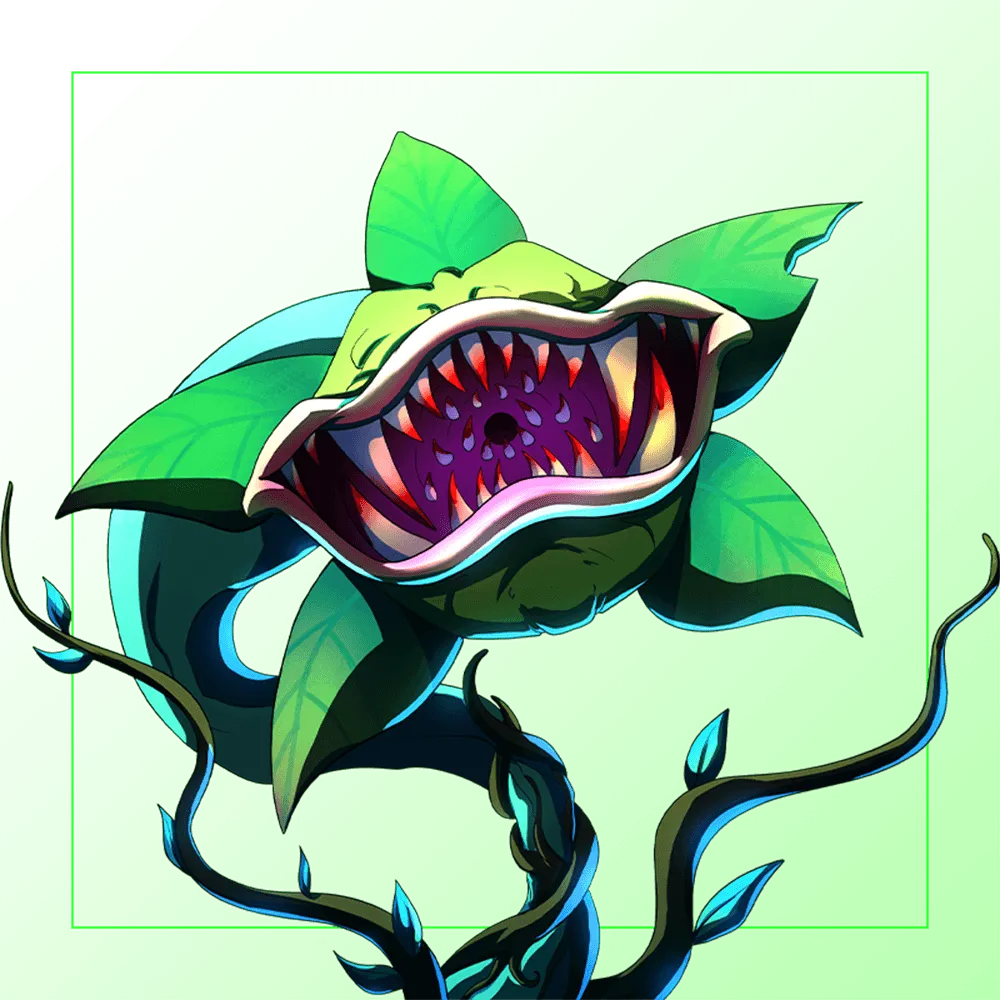
Today I bring you a fan-art of a card called "Vampiric Blossom", this is a plant that consumes the blood of their opponents, throws darts from his gut and paralyzes anyone who is touched by one of them, I found it interesting for its colors and appearance, so I wanted to materialize it in 3D in the quilling technique for all of you.
Hoping you like my work, without further ado, I leave you my creative process.
Let's get started:😃

Hola a Todos... ✨
Hola a mis queridos Hivers y a la querida comunidad de artistas HiveDIY, como siempre muy complacida y emocionada de encontrarme por acá nuevamente, mostrándole mi trabajo hecho con mucho amor y especialmente para ustedes.
Un saludo para la comunidad de Splinterland, y todos los que hacen vida por allí, me gratifica estar por acá para participar en el Splinterlands Art Contest Week 258.
Hoy les traigo un fan-art, de una carta llamada "Vampiric Blossom·, esta es una planta que consume la sangre de sus oponentes, lanza dardos desde sus entrañas y paraliza a cualquiera que sea tocado por uno de ellos, me pareció interesante por sus colores y apariencia, por ello quise materializarla en 3D en la técnica de quilling para todos ustedes.
Esperando les guste mi trabajo, sin más preámbulos, les dejo mi proceso creativo.
Comencemos:😃

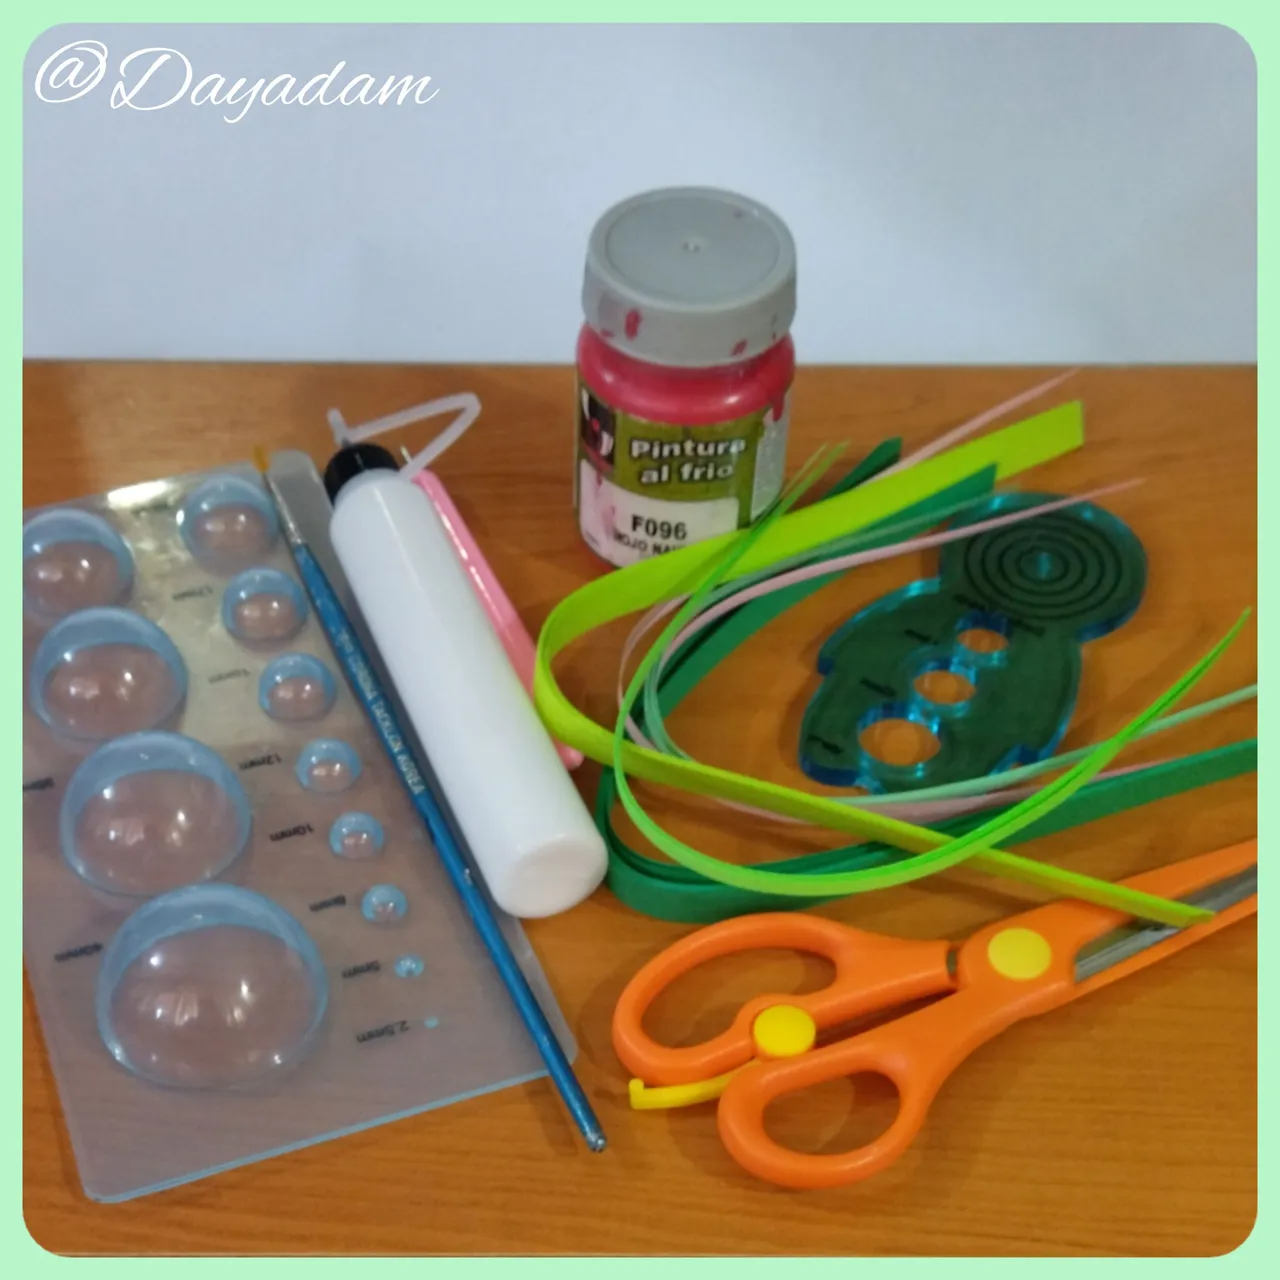
• Cintas de quilling de 3mm, 6mm y 9mm de ancho, diversos colores.
• Aguja para quilling.
• Plantilla para moldear círculos.
• Pinturas al frio.
• Pega blanca extra fuerte (de carpintería).
• Tijera.
• Pincel.
- Quilling ribbons of 3mm, 6mm and 9mm wide, different colors.
- Quilling needle.
- Template to mold circles.
- Cold paints.
- Extra strong white glue (carpentry glue).
- Scissors.
- Paintbrush.

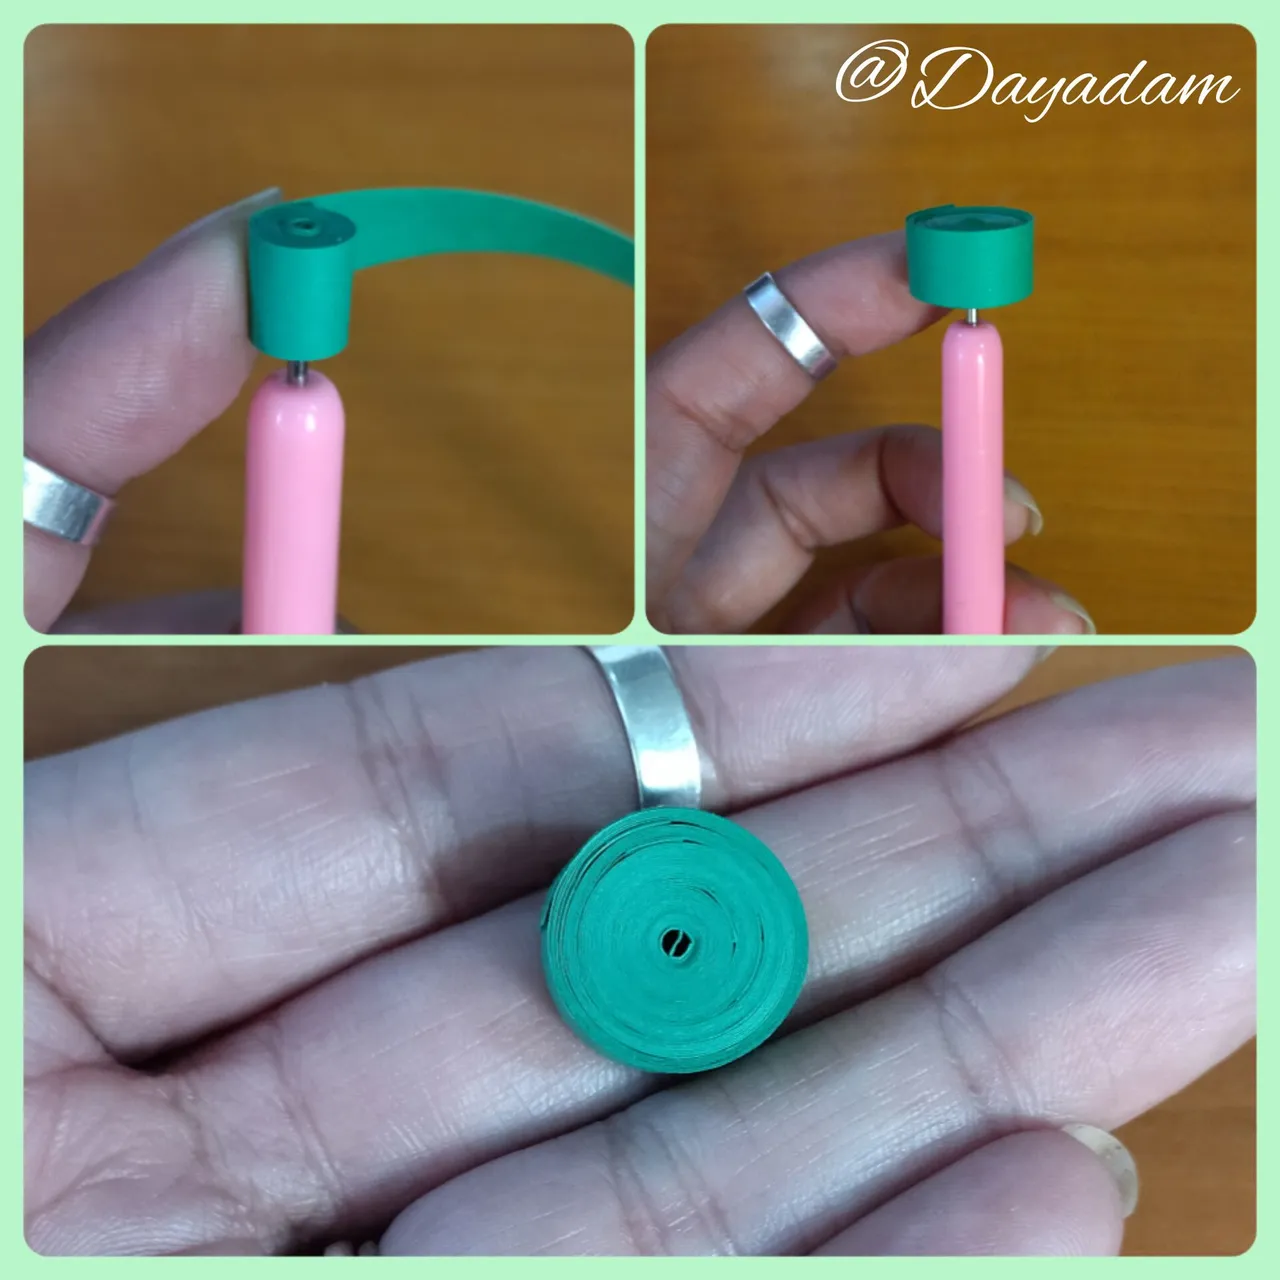
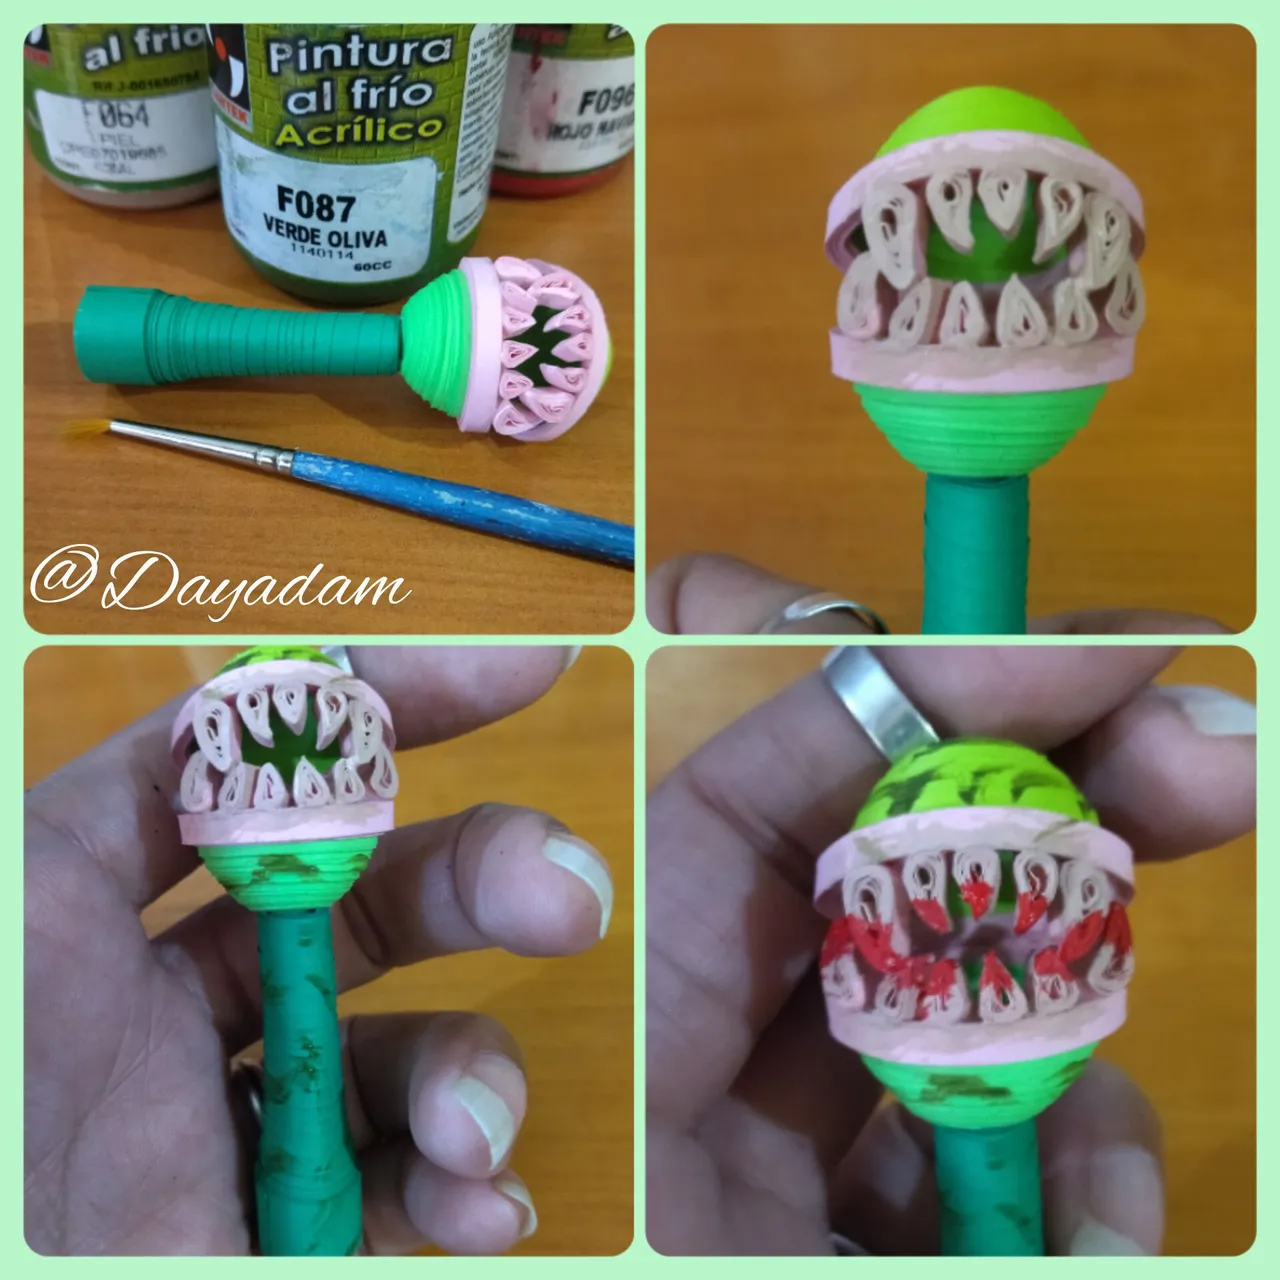
- Let's start by taking a 9mm wide x 100cms long quilling ribbon, roll it with the quilling needle until we get a closed circle, take it out of the needle and seal it with extra strong white glue.
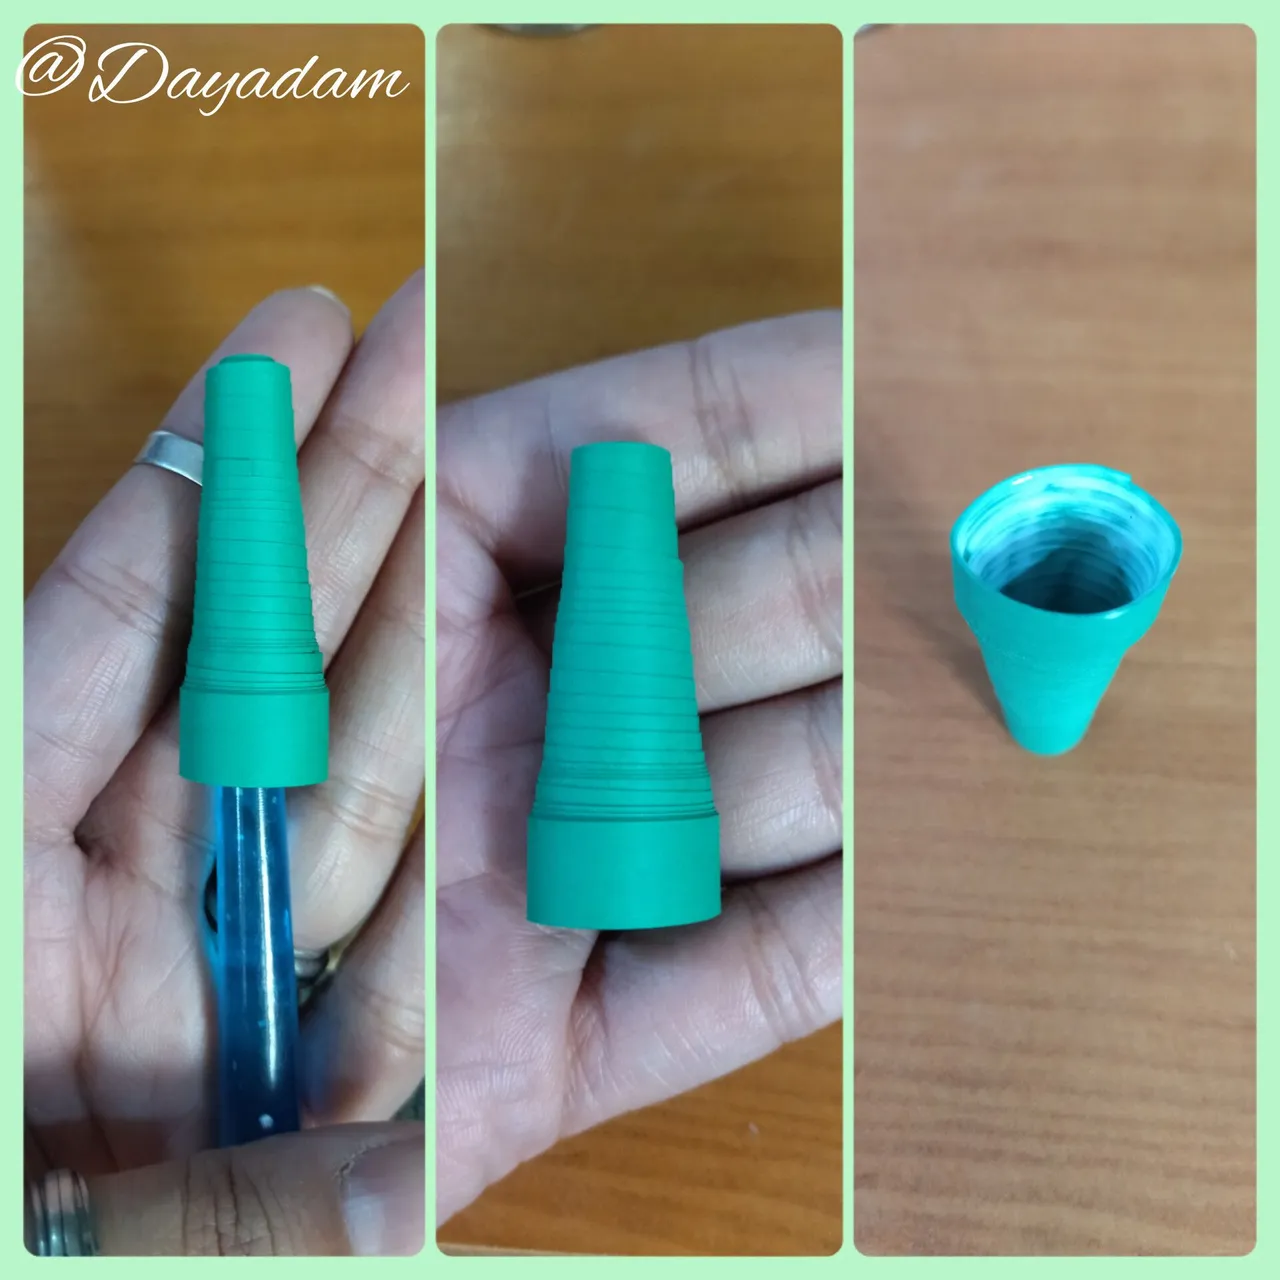
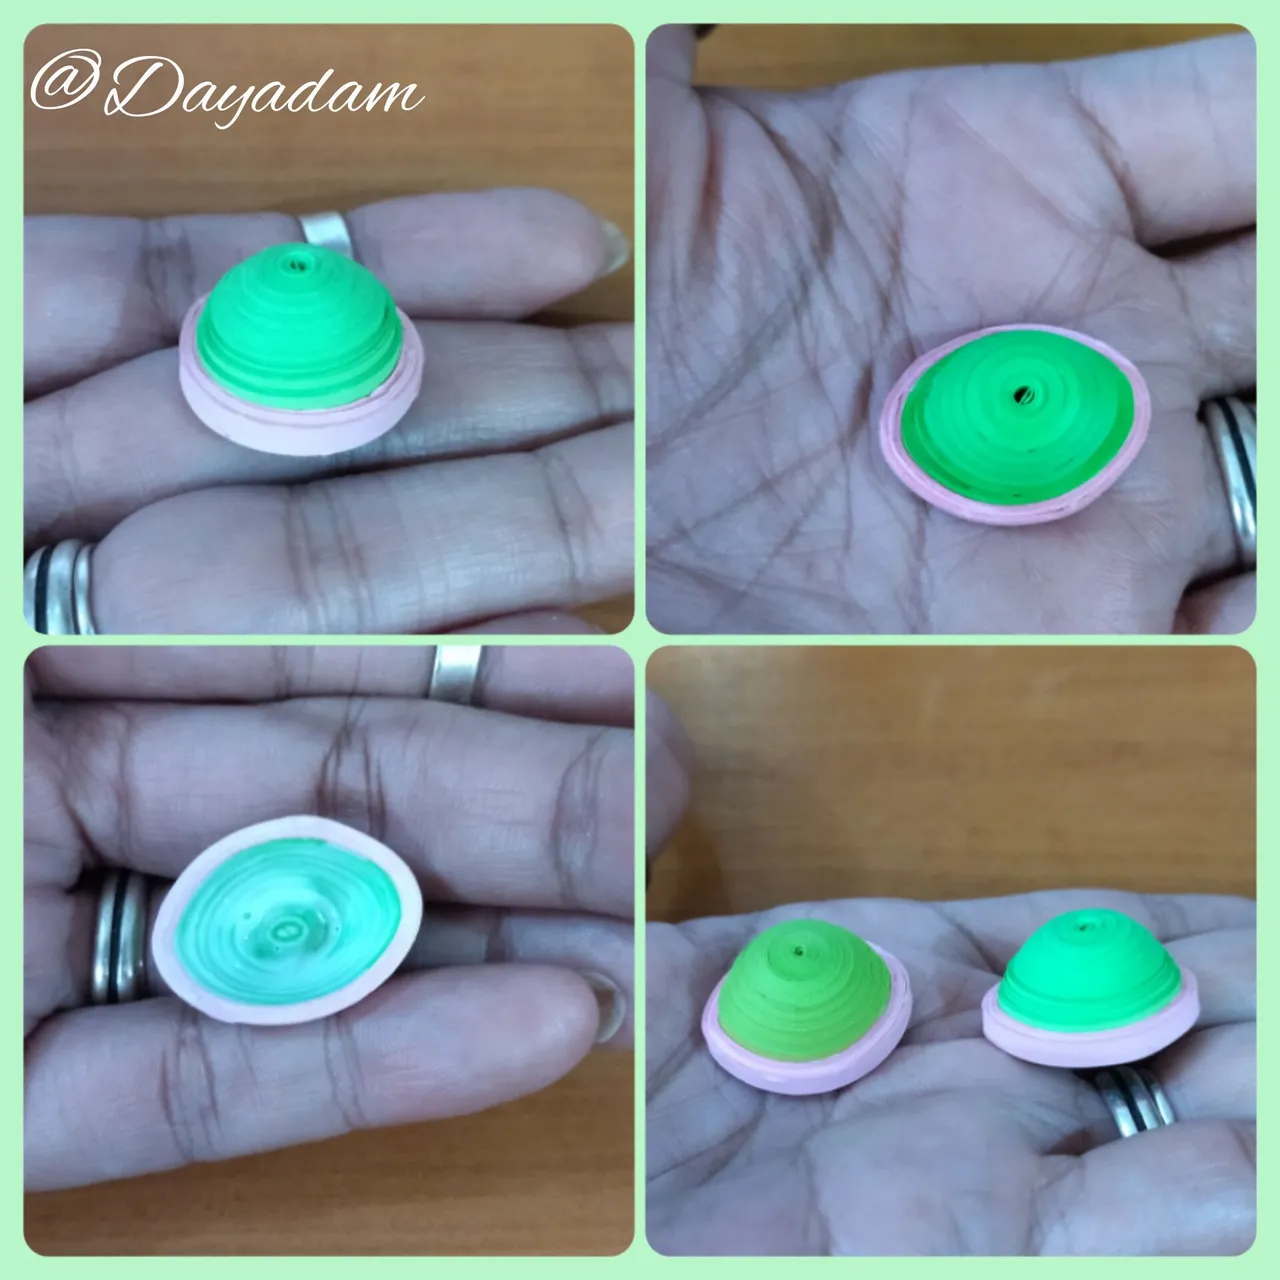
- We will mold lifting the circle with some object to form a high cone, then we flatten a little, we apply white glue in the hollow part so that the piece is not deformed.

• Vamos a comenzar tomando una cinta de quilling de 9mm de ancho x 100cms de largo, enrollamos con la aguja para quilling hasta obtener un círculo cerrado, sacamos de la aguja sellamos con cola blanca extra fuerte.
• Moldearemos levantando el circulo con algún objeto para formar un cono alto, luego aplanamos un poco, aplicamos pega blanca en la parte hueca para que no se deformen la pieza.

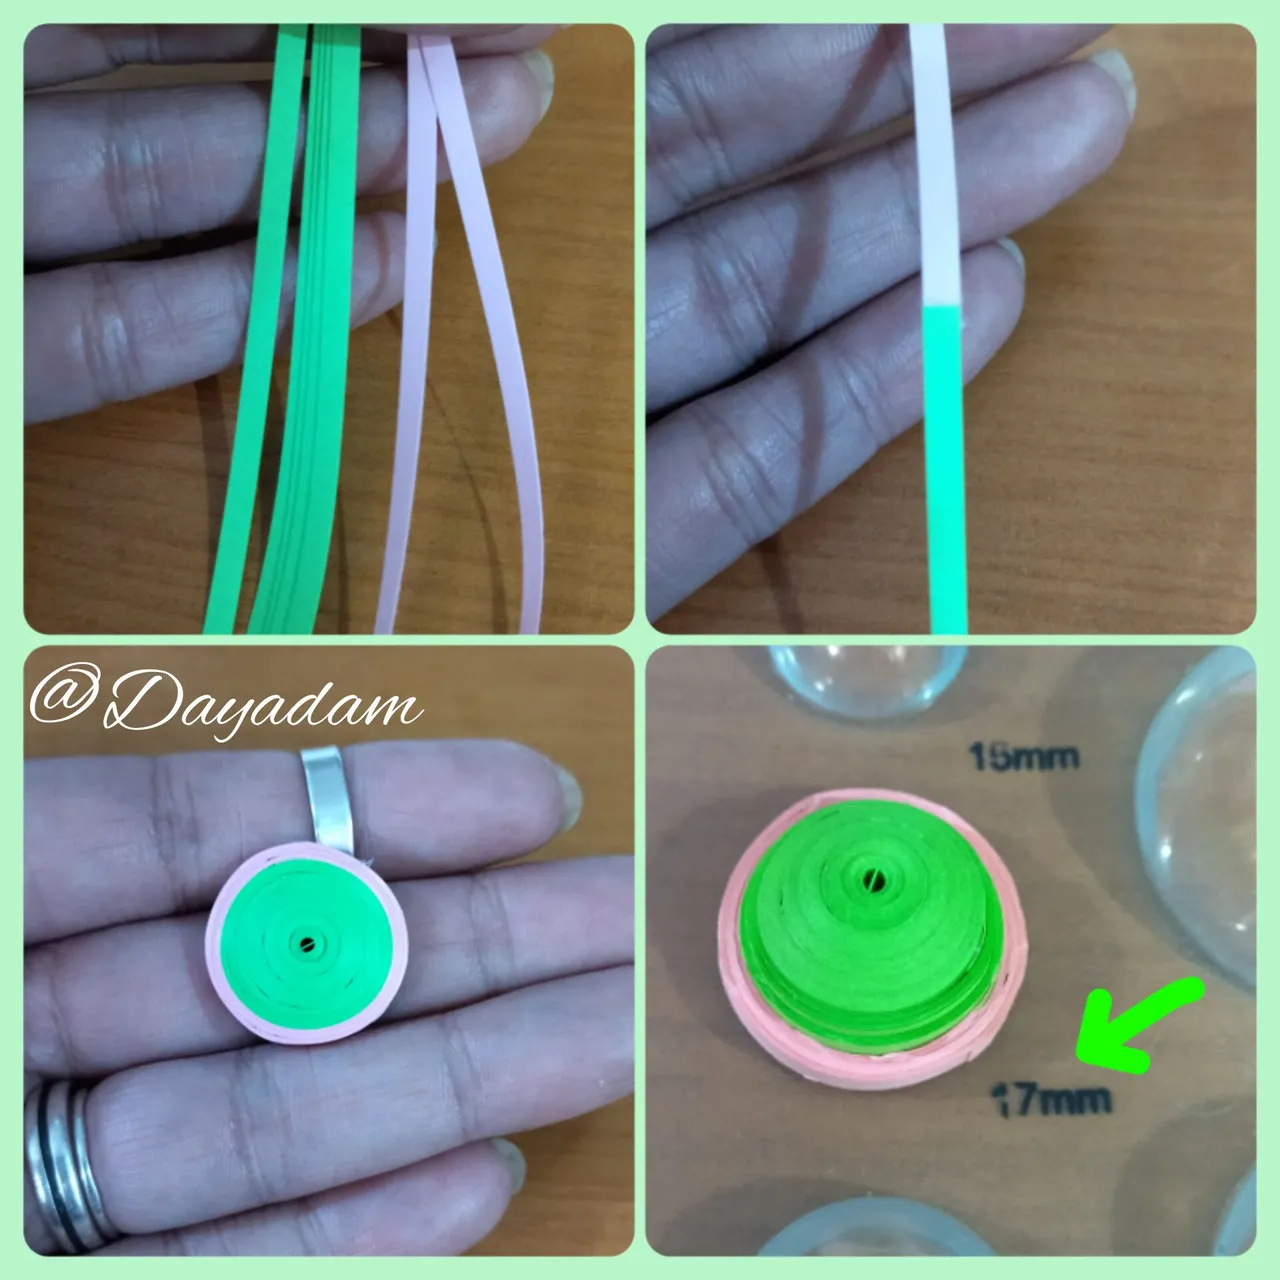
- We are going to take 3mm wide green and pink ribbon, we will join 2 pieces 150cms and 80cms respectively, we will join in one, we will roll up starting with the green part ending with the pink color to form a closed circle, we will mold with the circle template in the measure of 17mm (if you do not have a template, you can do it with your fingers), then we flatten a little, we apply white glue in the hollow part so that the piece is not deformed. We are going to make another piece just like this, the only thing that will change is the shade of green that we use.
• Vamos a tomar cinta verde de 3mm de ancho y rosada, uniremos 2 trozos 150cms y 80cms respectivamente, uniremos en una sola, enrollaremos comenzando por la parte verde terminando por el color rosado para formar un círculo cerrado, vamos a moldear con la plantilla de círculos en la medida de 17mm (si no cuentas con una plantilla, puede hacerlo con los dedos), luego aplanamos un poco, aplicamos pega blanca en la parte hueca para que no se deformen la pieza. Vamos a realizar otra pieza igual lo único que va es a variar la tonalidad del verde que use.
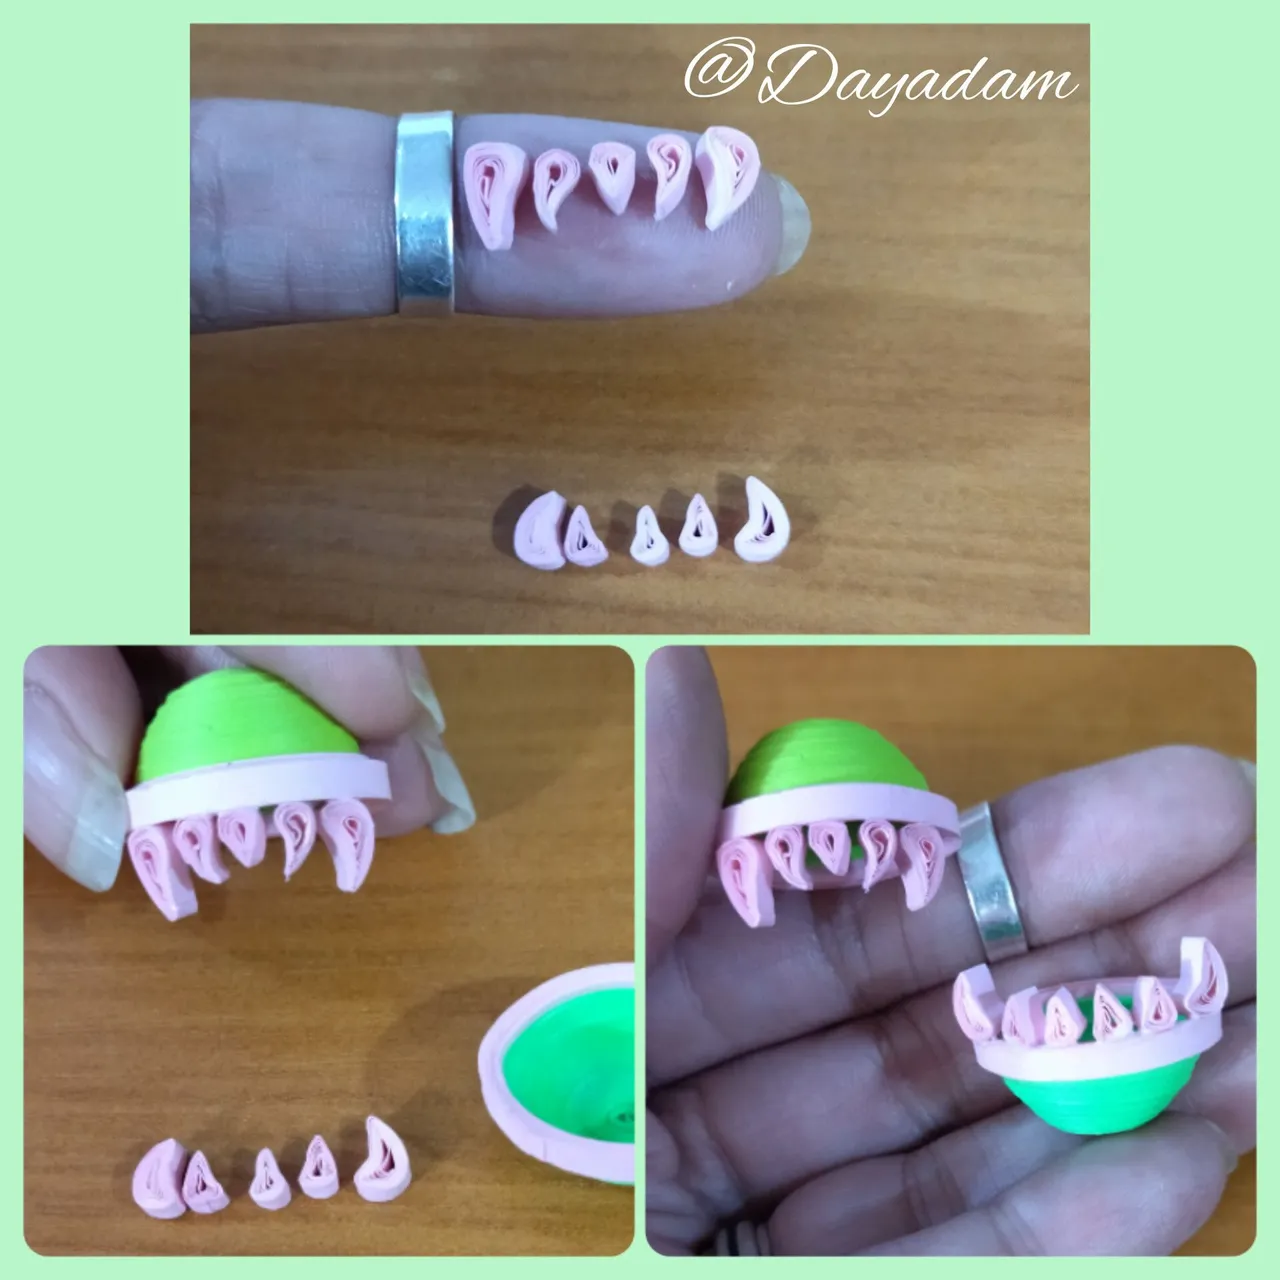
- To make the teeth, I took some 3mm wide pink tape with which I made some triangles of different sizes, and molded them to my liking, for the top and bottom.
- We will glue the teeth on the pieces that were made in advance.
- Once the teeth are placed and dry, we will join the 2 pieces, and then glue them to the base.
• Para realizar los dientes, tome cinta rosada de 3mm de ancho con la cual hice algunos triángulos de diversos tamaños, y los moldee a mi gusto, para la parte de arriba y abajo.
• Pegaremos los dientes en las piezas que se realizaron con antelación.
• Ya colocados los dientes y secos uniremos las 2 piezas, y luego pegaremos a la base.
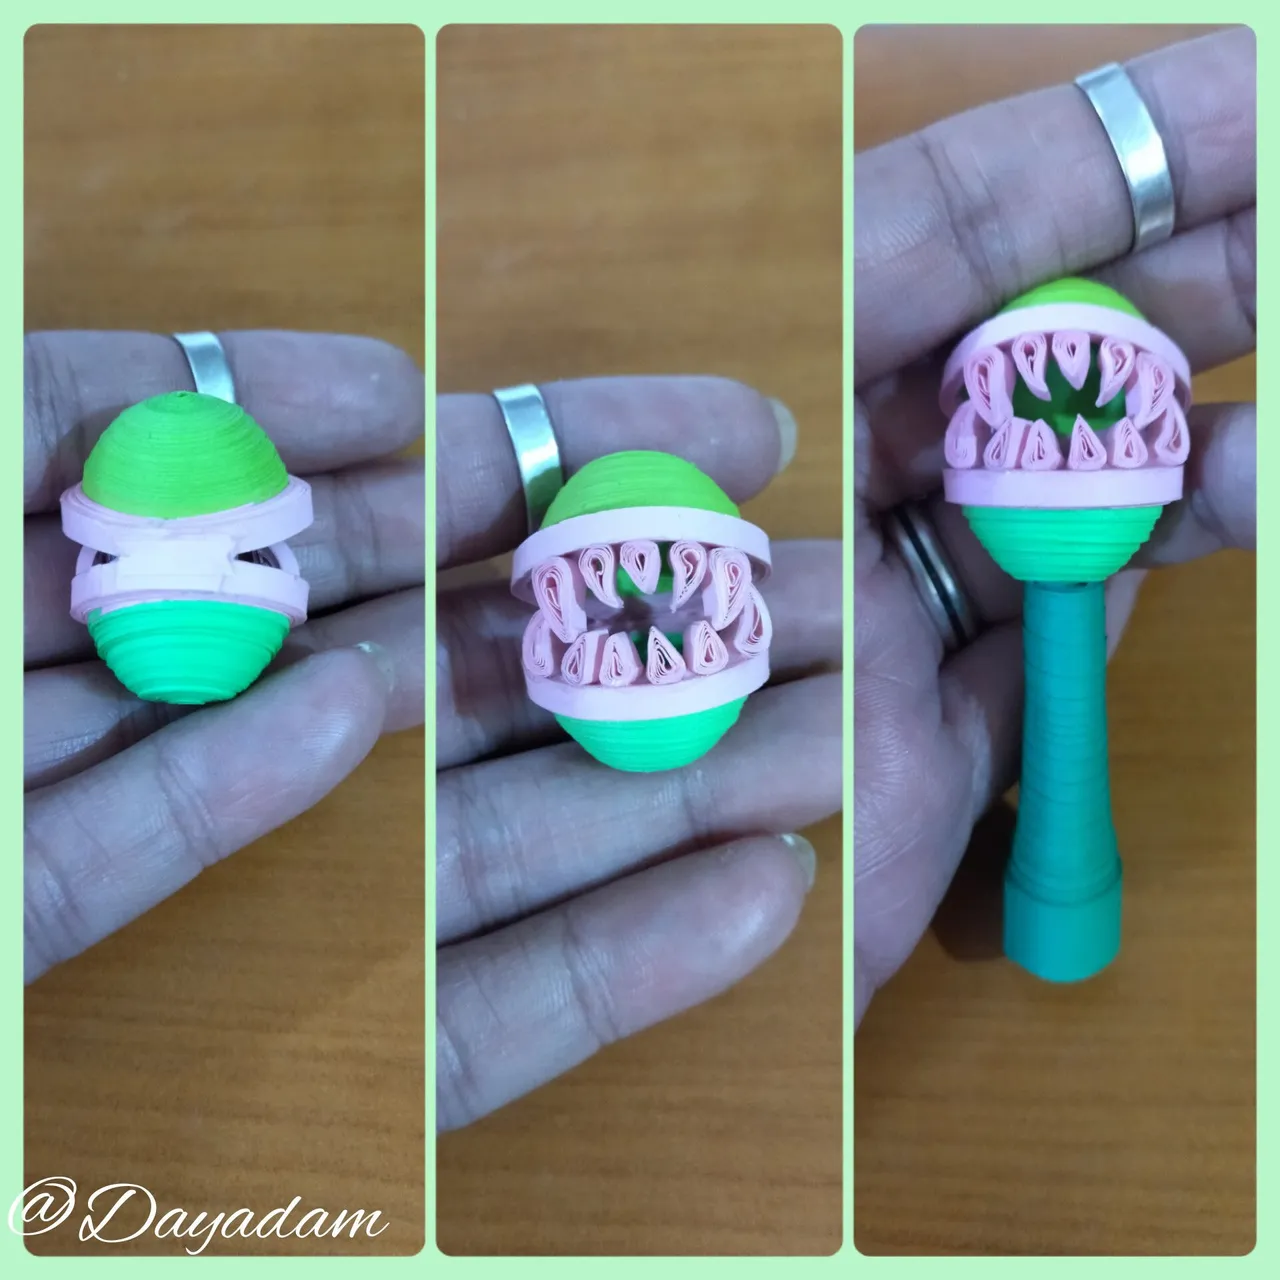
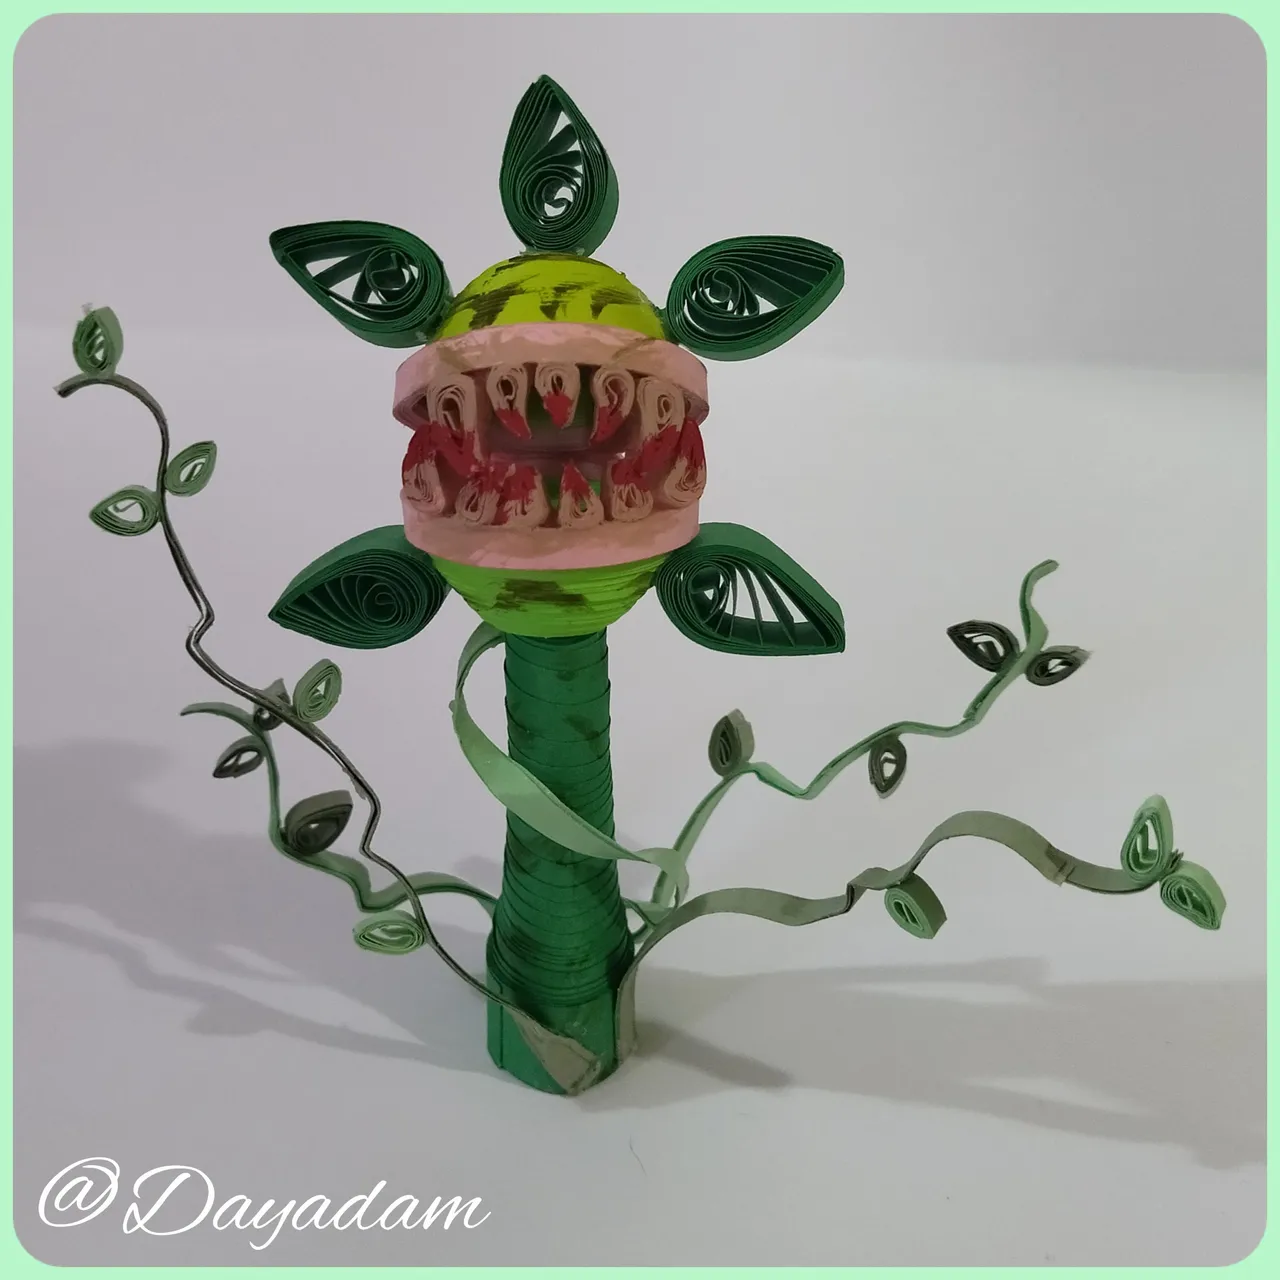
- I applied some cold paint to the teeth and other points of the plant.
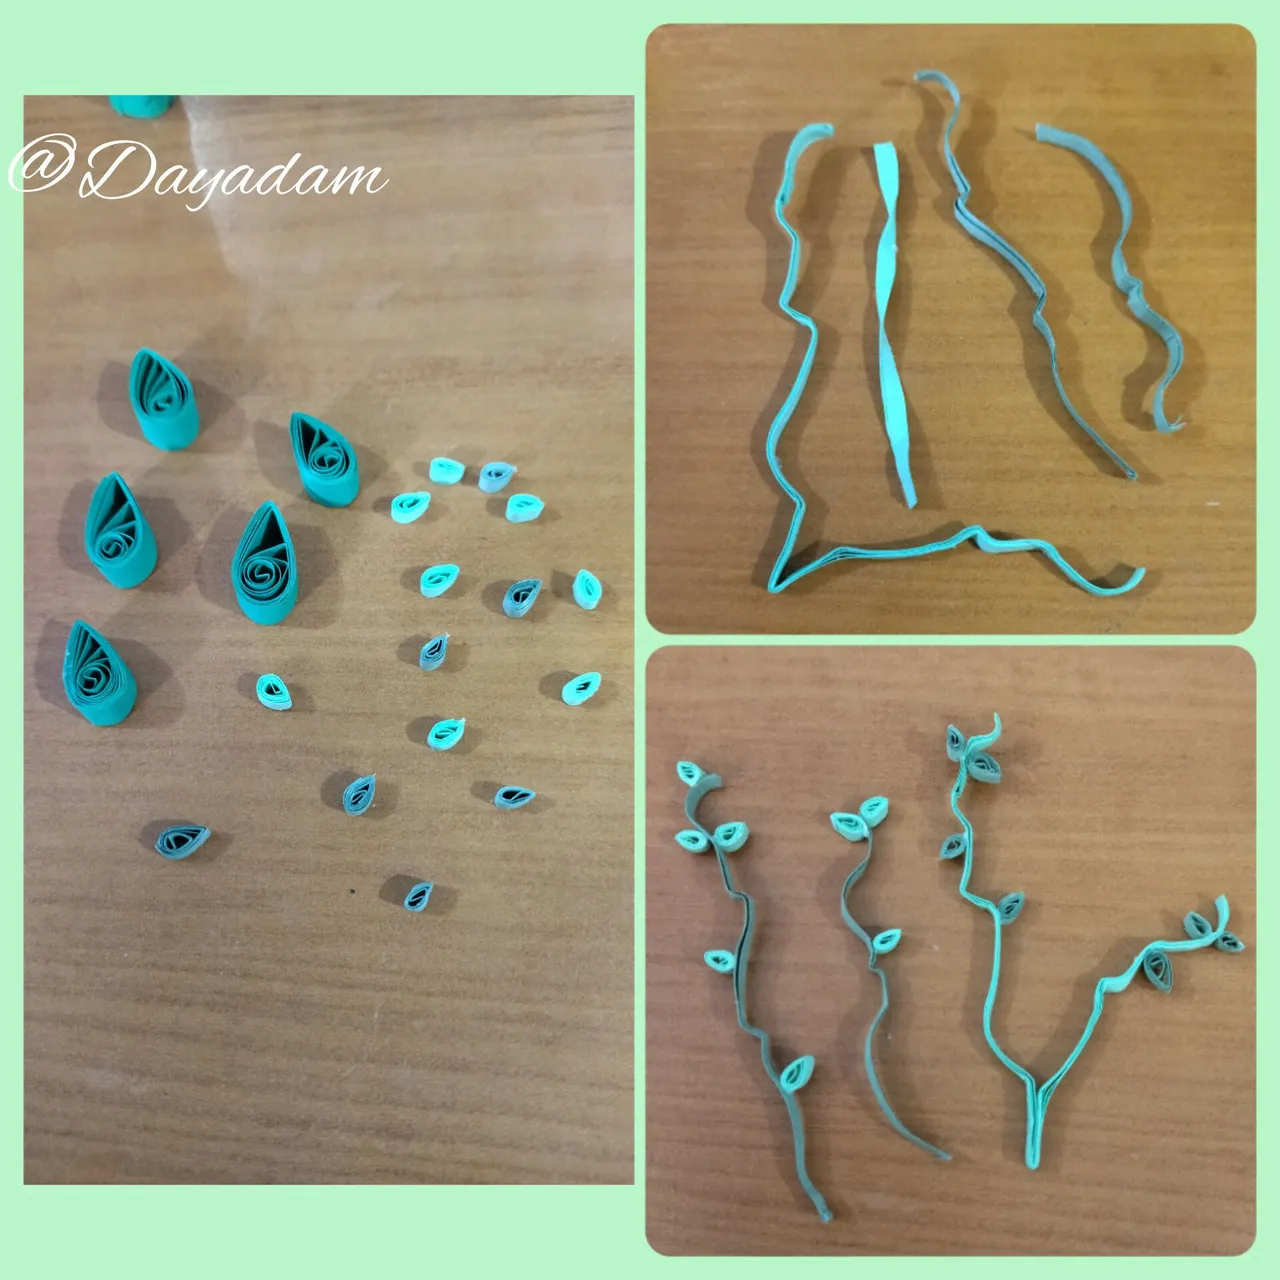
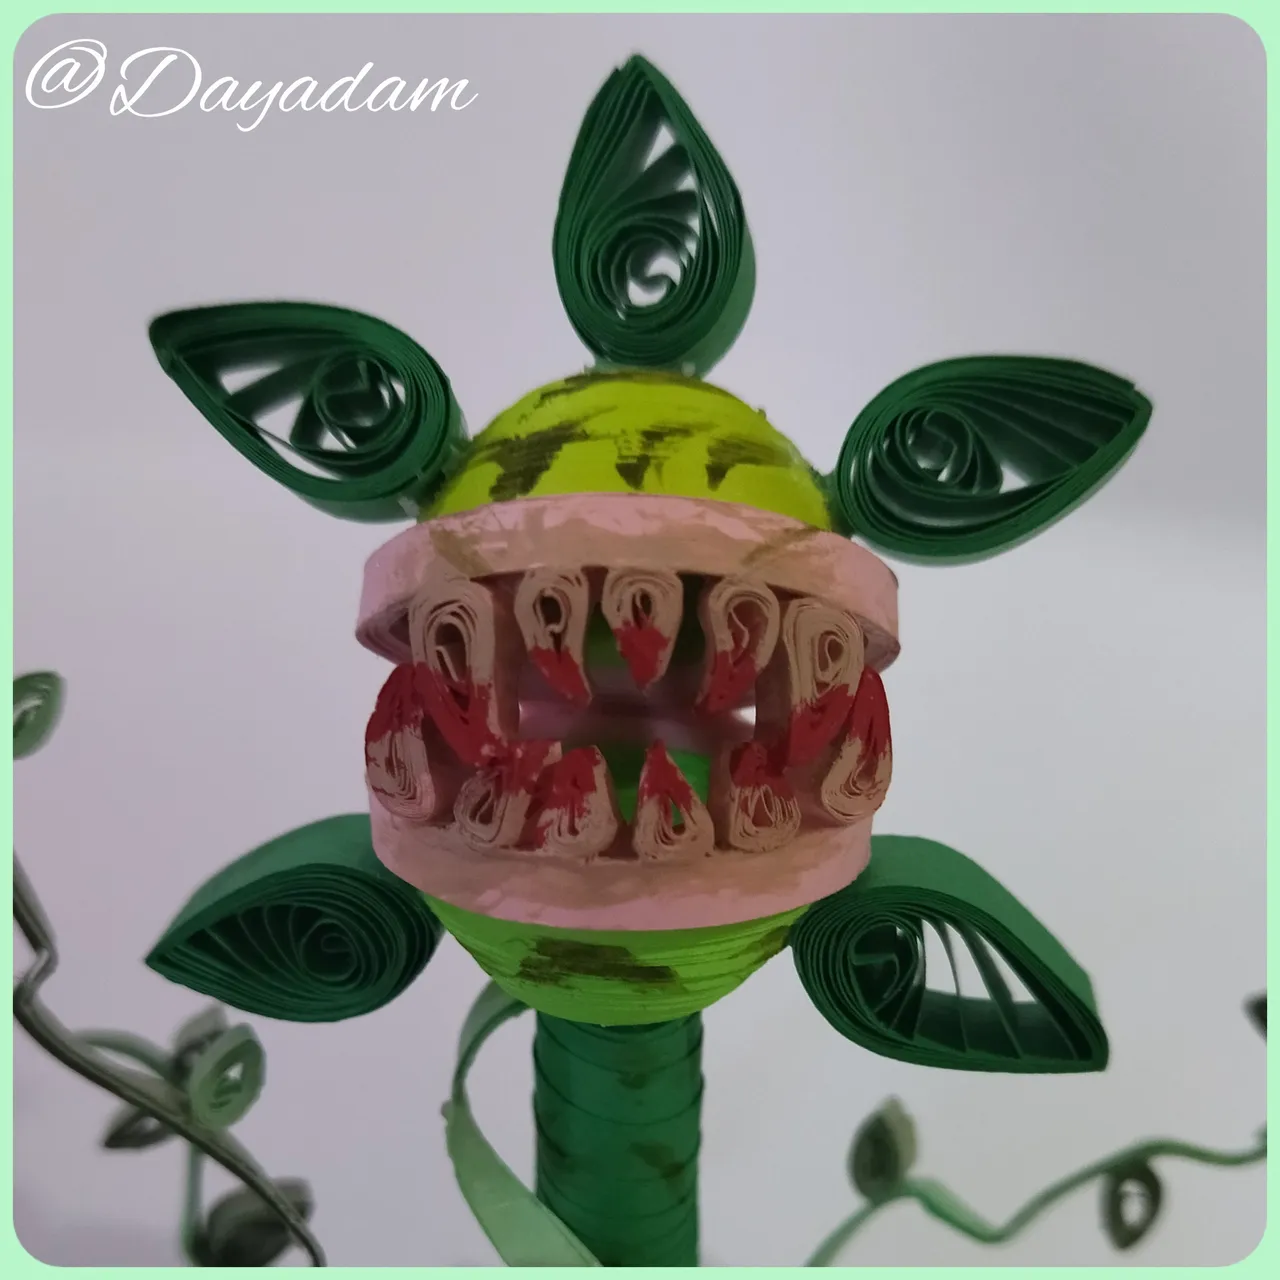
- To decorate the plant I made leaves of different sizes and colors in shades of green, I also molded ribbons of 3mm wide, in different shades to my taste to give resemblance to a root to these I glued some leaves.
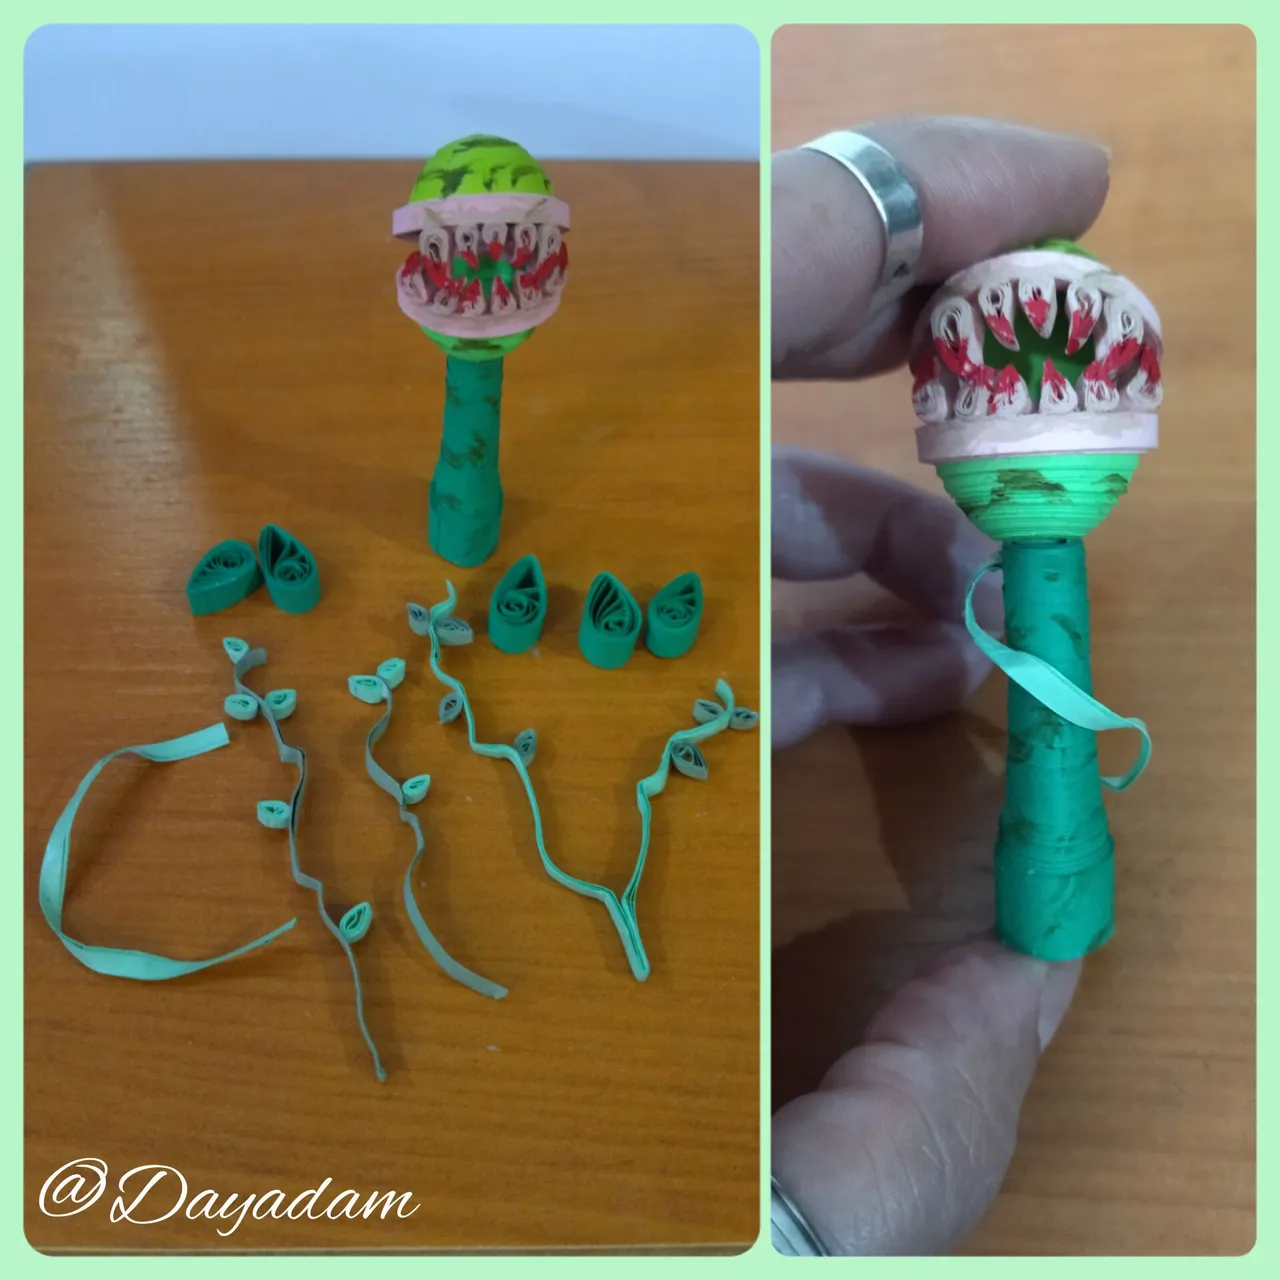
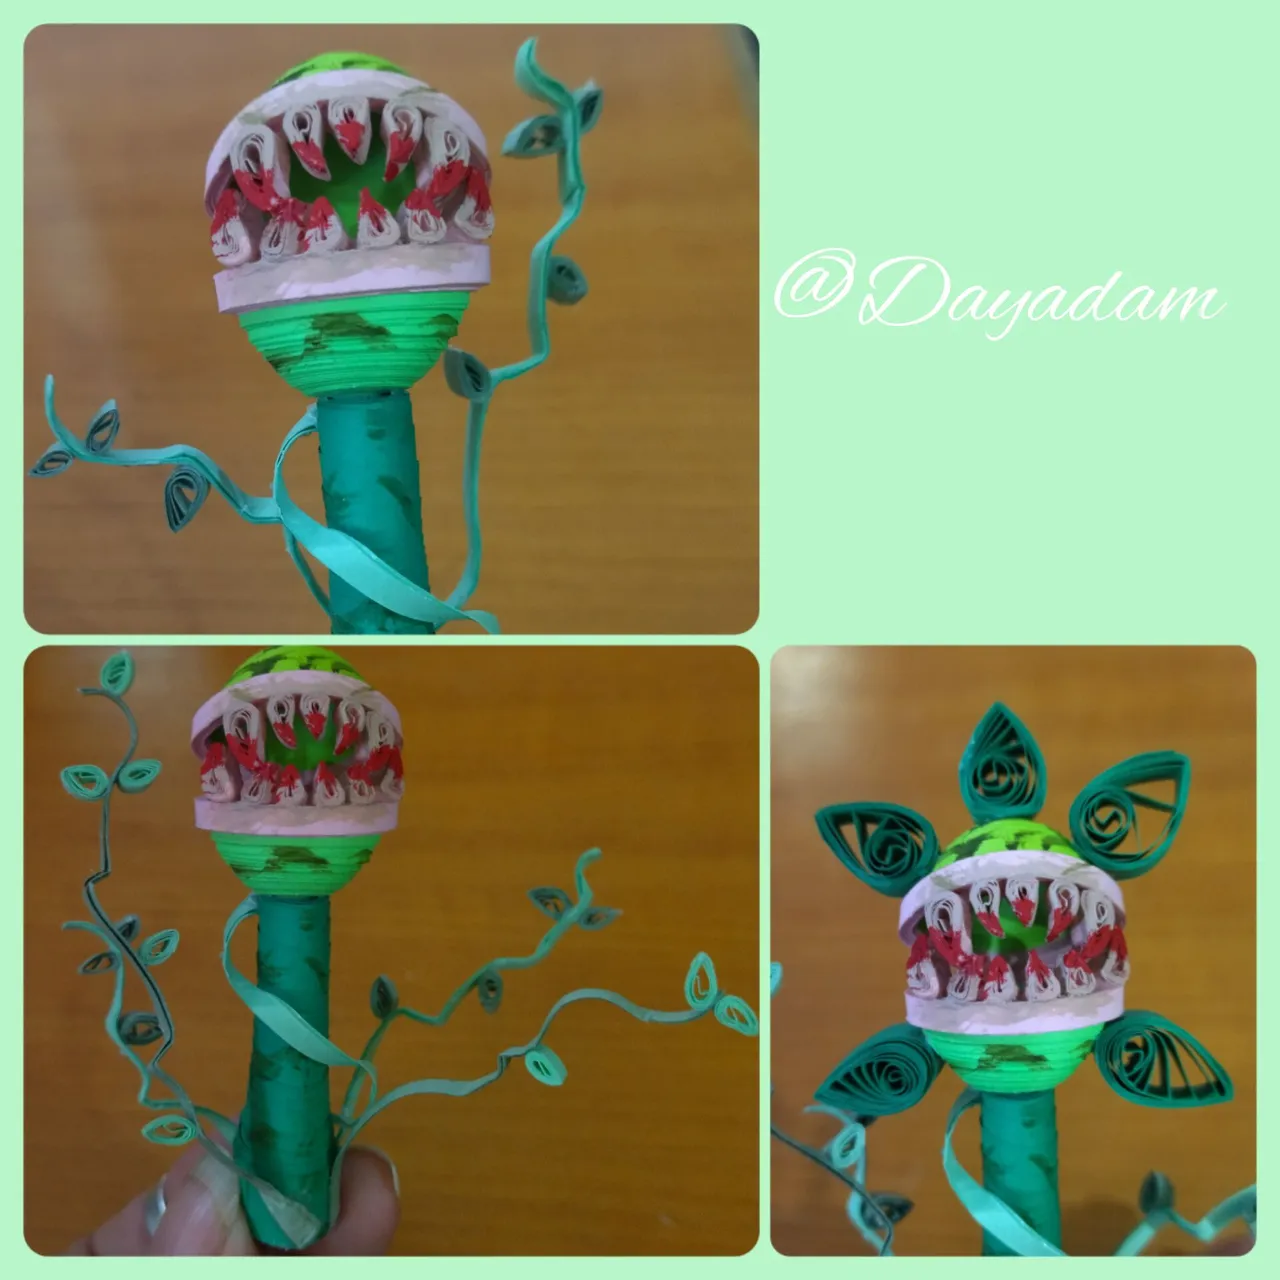
- I glued all the elements I made for the plant to my taste.
This way we have ready this fan-art of Vampiric Blossom in 3D, in the Quilling Technique.
• Le aplique un poco de pintura al frio a los dientes, y otros puntos de la planta.
• Para decorar la planta realice hojas de diversos tamaños y colores en tonalidades verdes, también moldee cintas de 3mm de ancho, en diversas tonalidades a mi gusto para dar semejanza a una raíz a estas les pegue algunas hojas.
• Pegue a mi gusto todos los elementos que elabore para la planta.
De esta manera tenemos listo este fan-art de Vampiric Blossom en 3D, en la Técnica de Quilling.


What did you think, did you like it?
I hope you did, I hope you liked my explanation, procedure and photos, I made them with love for you.
"Let out that muse that inspires you, and let your imagination fly".
Thank you all, see you next time.
¿Qué les pareció, les gustó?
Espero que sí, que les haya gustado mi explicación, procedimiento y fotos, los hice con mucho cariño por y para ustedes.
"Deja salir esa musa que te inspira, y deja volar tu imaginación".
Gracias a todos, nos vemos en la próxima.
Todas las fotos usadas en este post son de mi autoría y han sido sacadas en mi celular personal un Redmi 9T y editadas en Canva y en Inshot Fuente Carta Vampiric Blossom Banner y separador hecho por mí en Canva Traducido con la ayuda de DeepL
