Hello everyone... 🐱🐾💕
Hello my dear Hivers. I am here, first of all, wishing you a day full of many blessings, filled with love, joy, peace, and prosperity.
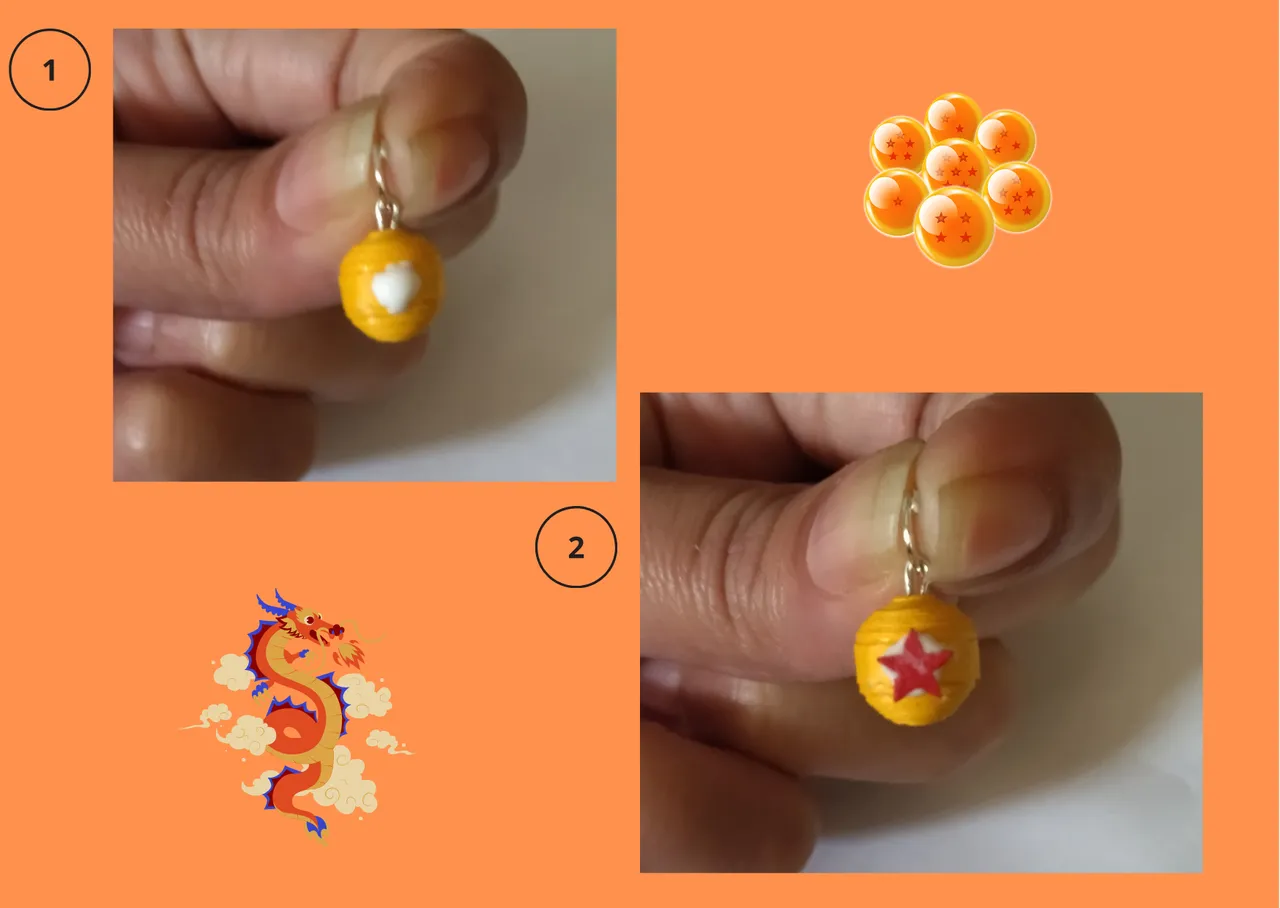
I tell you that today I join the Initiative, created by the community of @Aliento, to give a special surprise to his dear friend @TheyCallmeDan who this month turned a year older, and is a true fan of the Dragon ball saga.
Although I didn't know the celebrant for being relatively new to this medium, I still wanted to join in to wish him a happy birthday, and symbolically make him a small detail related to his great fondness for the majestic Dragon ball saga.
Who has not seen this saga and has fallen in love with it, well, I have. For me this has been one of the anime that I have enjoyed the most in my life since it appeared on national television, and as I could not follow it up, when it appeared on DVD I did not hesitate to buy it and enjoy it completely with my daughter, I would see it a thousand times more, because I loved it along with most of its characters, especially the GOKU eater. This has been an anime that filled us with so many joys, emotions, sadness and I would dare to say even tears for those of us that share the same feeling watching a series hahahahahah.
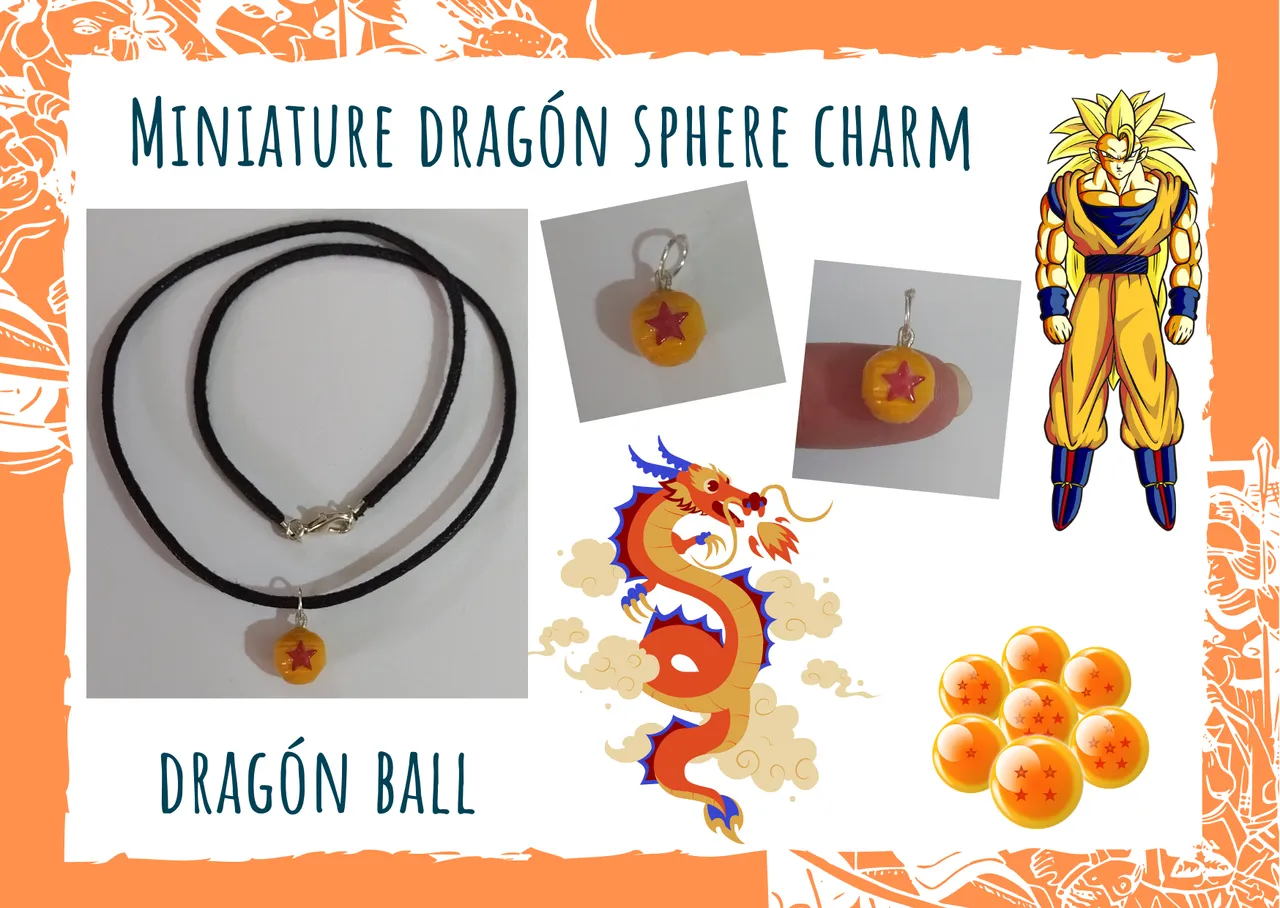
For today I bring you a pendant of a miniature dragon sphere, made in the quilling technique, mounted on a simple thick jute necklace that any gentleman can use, (in this case I would love to be the celebrant), with a very simple tutorial to perform, although the size of the piece has its level of difficulty for the development, but when things are done with love everything is possible, I hope the birthday boy enjoys it, and all my community of artists @HiveDiy, where I also wanted to share it.

Hola a todos... 🐱🐾💕
Hola mis queridos Hivers. Me encuentro por acá, primero que nada, deseando que tengan un día plagado de muchísimas bendiciones, colmado de amor, alegría, paz, y mucha prosperidad.
Les cuento que para hoy me sumo a la iniciativa, creada por la comunidad de @Aliento, para darle una sorpresa especial a su querido amigo @TheyCallmeDan que en este mes cumplió una año más de vida, y es un fehaciente admirador de la saga de Dragon ball.
Aunque no conocía al festejado por ser relativamente nueva en este medio, igual me quise sumar para desearle un gran feliz cumpleaños, y elaborarle simbólicamente un pequeño detalle relacionado con su gran afición a la majestuosa saga de Dragón ball.
Quien no ha visto esta saga y se ha enamorado de ella, pues yo sí. Para mi este ha sido uno de los animes que más he disfrutado en mi vida desde que apareció en televisión nacional, y como no le pude hacer el seguimiento debido, cuando apareció en DVD no dude en comprarla y disfrutarla por completo junto a mi hija, la vería una y mil veces más, ya que lo ame junto a la mayoría de sus personajes, en especial al comelón de GOKU. Este ha sido un anime que nos llenó de tantas alegrías, emociones, tristezas y me atrevería a decir hasta llantos para los que nos compenetramos viendo una serie jajajaj.
Para hoy les traigo un dije de una esfera del dragón en miniatura, realizada en la técnica de quilling, montado en un sencillo collar de yute grueso que cualquier caballero puede usar, (en este caso me encantaría que pudiese ser el festejado), con un tutorial muy sencillo de realizar, aunque por el tamaño de la pieza tiene su nivel de dificultad para la elaboración, pero cuando las cosas se hacen con cariño todo se puede, espero lo disfrute el cumpleañero, y toda mi comunidad de artistas de @HiveDiy, por donde quise también compartirlo.
🐉🐉
Let's get started:😃
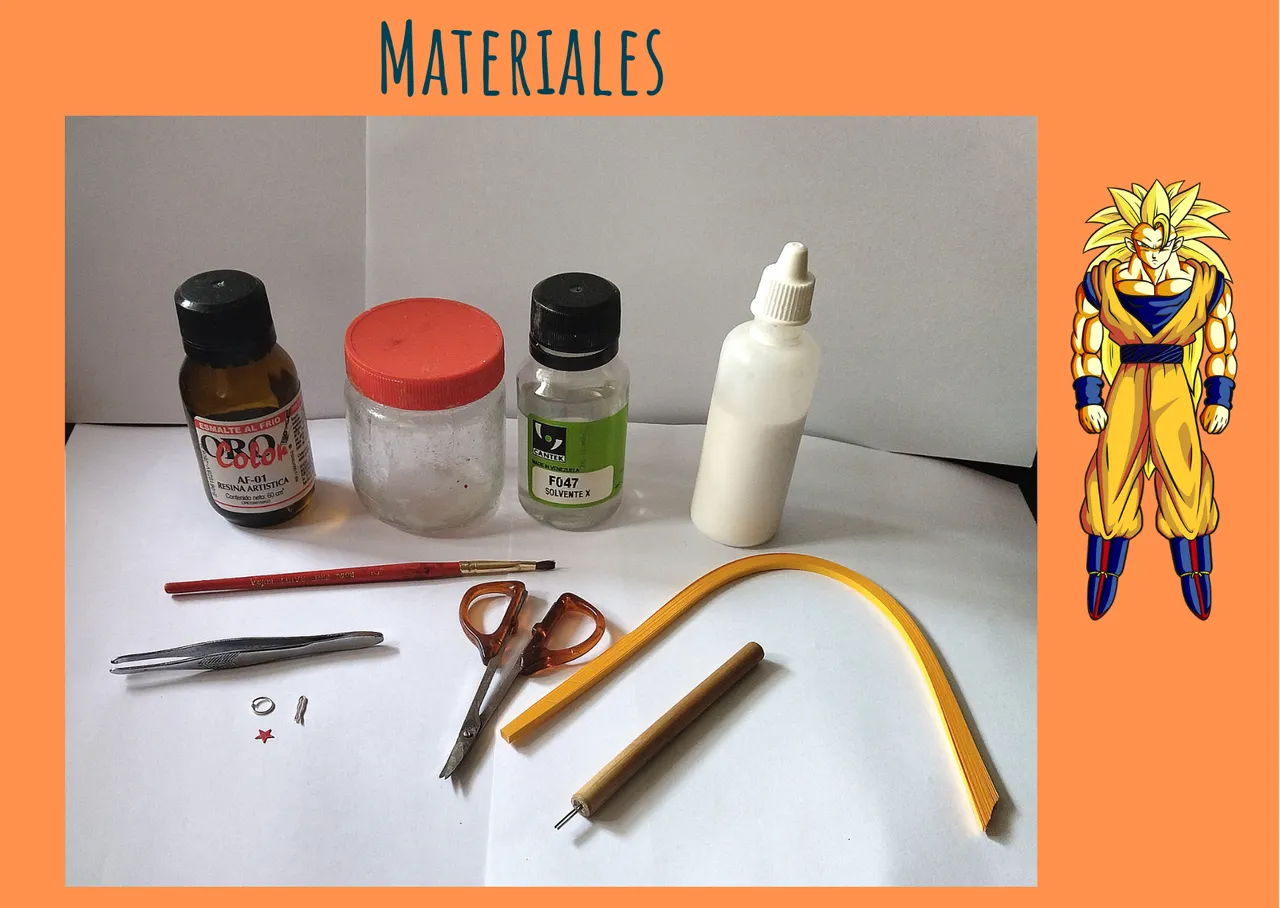
Materials:📏✏️✂️.
- Orange color quilling ribbons 3mm wide.
- Quilling needle.
- White glue.
- Scissors.
- Red star, 5mm in circumference.
- Medium size costume jewelry ring.
- Piece of wire.
- Fine-nosed pliers.
- Fine tip tweezers.
- Artistic resin.
- Solvent X.
- Glass bottle.
Comencemos:😃
Materiales:📏✏️✂️
• Cintas de quilling color naranja de 3mm de ancho.
• Aguja para quilling.
• Pega blanca.
• Tijera.
• Estrella roja, de 5mm de circunferencia.
• Argolla de bisutería mediana.
• Trozo de alambre.
• Alicate punta fina.
• Pinza punta fina.
• Resina artística.
• Solvente X.
• Frasco de vidrio.
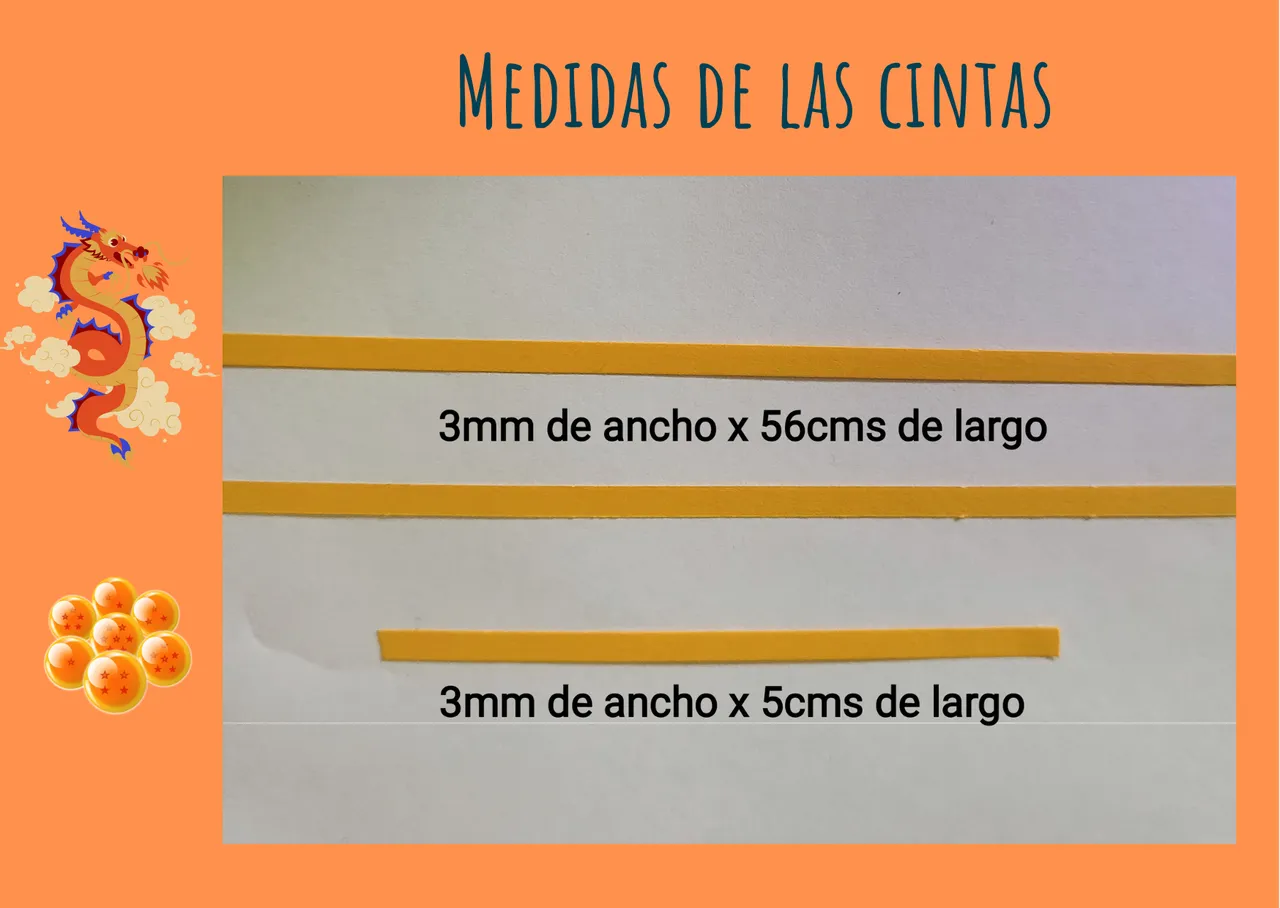
Tape sizes:🌈
- We will need 2 orange quilling ribbons 3mm wide by 56cms long, and another piece of orange quilling ribbon 3mm wide x 5cms long.
Medidas de las cintas:🌈
• Vamos a necesitar 2 cintas de quilling color naranja de 3mm de ancho por 56cms de largo, y otro trozo de cinta de quilling color naranja de 3mm de ancho x 5cms de largo.
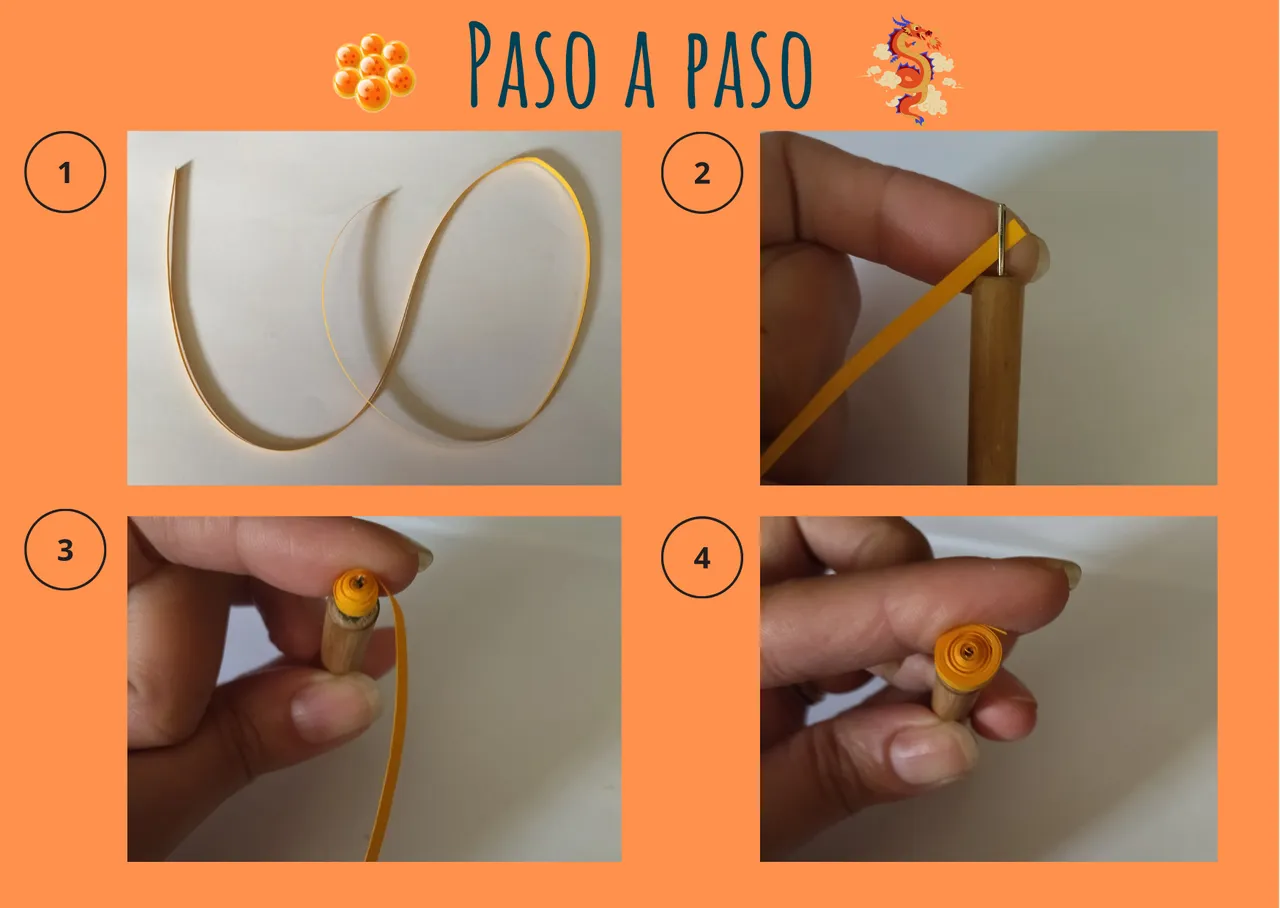
Step by step:💖
- To begin we will take the two orange quilling ribbons 3mm wide x 56cms long, with them we will proceed to make two closed circles, we take one of the ribbons, and with the help of the quilling needle we place the first end of one of the ribbons at the tip of the needle, we proceed to roll completely and at the end we seal with a glue point, in this way we repeat with the second ribbon, and we will have the two closed circles that we need for our piece.
Paso a paso:💖
• Para comenzar vamos a tomar las dos cintas de quilling color naranja de 3mm de ancho x 56cms de largo, con ellas vamos a proceder a elaborar dos círculos cerrados, tomamos una de las cintas, y con la ayuda de la aguja para quilling colocamos el primer extremo de una de las cintas en la punta de la aguja, procedemos a enrollar por completo y al finalizar sellamos con un punto de pega, de esta manera repetimos con la segunda cinta, y tendremos los dos círculos cerrados que necesitamos para nuestra pieza.
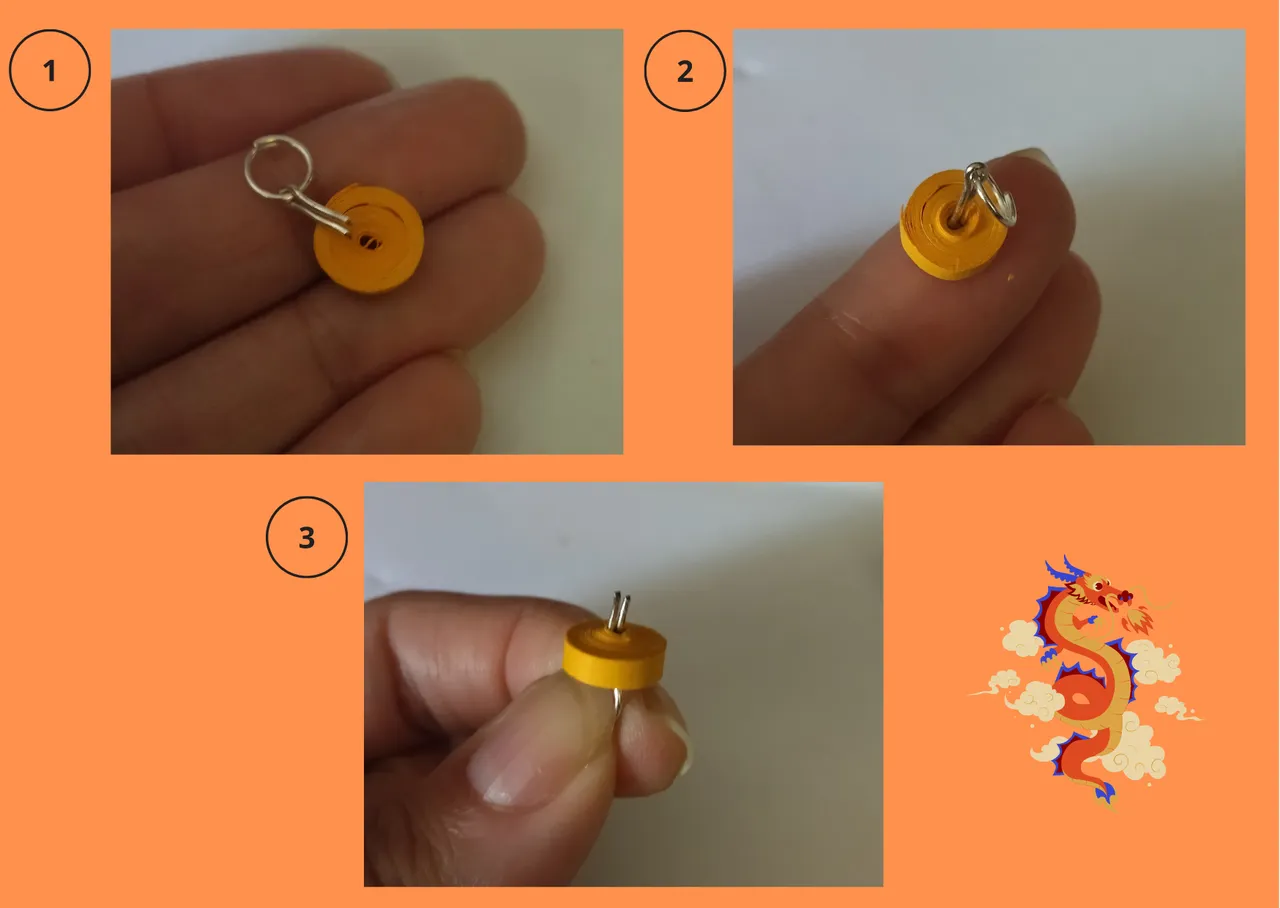
- Once we have our closed circles ready, we take the piece of wire and with the help of the fine needle nose pliers and our fingers, we will join it in equal parts leaving a small gap at the tip to insert a ring.
• Ya que tenemos nuestros círculos cerrados listos, tomamos el trozo de alambre y con la ayuda del alicate puna fina y nuestros dedos, vamos a unirlo en partes iguales dejando en la punta una pequeña separación para introducir una argolla.
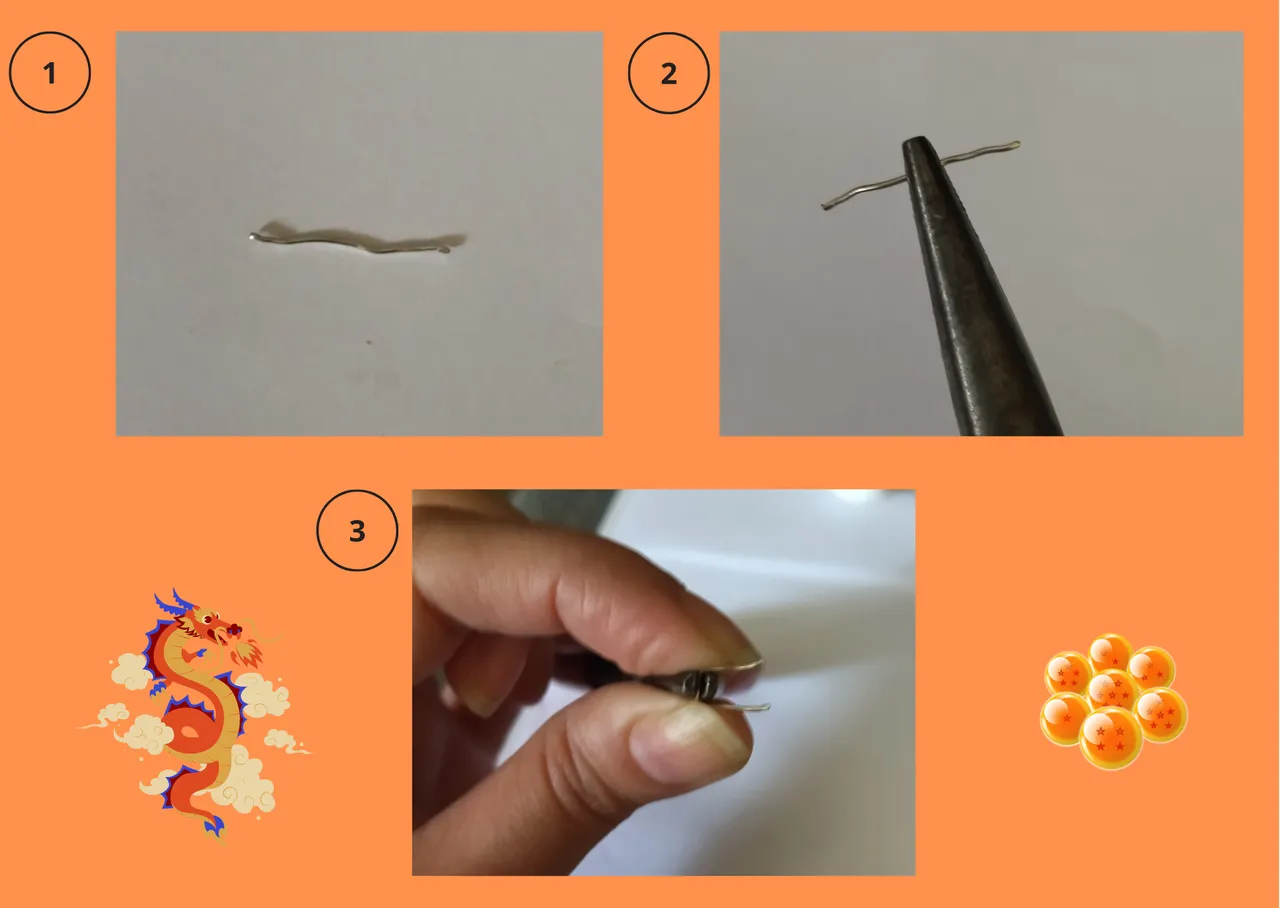
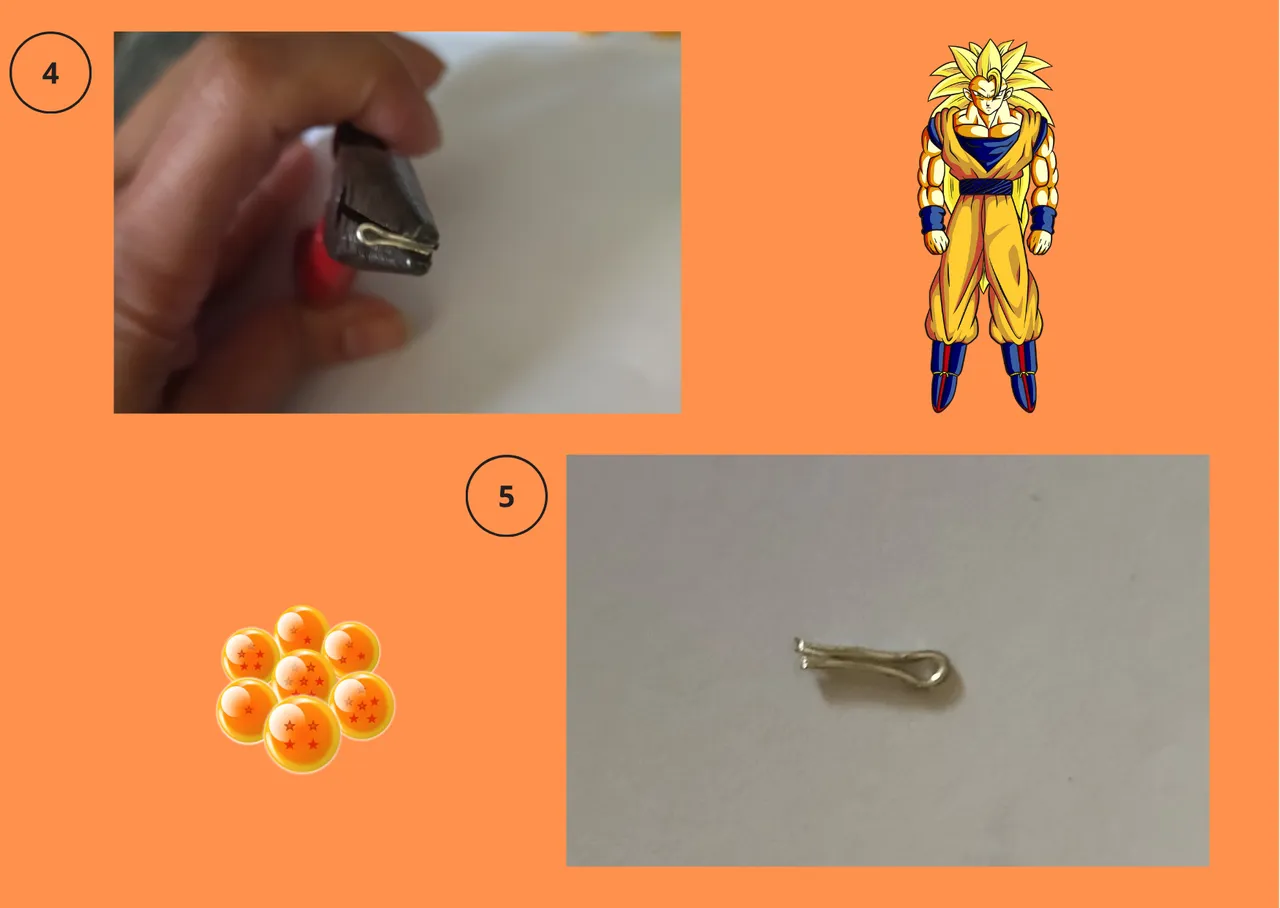
- Once the piece of wire has been shaped, we separate it a little, and proceed to place a costume jewelry ring in the separation that we left at the tip, we close the wire again.
• Una vez dada la forma al trozo de alambre separamos un poco, y procedemos a colocar una argolla de bisutería en la separación que dejamos en la punta, volvemos a cerrar el alambre.
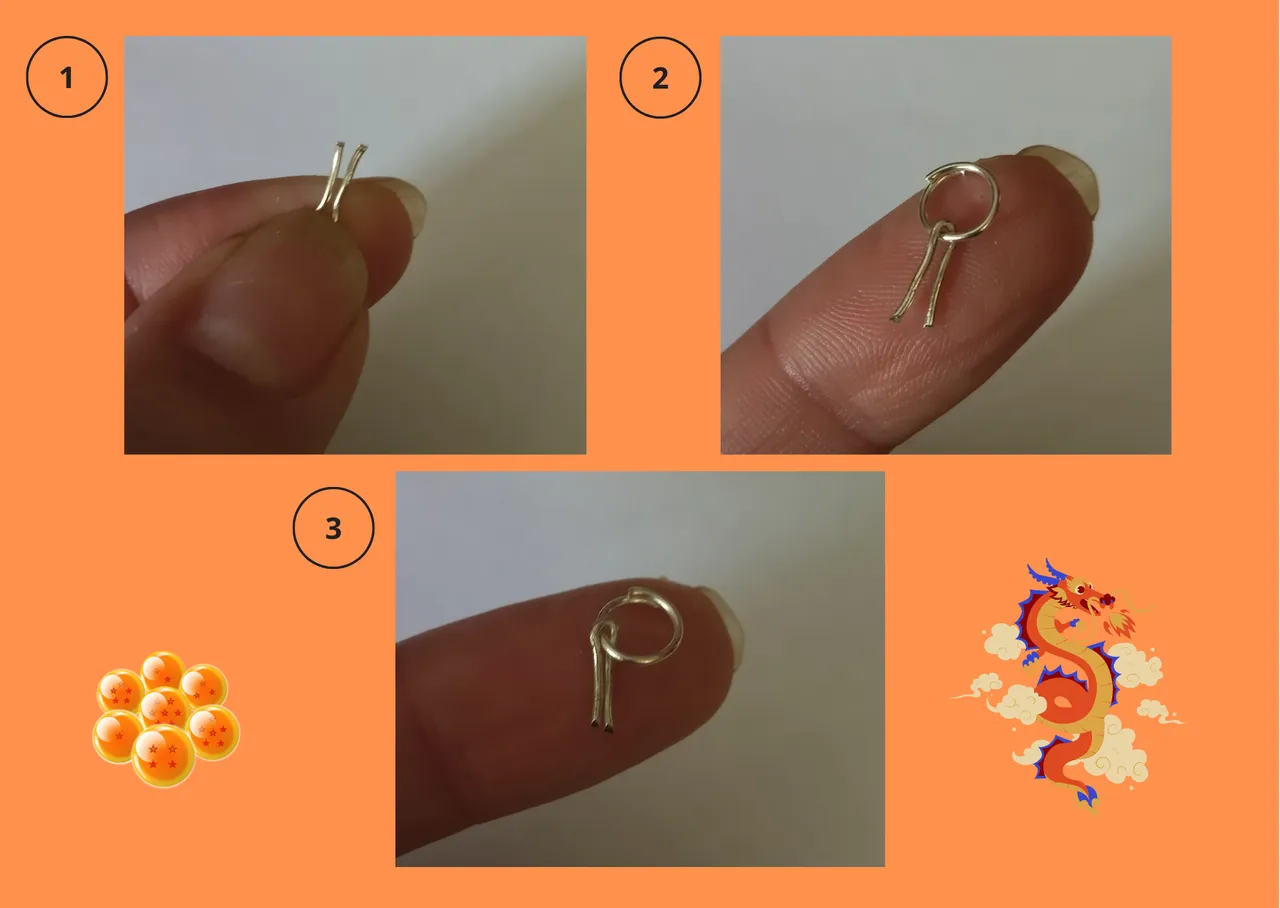
- Now we proceed to put that piece of wire through the hole that remains in the center of our small closed circle, and with the help of our needle-nose pliers we bend the ends of the wire a little so that the ring does not come out.
• Ahora procedemos a meter ese trozo de alambre por el agujero que queda en el centro de nuestro pequeño círculo cerrado, y con la ayuda de nuestro alicate punta fina doblamos un poco las puntas del alambre para que la argolla no se salga.
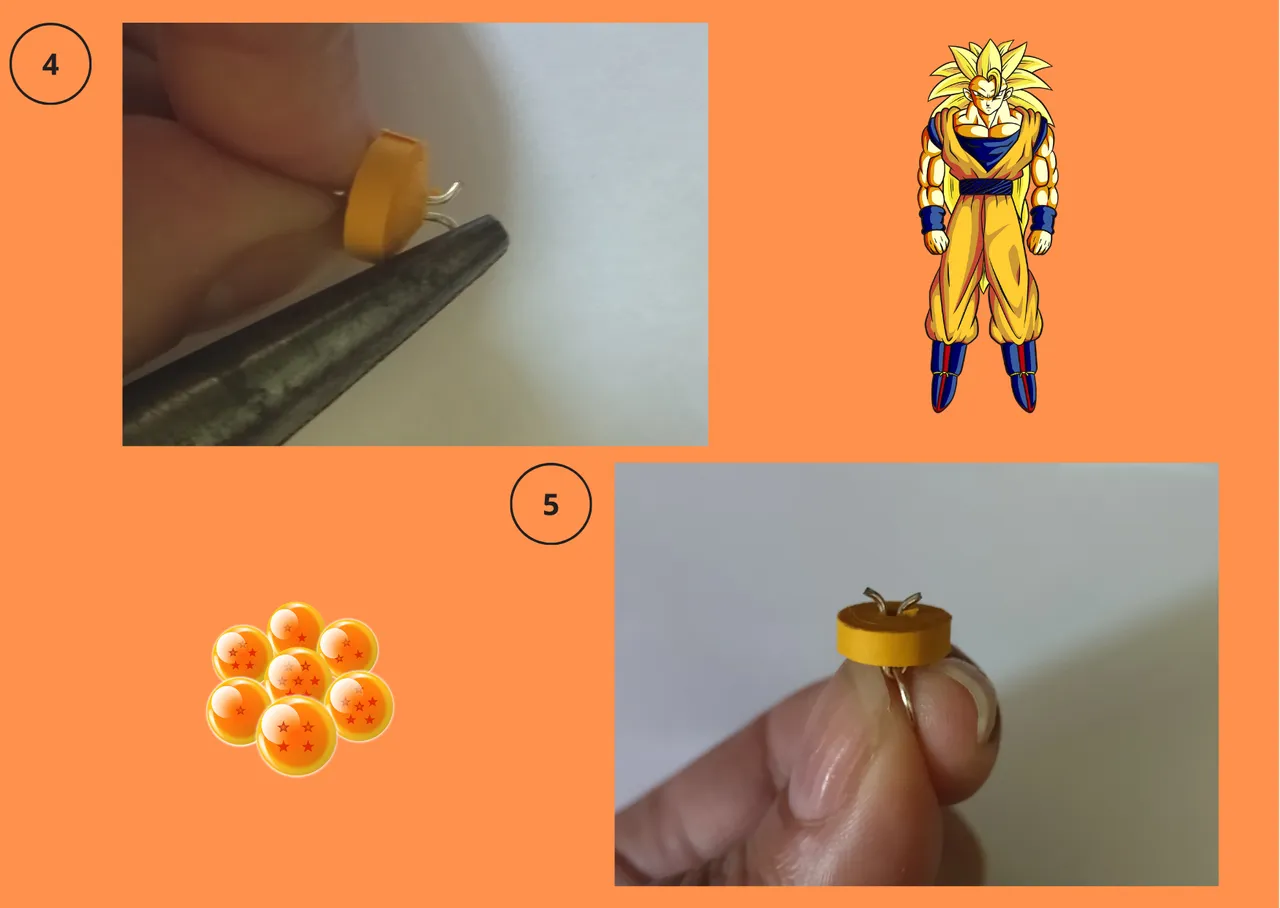
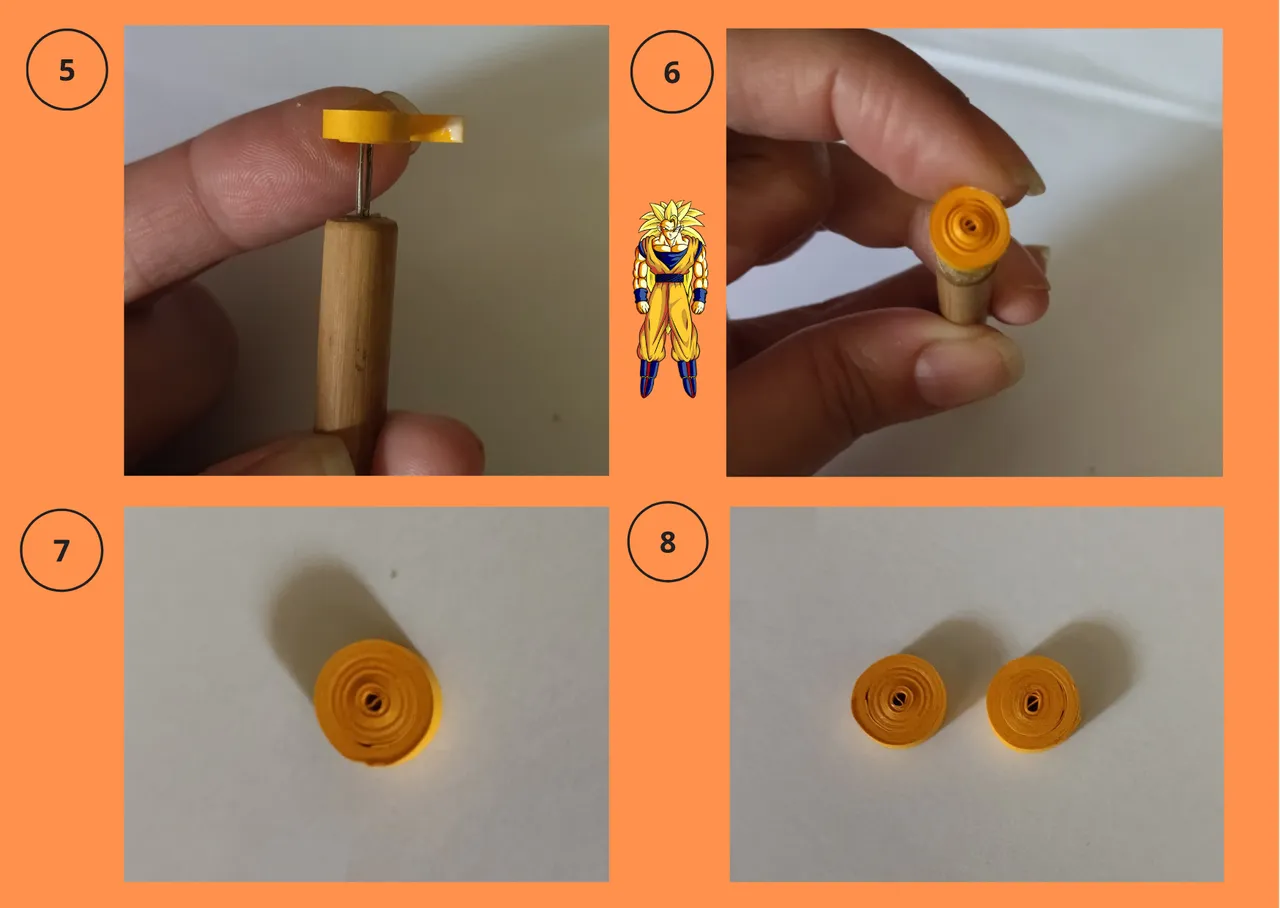
- We are going to shape our circle, with the help of our fingers we give a little depth to our circle, trying to make it as round as possible at the tip and with a height of approximately 3mm, we repeat with the circle that does not have the ring.
• Vamos a darle forma a nuestro círculo, con la ayuda de los dedos le damos a dar un poco de profundidad a nuestro círculo, tratando de que quede lo más redondo posible en la punta y con una altura de aproximadamente 3mm, repetimos con el círculo que no tiene la argolla.

- Once our circles are shaped, we put glue on the back so that they do not move and are uniform, we wait for them to dry.
• Una vez dada la forma a nuestros círculos, le colocamos pega por la parte trasera para que no se muevan y queden uniformes, esperamos que sequen.
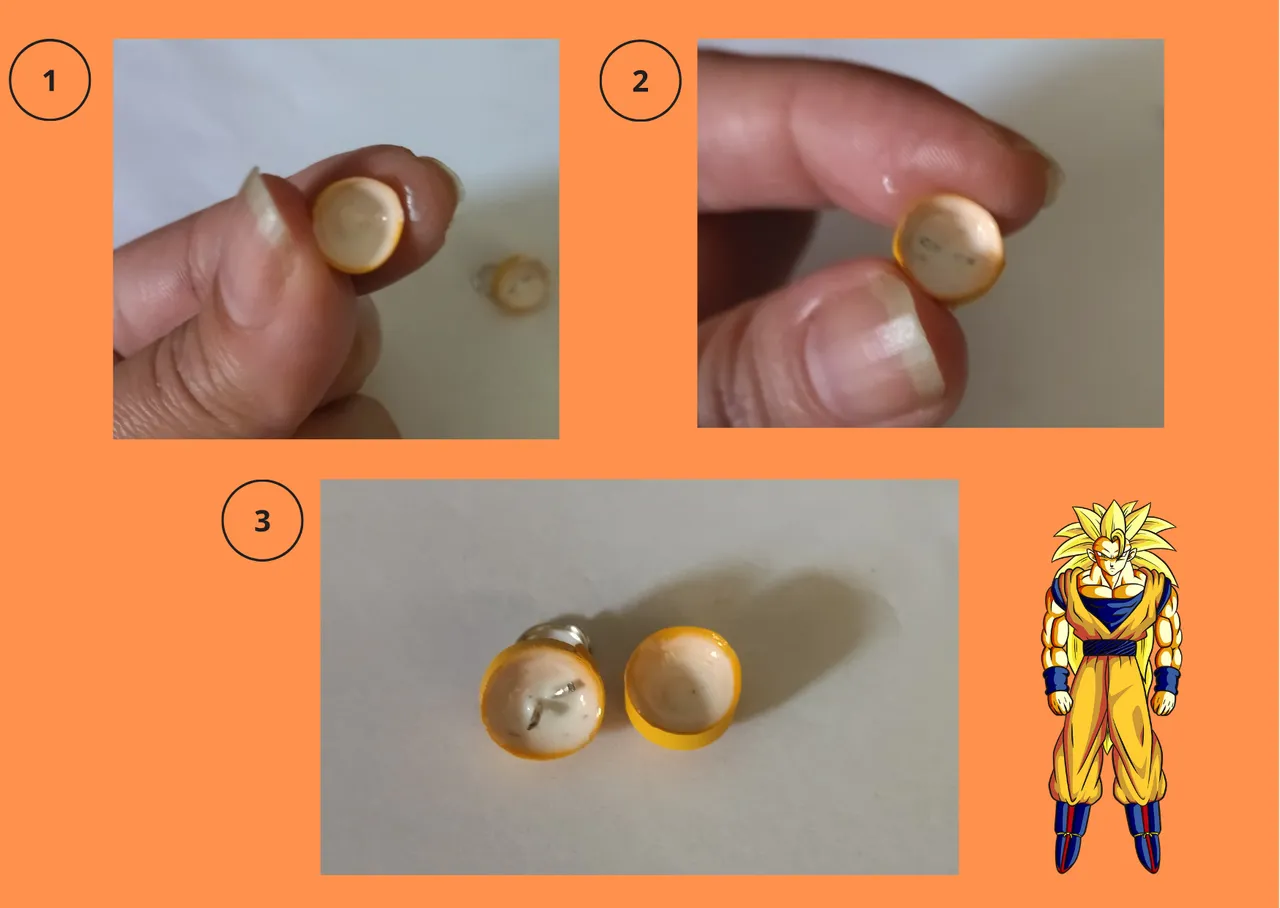
- Once both pieces are dry we will proceed to join them, we put white glue on both ends and glue, we take the orange ribbon of 3mm wide x 5cms long that we had reserved, and we place it centrally around our circle in this way we will have formed our miniature sphere.
• Ya secas ambas piezas vamos a proceder a unirlas, le colocamos pega blanca en ambos extremos y pegamos, tomamos la cinta naranja de 3mm de ancho x 5cms de largo que teníamos reservada, y la colocamos céntricamente alrededor de nuestro círculo de esta manera tendremos formada nuestra esfera miniatura.
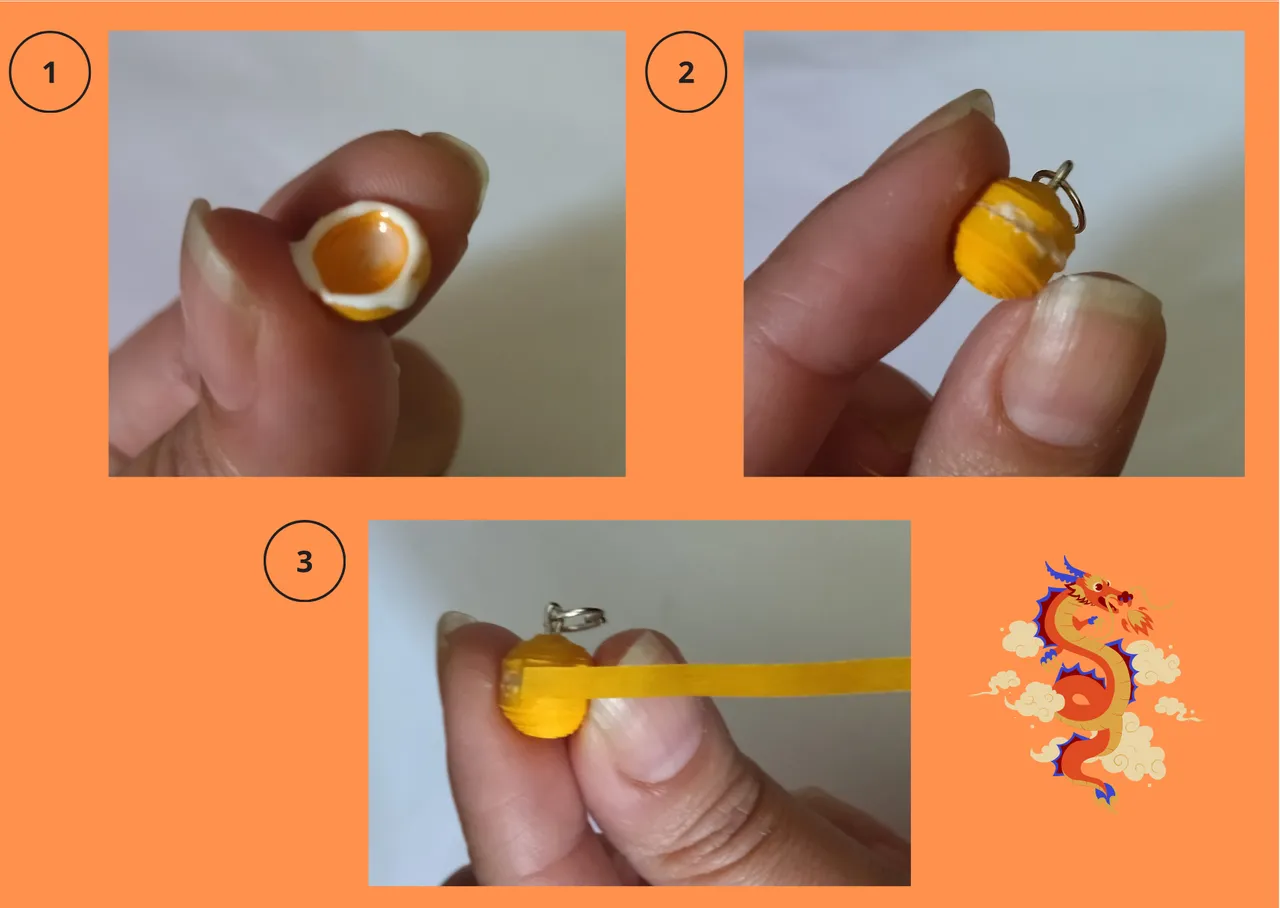
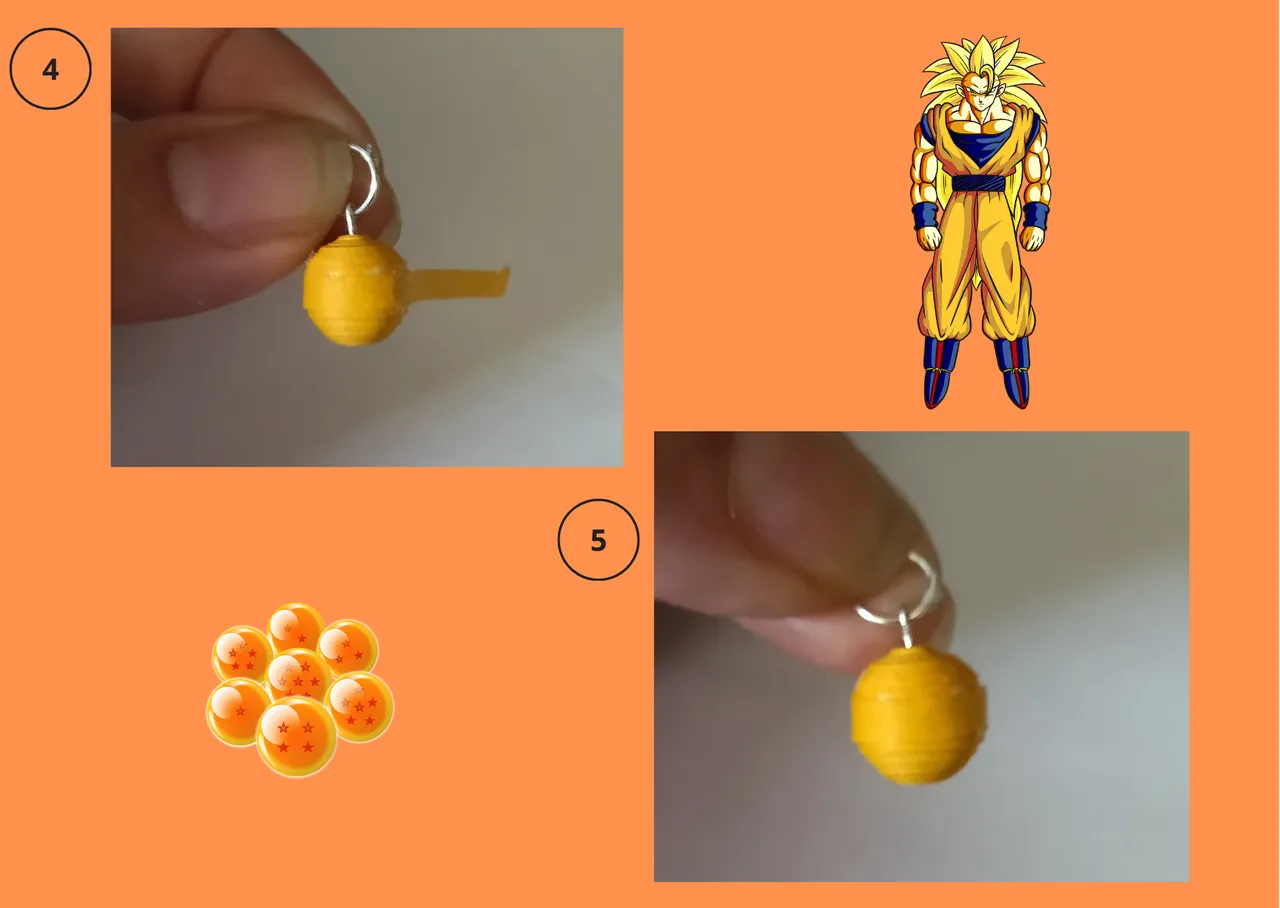
- Now we are going to glue the little red star of 5mm of circumference to our little sphere, we place a glue dot on the ribbon that we put in the middle, and with the help of the fine tip tweezers we put the star.
• Ahora vamos a pegar la estrellita roja de 5mm de circunferencia a nuestra pequeña esfera, colocamos un punto de pega en la cinta que colocamos en el medio, y con la ayuda de la pinza punta fina ponemos la estrella.
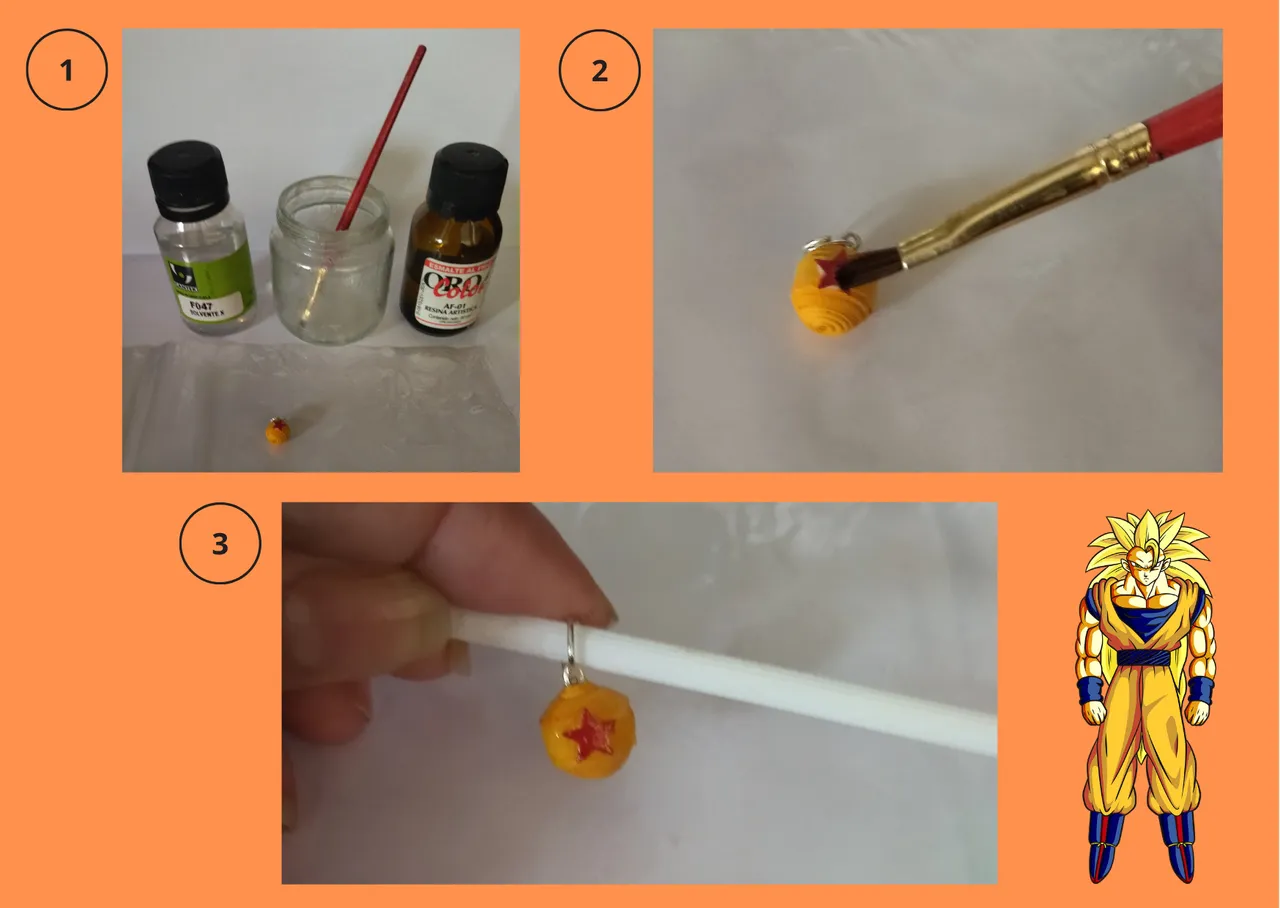
- At this point, we are going to apply our liquid protection, we take the resin, solvent and pour a part of each in a glass jar, stir with the brush and proceed to apply on all surfaces of the sphere, we hang on a stick, I used a lollipop and let it dry overnight.
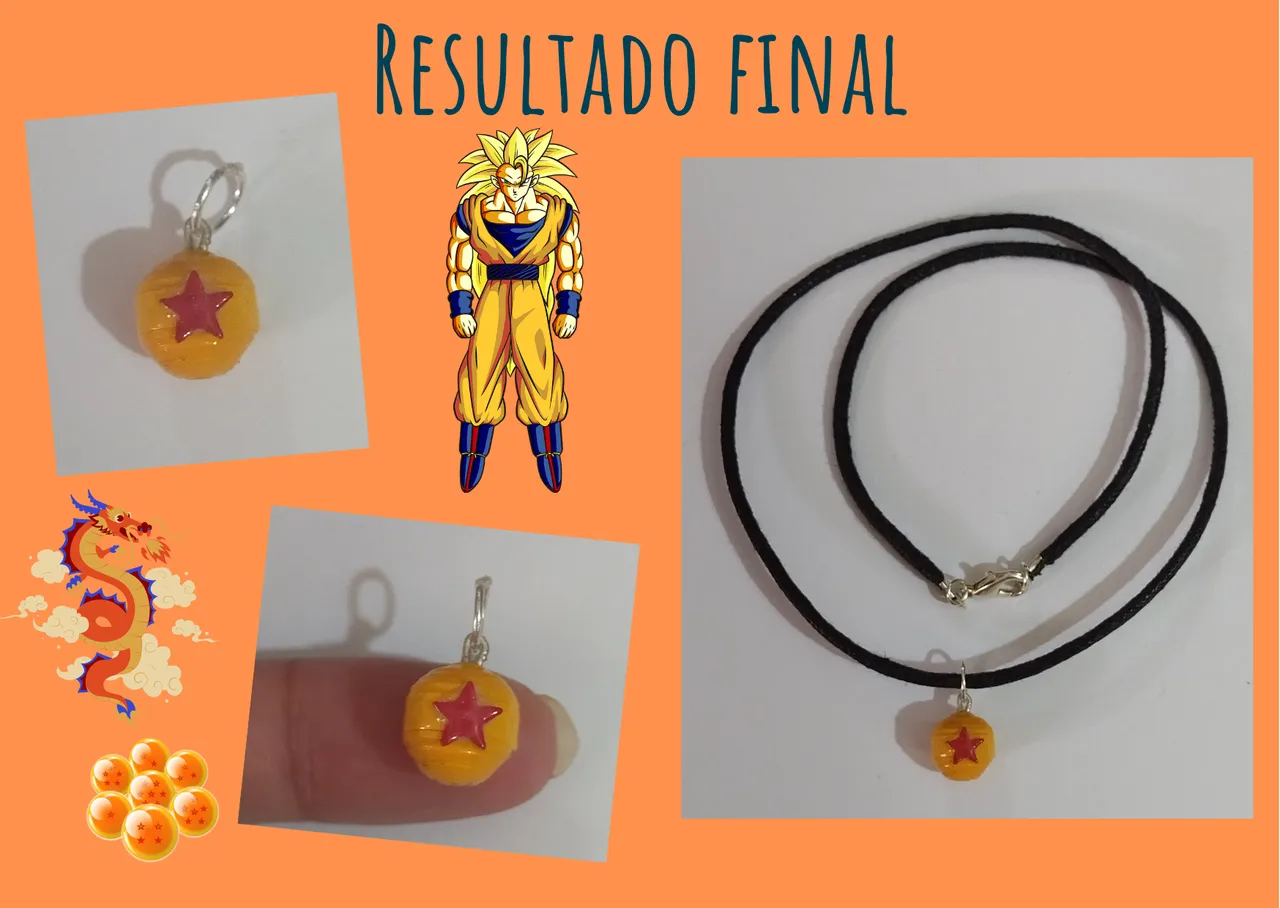
This way we already have our miniature dragon sphere, ready to place it on its necklace. In my case, as I said in the beginning, I used a simple necklace made of thick black jute thread, suitable for a gentleman to wear.
• Llegado a este punto, vamos a aplicar nuestra protección líquida, tomamos la resina, solvente y vertemos una parte de cada una en un frasco de vidrio, revolvemos con el pincel y procedemos a aplicar en todas las superficies de la esfera, guindamos en un palito, yo use uno de chupeta y dejamos secar de un día para otro.
De esta manera ya tenemos nuestra esfera del dragón miniatura, lista para colocarla en su collar. En mi caso como dije en el principio, utilice un sencillo collar de hilo yute negro grueso adecuado para que el festejado que es un caballero pueda utilizar.
Final Result:💕
Resultado Final:💕
A big happy birthday to friend @TheyCallmeDan. Now you are a symbolic creditor of the dragon sphere with a star (I-Shinchu), which will protect you in every step you take, (although I hope that Bulma's Capsule CORP tracker, can't locate it being in your possession hahahaha).
I hope someday you can get your hands on this little detail that I made for you, as well as the many symbolic gifts that so many people made to entertain you.
May you enjoy it, and may each one of your dreams be fulfilled, may luck be with you... 💕
What did you think, did you like it?
I hope you did, I hope you liked my explanation, procedure and photos, I made them with love for you.
"Let out that muse that inspires you, and let your imagination fly".
Thank you all, see you next time. 🐾🐱💕
Un gran feliz cumpleaños al amigo @TheyCallmeDan. Ahora eres acreedor simbólicamente de la esfera del dragón con una estrella (I-Shinchu), la cual te va a proteger en cada paso que des, (aunque espero que el rastreador de Capsule CORP de Bulma, no pueda localizarla estando en tu posesión jajajaja).
Ojalá algún día pueda llegar a tus manos este pequeño detalle que elabore para ti, así como los muchos obsequios simbólicos que tantas personas elaboraron para agasajarte.
Que lo disfrutes, y cada uno de tus sueños se cumplan, que la suerte este contigo… 💕
¿Que les pareció, les gustó?
Espero que sí, que les haya gustado mi explicación, procedimiento y fotos, los hice con mucho cariño por y para ustedes.
"Deja salir esa musa que te inspira, y deja volar tu imaginación".
Gracias a todos, nos vemos en la próxima. 🐾🐱💕
🐉🐉
Las imágenes de Goku, y Esferas del dragón utilizadas en la mayoría de las fotografias editadas en Canva de este post, fueron imágenes gratuitas sacadas de Pixabay. Fuente Esferas Pixabay / Fuente Goku Sayayin Pixabay La mayoría de las fotos usadas en este post son de mi autoría y han sido sacadas en mi celular personal un Redmi 9T y editadas Canva Divisores y banner hechos por mí en Paint Tool Sai Traducido con la ayuda de DeepL
