Hello everyone... ⚡️🐝⚡️💕
Hello to my dear Hivers and the dear community of artists #HiveDIY, as always very pleased and excited to be here again, showing you my work made with love and especially for you.
As every month I could not fail to commemorate this day that for me is always special because it celebrates our PUD of each month, in this case the month of April 2024.
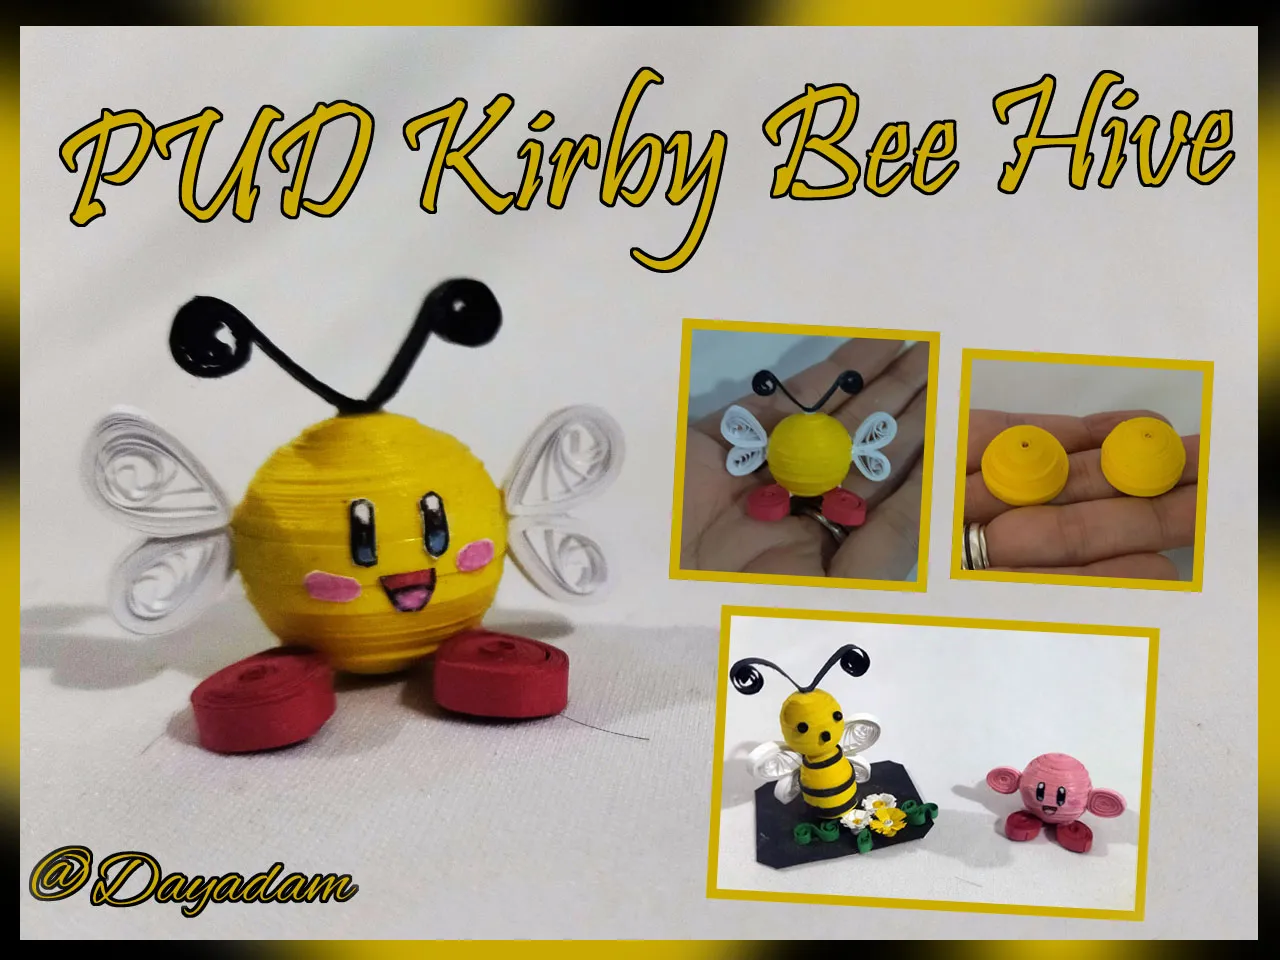
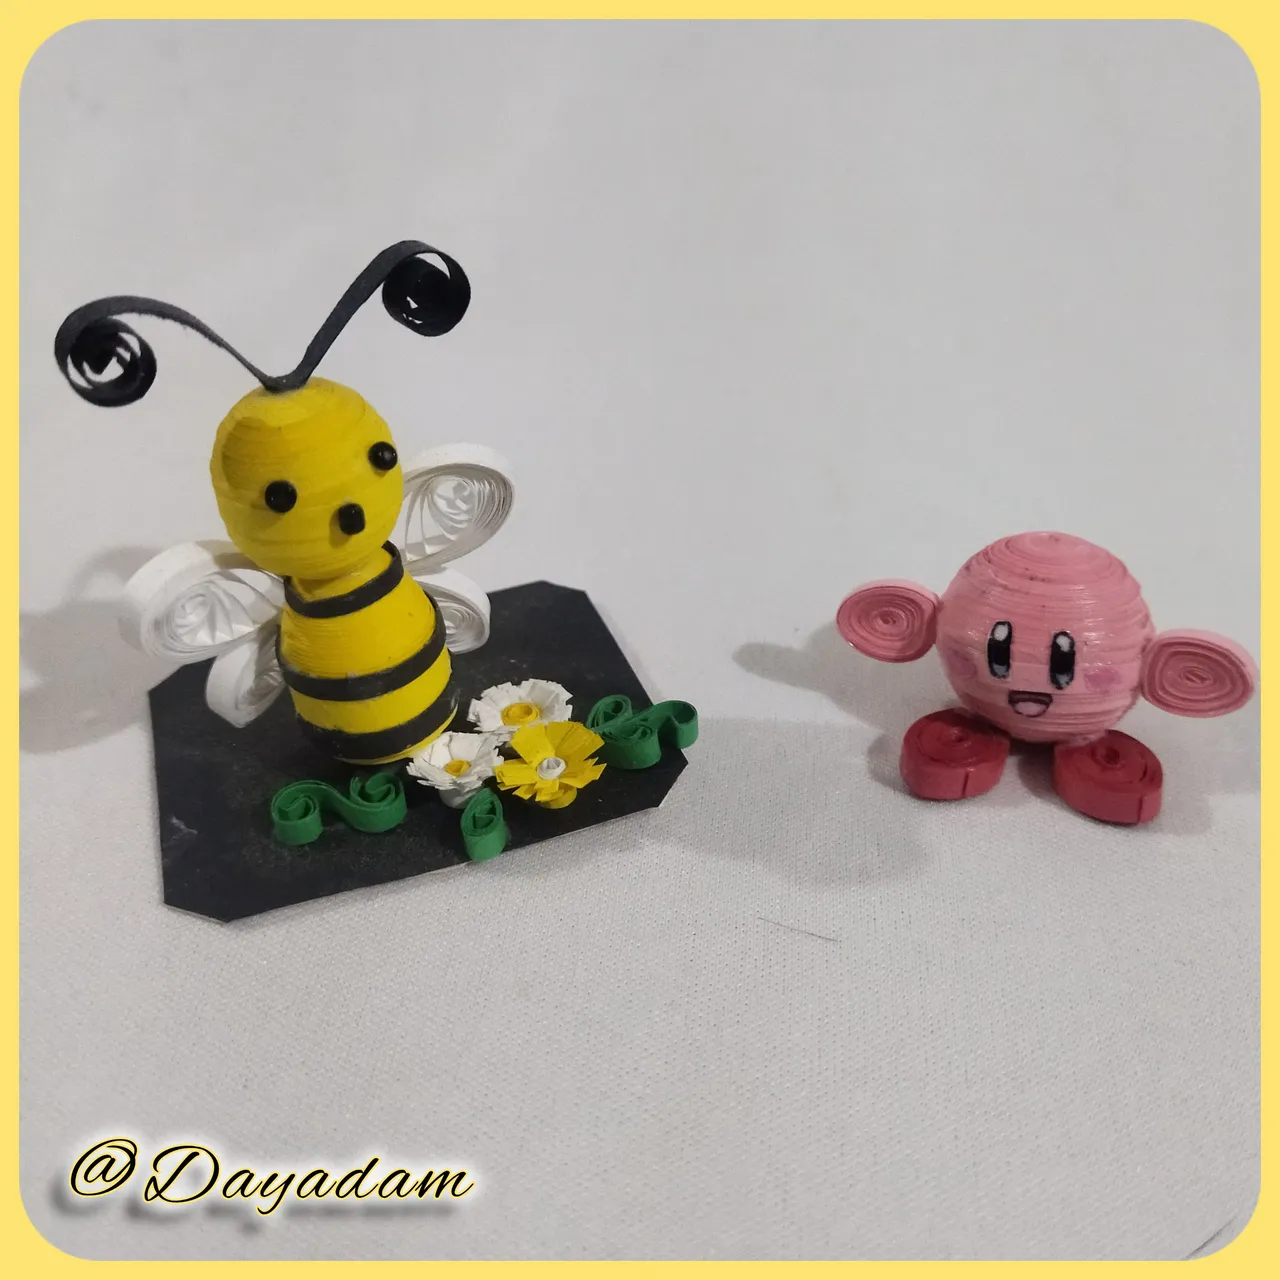
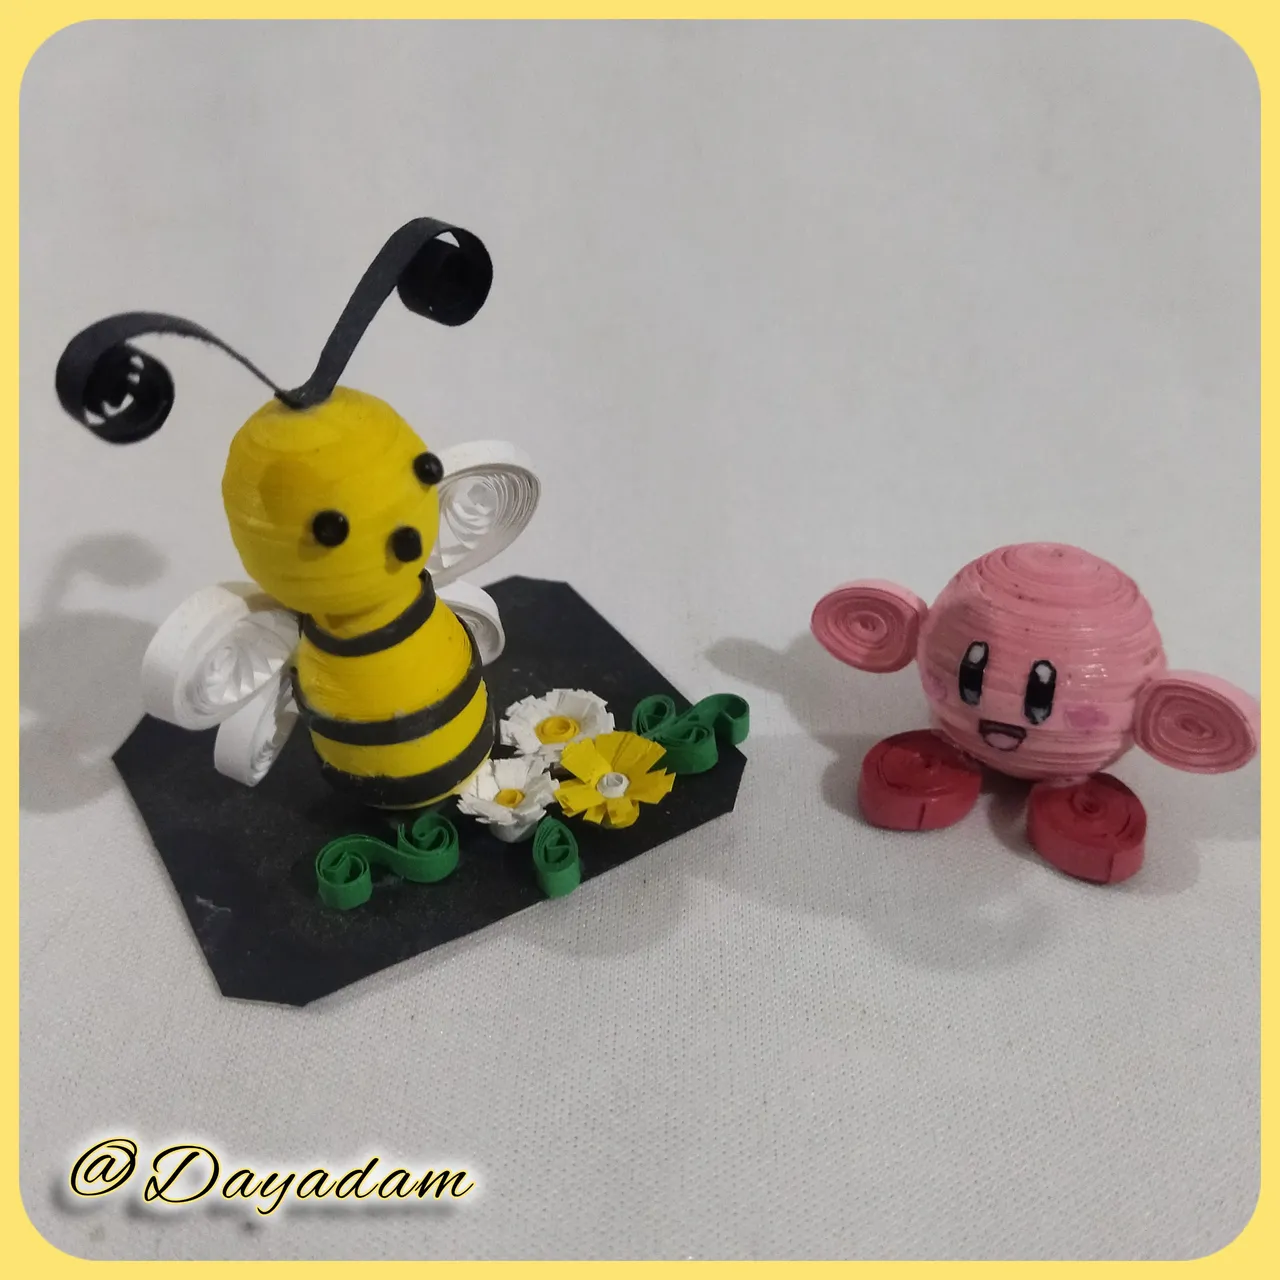
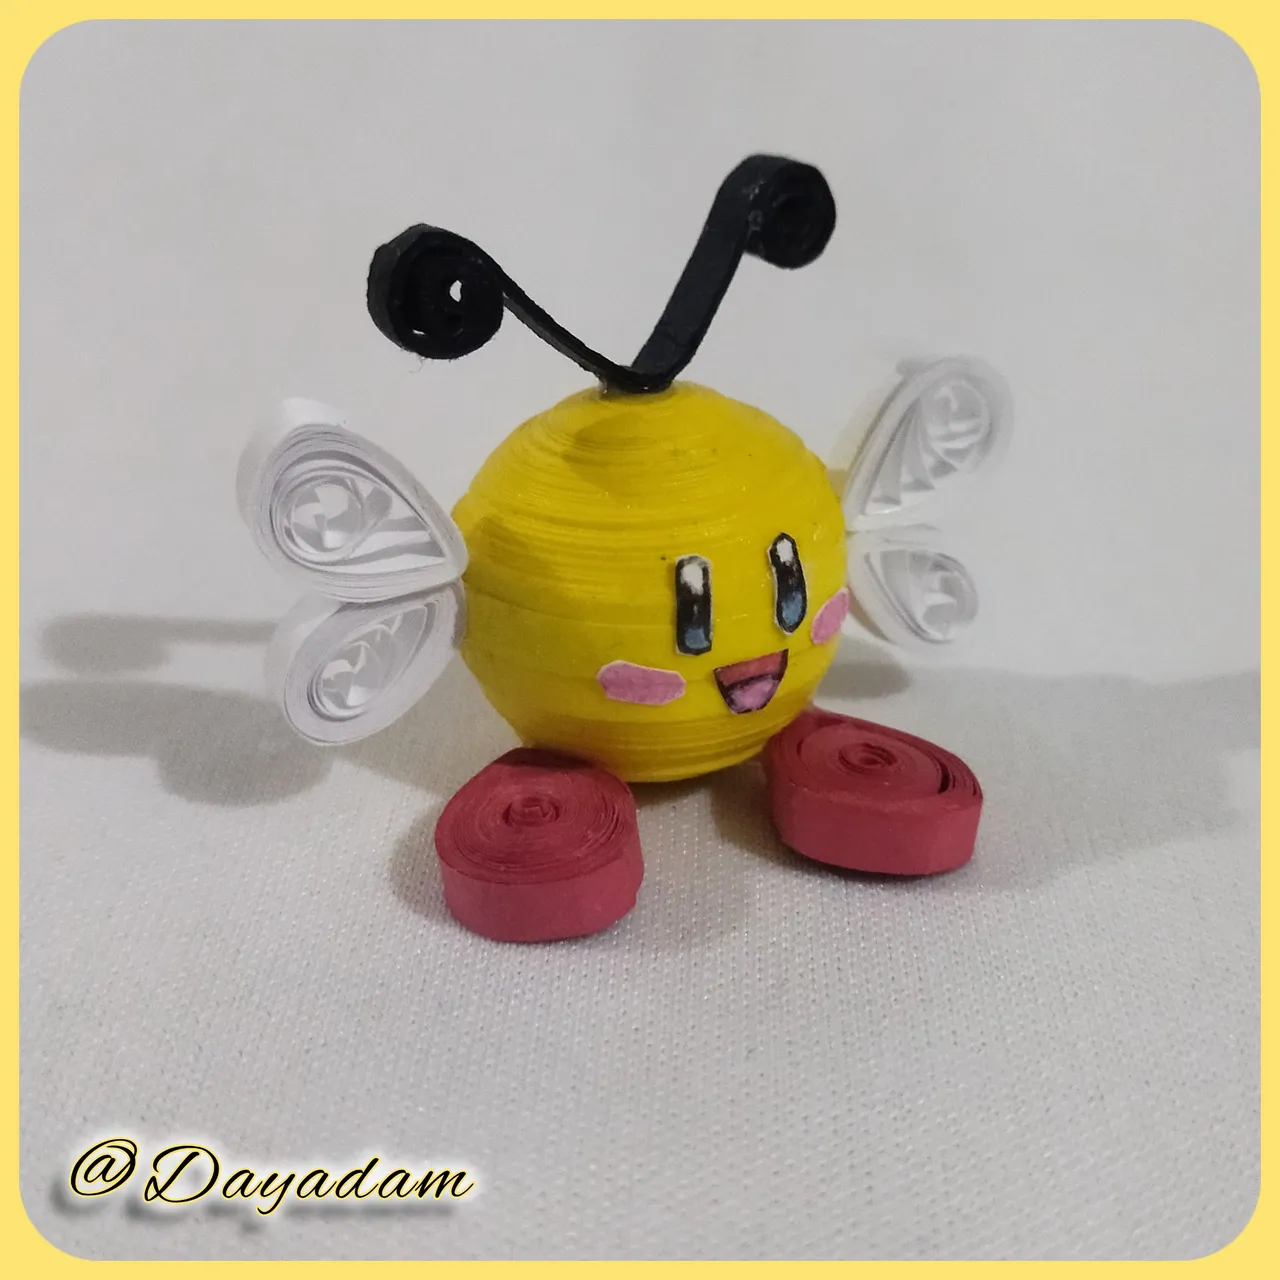
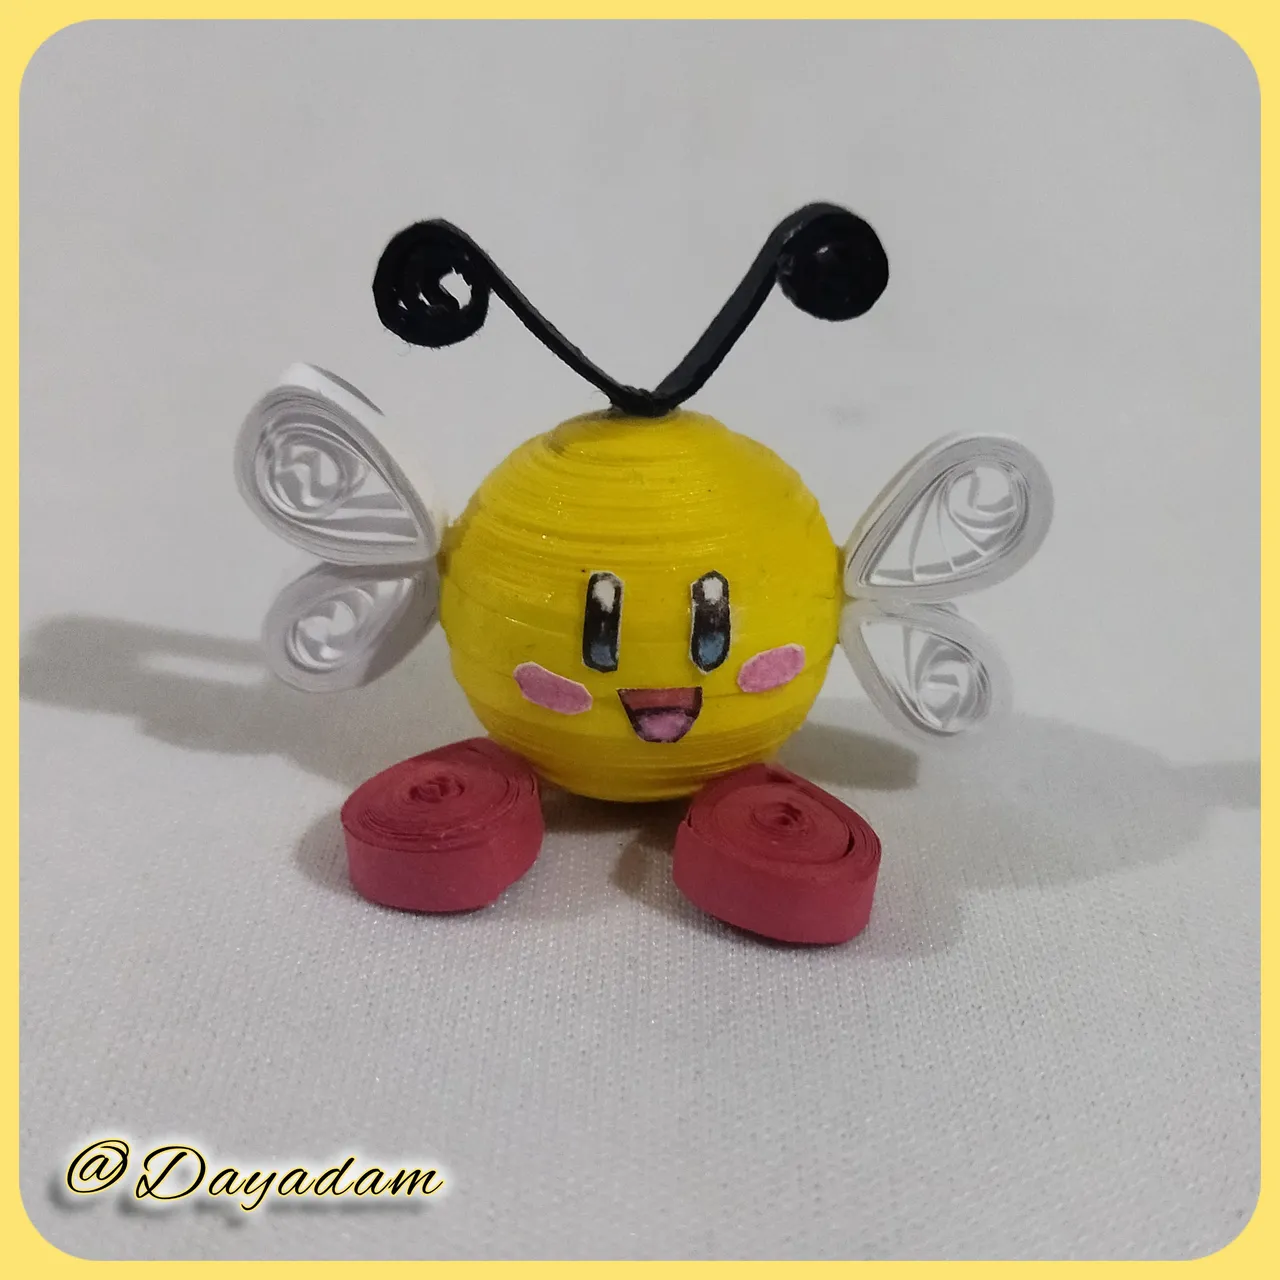
Today I came up with something different, as a few days ago I made a little Kirby decorative character known from a video game, (here the link of the publication), but as he loves to eat all kinds of things and then become them, I put my little Kirby next to the hive bee that I made for the Powerup in December (link of the publication), and what do you think? Kirby became a bee and a new character emerged which I call "Kirby BeeHive, I hope you like it and I hope it adds a touch of humor to your day.
I invite you to participate in the PUD every time you can and if possible do it month by month, this way you make your HP grow and thus go hand in hand so that our wonderful blockchain becomes stronger every day.
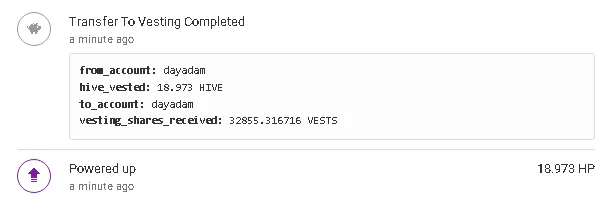
Below I leave you an image of my respective PowerUp with a small contribution of 18.973 Hive, this time I wanted to do it with this amount because it fills me with emotion that this way I will exceed today the 5000HP.
Hoping you like it, I leave you my creative process:
Let's get started:😃

Hola a Todos... ⚡️🐝⚡️💕
Hola a mis queridos Hivers y a la querida comunidad de artistas #HiveDIY, como siempre muy complacida y emocionada de encontrarme por acá nuevamente, mostrándole mi trabajo hecho con mucho amor y especialmente para ustedes.
Como todos los meses no podía dejar de conmemorar este día que para mi siempre es especial ya que se celebra nuestro PUD de cada mes, en este caso el del mes de Abril del 2024.
Hoy se me ocurrió algo diferente, como hace pocos días realice un pequeño Kirby decorativo personaje conocido de un videojuego, (por acá el link de la publicación), , pero como el acostumbra y le encanta comer toda clase de cosas para luego convertirse en ellas pues, coloque a mi pequeño Kirby junto a la abejita de hive que realice para el Powerup el mes de diciembre (link de la publicación) , y que creen? pues Kirby se convirtió en abejita y surgio un nuevo personaje el cual llame "Kirby BeeHive", espero sea de su agrado y le añada un toque de humor a su día.
Les hago una cordial invitación, a que participen en el PUD cada vez que puedan y si es posible lo hagan mes a mes, de esta manera haces que tu HP crezca y así vas de la mano para que nuestra maravillosa blockchain se fortalezca cada día más.
Más abajo les dejo una imagen de mi respectivo PowerUp con un pequeño aporte de 18.973 Hive, en esta oportunidad quise realizarlo con este monto ya que me llena de emoción que de esta manera superare el día de hoy los 5000HP.
Esperando que sea de su agrado, les dejo mi proceso creativo:
Comencemos:😃


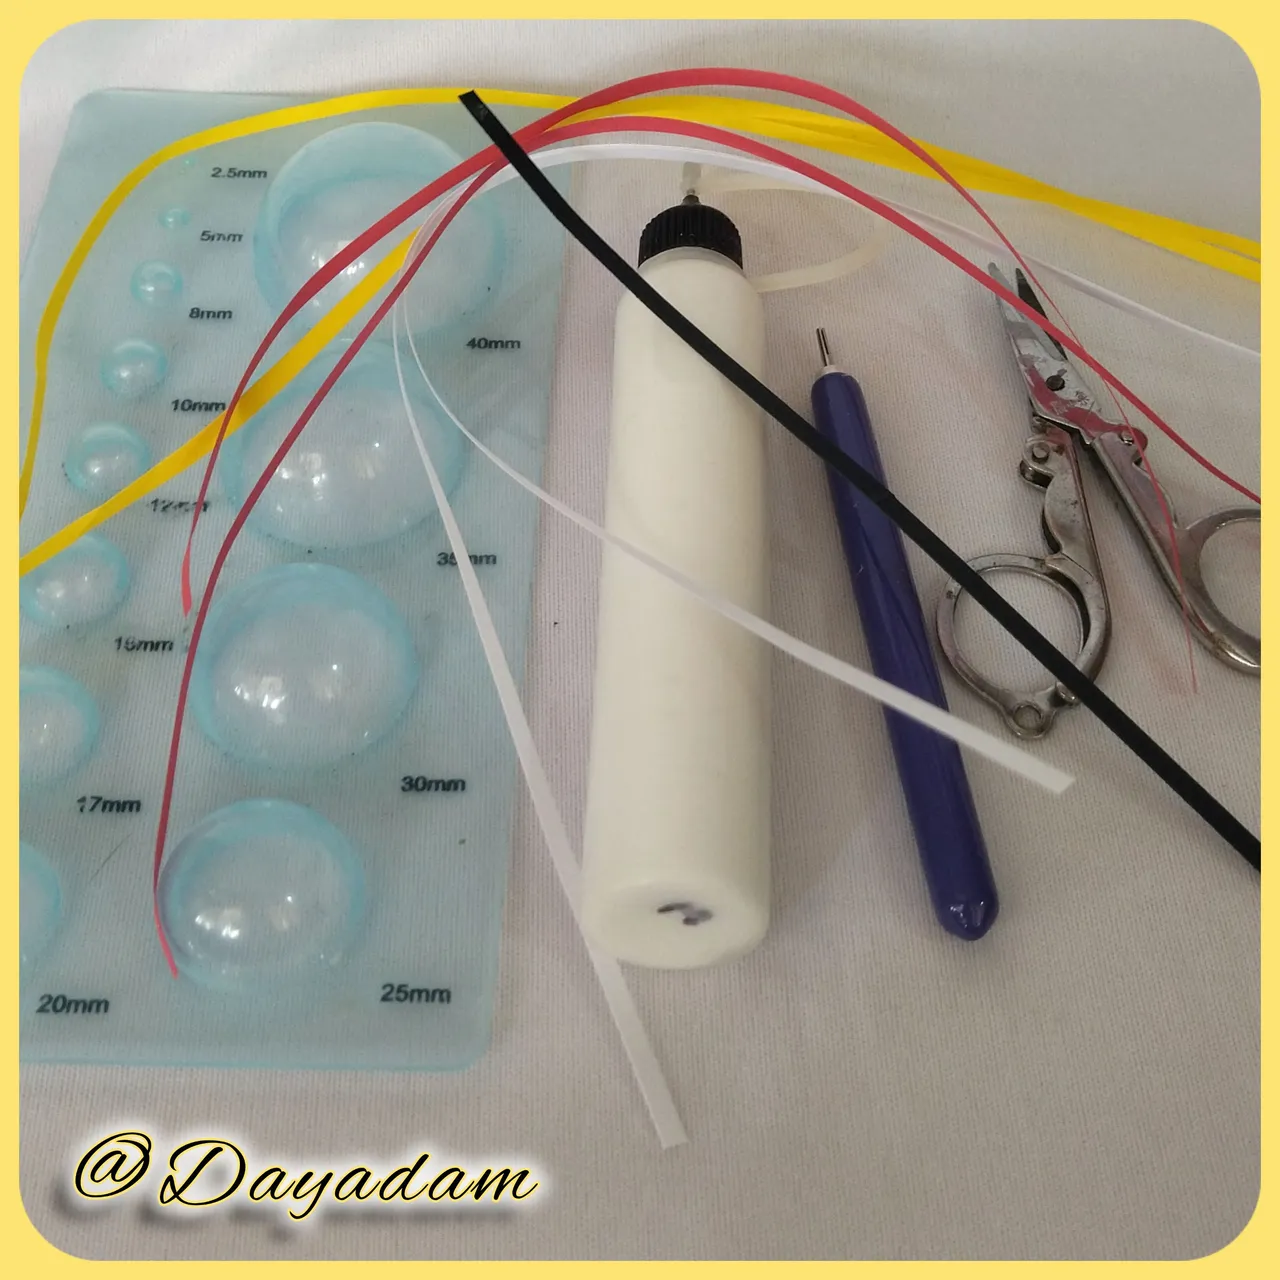
• Cintas de quilling de amarillo, negro, blanco y rojas.
• Aguja para quilling.
• Hoja blanca.
• Colores, marcadores.
• Alfiler.
• Pega blanca extra fuerte (de carpintería).
• Tijera.
• Pincel.
- Yellow, black, white and red quilling ribbons.
- Quilling needle.
- White sheet.
- Colors, markers.
- Pins.
- Extra strong white glue (carpentry glue).
- Scissors.
- Paintbrush.

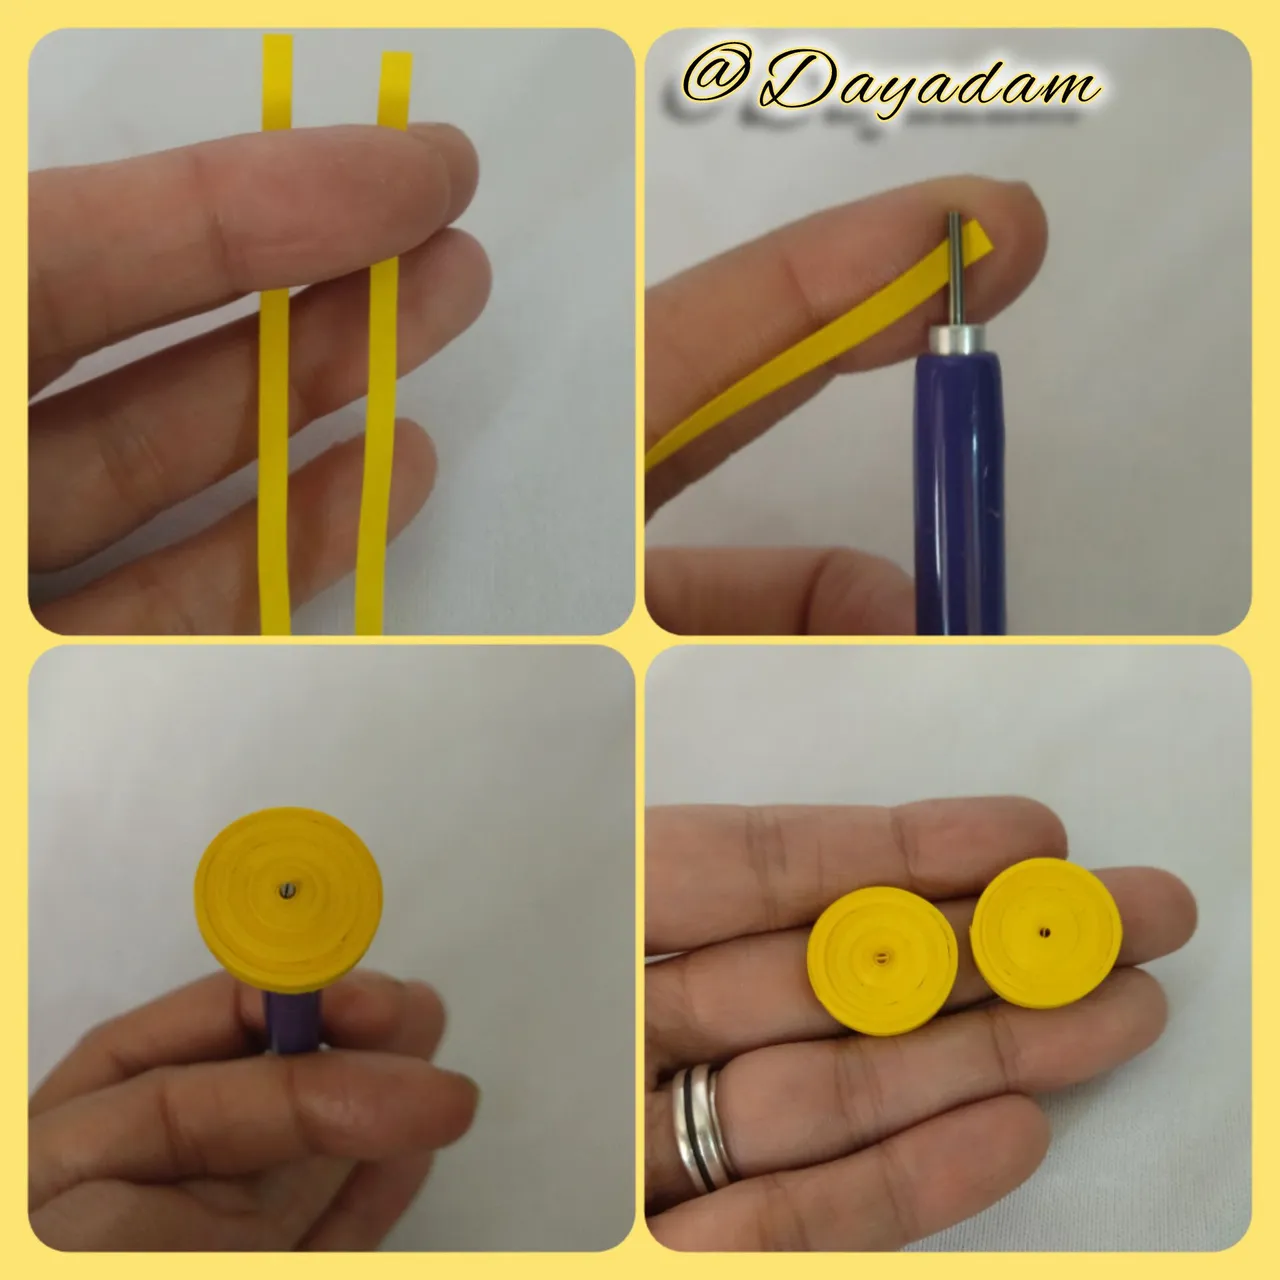
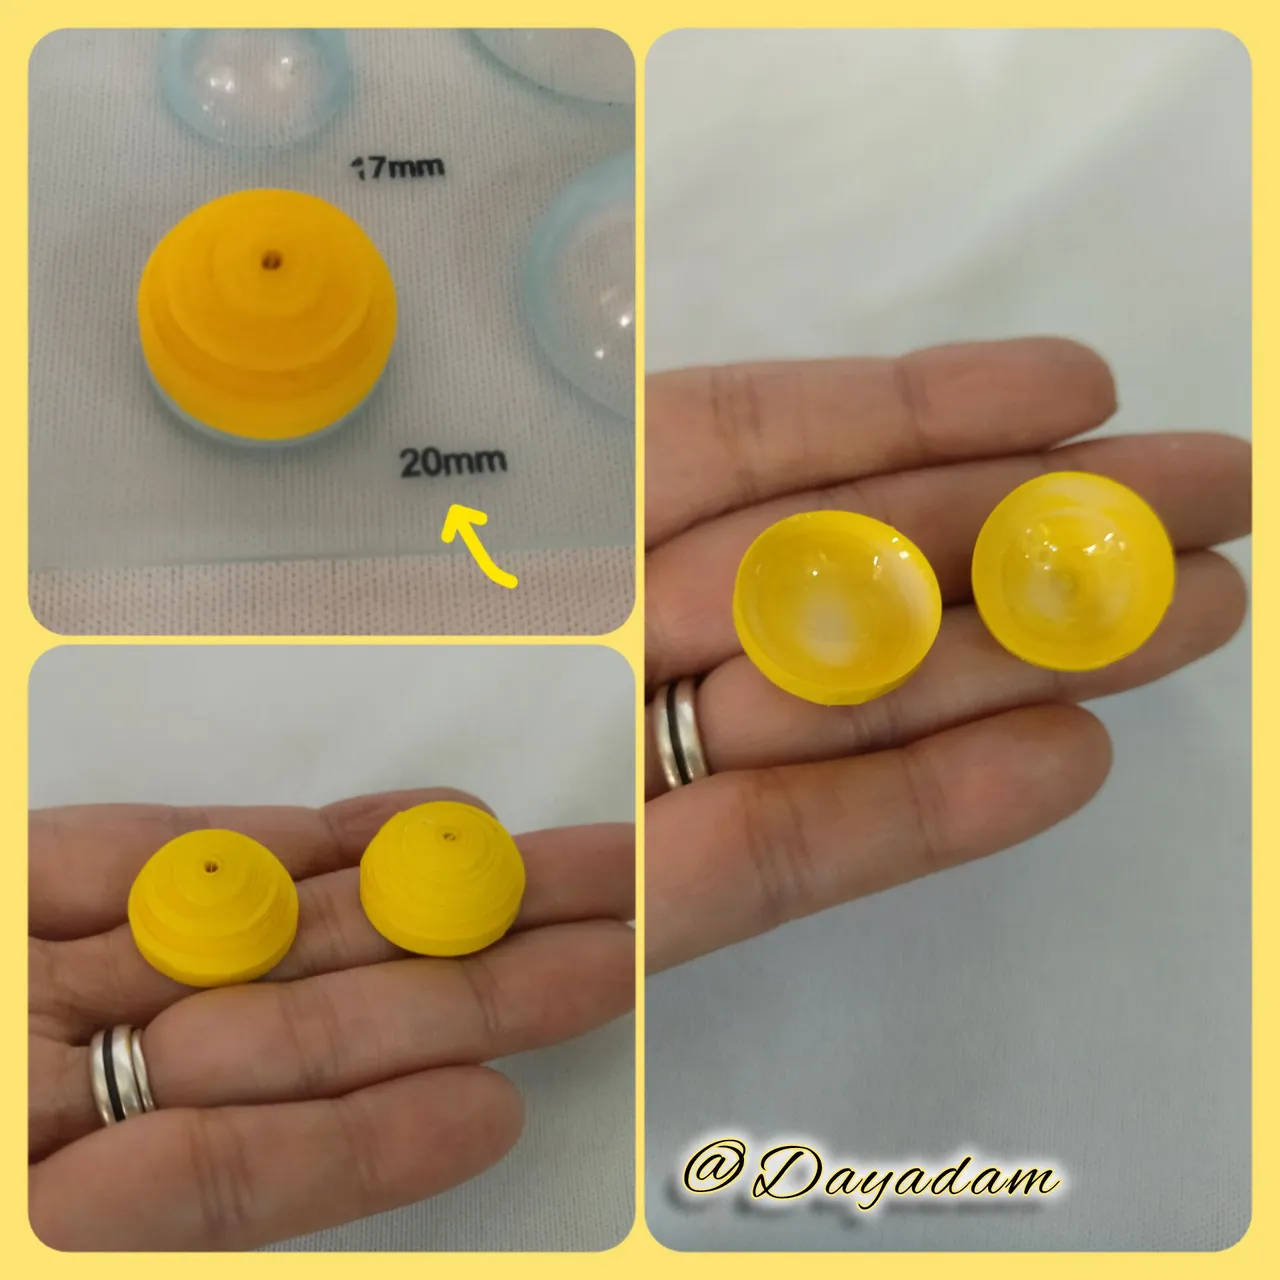
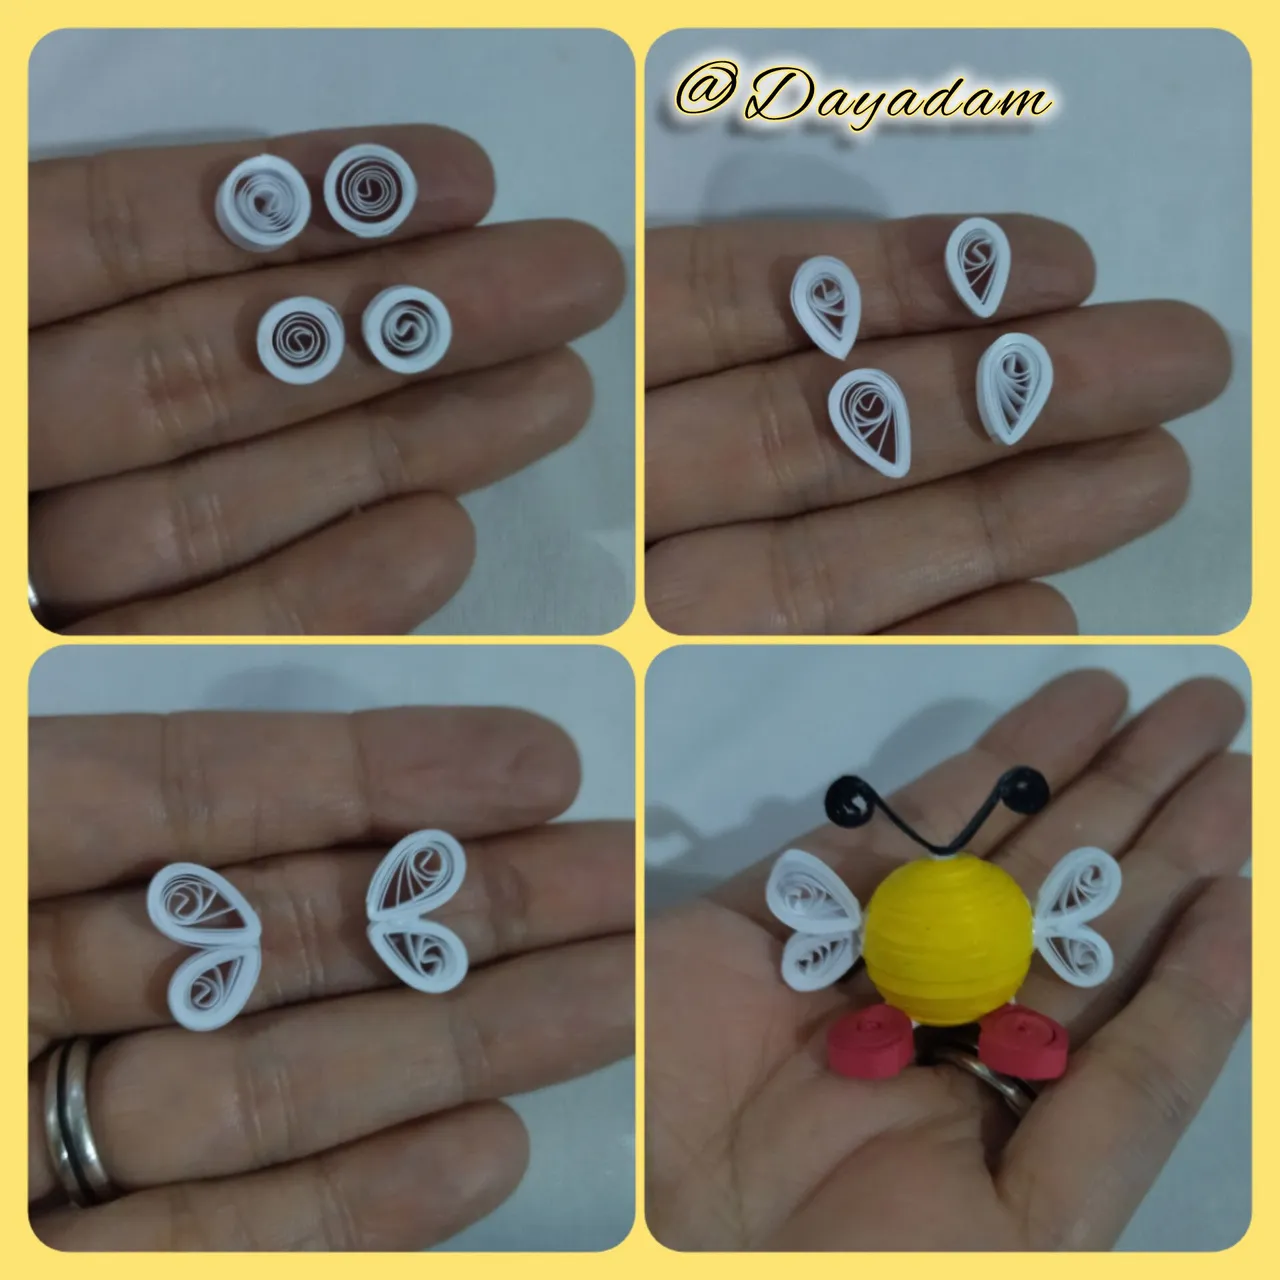
- We will begin by taking yellow quilling tape 3mm wide x 250cms long, we will roll with the help of the quilling needle until we reach the end of the tape, we will seal with extra strong white glue, we will remove the needle, we will obtain a closed circle. We will make 2 equal circles.
- We are going to mold both circles, we place them in the template of circles in the measure 20mm, once molded we take out of the template and in the internal part we add a little glue, we let dry to avoid moving or deforming the pieces.
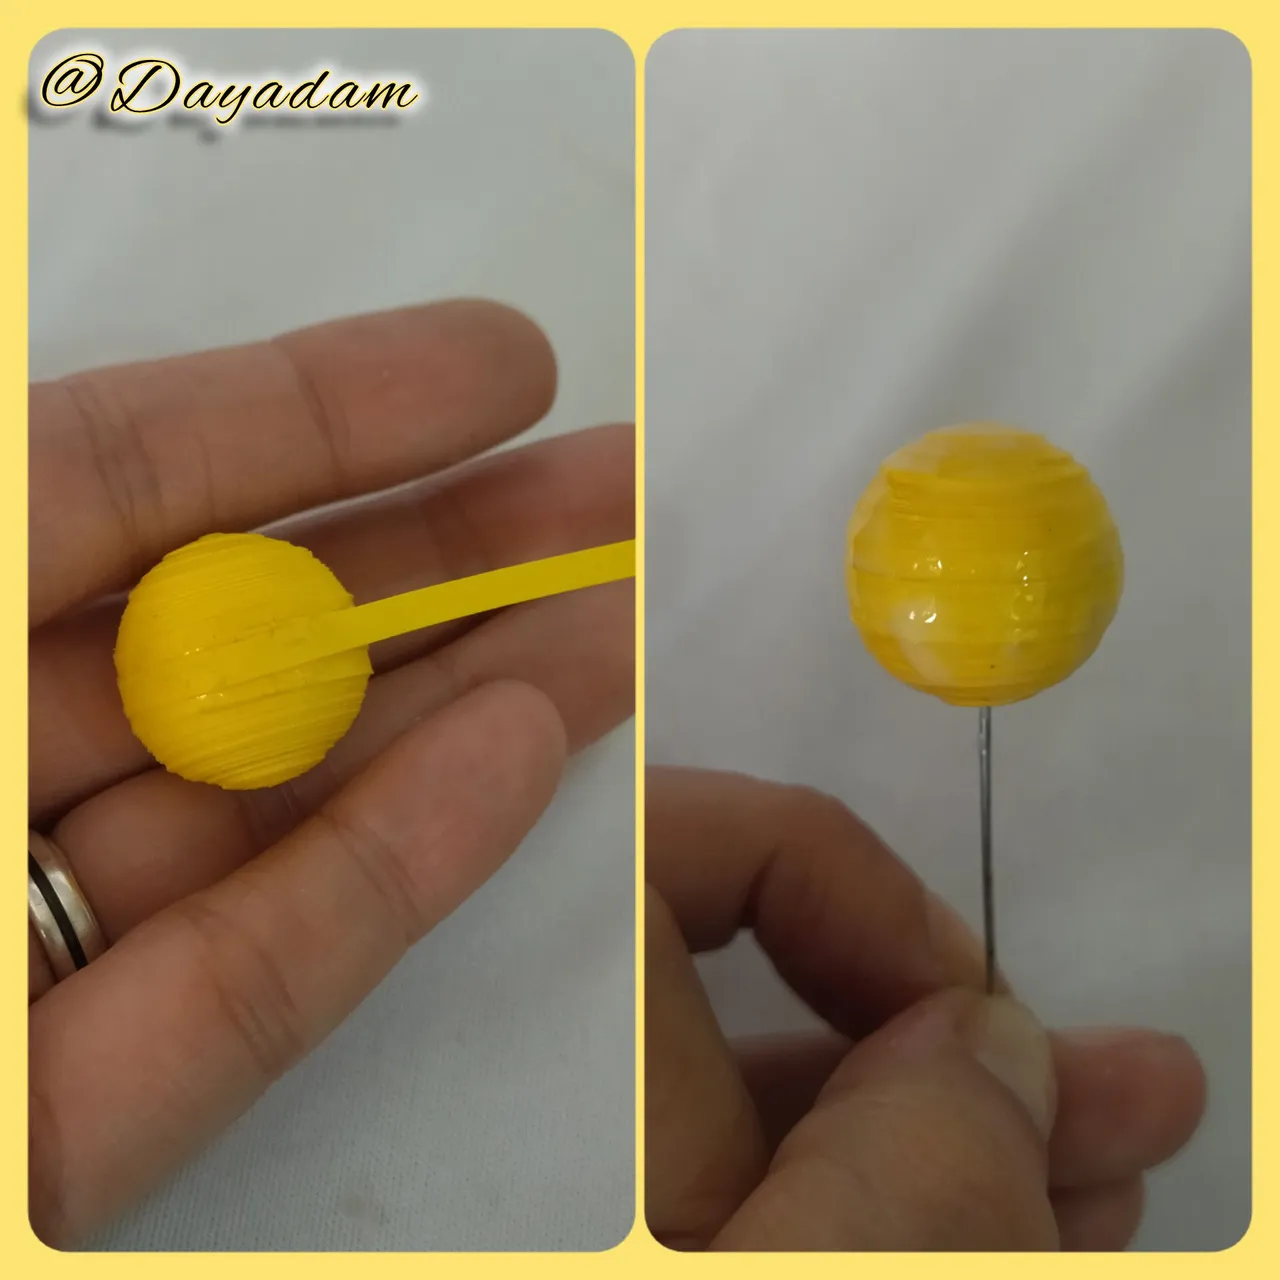
- We are going to take a small piece of yellow ribbon, 3mm wide to join the pieces that we made, we coupled both passing the tape through the middle with extra strong white glue.
- Once ready I decided to apply a layer of extra strong white glue to protect it and make it more resistant.

• Comenzamos tomando cinta para quilling de color amarillo de 3mm de ancho x 250cms de largo, enrollaremos con la ayuda de la aguja para quilling hasta llegar al final de la cinta, sellamos con pega blanca extra fuerte, sacamos de la aguja, obtendremos un círculo cerrado. Realizaremos 2 círculos iguales.
• Vamos a moldear ambos círculos, colocamos en la plantilla de círculos en la medida 20mm, una vez moldeados sacamos de la plantilla y en la parte interna agregamos un poco de pega, dejamos secar para evitar que se muevan o deformen las piezas.
• Vamos a tomar un pequeño trozo de cinta de color amarillo, de 3mm de ancho para unir las piezas que elaboramos, acoplamos ambas pasando la cinta por el medio con pega blanca extra fuerte.
• Une vez lista decidí aplicarle una capa de pega blanca extra fuerte para protegerla y hacerla mas resistente.
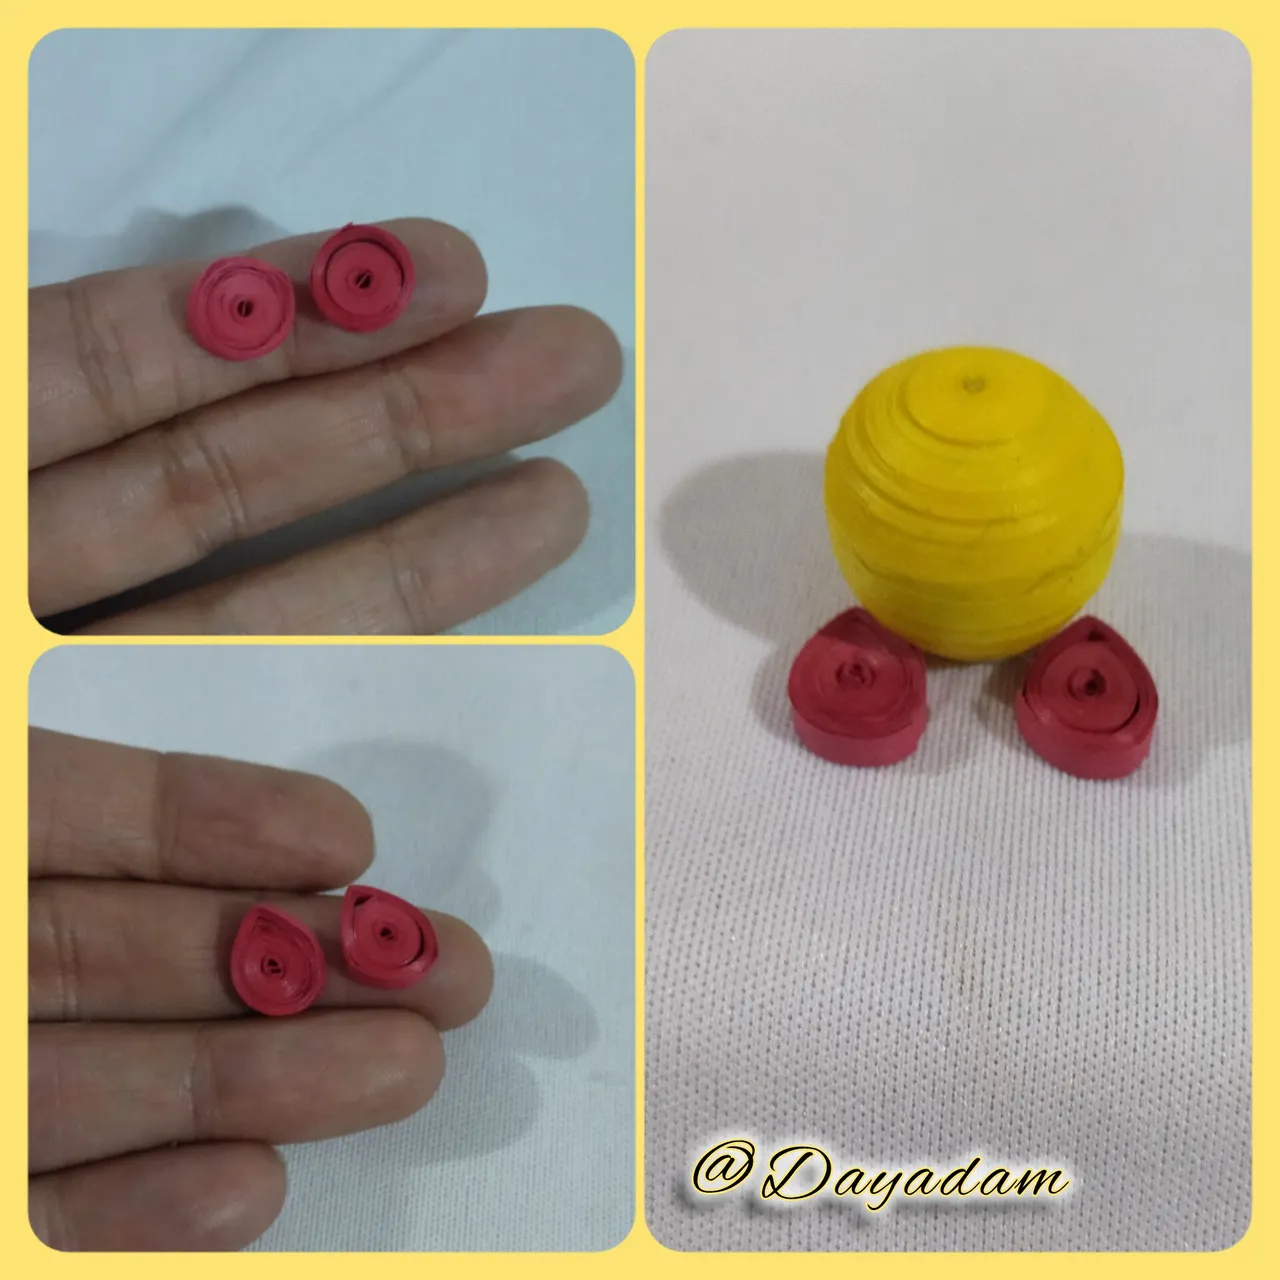
- For the feet of the Kirby bee take 3mm wide red quilling tape, make 2 closed circles, mold it just a little, and glue it on the bottom of the ball.
- Let's proceed to make the wings, we will take 3mm wide white quilling tape, with it we will make 4 open circles, 2 medium and two smaller ones, we will mold them in the shape of a leaf, we will join a big one and a small one, once ready we will glue them to the sides of the ball that is to say the body of the Kirby.
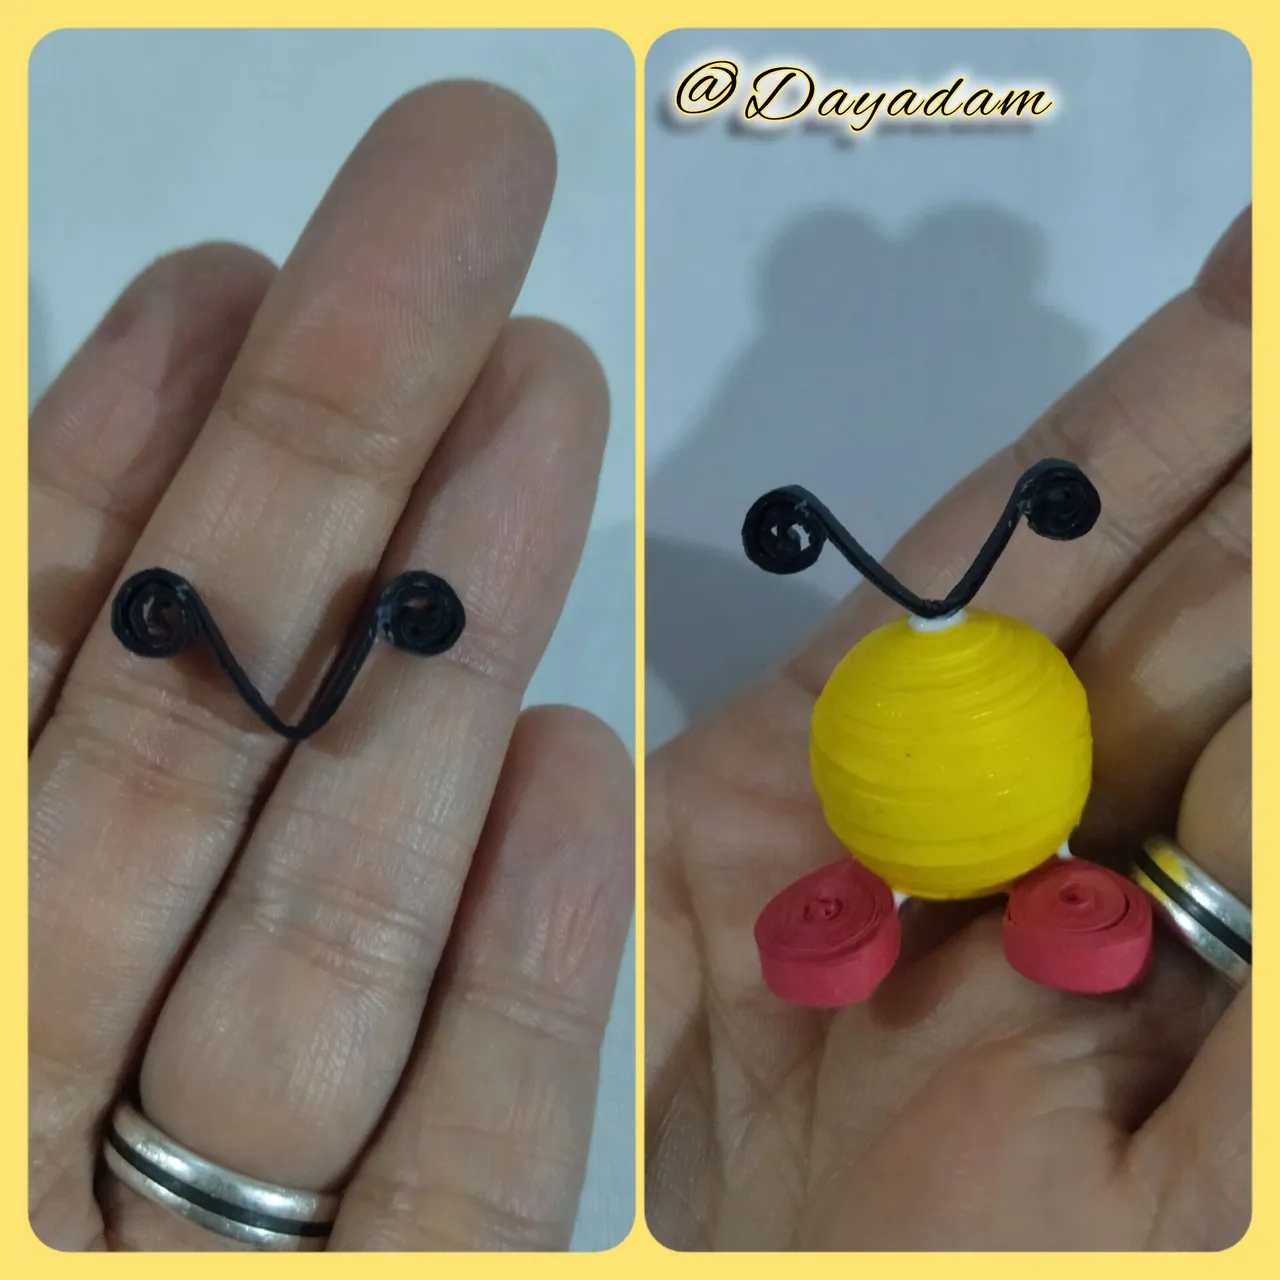
- Make the antennae with a piece of black ribbon 4mm wide which I folded in half and molded in a spiral shape at both ends, above the ball.
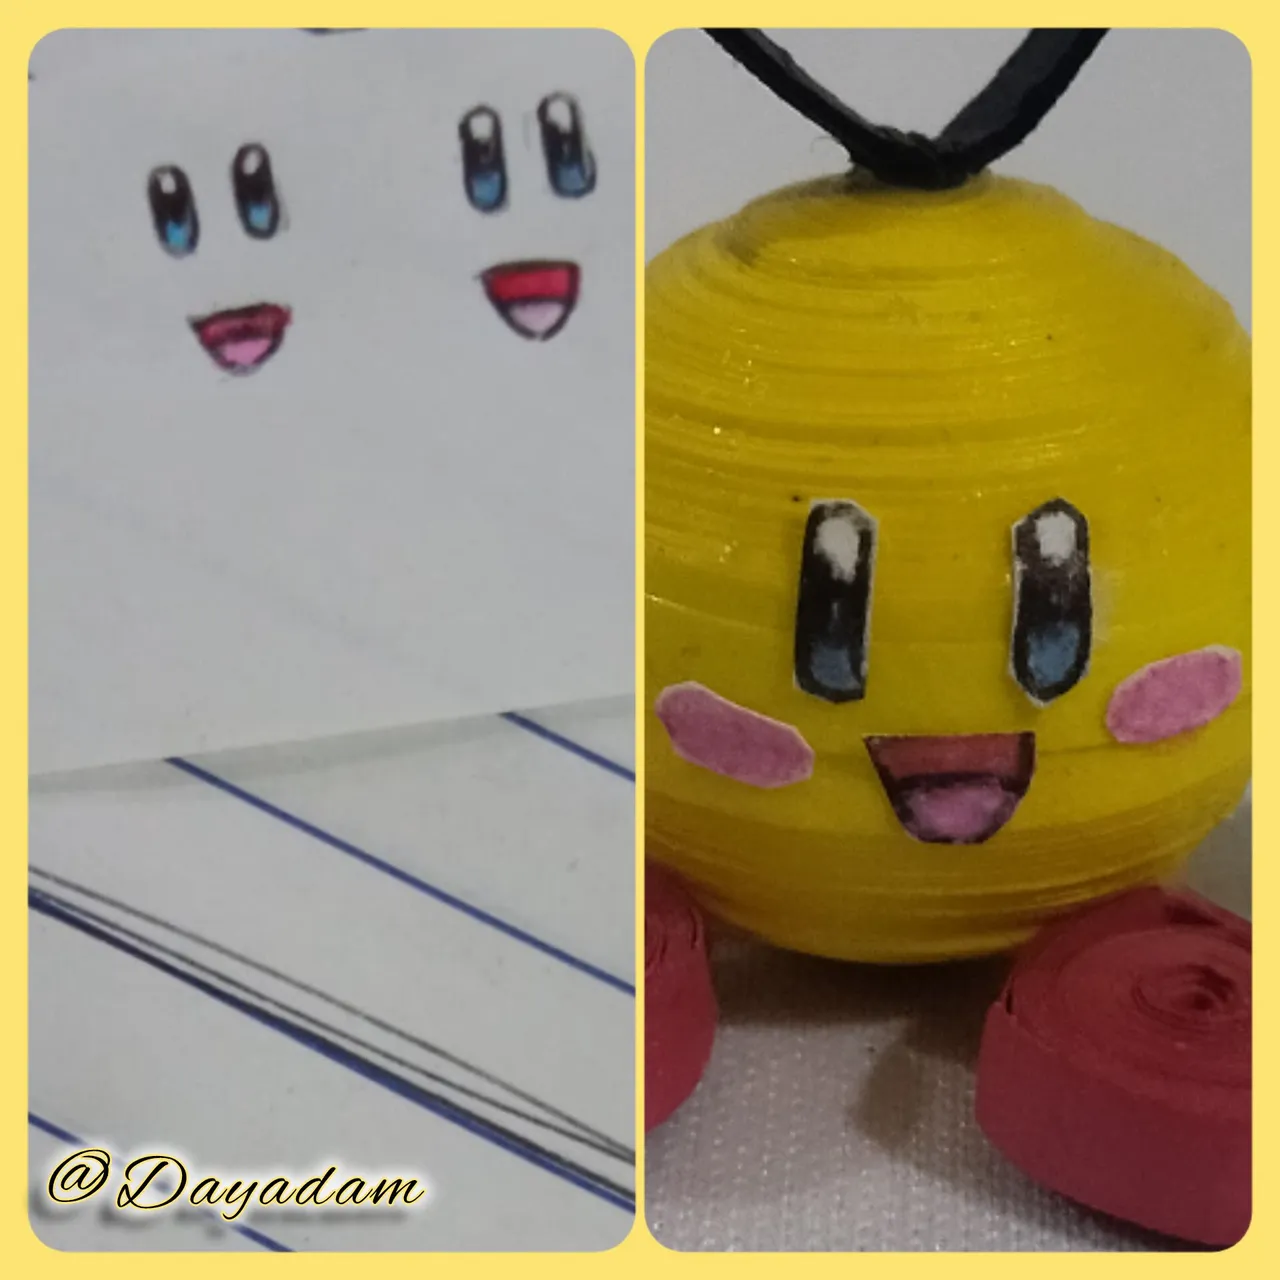
- I proceeded to make the eyes, mouth and cheeks, painted on a white sheet with colored pencils, cut out and glued on the corresponding face in a harmonious way.
- Finally and to finish, apply a few coats of white glue extra strong, to plasticize, give protection and a little shine.
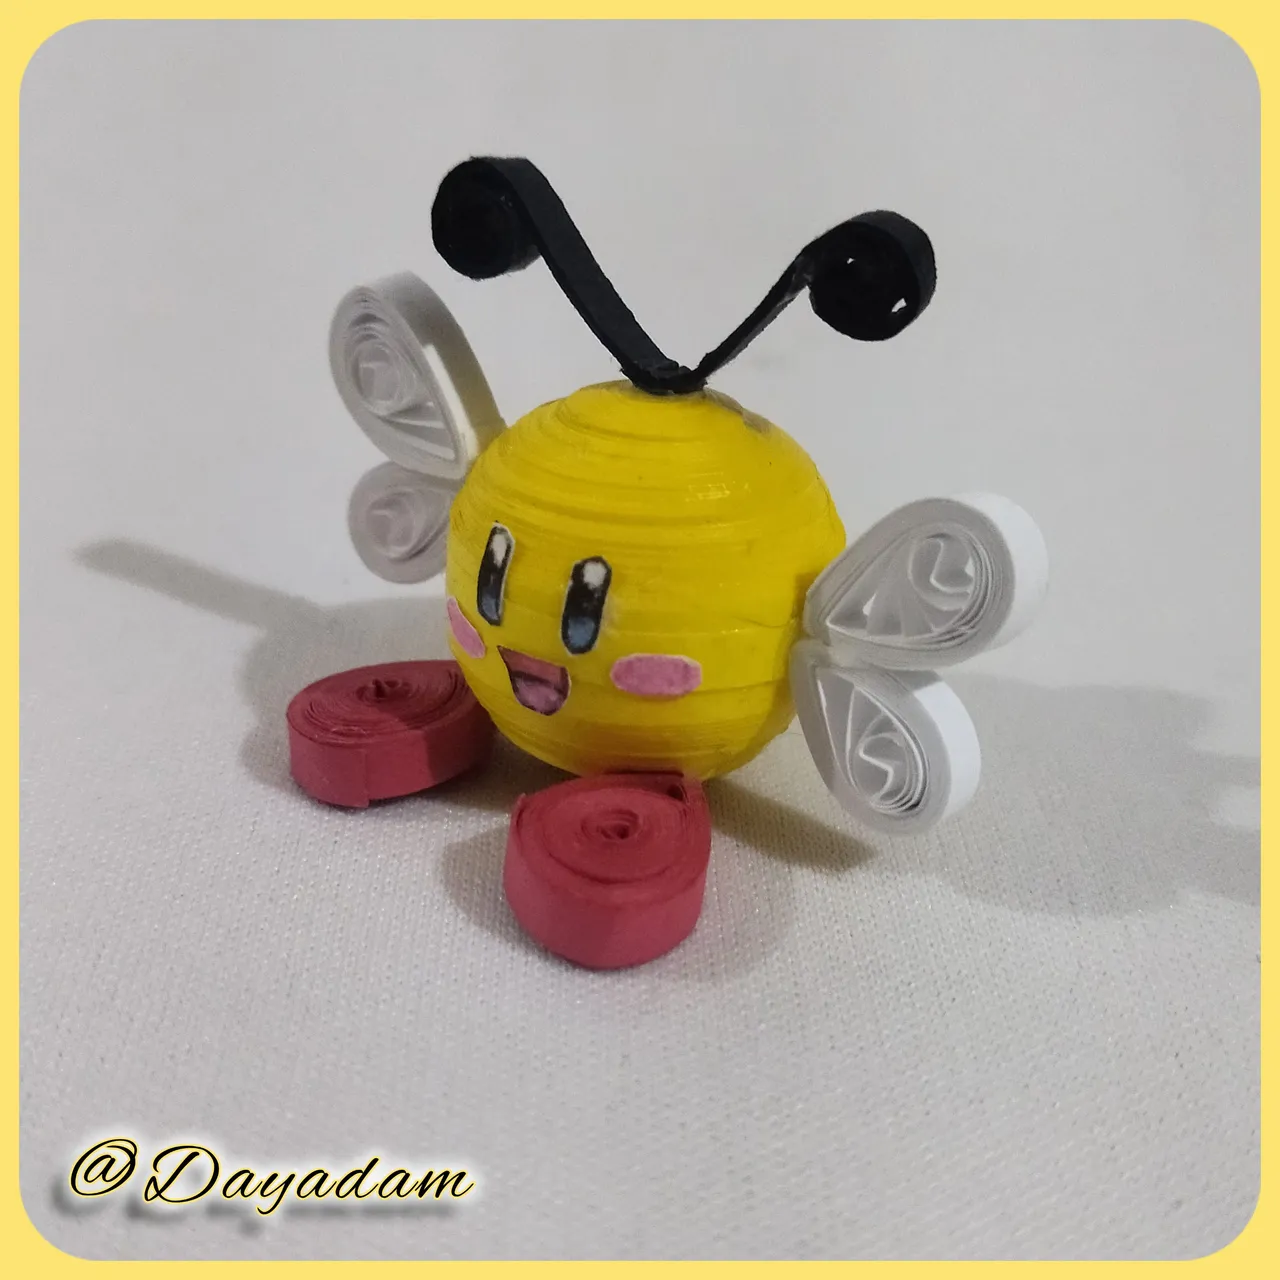
This way we have ready this fun "Kirby BeeHive", I made to commemorate our April PUD...⚡️🐝⚡️💕
• Para los pies del Kirby abejita tome cinta para quilling color rojo de 3mm de ancho, realice 2 círculos cerrados, lo moldee solo un poco, y lo pegue en la parte de abajo de la bolita.
• Procedamos a hacer las alas, tomaremos cinta para quilling de color blanco de 3mm de ancho, con ella haremos 4 círculos abiertos, 2 medianos y dos más pequeños, los moldearemos en forma de hoja, uniremos uno grande y uno pequeño, una vez listos los pegaremos a los lados de la bolita es decir el cuerpo del Kirby.
• Realice las antenas con un trozo de cinta negra de 4mm de ancho la cual doble a la mitad y moldee en forma de espiral en las dos puntas, arriba de la bolita.
• Procedí a realizar los ojos, boca y mejillas, pintados en una hoja de color blanca con lapices de colores, recorte y pegue en la cara correspondiente de manera armónica.
• Por ultimo y para finalizar, aplique unas capas de pega blanca extra fuerte, para plastificar, darle protección y un poco de brillo.
De esta manera tenemos listo este divertido "Kirby BeeHive", que realice para conmemorar nuestro PUD del mes de Abril...⚡️🐝⚡️💕


What did you think, did you like it?
I hope you did, I hope you liked my explanation, procedure and photos, I made them with love for you.
"Let out that muse that inspires you, and let your imagination fly".
Thank you all, see you next time. Happy PowerUpDay ⚡️🐝⚡️
¿Qué les pareció, les gustó?
Espero que sí, que les haya gustado mi explicación, procedimiento y fotos, los hice con mucho cariño por y para ustedes.
"Deja salir esa musa que te inspira, y deja volar tu imaginación".
Gracias a todos, nos vemos en la próxima. Feliz PowerUpDay ⚡️🐝⚡️
Todas las fotos usadas en este post son de mi autoría y han sido sacadas en mi celular personal un Redmi 9T, editadas en InShot y Canva Banner y separador hecho por mí en Canva Traducido con la ayuda de DeepL
