Hello everyone... ✨
Hello to my dear Hivers and the dear community of artists #HiveDIY, as always very pleased and excited to be here again, showing you my work made with love and especially for you.
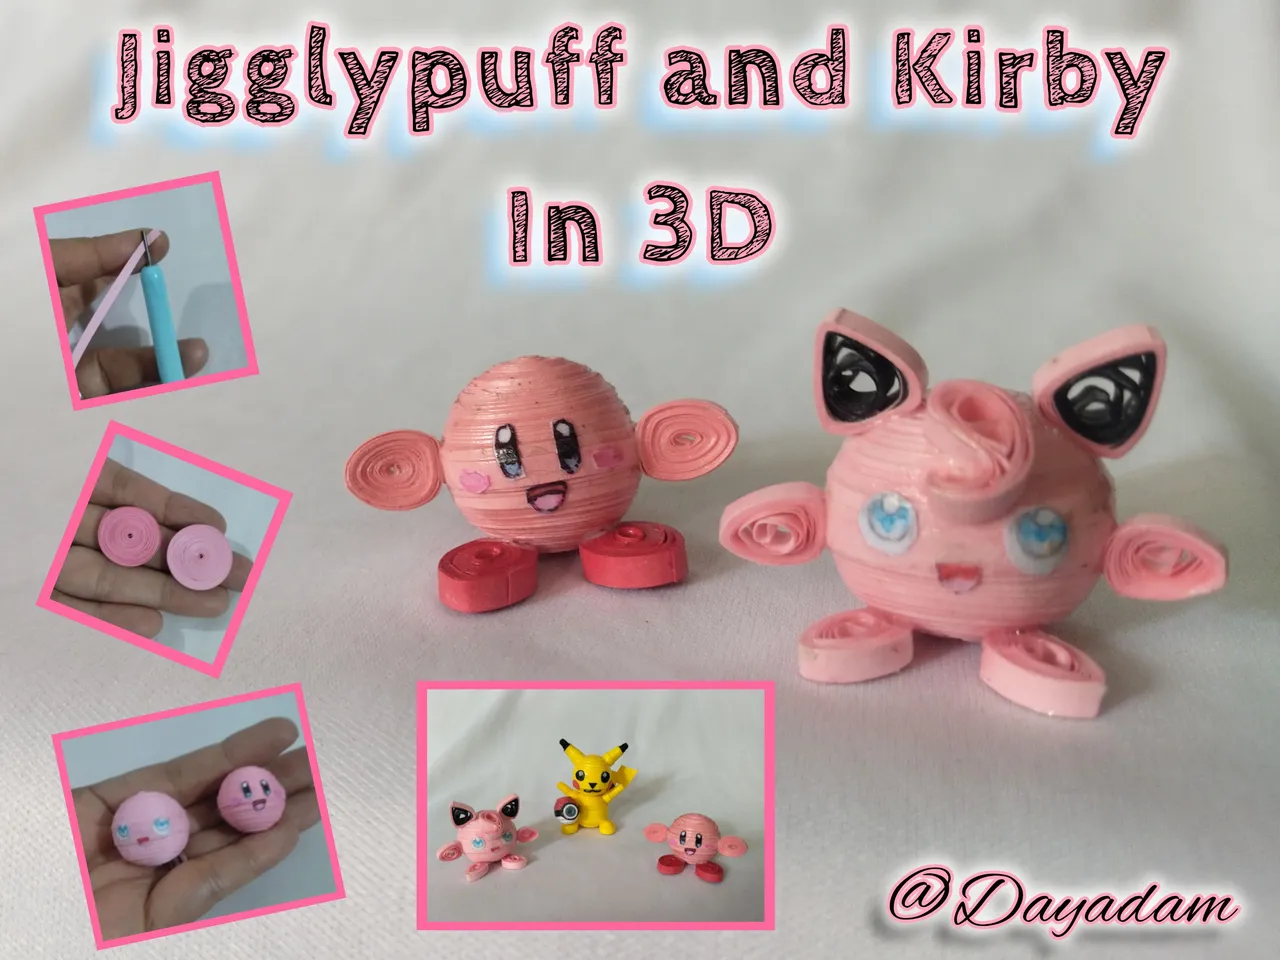
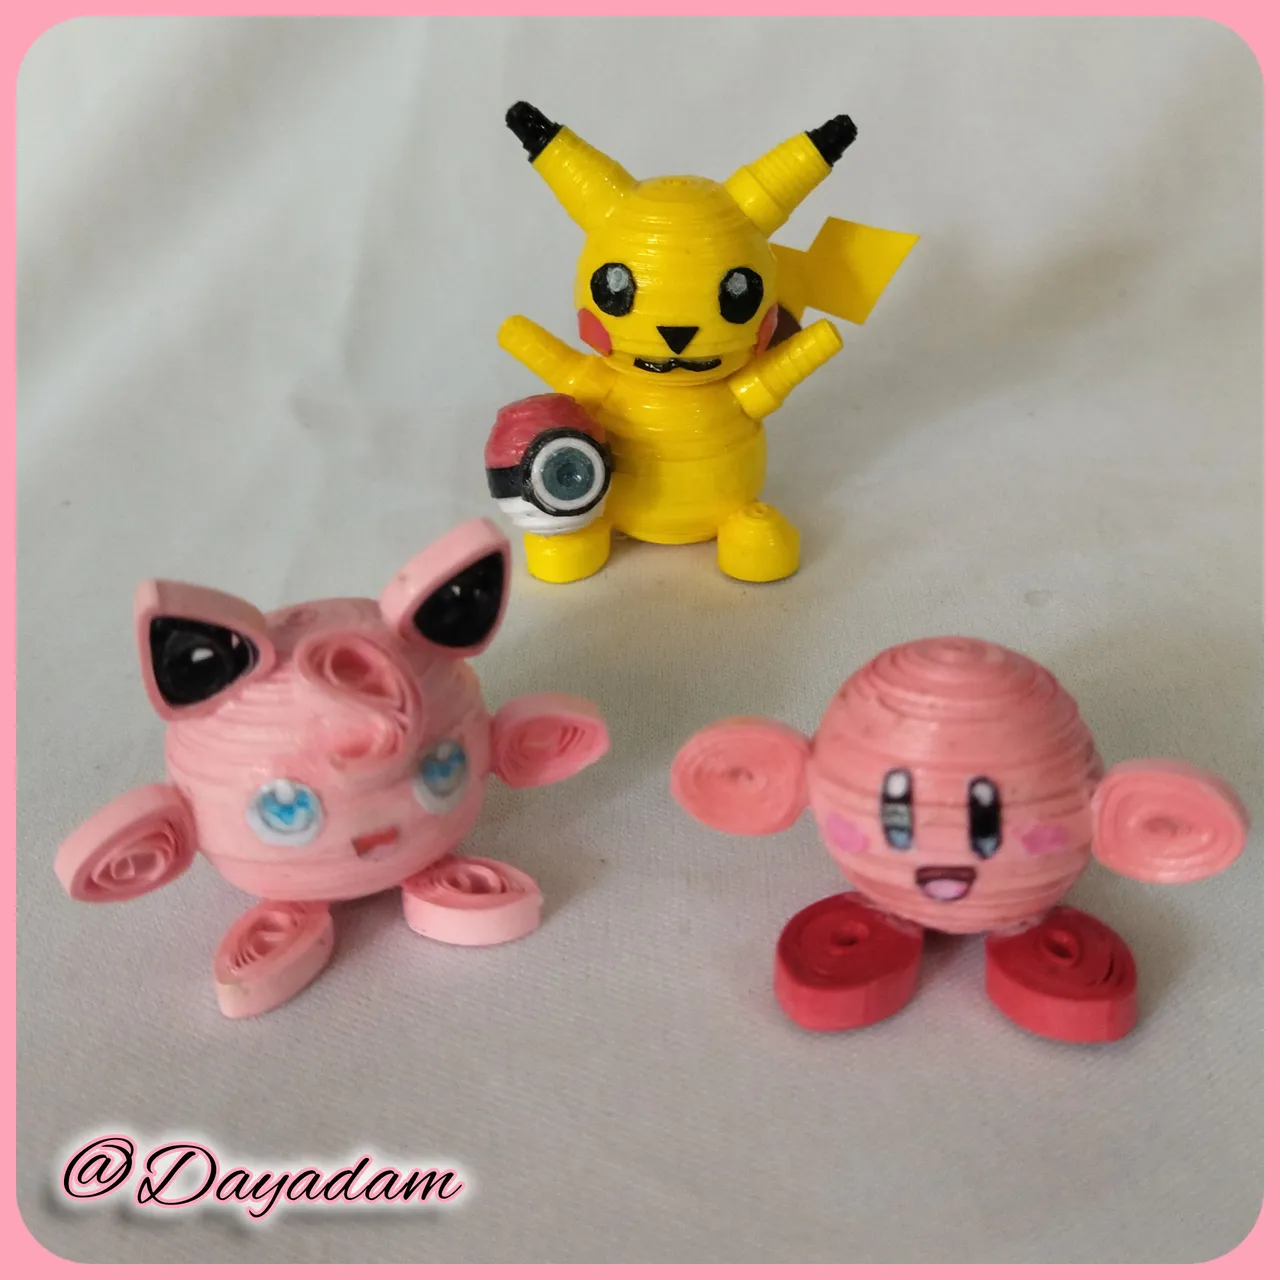
Some months ago I made a very well known character of "Pokemon " as is "Pikachu ", for today I wanted to continue my inspiration in this famous game and I bring you another of his characters as is "Jigglypuff ", additionally as the figure is very similar, belongs to another video game and these little characters appear in the franchise of Smash bros, I wanted to materialize together these 2 little pink balls, and also made the small "Kirby ", both in 3D in the quilling technique.
Hoping that you like it, and are encouraged to carry it out, without further ado I leave here my creative process.
Let's get started:😃

Hola a Todos... ✨
Hola a mis queridos Hivers y a la querida comunidad de artistas #HiveDIY, como siempre muy complacida y emocionada de encontrarme por acá nuevamente, mostrándole mi trabajo hecho con mucho amor y especialmente para ustedes.
Hace algunos meses realice un personaje muy conocido de "Pokemon" como lo es "Pikachu", pues para hoy quise seguir mi inspiración en esta famoso juego y les traigo otro de sus personajes como lo es "Jigglypuff", adicionalmente como la figura es muy parecida, pertenece a otro vídeo juego y estos pequeños personajes aparecen en la franquicia de Smash bros, pues quise materializar juntos a estas 2 bolitas rosadas, y también realice al pequeño "Kirby", ambos en 3D en la técnica de quilling.
Si desean ver mi trabajo anterior para disfrutar de su creación y resultado final, por acá les dejo el link, y si lo desean dejen su apreciación: Pikachu en 3D
Esperando que sea de su agrado, y se animen a llevarlo a cabo, sin más preámbulos les dejo por acá mi proceso creativo.
Comencemos:😃

• Cintas de quilling de diversas medidas y colores .
• Aguja para quilling.
• Plantilla para moldear círculos.
• Lapices de colores.
• Pega blanca extra fuerte (de carpintería).
• Tijera.
• Pincel.
- Quilling ribbons of different sizes and colors.
- Needle for quilling.
- Template to mold circles.
- Colored pencils
- Extra strong white glue (carpentry glue).
- Scissors.
- Paintbrush.

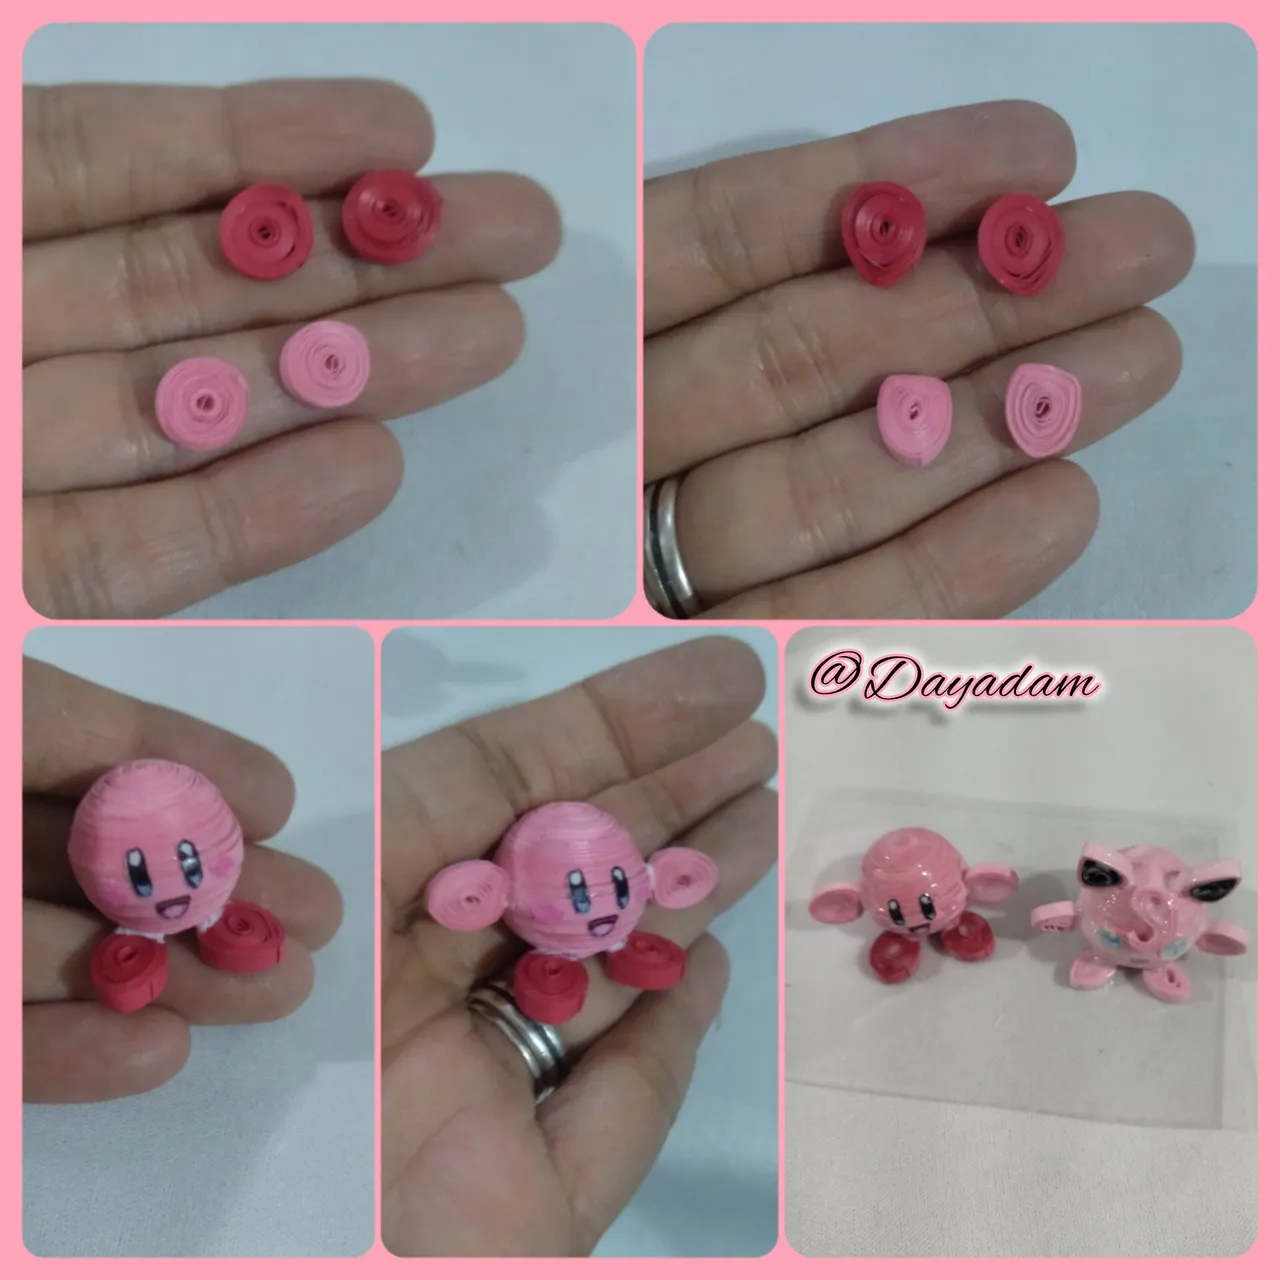
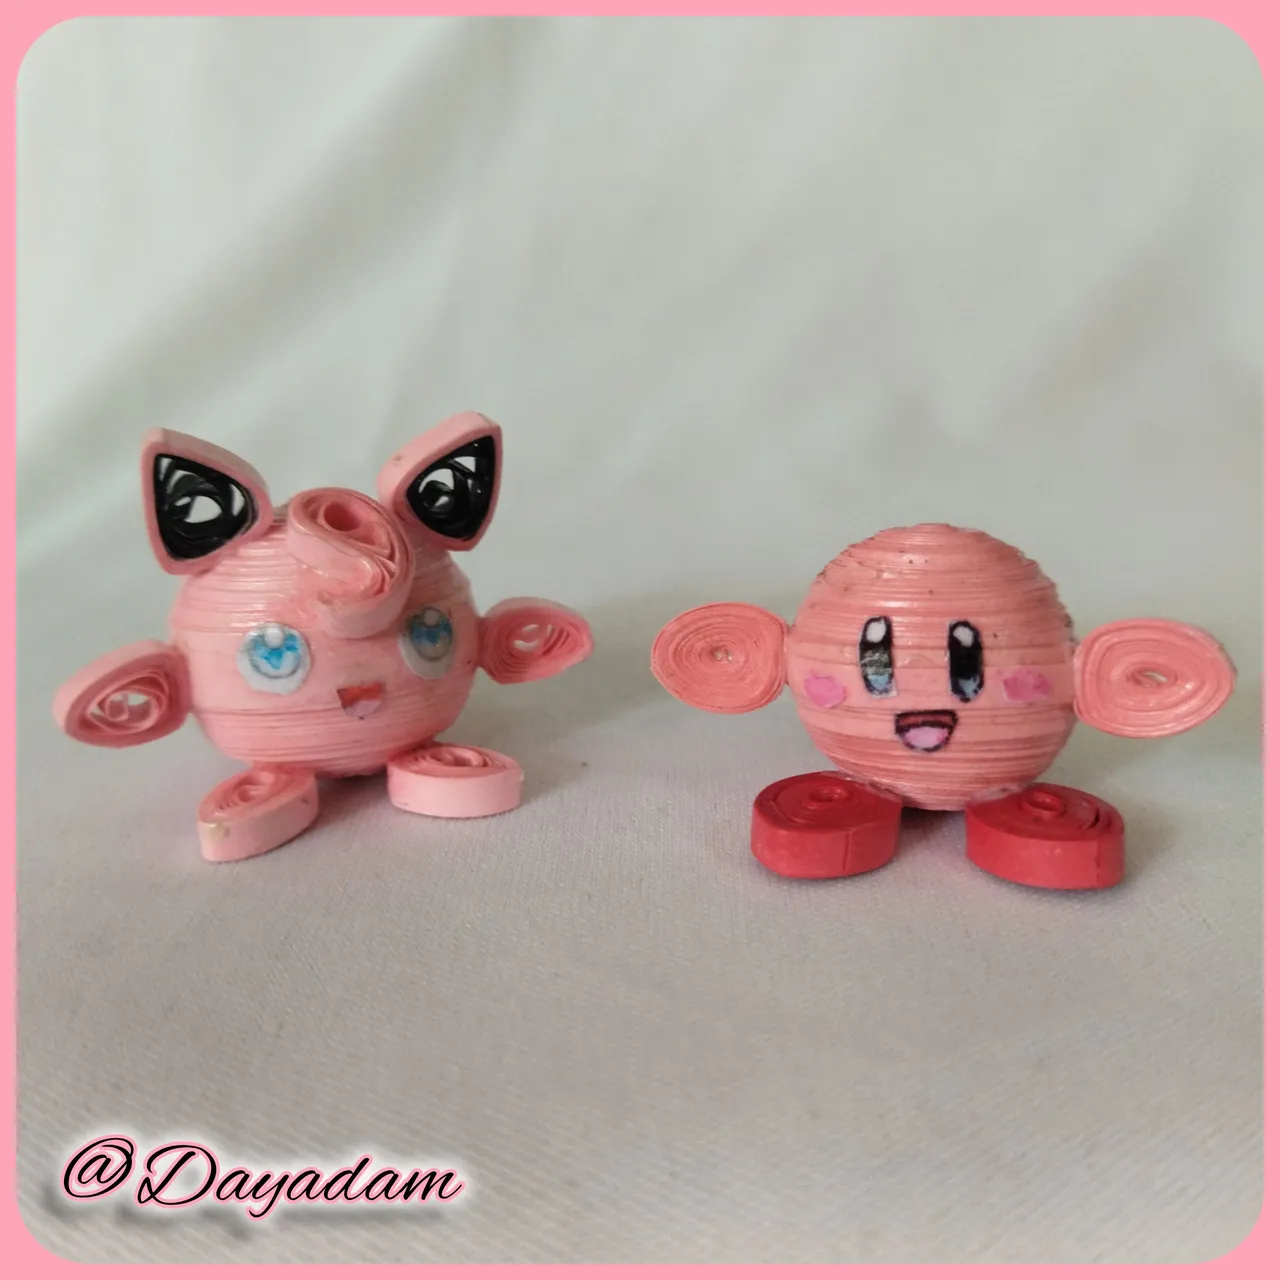
Basically both characters have similar shapes and are very easy to make, so I will show you the step by step together:
Jigglypuff and Kirby's body:
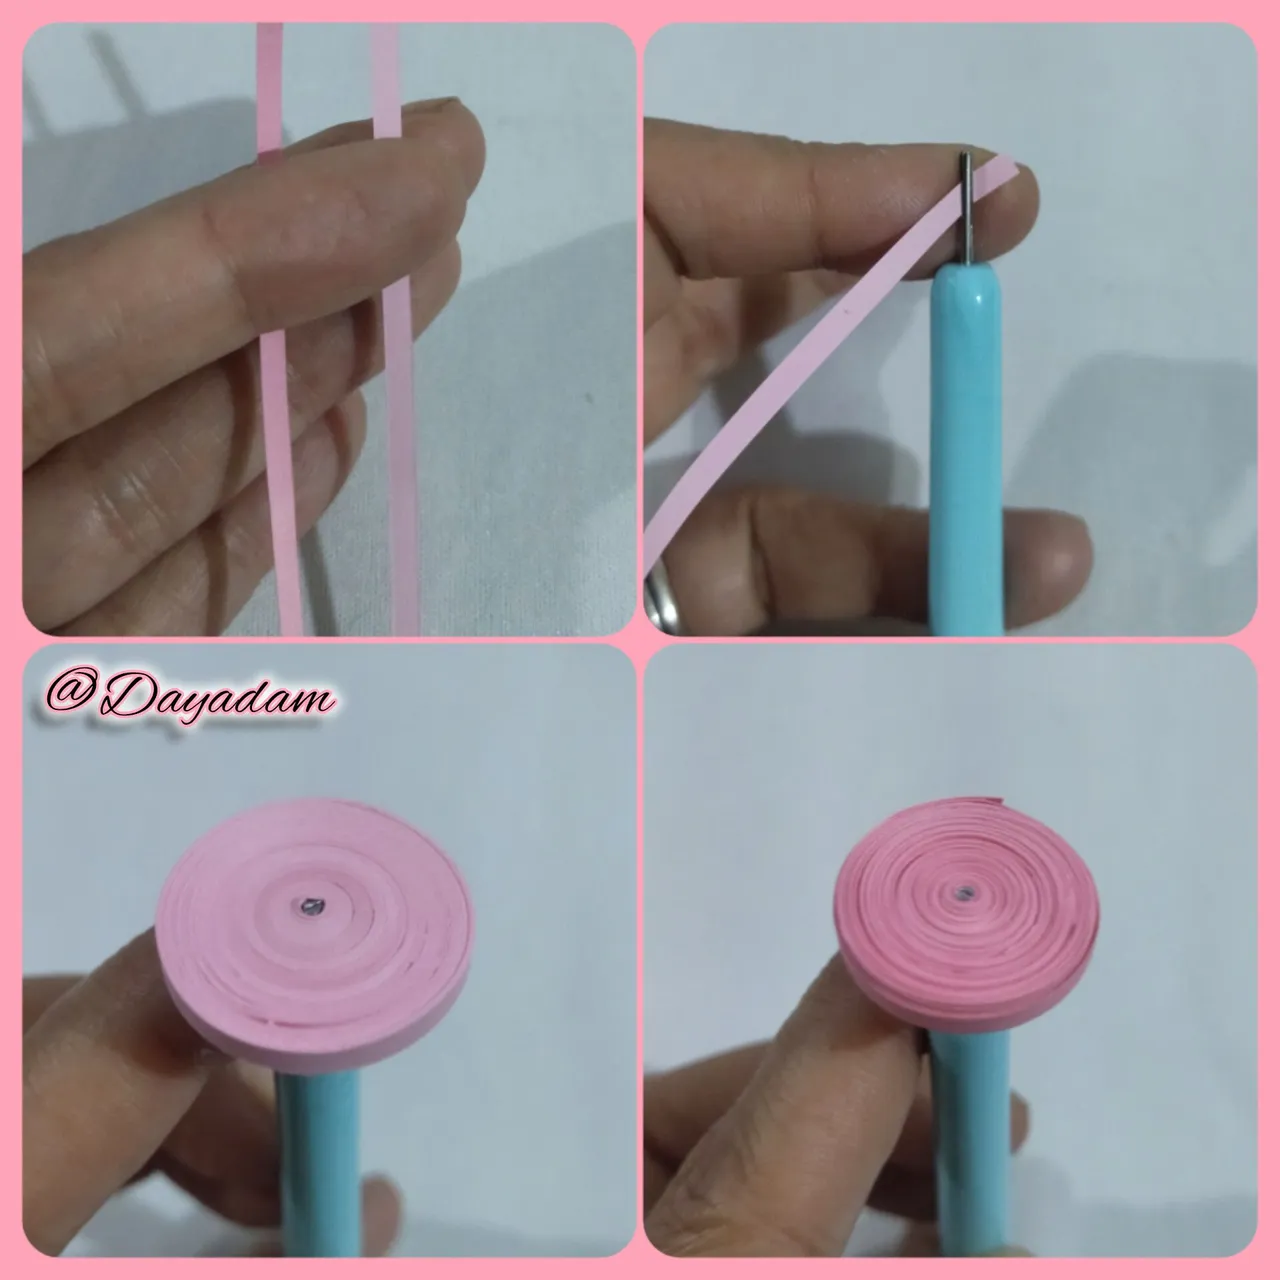
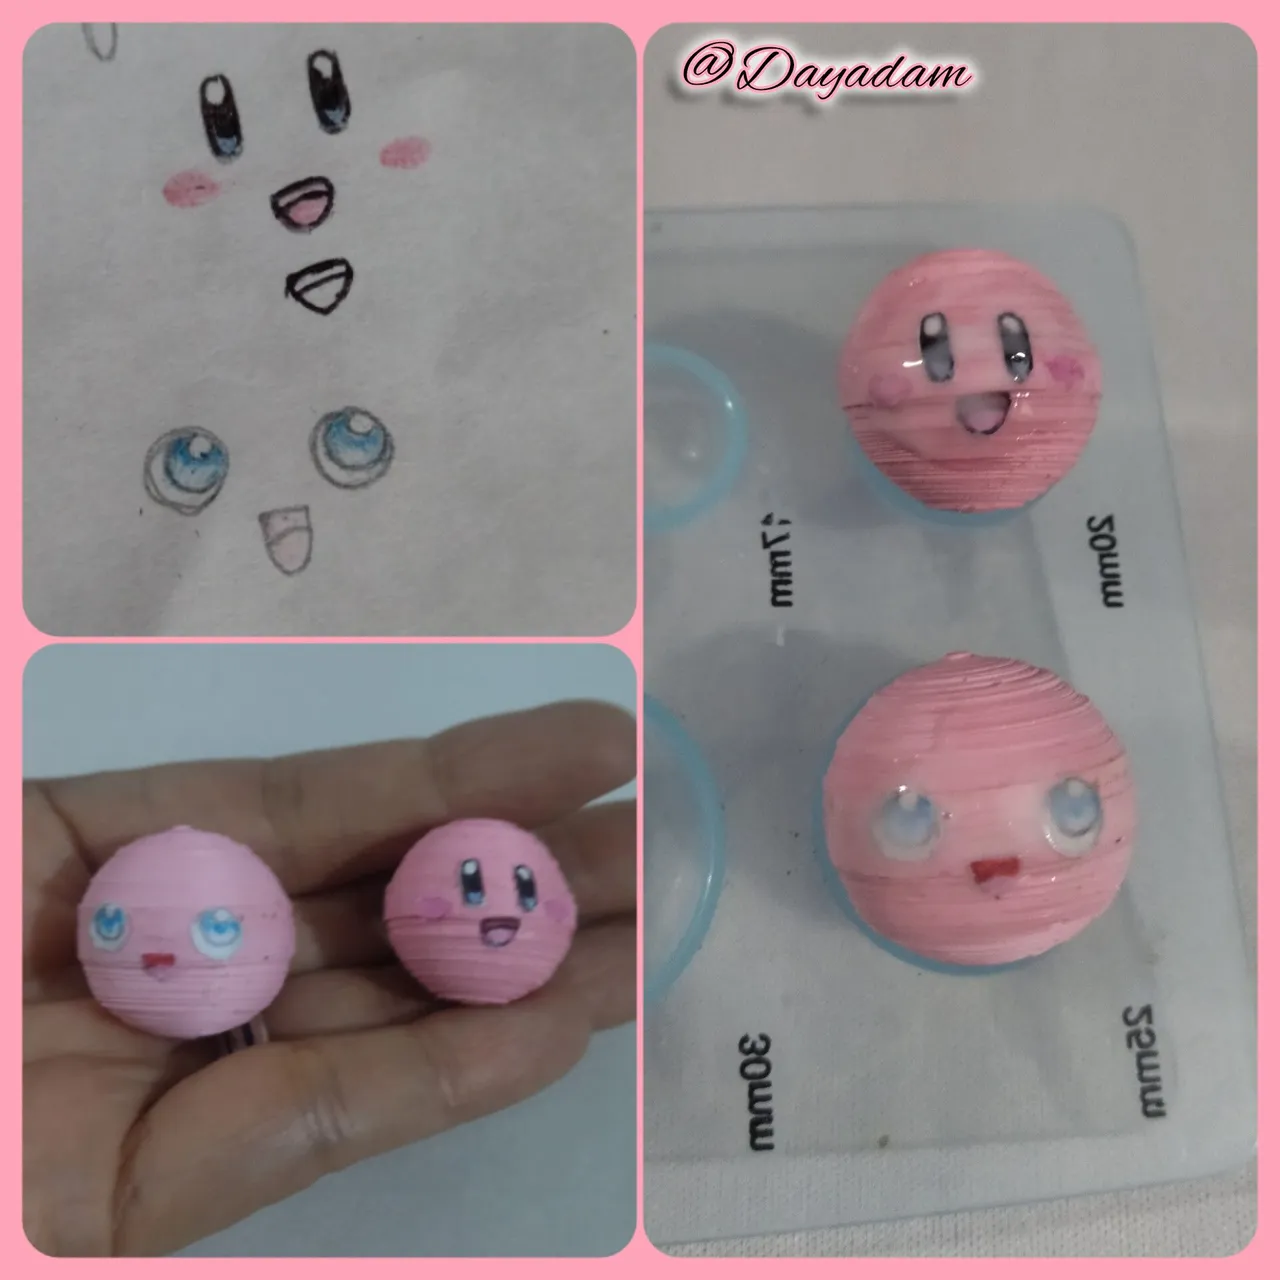
- We start by taking quilling tape of light pink color 3mm wide x 280cms and pink a darker tone of 3mm wide x 240cms long each, we roll with the quilling needle until we reach the end of the tape, we seal with extra strong white glue, we take out of the needle, we will obtain a closed circle. We will make 2 circles of each color.
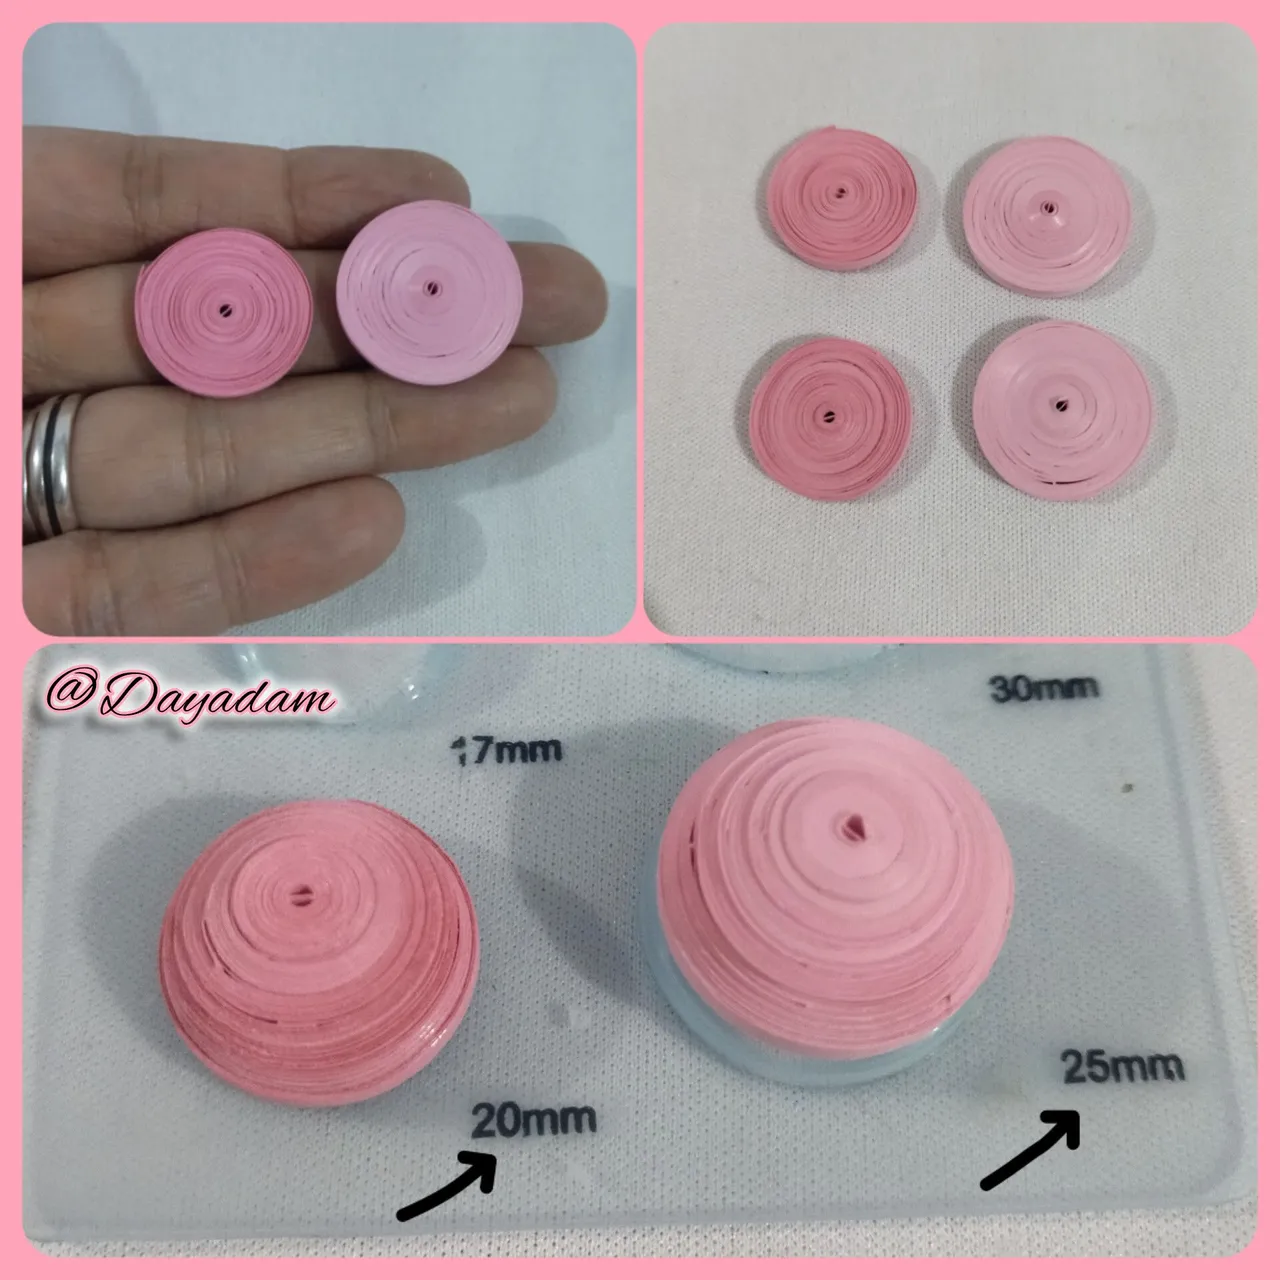
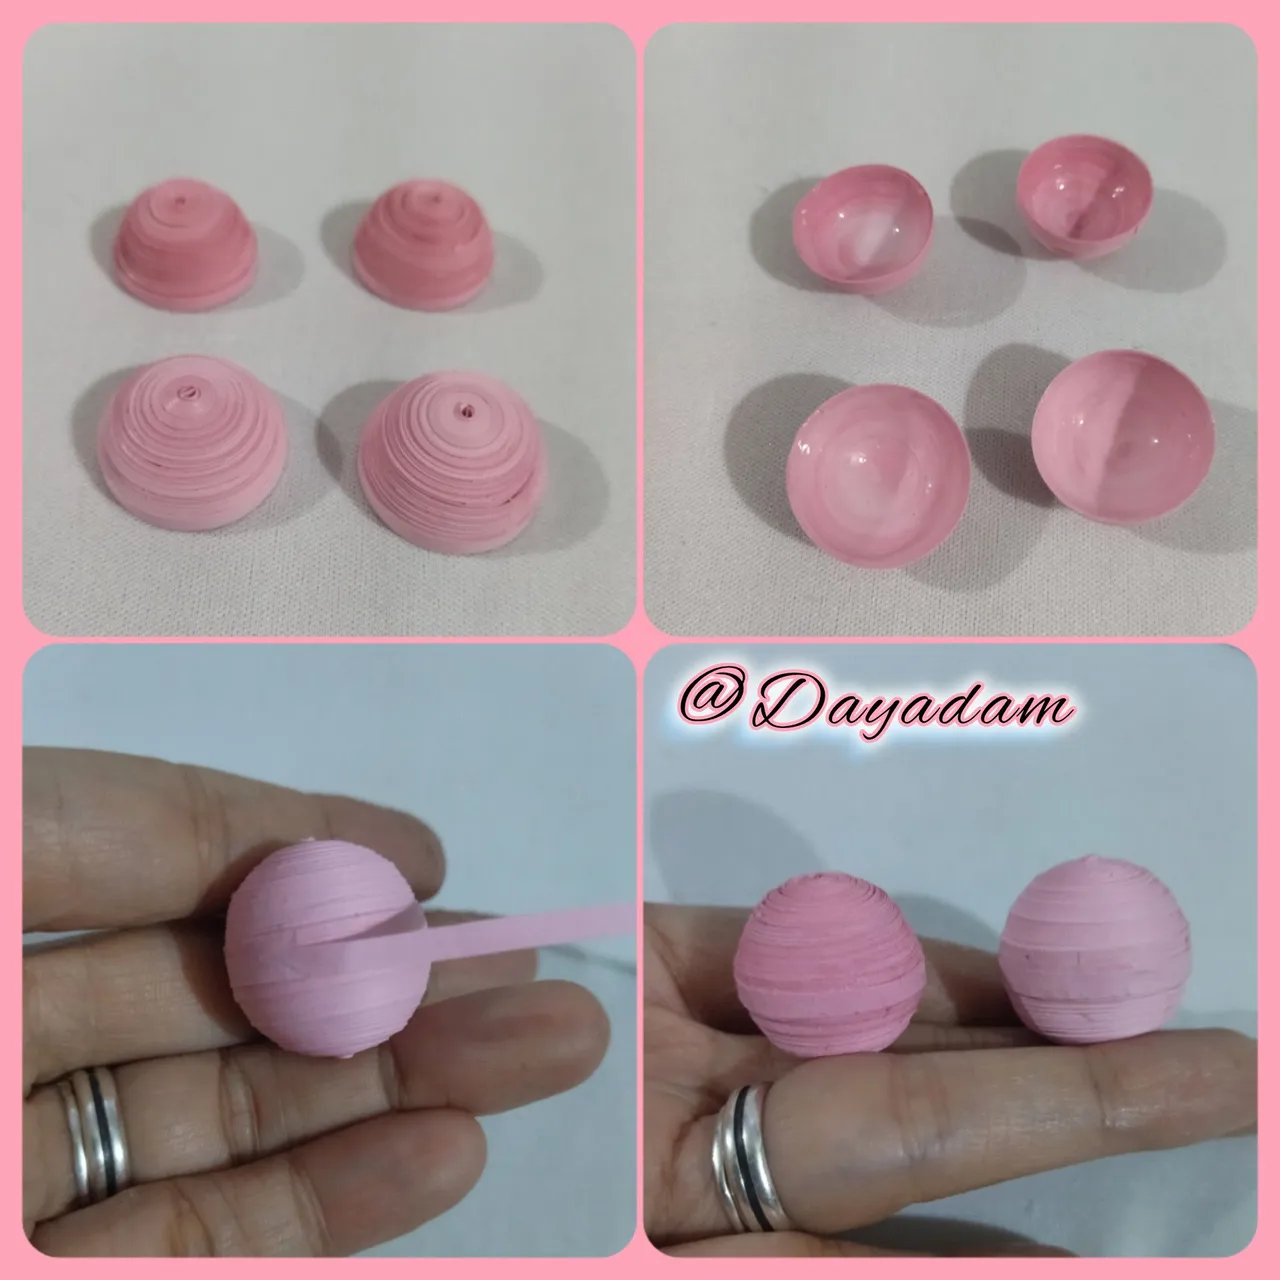
We are going to mold the circles, the light pink ones I placed them in the template of circles in the measure 25mm, and the smaller dark pink ones I placed them in the measure number 20mm, once molded we take them out of the template and in the inside we add a little glue, let them dry to prevent the pieces from moving.
We will take the pieces and join them together with a small piece of 3mm wide quilling tape, we couple both pieces passing the tape through the middle with extra strong white glue.
- At this point I wanted to make eyes, mouth and cheeks at once, I painted them on a white sheet, with colored pencils, cut them out and glue them on the corresponding face in a harmonic way, apply some glue to give it protection.

Básicamente ambos personajes tienen formas similares y son muy sencillos de realizar, por ello les mostrare el paso a paso en conjunto:
Cuerpo de Jigglypuff and Kirby:
• Comenzamos tomando cinta para quilling de color rosa claro 3mm de ancho x 280cms y rosa un tono mas oscuro de 3mm de ancho x 240cms de largo cada una, enrollamos con la aguja para quilling hasta llegar al final de la cinta, sellamos con pega blanca extra fuerte, sacamos de la aguja, obtendremos un círculo cerrado. Realizaremos 2 círculos de cada color.
• Vamos a moldear los círculos, los color rosa claro los coloque en la plantilla de círculos en la medida 25mm, y los mas pequeños color rosa oscuro los coloque en la medida numero 20mm, una vez moldeados sacamos de la plantilla y en la parte de adentro agregamos un poco de pega, dejamos secar para evitar que se muevan las piezas.
• Tomaremos las piezas y uniremos con un pequeño trozo de cinta de quilling de 3mm de ancho, acoplamos ambas pasando la cinta por el medio con pega blanca extra fuerte.
• En este punto quise realizar ojos, boca y mejillas de una vez, los pinte en una hoja de color blanca, con lapices de colores, recorte y pegue en la cara correspondiente de manera armónica, aplique un poco de pega para darle protección.
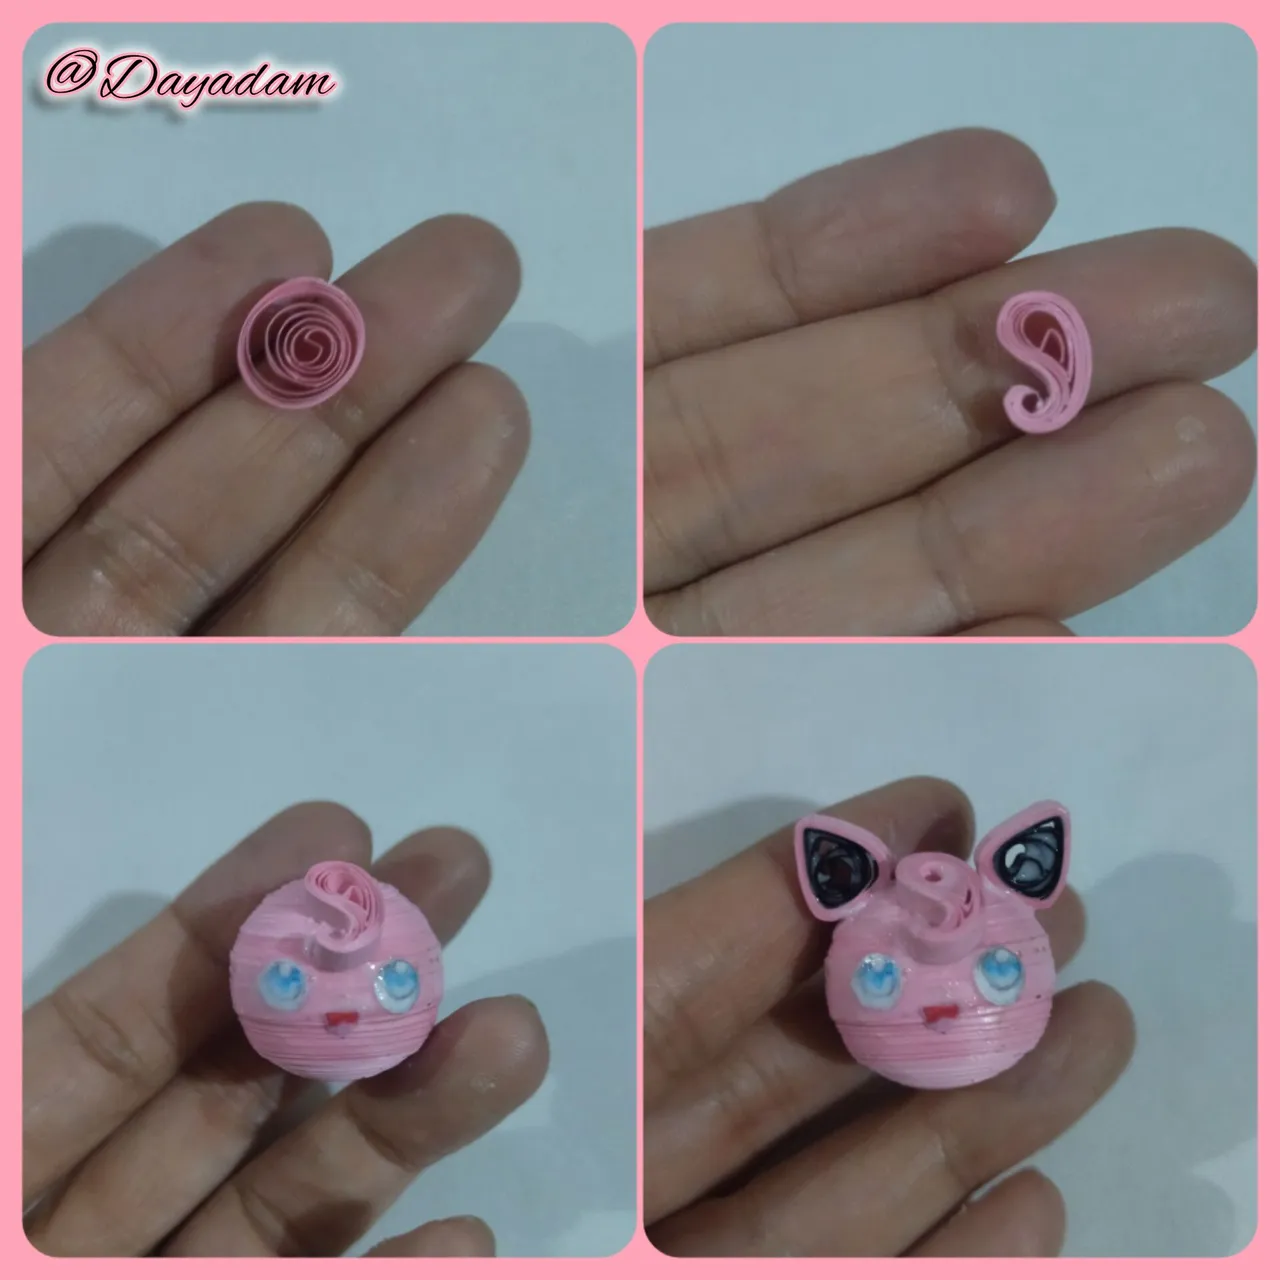
Jigglypuff loop:
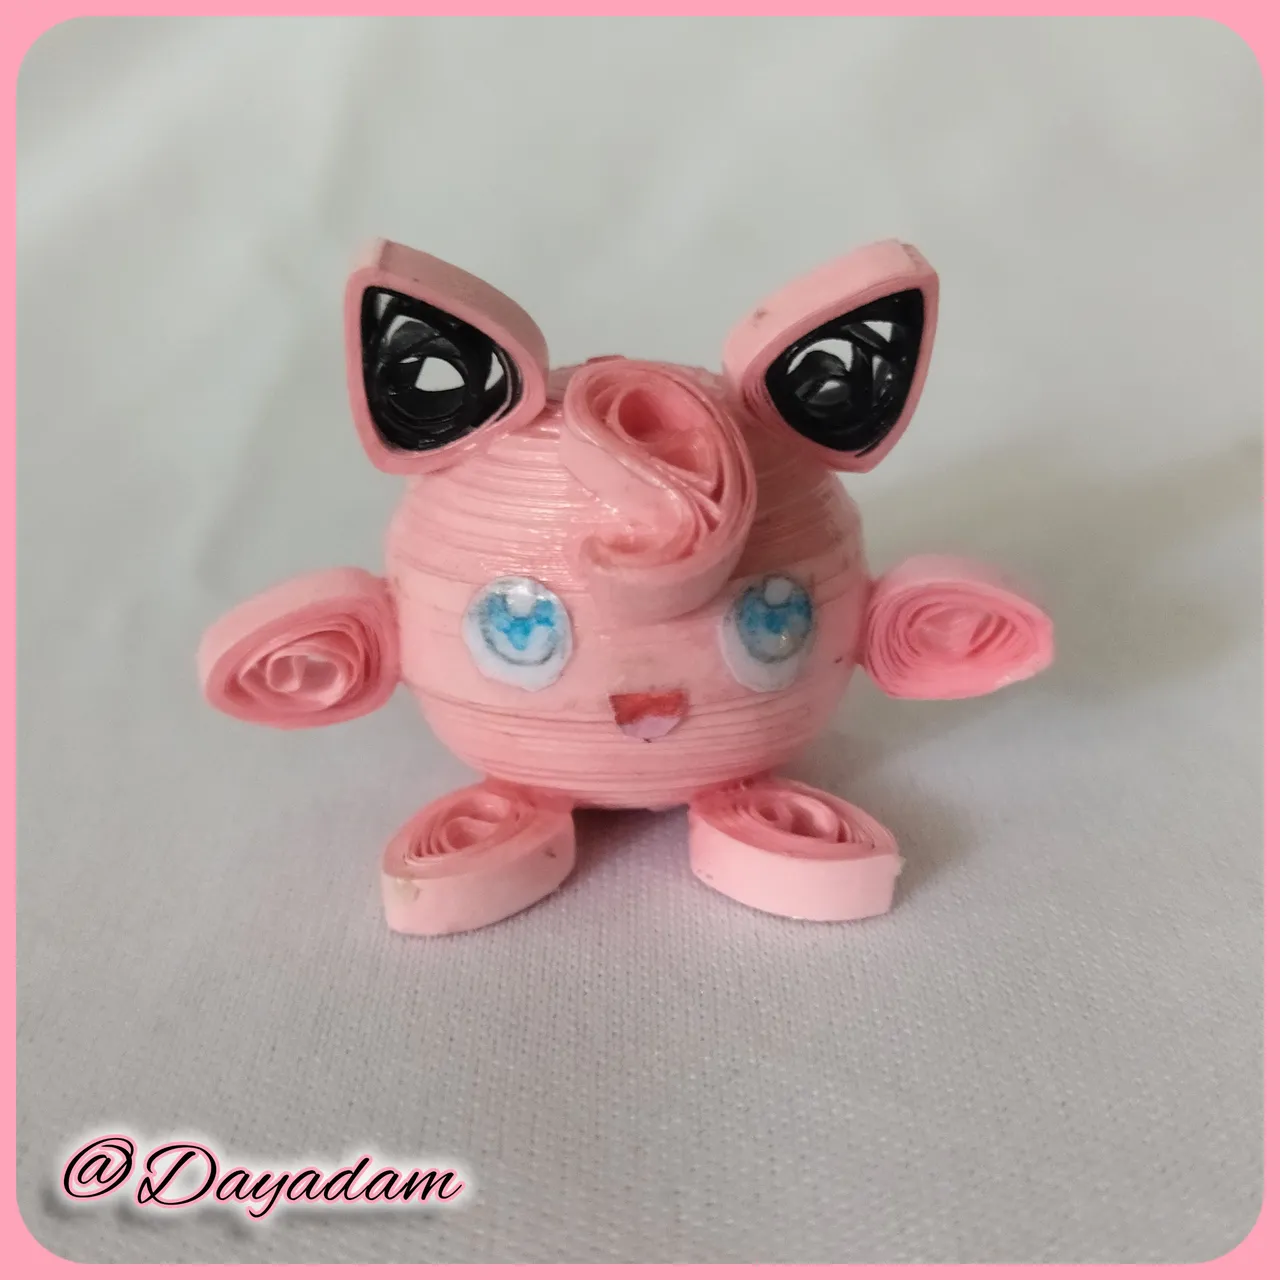
- I made a light pink open circle which I molded and glued in the middle of the head.
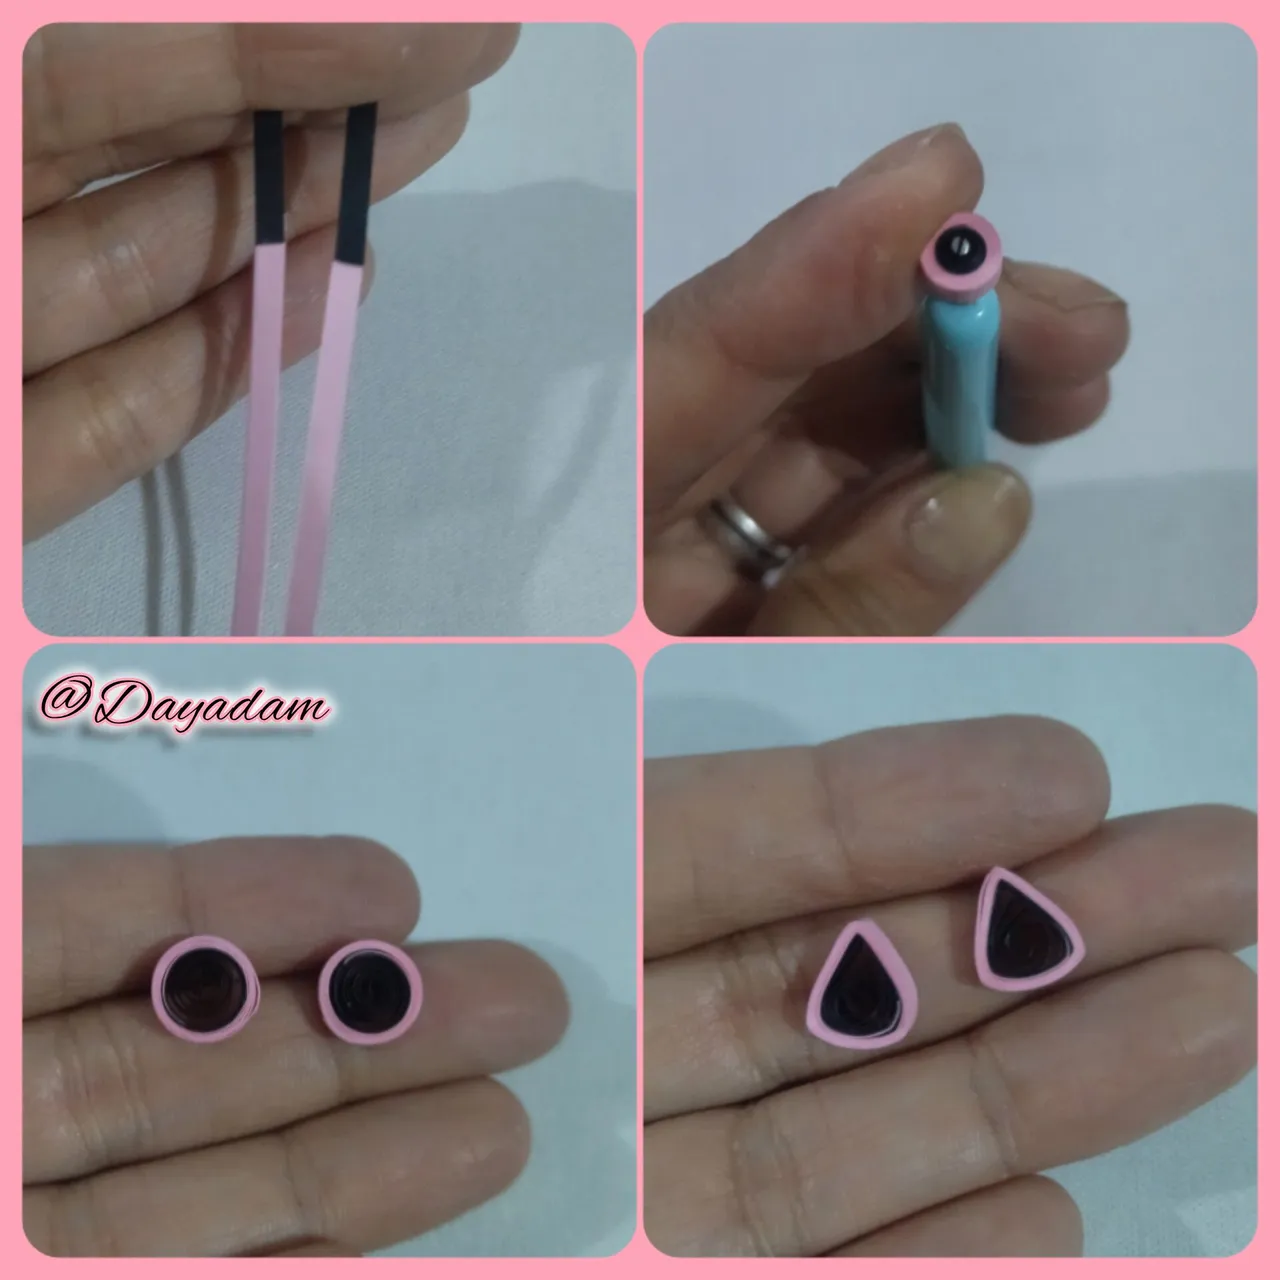
Jigglypuff ears:
- We will take light pink and black ribbon 3mm wide which we will join into one and we will make an open circle which we will mold in the shape of a triangle, we will glue it on the top of the head.
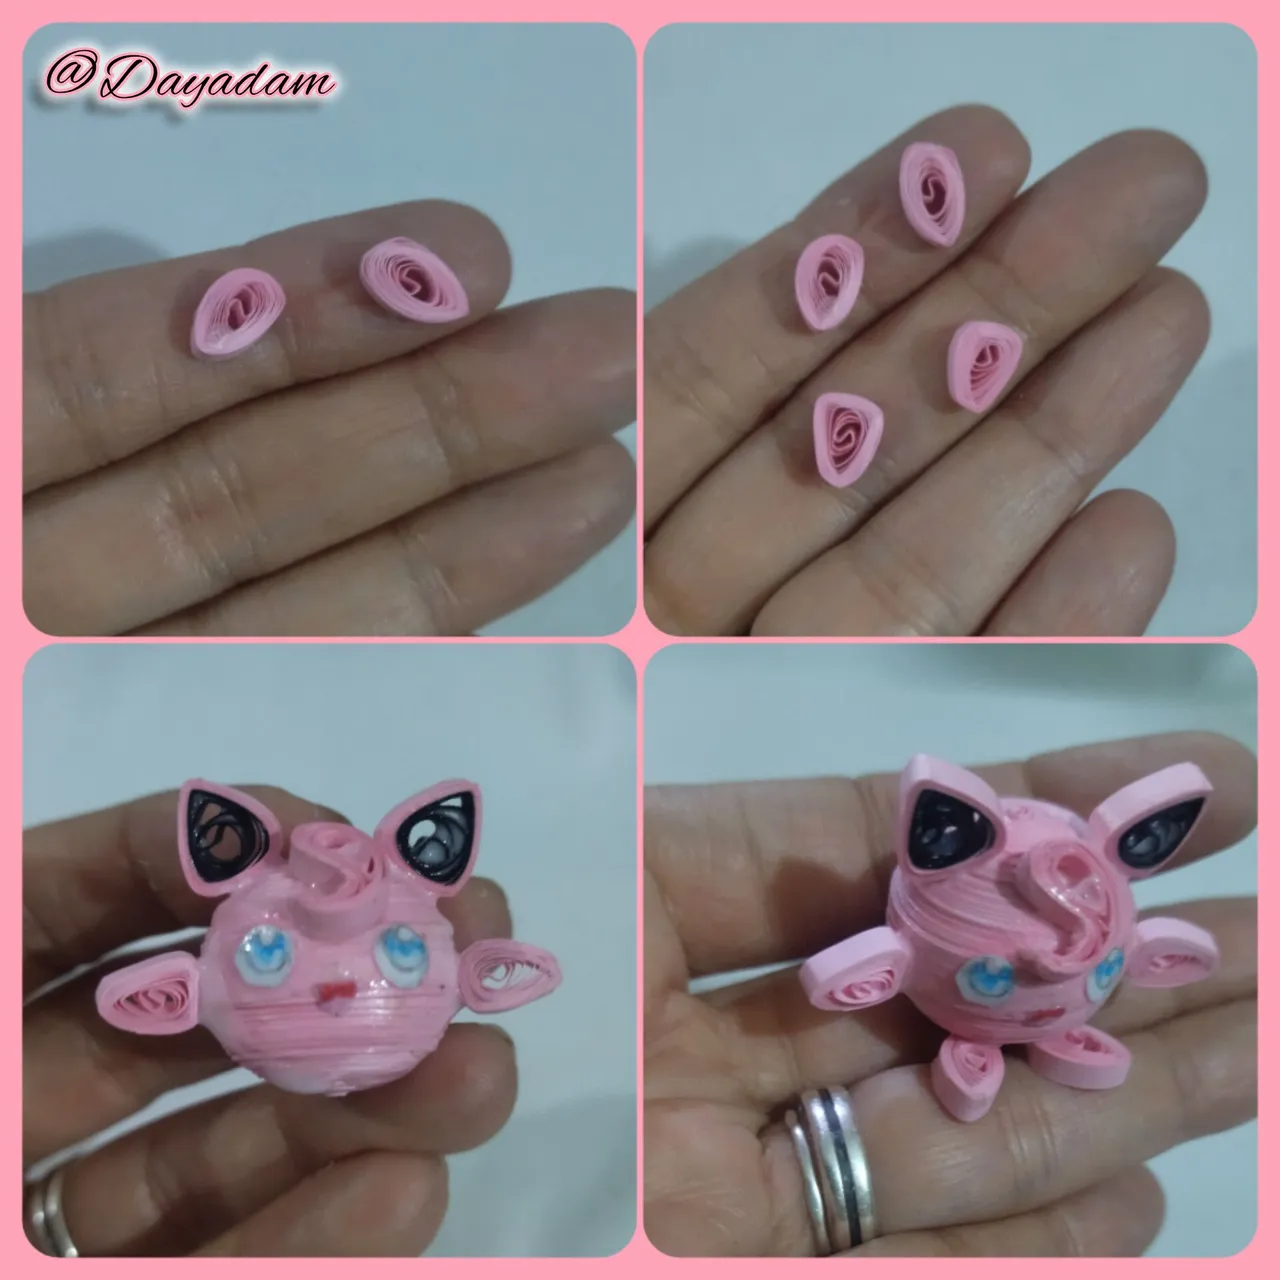
Jigglypuff arms and feet:
- For these take light pink quilling tape, make 2 semi-open circles for the hands, and 2 a little larger ones for the feet, shape them into a kind of small cone, glue them in the corresponding places.
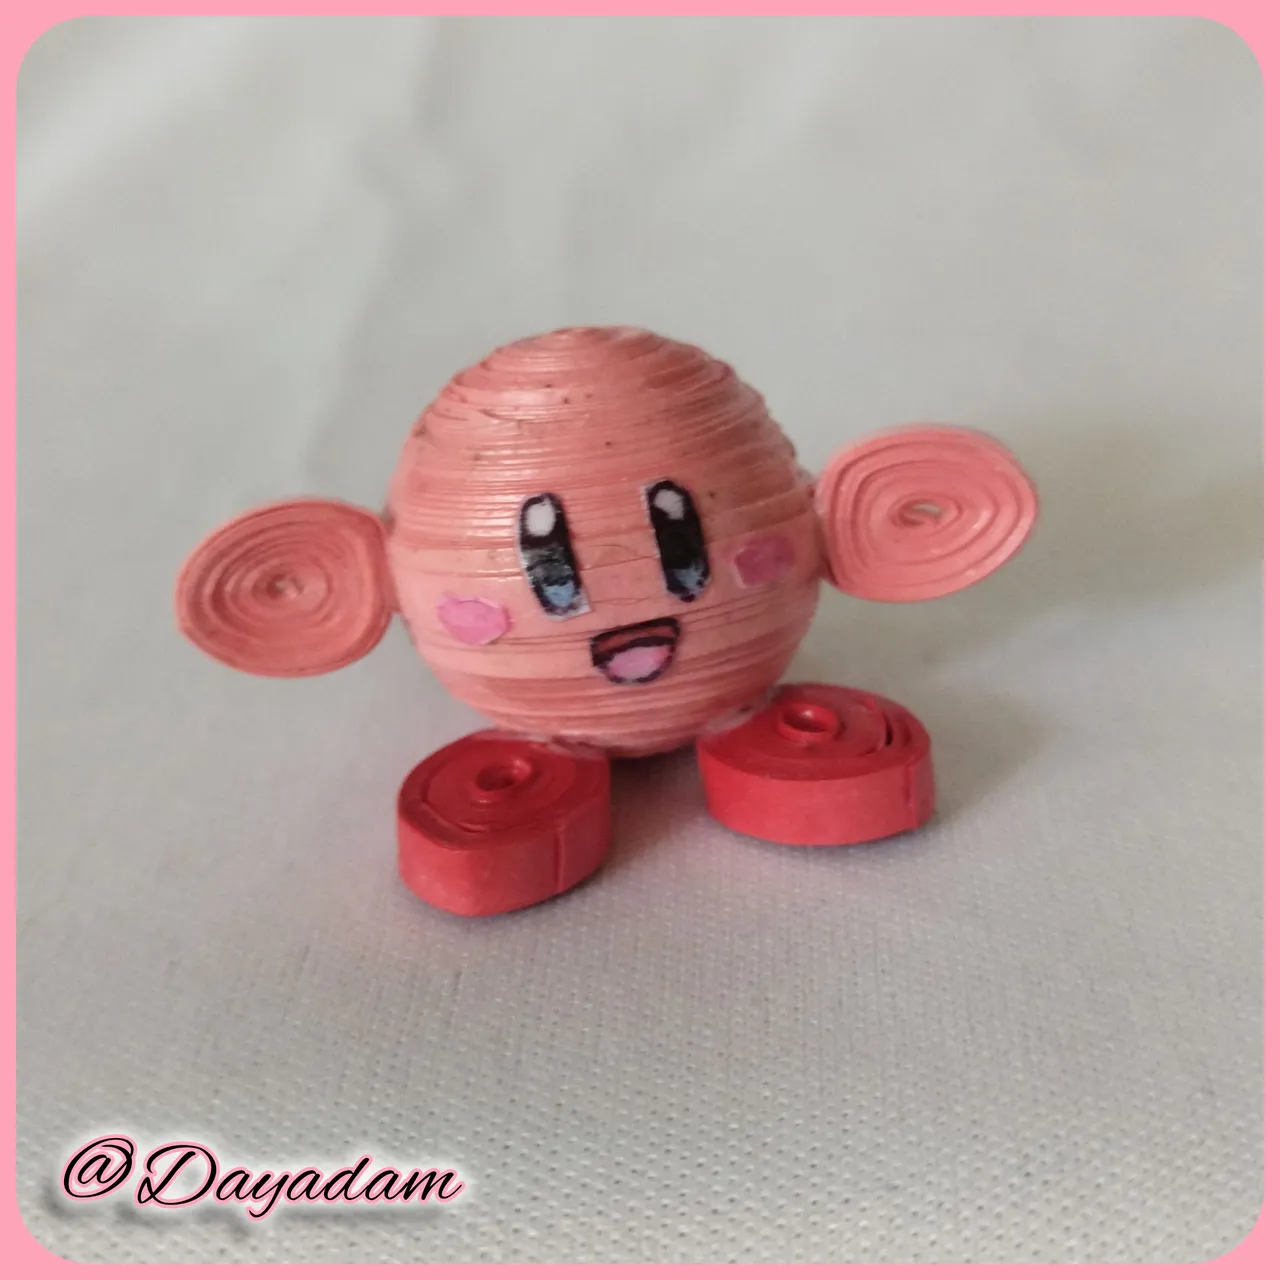
Kirby's arms and feet:
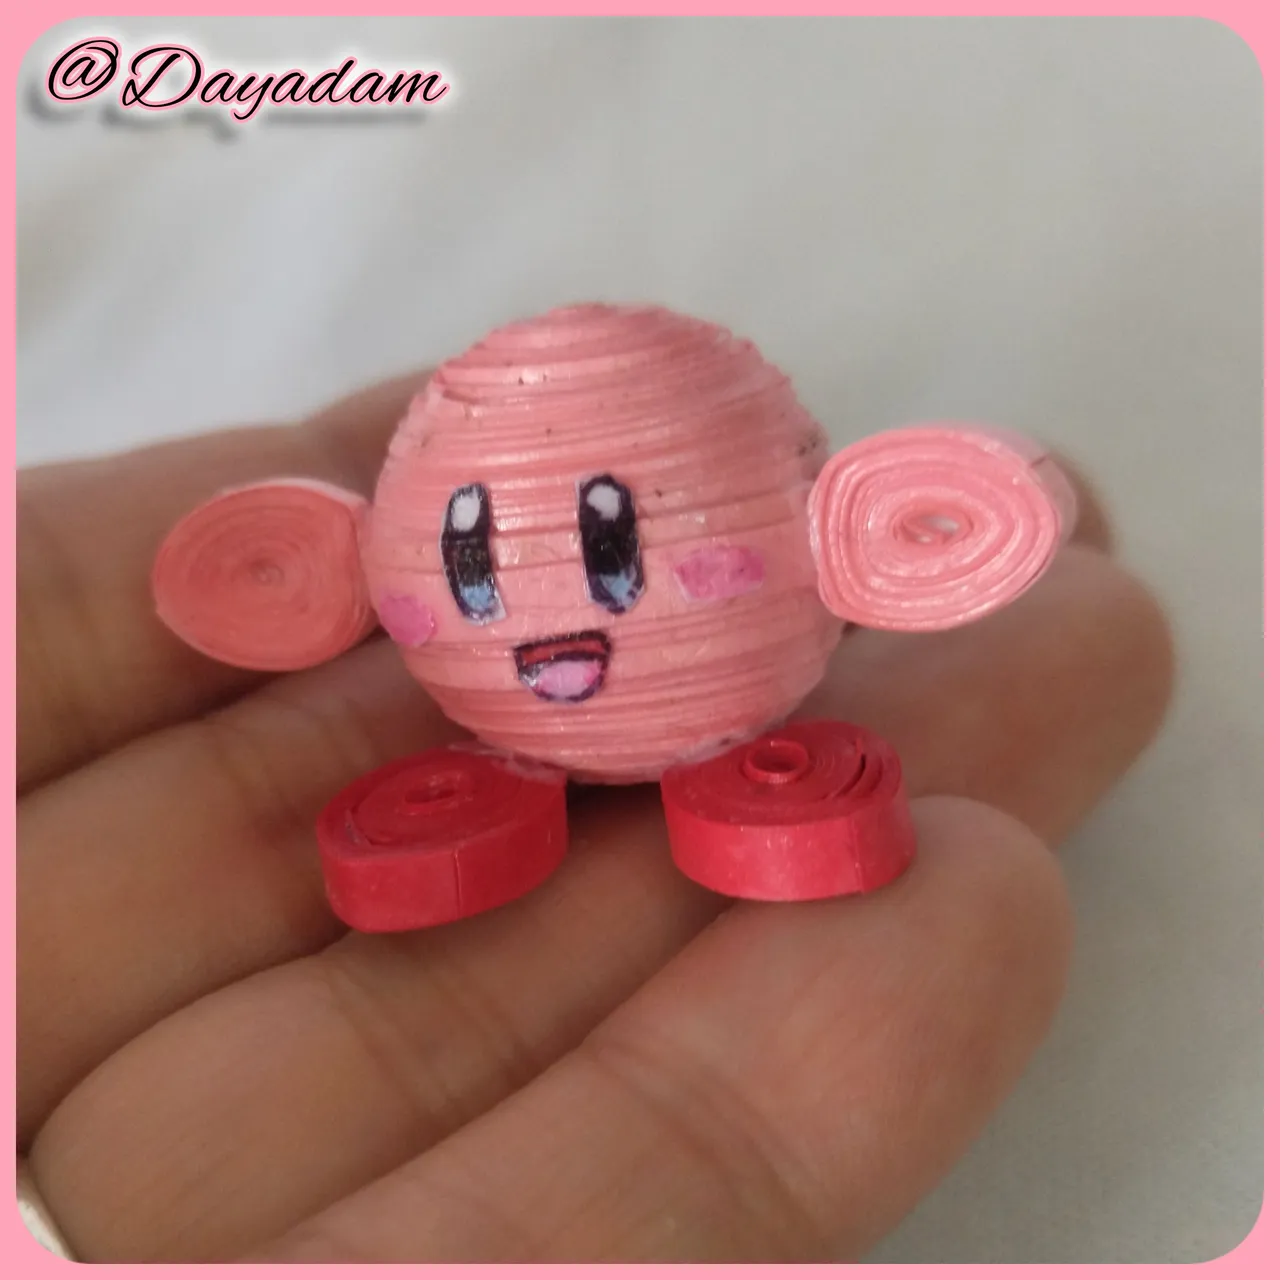
- In this case take red quilling tape 3mm wide, and darker pink quilling tape of the same color as the Kirby's body, with this tape make 2 closed circles (2 of each color), these circles I molded only a little and glue in the corresponding places, the red ones for the feet and the dark pink ones for the arms.
- Finally and to finish, apply a few coats of extra strong white glue to the 2 small figures, to plasticize them, give them protection and a little shine.
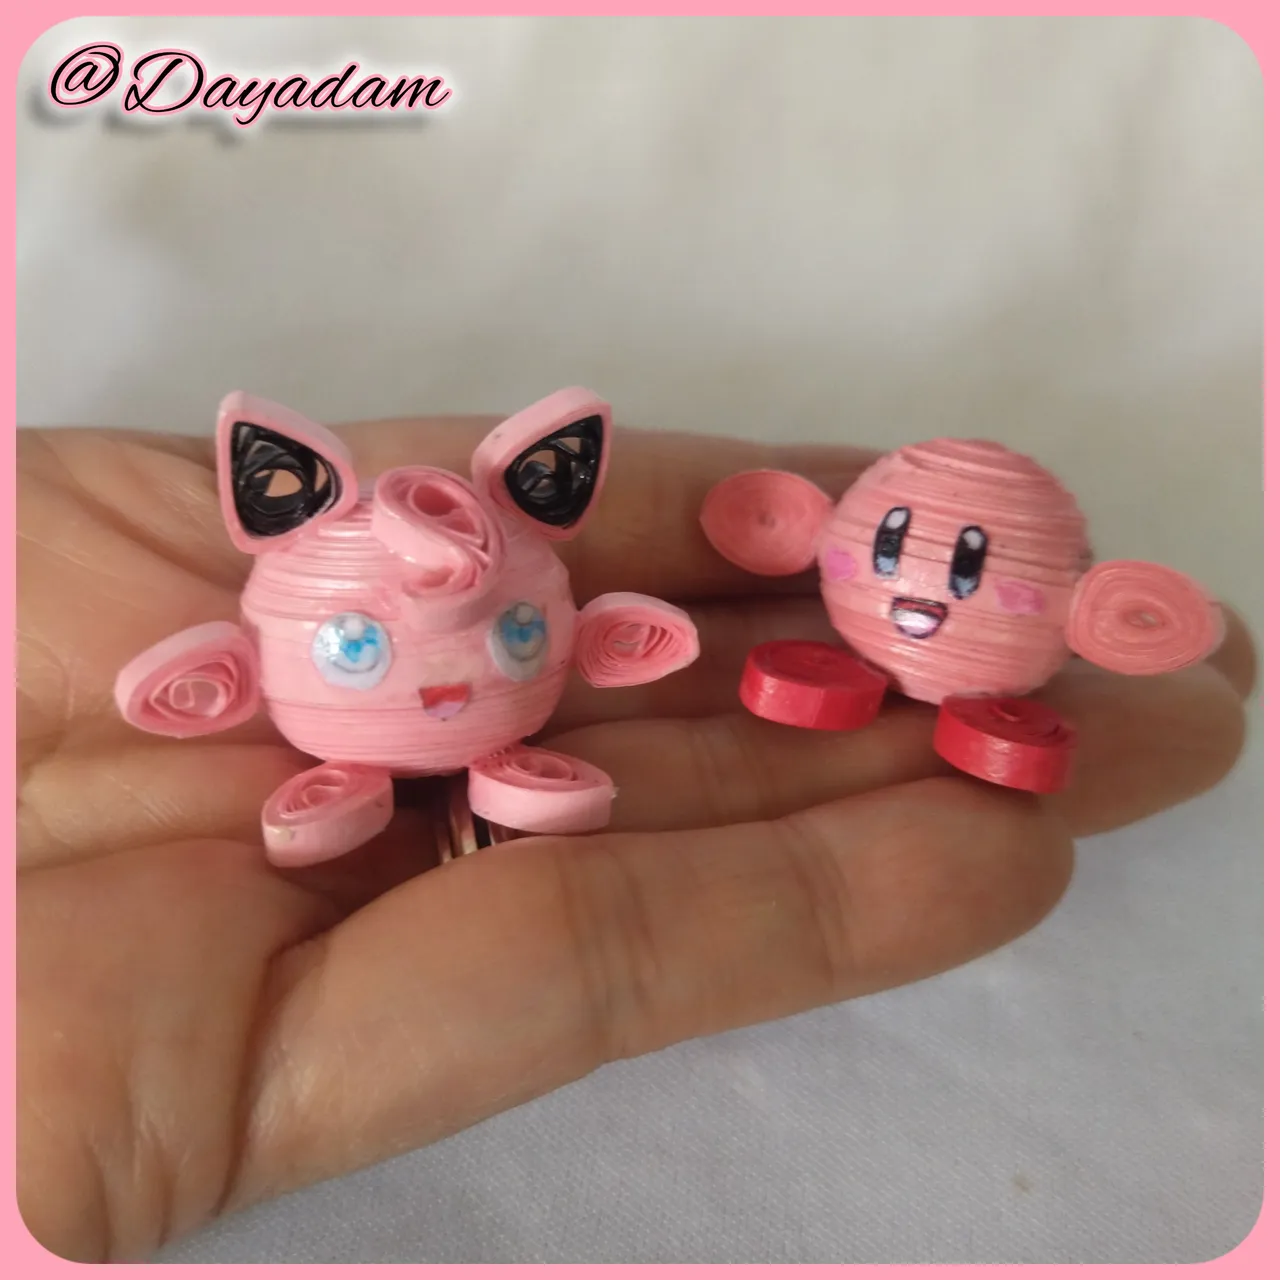
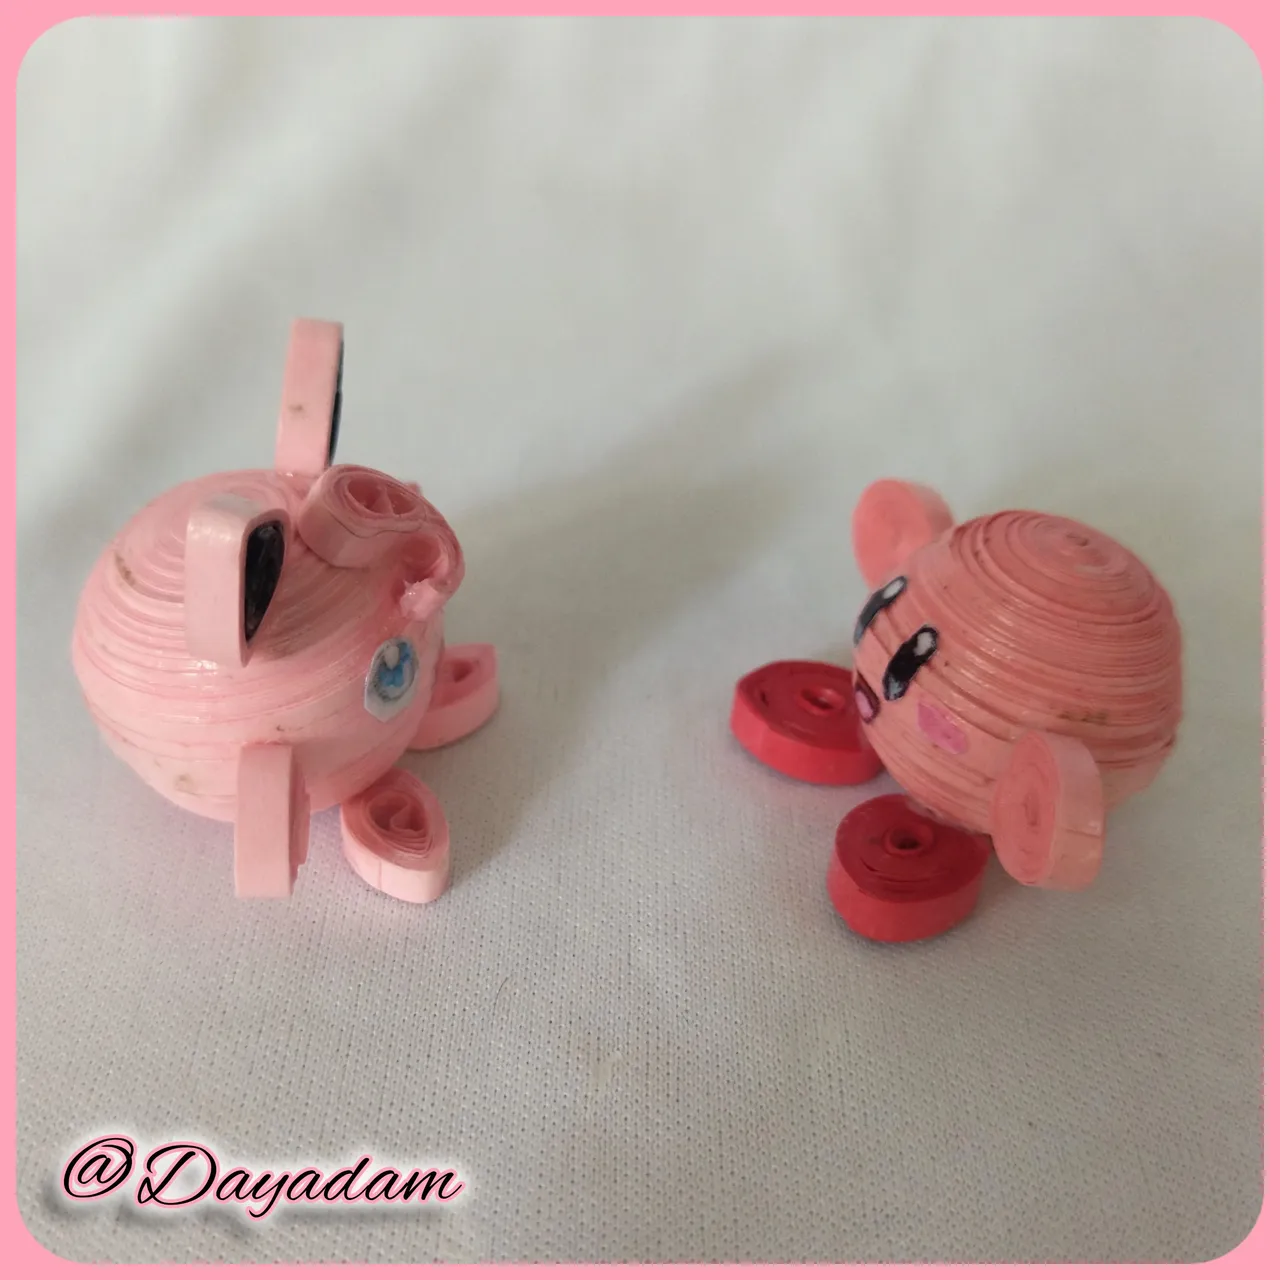
This way we have ready these 2 simple little Pokemon characters, Jigglypuff and Kirby.
Bucle de Jigglypuff:
• Este lo realice realizando un circulo abierto de color rosa claro el cual moldee y pegue en el medio de la cabeza.
Orejas de Jigglypuff:
• Tomaremos cinta de color Rosa claro y color negro de 3mm de ancho las cuales uniremos en una sola y realizaremos un circulo abierto el cual moldeare en forma de triangulo, Pegamos en la parte de arriba de la cabeza.
Brazos y pies de Jigglypuff:
• Para estos tome cinta ara quilling de color rosa claro, realice 2 circulo semi abiertos para las manos, y 2 un poco mas grandes para los pies, moldee realizando una especie de cono pequeño, pegue en los sitios correspondientes.
Brazos y pies de Kirby:
• En este caso tome cinta para quilling color rojo de 3mm de ancho, y cinta para quilling rosa mas oscuro de la misma tonalidad que realice el cuerpo del Kirby, con estas cinta realice 2 círculos cerrados (2 de cada color), estos círculos os moldee solo un poco y pegue en los sitios correspondientes, los rojos para los pies y los rosa oscuro para los brazos.
• Por ultimo y para finalizar, aplique unas capas de pega blanca extra fuerte a las 2 pequeñas figuras, para plastificarlos, darles protección y un poco de brillo.
De esta manera tenemos listos estos 2 pequeños sencillos personajes de Pokemon, Jigglypuff y Kirby.


What did you think, did you like it?
I hope you did, I hope you liked my explanation, procedure and photos, I made them with love for you.
"Let out that muse that inspires you, and let your imagination fly".
Thank you all, see you next time.
¿Qué les pareció, les gustó?
Espero que sí, que les haya gustado mi explicación, procedimiento y fotos, los hice con mucho cariño por y para ustedes.
"Deja salir esa musa que te inspira, y deja volar tu imaginación".
Gracias a todos, nos vemos en la próxima.
