🧁💗💓💖💕💘🌹🧁💗💓💖💕💘🌹
 🧁💗💓💖💕💘🌹🧁💗💓💖💕💘🌹
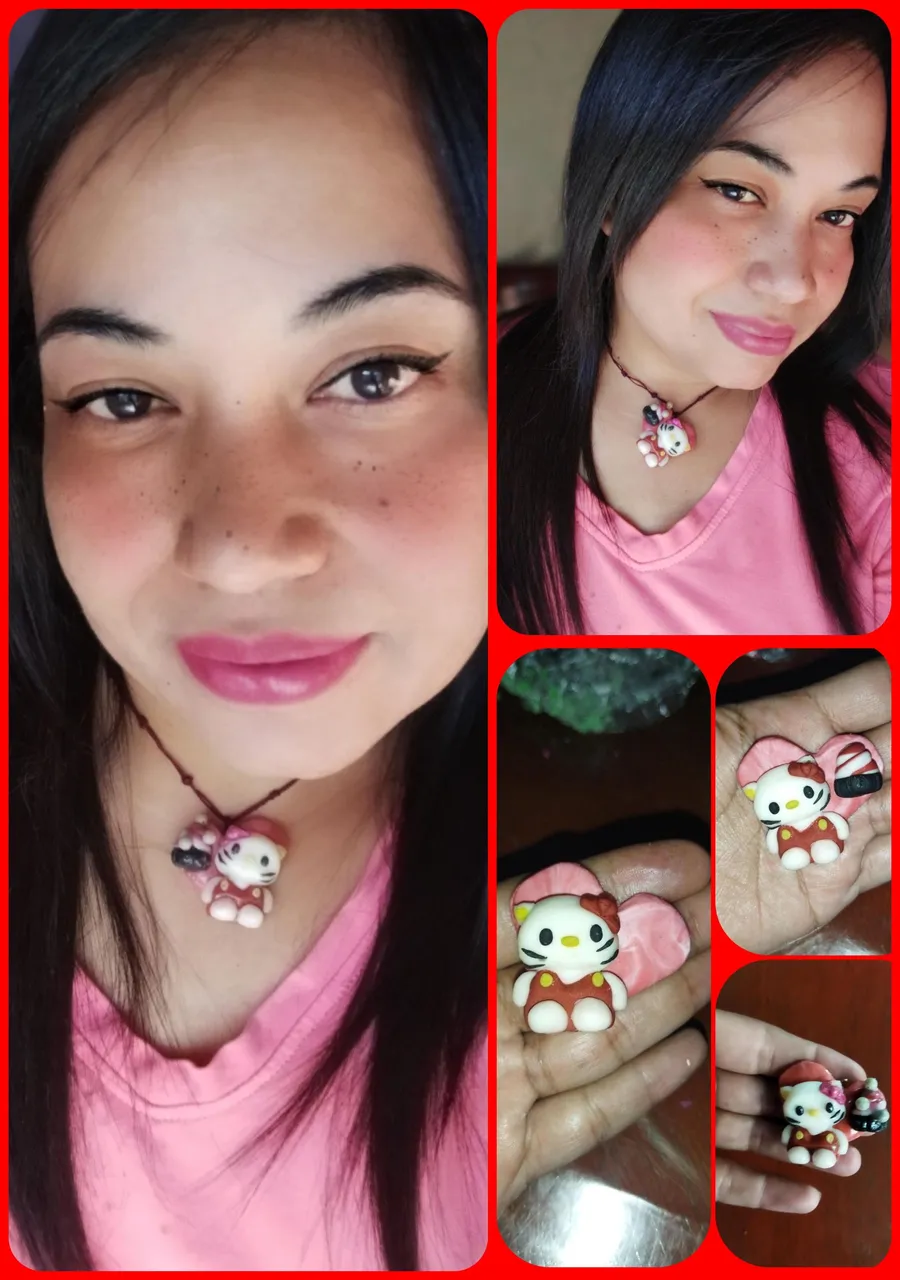
Greetings friends and dear colleagues of this creative and ingenious community, what a pleasure to be able to enjoy all the wonderful arts that we can find here. Today I wanted to take the opportunity, to celebrate the day of love and friendship, to make a cute, very tender and romantic pendant, with the character Hello Kitty as the protagonist.
Saludos amigos y apreciados compañeros de esta comunidad tan creativa e ingeniosa, que gusto poder disfrutar de todas las maravillosas artes que aquí podemos encontrar.
Hoy día quise aprovechar la oportunidad, que con motivo a celebrarse el día del amor y la amistad, de realizar un lindo colgante muy tierno y romántico, teniendo como protoganista al personaje Hello Kitty.
🧁💗💓💖💕💘🌹🧁💗💓💖💕💘🌹
 🧁💗💓💖💕💘🌹🧁💗💓💖💕💘🌹
I love this cute and friendly character, he is one of my favorites, and since I had never made one in a flexible mass, I wanted to try to see how it was and well, this was the result, I hope you like it.
Este personaje tan lindo y simpático me encanta, es uno de mis favoritos, y como nunca había relaizando uno en masa flexible, quise intentar a ver qué tal y pues bien este fue el resultado espero sea de todo su agrado.
🧁💗💓💖💕💘🌹🧁💗💓💖💕💘🌹
 🧁💗💓💖💕💘🌹🧁💗💓💖💕💘🌹
The materials used were: homemade flexible dough, colored pigments, white glue and rings to hang.
Los materiales utilizados fueron: masa flexible casera, pigmentos de colores, pega blanca y aros para colgar.
🧁💗💓💖💕💘🌹🧁💗💓💖💕💘🌹
 🧁💗💓💖💕💘🌹🧁💗💓💖💕💘🌹
To make it, these were the steps I followed:
Para su elaboración estos fueron los pasos que seguí:
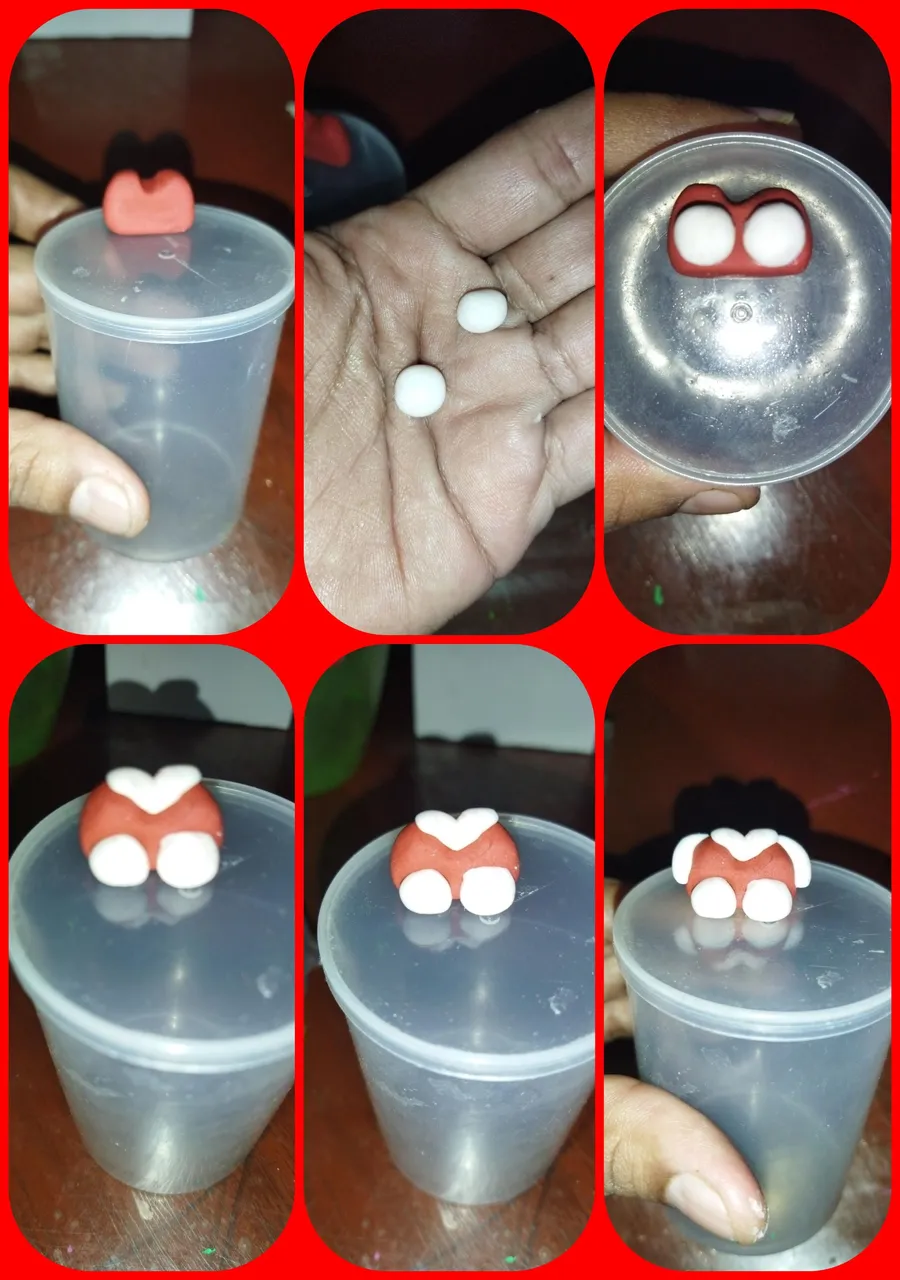
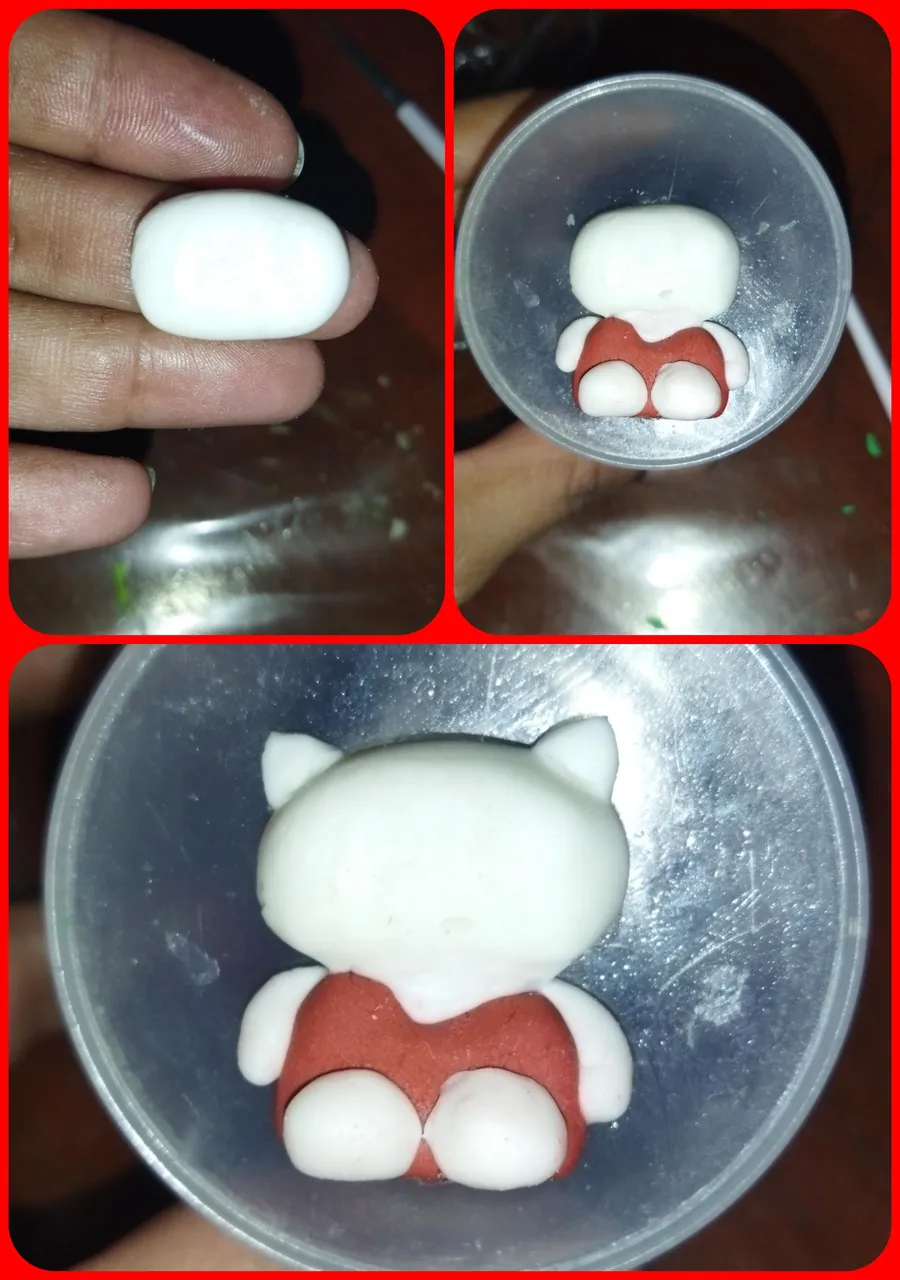
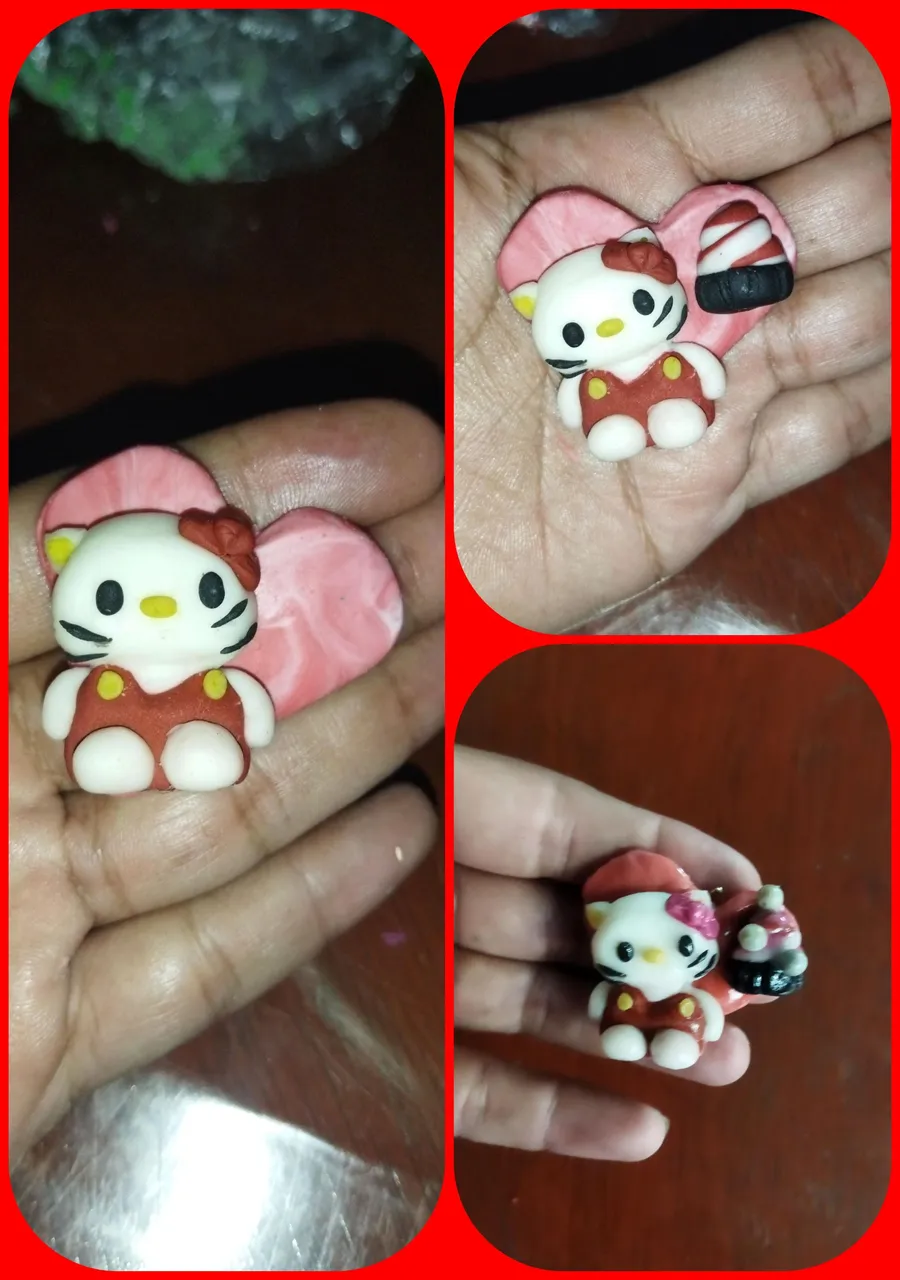
1. I started by dyeing the masses in pink, yellow, and black. And I started molding the body of Hello Kitty with red dough, making a kind of little bag. Then with two blank balls I made his legs, his hands and a small elongated neck.
1. Comencé tiñendo las masas en tono rosa, amarillo, y negro. Y empecé moldeando el cuerpo de Hello Kitty a masa roja haciendo como especie de un bolsito. Luego con dos pelotitas en blanco le hice sus patitas, las manitos y un pequeño cuello de forma alargada.
🧁💗💓💖💕💘🌹🧁💗💓💖💕💘🌹
 🧁💗💓💖💕💘🌹🧁💗💓💖💕💘🌹
2. For the head, make an oval slightly larger than the body, rounding the edges and sticking to the body and making the little ears also in white, pointed like kittens.
2. Para la cabeza hacemos un óvalo un poco más grande que el cuerpo, redondeando los bordes y pegamos al cuerpo y hacemos las orejitas también en blanco de forma puntiagudas como los gatitos.
🧁💗💓💖💕💘🌹🧁💗💓💖💕💘🌹
 🧁💗💓💖💕💘🌹🧁💗💓💖💕💘🌹
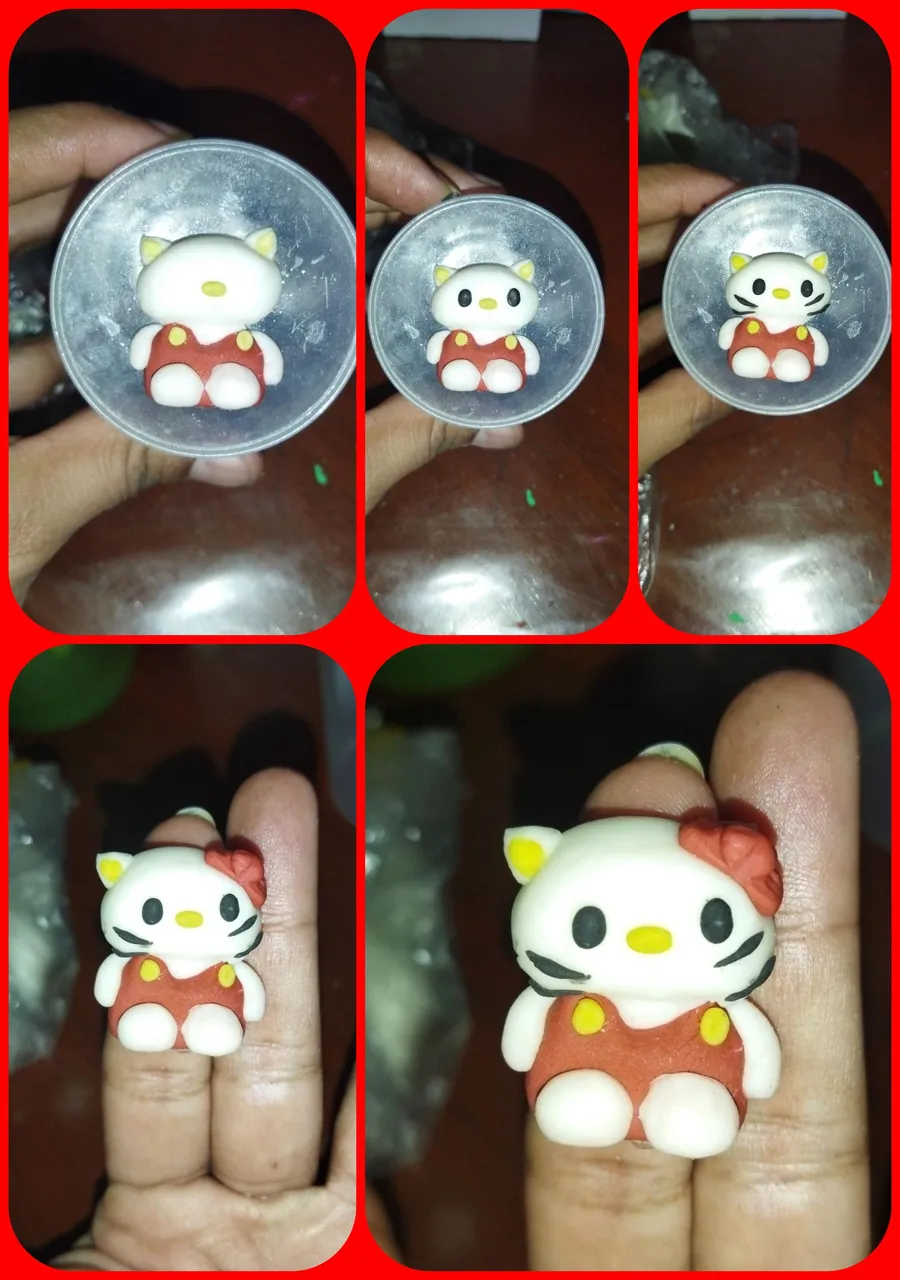
3. We do the decoration part with yellow for the nose, center of the ears and panty buttons, and black for the eyes and mustache and pink for its characteristic bow on the ear.
3. La parte de la decoración la hacemos con amarillo para la nariz, centro de las orejas y botones de la braga, y negro para los ojos y bigotes y rosa para su carácteristico lazo en la oreja.
🧁💗💓💖💕💘🌹🧁💗💓💖💕💘🌹
 🧁💗💓💖💕💘🌹🧁💗💓💖💕💘🌹
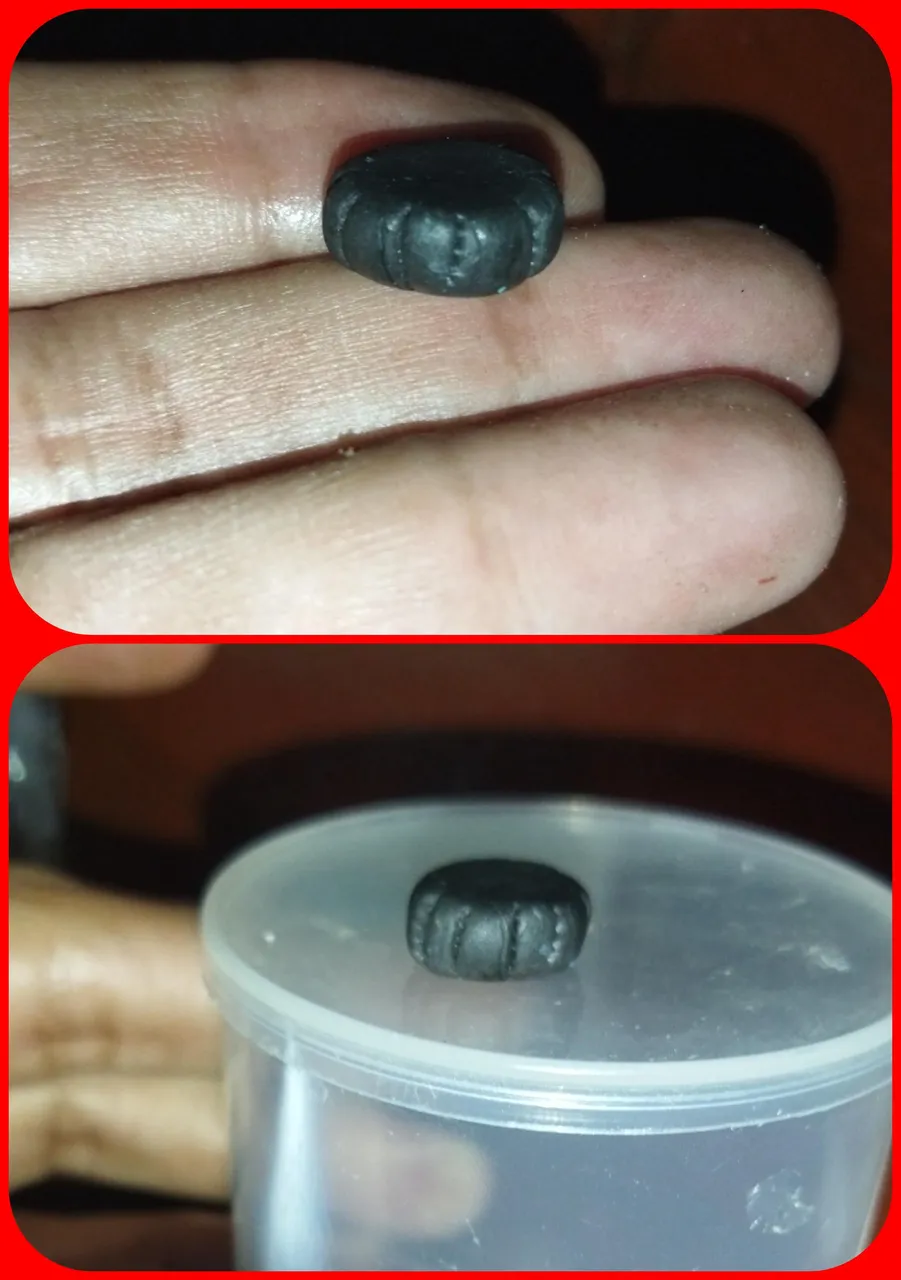
4. We are going to create a cupcake, we make the base in brown, giving it a rounded shape and a little flat and we make little faces around the circumference.
4. Vamos a crear un cupcake, la base la relaizamos en marrón, dándoles forma redondeada y un poco plana y le hacemos pequeñas muecas por toda la circunferencia.
🧁💗💓💖💕💘🌹🧁💗💓💖💕💘🌹
 🧁💗💓💖💕💘🌹🧁💗💓💖💕💘🌹
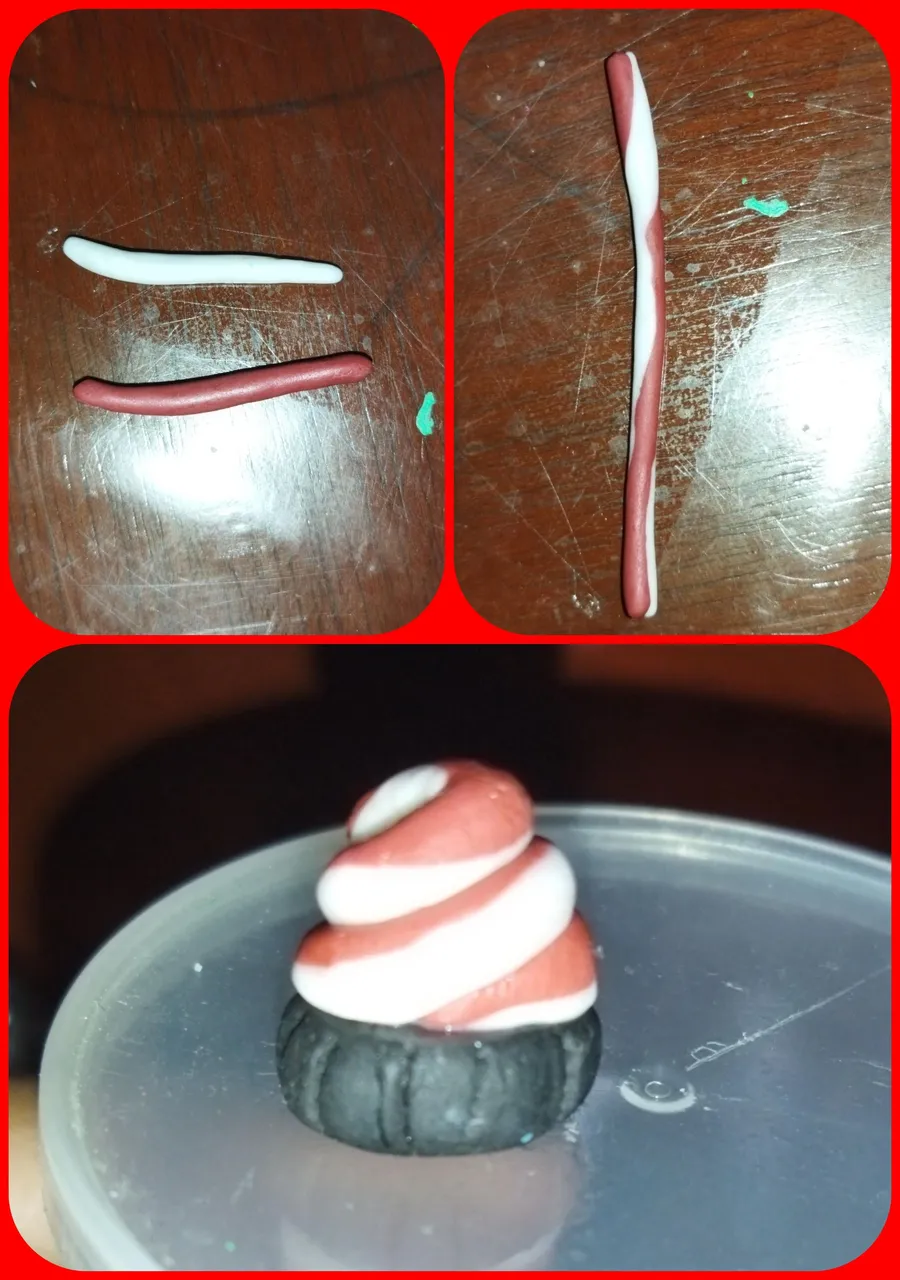
5. For the meringue, we combine white and pink colors in the form of threads that we are then going to wrap gently and wind in a spiral on top of the base.
5. Para el merengue combinamos colores blanco y rosa en forma de hilos que luego vamos a envolver suavemente y enrollamos en forma de espiral encima de la base.
🧁💗💓💖💕💘🌹🧁💗💓💖💕💘🌹
 🧁💗💓💖💕💘🌹🧁💗💓💖💕💘🌹
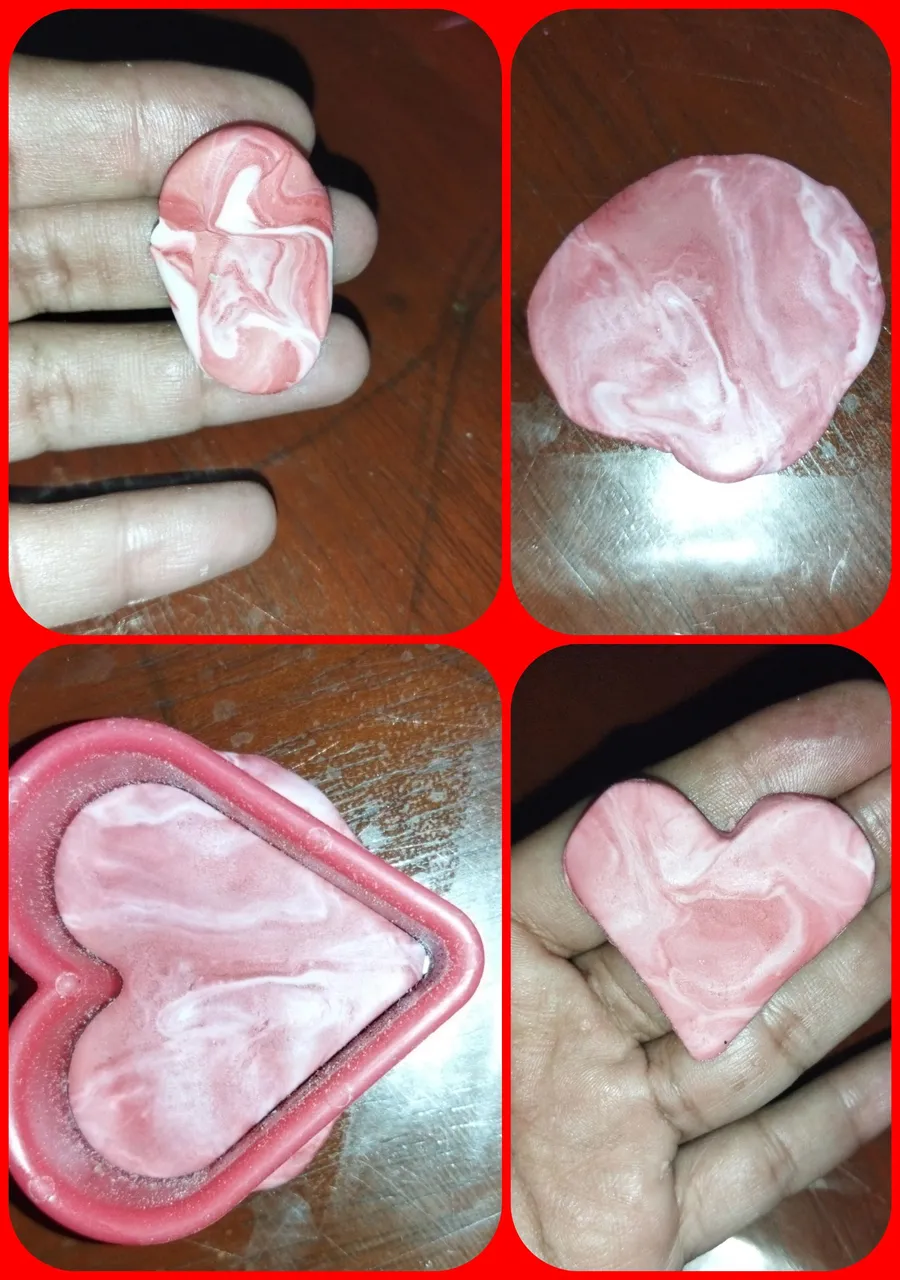
6. For the base uni mass pink and white to give that gradient effect, I flattened and with a heart-shaped mold I made the figure.
6. Para la base uni masas rosa y blanca para dar ese efecto de degradado, aplané y con un molde en forma de corazón realicé la figura.
🧁💗💓💖💕💘🌹🧁💗💓💖💕💘🌹
 🧁💗💓💖💕💘🌹🧁💗💓💖💕💘🌹
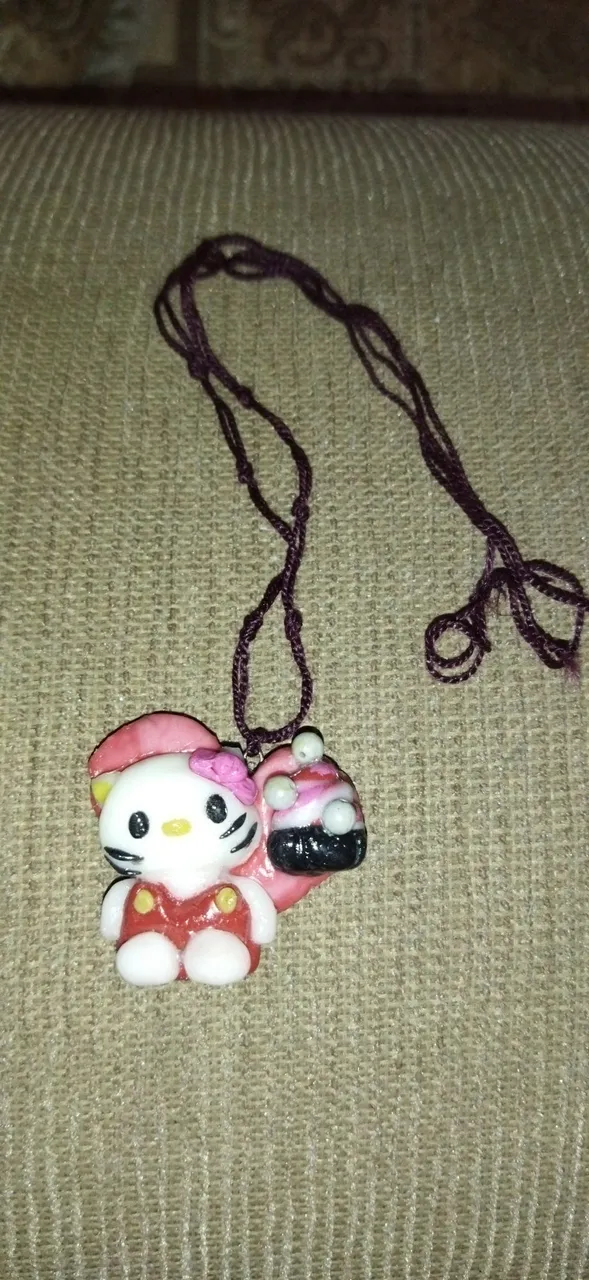
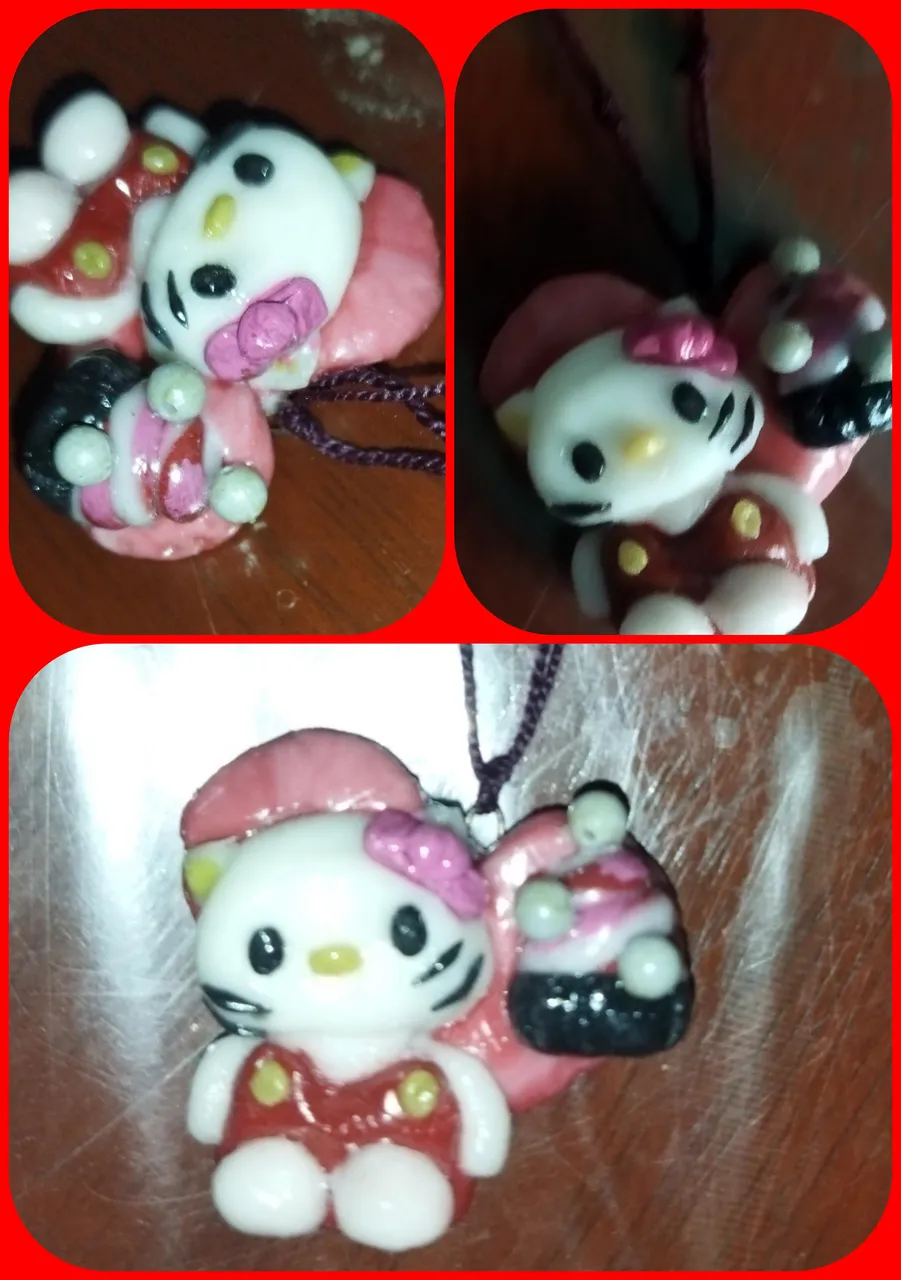
7. Now all we have to do is unify the work, for this we place the Hello Kitty and the cupcake on the base of the heart with a little white glue, we introduce the ring to hang it on the back and let it dry well, and then we apply varnish nails to give it greater shine and greater resistance.
7. Ya solo nos quedaría unificar el trabajo, para ello en la base de corazón colocamos con un poco de pegamento blanco la Hello Kitty y el cupcake, introducimos en la parte posterior el arito para colgar y dejamos secar bien, para luego cocarle barniz de uñas para darle mayor brillo y mayor resistencia.
🧁💗💓💖💕💘🌹🧁💗💓💖💕💘🌹
 🧁💗💓💖💕💘🌹🧁💗💓💖💕💘🌹
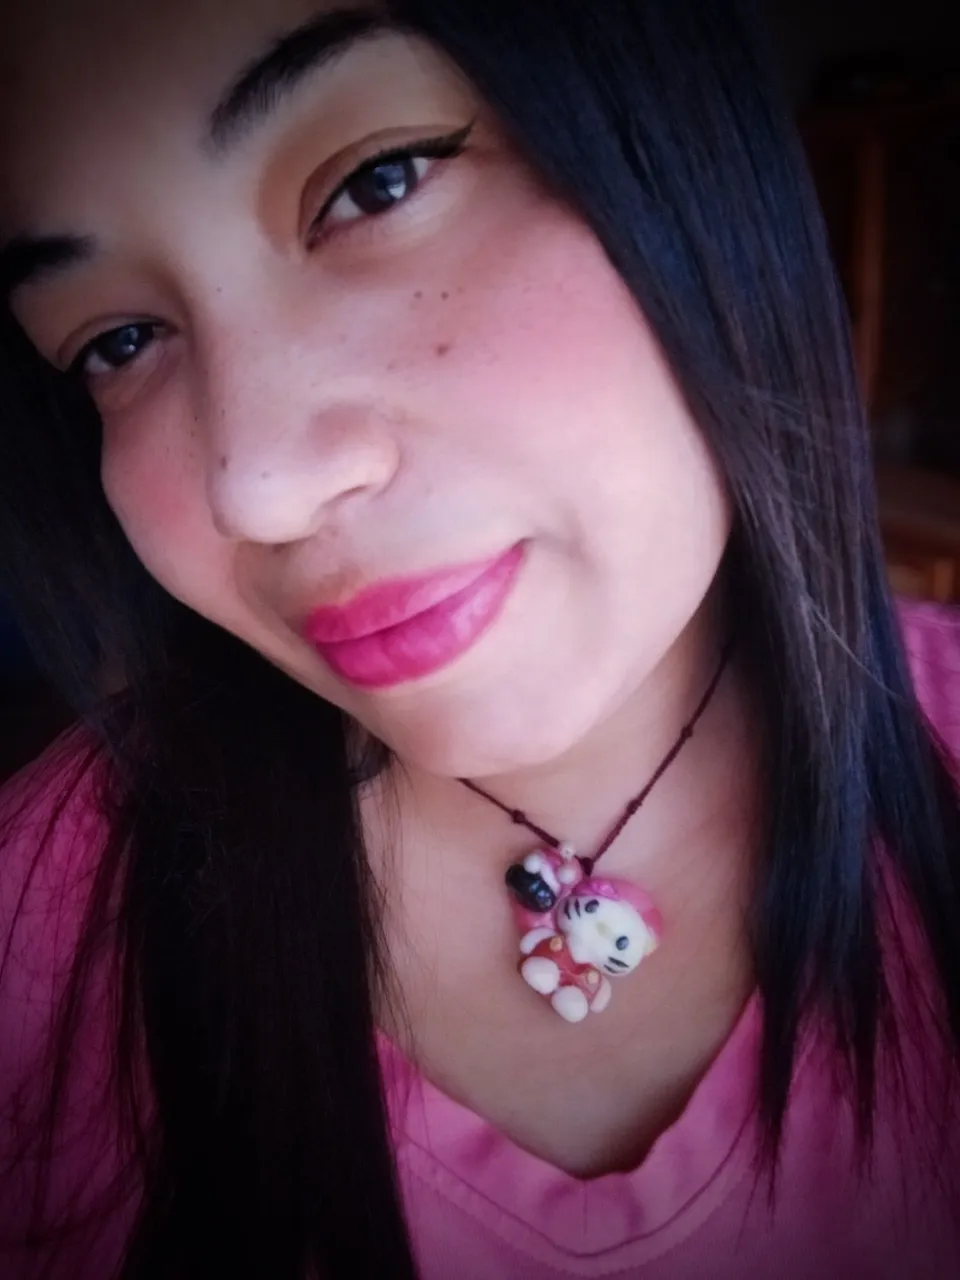
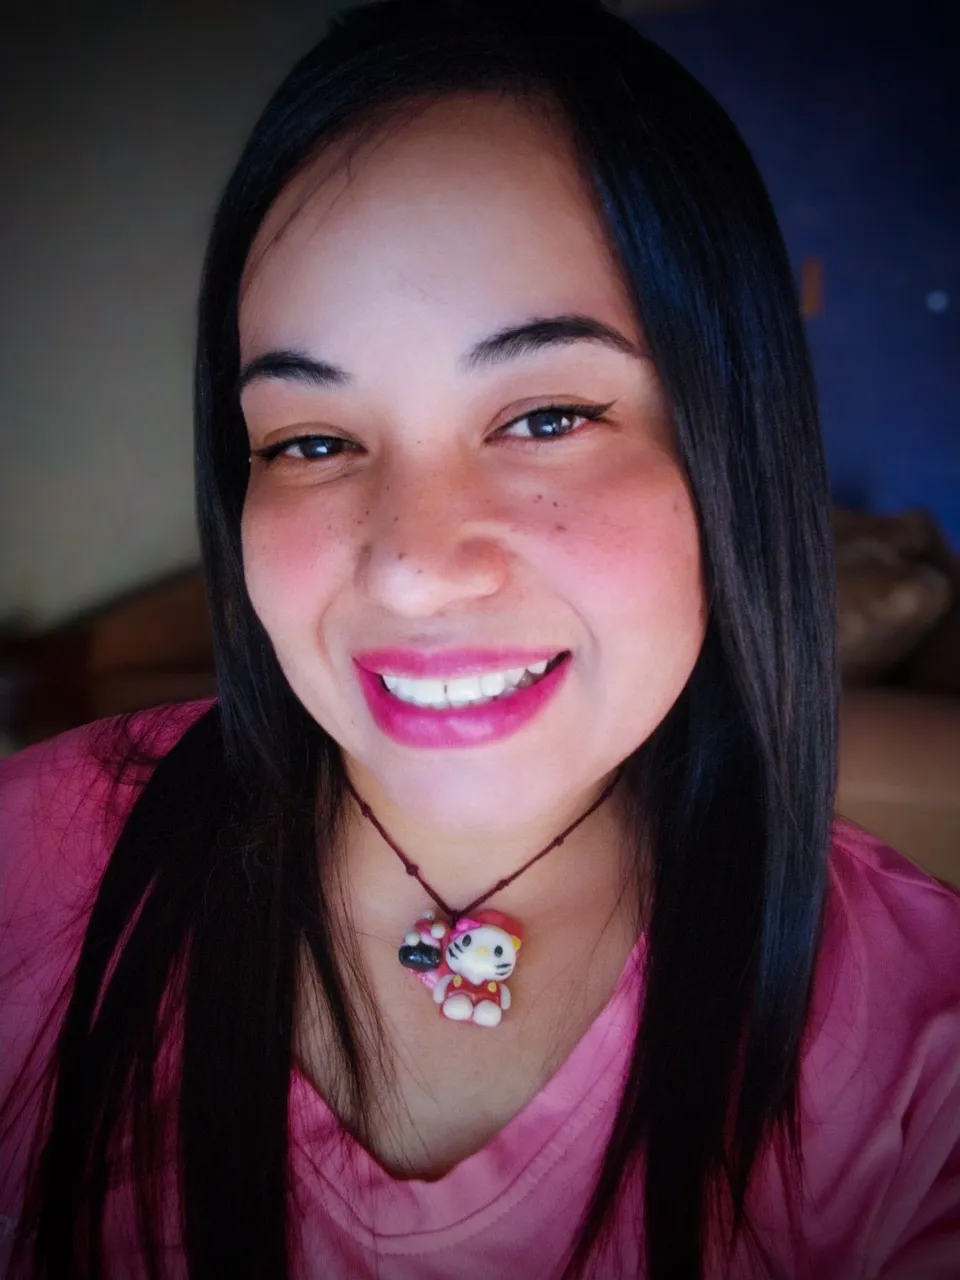
put a satin thread and in this way we have finished this original cute and romantic Hello Kitty pendant, which I made with great love and care since it was the first time I made this character and I didn't want anything to go wrong.
Colocamos un hilo satinado y de esta manera ya tenemos culminado este original lindo y romántico colgante de Hello Kitty, el cual realicé con mucho cariño y cuidado ya que era la primera vez que hacia este personaje y no quería que nada saliera mal.
🧁💗💓💖💕💘🌹🧁💗💓💖💕💘🌹
 🧁💗💓💖💕💘🌹🧁💗💓💖💕💘🌹
In this way he reached the end of this post, hoping that it has been to your liking and that you are motivated to do it. We will see each other God willing in a new opportunity greetings and blessings
De esta manera llegó al final de este post, deseando que haya sido de todo su agrado y se motiven a reliazarlo. Nos veremos Dios mediante en una nueva oportunidad saludos y bendiciones.
🧁💗💓💖💕💘🌹🧁💗💓💖💕💘🌹
 🧁💗💓💖💕💘🌹🧁💗💓💖💕💘🌹
All images are my property taken with Redmi 9t and edited with Photoshop Express for Android.All the steps were made by me, with my own materials and the sketch was my inspiration.
***
Todas las imágenes son de mi propiedad tomadas con Redmi 9t y editadas con Photoshop Express para Android. Todos los pasos fueron realizados por mi persona, con materiales propios y el boceto fue de mi inspiración
🧁💗💓💖💕💘🌹🧁💗💓💖💕💘🌹
 🧁💗💓💖💕💘🌹🧁💗💓💖💕💘🌹