Español.
Hola a todos. Feliz año 2023. En estos días de inicio de año quise ordenar las cajas en donde guardo los materiales para elaborar prendas y diferentes tipos de accesorios. En el proceso de acomodo encontré cuentas y perlitas que no recordaba tenerlas. Aproveché entonces de crear algunas pulseras con ellas. Hoy voy a mostrarles el primer diseño que hice. Es un modelo de pulsera pequeña ya que aproveché un trozo de hilo que quedaba suelto en una de las cajas. La idea es que vean cómo se ve la pulsera combinando estas cuentas. ¡Disfrútenlo!
PULSERA CON CUENTAS DE MADERA Y SWAROVSKI.
MATERIALES.
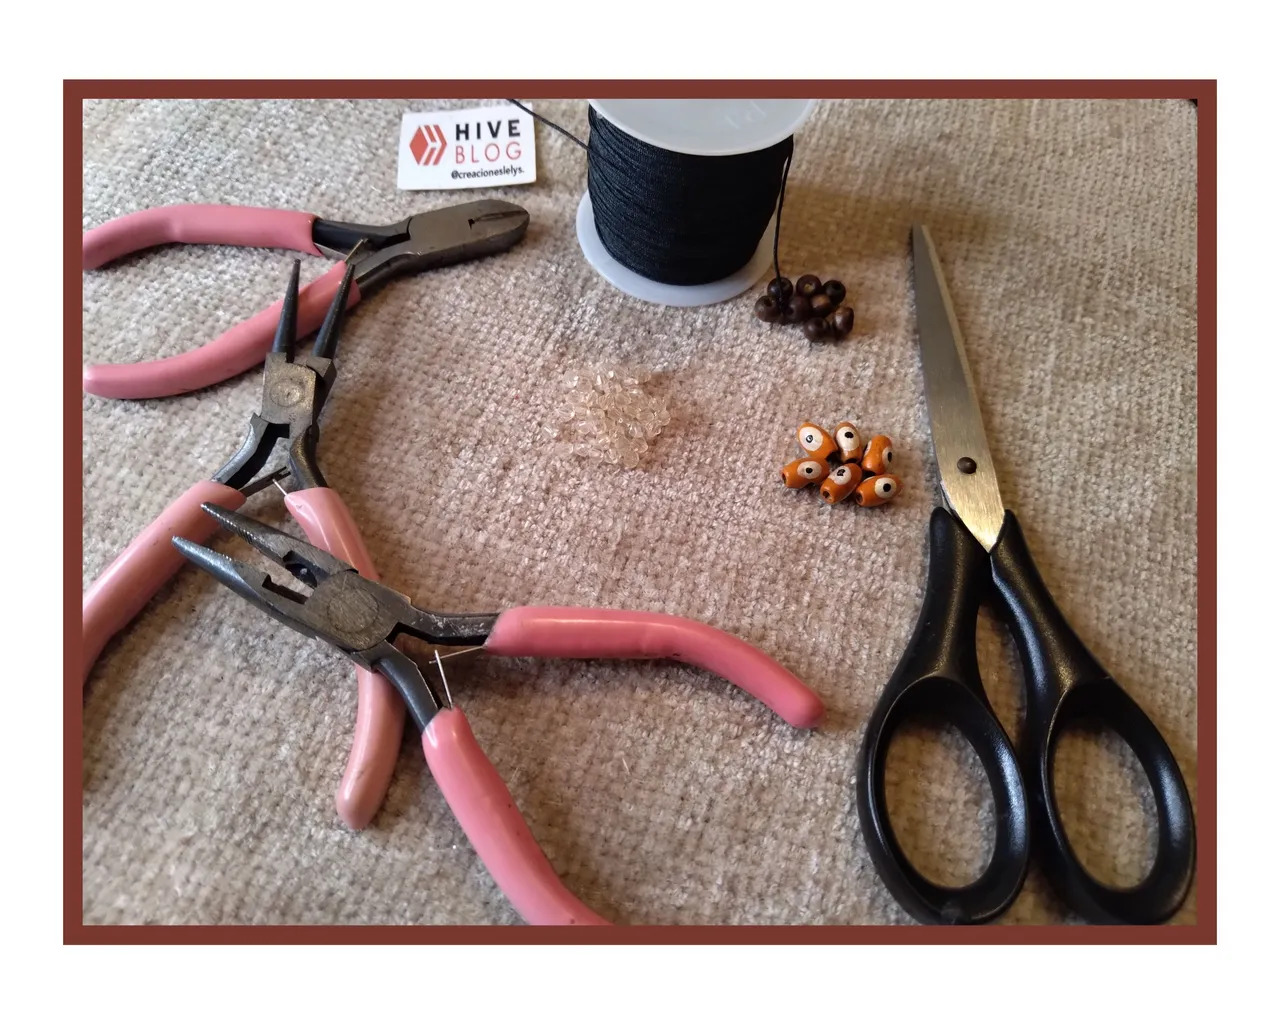
Los materiales que usé son muy pocos: cuentas de madera, mostacillas pequeñas color caramelo, imitación de Swarovski color rosado suave, hilo chino color negro, tijeras, yesquero, cinta métrica.
PROCEDIMIENTO PARA ELABORARLA.
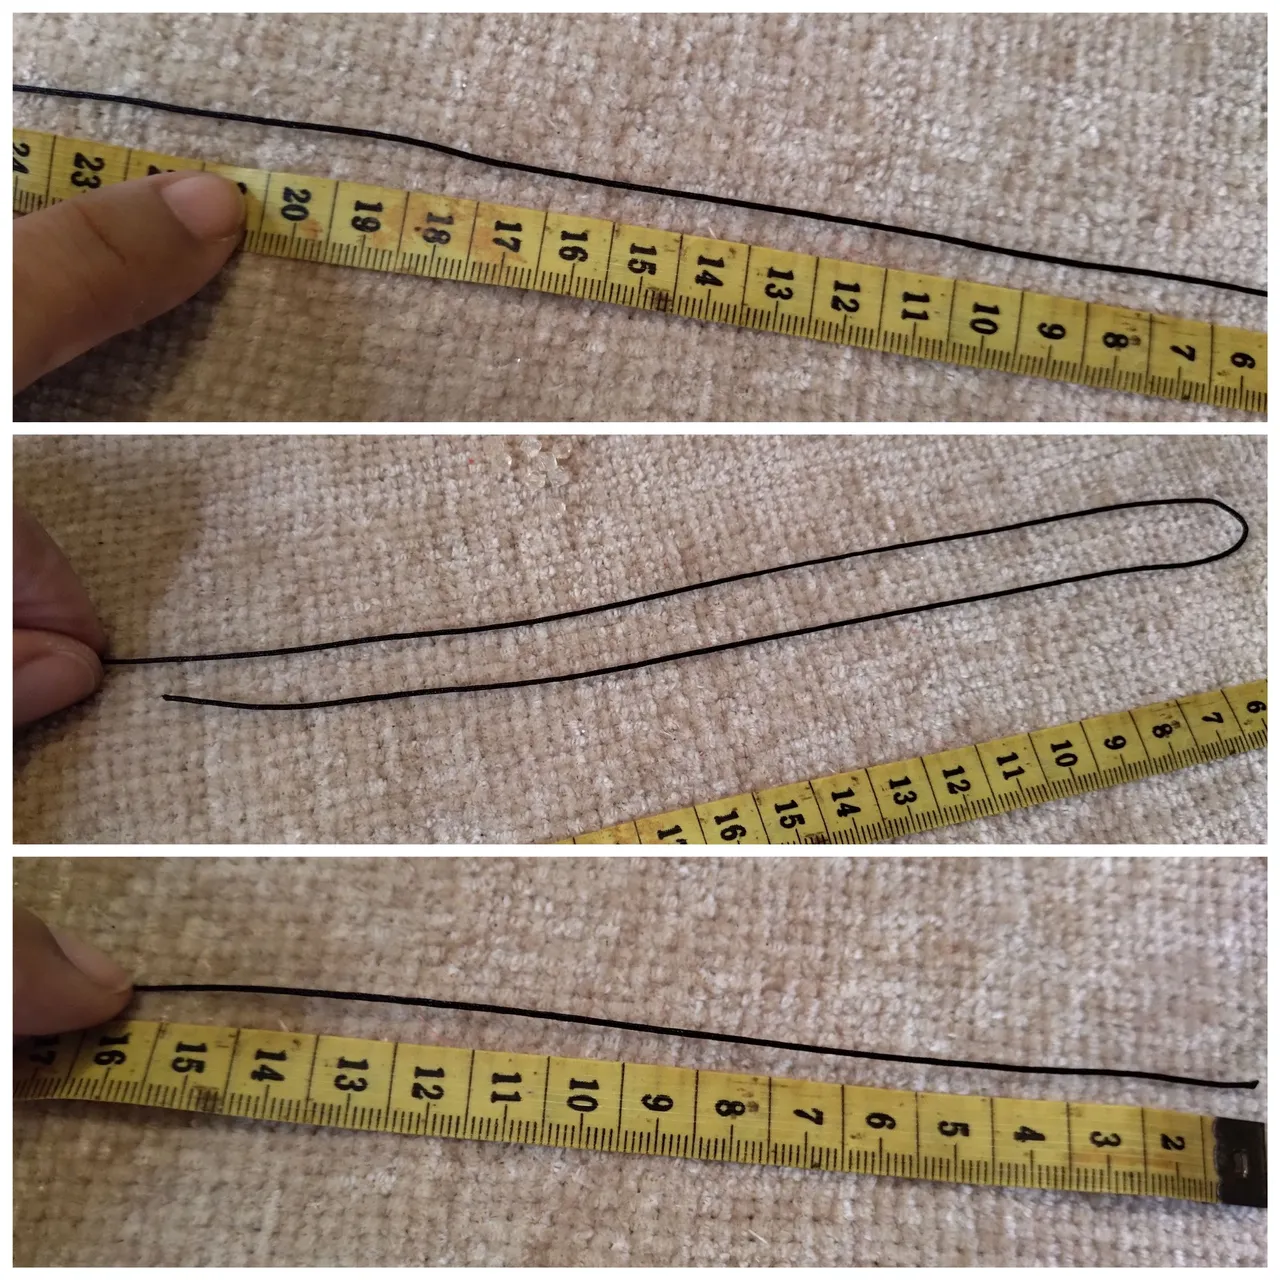
🌟 Empecé cortando dos tiras de hilos de 20cm y una de 15cm.
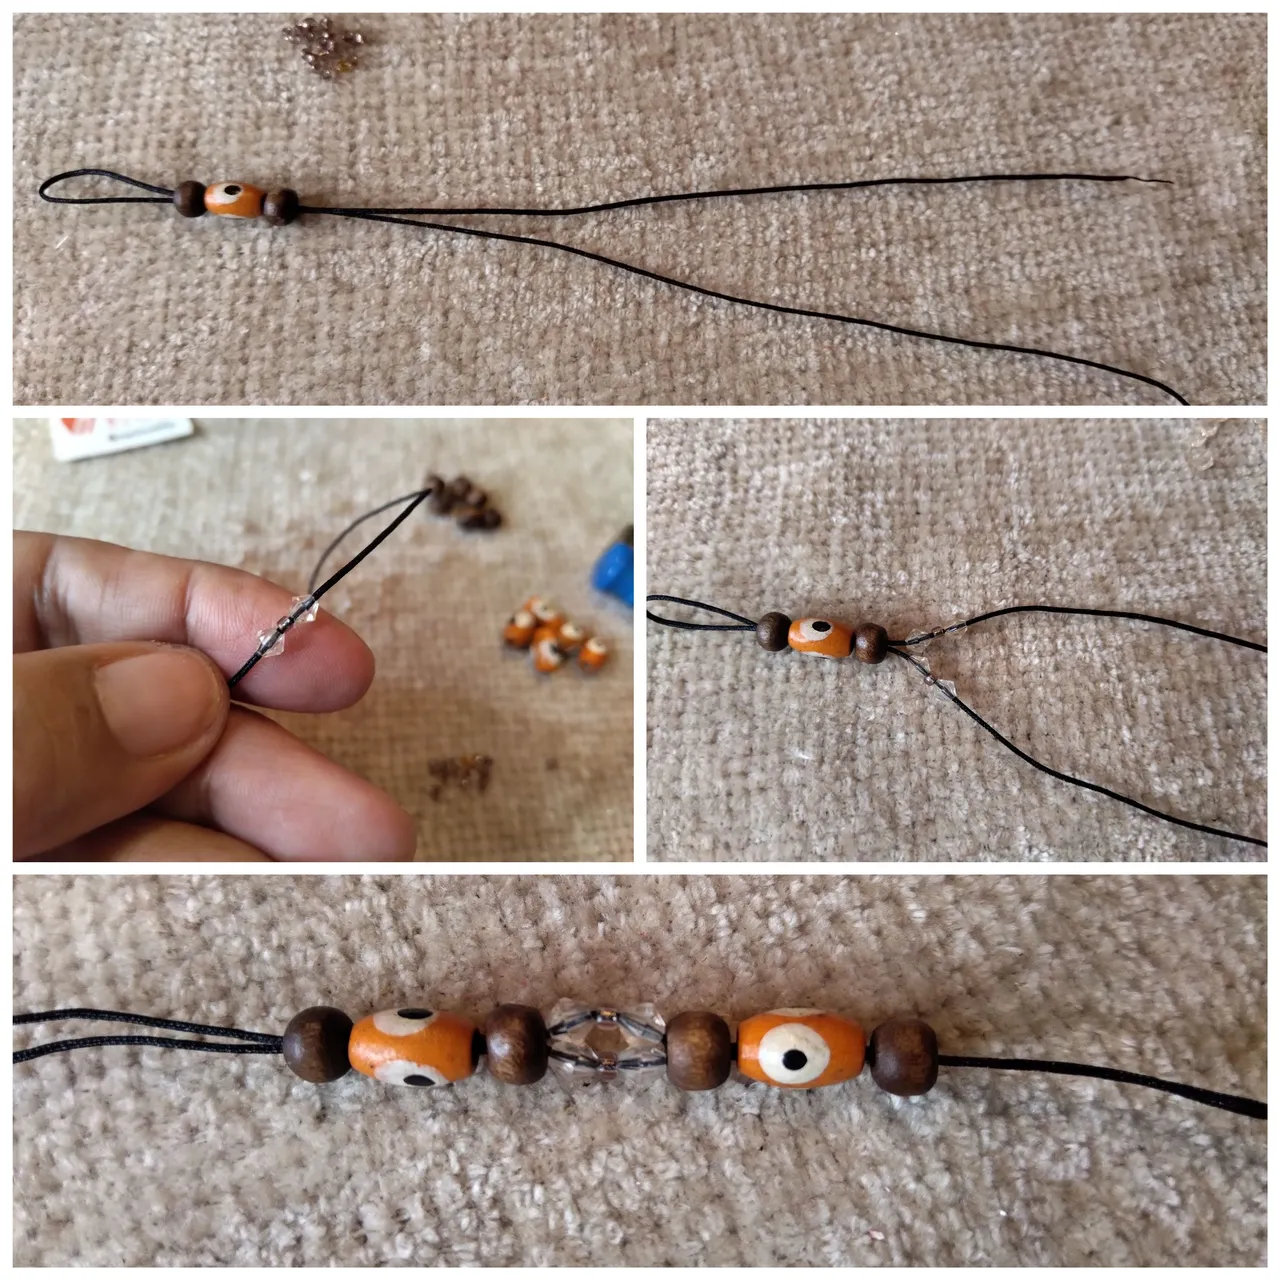
🌟 Después tomé los dos hilos de 20cm los uní, quemé un poco las puntas de uno de sus extremos para hacer filo y empecé a meter las cuentas de maderas según el diseño que tenía en mente; primero una redonda de madera marrón, luego una larga color naranja con ojo pintado y después otra marrón. Estas cuentas son livianas y muy bonitas.
🌟 Después de las cuentas de madera separé las dos hebras. Por cada una coloqué 1 SWAROVSKI, 1 mostacilla, 1 SWAROVSKI. Uní luego las dos hebras y nuevamente coloqué en la misma secuencia de la anterior, tres cuentas de madera.
🌟 Repetí este diseño hasta completar cuatro secuencias. La pulsera es pequeña. El hilo alcanzó justo para la cantidad de cuentas disponibles.
Este año 2023 quiero obtener más insumos para realizar muchos diseños de pulseras que tengo en mente. He visto una gran variedad de modelos y nuevas técnicas que me encantaría recrear. Las pulseras jamás pasarán de moda. A las mujeres nos encanta usarlas y la tendencia marca también el uso que le dan los hombres. Es por ello que trataré de enfocarme un poco más en la elaboración de modelos unisex.
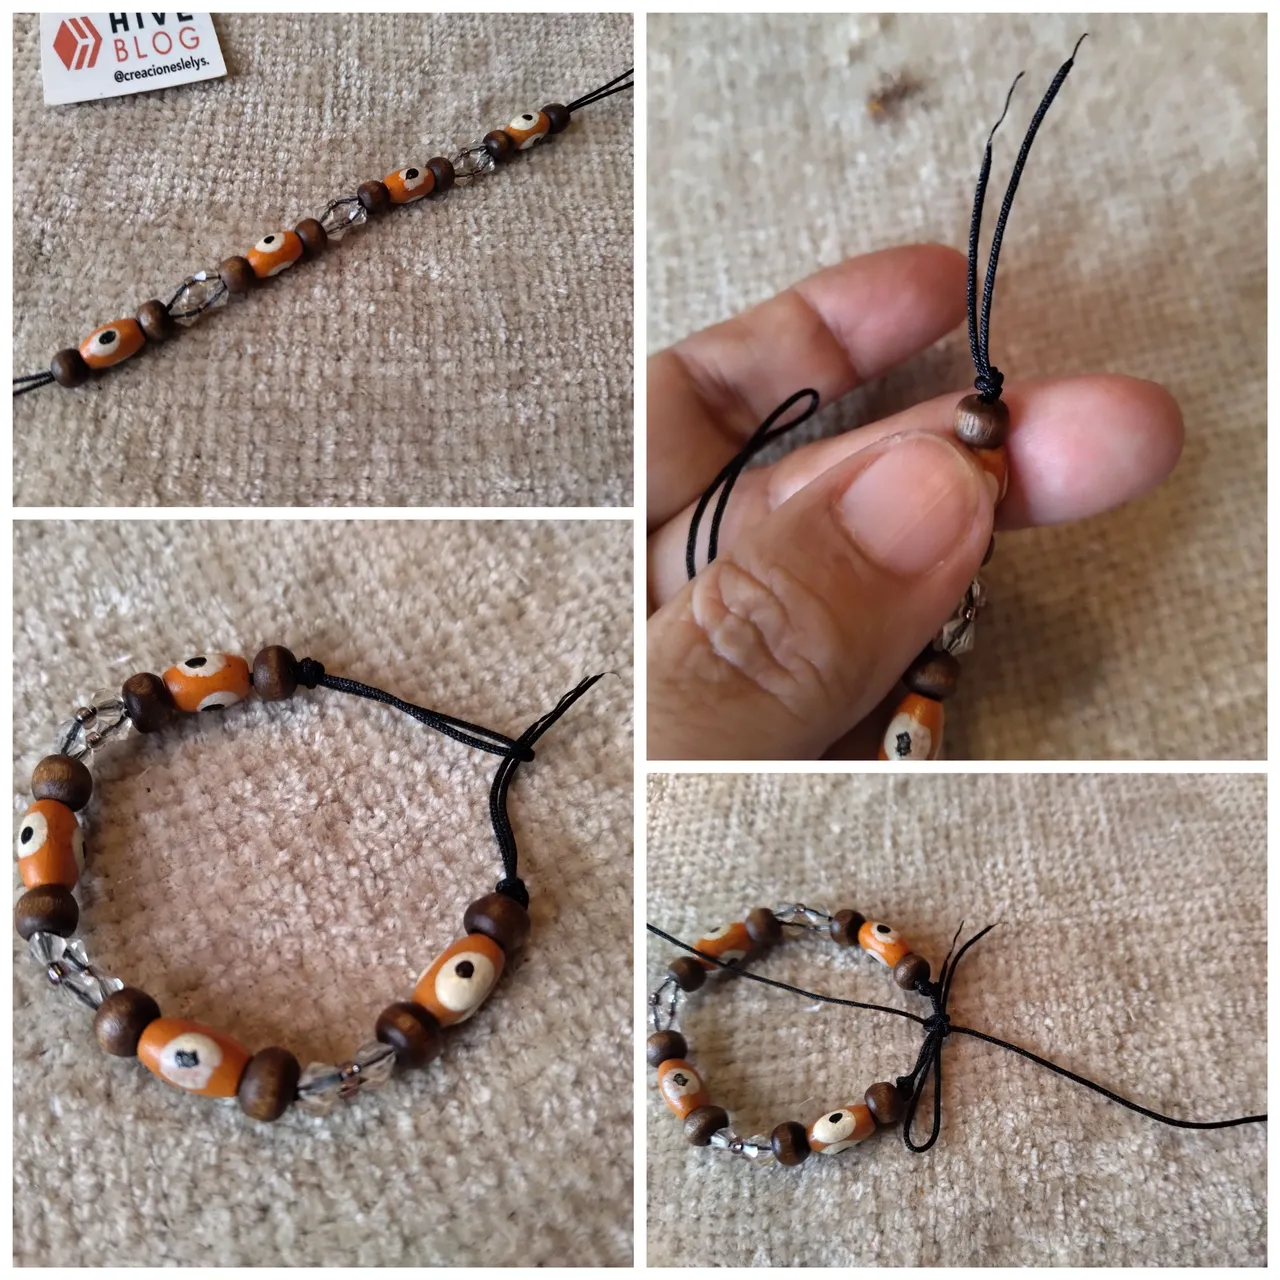
🌟 Una vez completado el diseño lo que hice fue asegurar con un nudo en cada extremo del hilo chino sobrante.
🌟 Para el cierre hice un nudo plano tomando los dos extremos con la hebra de hilo de 15cm. Esto es mientras que salgo a comprar los seguros pico'e loro que me hacen falta.
RESULTADO.
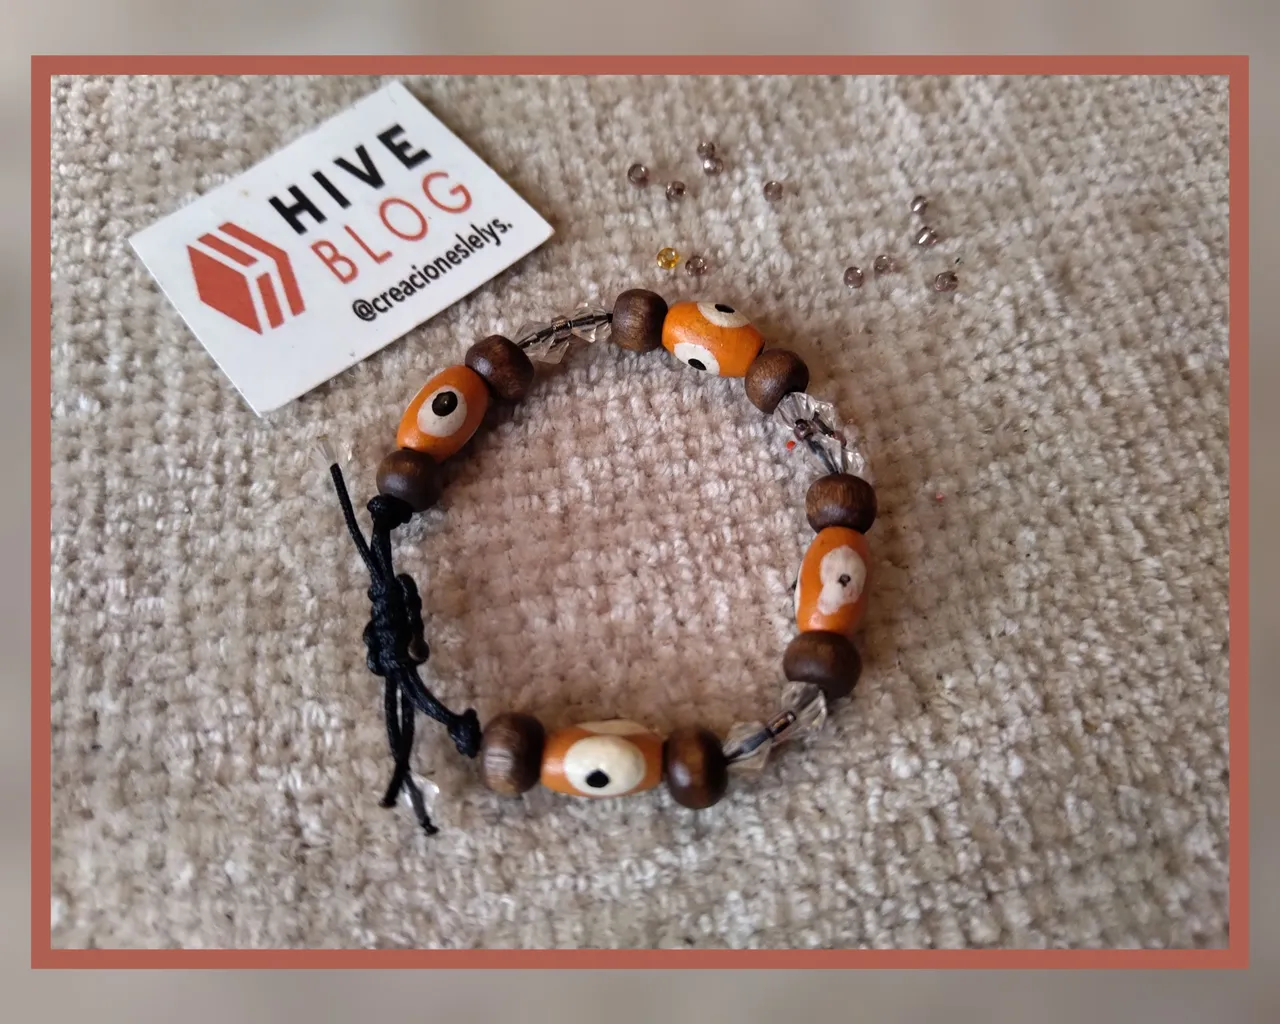
Me gusta mucho como se ve este diseño. Las cuentas anaranjadas lo hacen ver muy llamativo. Espero que ese ojo impida que lleguen los malas vibras al dueño de la pulsera. Además me encanta la forma en que se ven las mostacillas y los SWAROVSKI.
🙋 Se siente bien crear algo lindo con un material que no sabía que tenía. Espero que a ustedes les haya gustado. Seguramente cuando ustedes estén ordenando su mesa de trabajo encontrarán este tipo de hallazgos. Fue divertido y entretenido hacer esta pulsera.

Todas las fotos son de mi propiedad. Edité con Polish. Usé el traductor de deepl. Hasta un próximo tutorial amigos. Cuidense mucho. Bendiciones 🙏
English.
Hello everybody. Happy New Year 2023. In these days of the beginning of the year I wanted to sort the boxes where I keep the materials to make garments and different types of accessories. In the process of arranging them I found beads and pearls that I didn't remember having them. So I took the opportunity to create some bracelets with them. Today I am going to show you the first design I made. It is a small bracelet model since I took advantage of a piece of thread that was loose in one of the boxes. The idea is that you can see how the bracelet looks combining these beads. Enjoy it!
BRACELET WITH WOODEN BEADS AND SWAROVSKI.
MATERIALS.
The materials I used are very few: wooden beads, small candy-colored beads, soft pink Swarovski imitation, black Chinese thread, scissors, tinder, tape measure.
PROCEDURE TO MAKE IT.
🌟 I started by cutting two 20cm and one 15cm strips of yarn.
🌟 Then I took the two 20cm strands and joined them together, burned the ends of one of their ends to make a sharp edge and started to put in the wooden beads according to the design I had in mind; first a round brown wooden one, then a long orange one with a painted eye and then another brown one. These beads are lightweight and very pretty.
🌟 After the wooden beads I separated the two strands. For each I placed 1 SWAROVSKI, 1 mustard, 1 SWAROVSKI. I then joined the two strands and again placed in the same sequence as above, three wooden beads.
🌟 I repeated this design until I completed four sequences. The bracelet is small. The thread reached just enough for the amount of beads available.
This year 2023 I want to get more supplies to make many bracelet designs I have in mind. I have seen a variety of patterns and new techniques that I would love to recreate. Bracelets will never go out of style. Women love to wear them and the trend sets the trend for men as well. That is why I will try to focus a little more on the development of unisex models.
🌟 Once the design was completed what I did was secure with a knot at each end of the leftover Chinese thread.
🌟 For the closure I tied a flat knot taking both ends with the 15cm strand of yarn. This is while I go out to buy the pico'e loro locks I need.
RESULT.
I really like the way this design looks. The orange beads make it look very striking. I hope that eye keeps the bad vibes from getting to the owner of the bracelet. Plus I love the way the beads and SWAROVSKI look.
🙋 It feels good to create something pretty with a material I didn't know I had. I hope you guys liked it. Surely when you guys are tidying up your work table you will find these kinds of finds. It was fun and entertaining to make this bracelet.
All photos are my property. I edited with Polish. I used deepl translator. Until next tutorial friends. Take care of yourselves. Blessings 🙏