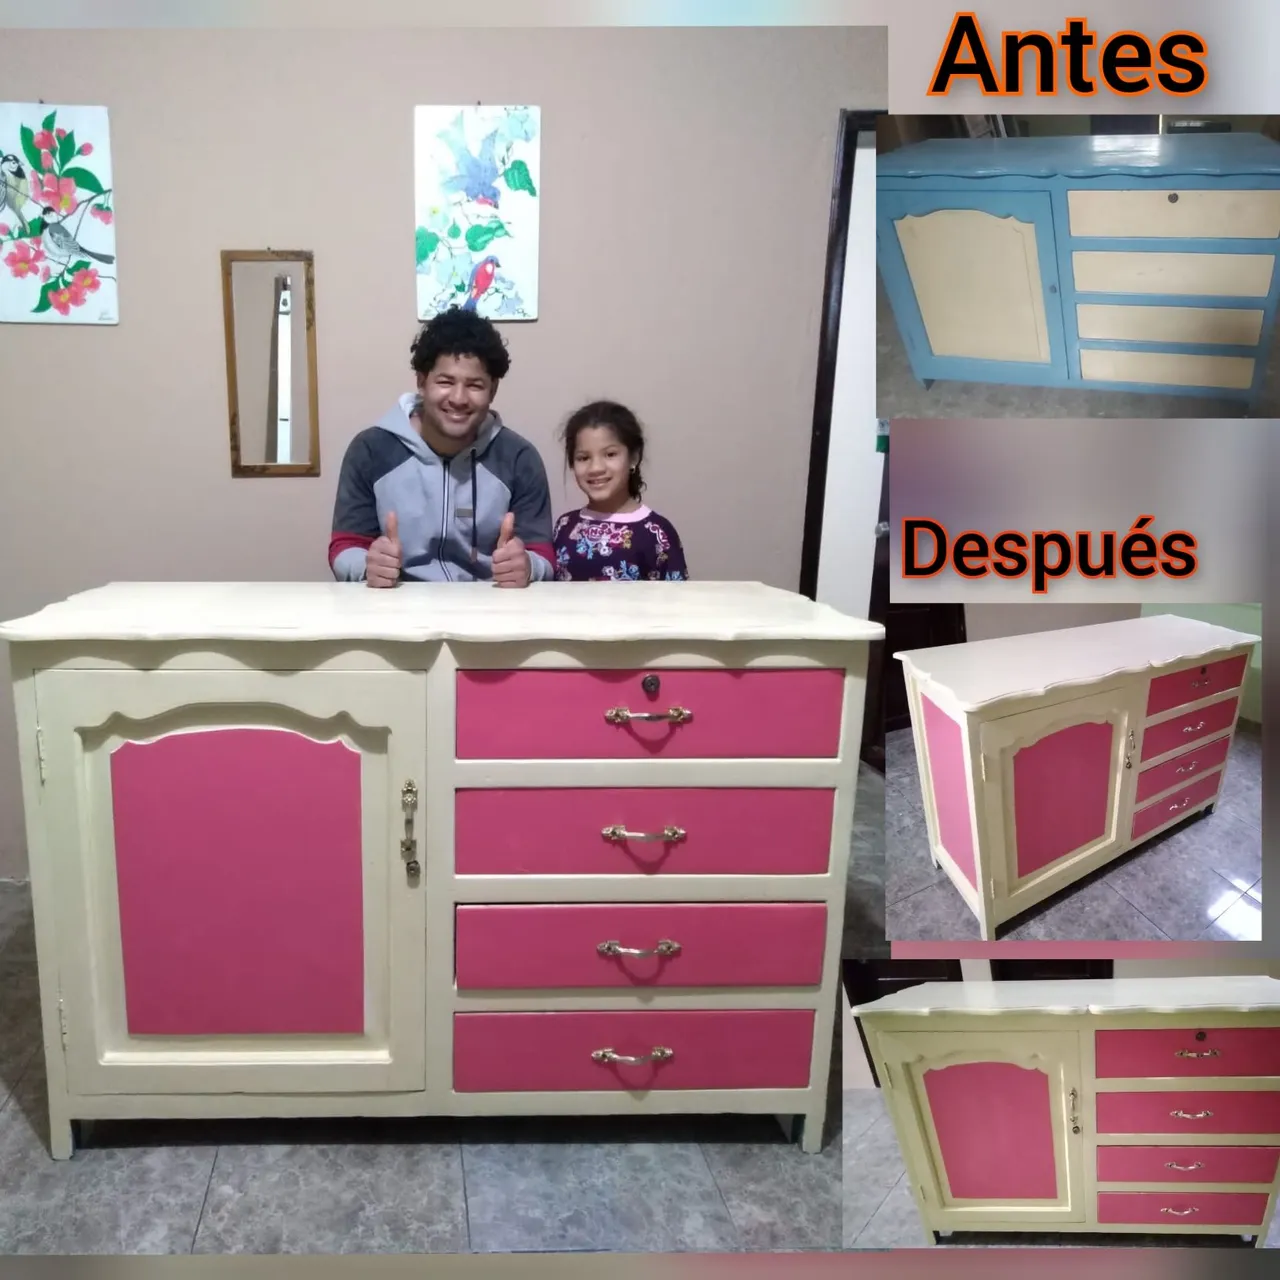
Un saludo cordial a todos los artesanos, Craftero, creadores, pintores y de más que integran esta maravillosa colmena, me encuentro por acá con ustedes en esta ocasión para mostrarles cómo restaurar un armario y darle un hermoso acabado para que mis niñas lo disfruten
A cordial greeting to all the artisans, Craftero, creators, painters and more that make up this wonderful hive, I am here with you on this occasion to show you how to restore a cabinet and give it a beautiful finish for my girls to enjoy it.
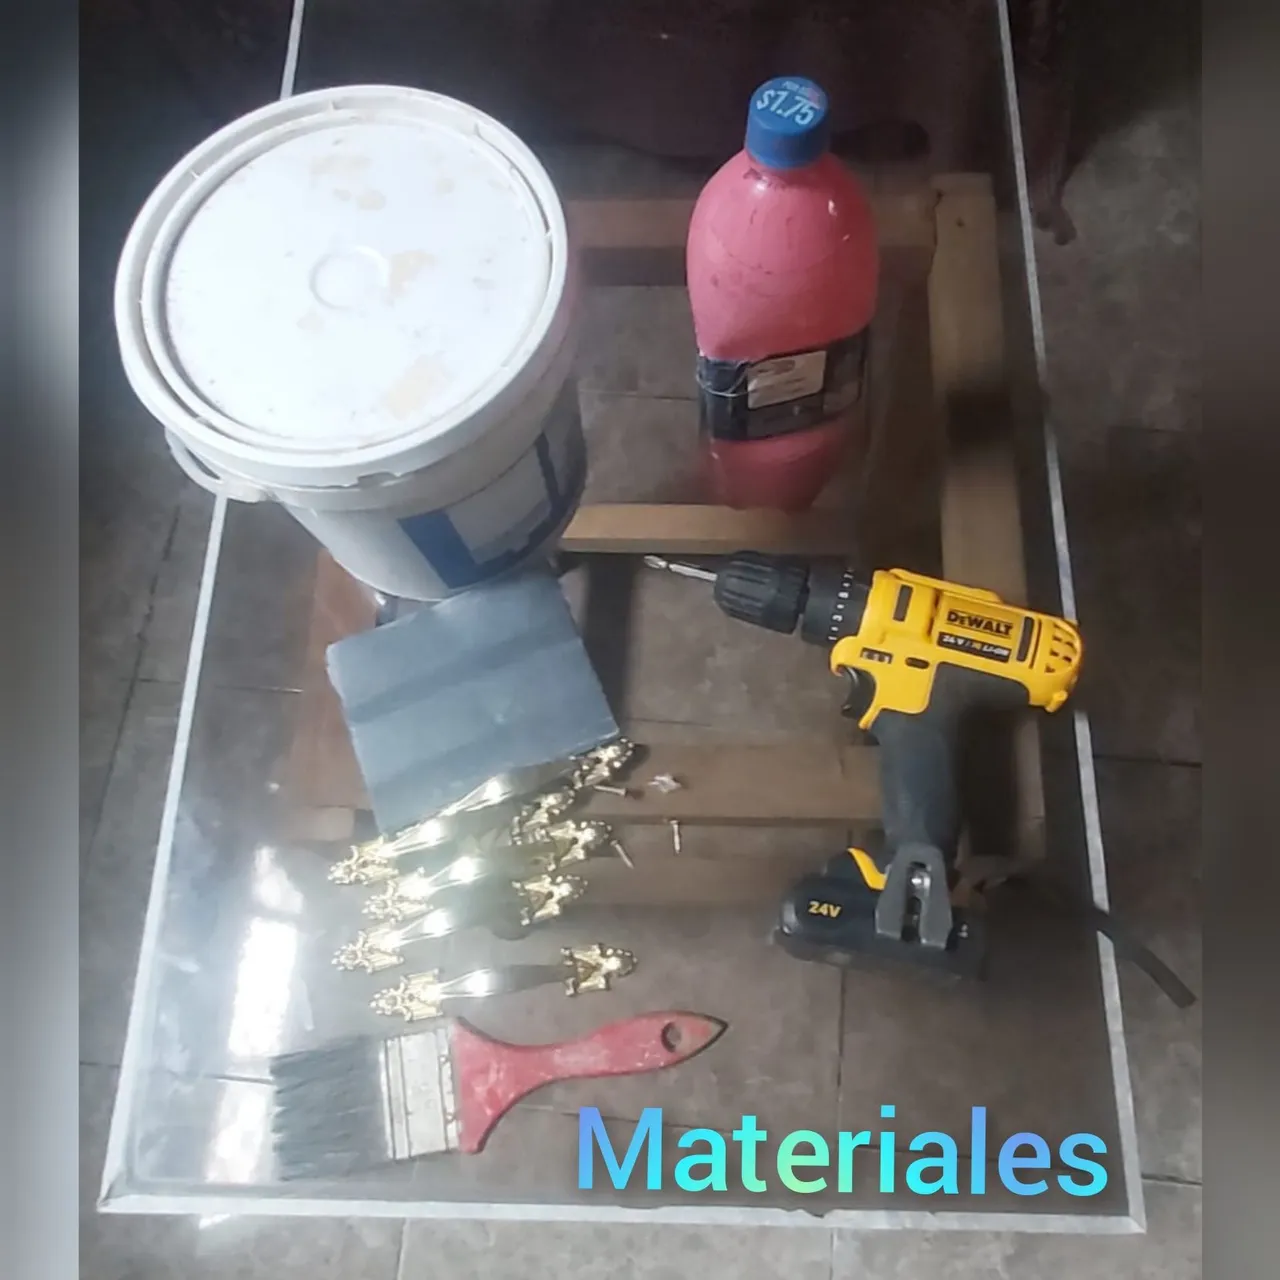
Materiales
Lija
Brocha
Pintura
Taladro eléctrico
Manijas para cajones
Tornillos.
Materials
Sandpaper
Brush
Paint
Electric drill
Drawer handles
Screws.
Acompañenme a ver el paso a paso
Join me to see the step by step
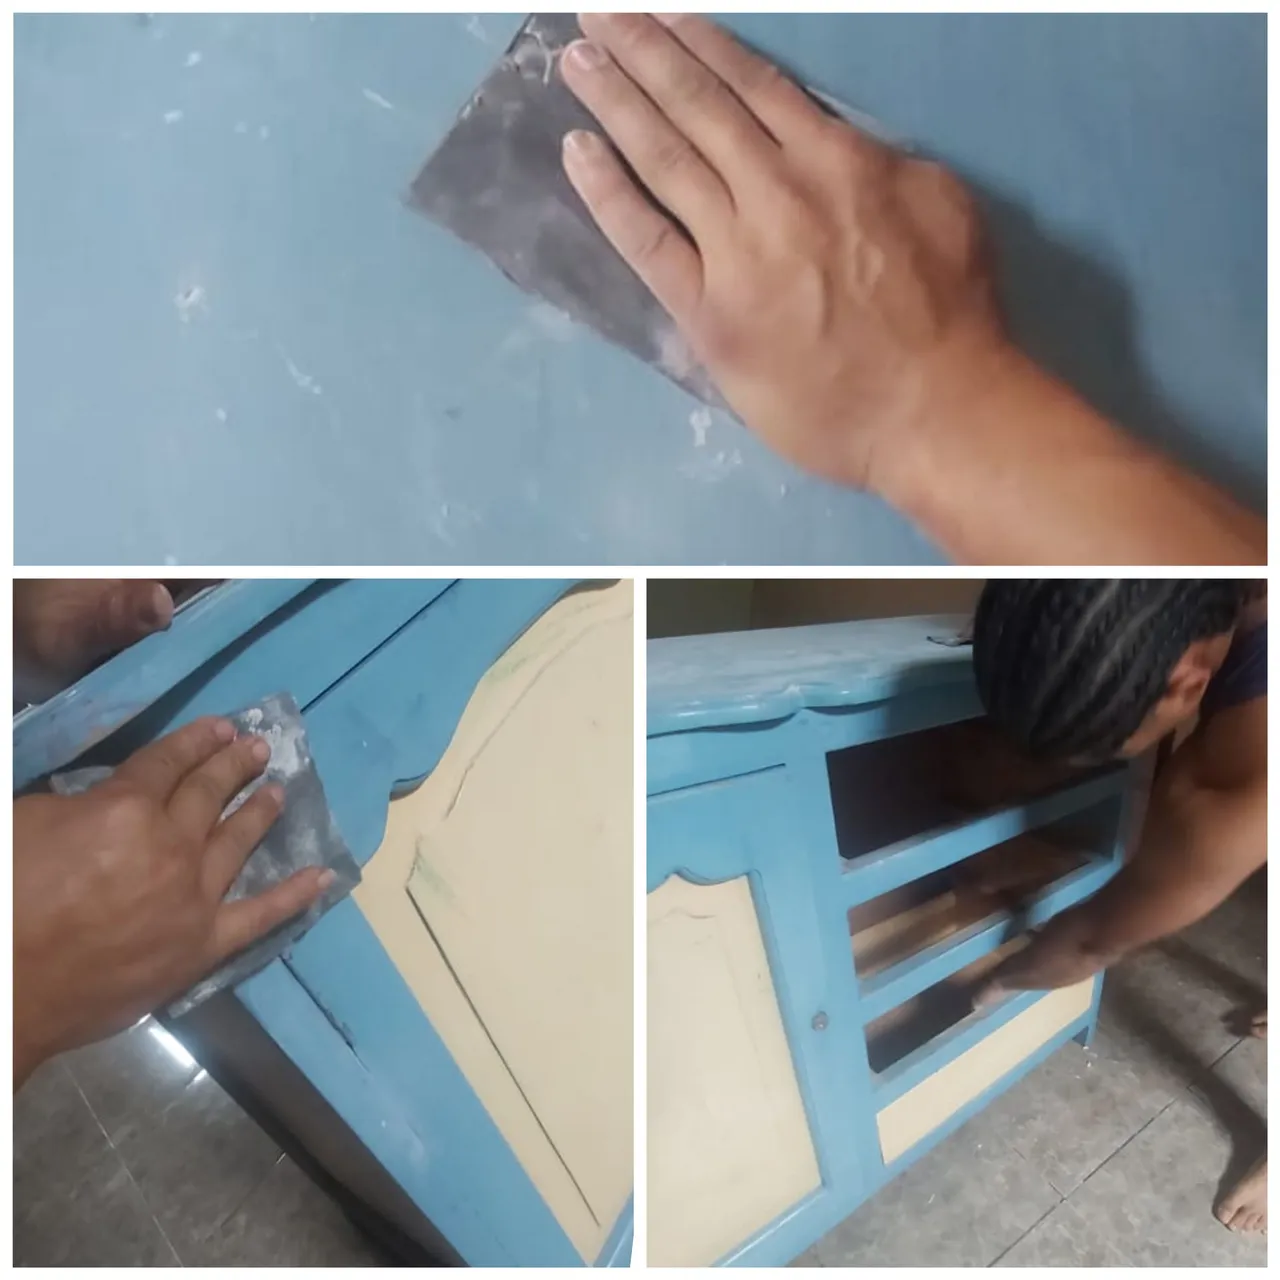
Paso 1
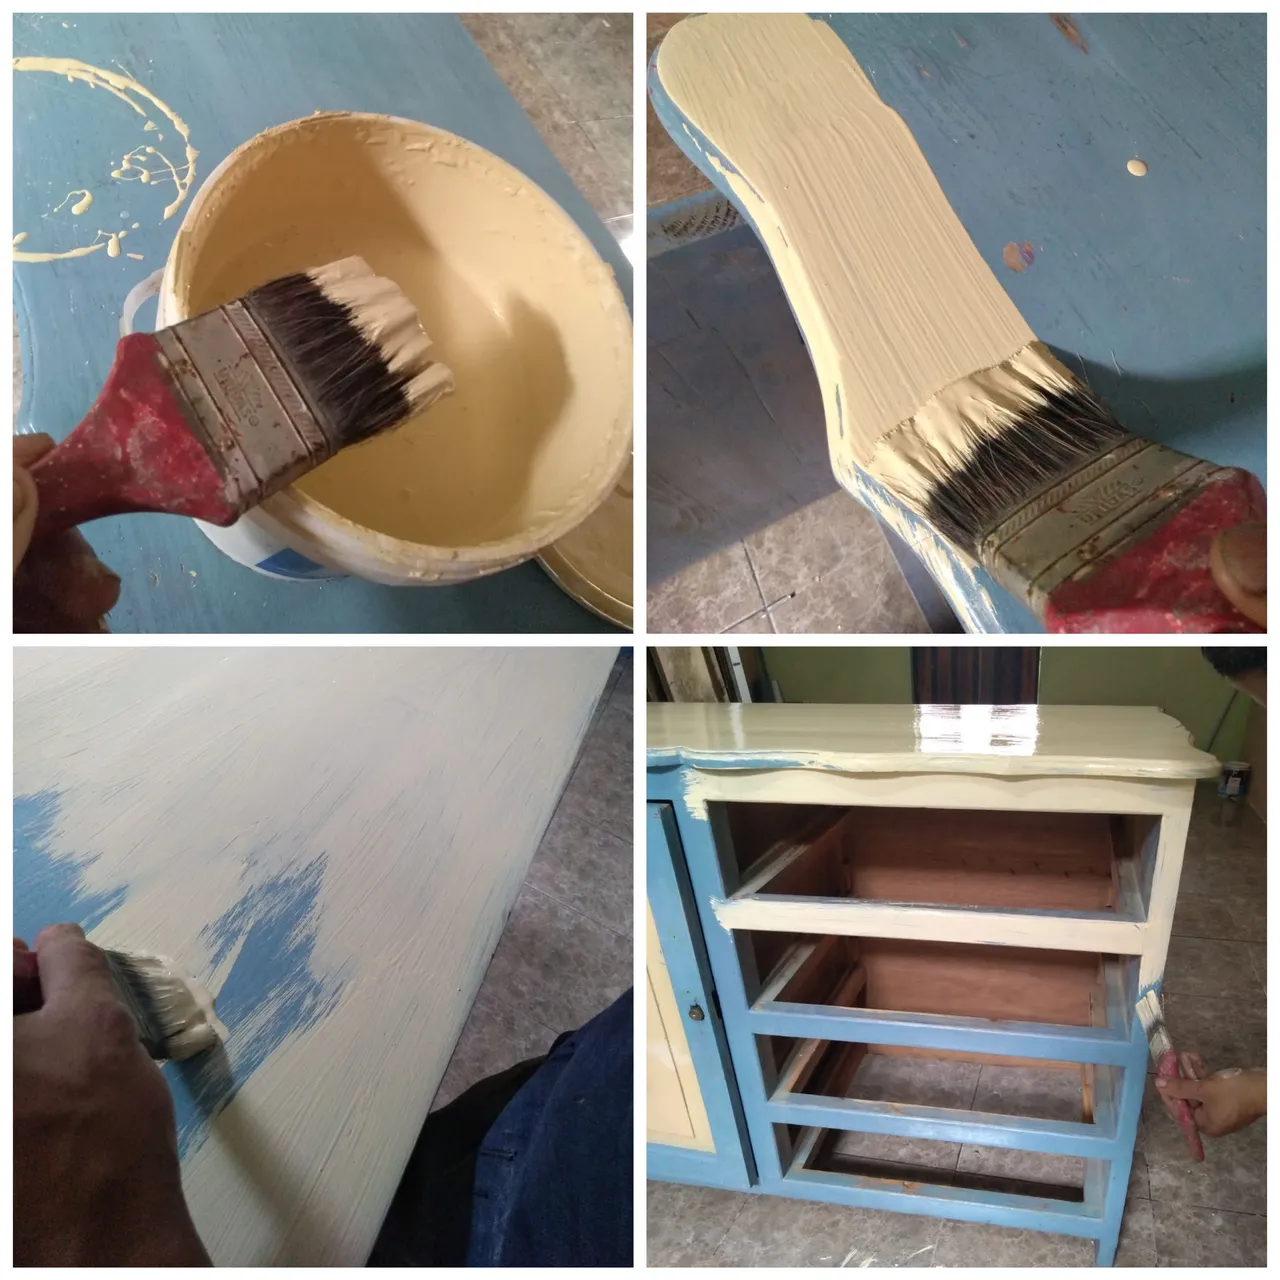
Mis amigos comenzamos agarrando la lija y doblamos a la mitad y pasamos por todo el armario, quitandole todos las manchas o desperfectos que tenga.
Step 1
My friends, we start by taking the garter and folding it in half and going through the entire closet, removing any stains or blemishes.
Paso 2
Después de lijar toda la superficie, agarramos la pintura color marfil, la destapamos, mezclamos y comenzamos a pintatr con la Brocha de 4" por toda la parte superior del armario, los bordes de los lados derecho e izquierdo, también pintamos los bordes de la puerta y las gavetas.
Step 2
After sanding the entire surface, we grabbed the ivory paint, uncovered it, mixed it and started painting with the 4" brush all over the top of the cabinet, the edges of the right and left sides, we also painted the edges of the door and the drawers.
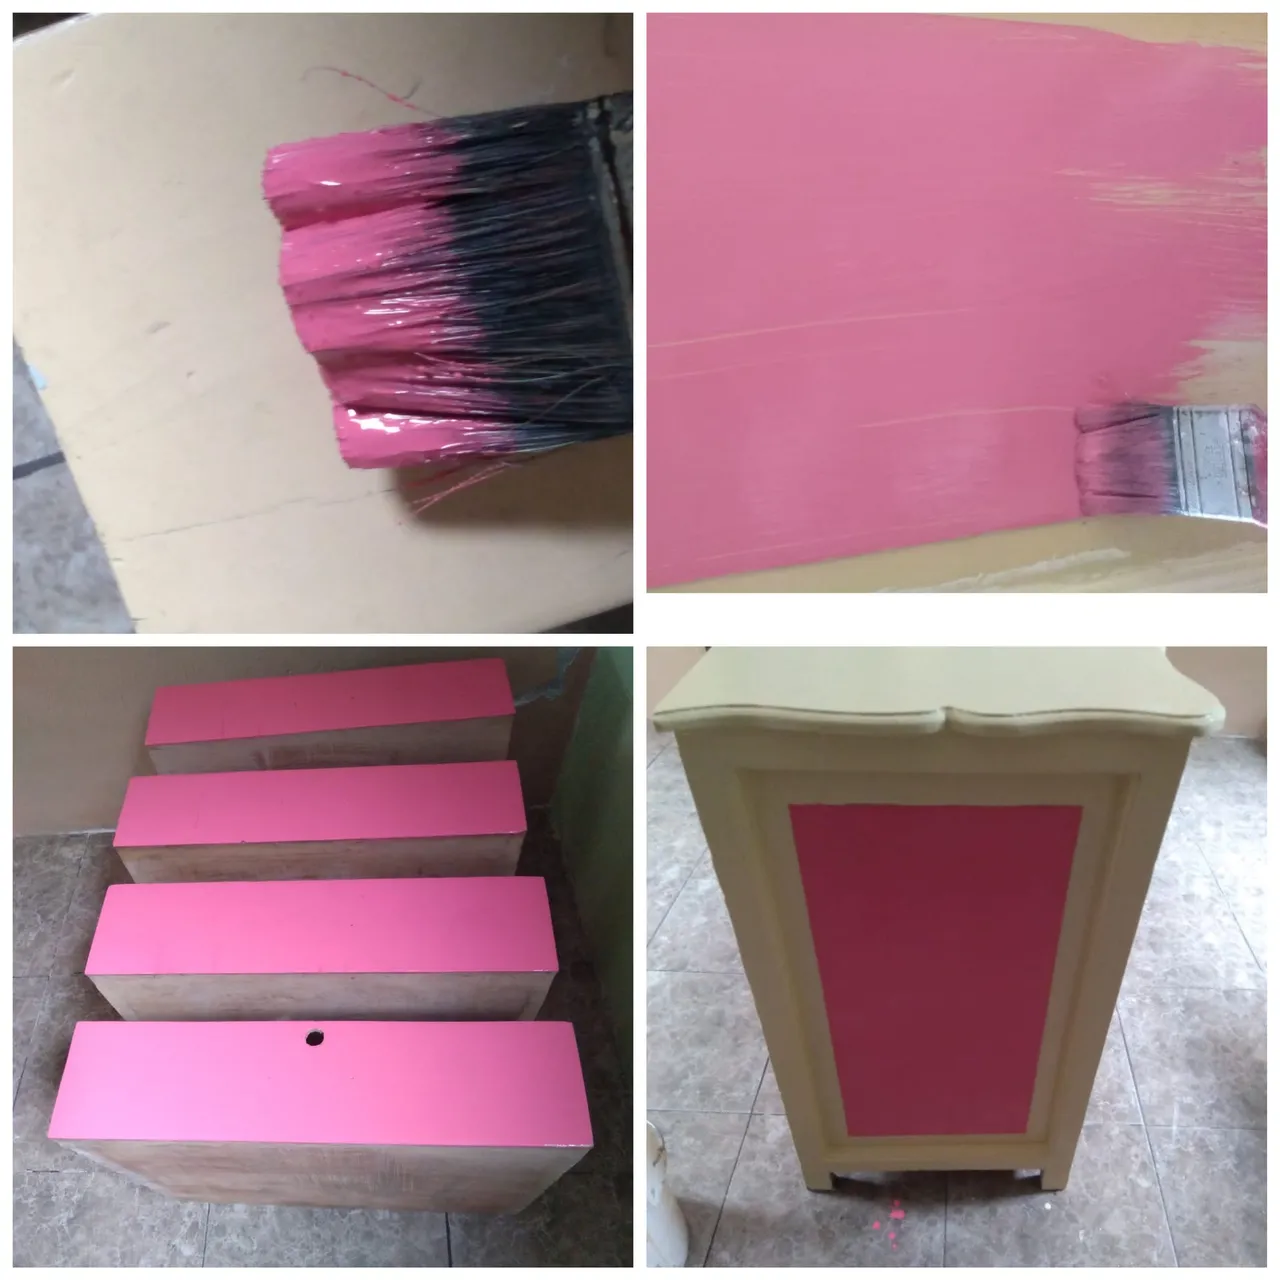
Paso 3
Luego vamos a pintar el centro de la puerta, las gavetas y el centro de los lados derechos e izquierdo con la pintura color fucsia.
Step 3
Then we will paint the center of the door, the drawers and the center of the right and left sides with the fuchsia paint.
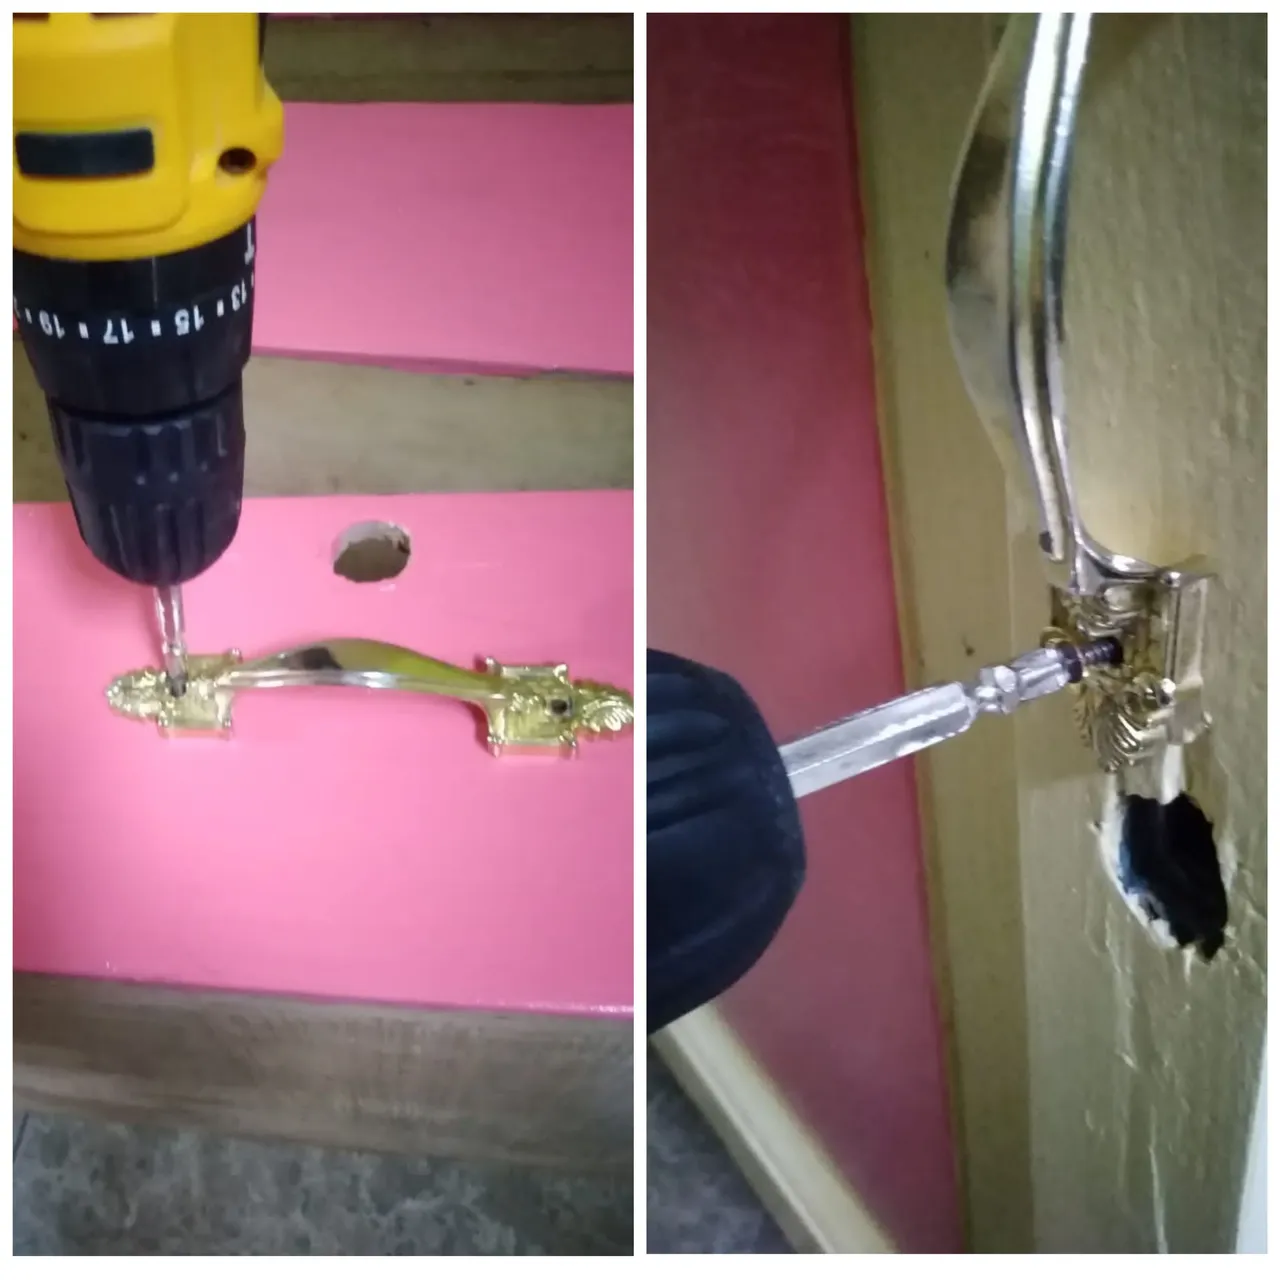
Paso 4
Después de transcurrido el tiempo de secado vamos a colocar las manijas de las gavetas y la puerta.
Step 4
Thank you for visiting my blog, I hope you find it excellent and you like the result of my work.
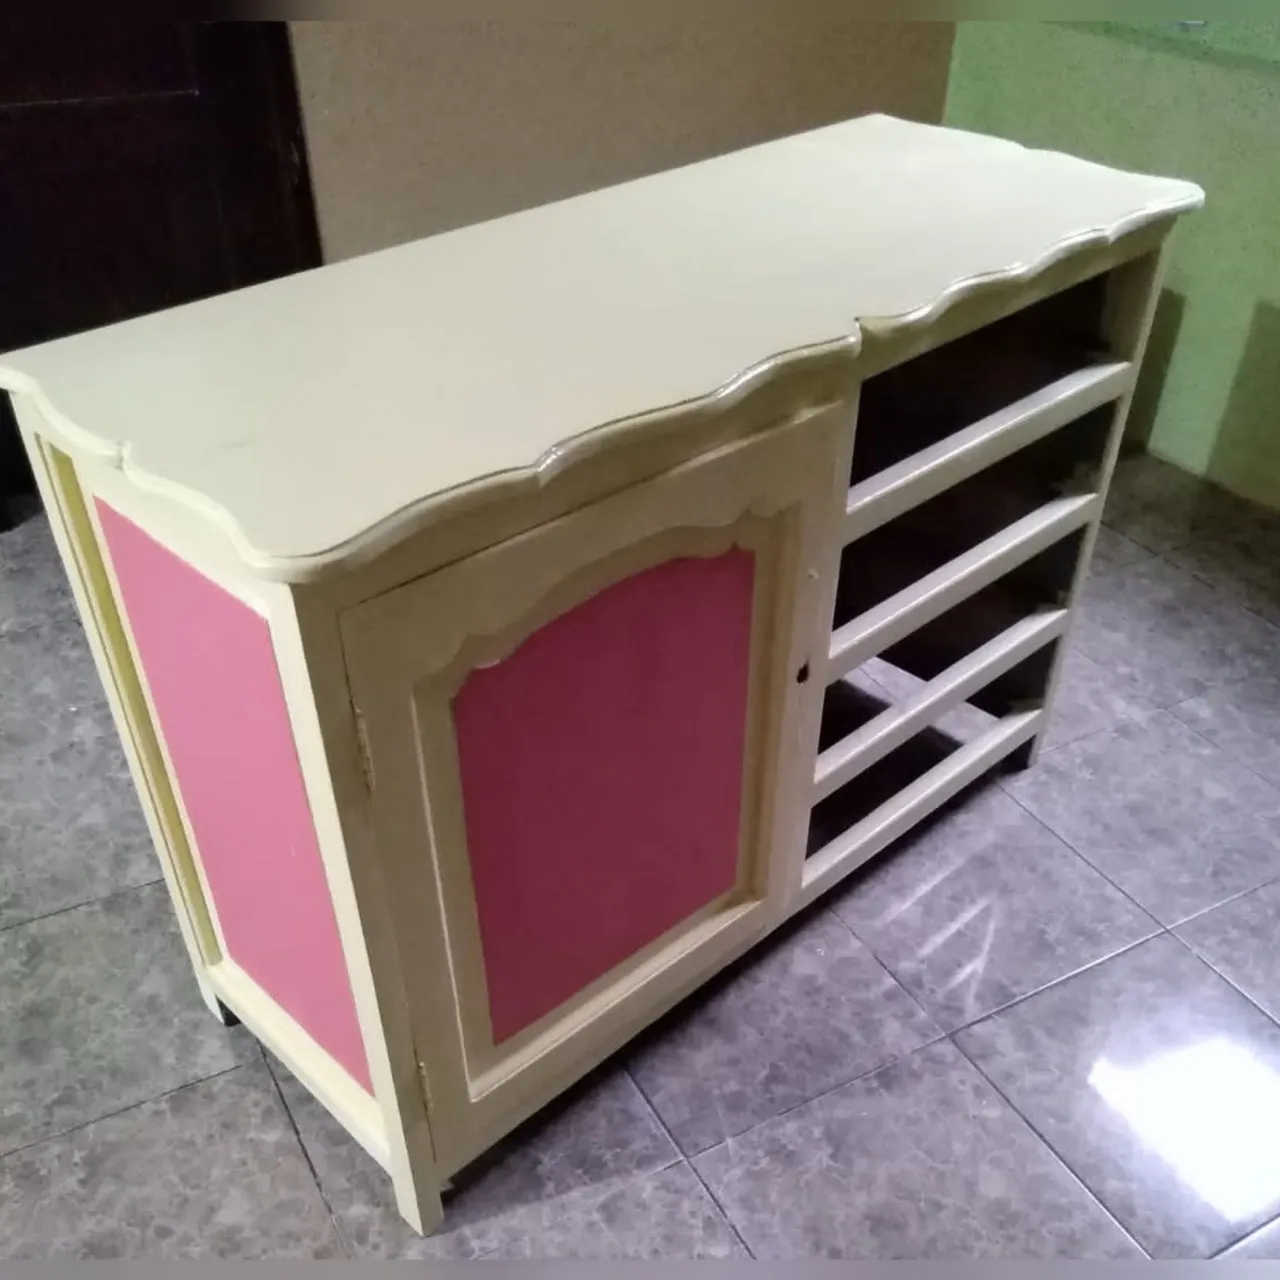
Paso 5
Para finalizar colocamos las gavetas en el armario.
Step 5
Finally, we place the drawers in the cabinet.
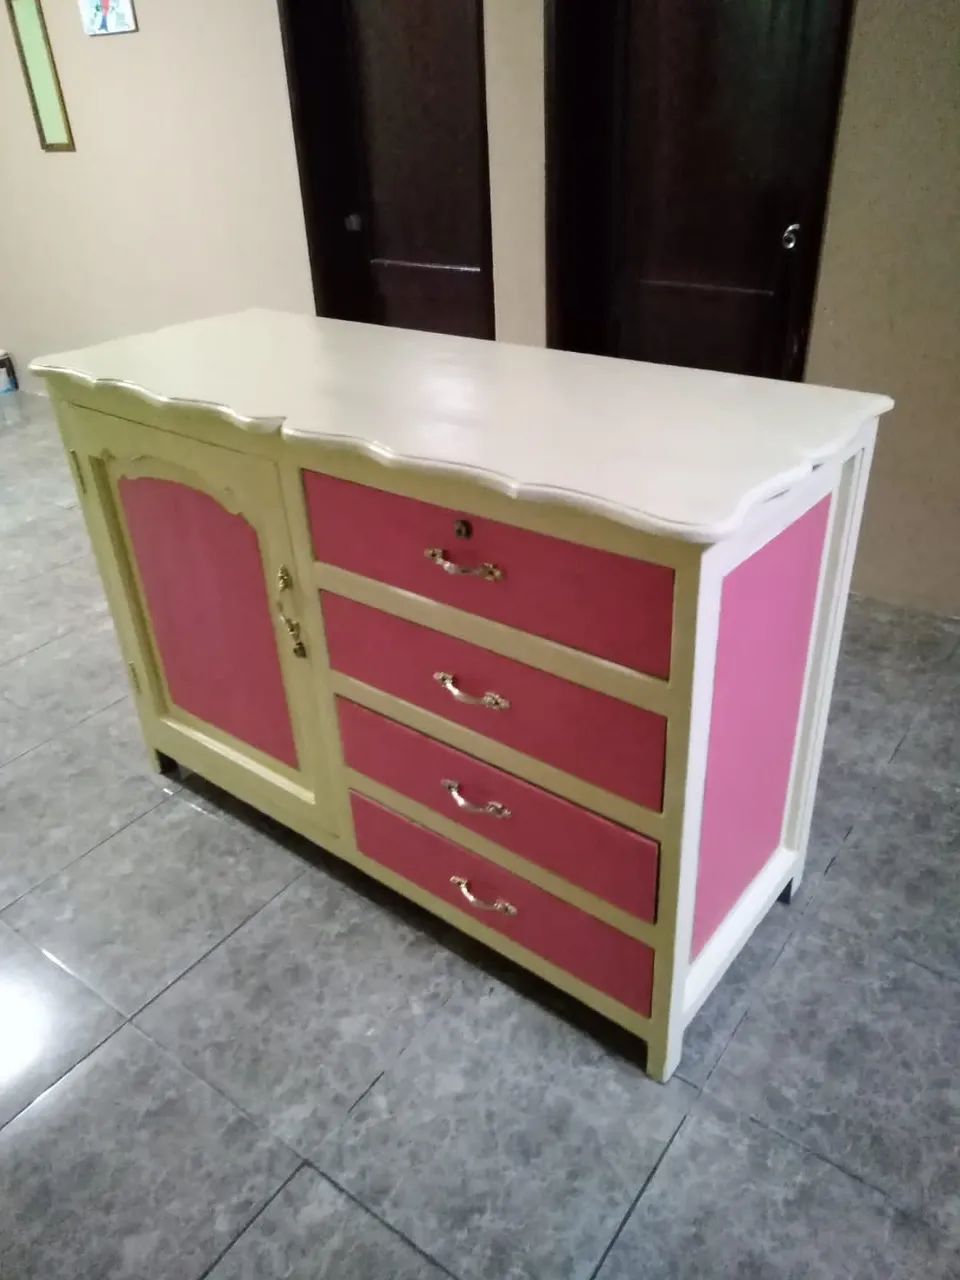
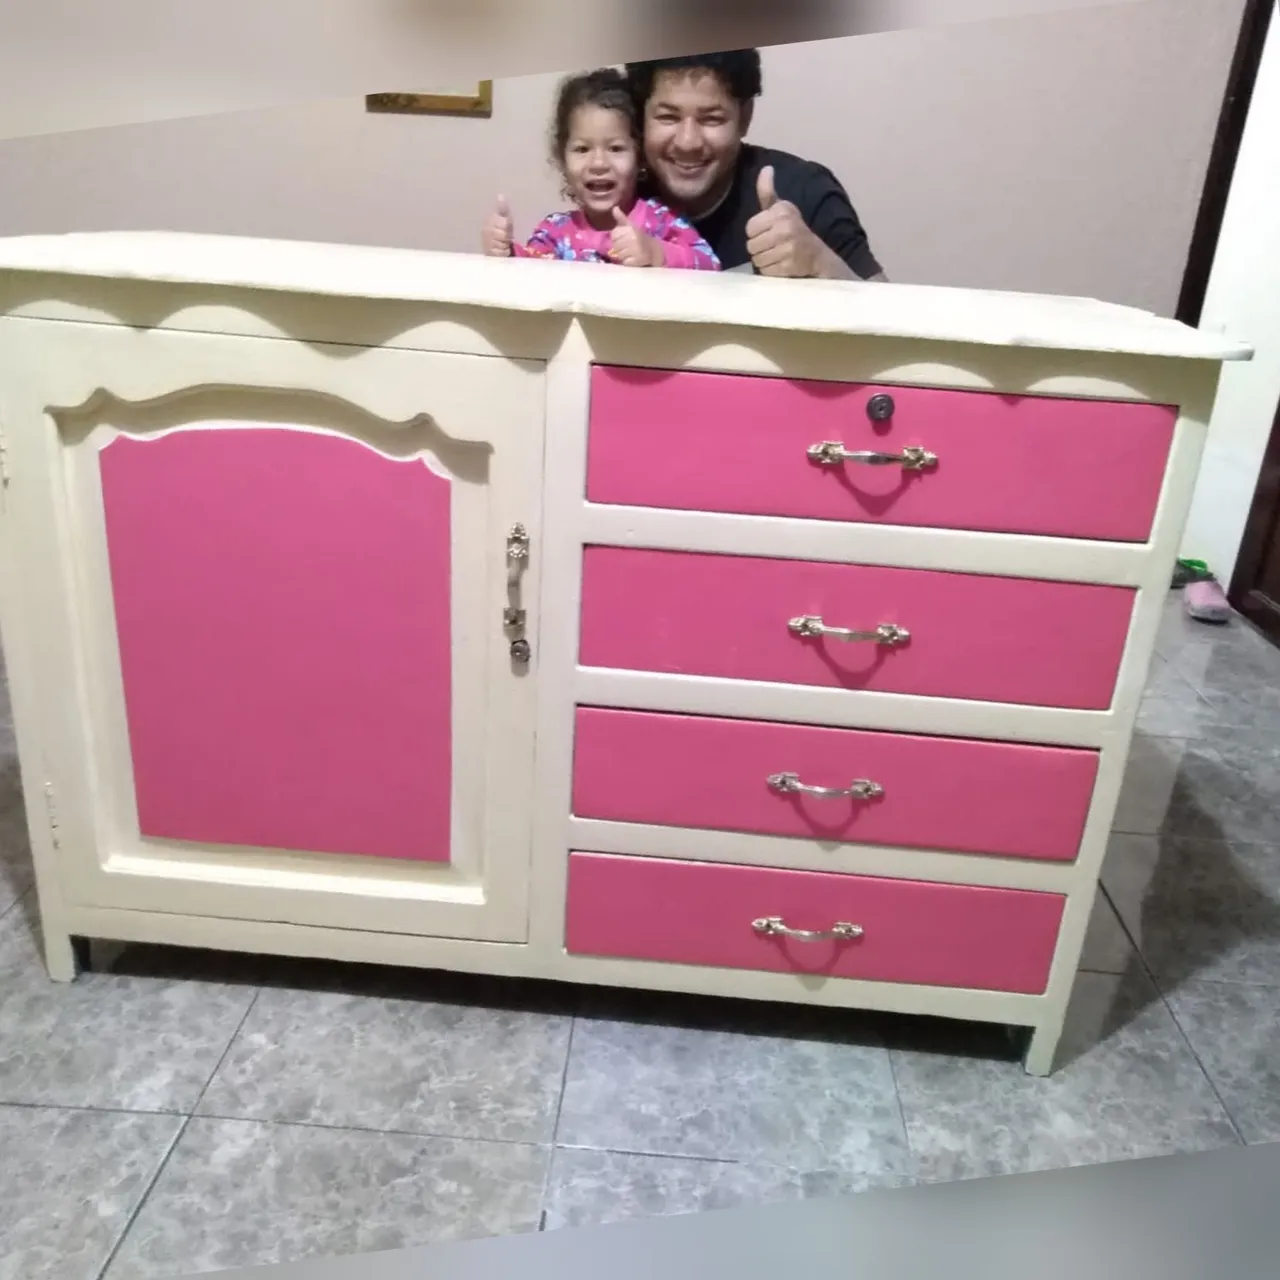
Así nos queda la restauración del armario
This leaves us with the restoration of the cabinet

Gracias por pasar por mi blog, espero se encuentren excelente y les halla gustado el resultado de mi trabajo
Thank you for visiting my blog, I hope you find it excellent and you like the result of my work