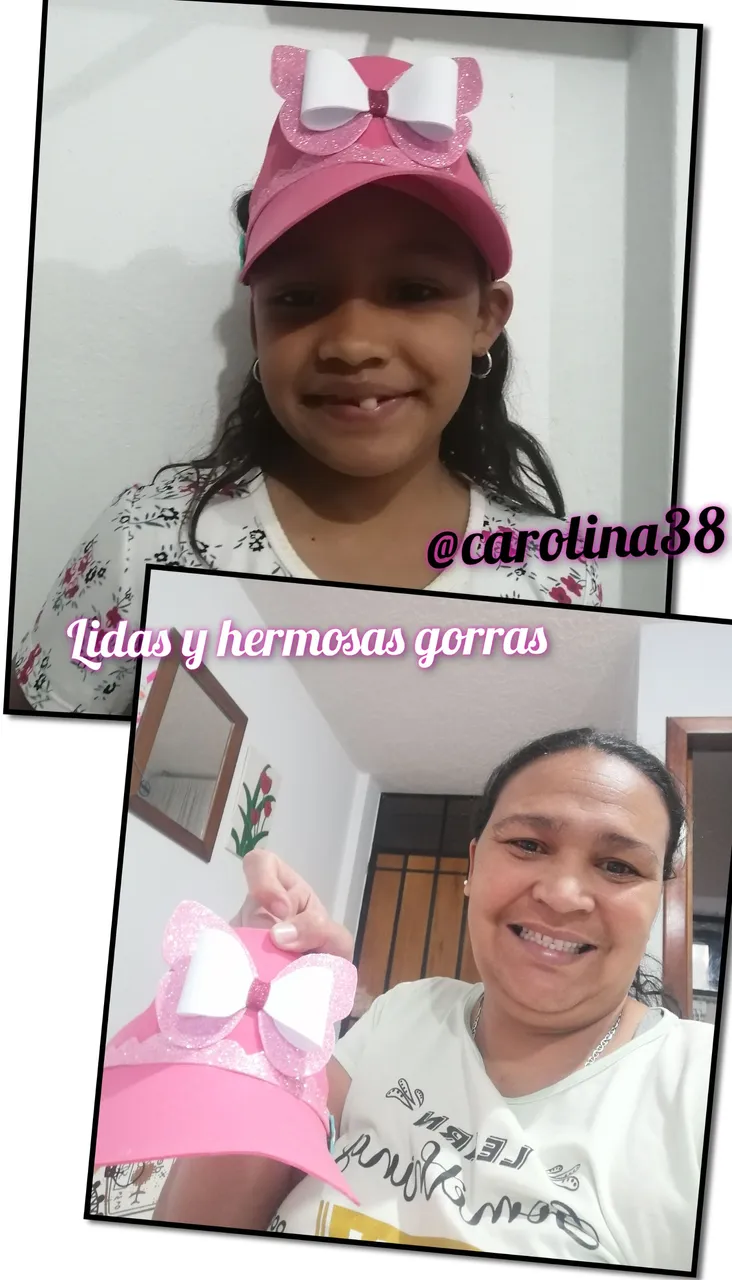
Buenas querida y hermosa comunidad de hiver diy, amigos blogueros dios me los bendiga en esta oportunidad les muestro un nuevo proyecto que consiste en la elaboracion de unas hermosas y creativas gorras para niñas y niños, ideal para regalar en alguna ocasión o celebración tambien son utilizadas en las escuelas espero y les guste.
Este proyecto lo realize por la necesidad de celebrar un acto escolar donde los niños tendran un desfile donde estan expuestos al sol y con la ayuda de estas podran protegerse un poco del mismo.
Good dear and beautiful community of hiver diy, bloggers friends god bless me this time I show you a new project that involves the development of a beautiful and creative caps for girls and boys, ideal for gifts on any occasion or celebration are also used in schools I hope you like it.
This project was made by the need to celebrate a school event where children will have a parade where they are exposed to the sun and with the help of these can protect themselves a little of it.
- Materiales para la elaboración estas hermosas gorras
. Foami de los colores deseados
. Silicon
. pistola de silicon
. Tijera
. Elastico de 20cm
. Patrones
Materials for the elaboration of these beautiful caps
. Foami of the desired colors
. Silicon
. silicone gun
. Scissors
. 20cm elastic
. Patterns

Procedimientos > Procedures
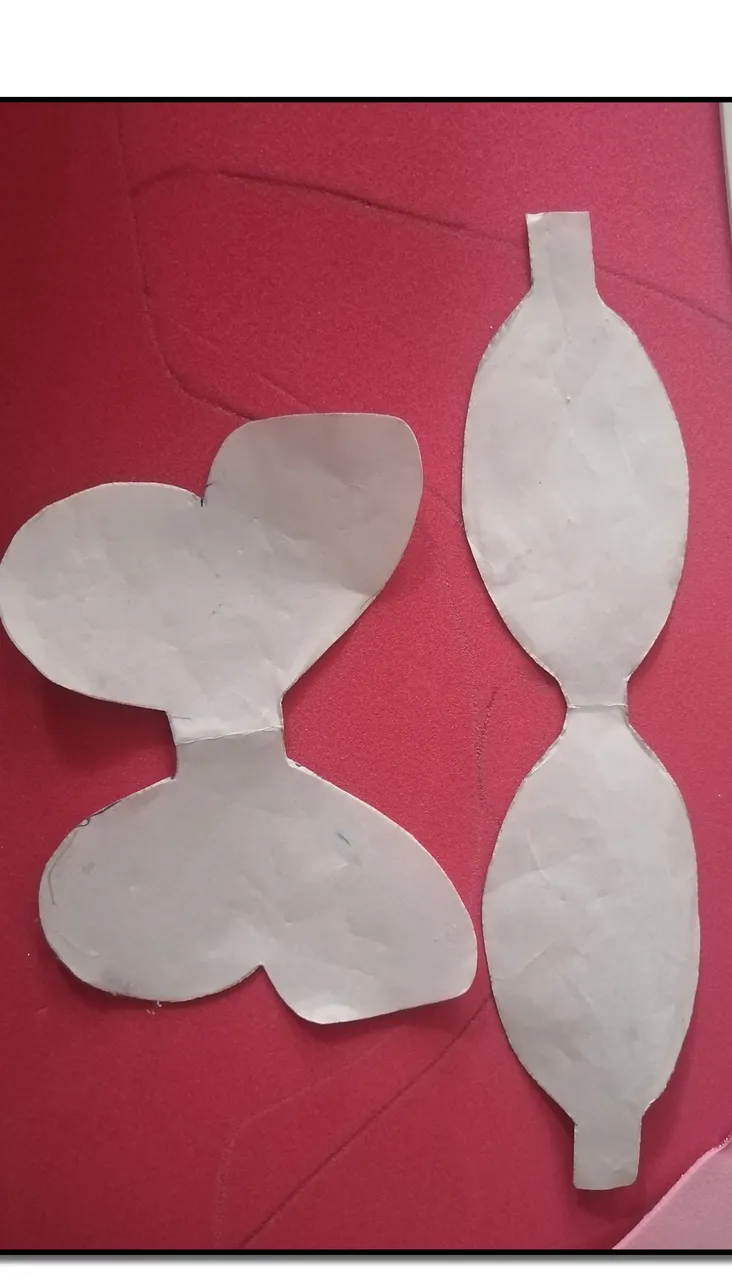
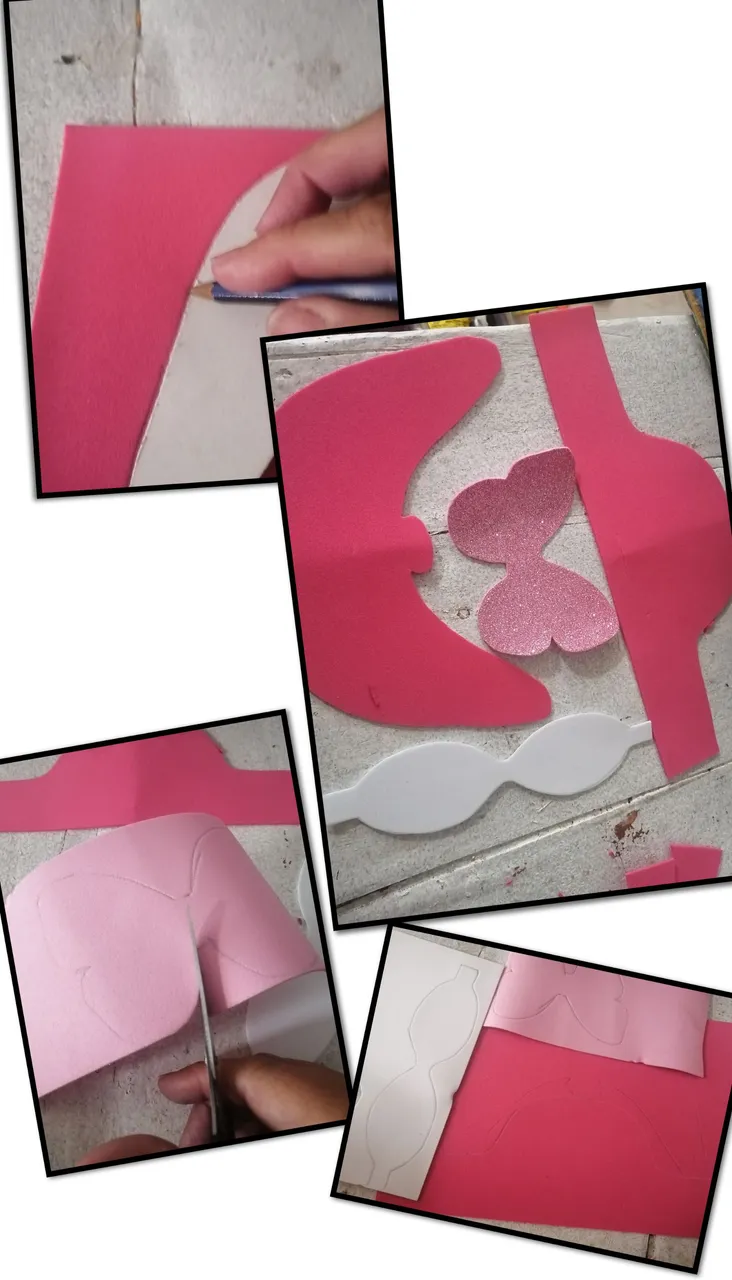
para comenzar tomamos los patrones y los marcamos en el foami luego con ayuda de una tijera cortamos los mismos.
to start we take the patterns and mark them on the foami, then with the help of a scissors we cut them.
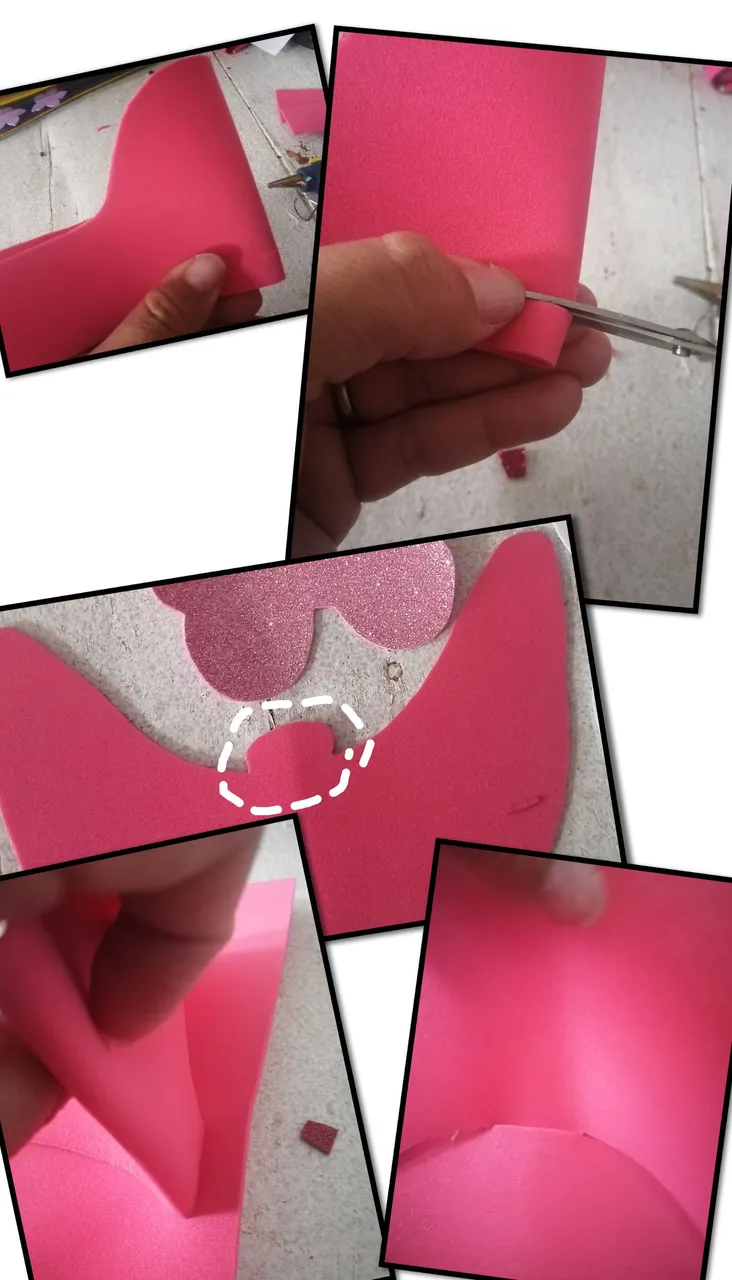
- El siguente paso sera doblar la parte de arriba de la gorra y hacer un pequeño corte a un centimetro de la punta, luego tomamos la parte de abajo y introducimos la parte sobresaliente de la misma en el corte anterior.
The next step is to fold the top part of the cap and make a small cut one centimeter from the tip, then take the bottom part and insert the protruding part of it into the previous cut.
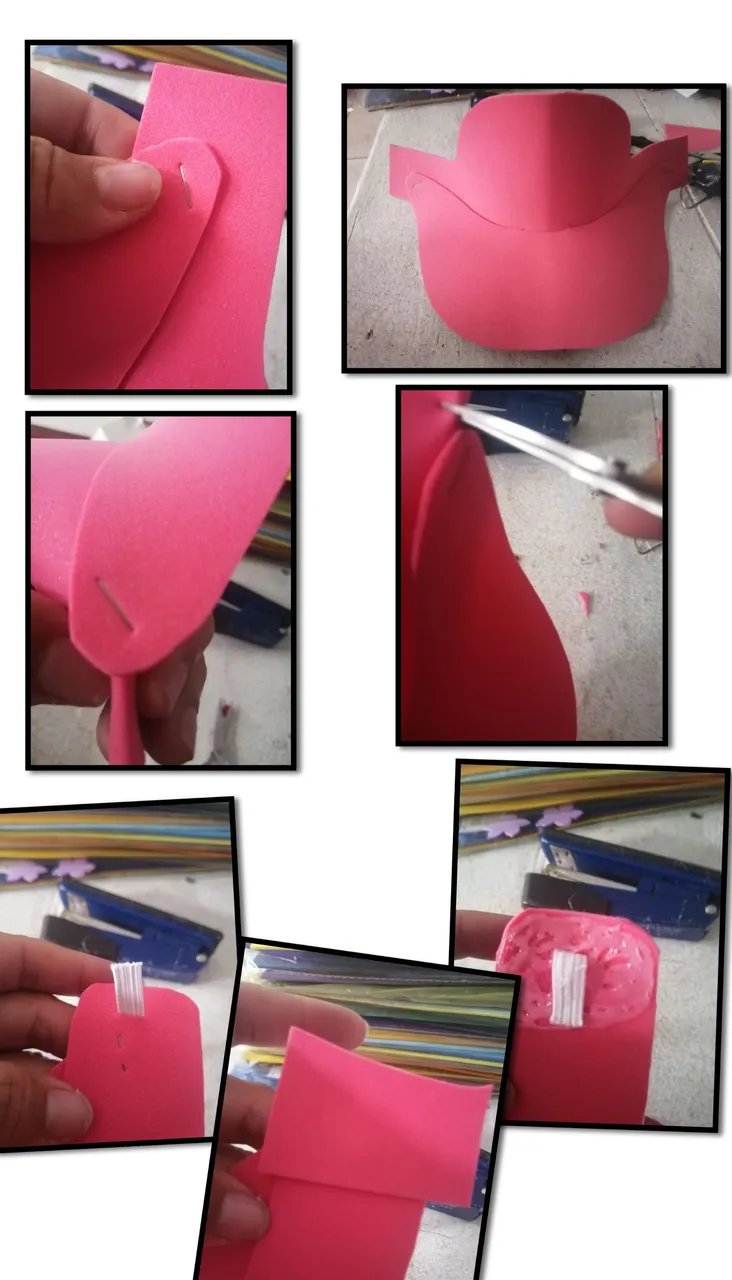
- Ahora tomamos las 2 puntas de la parte de abajo y las aseguramos a la parte de arriba con ayuda del silicon o la engrapamos, ahora hacemos dos aventuras en los extremos donde colocaremos el elastico, pasamos los elasticos les colocamos silicon en las puntas y para darle fuerza le pegamos un trozo de foami en cada lado.
Now we take the 2 ends of the bottom part and secure them to the top part with the help of the silicon or we staple it, now we make two adventures in the ends where we will place the elastic, we pass the elastics we place them silicon in the ends and to give it strength we glue a piece of foami in each side.
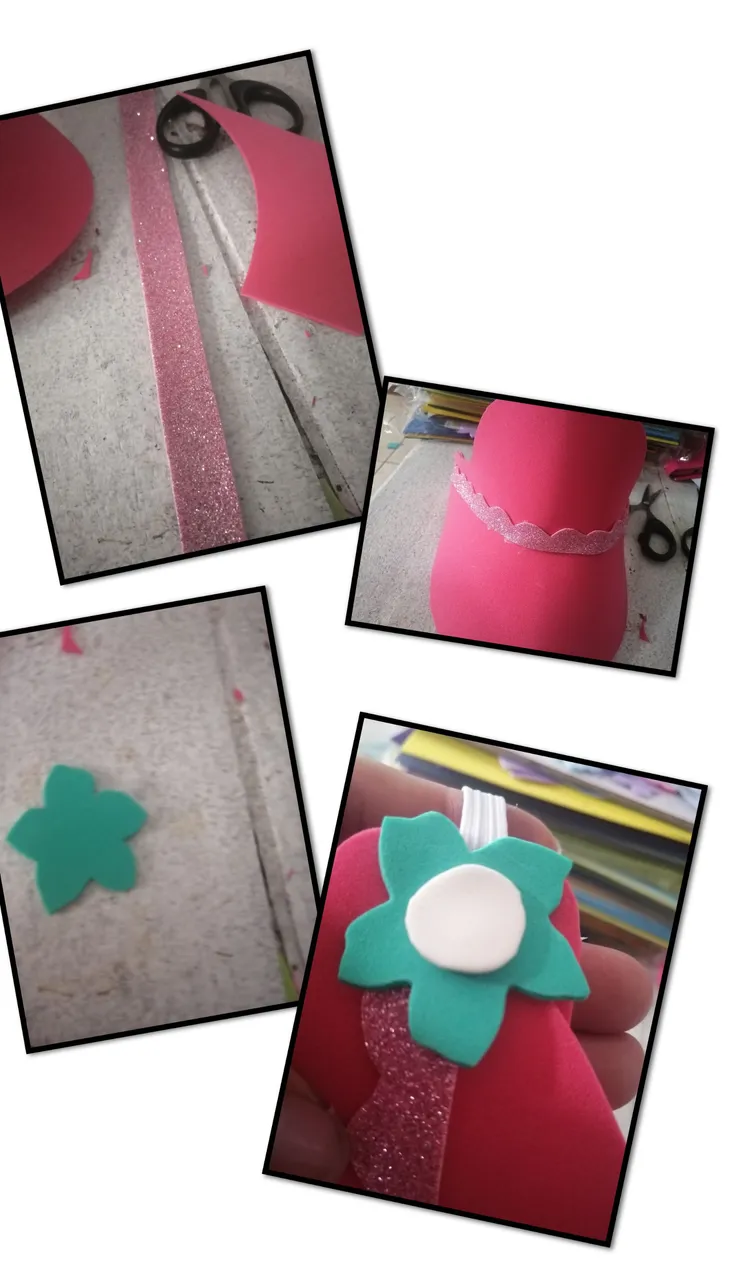
- Ahora tomamos una tira de foami y le cortamos uno de los bordes con una tijera de forma y luego pegamos la misma en la parte donde se unan las dos piezas, hacemos unas flores pequeñas o lo que nos guste para tapar la union en las dos puntas donde se pegaron las ligas para tapar y darle un bonito acabado.
Now we take a strip of foami and cut one of the edges with a scissors and then glue it in the part where the two pieces are joined, we make some small flowers or whatever we like to cover the union in the two ends where the rubber bands were glued to cover and give a nice finish.
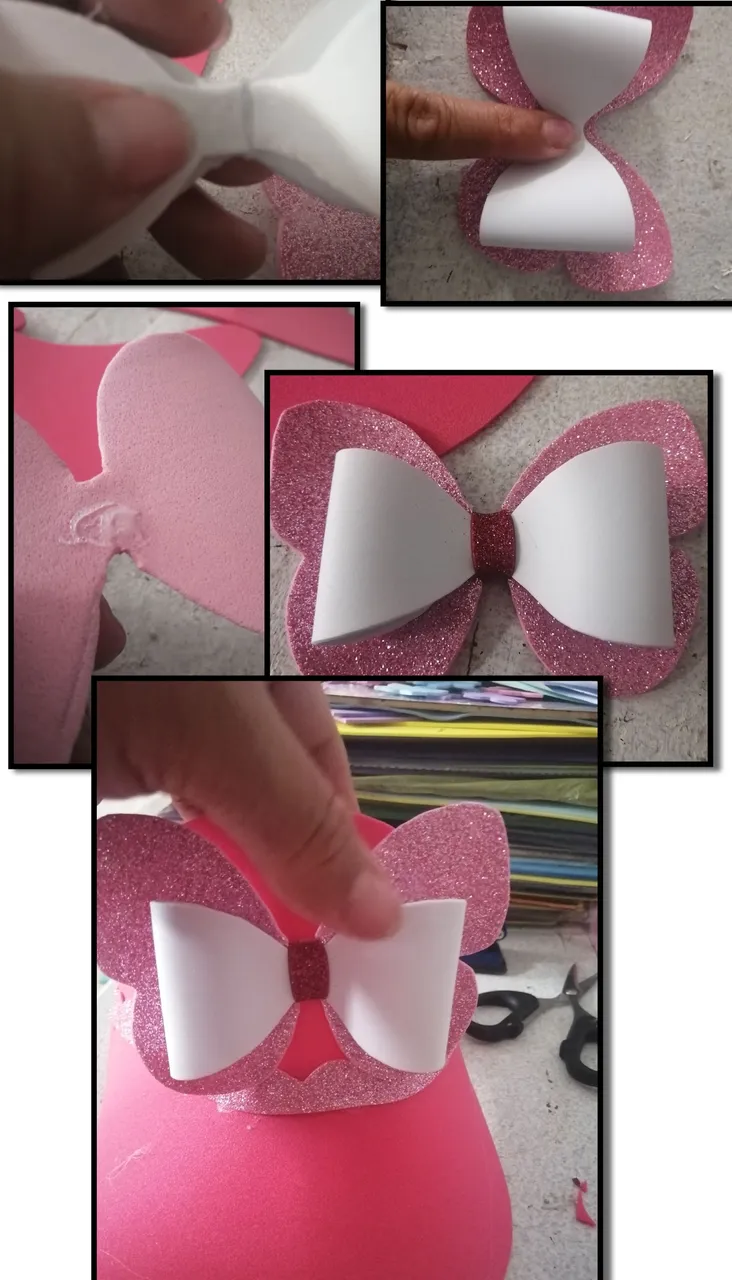
- Para finalizar en mi caso arme una mariposa con un lazo pero pueden hacer lo que les guste, y pegamos en la solapa de la parte de arriba.
Finally, in my case I made a butterfly with a ribbon, but you can do whatever you like, and we glued it on the flap at the top.
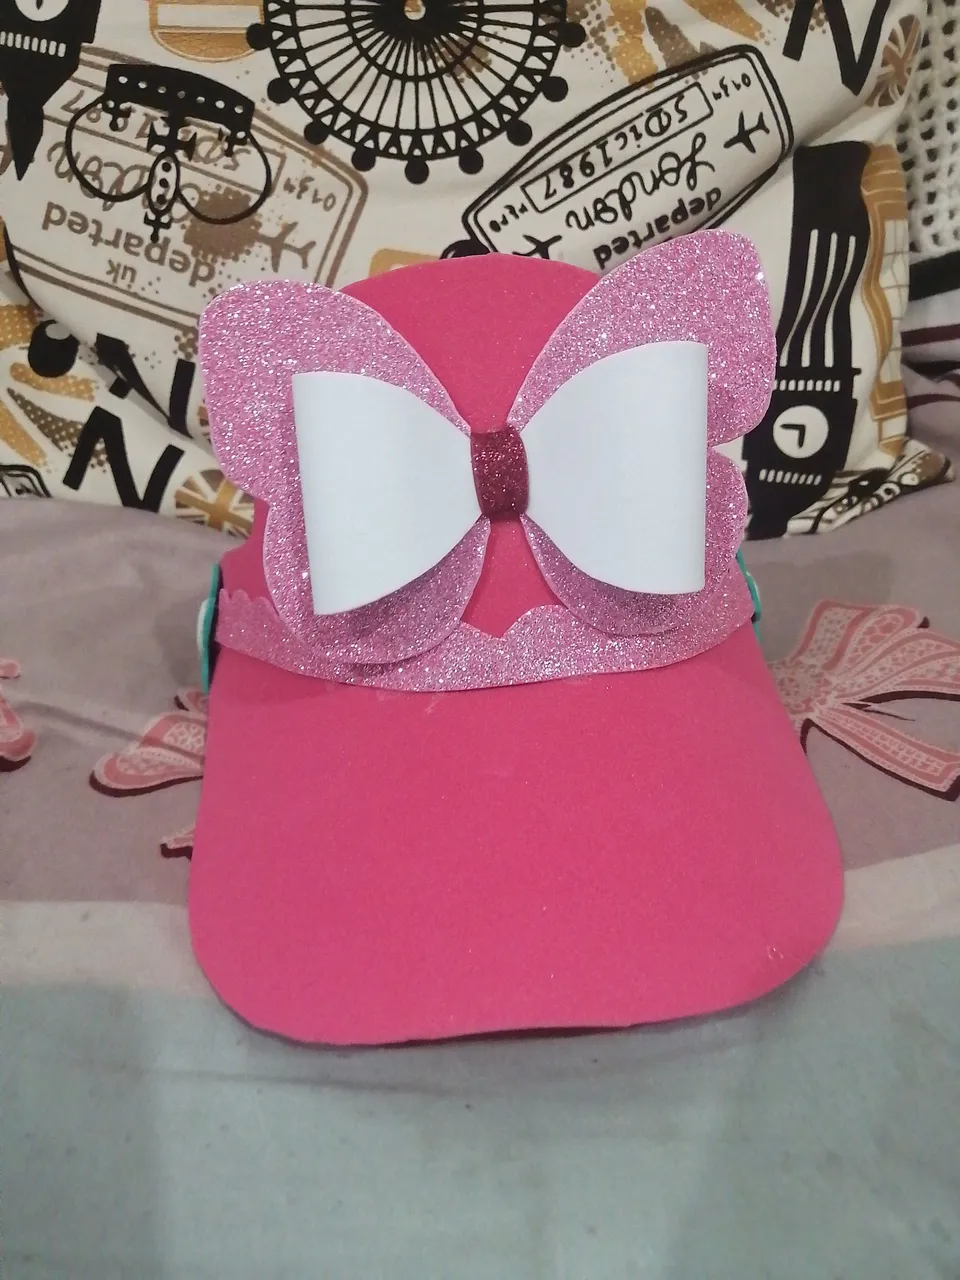
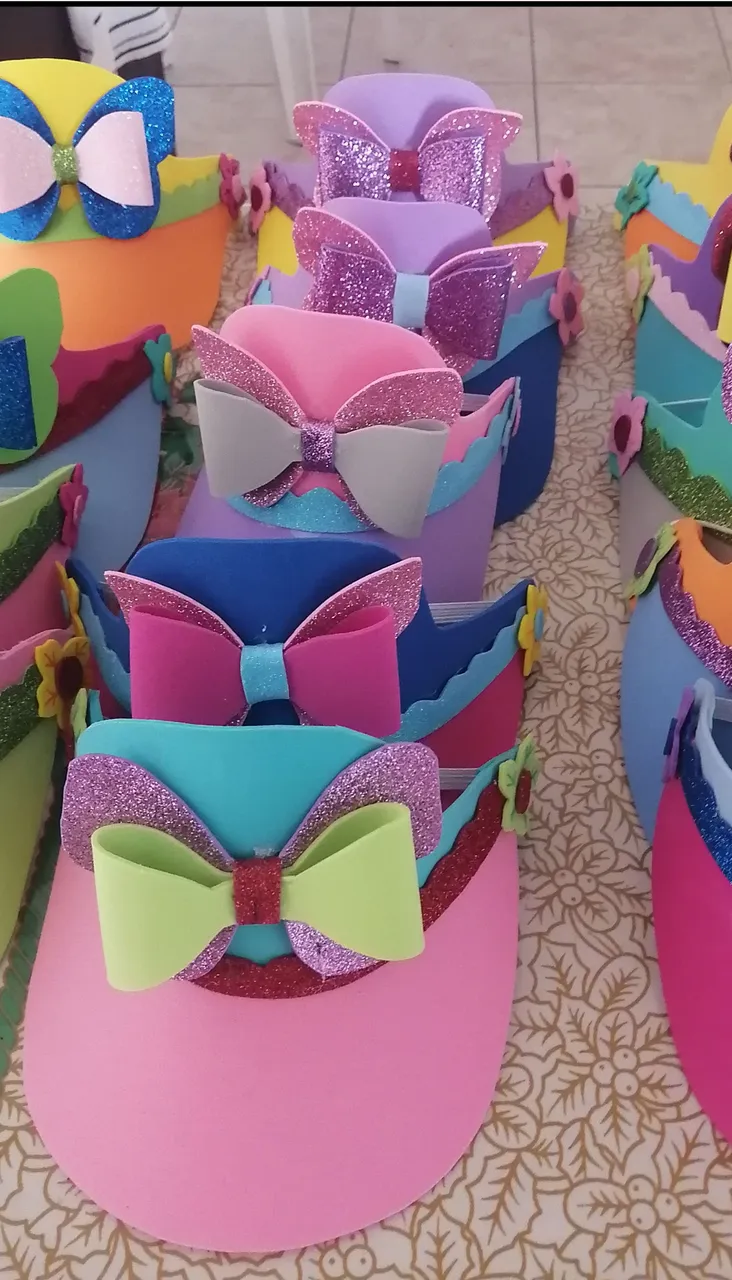
- Producto final > Final product
- Gracias por leer mis publicaciones dios me los bendiga hasta una próxima oportunidad espero que les haya gustado y sea de su total agrado gracias.
Thank you for reading my publications, God bless you until the next opportunity, I hope you liked it and I hope you like it.