Dar formas a nuestras creaciones siempre viene acompañado de una fuerte voluntad de hacer las cosas con amor, como si la creases para uno mismo.
Giving shapes to our creations is always accompanied by a strong will to do things as if you were creating them for yourself.

Hola que tal a todos mis queridos amigos. Es un gustazo para mi saludarles y desearle lo mejor para el día de hoy.
En esta oportunidad les traigo un tutorial de diseño gráfico, sin necesidad de tableta electrónica para elaborar la figura que más nos guste, ya que los contornos lo haremos a mano alzada y utilizaremos el mismo trazo en papel para crear y darle forma a nuestro dibujo.
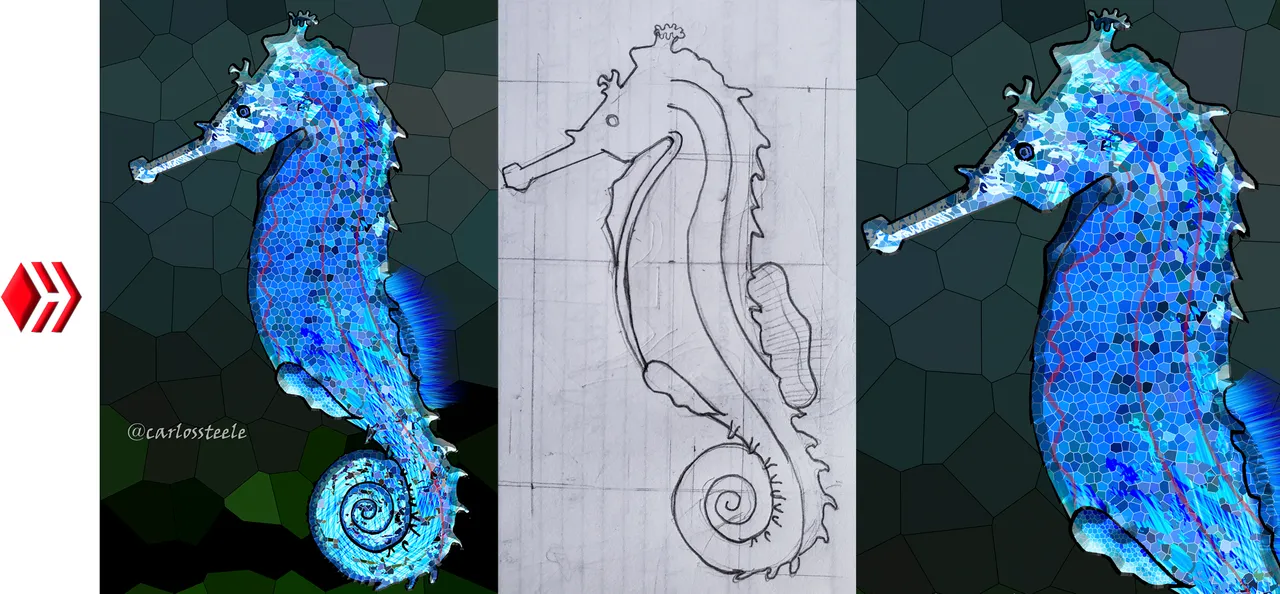
Me inspire en un caballito de mar o por su nombre científico hipocampos, este pez se encuentra en peligro de extinción, y es una verdadera belleza. Siempre en los acuarios que visitaba en los paseos escolares quedaba anonadado por sus colores. Este pez con la cabeza en forma de caballo y con una cola larga y flexible para aferrarse en la vegetación marina, se alimenta en los corales y se camufla con su entorno, me pareció muy interesante investigar sobre el pez en la web antes de inspirarme con esta majestuosa obra de la naturaleza.
Espero sea de su agrado. En la elaboración se me hizo un poco complejo imitar los colores de este bello pez, ya que el nivel de detalle a imitar es un verdadero rompe cabezas, este proyecto se los iba a mostrar un día antes pero no me sentía conforme con lo que veía, es allí donde entra mi cita inicial, si no te gusta porque sabes que en otra oportunidad lo podrás mejorar, espera tu momento en que vuelva la inspiración y veras tu resultado, en mi caso me gusto lo que vi, y me pareció digno mostrárselos.
Comenzamos:
Para el dibujo a mano alzada; Utilice una libreta, hoja reciclada blanca, lápiz, borrador.
Para el dibujo digital; Capturamos el dibujo en el papel con una cámara de teléfono y transfiriendo el archivo al ordenador y posteriormente editándolo con Photoshop o cualquier otro editor de su preferencia.
Hello how are you all my dear friends. It is a pleasure for me to greet you and wish you the best for today.
This time I bring you a graphic design tutorial, without the need for an electronic tablet to create the figure that we like the most, since we will do the contours freehand and we will use the same line on paper to create and shape our drawing.
I was inspired by a seahorse or by its scientific name seahorses, this fish is in danger of extinction, and it is a true beauty. Always in the aquariums he visited on school outings he was stunned by their colors. This fish with a horse-shaped head and a long flexible tail to cling to marine vegetation, feeds on corals and camouflages itself with its surroundings, I found it very interesting to research the fish on the web before being inspired by this majestic work of nature.
I hope you like it. In the elaboration it was a bit complex for me to imitate the colors of this beautiful fish, since the level of detail to imitate is a real puzzle, this project was going to show them a day before but I did not feel satisfied with what I saw , that's where my initial quote comes in, if you don't like it because you know that in another opportunity you can improve it, wait for your moment when inspiration returns and you will see your result, in my case I liked what I saw, and it seemed worth showing them to you.
We start:
For freehand drawing; Use a notebook, recycled white sheet, pencil, eraser.
For digital drawing; We capture the drawing on paper with a phone camera and transferring the file to the computer and later editing it with Photoshop or any other editor of your choice.
Pasos de elaboración:
Preparation steps:
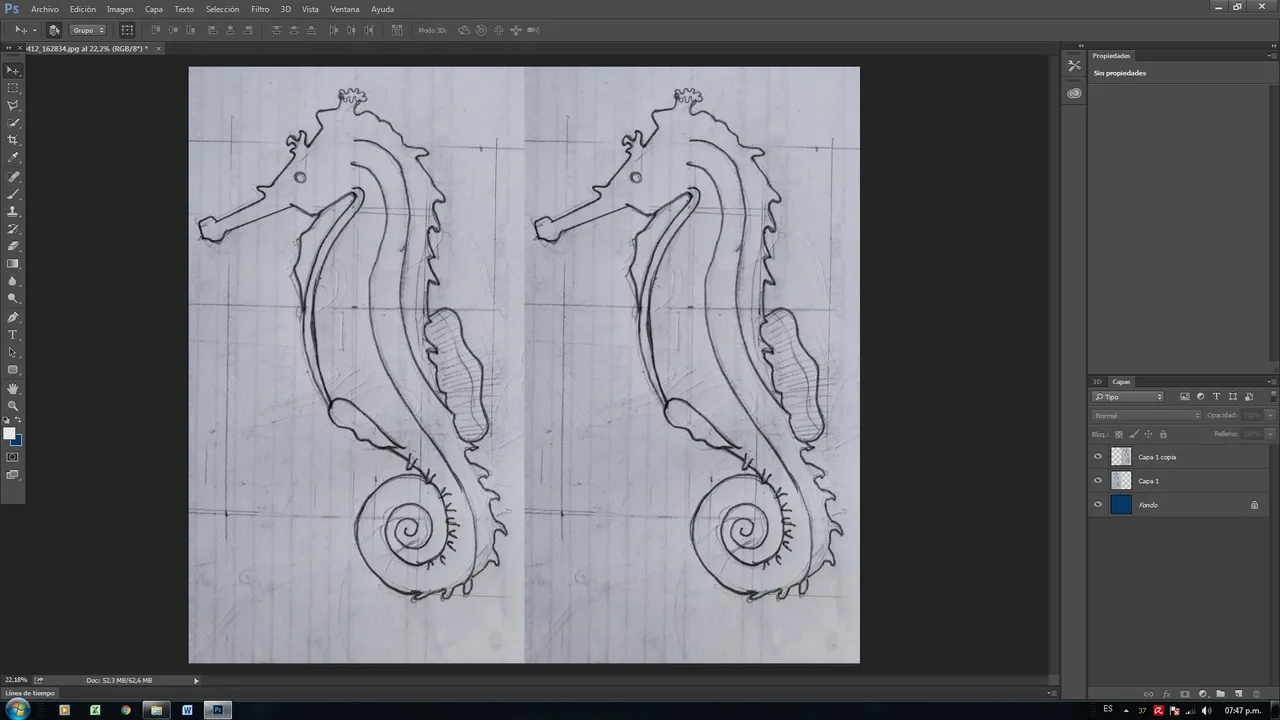
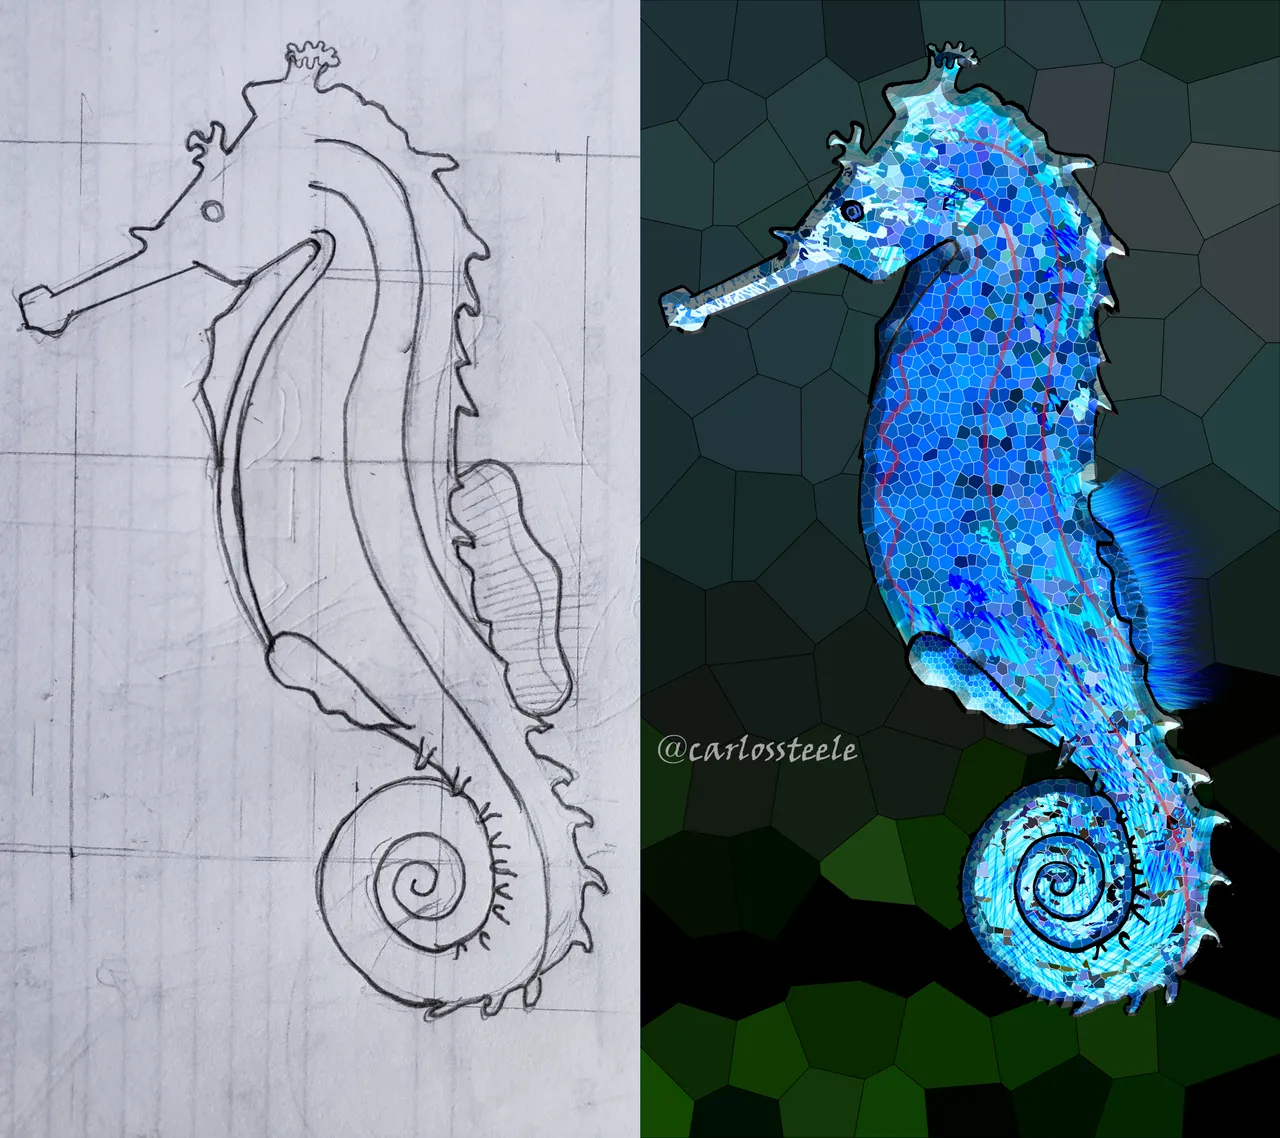
Antes de comenzar a plasmar mi dibujo, investigue un poco sobre las dimensiones del pez, y todas sus características, así tengo noción de cómo crear una imagen de lo que quiero mostrar, en este caso quise representar en su mejor postura y temple.
Estimando sus dimensiones con una escuadra y lápiz, trazo y corrijo antes de subirlo al editor.
Before starting to capture my drawing, I did some research on the dimensions of the fish, and all its characteristics, so I have a notion of how to create an image of what I want to show, in this case I wanted to represent it in its best posture and temper.
Estimating its dimensions with a square and pencil, I trace and correct it before uploading it to the editor.

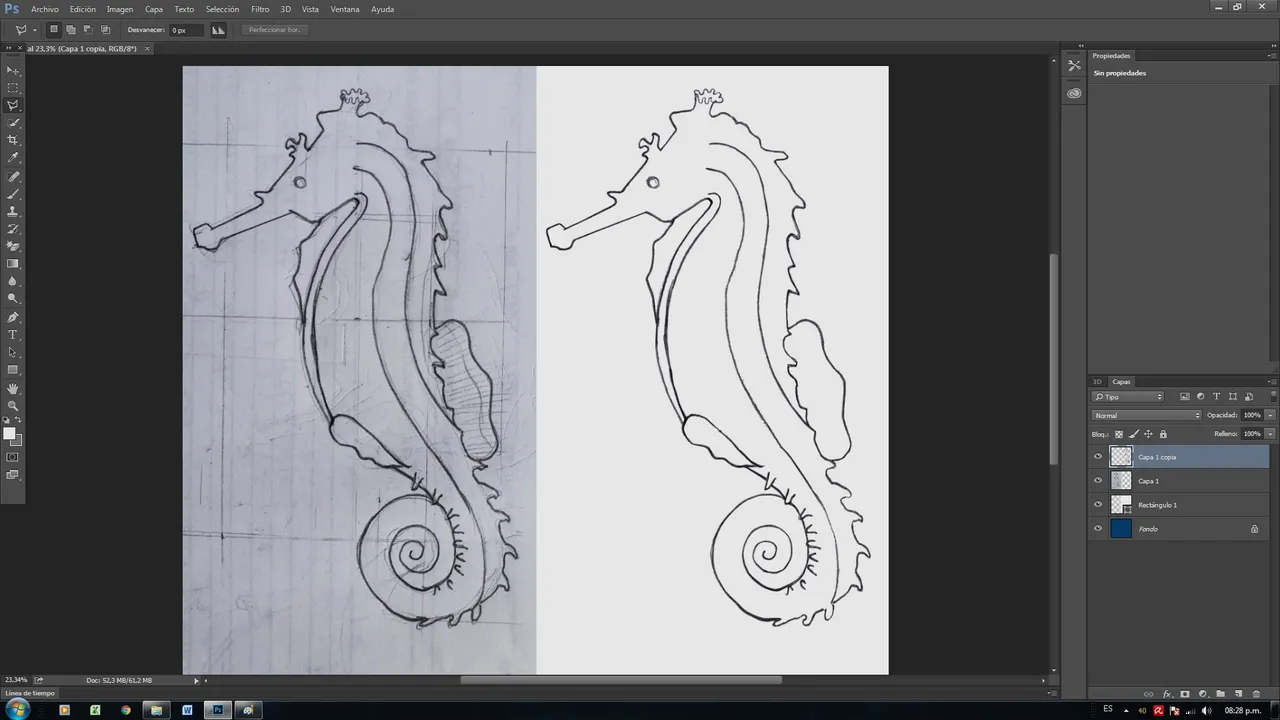
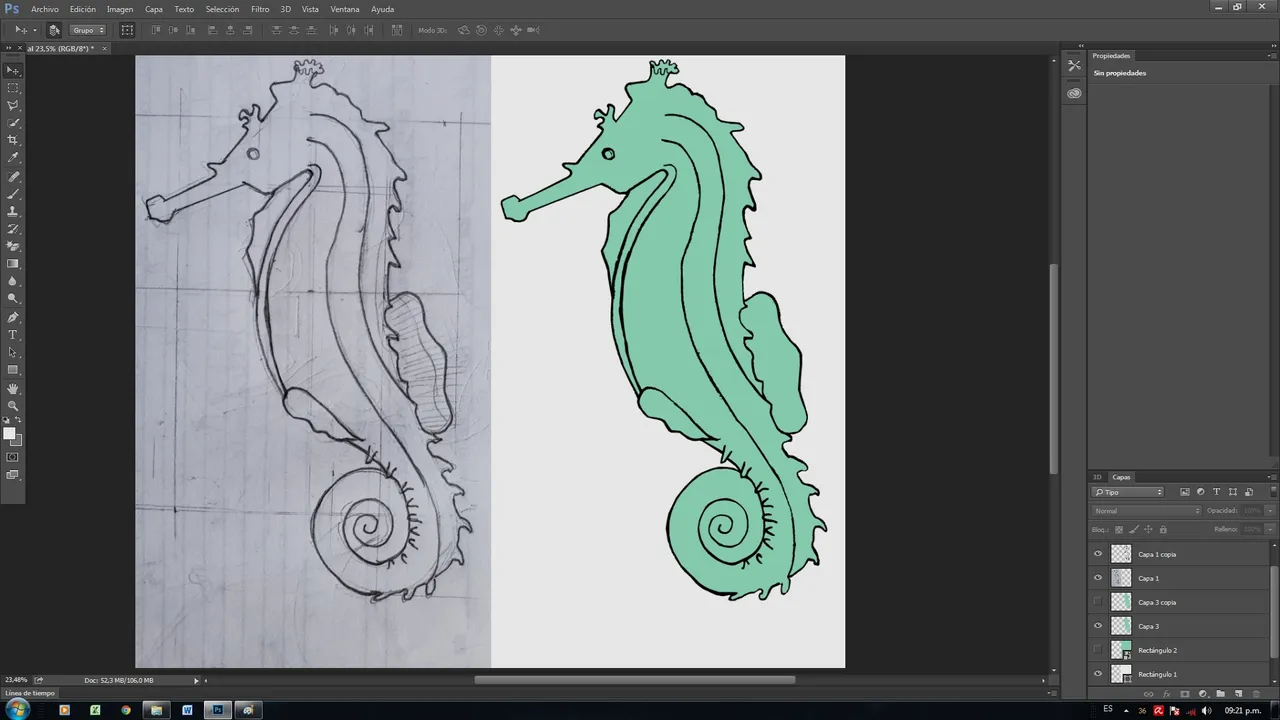
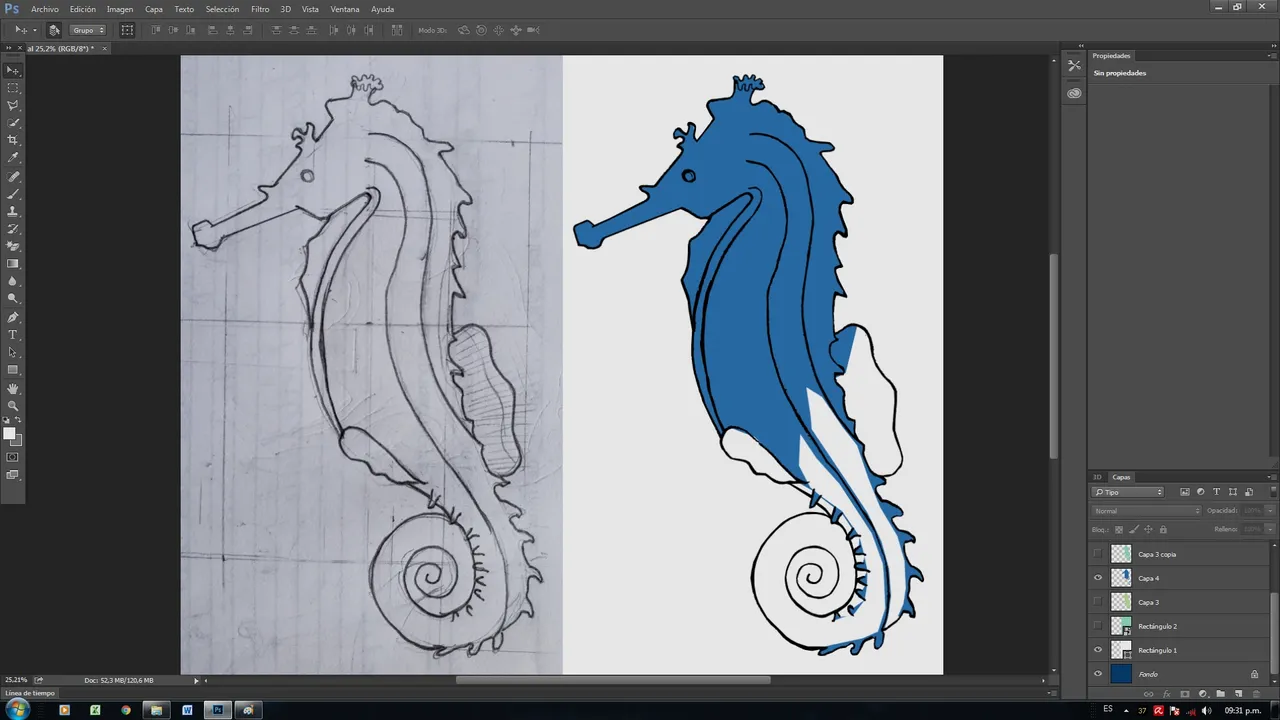
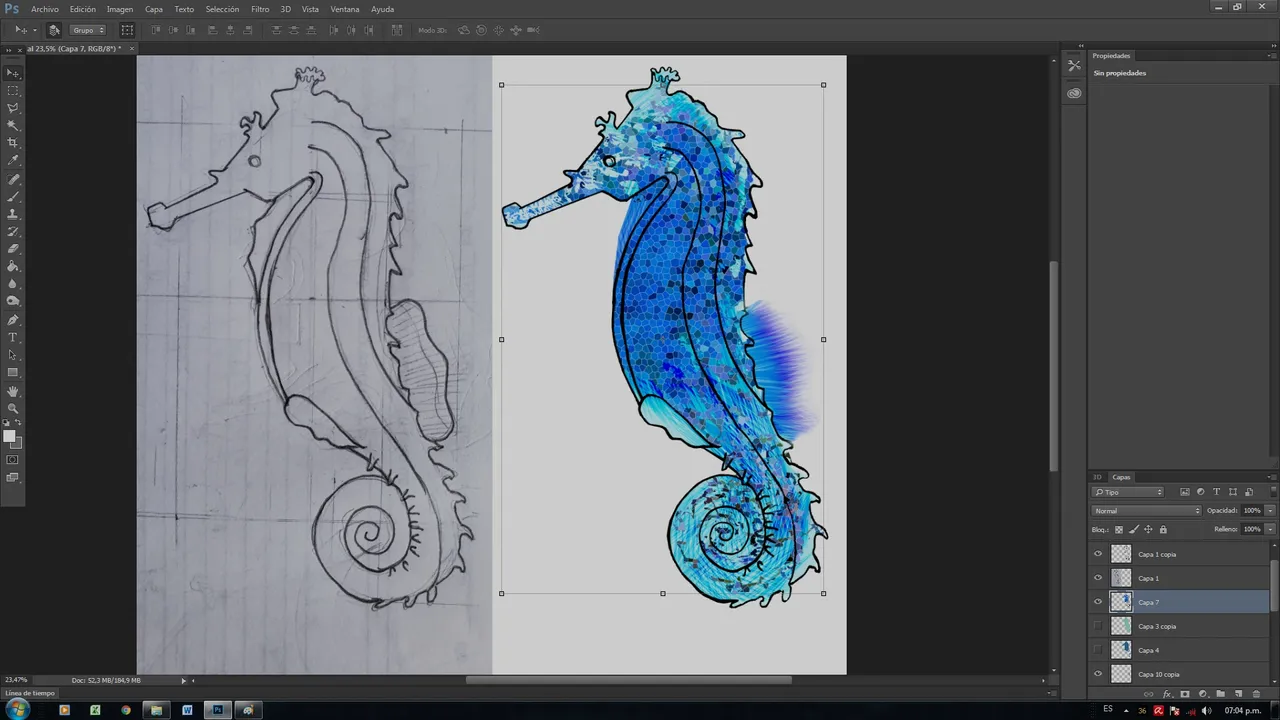
Hago una copia, para mostrar el avance del dibujo, y comienzo a extraer las líneas en grafito con la herramienta de corte poligonal, para luego oscurecer las líneas.
Coloco mis paletas de colores según considere utilizar y hago los cortes dándole forma según la línea del dibujo
I make a copy, to show the progress of the drawing, and start drawing the lines in graphite with the polygon cutter, then darken the lines.
I place my color palettes as I consider using and I make the cuts giving it shape according to the line of the drawing.
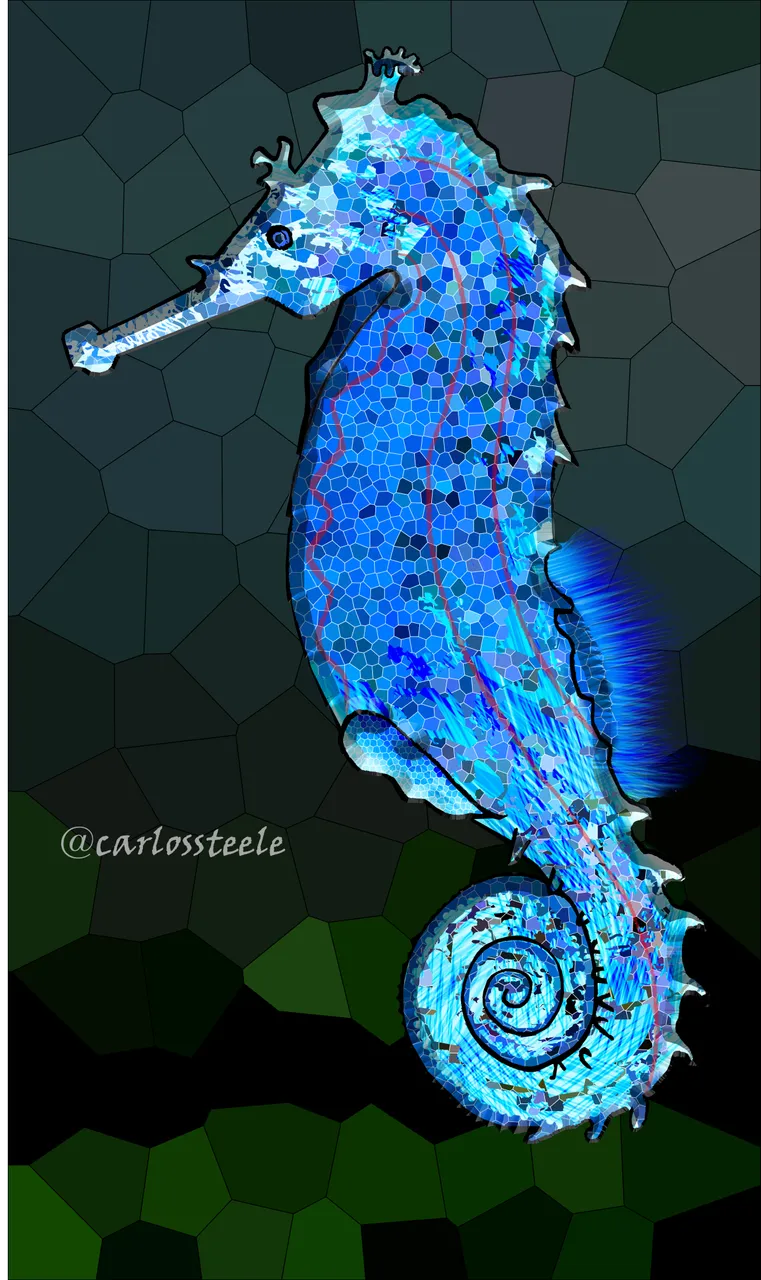
Para imitar ese aspecto irrepetible en la piel del pez, les comento que tuve que hacer muchas pruebas hasta dar con la que realmente me convenció, en la superficie azul realice un texturizado con la herramienta licuar / galería de filtros / texturizar granulado, luego con el borrador mágico comencé a darle toques espaciados para que fuera dejando espacios en blanco, esto con la finalidad de imitar la piel o la textura del pez.
To imitate that unrepeatable aspect in the skin of the fish, I tell you that I had to do many tests until I found the one that really convinced me, on the blue surface I made a texturing with the liquify tool / filter gallery / grainy texture, then with the magic eraser I began to give it spaced touches so that it was leaving blank spaces, this with the purpose of imitating the skin or the texture of the fish.
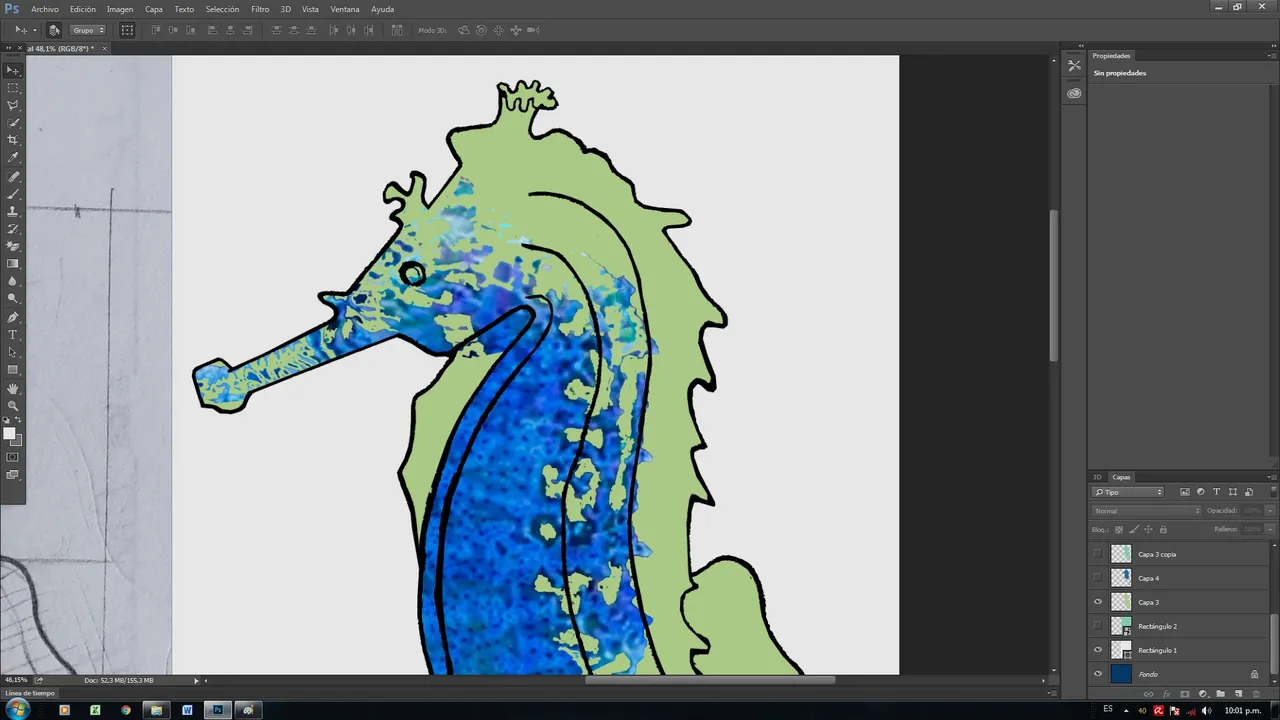
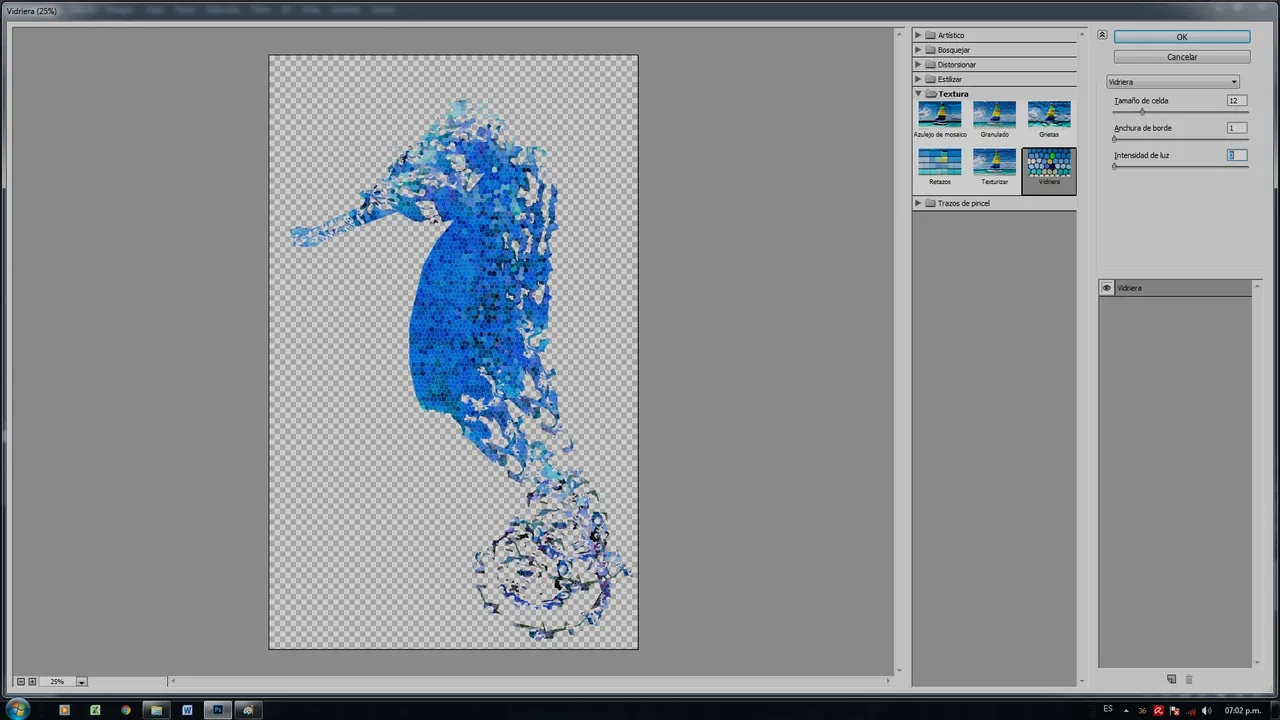
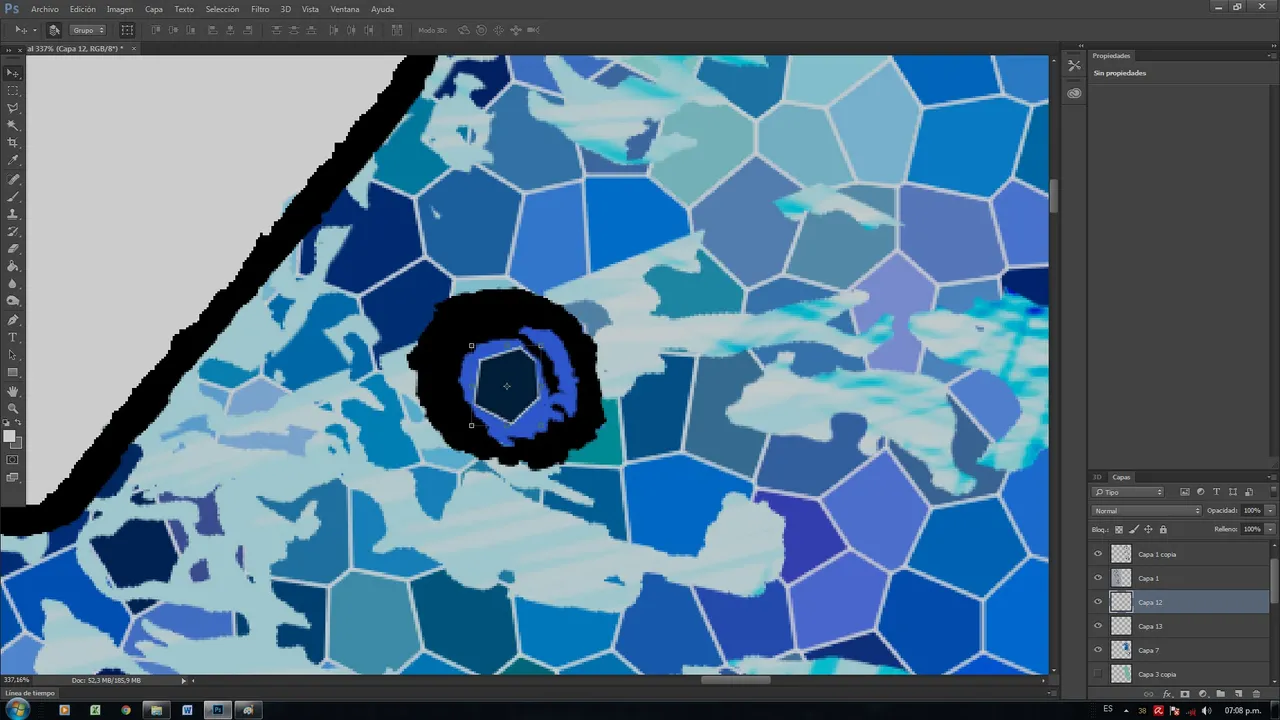
Seguidamente la capa texturizada la someto a un cambio de forma con la herramienta licuar / cristalizar. Decidí colocar en los ojos un fragmento de este efecto cristalizado.
Next, I subjected the textured layer to a change of shape with the liquify / crystallize tool.
I decided to place a fragment of this crystallized effect on the eyes.

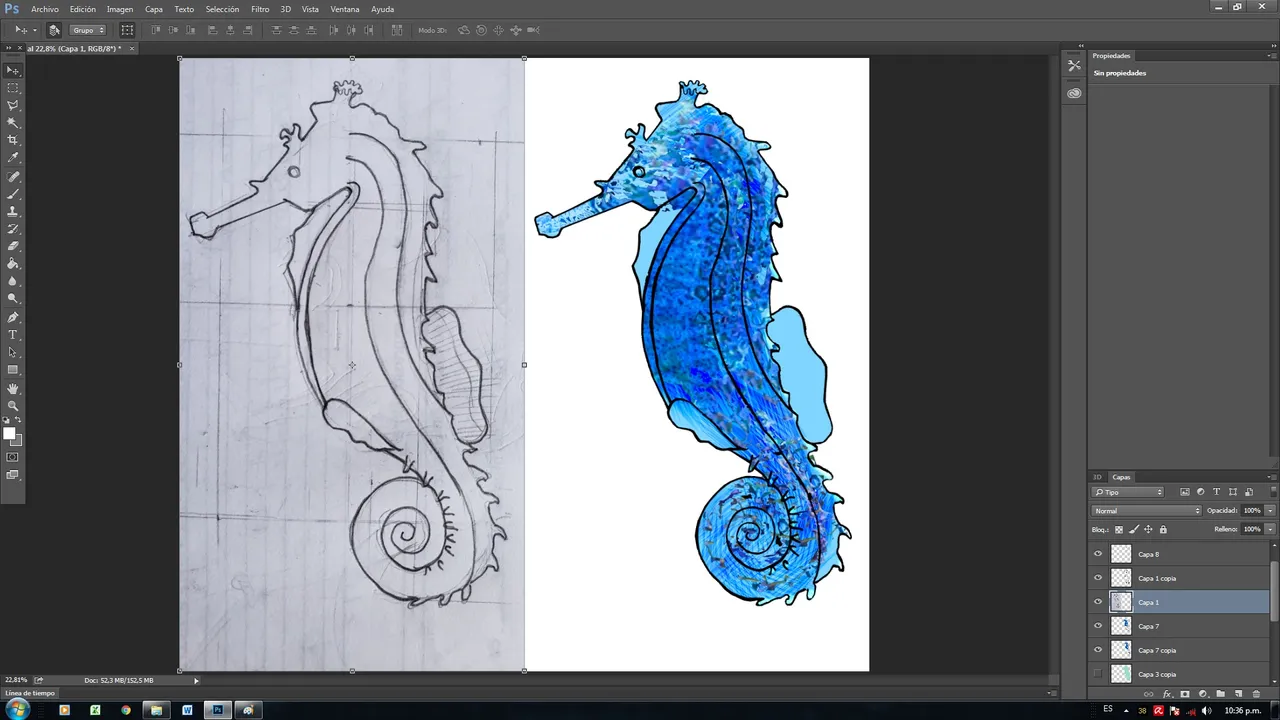
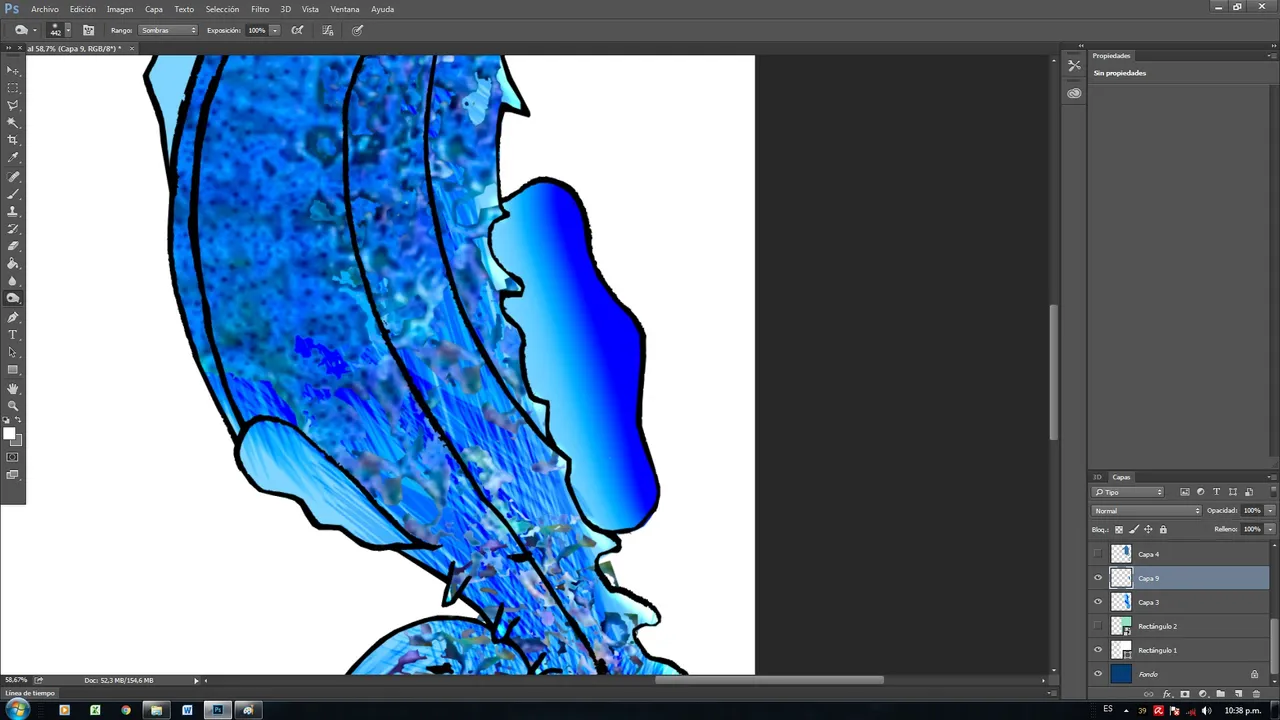
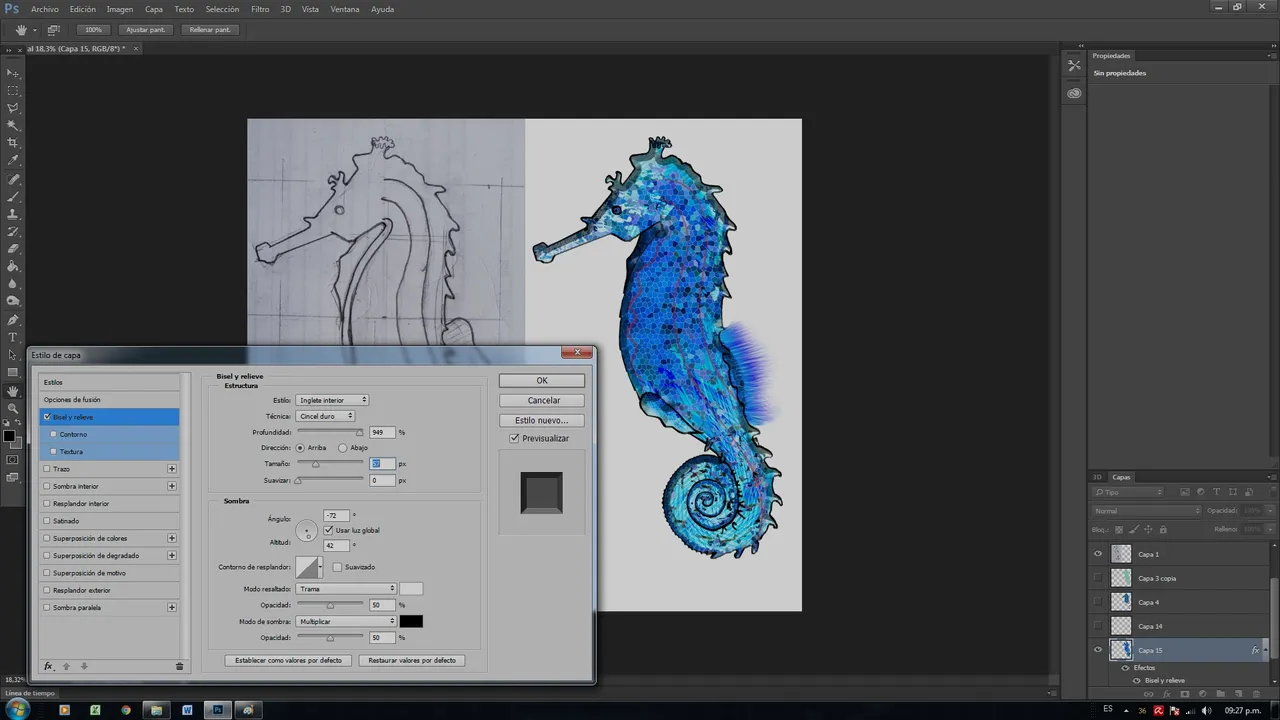
Para finalizar a toda la estructura del dibujo la convertí en una sola capa, y aplique difusión en los bordes con cincel duro a criterio, dándole ese efecto 3D con relieve dramático.
To finish the entire structure of the drawing, I turned it into a single layer, and diffused the edges with a hard chisel as desired, giving it that 3D effect with dramatic relief.
Feliz día para todos, espero la pasen bonito con los suyos, se les quiere, bendiciones.
Happy day to all, I hope you have a nice time with yours, you love them, blessings.