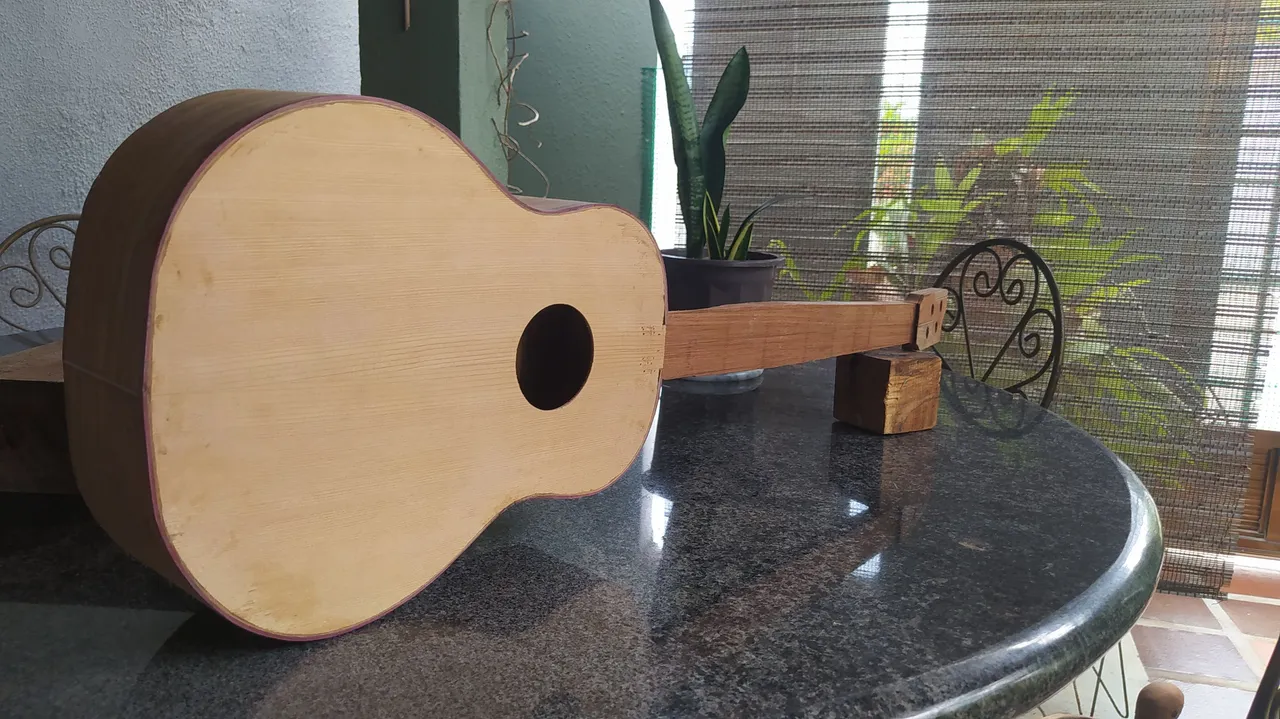
My first concert type instrument. I have named it "El Chocolate".

Welcome back to Woodworking Wednesdays. There's been a lot of developments in projects around here. Today, well see some of the work on my first concert type instrument. I'm excited to show how it is going and can't wait to listen to its first sounds!
Sound Board
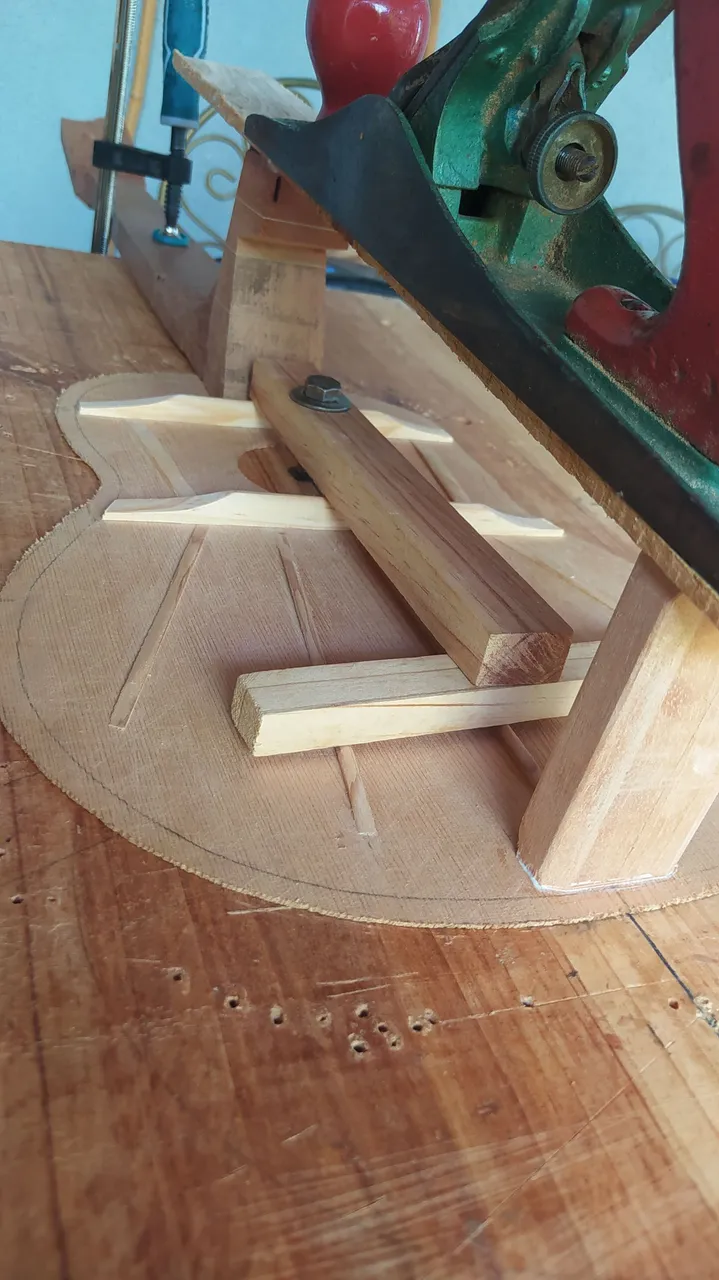
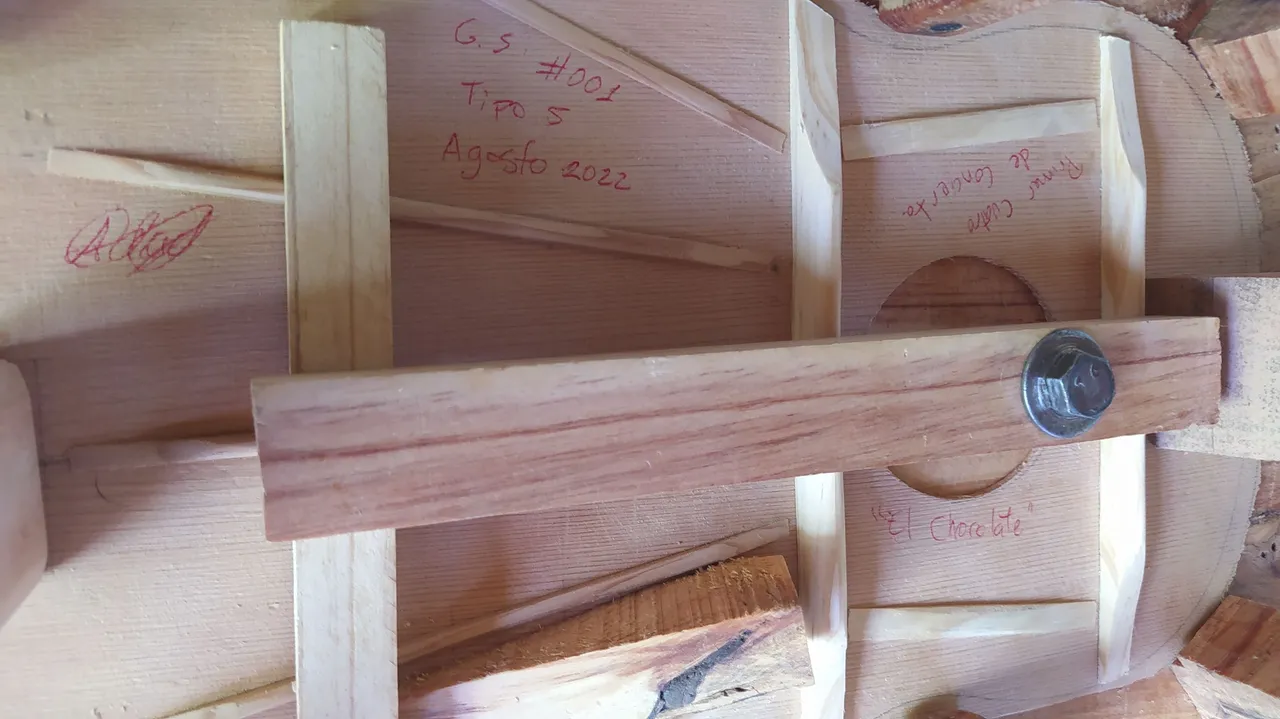
We start with the soul of the project. The sound board is responsible for the quality of th sound in any strings instrument. On this project, I got some Red Cedar (thija plicata). I have listened to a lot of instruments made with tops of this wood and think it is an interesting choice for an instrument without bass like a Venezuelan Cuatro. It will give a deep and rich nature to the instrument's timbre. Thus the name, "El Chocolate" (the chocolate)
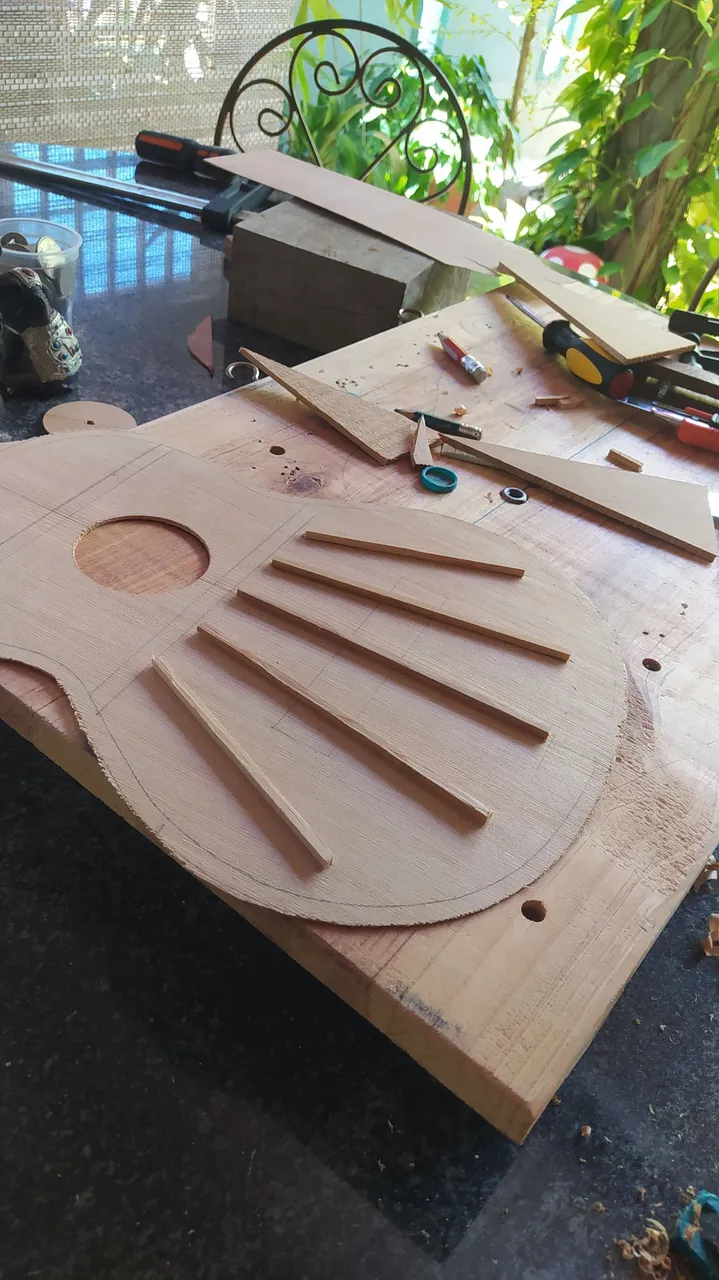
I went to an old strut display. To be honest, having so many struts isn't ideal for such a small instrument. However, there are give plus a reinforcement because I'm working with a thin top. We are somewhere around 1.3 - 1.2 millimeters. Red Cedar is really flexible with ways, vertical and horizontal, thus we need to ensure the sound board won't be deformed by the tension of the strings.
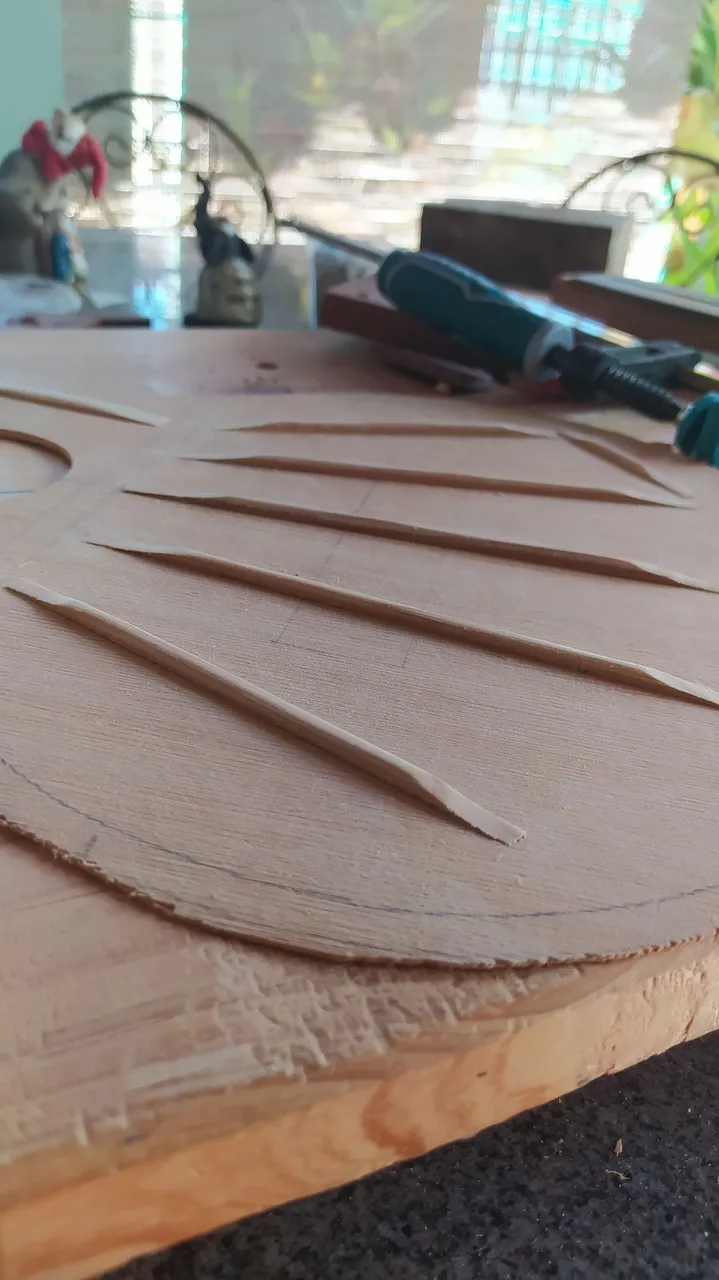
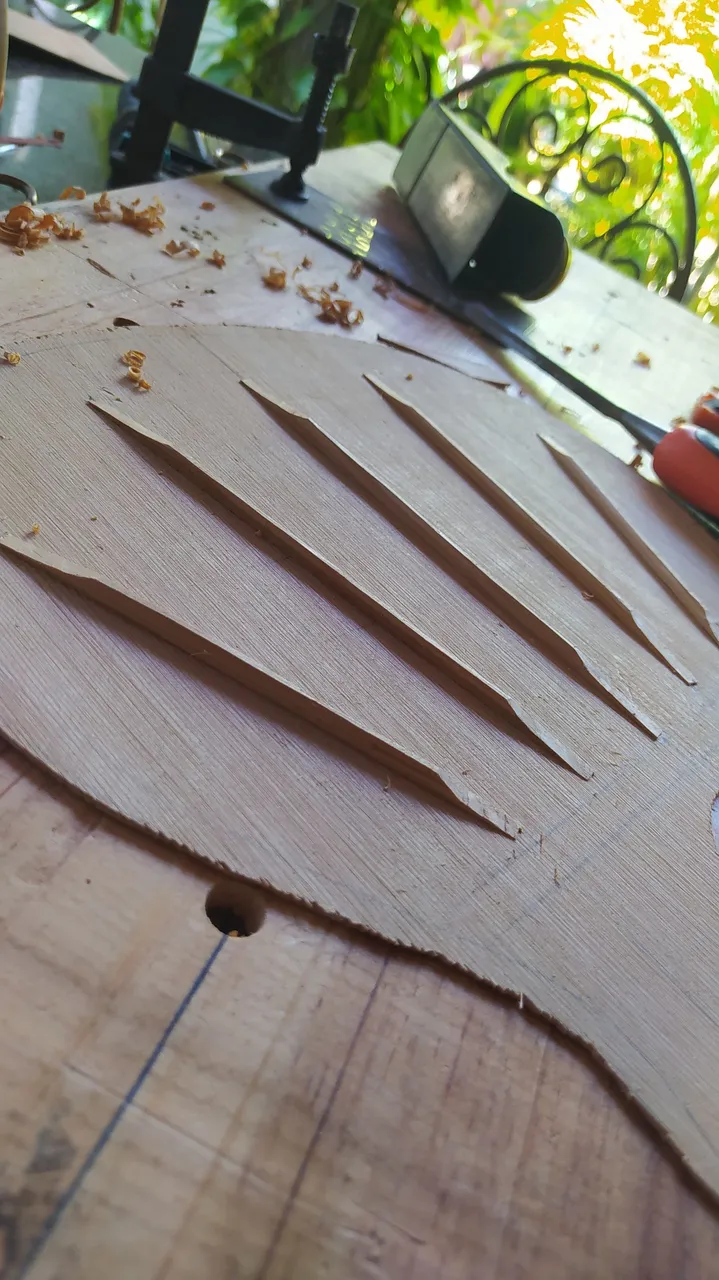
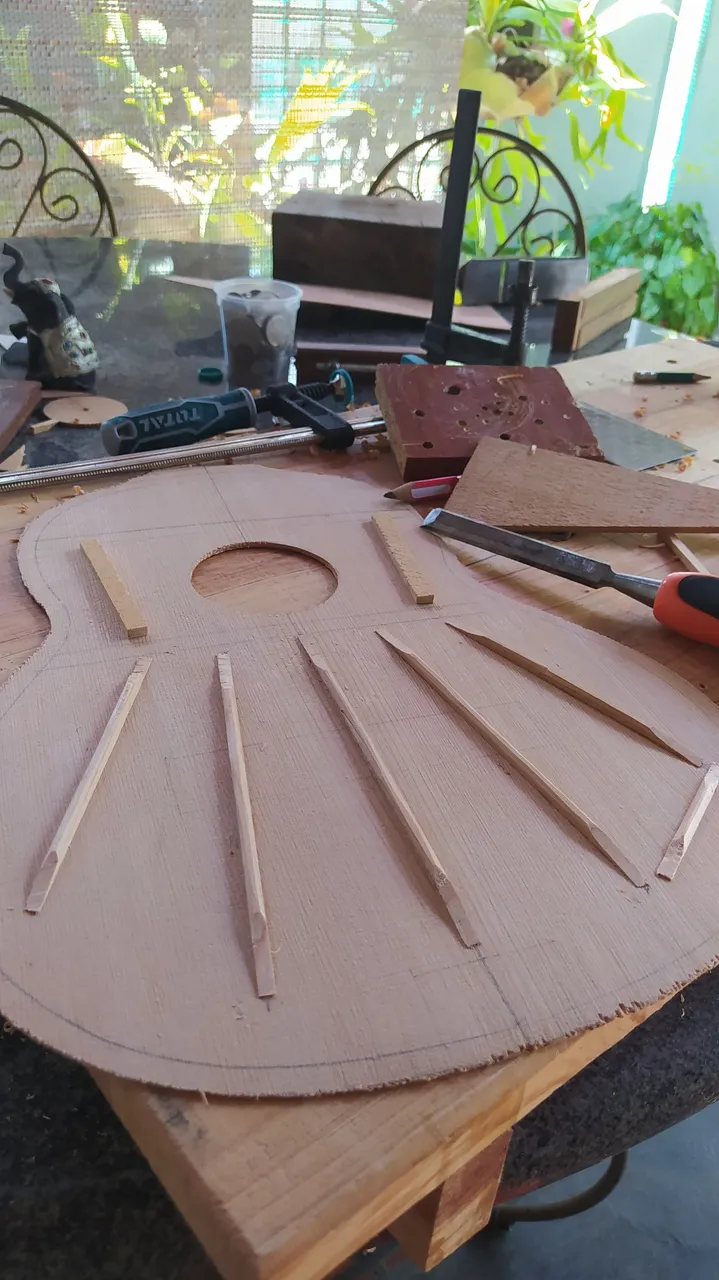
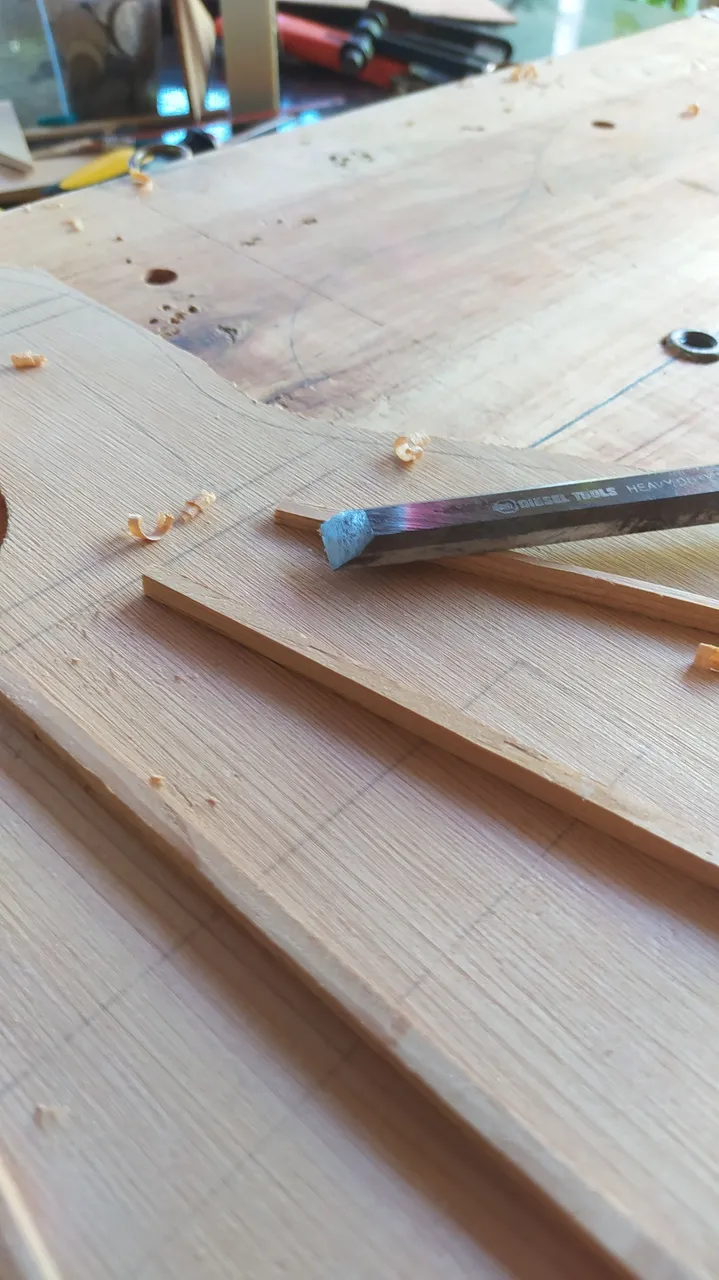
While voicing the top, we remove material from the struts to get to the desired sound. We shouldn't remove too much material from the middle strut since it's the one reinforcing the joint between the two pieces of wood that make up the sound board.
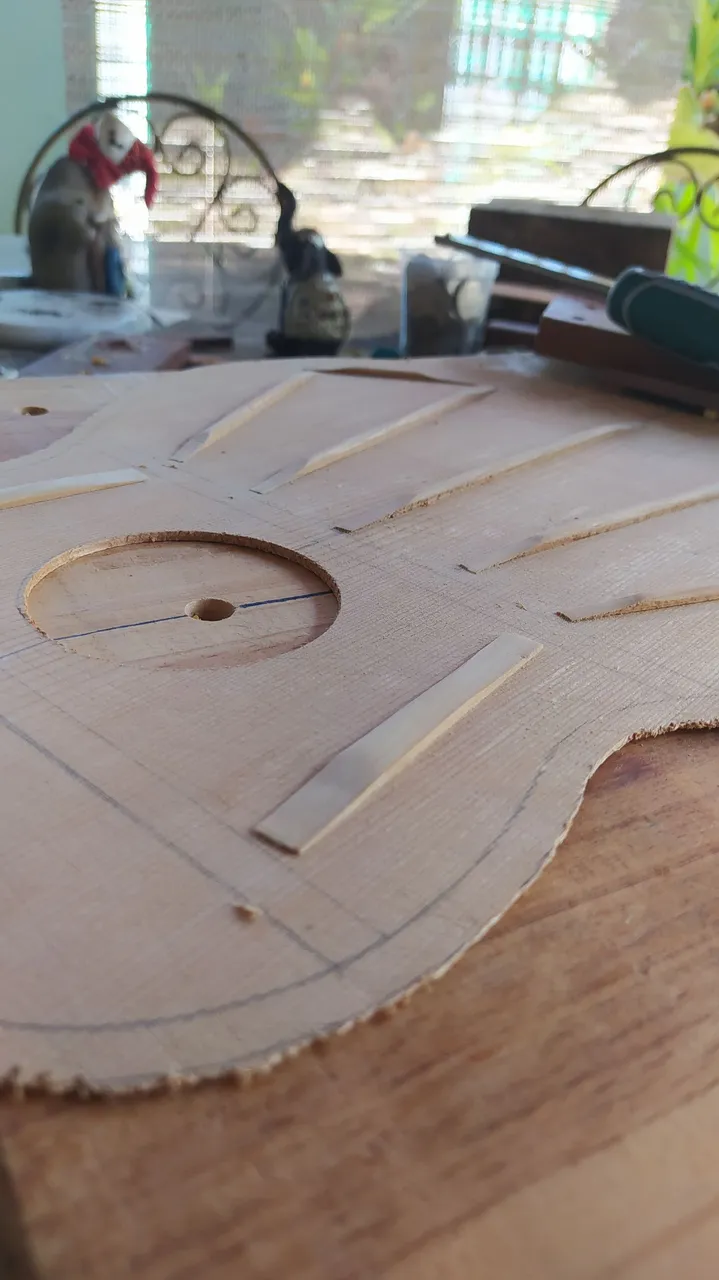
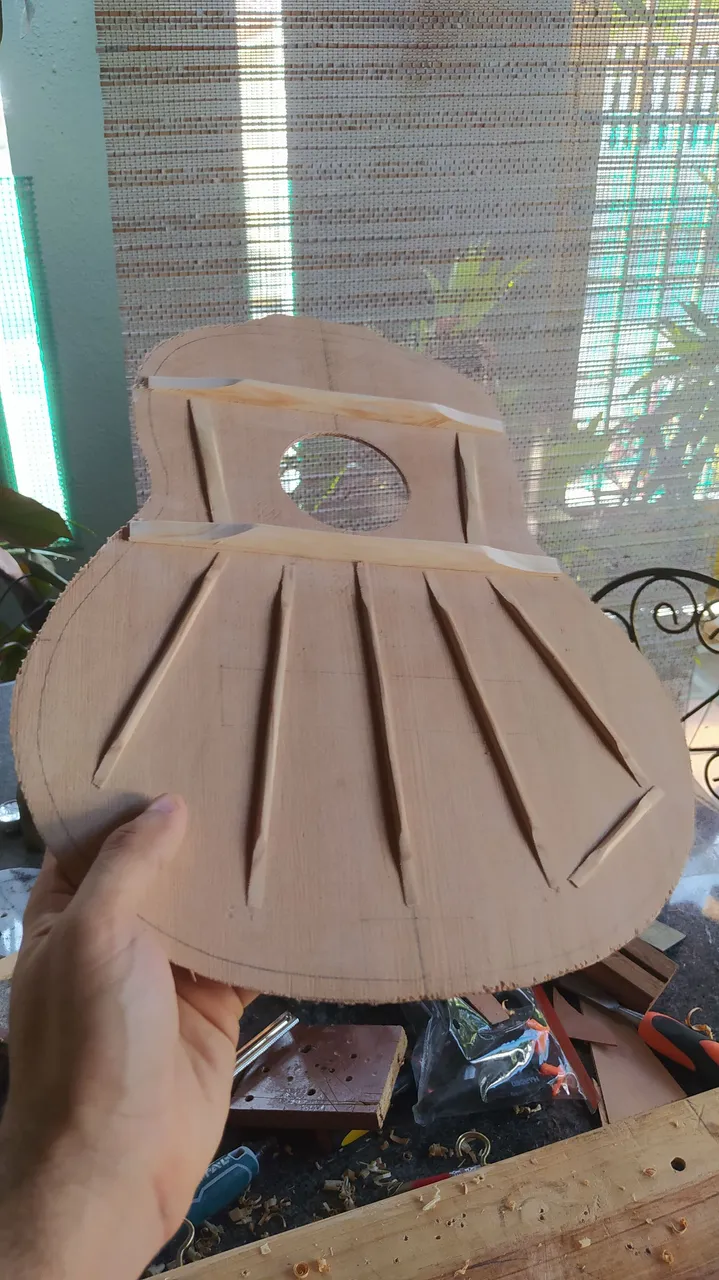
Once we have the rest of the reinforcements in peace, we can go ahead and carve them and sand everything to make it look smooth!
Assembly
If you're wondering when did I make the rest of the parts to assemble this one, you can go over here to recap. There's more about this and another project here. What can I say? I've been busy this year!
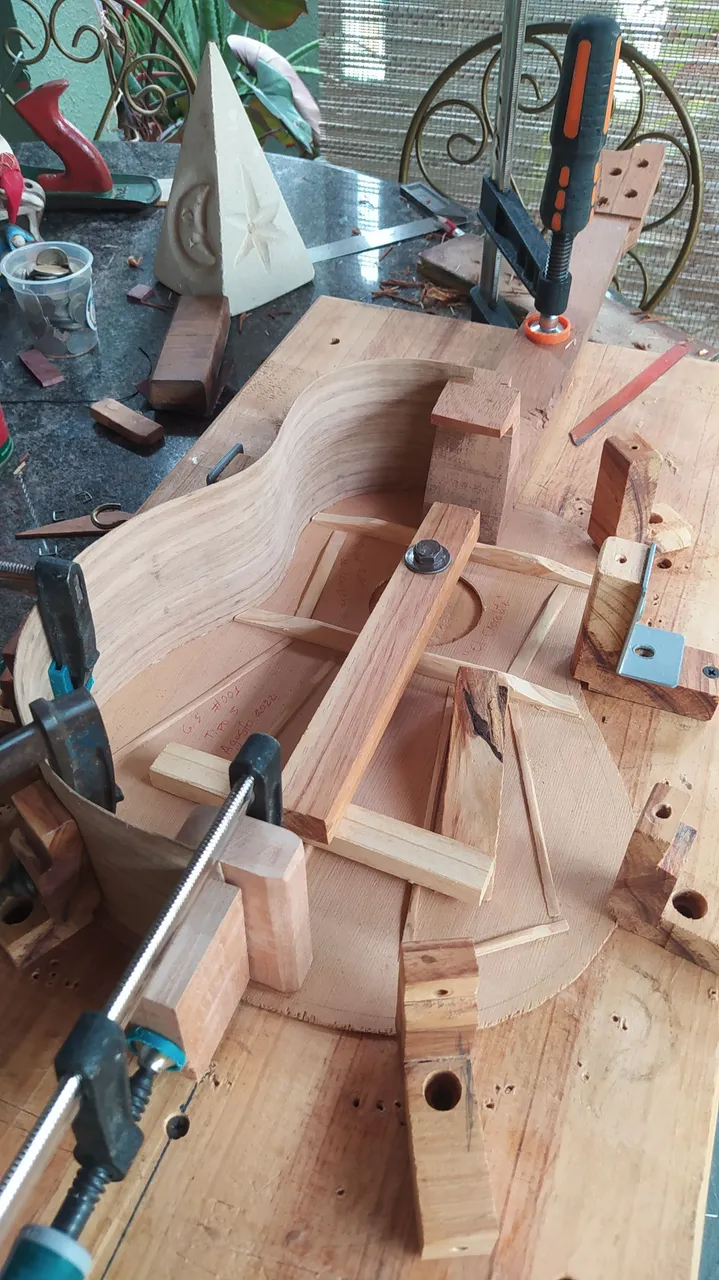
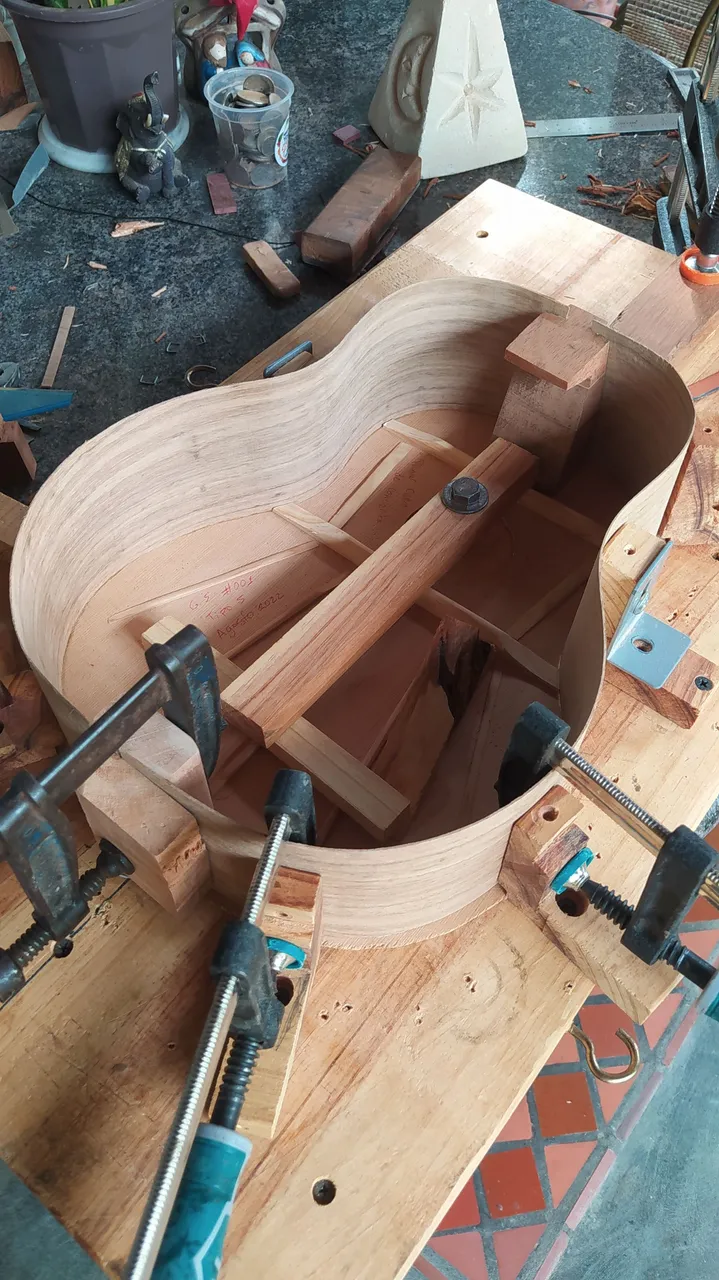
So, this one is going on the mould. All ready for assembly.
Ah, the beauty of having made a lot of work ahead of time.
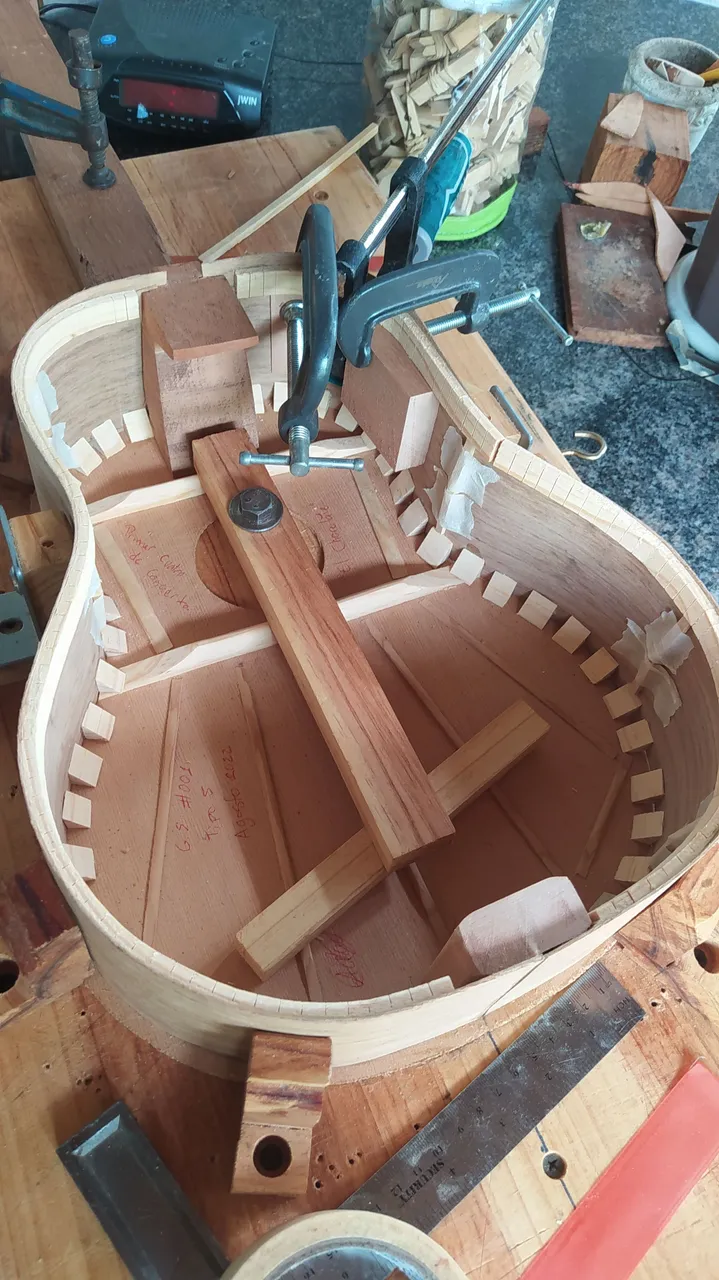
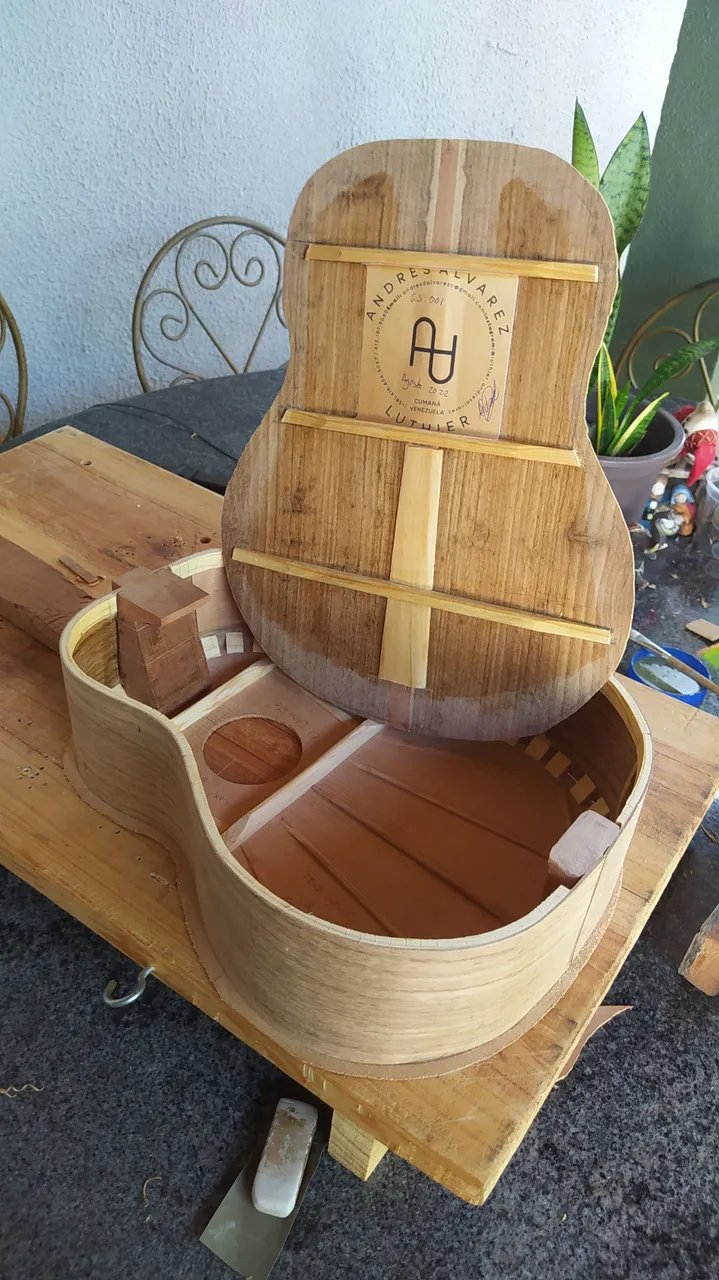
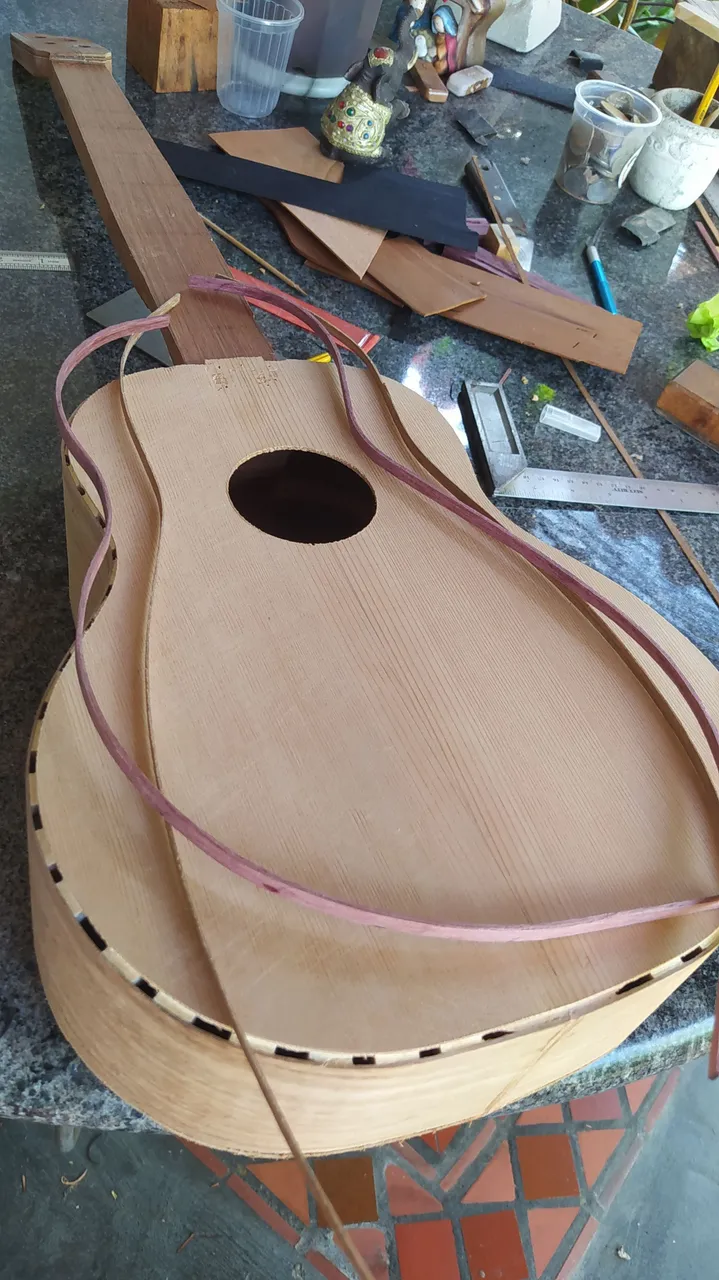
We start with the end block on the sound board. This is where all the pieces will come together. Once we have fixed the top with the neck, we are on with the assembly process. We take a quick time to sign the instrument and we press of with the build.
Sides
I'm using a beautiful national wood called Pardillo. The scientific name of the spices is Cordia Alliodora. It is an easy wood to work that is somehow related to bay leaves. I say this because it has a similar aroma. It has a pale brown color and a beautiful grain.
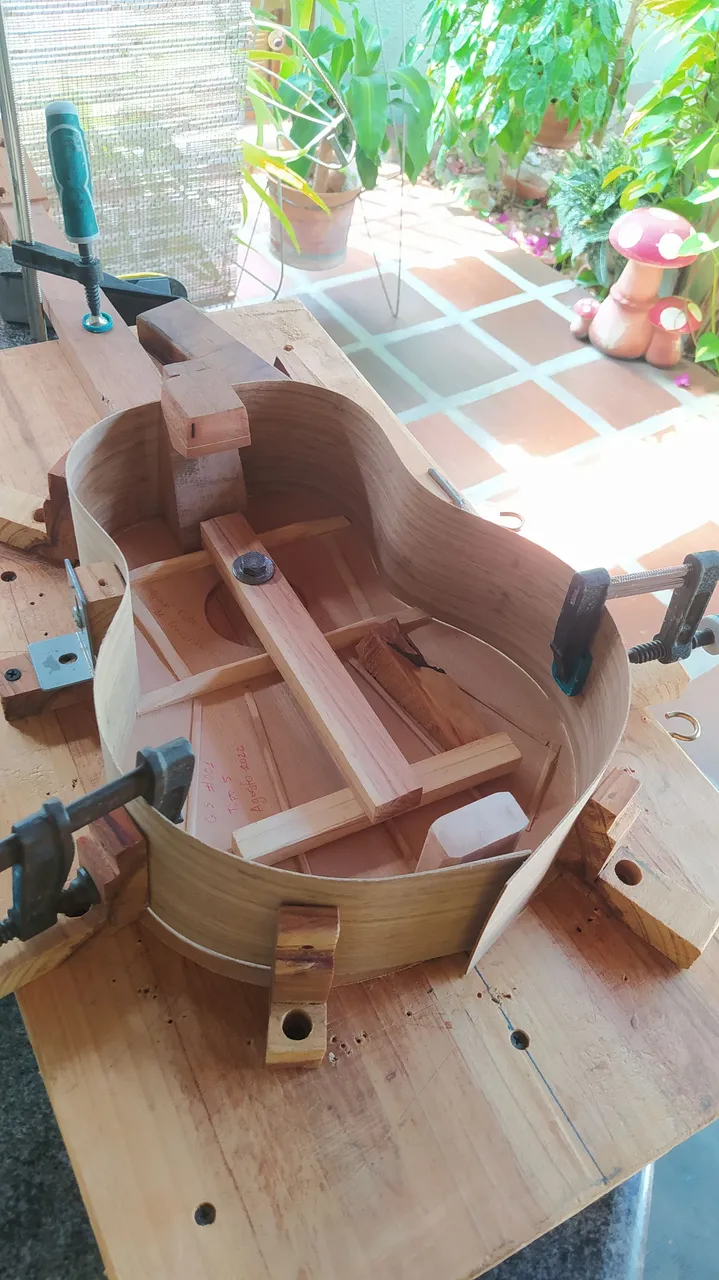
After bending the sides, we make sure to trim them to the desires length. Then we glue them to the sound board using clamps. One side at a time, as to make sure each piece glues properly. With them into place we can move on to the internal reinforcements.
Reinforcements
We are using two kind of kerfing here. First, the wedged for the sound board and a complete kerfing for the back. These reinforcements are here to see sure the top and sides are bound. The same thing for the back and sides. The last reinforcements in the interior are to reinforce the sides themselves and extra one to make a monitor for the player.
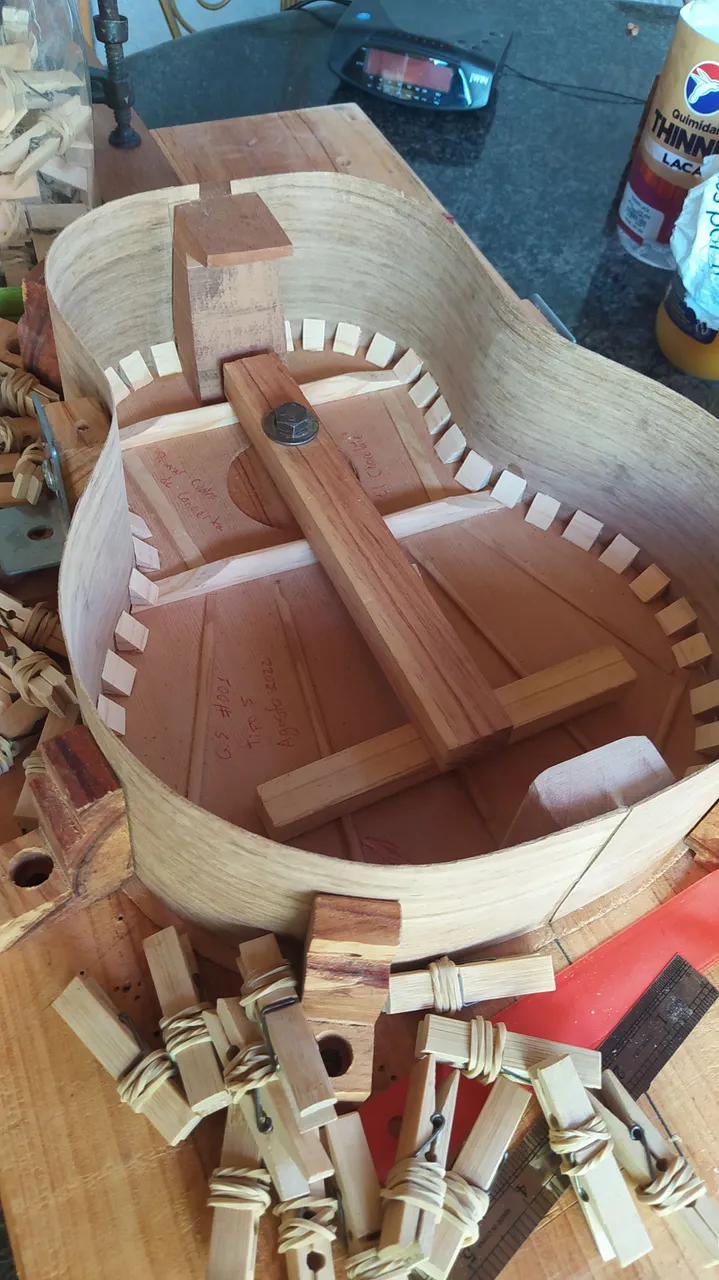
With all these pieces in place we only have to take the extra step of trimming the sides to fit the back. This instrument has a rounded back with a 6000mm radius. After this is done we can finally close it.
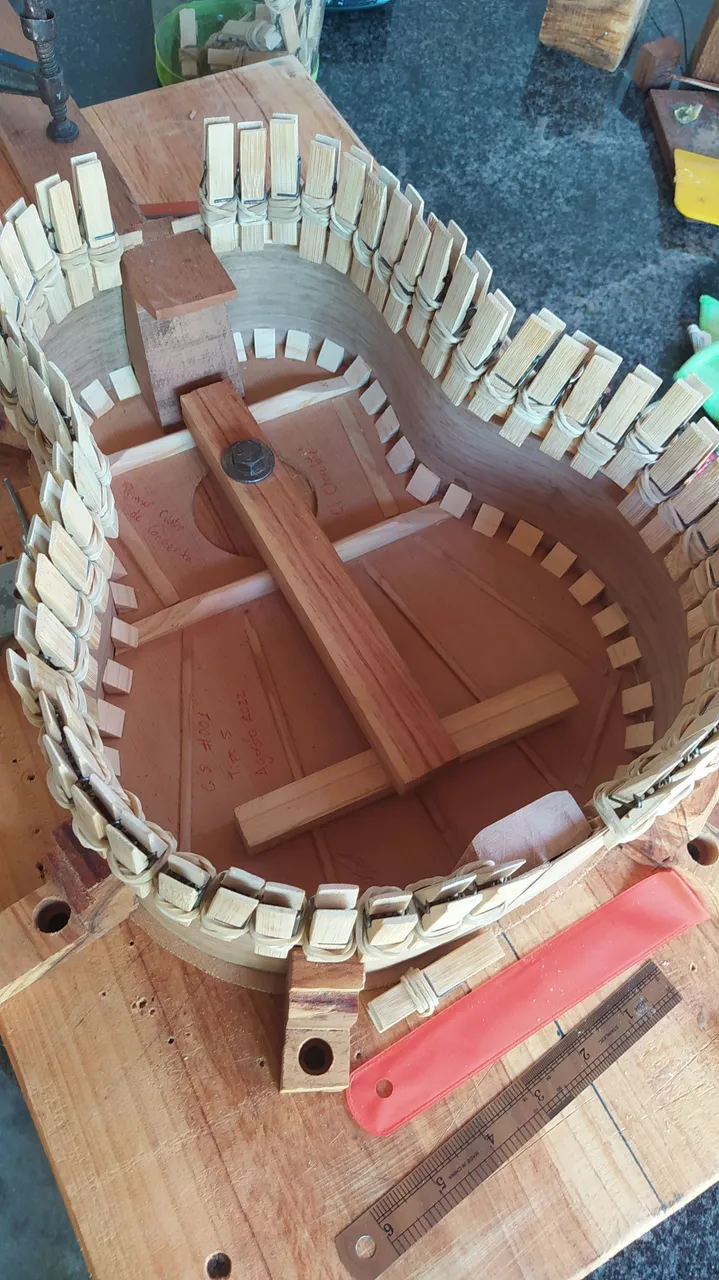
Closing up
Before doing all the rubber binding, I too some time to see this. It is a thing of beauty. I'll never be making my first concerts instrument again, so I'm savoring the moment.
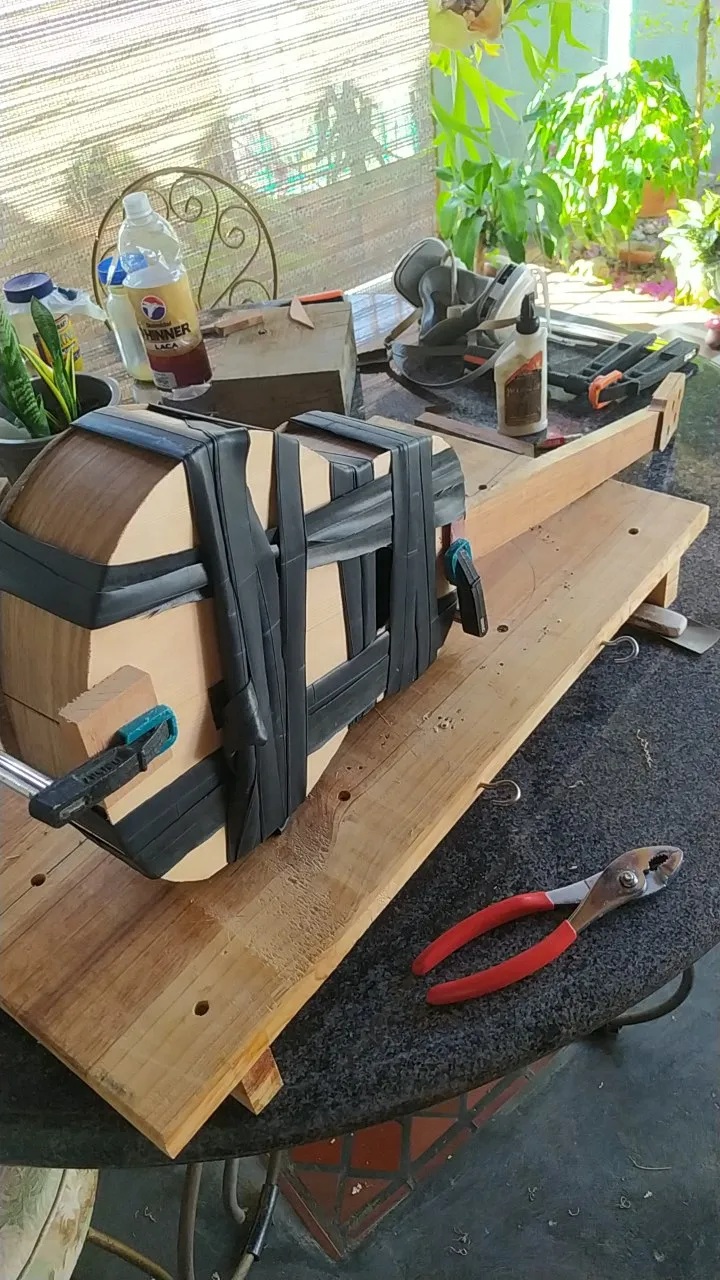
Now we just need to wait until the glue settles so we can move on and keep up with the project.
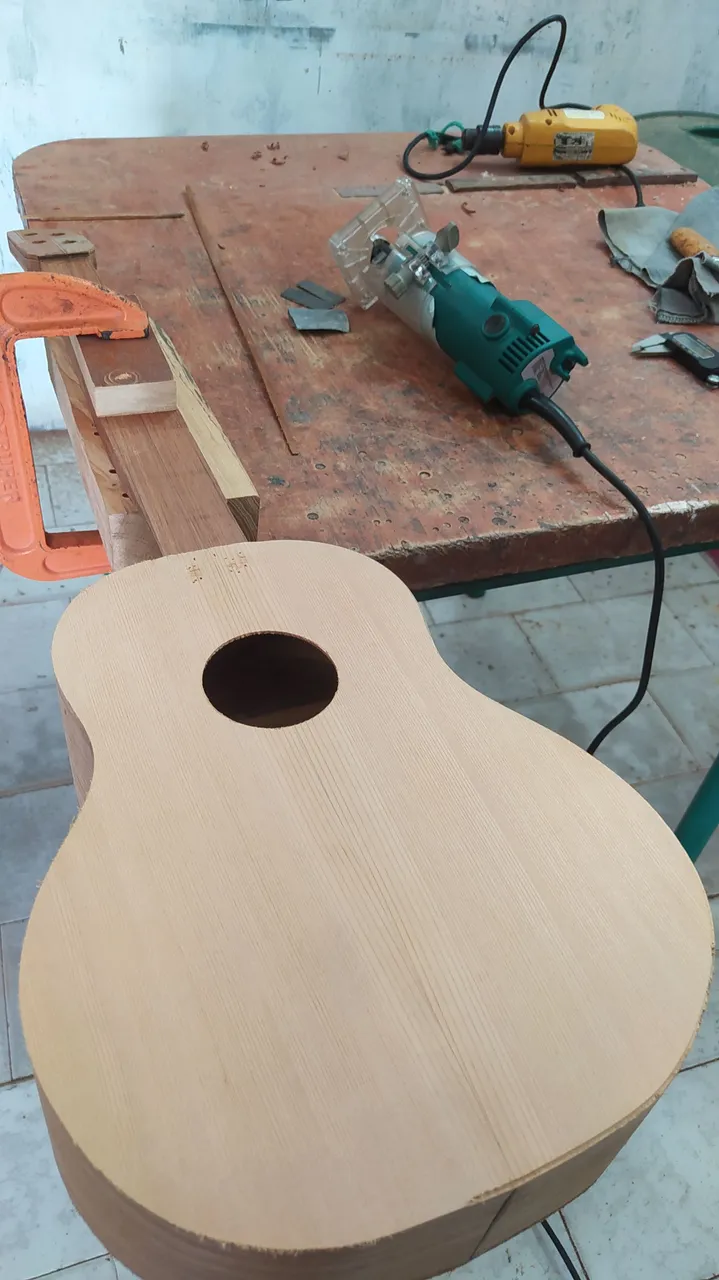
Bindings and Purflings
These are some of the ornaments that need a tons of skill. You need to trim a section of the sound board in order to place them. You can use anything you want to make both purflings and bindings. The rule of thumb would be to use a softer material for the binding (the inner strip) and a harder one for the purfling (outer strip). How you combine these depend entirely on aesthetics values of each person or a color scheme of the instrument.
I got some help back at my teacher's workshop to do this part. But this is the easy thing. The good part went on back home for the installation of these strips of wood.
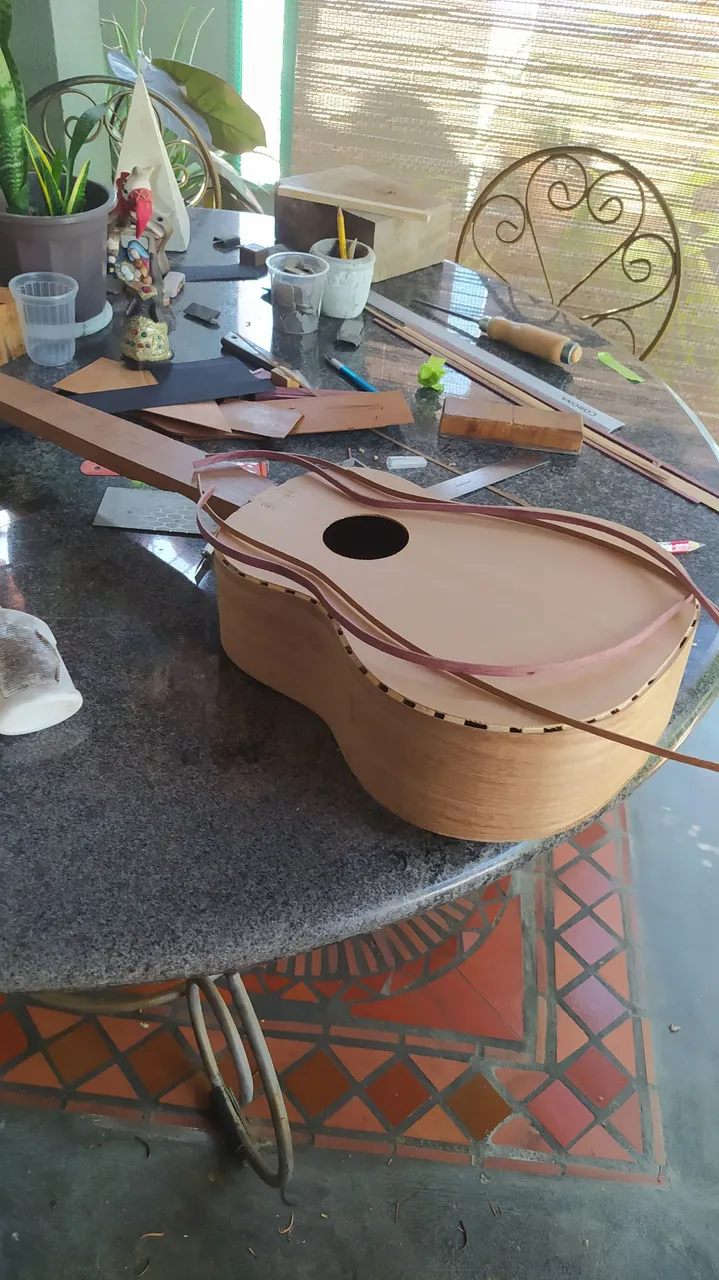
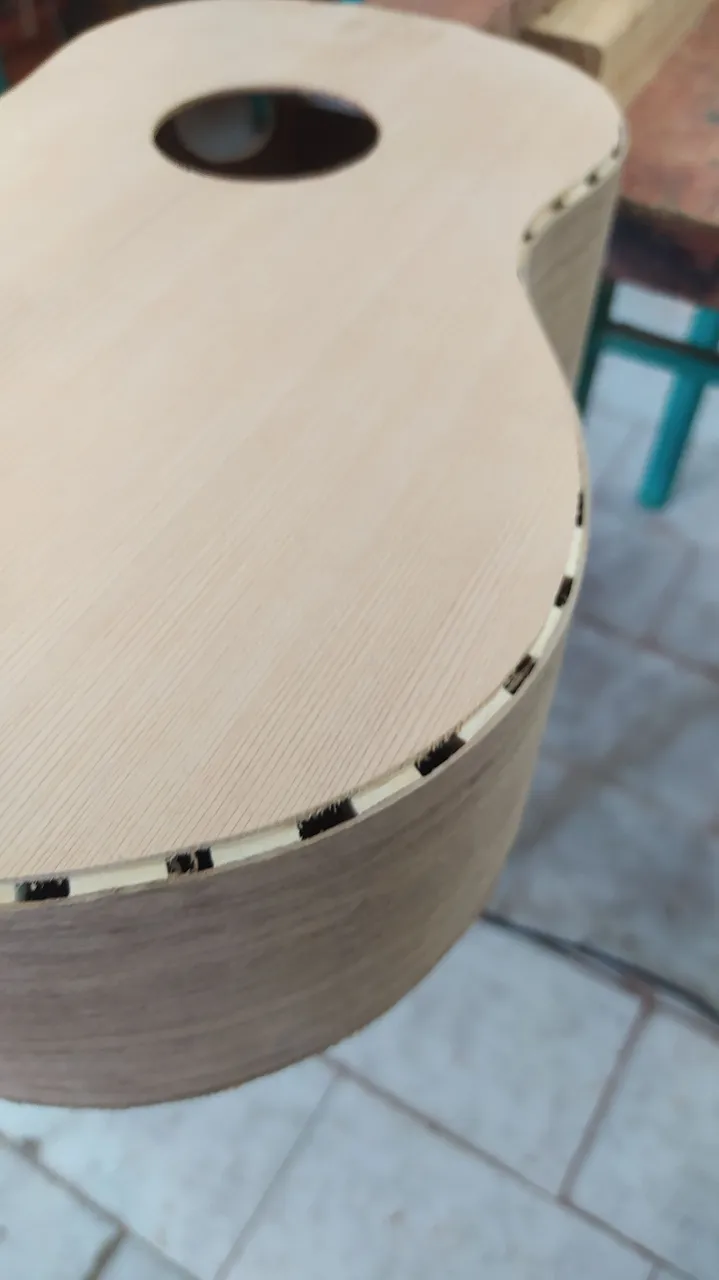
I'm using more pardillo and purpleheart. The bridge and fretboard are going to be made of the latter too, so I figured I might as well use some for the ornaments. Once we have the strips theres a lot of measuring to be done and cutting implied. Both sides need to match at the bottom.
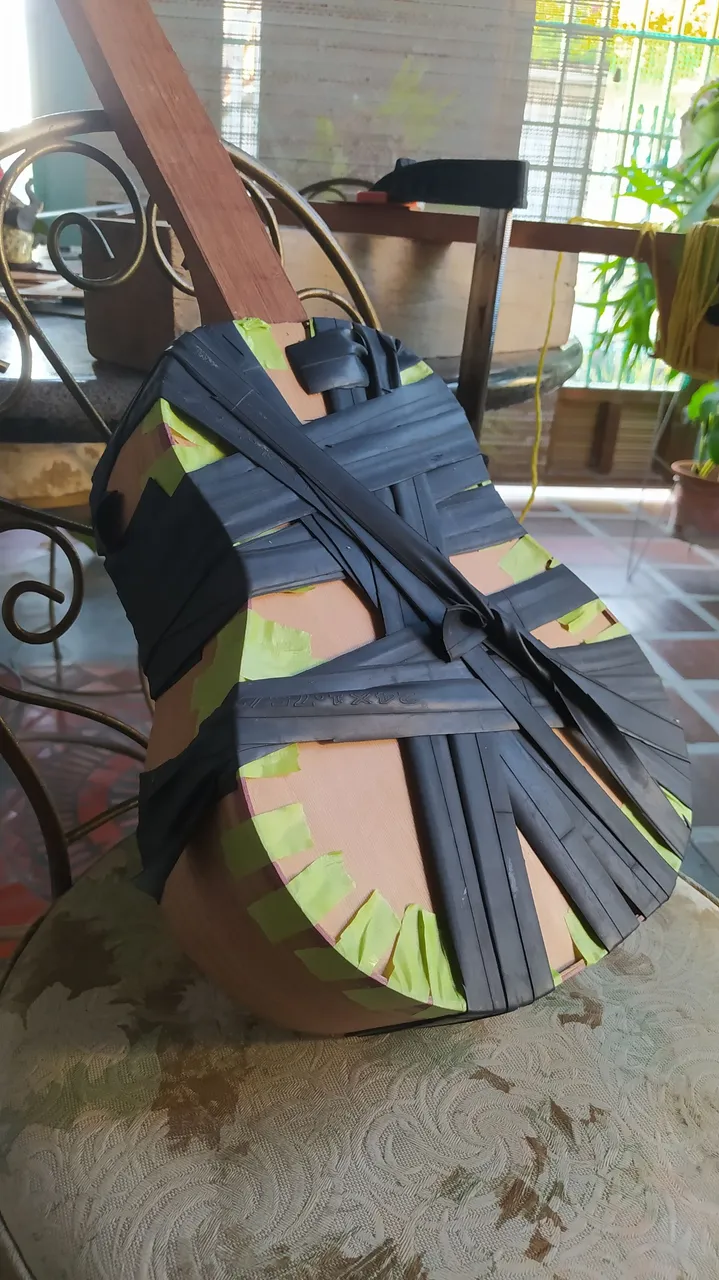
To help holding the bindings and purflings we use masking tape. To press them against the instrument we use some rubbers (these are bike's tire tubes cut in pieces). With this technique, we end with this result:
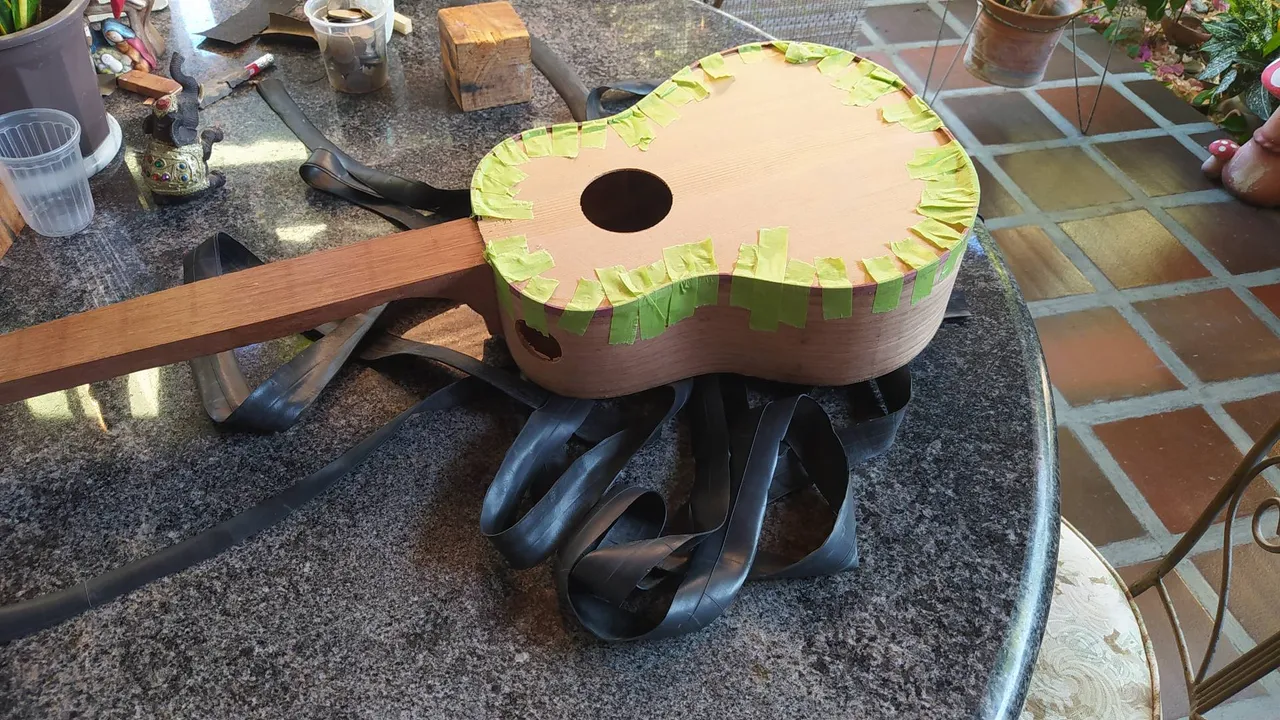
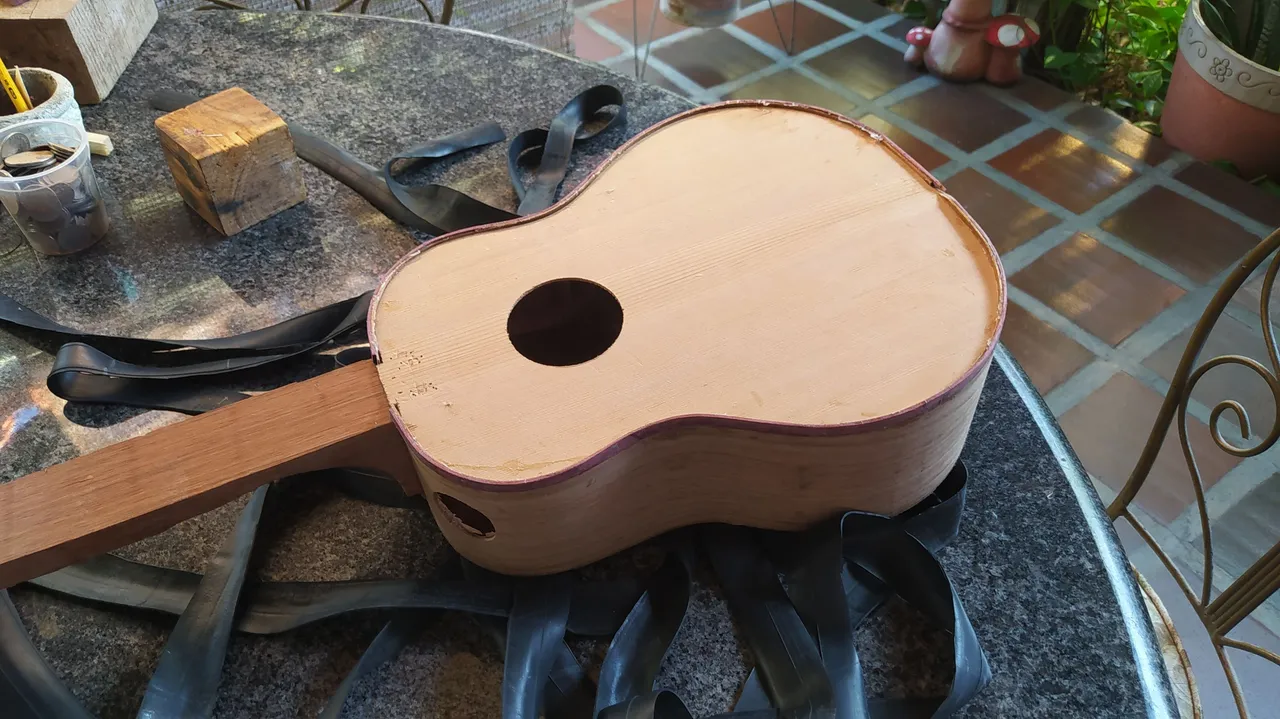
And after trimming the excess material, we end up like the photo sth the start of this post:
The work on this project has just begun. Join me next time as I go into making some of the pieces missing form this build and start with its finish too. I hope you have liked this project so far!

Follow me on Instagram for enquires and commission.
If you'd like to help the workshop grow, you can make a donation here. You can find me at discord as bertrayo#1763