
Hello, hello dear crafters and creative friends, I wish you an excellent weekend and may God's blessing abound in your homes; the first days of June have been very active and hot; my son's school activities are more demanding and time consuming every day; I have had to put some sewing projects on hold to support him in his assignments, but it is always possible to take some time to sew and relax, I am passionate about sewing and it is my moment of creativity that I enjoy to the fullest, I put on my favorite music and get to work in the wonderful world of threads and needles.
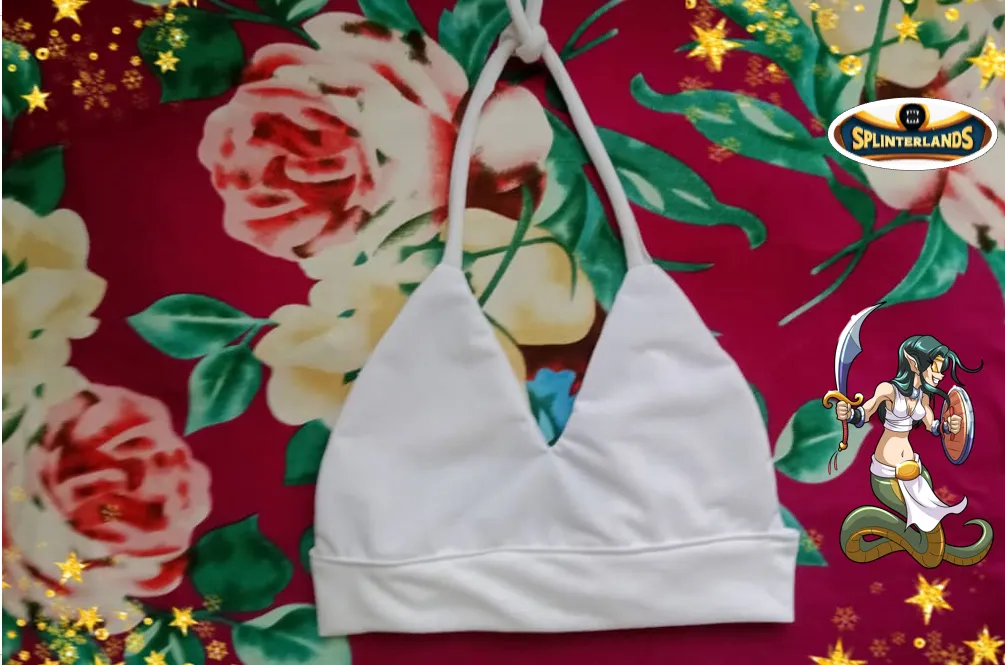
This time I share the elaboration of a top inspired by Naga Warrior, a character from the Splinterlands cards; the top has adjustable straps on the top and sides.

Hola, hola estimados artesanos y amigos creativos, les deseo un excelente fin de semana y que la bendición de Dios abunde en sus hogares; los primeros días del mes de junio han sido muy activos y calurosos; las actividades escolares de mi hijo son cada día más exigentes y demandan tiempo; algunos proyectos de costura los he tenido que dejar en pausa para apoyarlo en sus asignaciones, pero siempre es posible sacar un poco de tiempo para coser y relajarme, la costura me apasiona y es mi momento de creatividad que disfruto al máximo, pongo mi música favorita y manos a la obra en el maraviloso mundo de los hilos y agujas.
En esta ocasión comparto la elaboración de un top inspirado en Naga Warrior, un personaje de las cartas de Splinterlands; el top tiene tirantes ajustables en la parte superior y los costados.


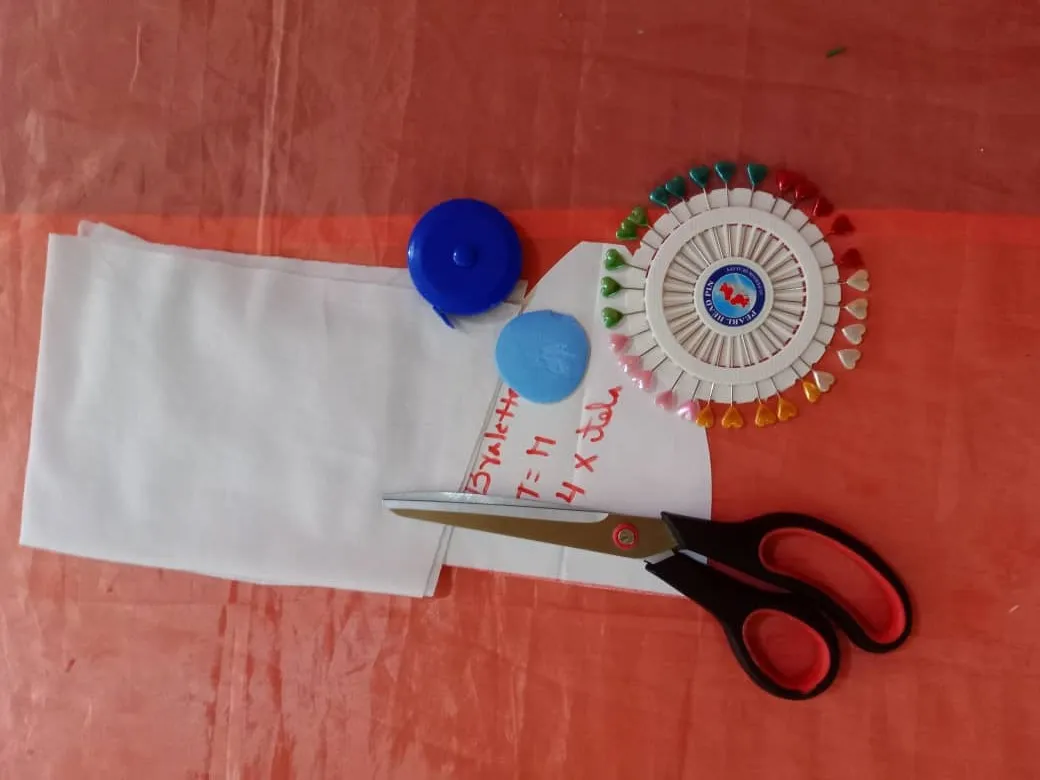
The materials used were:
Jersey fabric
Tape measure
Scissors
Soap soap
Pins
Mold
Los materiales usados fueron:
Tela jersey
Cinta métrica
Tijera
Jaboncilo
Alfileres
Molde
Elaboration
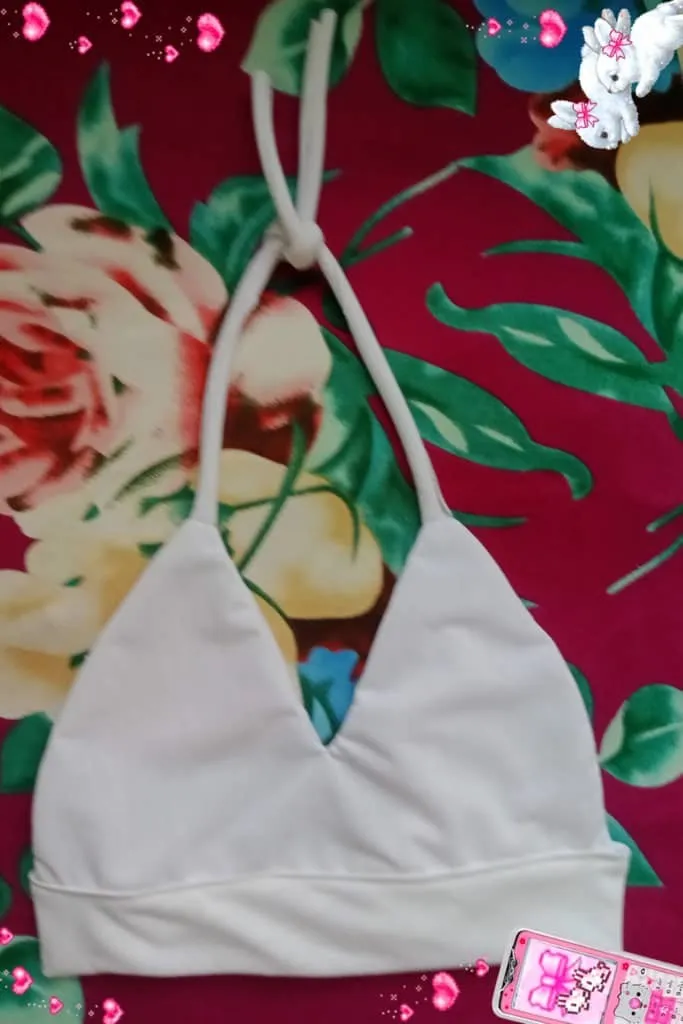
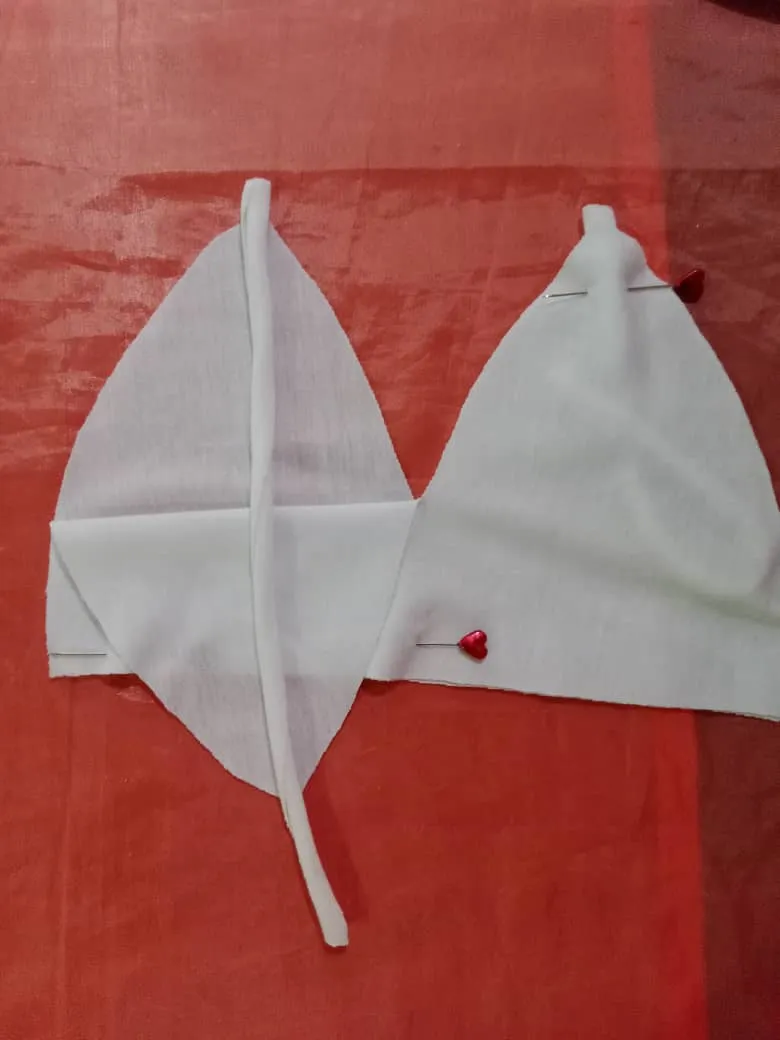
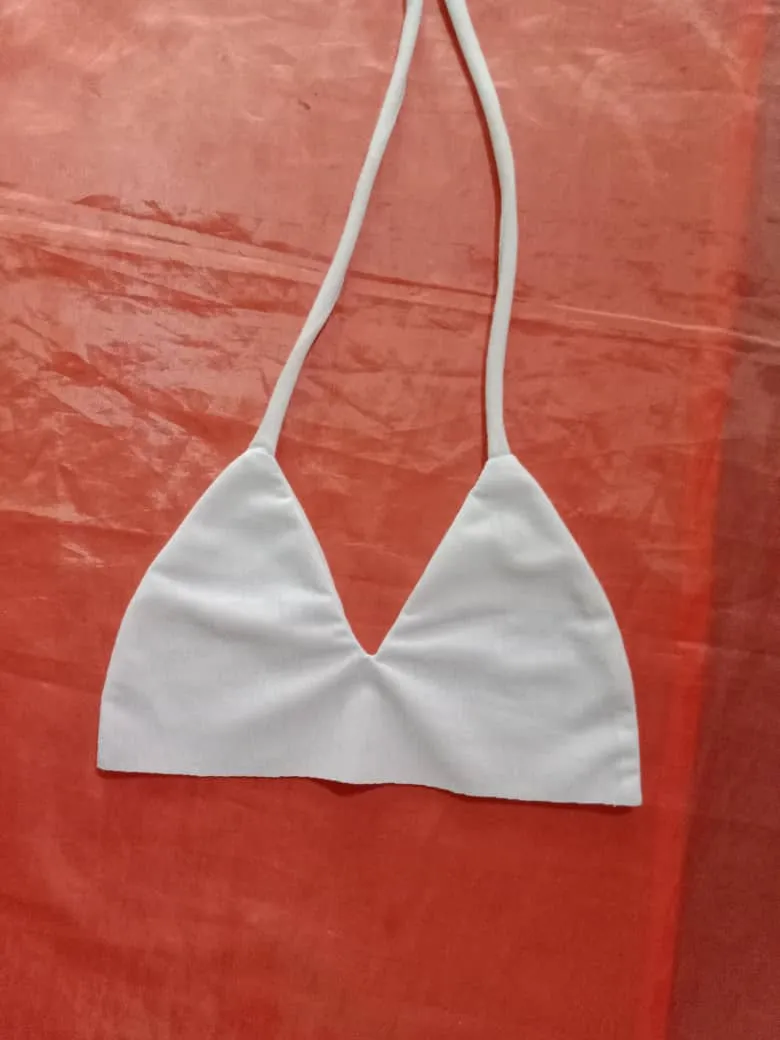
The top is for a teenage girl, after taking the measurements we decided to use the bralette pattern and make a modification taking out the front part in one piece; I folded the fabric, marked and cut the top, also the back part and the straps.
Elaboración
El top es para una adolescente, luego de tomar las medidas decidimos usar el patron de bralette y hacer una modificación sacando el delatero en una sola pieza; doblé la tela marqué y corté el top, también la parte trasera y las tiras.


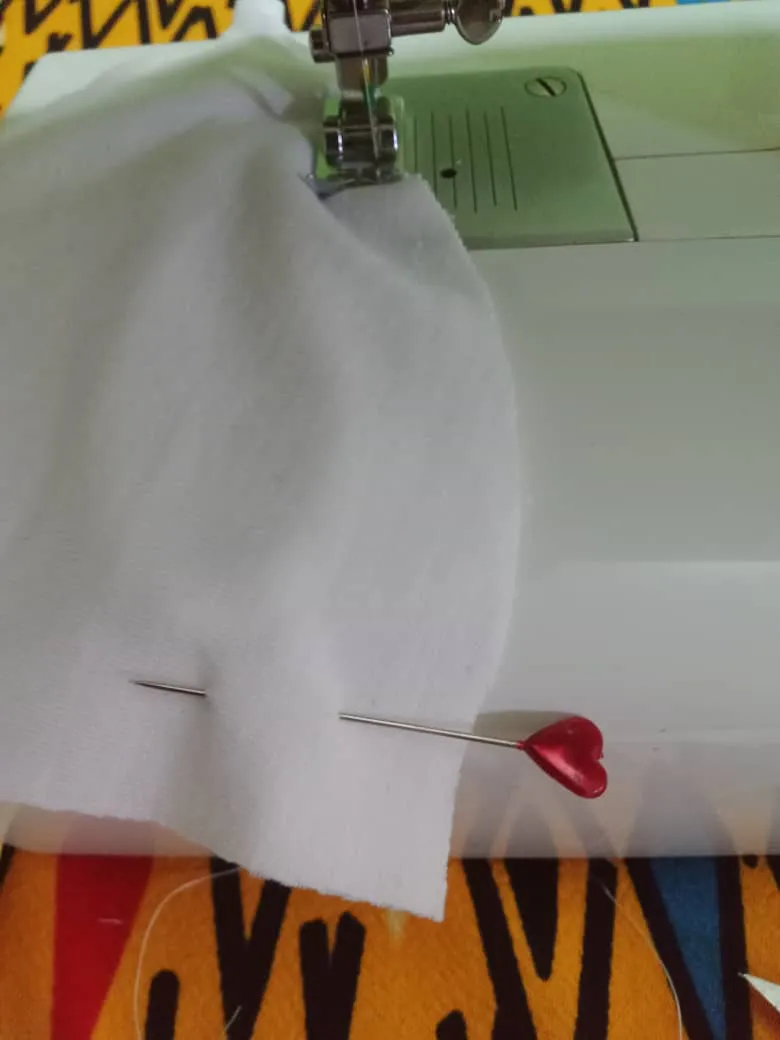
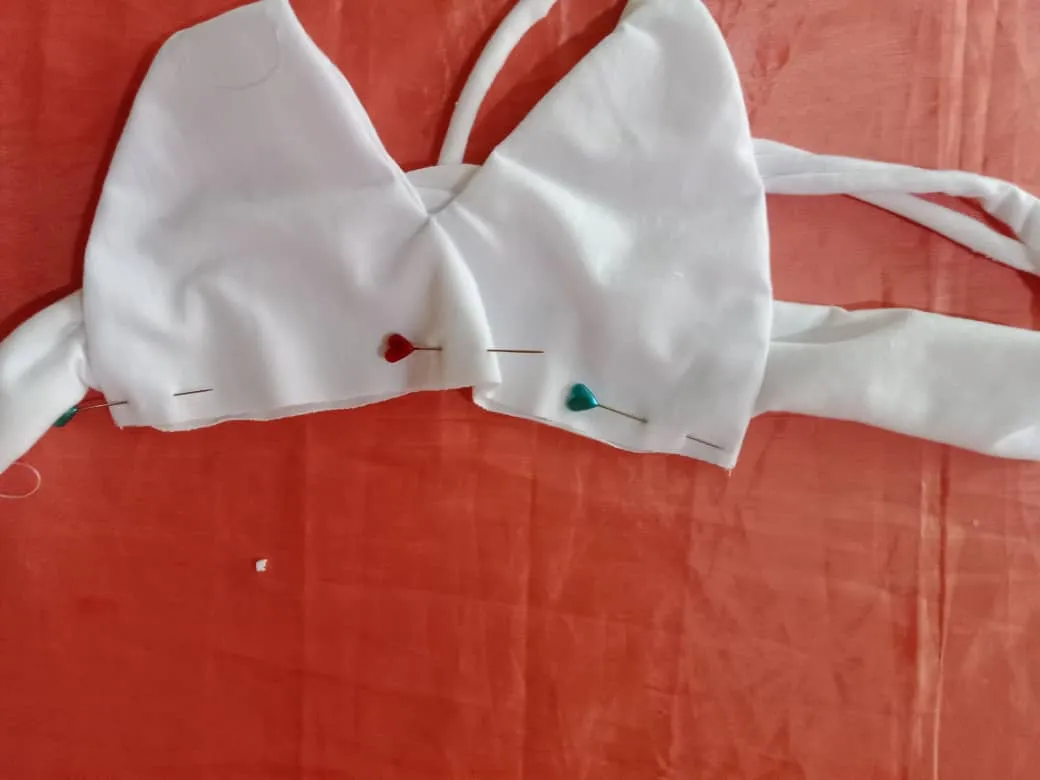
Once the pieces were cut, I faced the front pieces right sides together and pinned the upper strips at the top, then sewed with a straight stitch leaving the lower part open for turning.
Cortadas las piezas, enfrenté los delanteros por el derecho y en la parte superior sujeté con alfileres las tiras supriores, luego cosí con puntada recta dejando abierta la parte inferior para voltear.
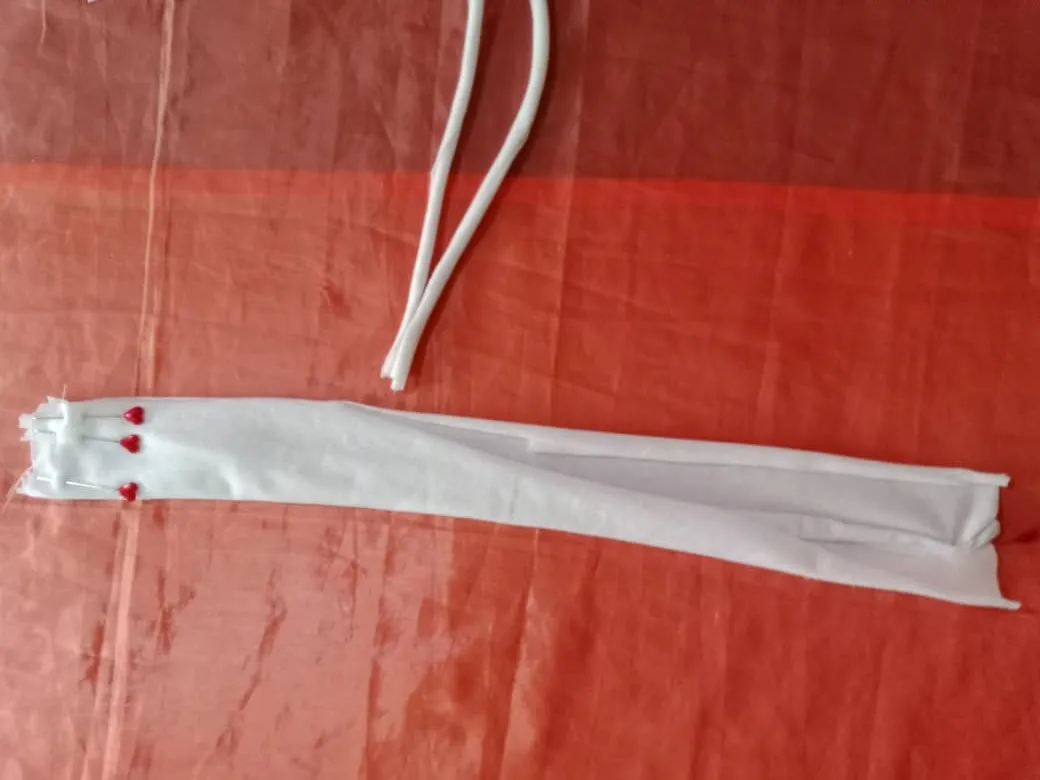
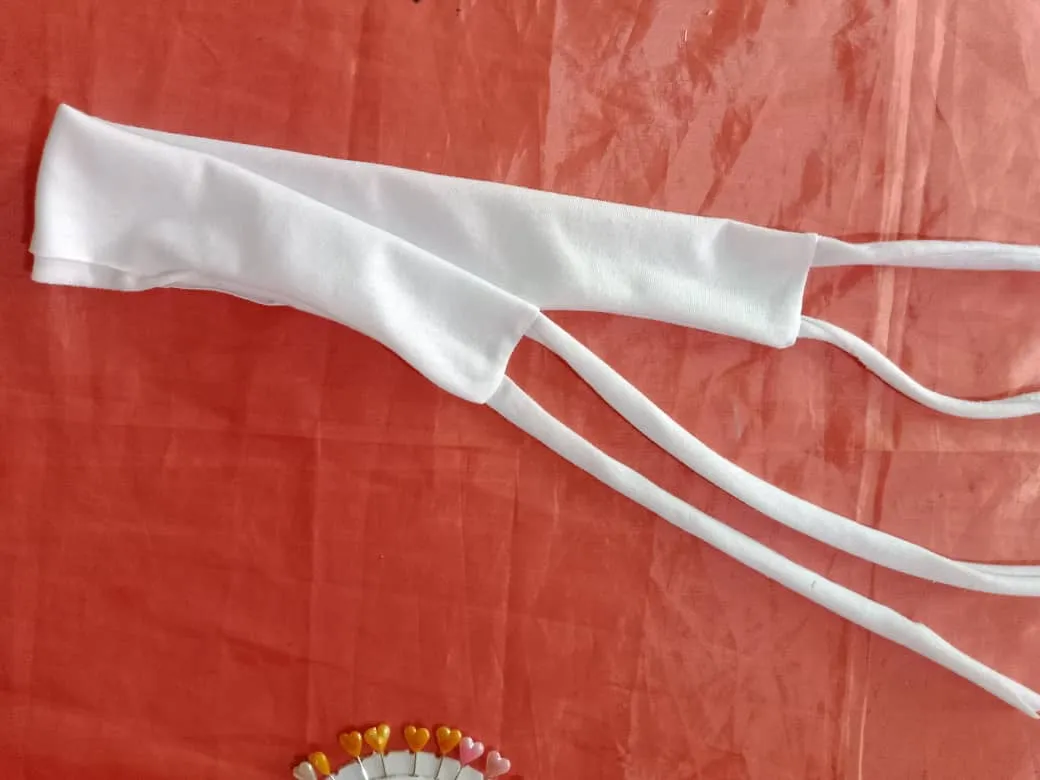
To make the back and sides, I folded the fabric right sides together, placed the strips on the ends, pinned, then measured the top with the sash and made marks for the seam allowance, then sewed leaving the opening to place the top and flipped.
Para hacer la parte trasera y costados, doblé la tela enfrentando los derechos, coloqué las tiras en los extremos, sujeté con alfileres, luego medí el top con el fajín e hice marcas para la costura, luego cosí dejando la abertura para colocar el top y volteé.
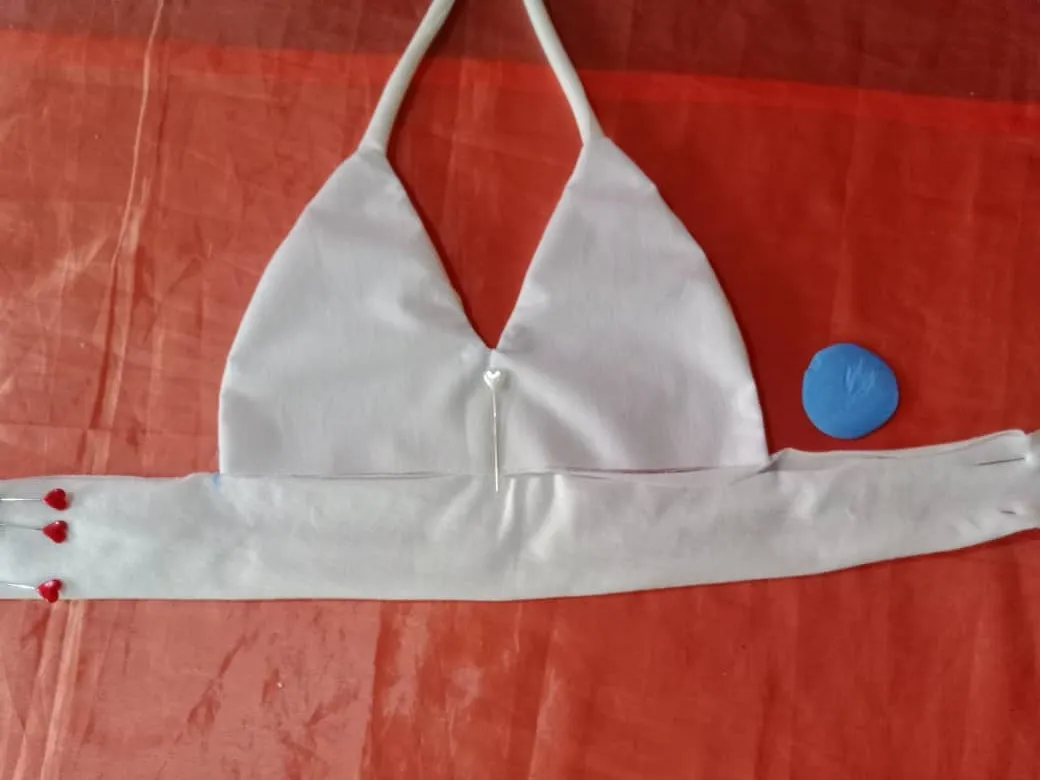
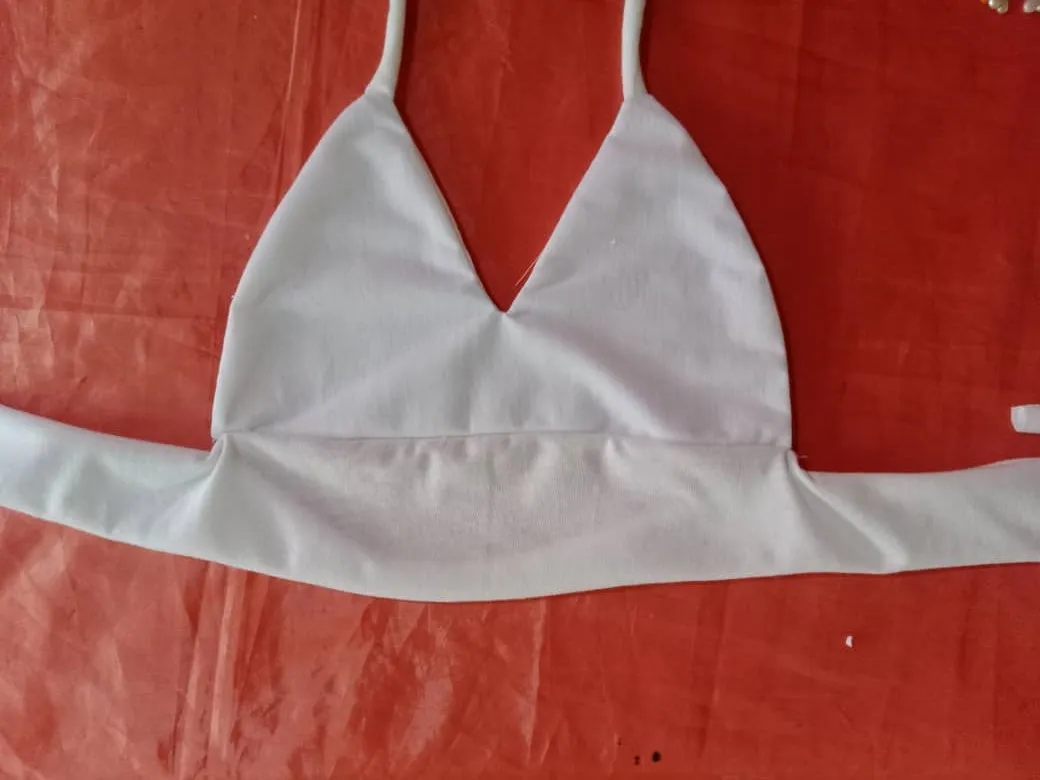
The next step was to place the sash at the bottom matching the top with the opening, I faced the bottom of the top with one side of the sash on the right side, pinned and sewed with a straight stitch.
El siguiente paso fue colocar el fajín en la parte inferior haciendo coincidir el top con la abertura, enfrenté por el derecho la parte inferior del top con un lado del fajín, sujeté con alfileres y cosí con puntada recta.
To finish, I made a small fold over the previous seam, pinned and sewed with a straight stitch, so the seams are even and the top can be used on both sides.
Para finalizar hice un pequeño doblez encima de la costura anterior, sujeté con alfileres y cosí con puntada recta, así la costuras quedan embonadas y el top se puede usar por ambos lados.
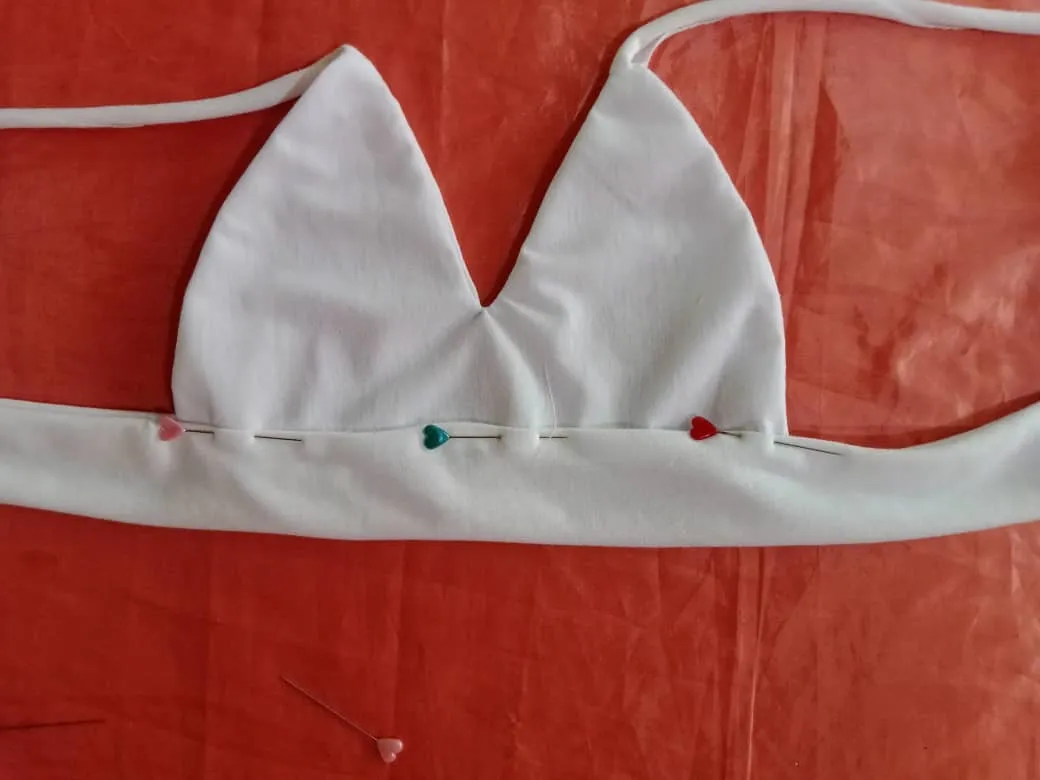
The emboned seam is a technique that I really like because all the seams are hidden and you get a nice finish, since the instructor explained this technique I loved it, at first it was a little difficult but with practice I have been improving and I am very happy to finish a new project with this technique, I hope you like it and find it useful.
La costura embonada es una técnica que me gusta mucho porque todas las uniones quedan ocultas y se obtiene un lindo acabado, desde que la instructora explicó esta técnica me encantó, al principio fue un tanto difícil pero con práctica he ido mejorando y me siento muy feliz al terminar un nuevo proyecto con esta técnica, espero les guste y les sea de utilidad.
Blessings!
Bendiciones!
Hasta luego!
Translated with https://www.deepl.com/translator
              All images are my own, captured by a Síragon LC-3000 camera. Dividers courtesy of @kattycrochet.


   Todas las imágenes son de mi autoría, capturadas por una cámara Síragon LC-3000. Divisores cortesía de @kattycrochet.