Haciendo una libreta vintage de notas súper pequeña✨🦋//Making a super small vintage notebook✨🦋[Esp~Eng]

Agenda_20240917_143908_0000.png

Agenda_20240917_145954_0000 (1).png

Linda tarde mis queridos lectores les doy la bienvenida en esta oportunidad a mi blog creativo,😊dónde les estaré enseñando como hacer con pocos materiales esta linda libreta tipo libro muy pequeño para que sea más facil llevar tus notas en una agenda pequeña como esta,este tipo de libretitas me encata mucho ya que puedo llevarlas en cualquier bolsito pequeño.

Good afternoon my dear readers, I welcome you on this occasion to my creative blog, 😊 where I will be teaching you how to make this cute little book-type notebook with just a few materials so that it is easier to carry your notes in a small diary like this one. I really love this type of little notebook since I can carry it in any small bag.

Si deseas saber cómo la he realizado te invito a que observes el paso a paso y el resultado final se que te gustará mucho y espero te sirva como idea para hacer este tipo de libretas y otras más grandes así que vamos por los materiales.

If you want to know how I made it, I invite you to watch the step by step and I know you will like the final result very much and I hope it serves as an idea for you to make this type of notebooks and other larger ones, so let's go with the materials.
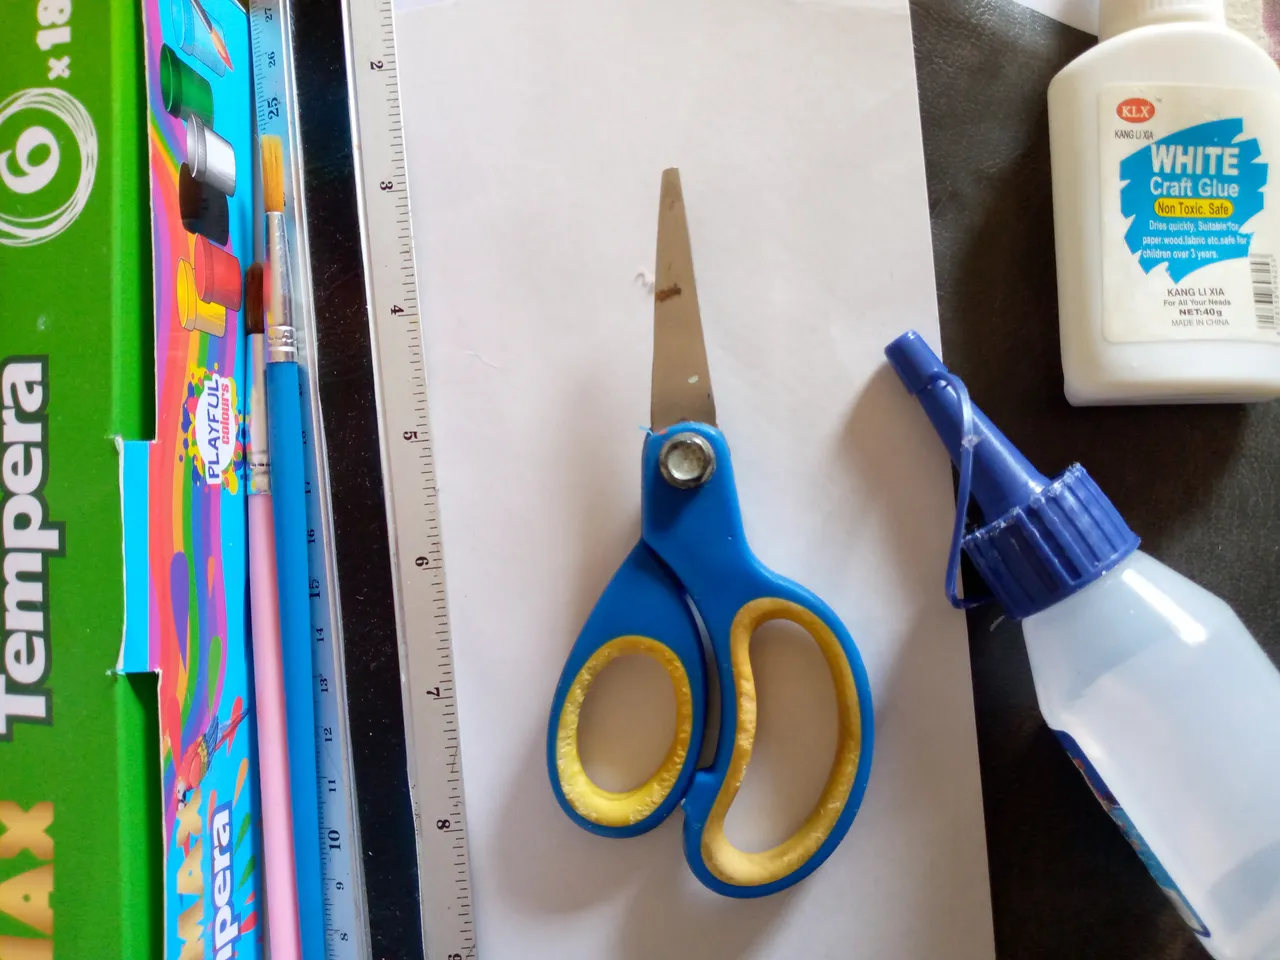

IMG_20240917_120441_697 (1).jpg

Agenda_20240917_145954_0000 (1).png

Materiales que usé:

Materials i used:

Agenda_20240917_145954_0000 (1).png

  • Trozo de cartón delgado
  • Pega y silicón líquido
  • Lápiz
  • Regla
  • Hojas blancas
  • Tijera
  • Pinturas por si deseas decorar tu libreta
  • Encaje del color de tu preferencia
  • Papel en forma de semicuero o cartulina

  • Piece of thin cardboard
  • Glue and liquid silicone
  • Pencil
  • Ruler
  • White sheets
  • Scissors
  • Paints in case you want to decorate your notebook
  • Lace in the color of your choice
  • Semi-leather or cardboard-shaped paper

Agenda_20240917_145954_0000 (1).png

Pasos a seguir:

Steps to follow:

Agenda_20240917_145954_0000 (1).png

Paso 01

Bien amigos las medidas que usé para esta libreta pequeñita son las siguientes 10 cm de largo x 8 cm de largo cada pieza de adelante y atrás de la libreta la cinta del medio es de 1 cm de ancho x 10 cm de largo estas medidas vamos a marcar las en el cartón que usaremos de base para las tapas de la misma y procedo a cortar.

Step 01

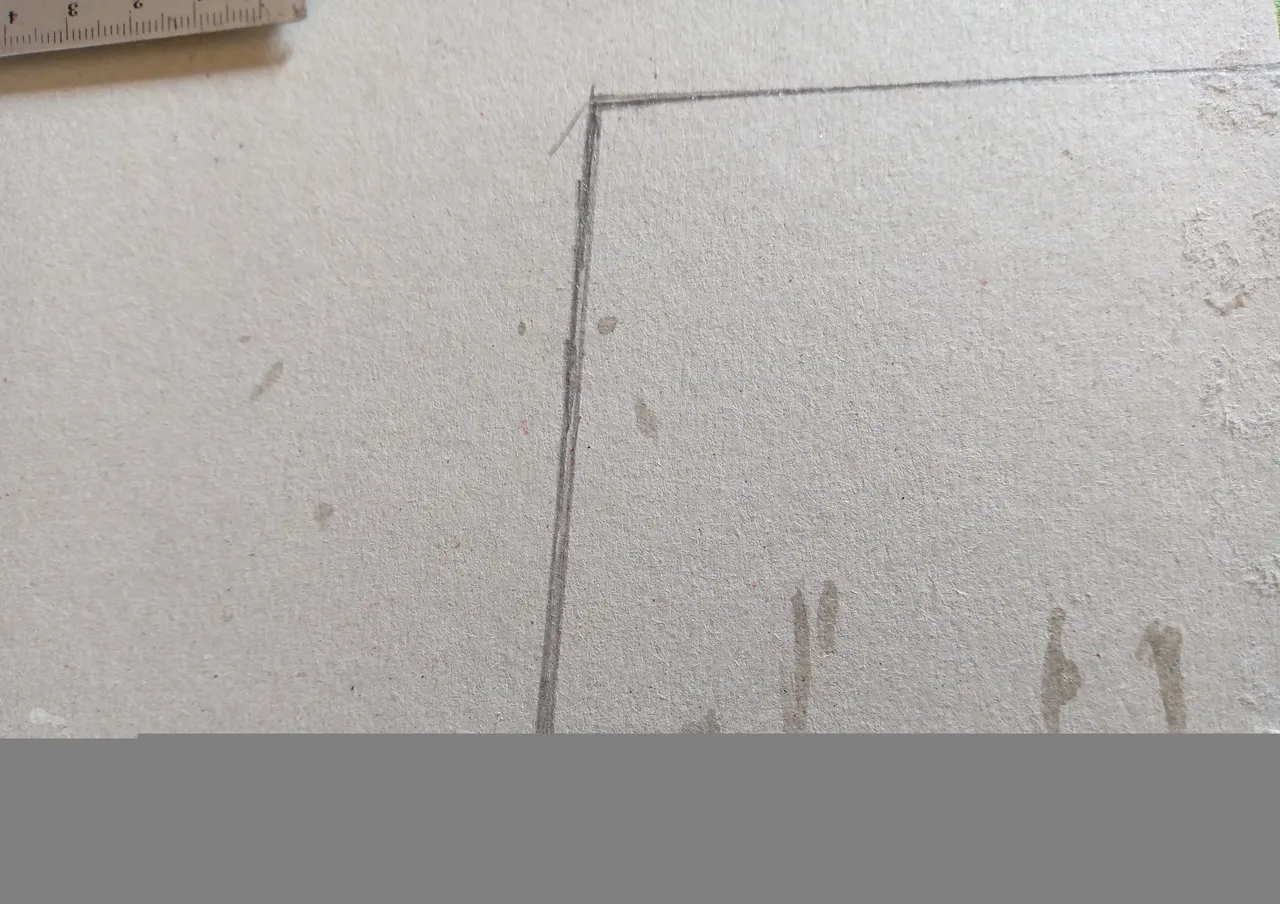
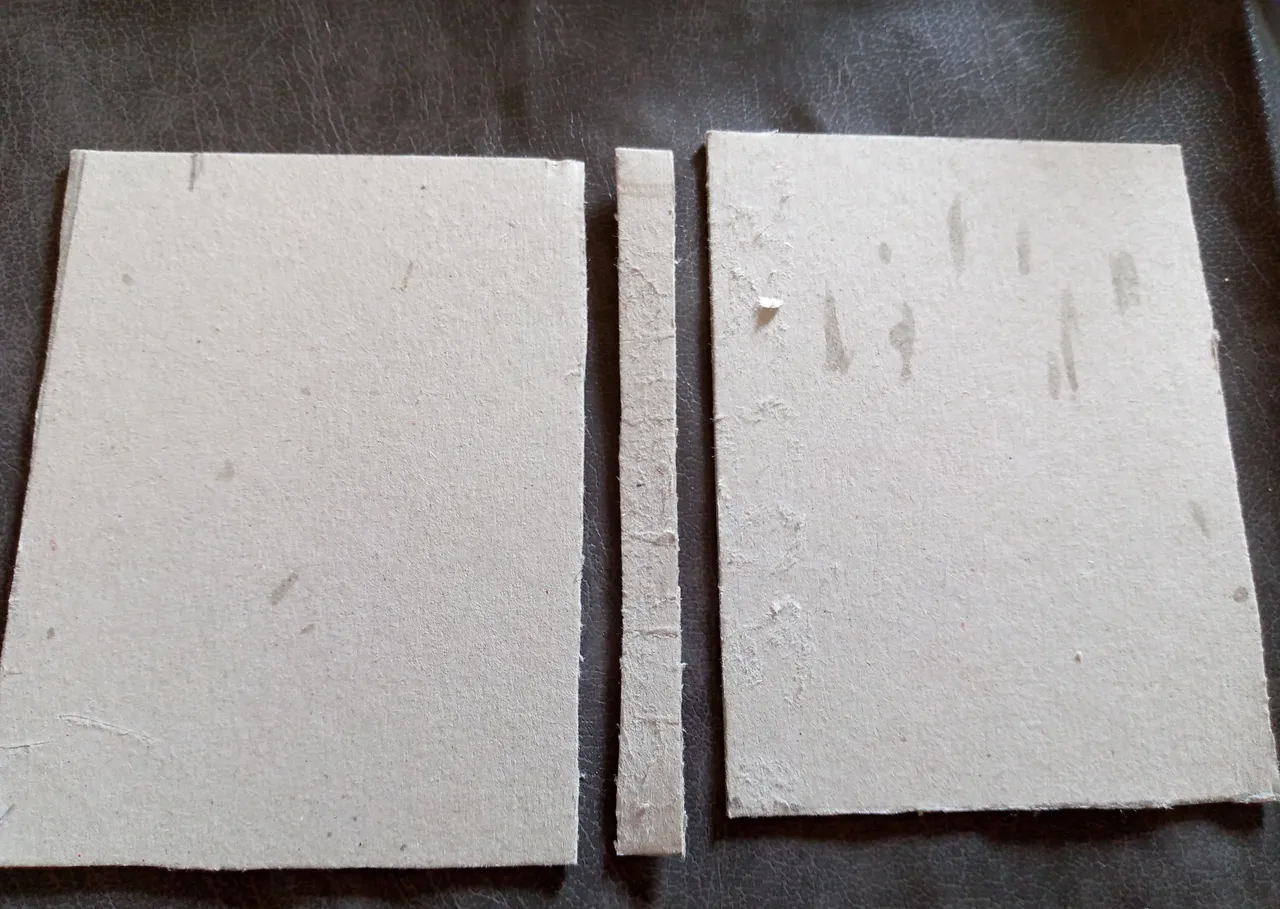
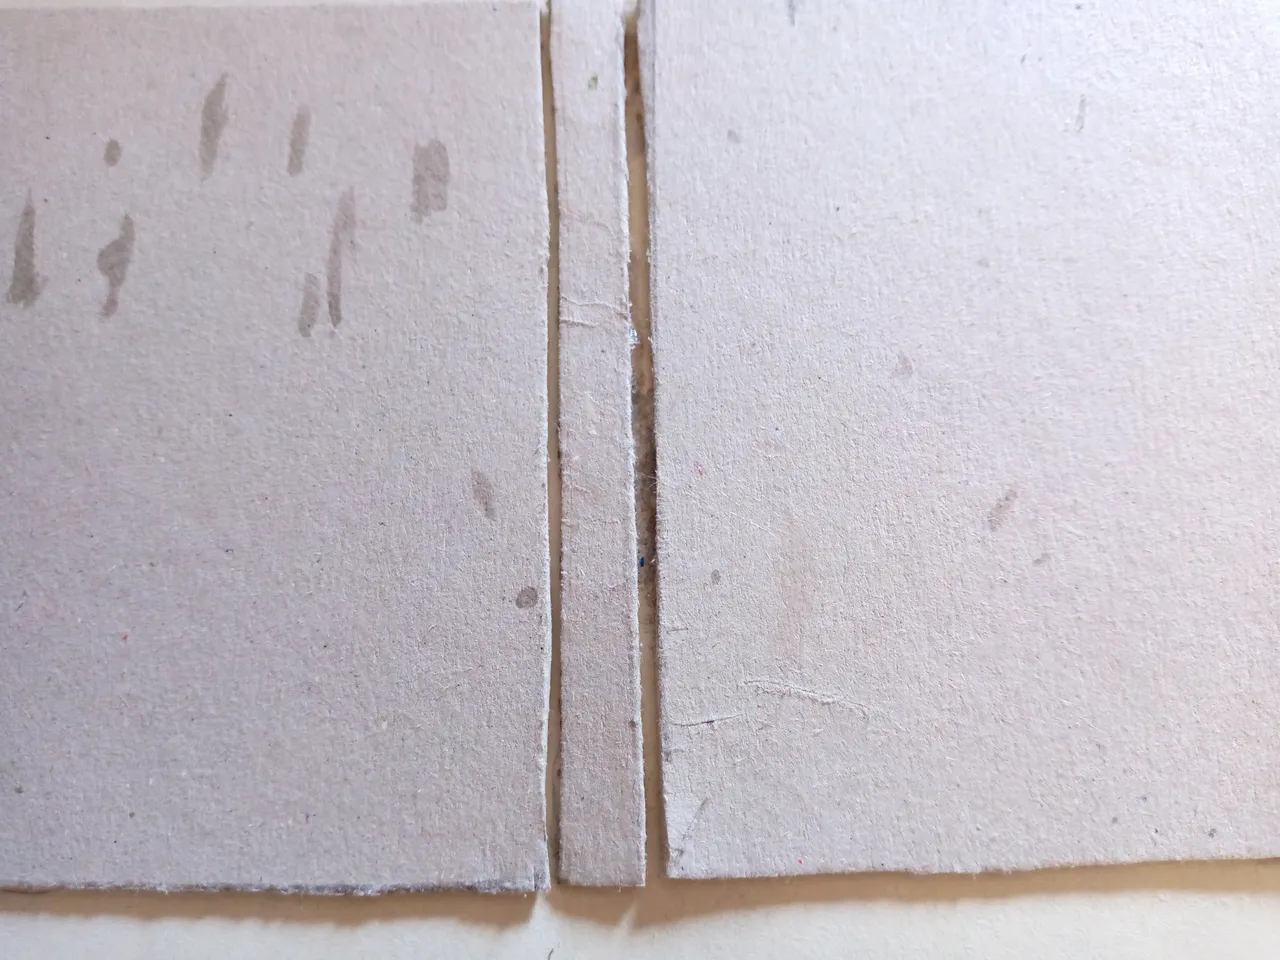
Well friends, the measurements I used for this little notebook are the following: 10 cm long x 8 cm long each piece of the front and back of the notebook, the ribbon in the middle is 1 cm wide x 10 cm long. We are going to mark these measurements on the cardboard that we will use as a base for the covers of the notebook and I will proceed to cut it.

IMG_20240917_120714_479 (1).jpg

IMG_20240917_121144_198 (1).jpg


Paso 02

Como siguiente paso es importante que las hojas primeramente las vayamos cortando a la medida de la tapa que usaremos para la libreta y vamos a ir doblandolas cada una y pegando las en el centro formando pequeños libritos de tres hojas cada una en total saqué nueve libritos de tres hojas cada uno.

Step 02

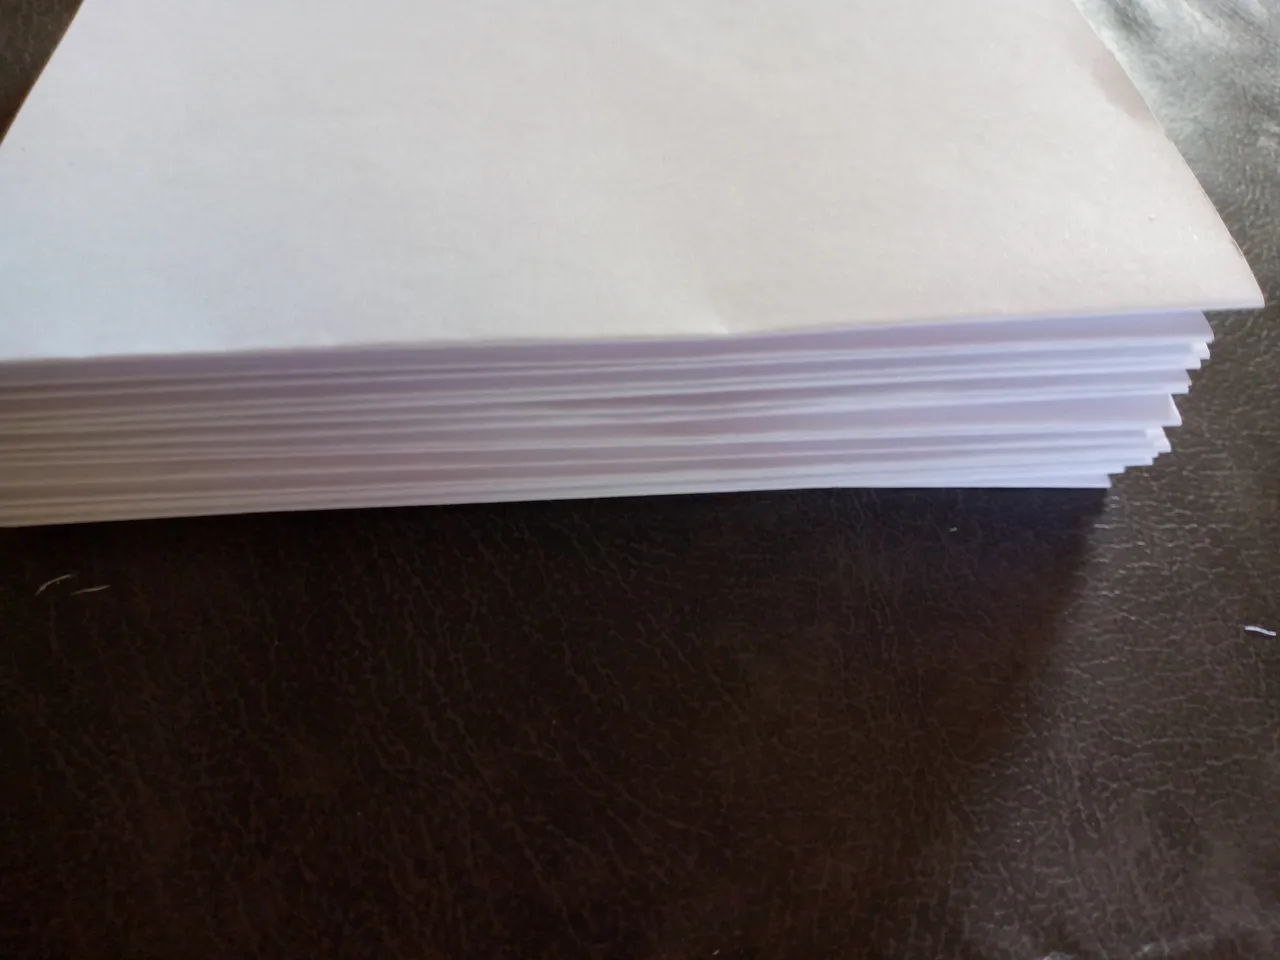
As a next step, it is important that we first cut the sheets to the size of the cover that we will use for the notebook and we will fold each one and glue them in the center, forming small booklets of three sheets each. In total, I made nine booklets of three sheets each.

IMG_20240917_121402_403 (1).jpg

IMG_20240917_122310_915.jpg

IMG_20240917_122358_925.jpg


Paso 03

Procedo a pegar las piezas del cartón a el papel en forma de semicuero o tu cartulina vamos a pegar las piezas con silicón separadas de la cinta del centro para que se pueda doblar bien luego recortamos los bordes de la cartulina dejandole 1 cm de la cartulina y luego lo que haremos sera echar un poco de nuestro silicon por el borde y vamos a ir sellando y pegando doblando hacia adentro las esquinas luego las otras partes.

Step 03

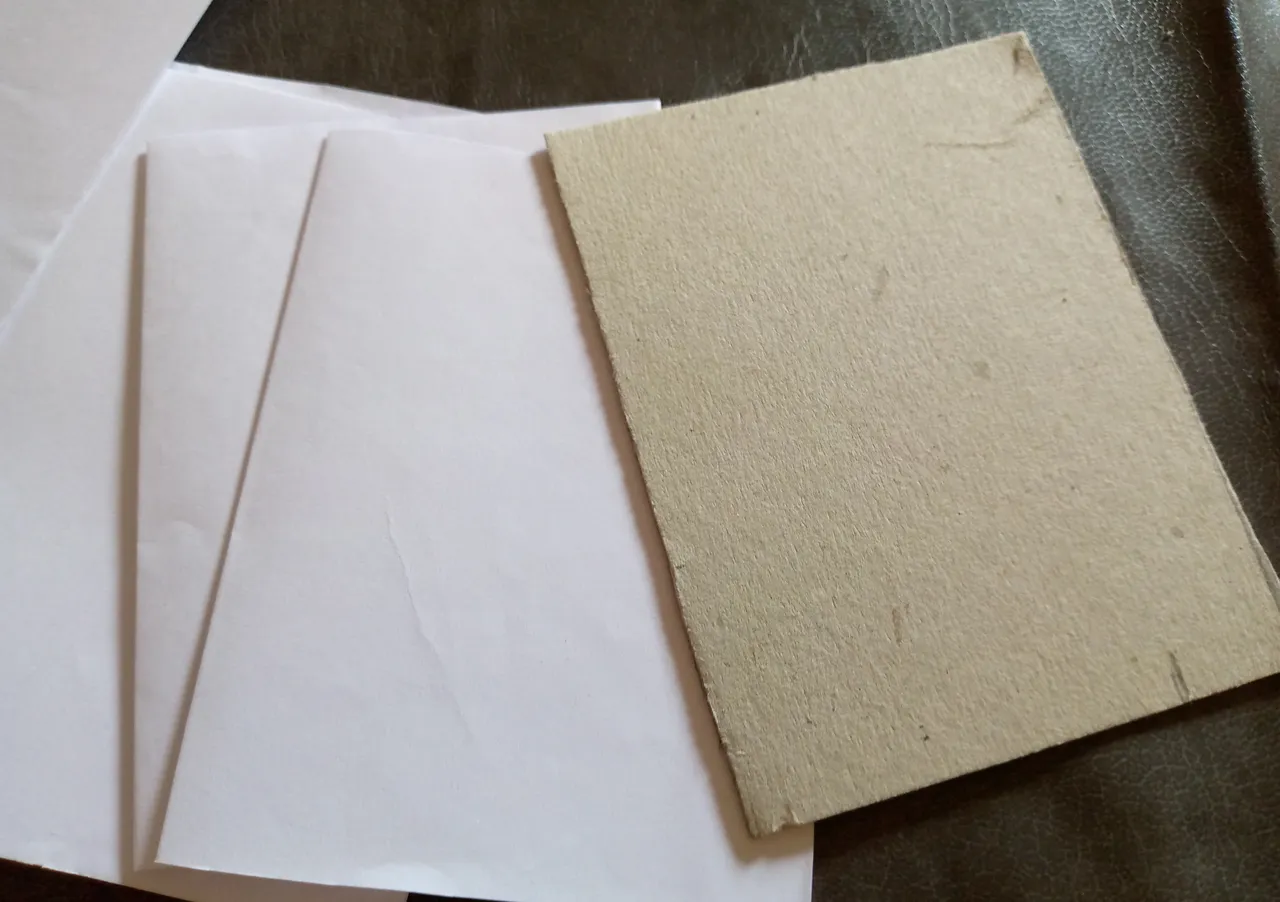
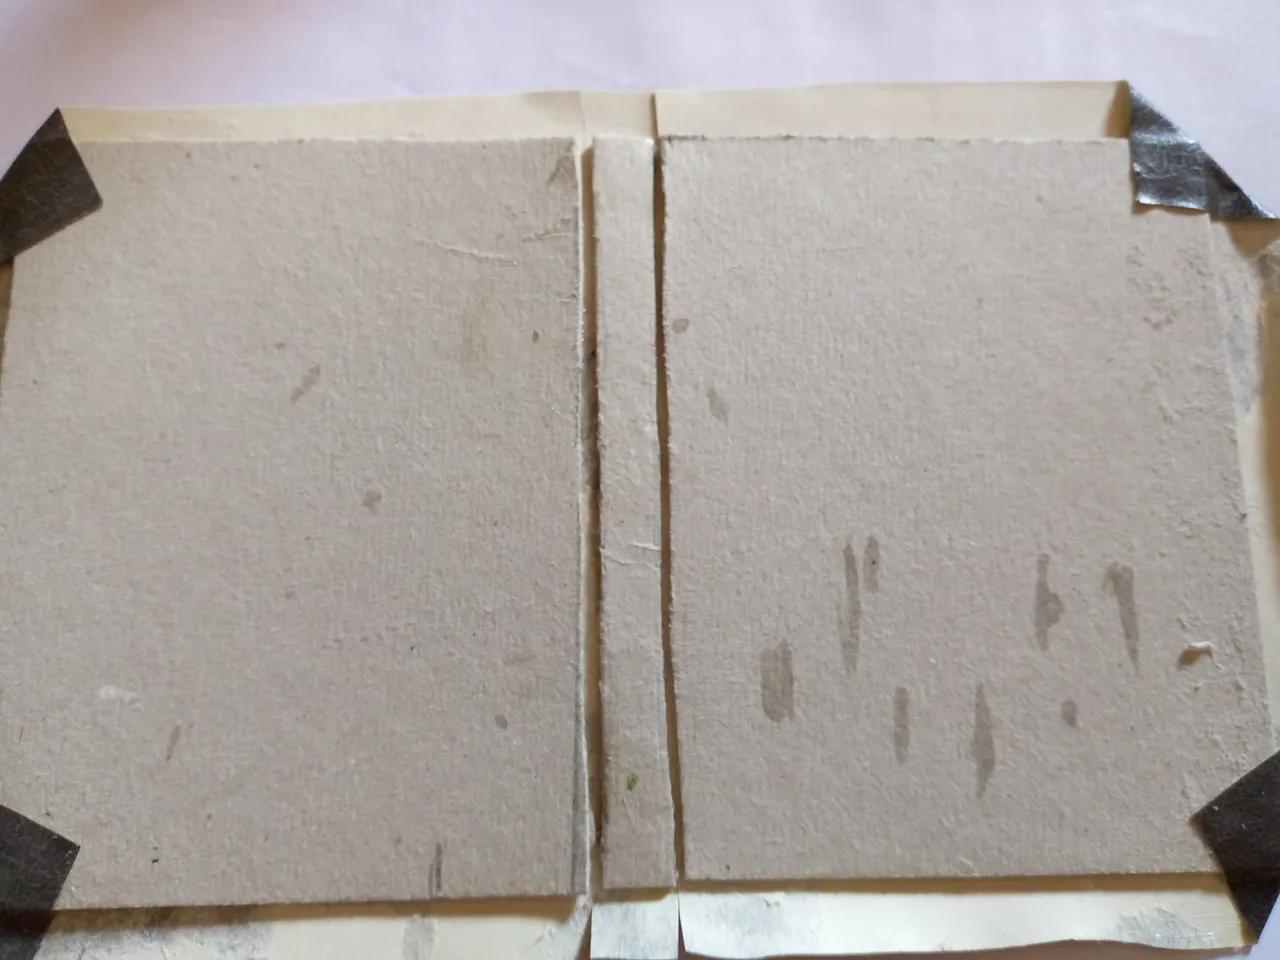
I proceed to glue the cardboard pieces to the semi-leather-shaped paper or your cardstock. We are going to glue the pieces with silicone, separating them from the center tape so that it can be folded well. Then we cut the edges of the cardstock, leaving 1 cm of the cardstock and then what we will do is pour a little of our silicone along the edge and we will seal and glue, folding the corners inwards, then the other parts.

IMG_20240917_123206_804.jpg

IMG_20240917_124646_325.jpg

IMG_20240917_124940_539 (1).jpg


Paso 04

Ahora pegaremos dos papeles de cada lado que hemos dejado de los cuadernillos y el centro solo pegamos los cuadernillos en la cinta de cartón del medio de la libreta ,para que esto se adhiera bien al carton usaremos dos ganchos de ropa para presionar ambar partes y asi pueda pegarse el papel.

Step 04

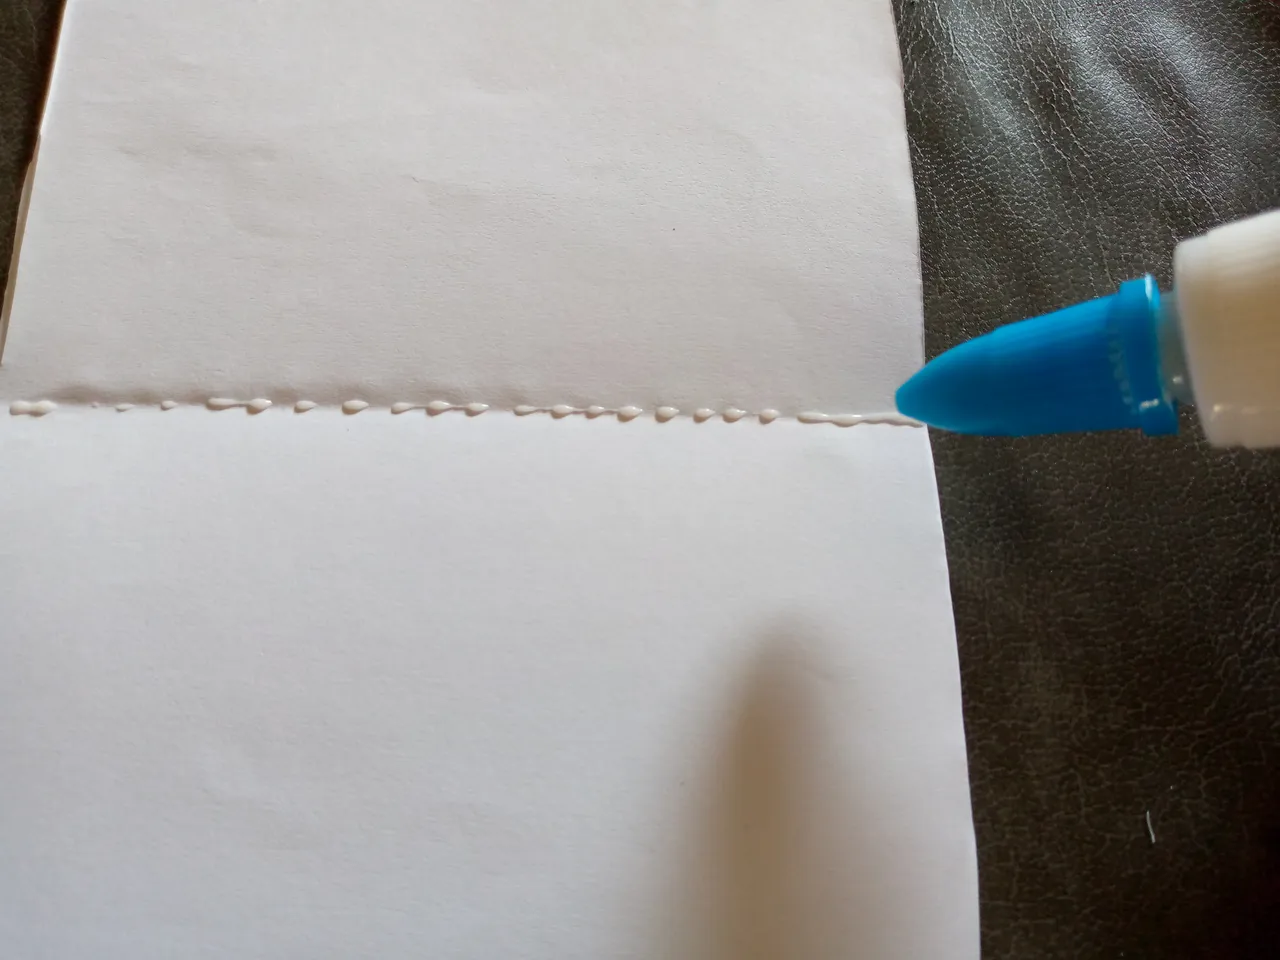
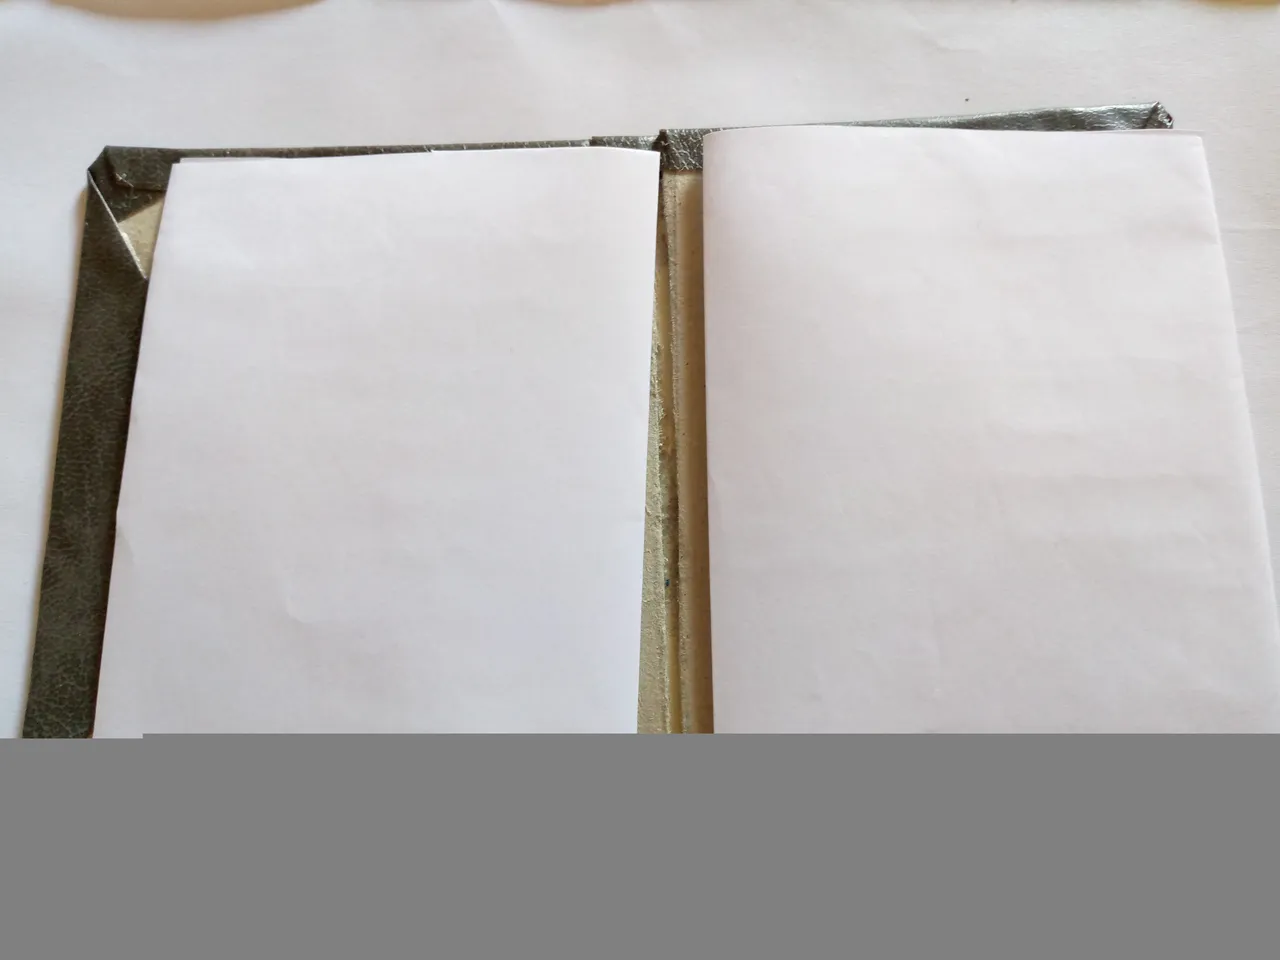
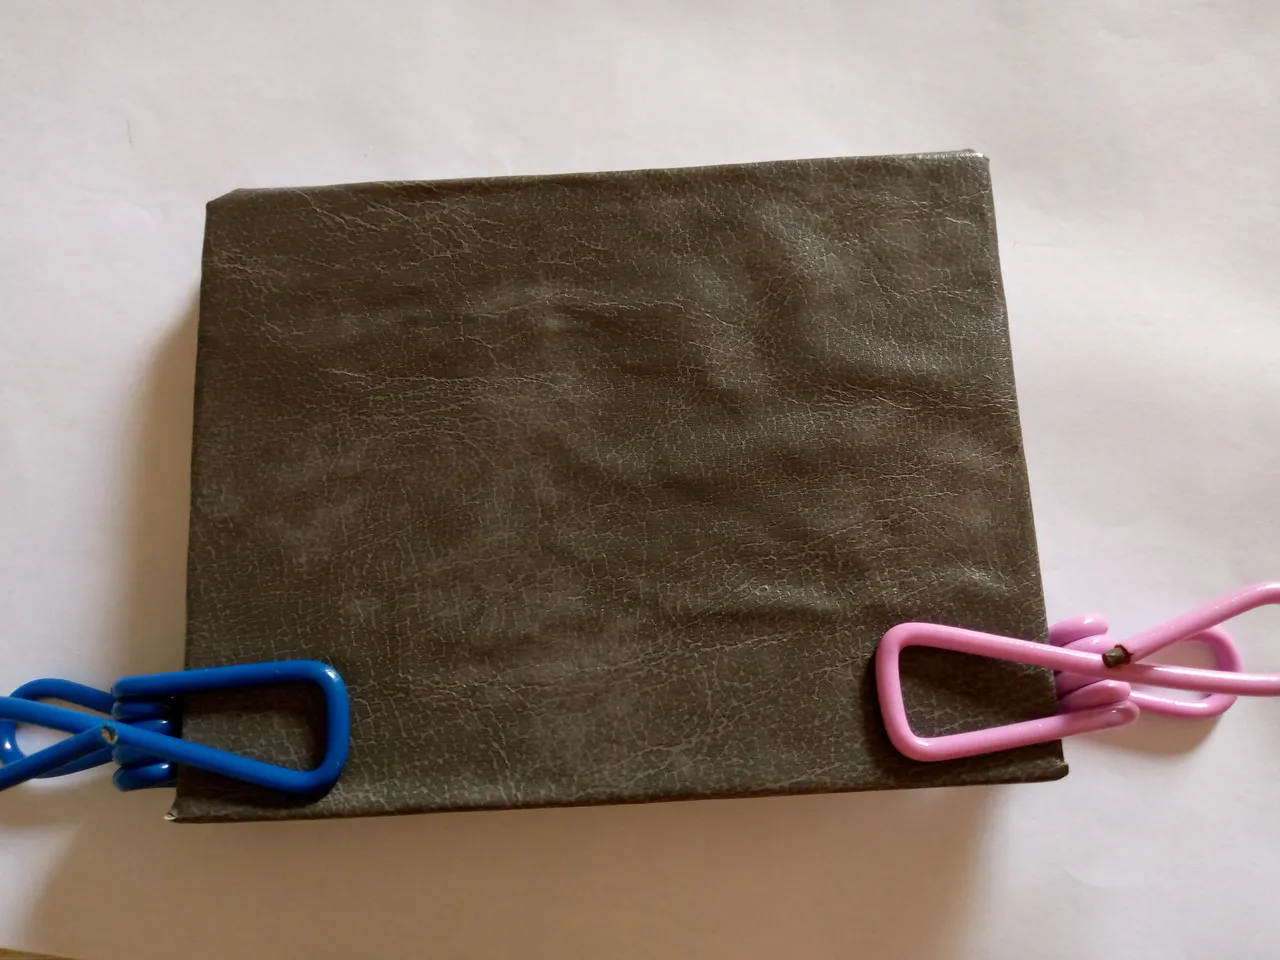
Now we will glue two papers on each side that we have left from the notebooks and in the center we will only glue the notebooks to the cardboard strip in the middle of the notebook. To ensure that this adheres well to the cardboard we will use two clothes pins to press both sides so that the paper can stick.

IMG_20240917_125212_895.jpg

IMG_20240917_130306_184 (1).jpg


Paso 05

Una vez esté seco la libreta procedemos a pegar nuestro encaje en todo el borde abajo de la libreta y por la parte de atrás para que se vea muy vintage y así hemos terminado está linda libreta.

Step 05

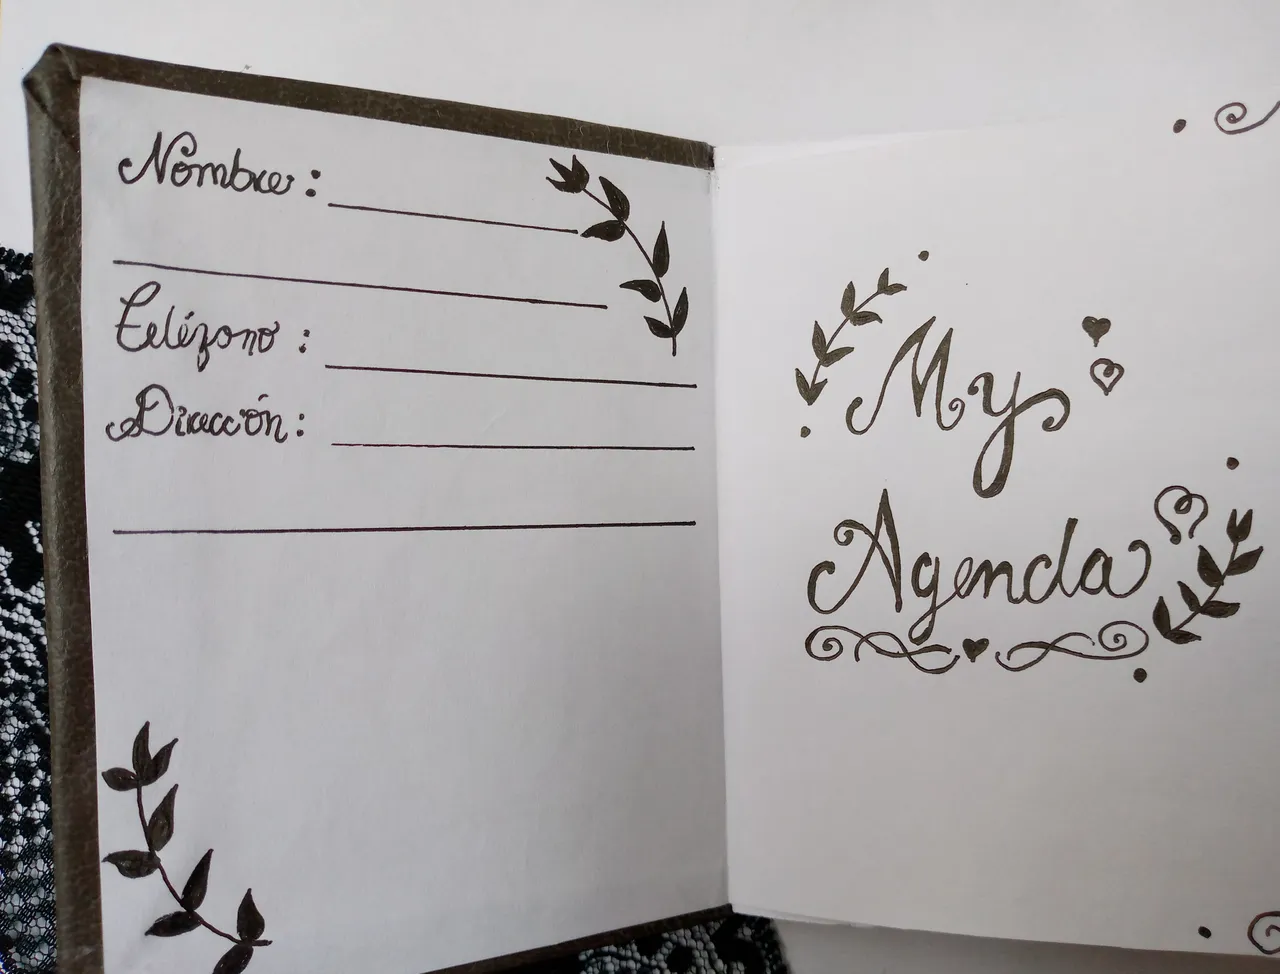
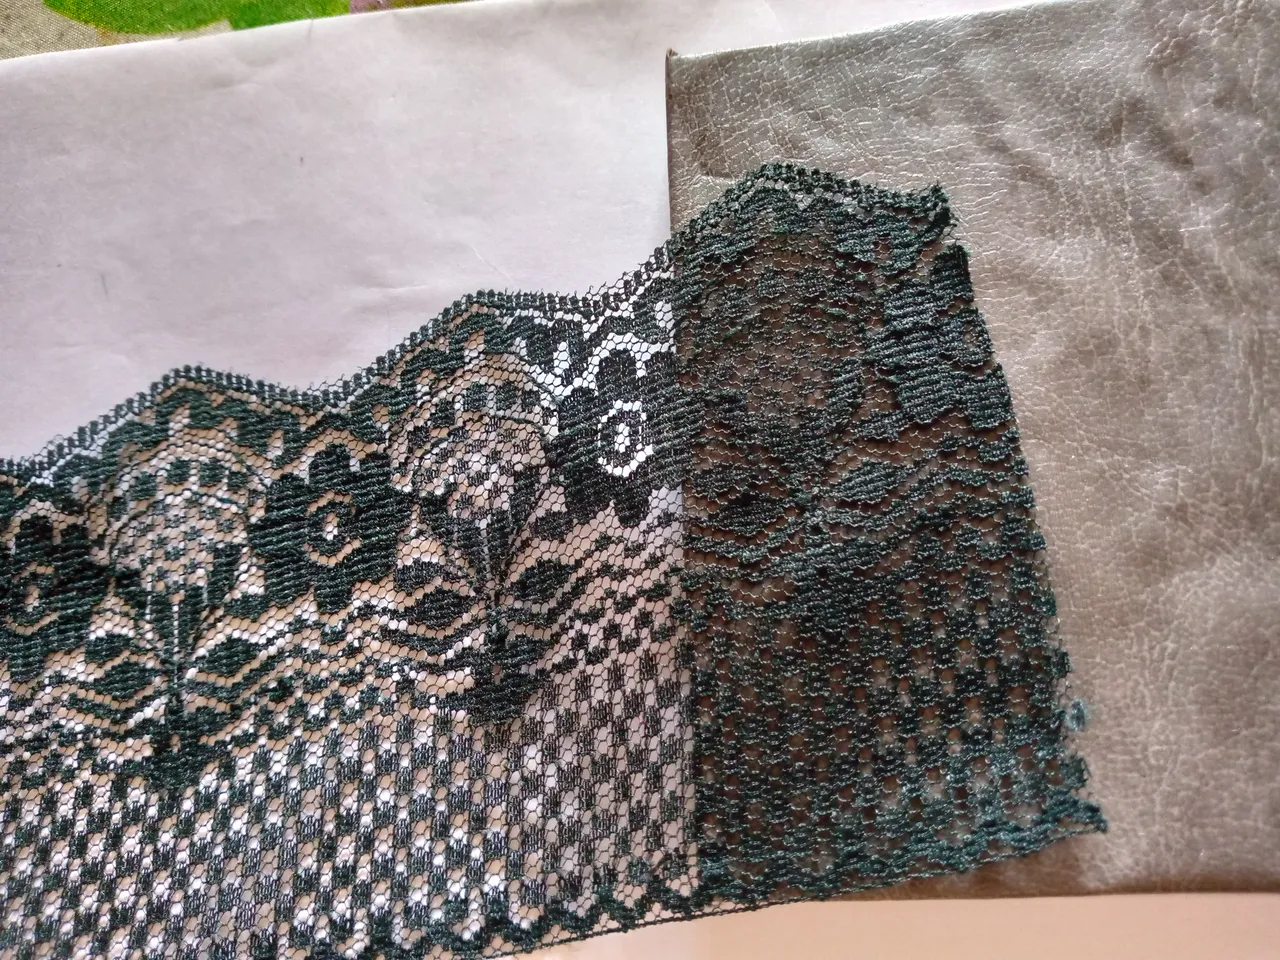
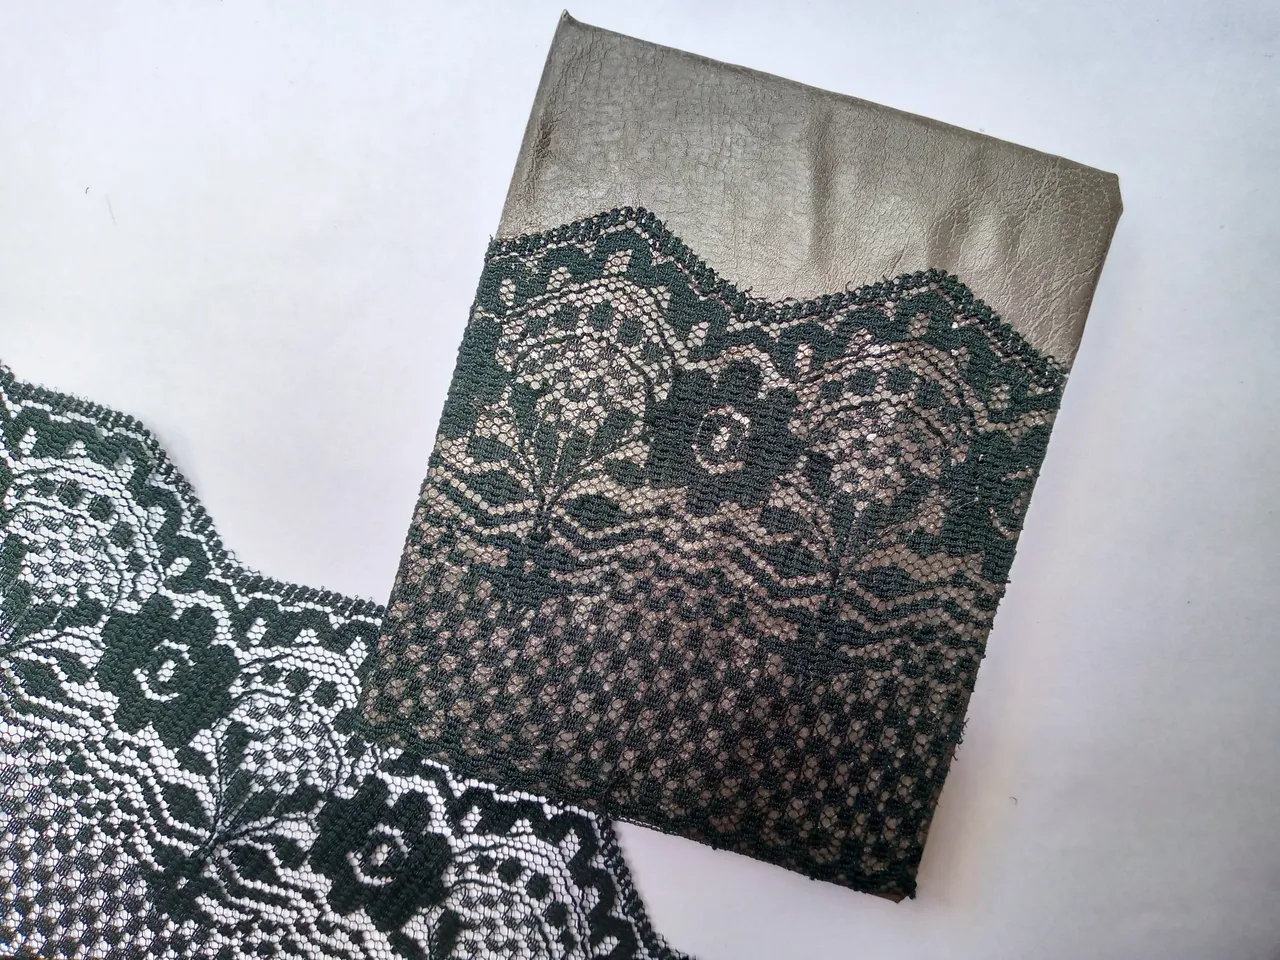
Once the notebook is dry, we proceed to glue our lace along the entire bottom edge of the notebook and on the back so that it looks very vintage and thus we have finished this beautiful notebook.

IMG_20240917_130733_937.jpg

IMG_20240917_131352_218 (1).jpg


Agenda_20240917_145954_0000 (1).png

Resultado:

Result:

Agenda_20240917_145954_0000 (1).png

Este es el resultado final súper fácil y sencilla de hacer me encantaría hacer una más grande para anotar más cositas ya que yo escribo muchisimo 🤭pero ya será en otra proxima oportunidad amigos,espero les haya gustado esta libreta chiquita que he realizado estilo vintage y si les ha gustado me gustaría saberlo,les deseo una feliz y hermosa tarde y bendiciones para ustedes,saludos!!!😍🦋✨.

This is the final result, super easy and simple to make. I would love to make a bigger one to write down more things since I write a lot 🤭but it will be another time, friends. I hope you liked this little vintage-style notebook that I made and if you liked it, I would like to know. I wish you a happy and beautiful afternoon and blessings to you, greetings!!!😍🦋✨.

IMG_20240917_131411_877 (1).jpg

IMG_20240917_132327_898 (1).jpg

Agenda_20240917_145954_0000 (1).png

🦋✨Todas las imágenes de esta publicación son de mi autoria ,📱tomadas con mi celular TecnoSpark8C |📸Fotos editadas en PicsArt y Canva. Texto traducido en el traductor de Google.

🦋✨ All the images in this publication are my author ,📱taken with my TecnoSpark8C cell phone |📸Photos edited in PicsArt and Canva. Text translated in Google Translate.


Picsart_24-08-15_13-46-37-839.jpg


H2
H3
H4
3 columns
2 columns
1 column
Join the conversation now
Logo
Center