
Greetings dear community I am glad to be with you here, 🥰🤗 I give you a warm welcome to another tutorial, breaking the routine once again this day I wanted to do something different from what I always do, well the truth is I was also taking out some orders from a client that were some shirts and a blouse that by the way I finished
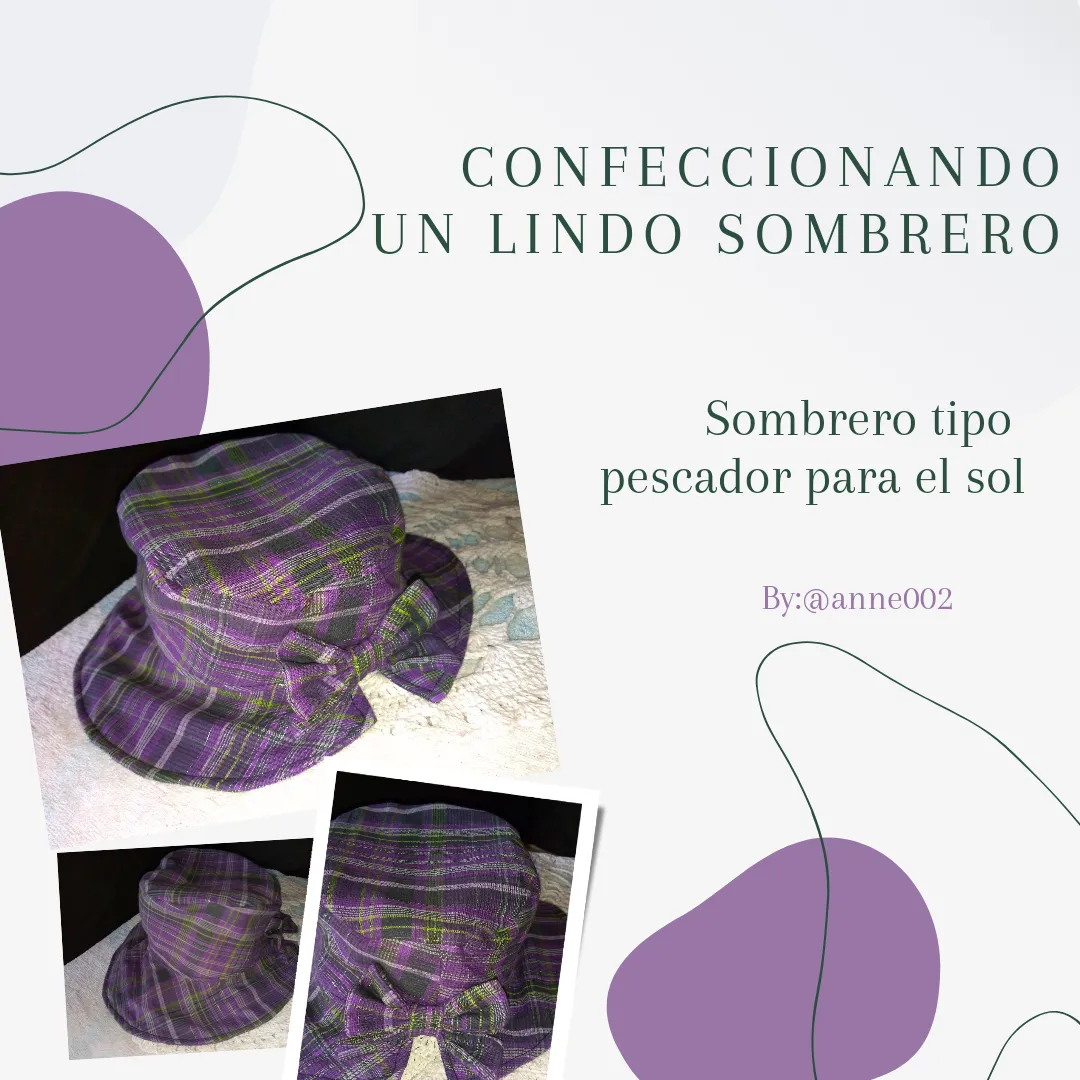
yesterday, so well since I still had scraps of fabric without using them, it occurred to me to make a fisherman-type hat since I am thinking of using it for the sun and for the approaching summer in my city we have reached a somewhat high temperature last summer and of course it is still hot and sunny even if it rains temperatures that felt like 43 ° and more, so in those times it is convenient that we always use our sunscreen and protect ourselves from UV rays.
To make this hat I used patterns that I had access to here and with my corresponding measurements, it has a nice bow in the back and a small space in the back of the hat so that the bow gives it a very flirtatious touch and can fit well if we have or wear a ponytail, here I show you the step by step of this cute hat and I hope you like it a lot.
¡Vamos con el proceso✂️💜!
Let's go with the process✂️💜!
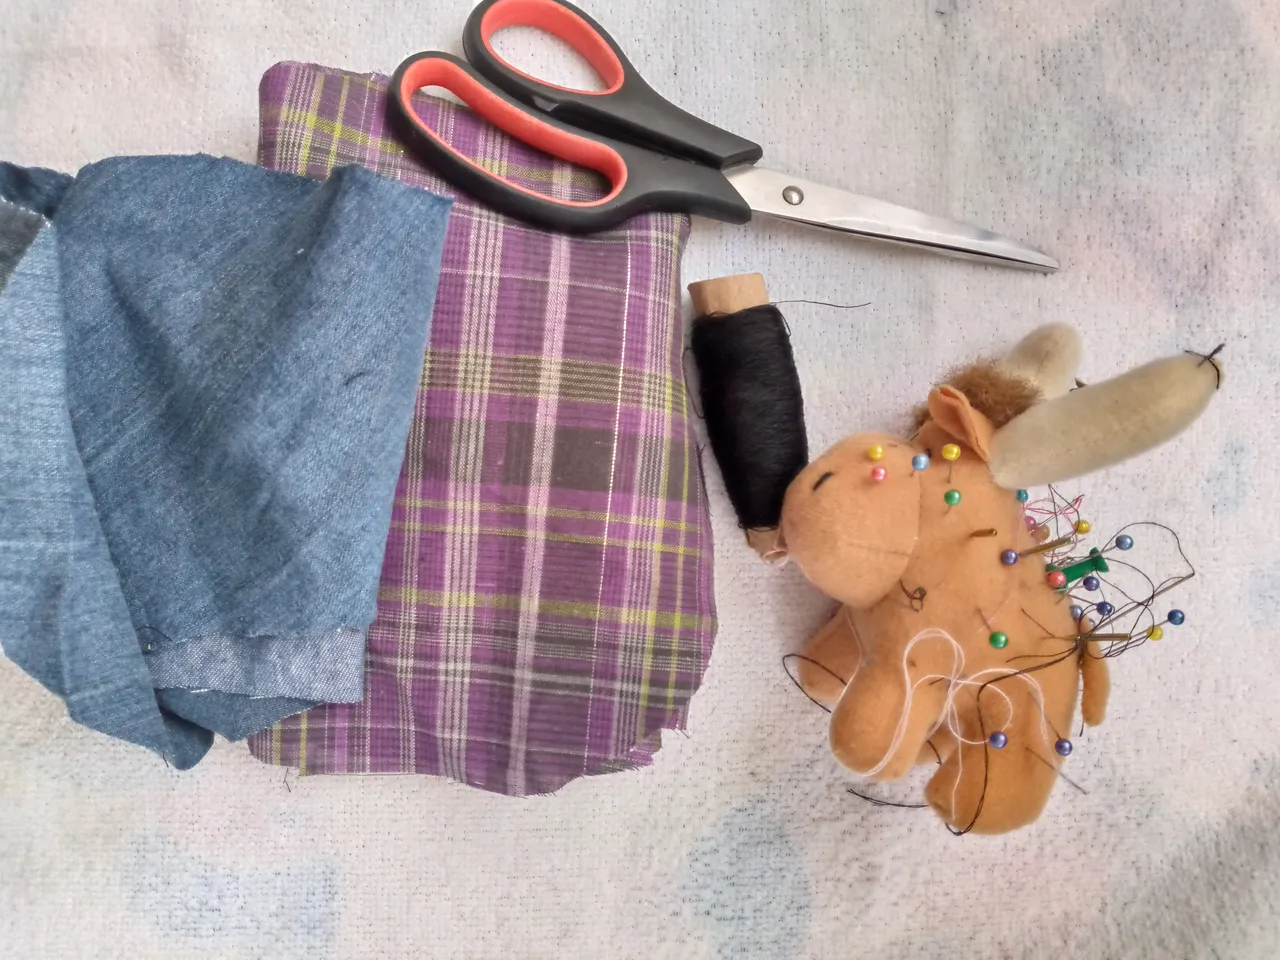
Materiales que usé:
Materials i used:
- Trozos de tela
- Usaremos patrones adaptados y hechos a nuestra medida,yo los he conseguido en Pinterest
- Hilo y aguja
- Alfileres
- Tijeras
- Máquina de coser
- Pieces of fabric
- We will use patterns adapted and made to our measurements, I found them on Pinterest
- Thread and needle
- Pins
- Scissors
- Sewing machine
Pasos a seguir:
Steps to follow:
Paso 01
Step 01
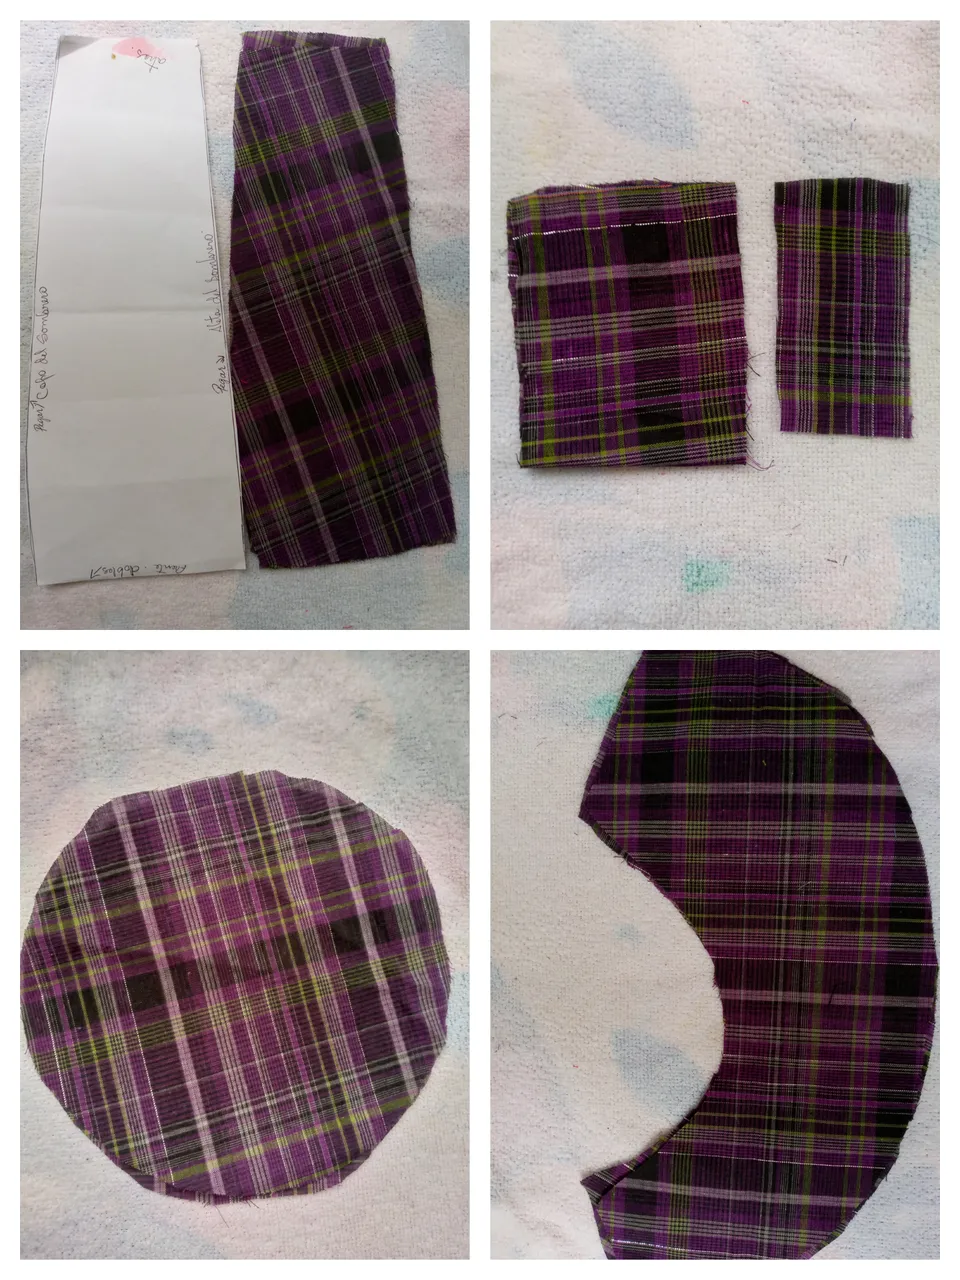
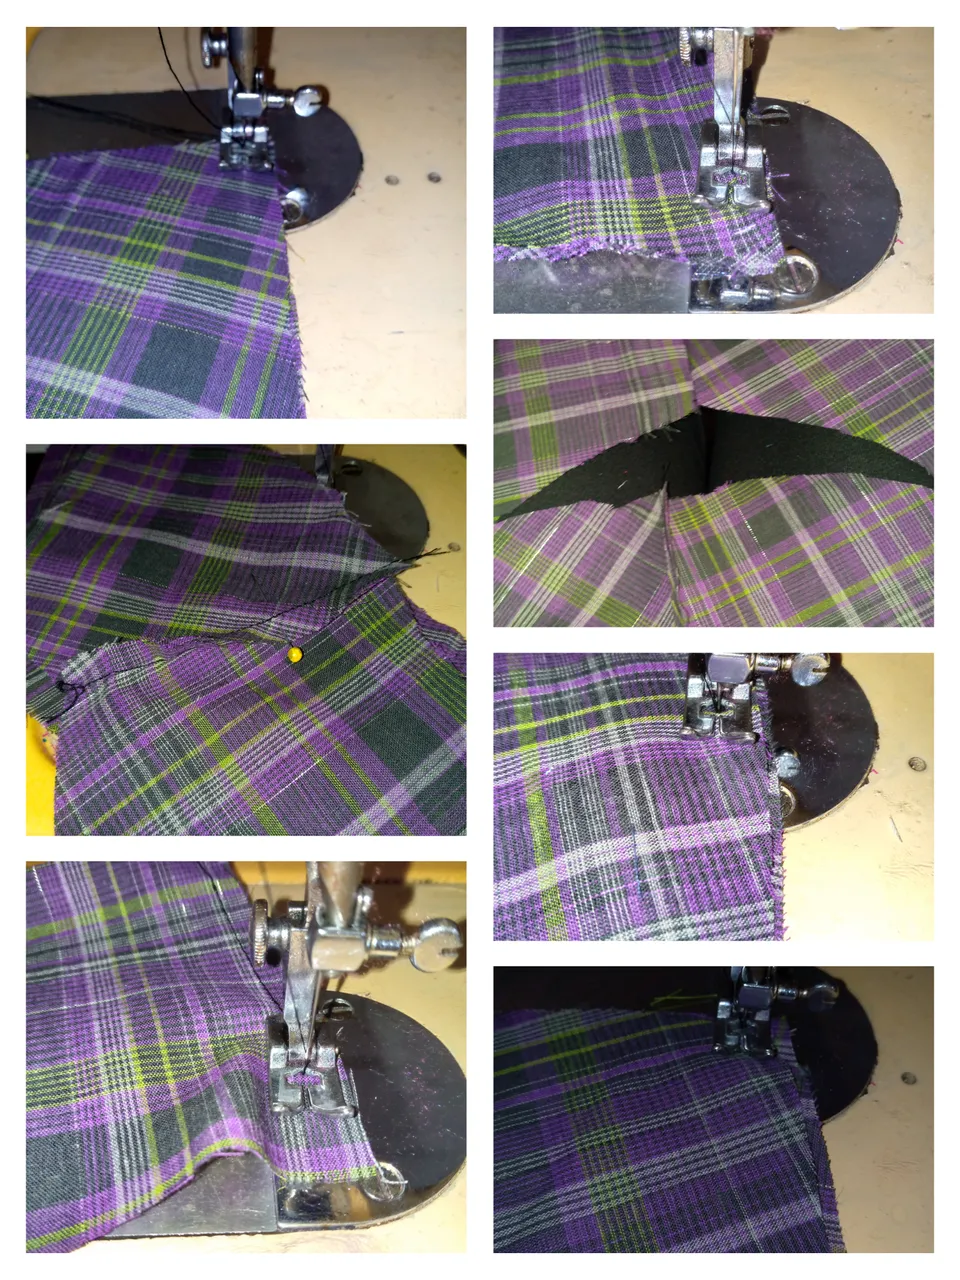
Well my loves you know that I always show you the process of how I have cut the pieces so I have cut them according to my patterns always leaving a small space of 1 cm to be able to sew there later because if we do not leave this space our hat can be smaller than the pieces are, for each piece of the pattern I have cut 2 for example of the fin if I cut 4 because the fabric was not long enough to make this double piece the fin is double that is why I cut four pieces, also the part of the outline of our head I also cut 4 pieces, also to make the bow the square the piece that divides it and the one below a small rectangle.
Paso 02
Step 02
So to start sewing I joined the pieces together, the ones that were tied I sewed the fin pieces and the outline of my head with a straight stitch.
Paso 03
Step 03
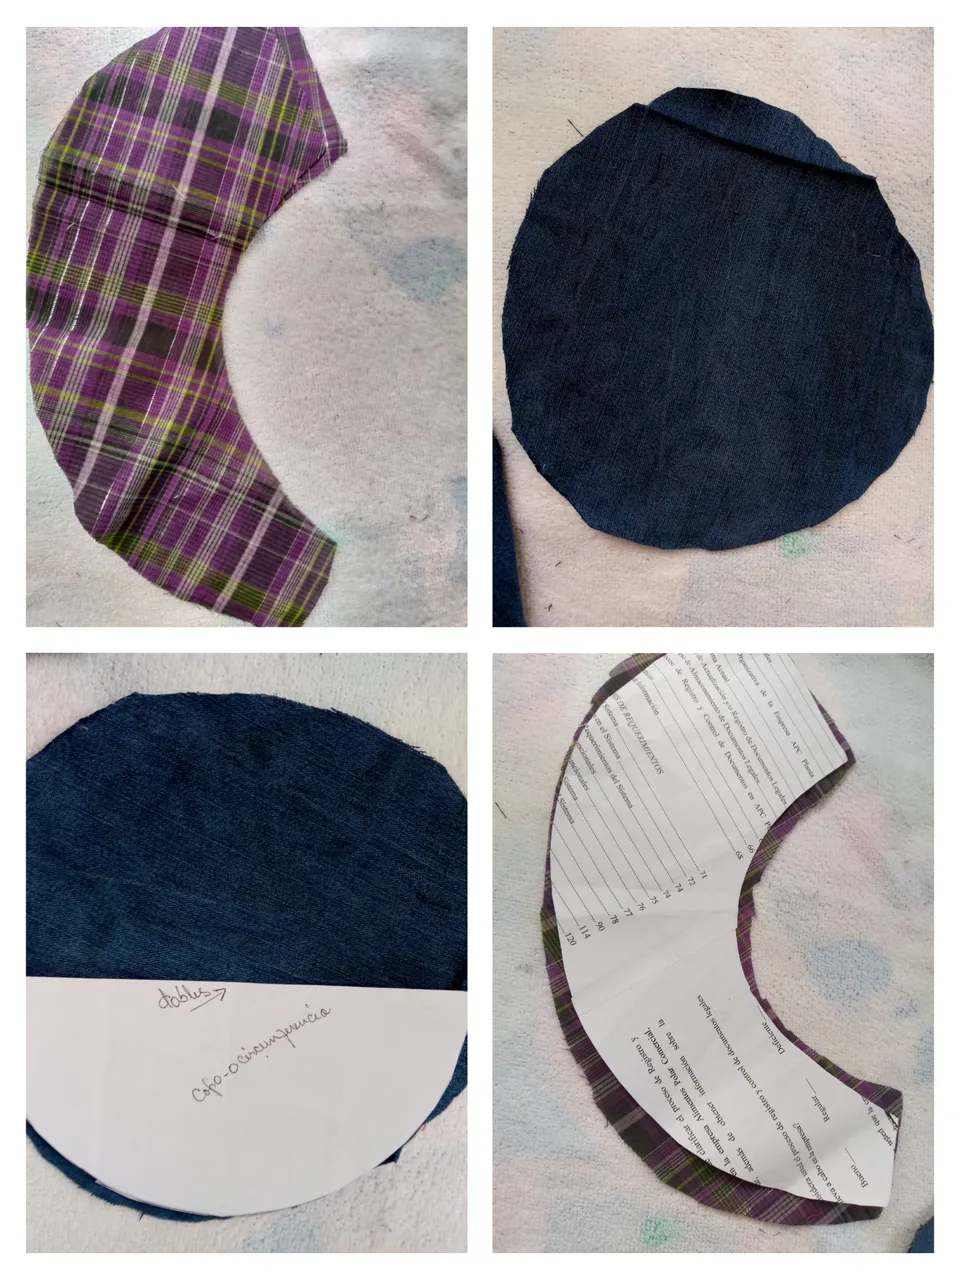
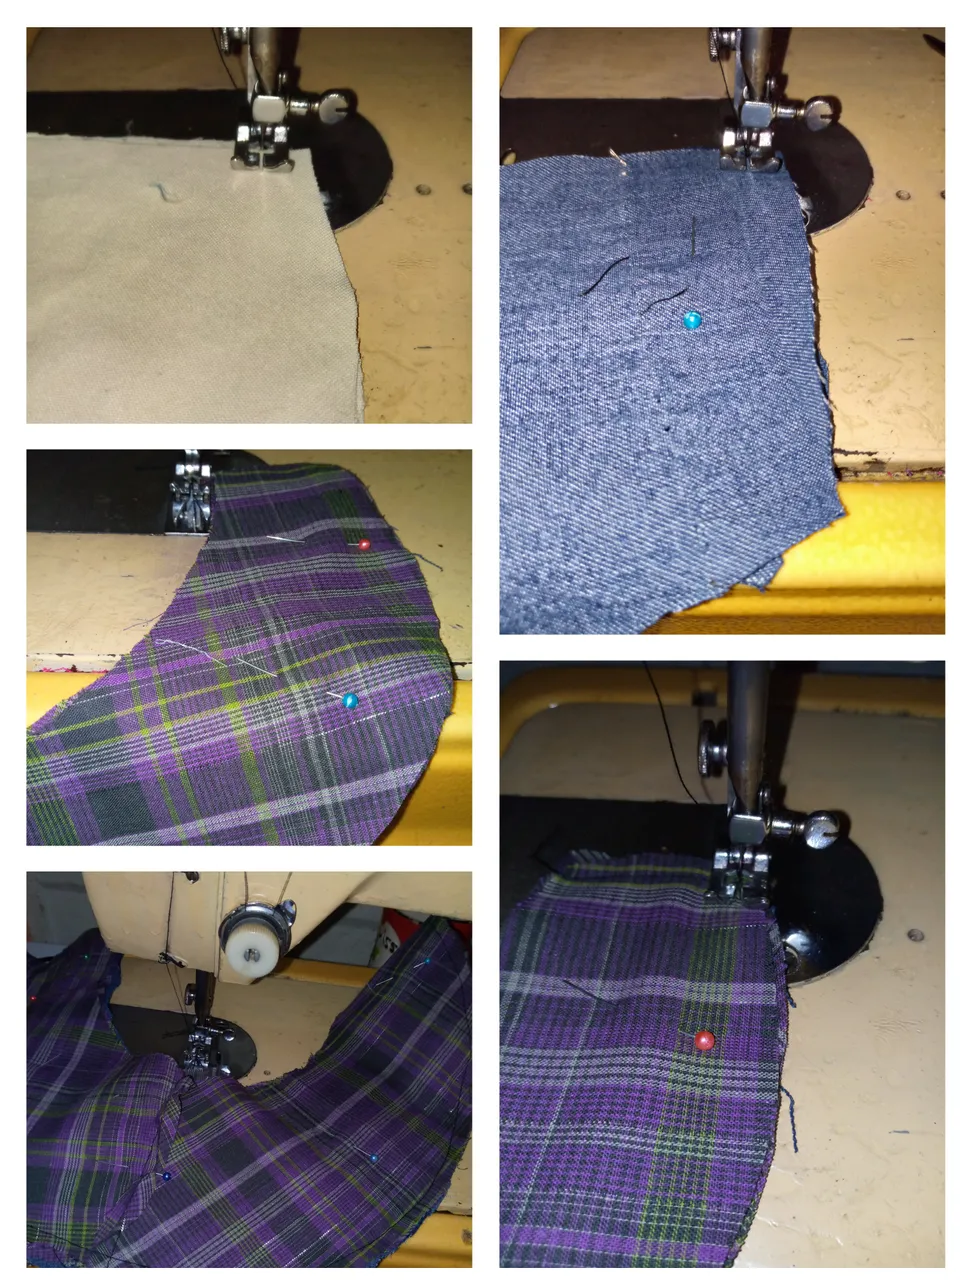
I moved on to join the lining pieces, which of course I used some thick fabrics like jeans, and since this goes inside our upper side fabric, then it is good to place any hard fabric inside it, then what I will do is with the help of my pins sew the entire flap around the outline and turn it over, always holding it with pins so that the fabric does not roll up. When we go to sew each piece of the upper side that we sew, we must put the lining piece inside the hat pieces.
Paso 04
Step 04
Here we will sew and join the piece of the brim next to the piece of the outline of our hat, helping ourselves with our pins we can hold the pieces, we also sew the lining inside of course and there we are going to sew the crown on the bottom and top of both pieces. We should have a small space at the bottom which is where we are going to turn the hat and we sew it with an invisible seam at the end.
Paso 05
Step 05
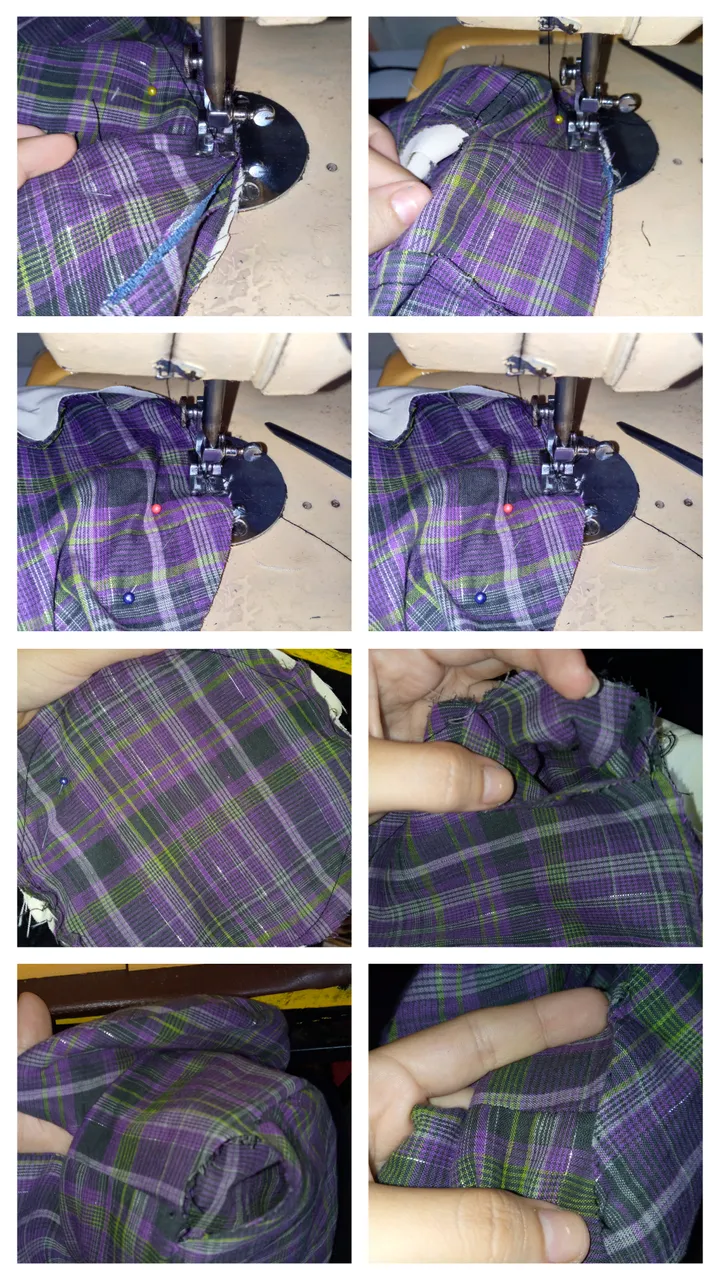
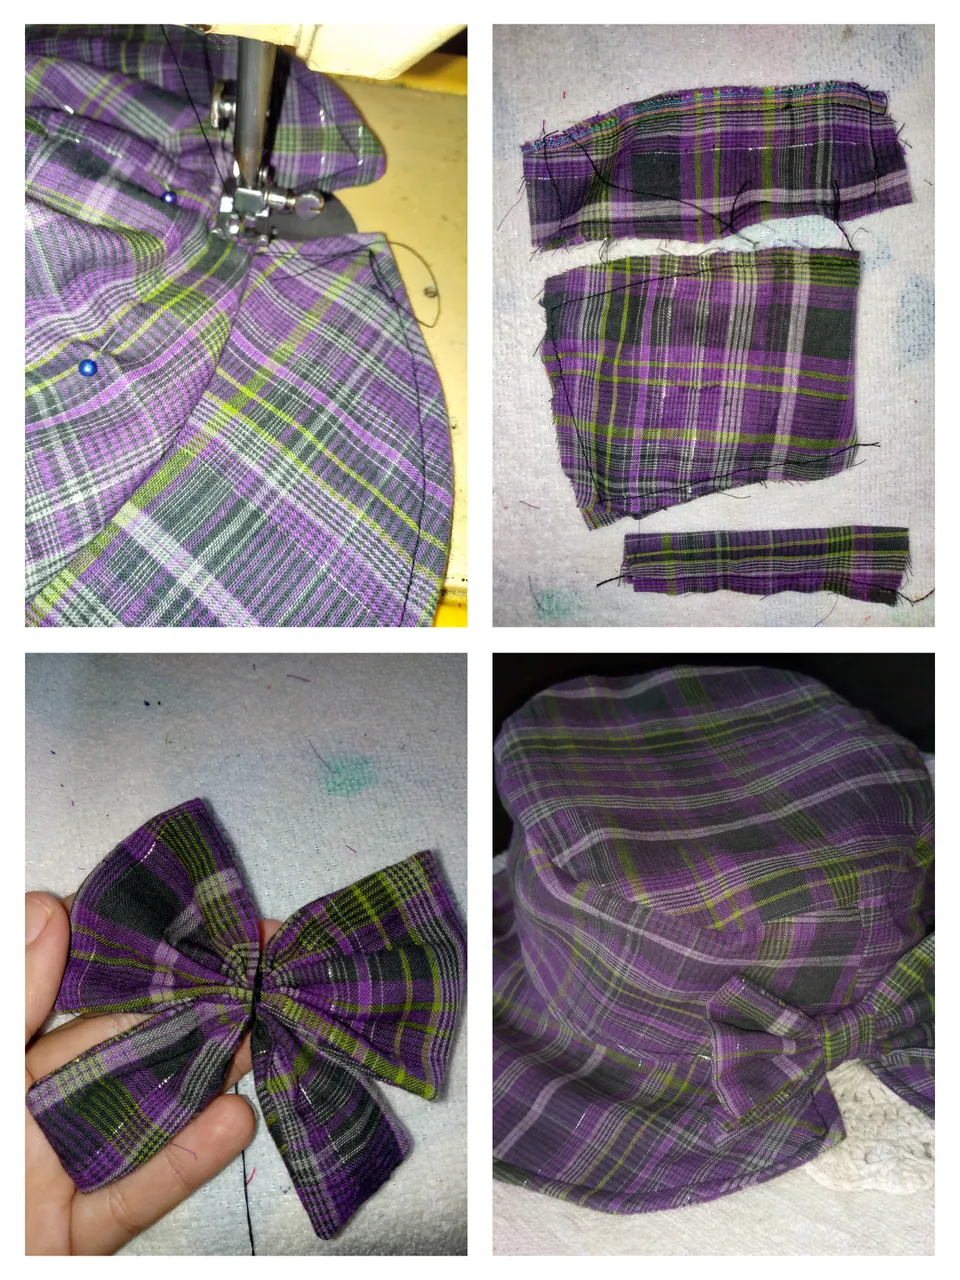
Then what we will do to finish sewing it is to sew a seam above the fin and also sew the outline of our head, I have sewn the pieces of the bow, I have turned them over and I proceed to assemble it, I will sew the square in half and I will gather it making three turns, I place the other piece below, I make two turns and with the piece that is going to join them I will sew them on the back side and I will sew it to the hat on the back side where the small space of the fin is and so we finish.
Resultado:
Result:
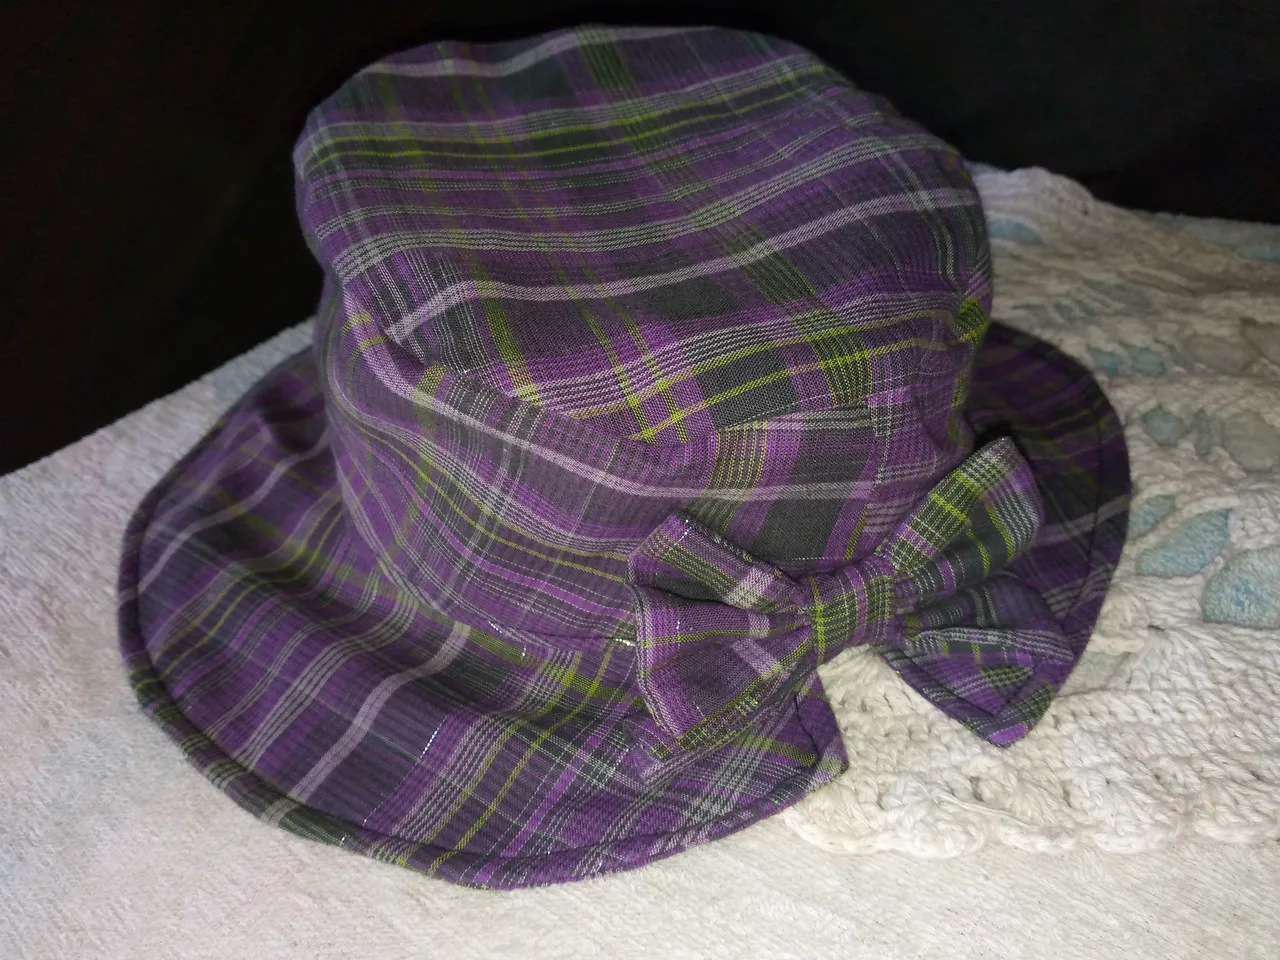
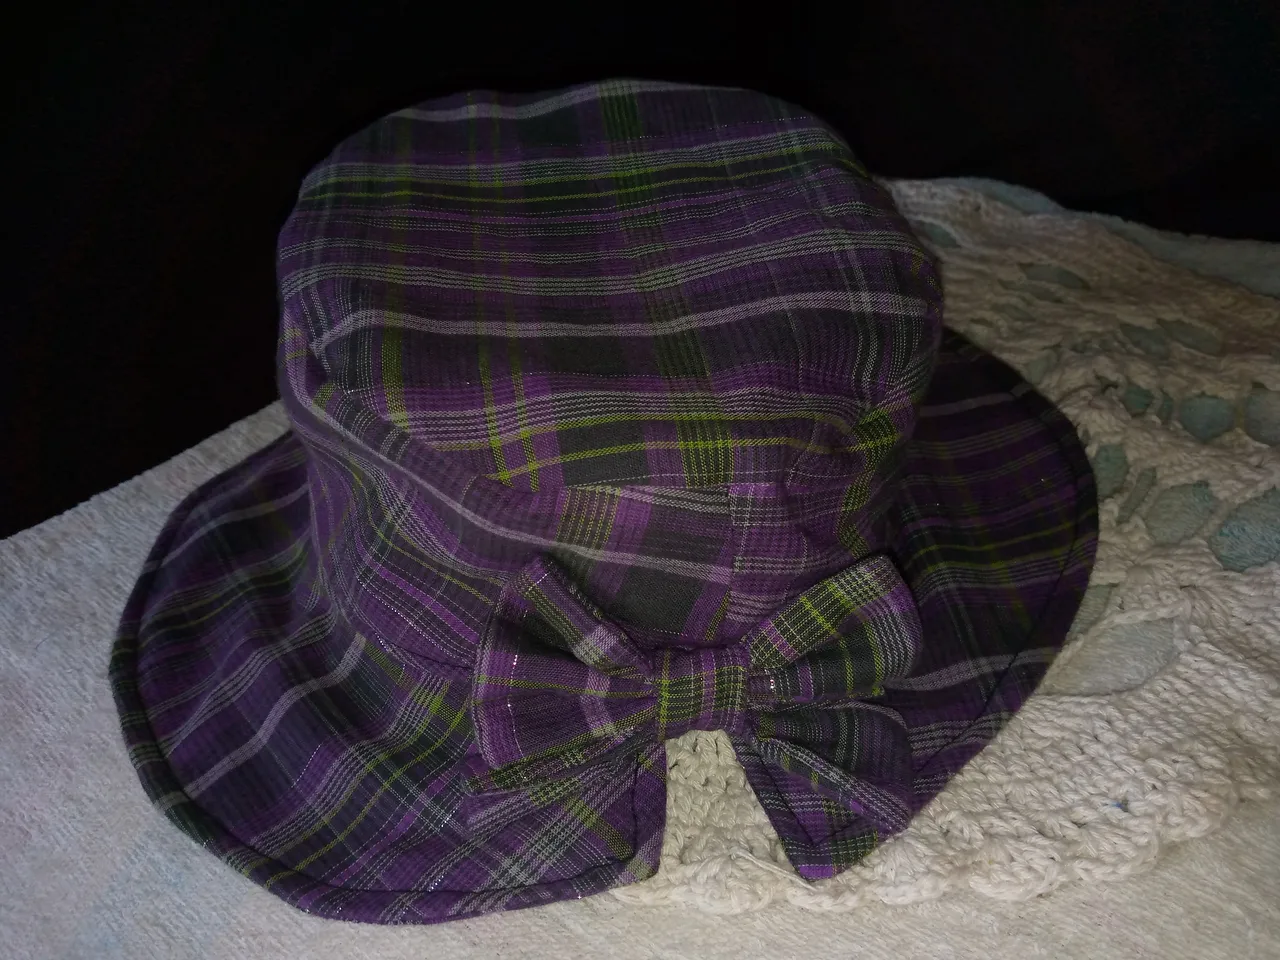
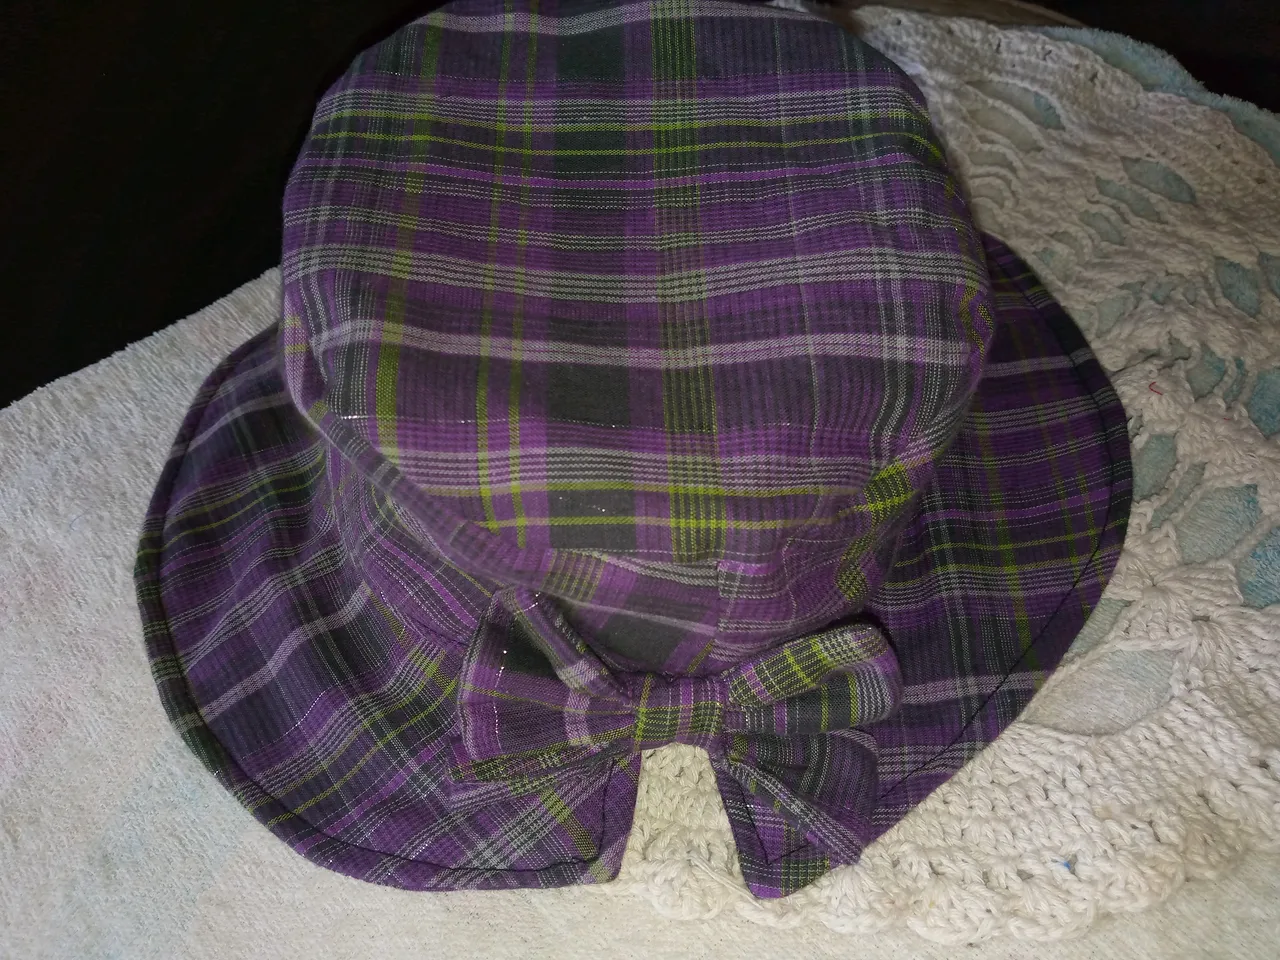
Así ha quedado nuestro sombrero súper listo para usarlo cuando haya sol ,claro casi todos los dias porque ayer si llovió pero como les dije siempre el sol sigue , así que es una oportunidad muy buena para usarlo,me ha encantado como ha quedado este modelo,cuando lo ví me gustó y quise hacerlo ya que nunca lo habia hecho asi con este moño atrás ,aquí te muestro las fotos de como ha quedado,gracias por llegar al final de mi blog y me despido de ustedes con un fuerte abrazo y deseandoles un bello y hermoso dia nos vemos ♥️☀️.
This is how our hat has turned out, super ready to use when there is sun, of course almost every day because yesterday it did rain but as I always told you the sun is still shining, so it is a very good opportunity to use it, I loved how this model turned out, when I saw it I liked it and I wanted to do it since I had never done it like this with this bow in the back, here I show you the photos of how it turned out, thank you for getting to the end of my blog and I say goodbye to you with a big hug and wishing you a beautiful and lovely day, see you ♥️☀️..