Welcome back to the bunker build!
Last time we met up, we added the roof with a small air gap, and said next we would focus on building the tunnel. This tunnel will need to be large enough to allow me to carry buckets of dirt through as I excavate the main fire room chamber.
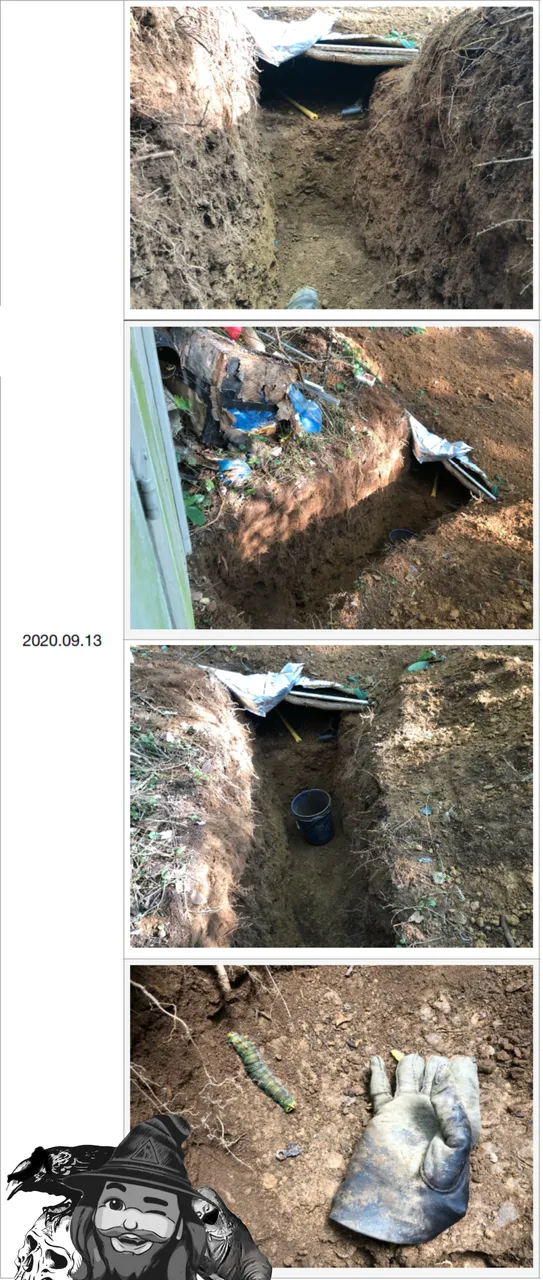
This was probably my least favorite digging so far; very tight space to work within, and the deeper you go the harder it is to maneuver. See that big-ass caterpillar looking thing? I picked him up with those gloves on and he wrapped around my finger and squeezed tight enough that I could feel it. Not sure if he was biting or what, but I went ahead and chucked him off into the woods. In the first image above, you can see that the tunnel is at about half way to target depth.
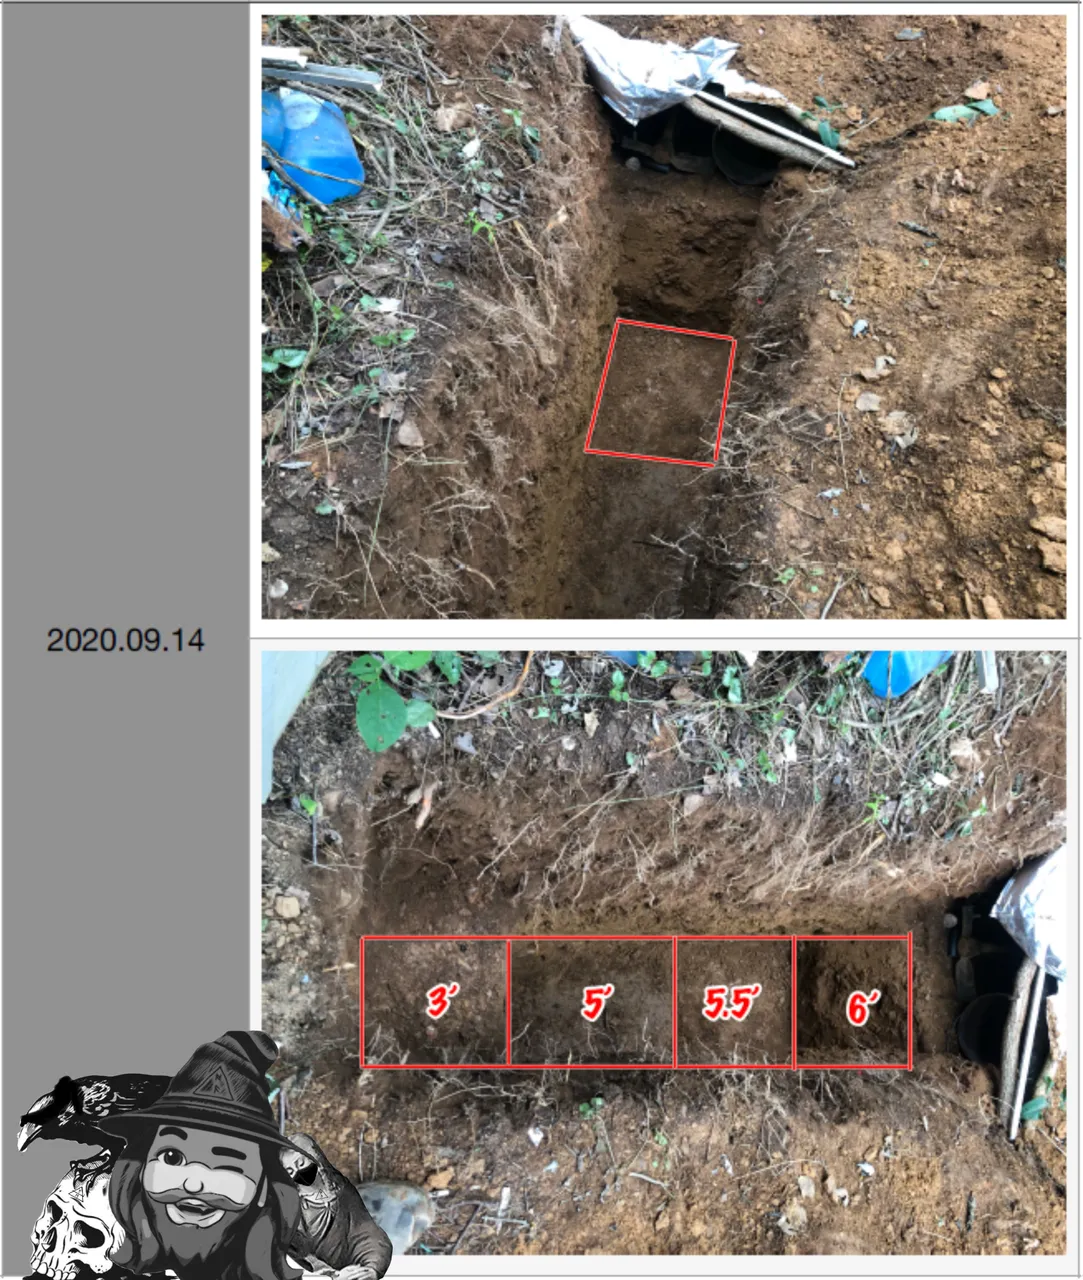
By this second set of images, I’ve managed to get one end of the tunnel down to a depth of about six feet. Target depth is more like 8’ though, and measuring progress in terms of depth is slow going when you’re removing material one bucket at a time!
As always, I know this was a bit short, but there’s a lot of digging that goes into making these pictures! Now I need to do some planning as to how I’ll bring this up into the shed. Next week I should have updates on this next step.
Until then, thanks as always for checking it out!
You can find the links to all the Fire Room posts, here.
For an indexed view of (most) of my works, don’t forget to check out the Albus Index! Quickly search through my content or browse for what available by topic!
- - : GO TO THE ALBUS INDEX : - -
Use my Coinbase referral link to get started with Coinbase! I’ll get $10 in Bitcoin but, more importantly, you will get $10 in Bitcoin too!
Here is a post I did recently about using Coinbase with HiveWallet to get Hive in the US. If you’re wanting to buy Hive and are having difficulties, this may be helpful for you!