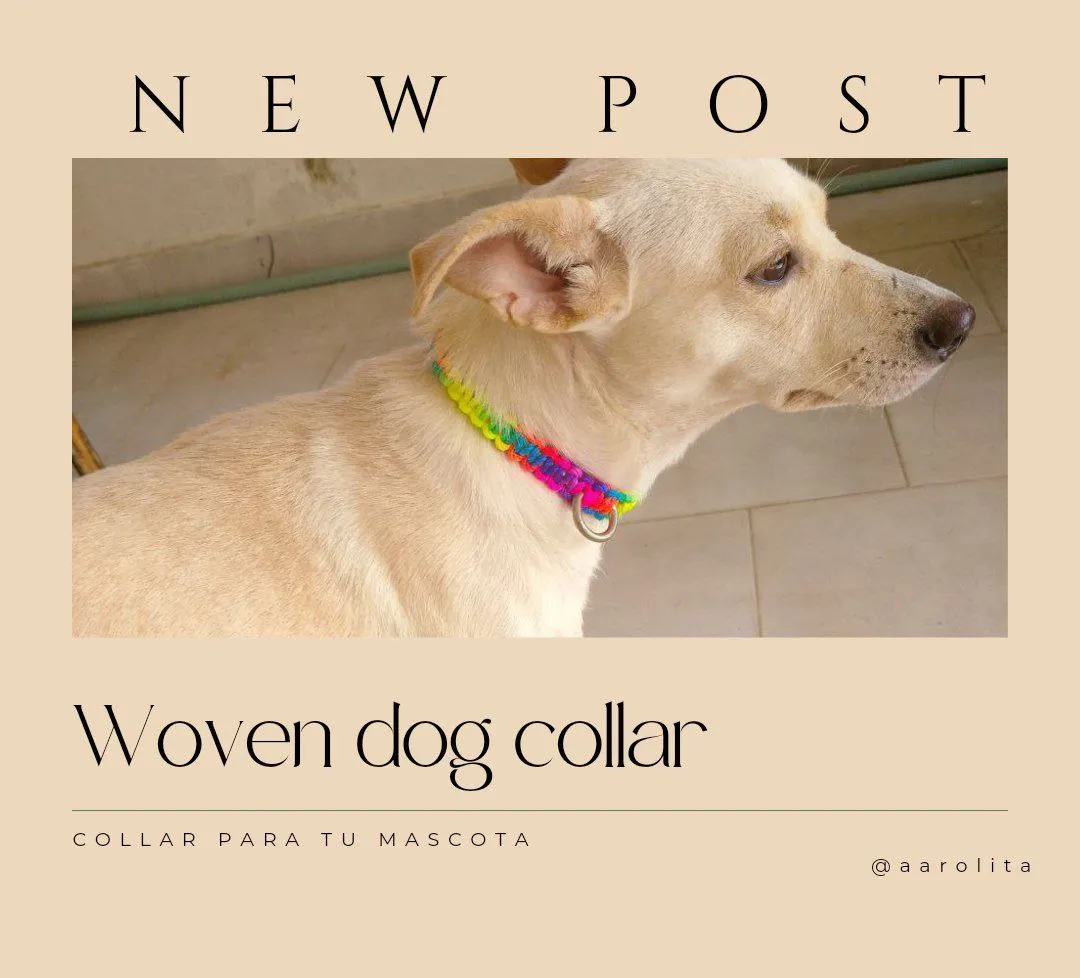
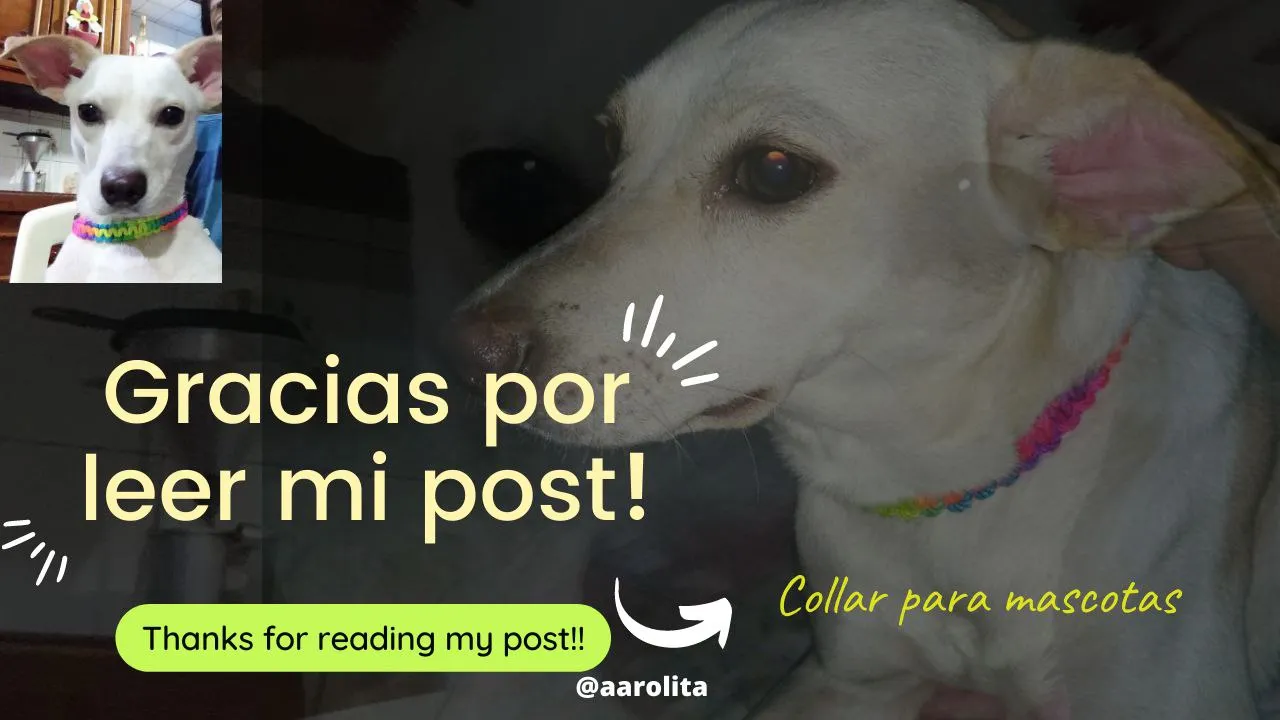
Hello hello, my friends in the Hive Diy community. I greet you again, this time it was my turn to pamper my pet with an accessory, I have made a macrame necklace for him. I have a dog named Chloe that I adopted since she was a baby, and she hasn't used a collar for a long time since she grew up and the one she had stopped fitting her. One day I went to a store where they sold threads and I saw one of various colors that caught my attention and the idea of buying to make a collar for my pet immediately came to mind, and it did.
Hola hola, mis amigos en la comunidad de Hive diy. Los saludo nuevamente, en esta ocasión fue el turno de consentir a mi mascota con un accesorio, le he realizado un collar de macramé. Tengo una perra, llamada Chloe que adopte desde bebé, y desde hace mucho tiempo que no utiliza collar ya que creció y el que tenía dejo de quedarle. Un día fui a una tienda donde vendían hilos y vi uno de varios colores que llamo mucho mi atención y de inmediato se me vino a la mente la idea de comprar para hacerle un collar a mi mascota, y así fue.
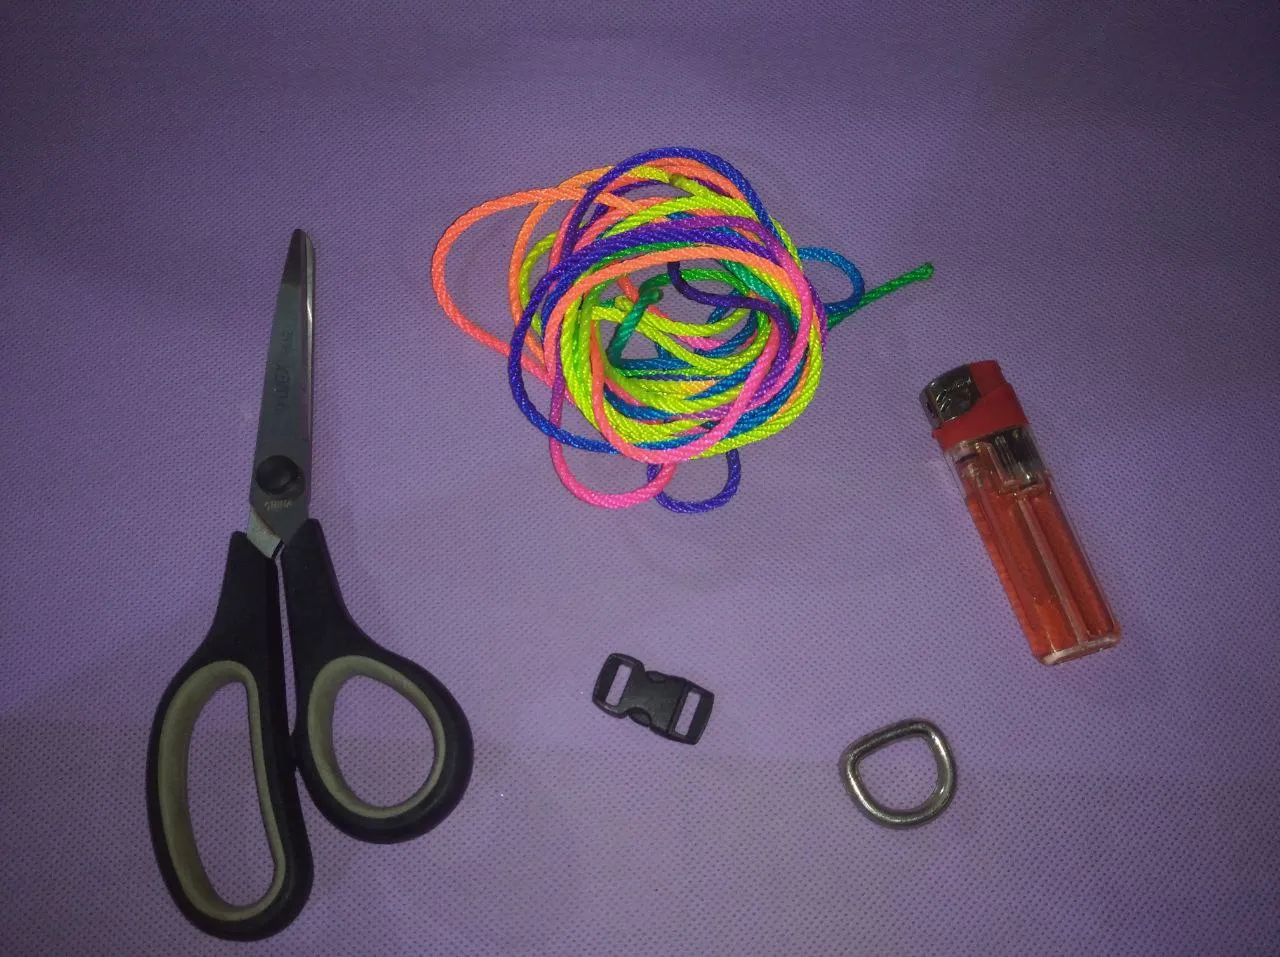
Materials to make a macrame necklace:
- Colored cord
- Buckle or brooch.
- A metal ring.
- lighter
- Scissors
Materiales para hacer un collar de macramé:
- Cordón de colores
- Hebilla o broche.
- Un anillo de metal.
- Encendedor.
- Tijeras.
Steps to make a macramé necklace:
Pasos para hacer un collar de macramé :
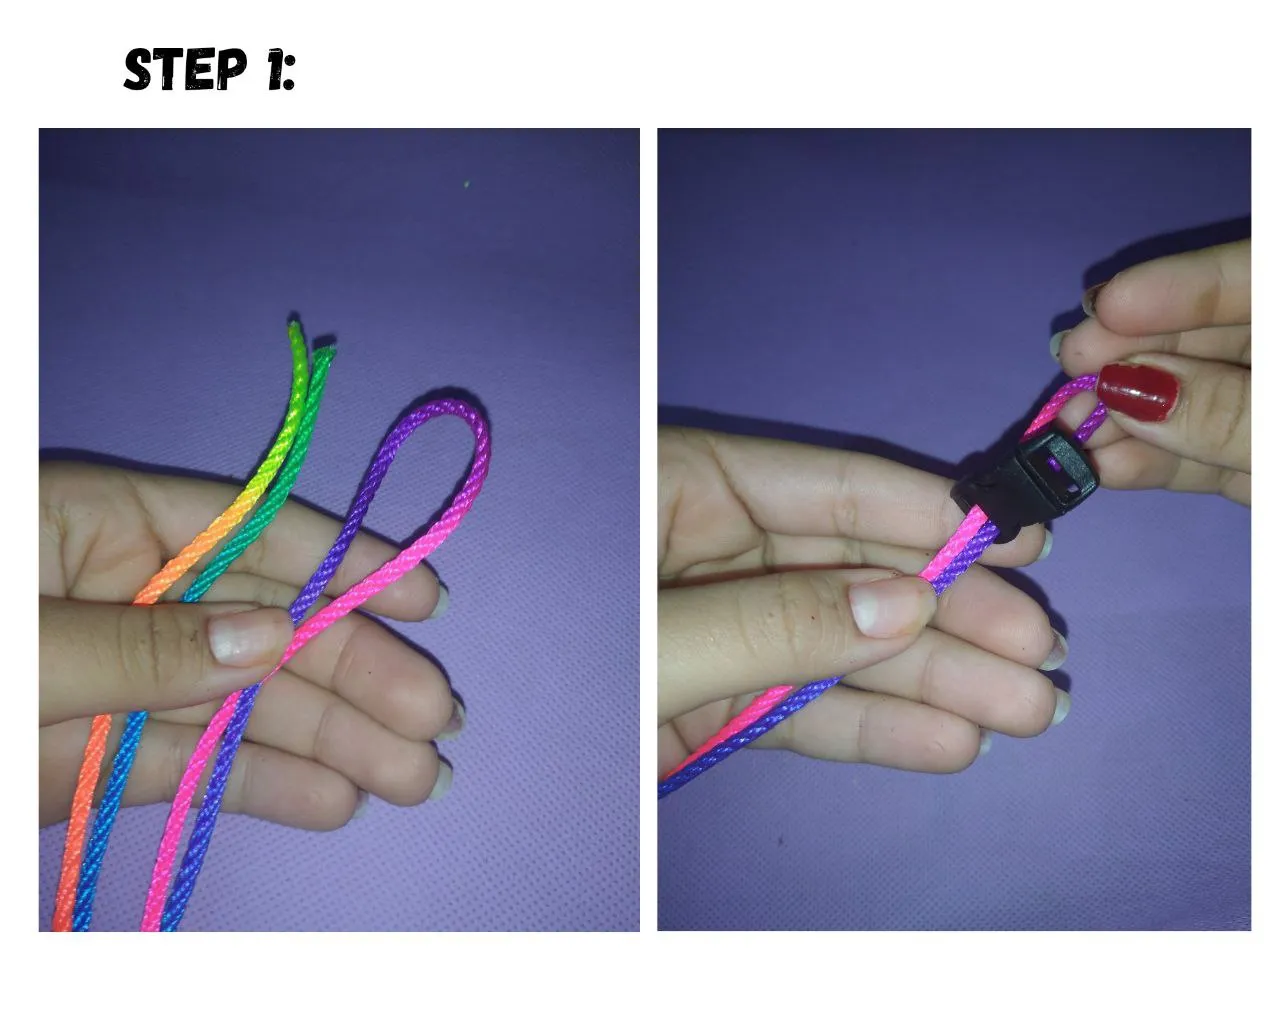
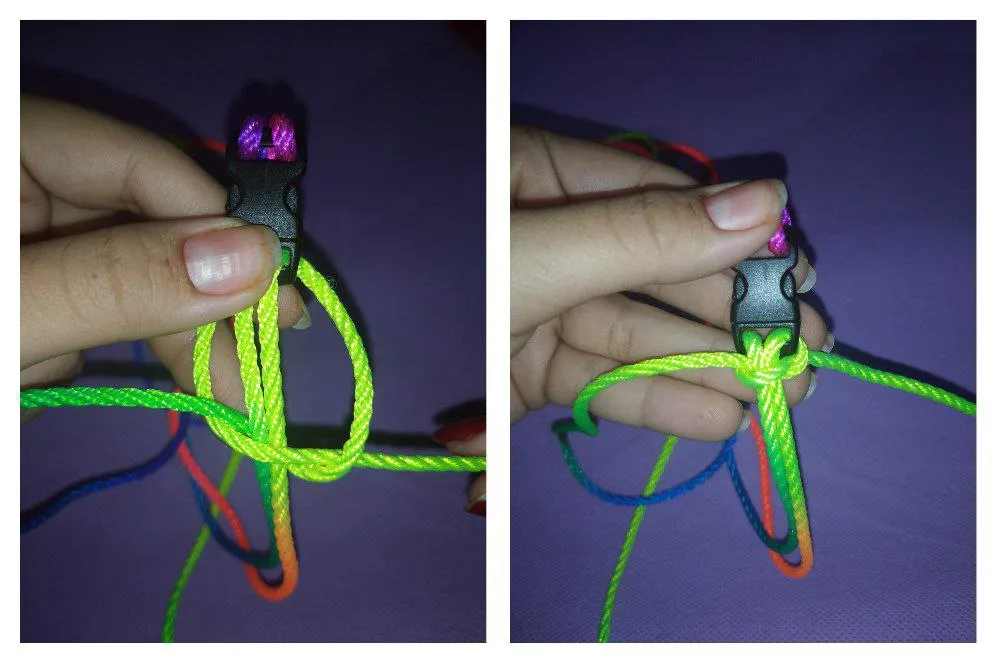
- The first step to make this necklace is to tie the cord to the buckle that will serve as a guide to trace this wonder. In my case, my pet's neck measures almost 40cm, so I used 3.50 meters of cord. I look for half of the thread and folded like this I will put it through one of the holes in the brooch.
- El primer paso para hacer este collar es atar el cordón a la hebilla que será la que nos sirva de guía para ir trazando esta maravilla. En mi caso, el cuello de mi mascota mide casi 40cm, por lo tanto, utilice 3.50 metros de cordón. Busco la mitad del hilo y así doblado lo meteré por alguno de los huecos del broche.
2.Through the hole that I make when I put the cord in the clasp I will put the ends of the thread to form a knot.
2.Por el agujero que forme al introducir el cordón en el broche meteré los extremos del hilo para formar un nudo.
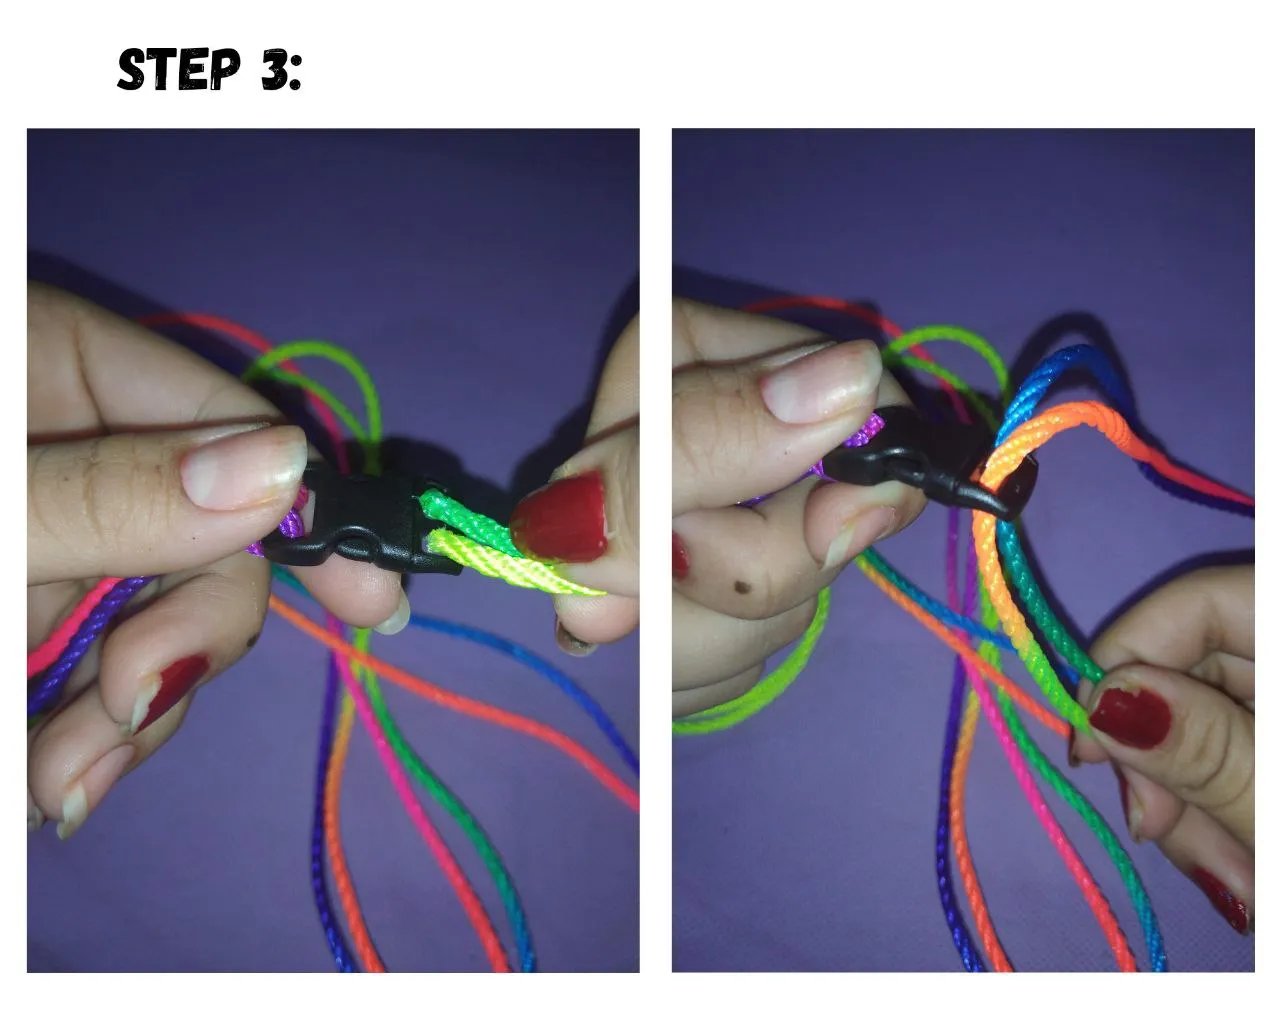
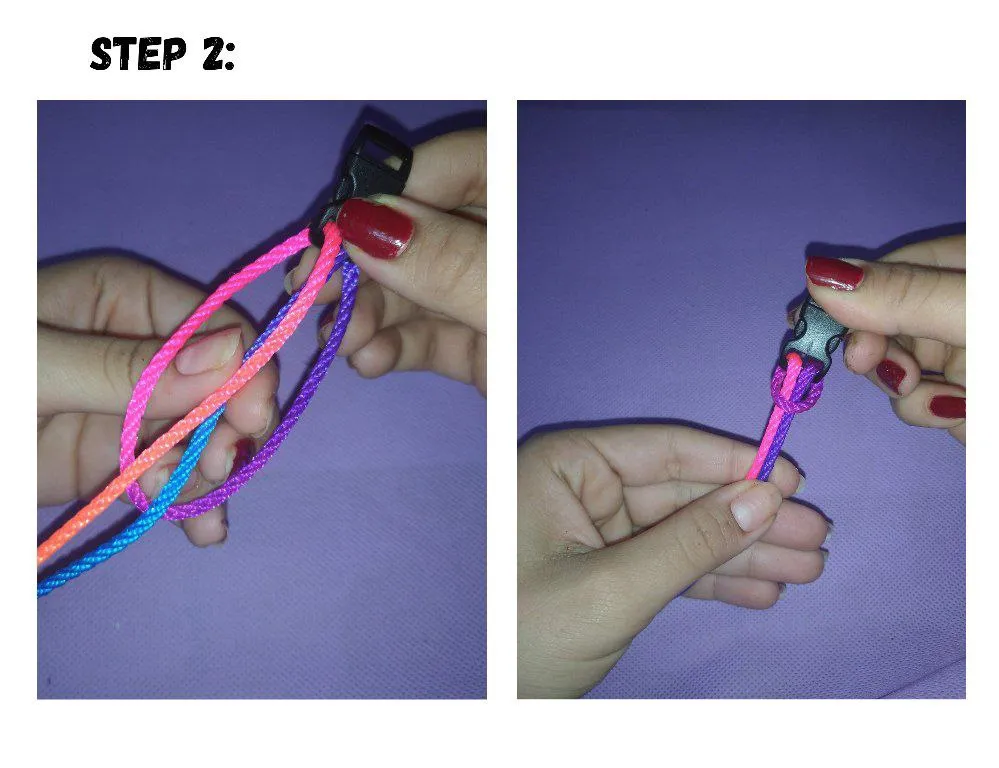
3.Now I will put the ends of the thread through the other side of the brooch from top to bottom.
3.Ahora meteré los extremos del hilo por el otro lado del broche de arriba hacia abajo.
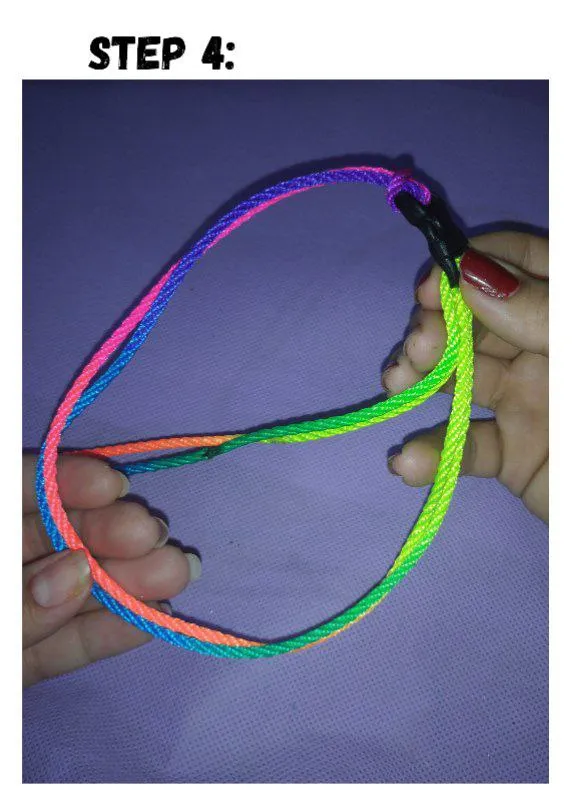
4.To make sure that the collar is not going to be tight on my pet, I took the measurement directly from his neck, but I could have simply done it with the help of the meter in case your pet is very restless. Remember that it must be loose, but not too loose, so as not to hurt them.
4.Para asegurarme de que el collar no le vaya a quedar ajustado a mi mascota yo le tome la medida directamente de su cuello, pero simplemente pude haberlo hecho con la ayuda del metro en el caso de que tu mascota sea muy inquieta. Recuerden que debe de quedar suelto, pero no demasiado, para no hacerles daño.
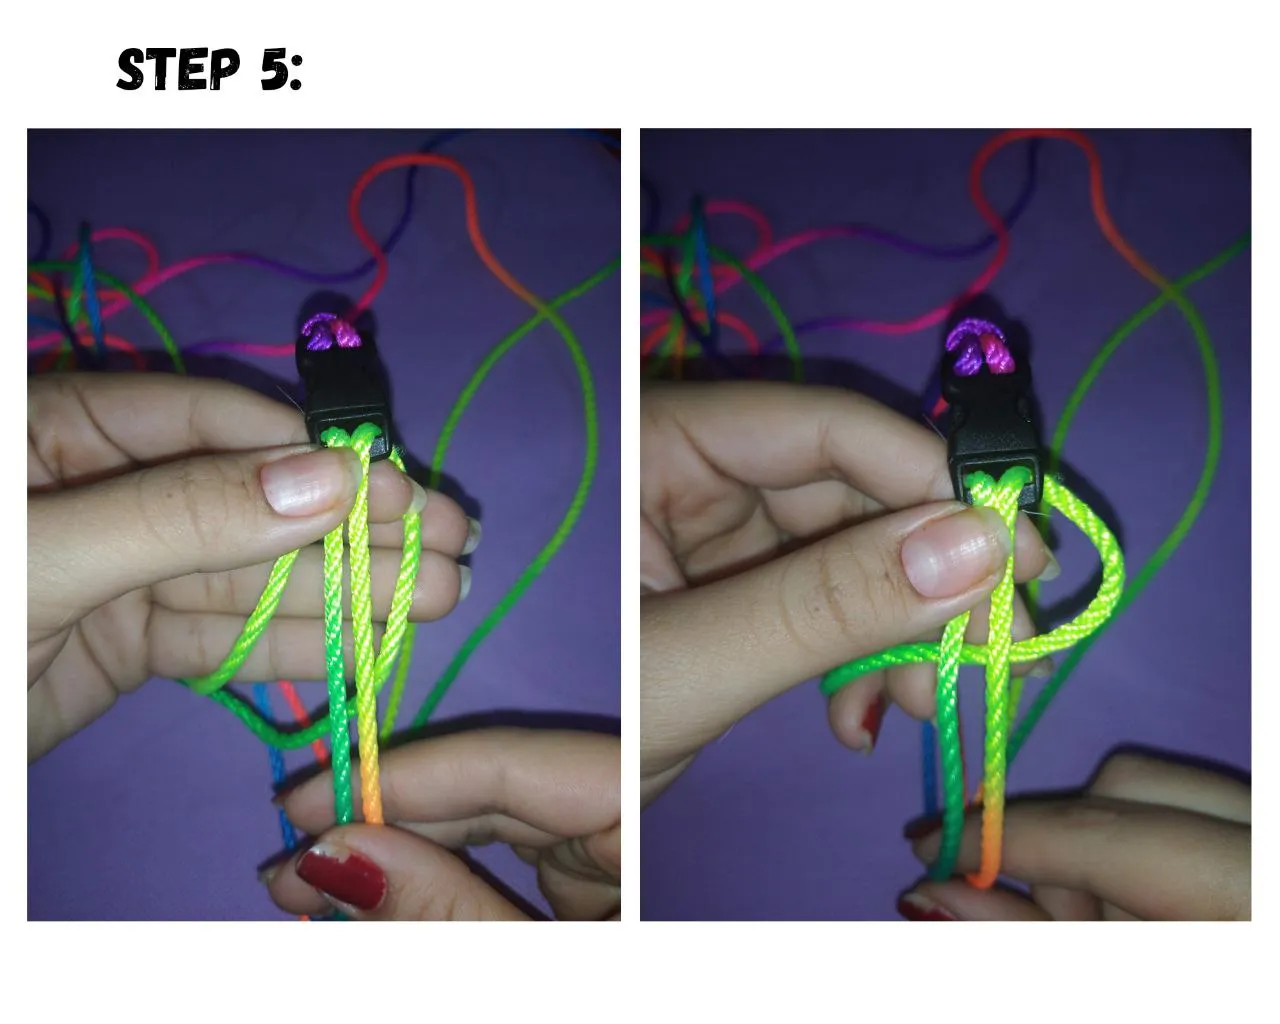
5.Now we are going to take the end and place it over the center to start weaving the necklace. The knot I chose to make this necklace was the basic flat knot, it begins by forming a C with the end on the right side passing it under the threads in the center. Remaining above the thread on the left side. Now we will pass the tip of the left thread through the c that we formed on the right side. We are tightening the two ends and you will see how the first knot that we will create to weave the necklace is formed.
5.Ahora vamos a coger el extremo y lo colocamos sobre el centro para comenzar a tejer el collar. El nudo que elegí para hacer este collar fue el básico nudo plano, se comienza formando una C con el extremo del lado derecho pasándolo por debajo de los hilos del centro. Quedando por encima del hilo del lado izquierdo. Ahora pasaremos la punta del hilo izquierdo por la c que formamos del lado derecho. Vamos apretando los dos extremos y verán como se forma el primer nudo que iremos creando para tejer el collar.
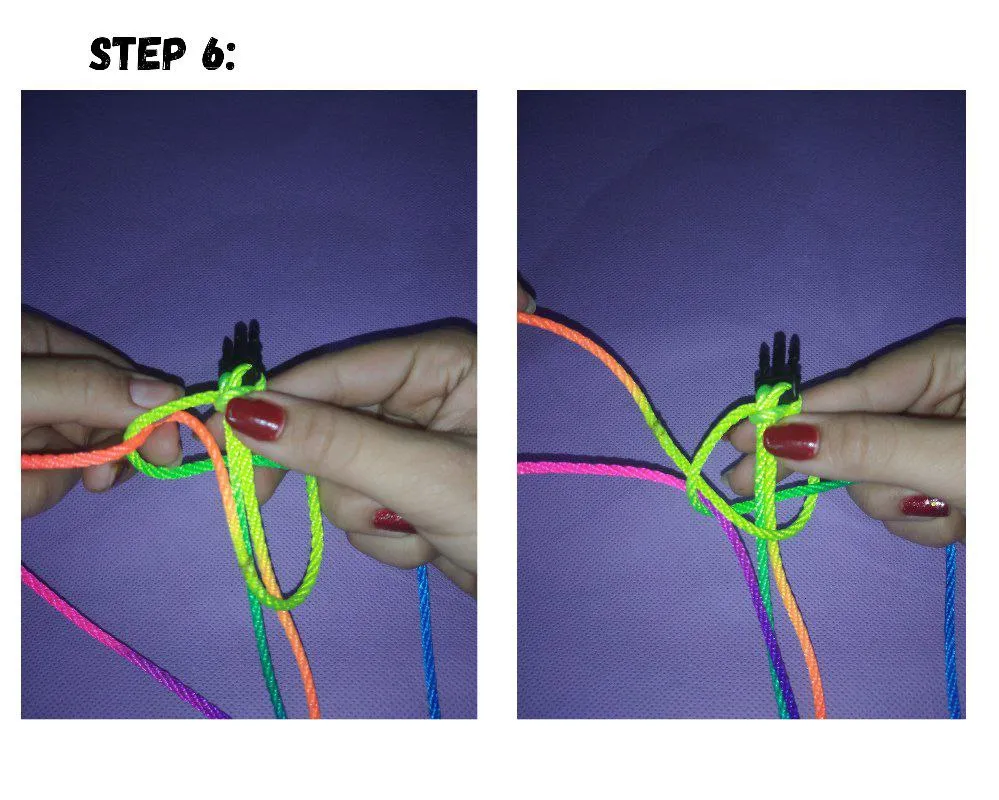
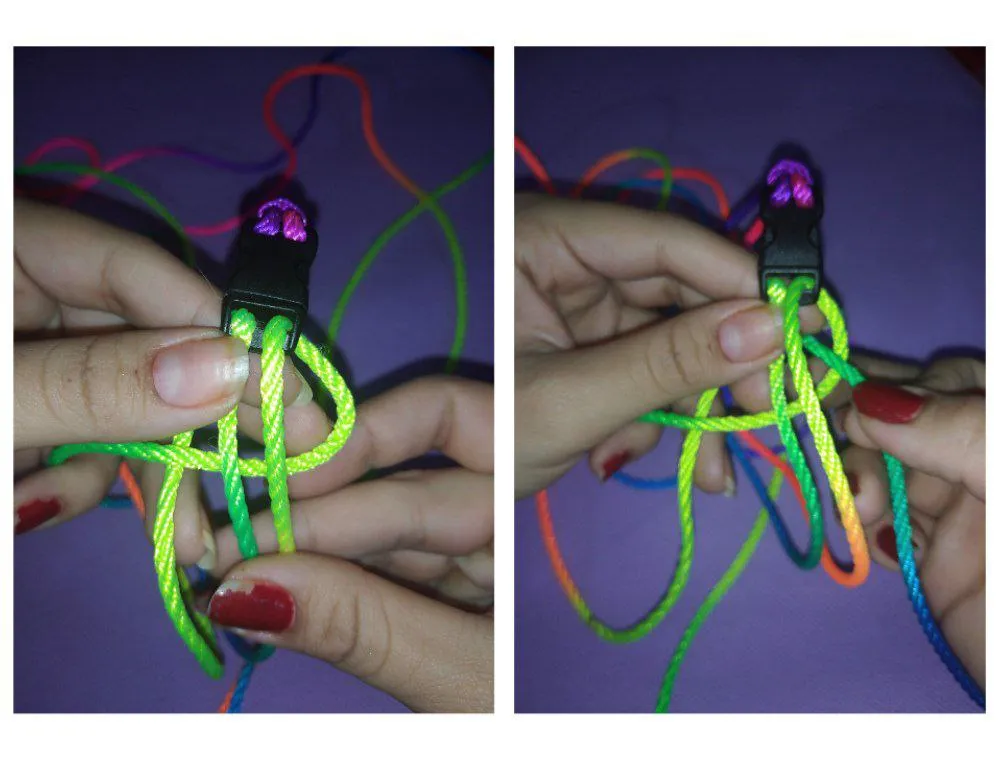
6.Now we will do the same procedure but on the opposite side, we create a C with the left thread, passing it under the center thread, leaving it above the thread on the right side, and we pass the end of the right thread through the hole that was formed on the right side. left we tighten and there we have our second knot.
6.Ahora haremos el mismo procedimiento pero del lado contrario, creamos una C con el hilo izquierdo pasandolo por debajo de los hilos del centro dejandolo por encima del hilo del lado derecho y pasamos el extremo del hilo derecho por el agujero que se formo del lado izquierdo apretamos y ahí tenemos nuestro segundo nudo.
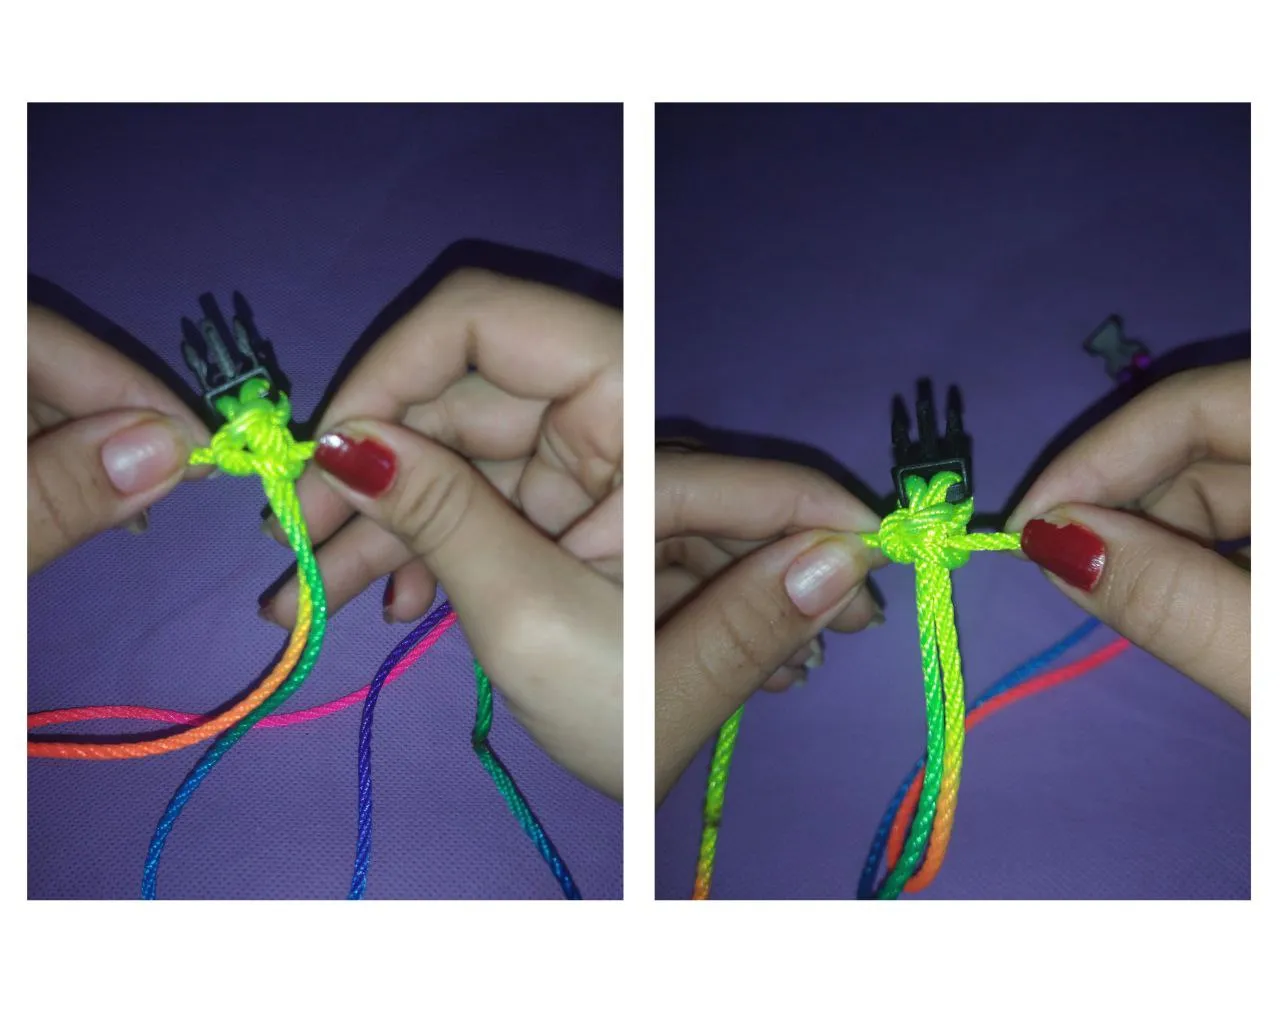
7.I do this same procedure about six more times, first the right side and then the left, and so on.
7.Hago este mismo procedimiento unas seis veces más, primero el lado derecho y luego el izquierdo, y así sucesivamente.
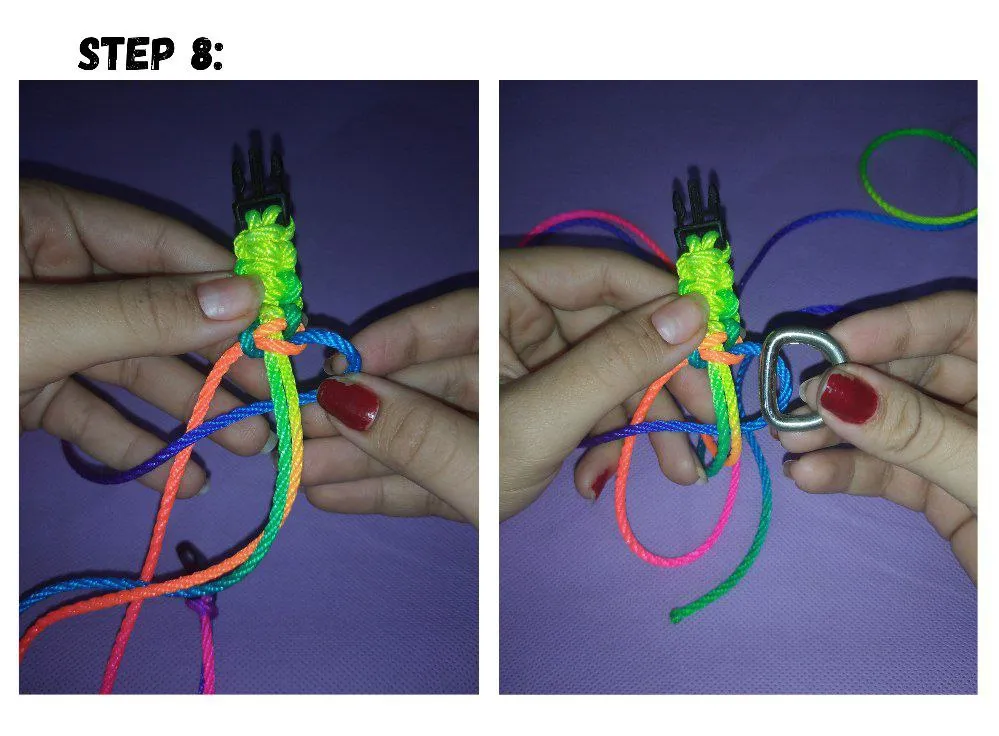
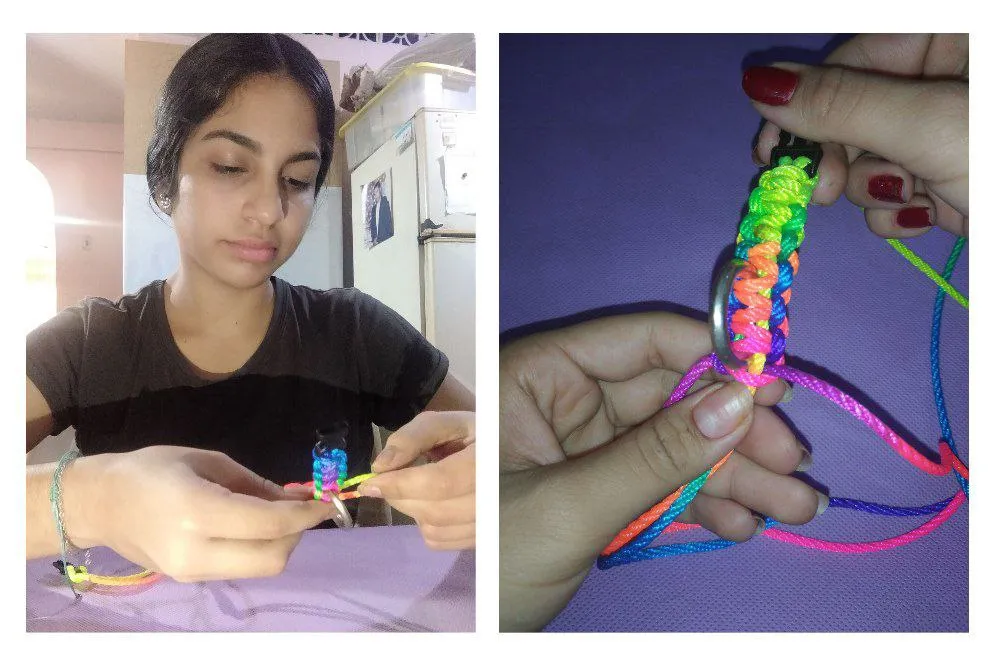
8.At this point I am now going to place the ring, by which the puppy's leash will be attached when we take it out for a walk. To place the ring, we will follow the fabric in the normal way, with the difference that before passing the end through the middle of the "C" that we formed, we will insert it through the center of the metal ring.
8.En este punto ahora voy a colocar el anillo, por el cual se va a sujetar la correa del cachorro cuando lo saquemos a pasear. Para colocar el anillo seguiremos el tejido de manera normal, con la diferencia de que antes de pasar el extremo por el medio de la “C” que formamos lo vamos a meter por el centro del anillo de metal.
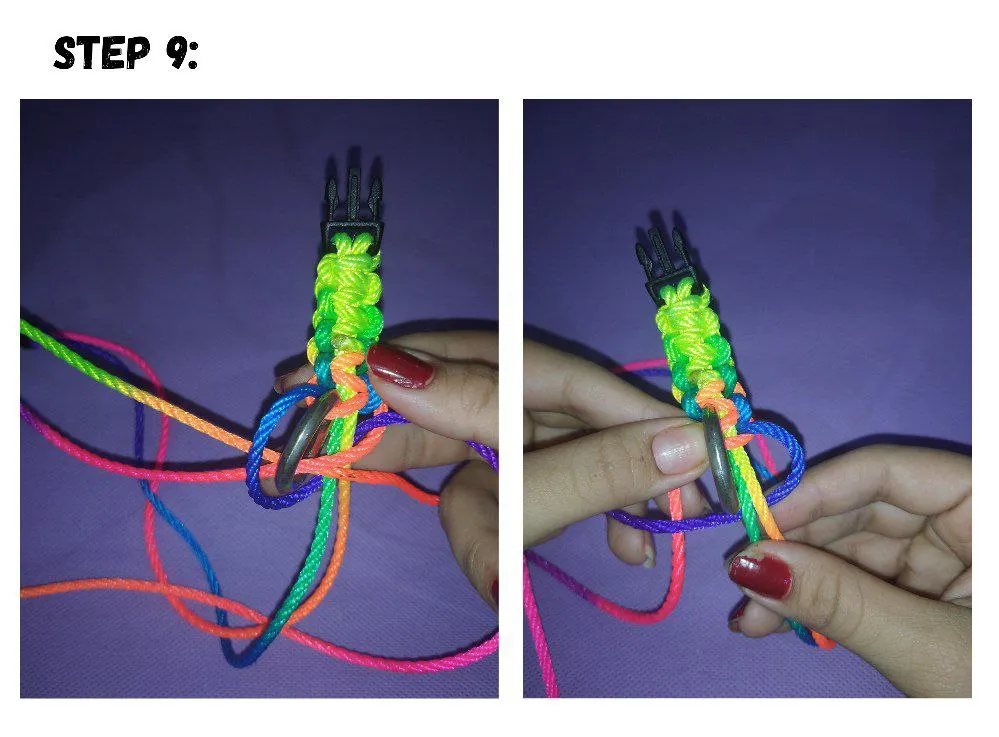

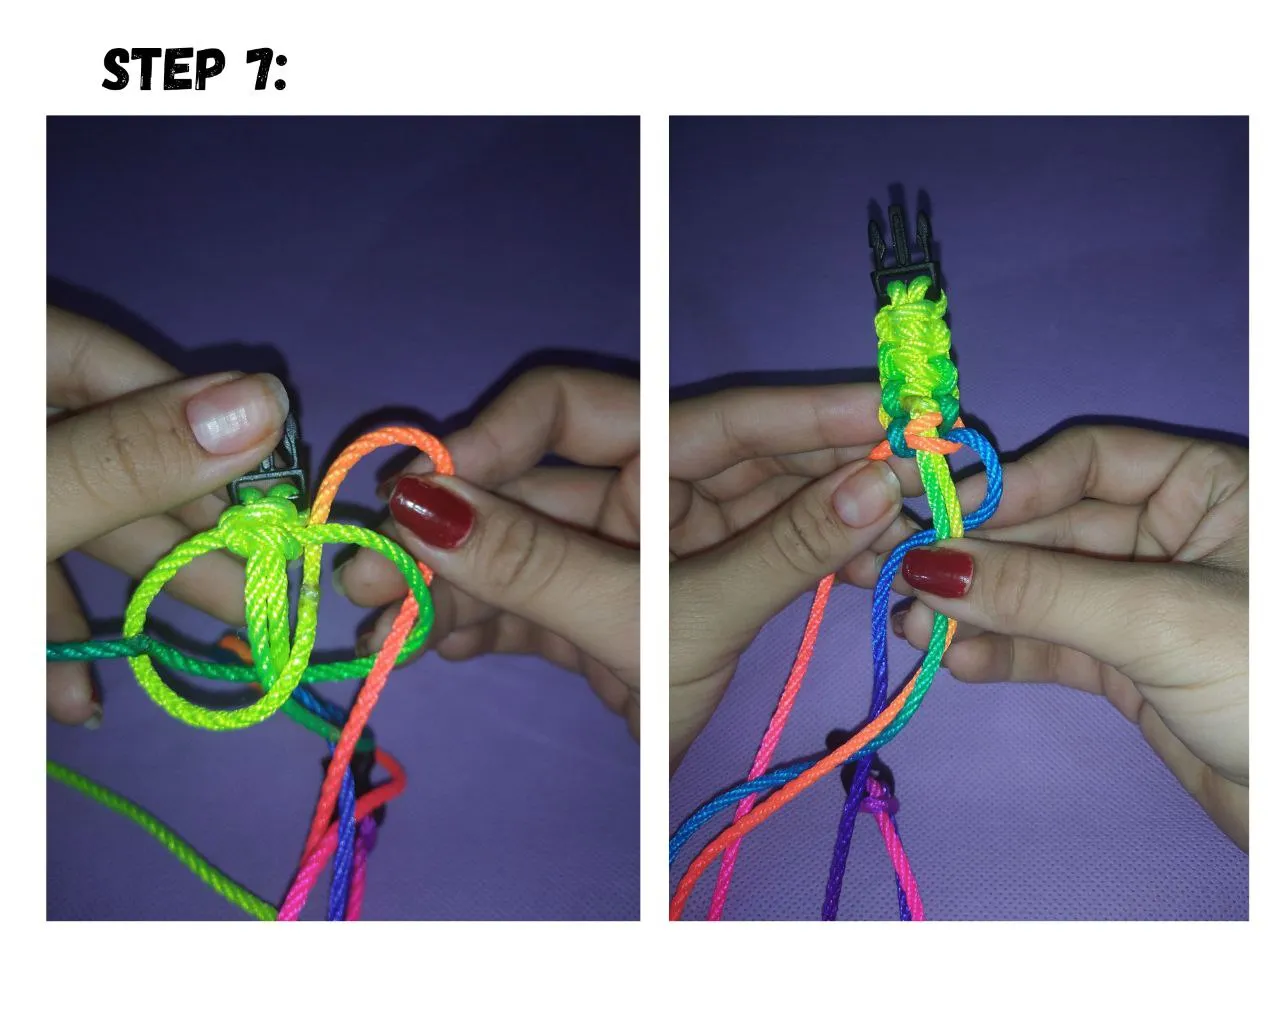
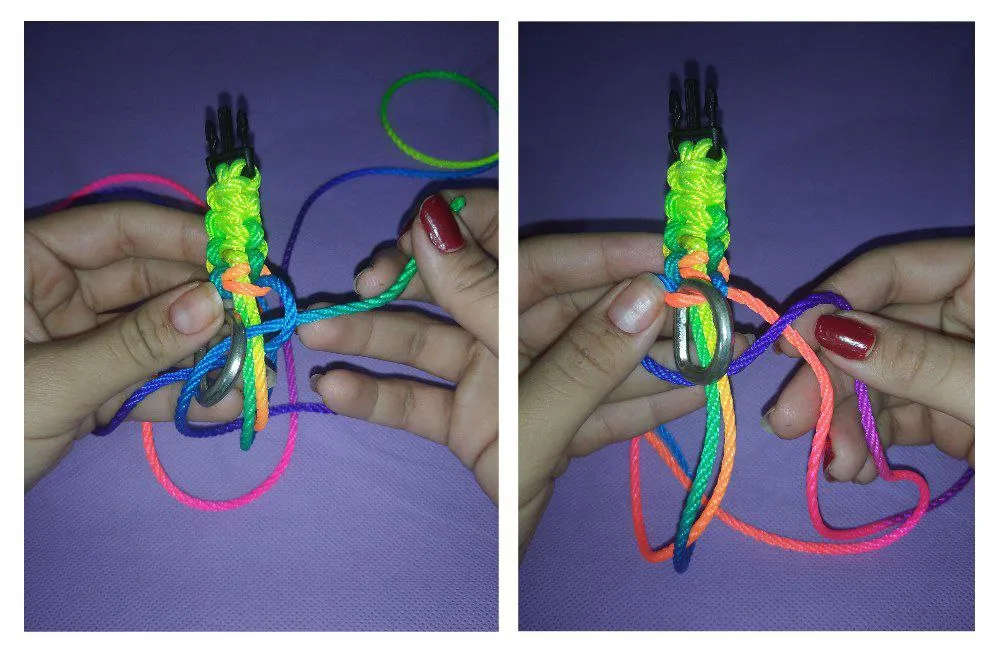
9.I had to make only three knots to tie the ring. Once it is ready, continue weaving normally until you reach the end of the necklace.
9.Yo tuve que hacer tan solo tres nudos para atar el anillo una vez este listo se continua tejiendo normal hasta llegar al final del collar
10.If you want to place a pendant or something to identify your pet, the ideal thing would be to do it in the center so that it hangs, I did not get any that I would like for my dog, so I omitted this step. So I kept weaving the necklace until the end.
10.Si quieres colocarle algún colgante o algo para identificar a tu mascota lo ideal seria hacerlo en el centro para que cuelgue, yo no conseguí ninguno que me gustará para mi perro por lo cual omití este paso. Así que seguí tejiendo el collar hasta el final.
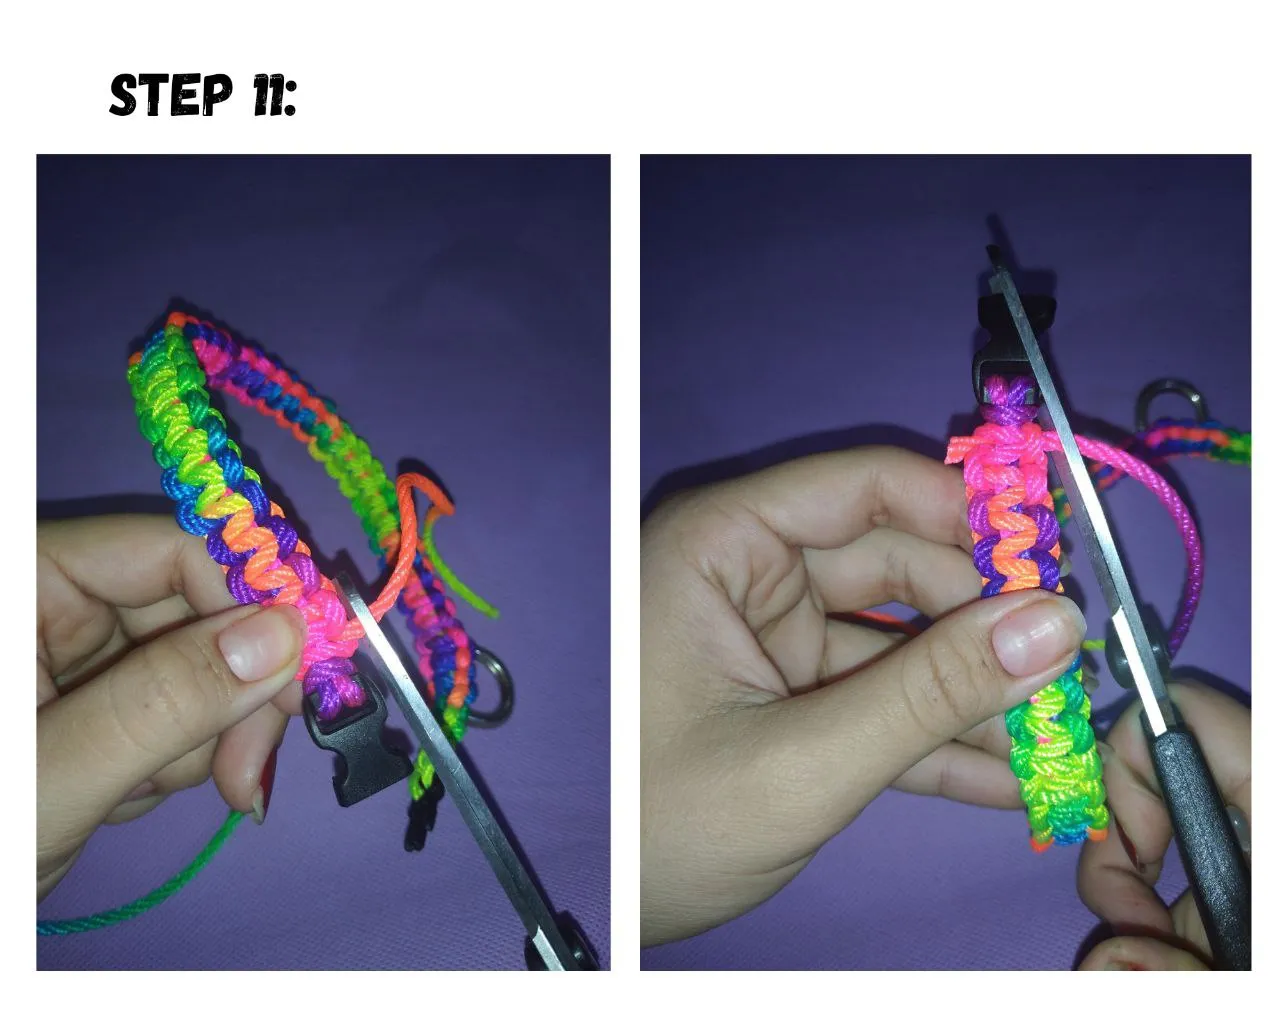
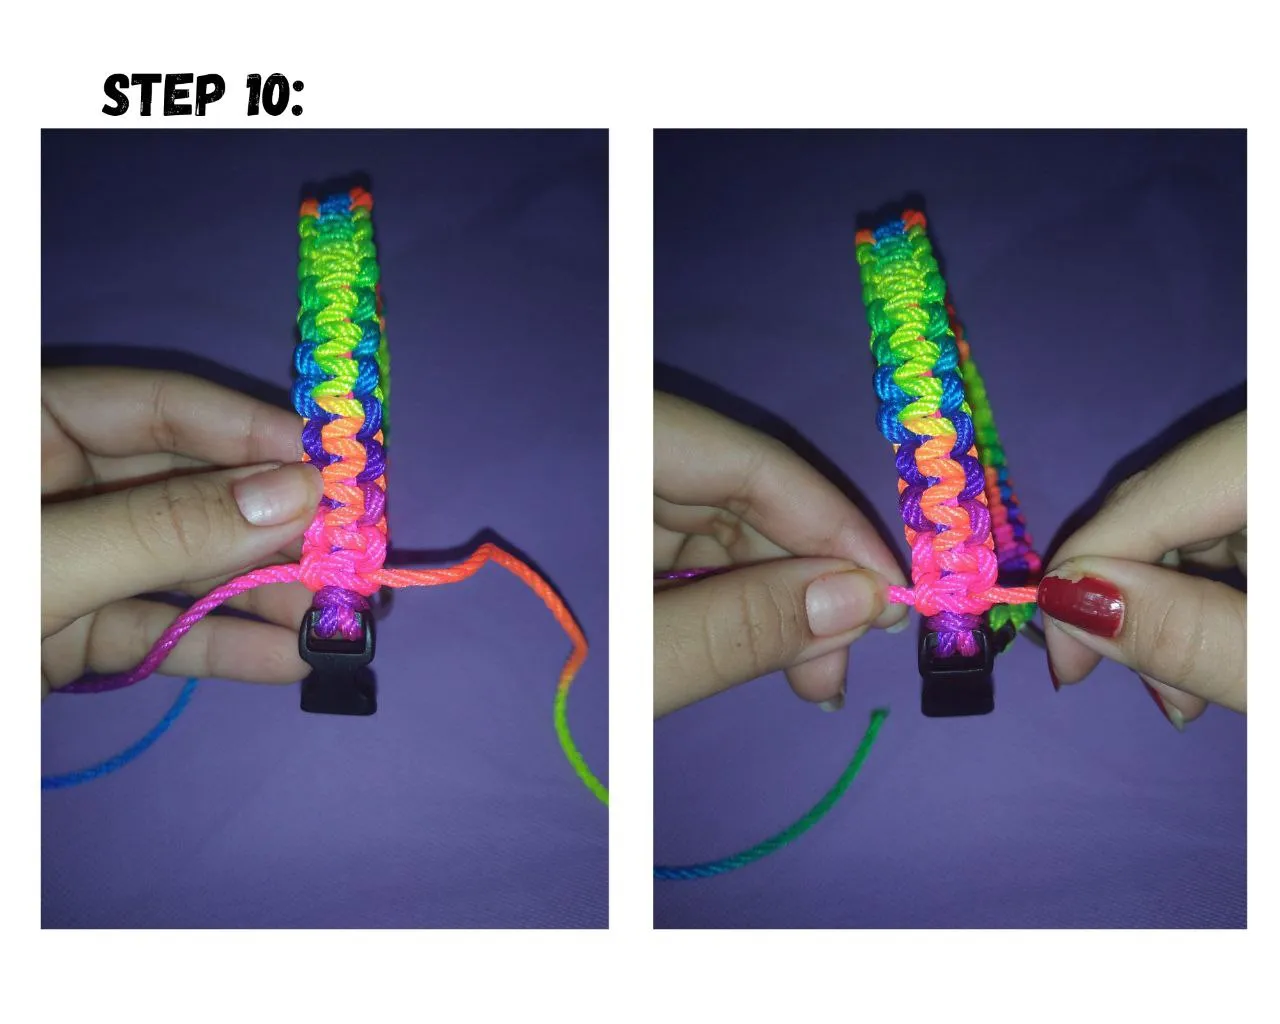
11.When we reach the end of the necklace we are going to cut the ends that were left over with the scissors.
11.Al llegar al final del collar vamos a cortar los extremos que nos sobraron con la tijera.
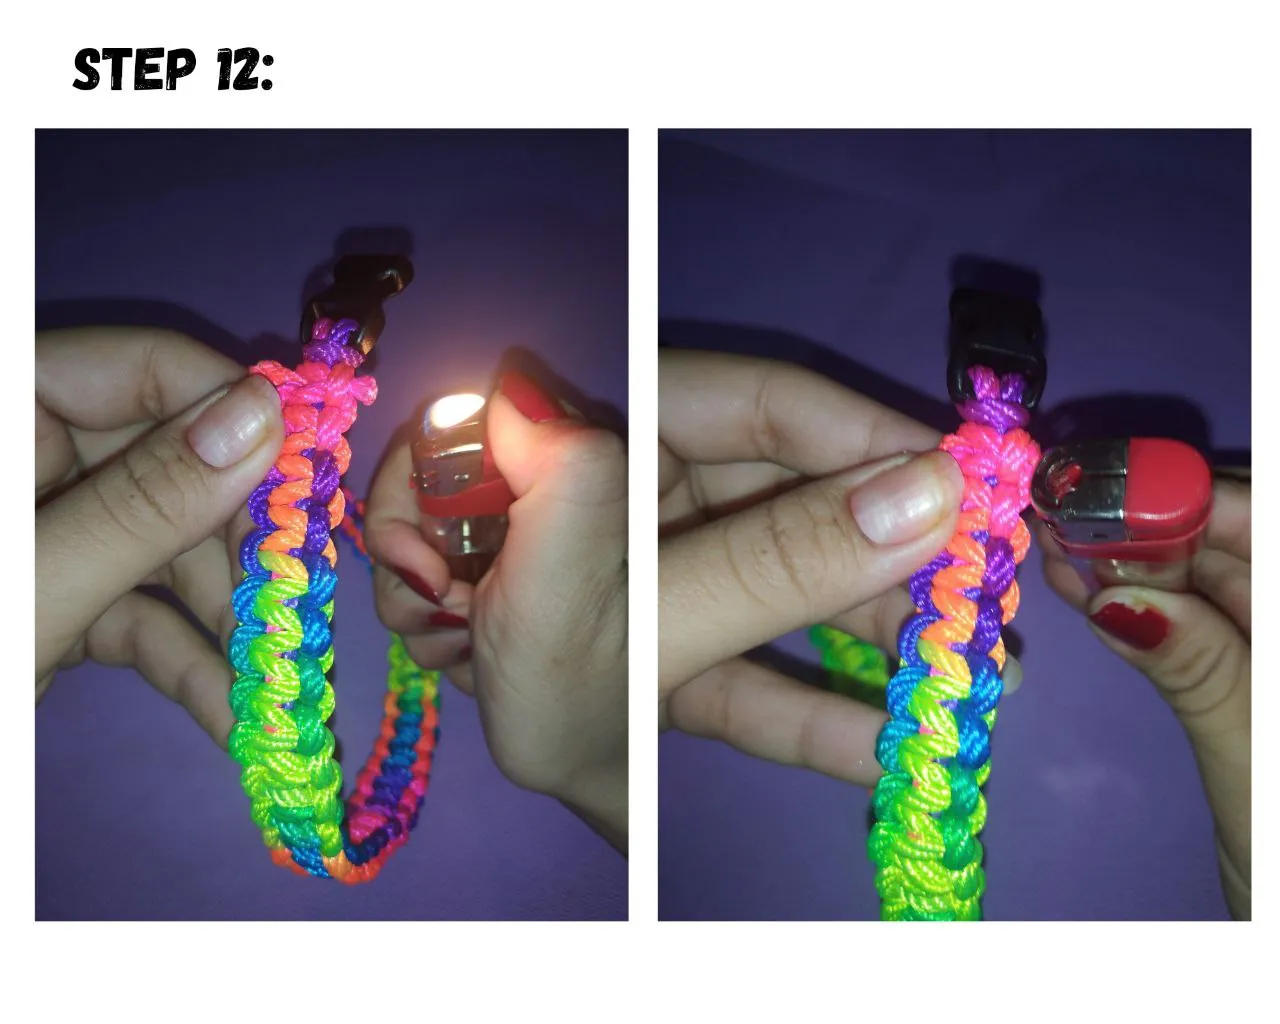
12.Then with the lighter we are going to burn those small points and we will stick it to the same thread to seal and the necklace does not unravel.
12.Después con el encendedor vamos a quemar esas pequeñas puntas y la pegaremos al mismo hilo para sellar y no se desteja el collar.
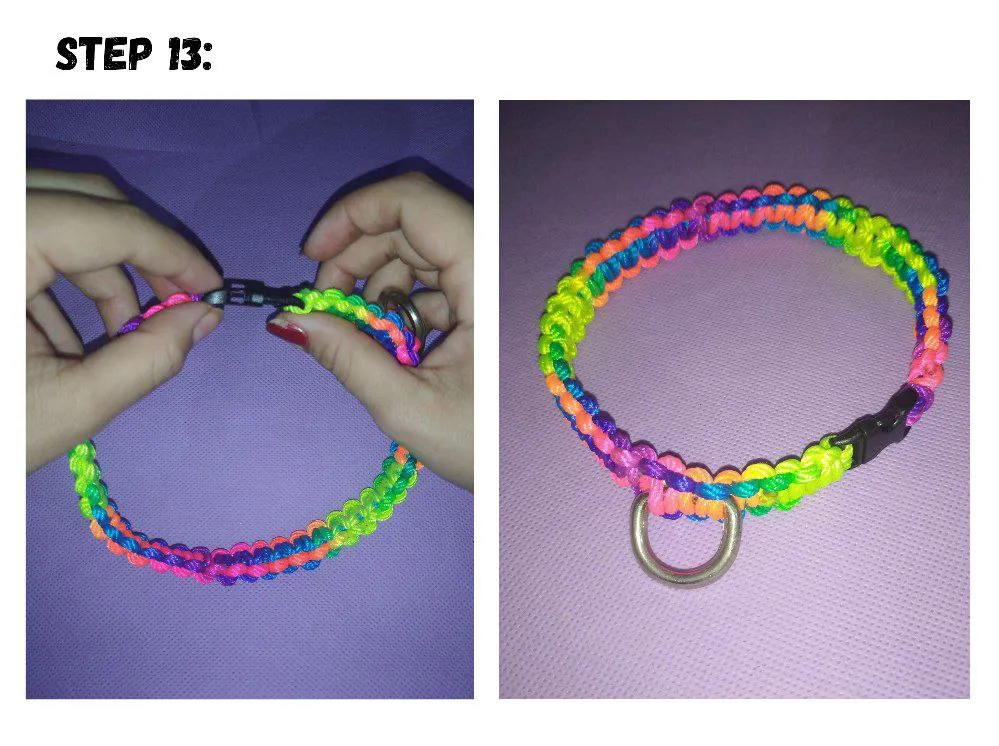
13.We will be able to personalize the dog or cat macramé necklace, placing some extra accessory, using the color that looks best and adapting them to each animal. But even if it is extremely simple, it is perfect and ideal for dressing your pet's neck.
13.Podremos personalizar el collar de macramé de perro o gato, colocando algún accesorio extra, utilizando el color que más le luzca y adaptarlas a cada animal. Pero aunque sea sumamente sencillo es perfecto e ideal para vestir el cuello de tu mascota.
All the photos were taken from my redmi 9A phone, and edited in Canva.
Todas las fotos fueron tomadas desde mi telefono redmi 9A, y editadas en Canva.