I have been a listener of Blackpink's music for a few years now. At first, I was just an involuntary listener aka my classmates played Blackpink's songs on speakers so I have no choice but to listen to the songs.
When the COVID pandemic hit, I was bored. Then I come across an episode of the Blackpink House, and since then I have become an official BLINK. I really enjoyed watching all episodes of Blackpink house. I binged watch it in a day. I actually finished watching the reality show first before I even watched any of their music videos. Crazy, right?
But anyway, that is the origin story of how I became a blink. I really like all of them, I consider myself as an OT4. Still, I will not be able to deny that my bias is Kim Jisoo. She really captured my heart with her personality. I like how responsible she is and how she takes care of the other members. Yet she still does a lot of funny things as well. I also enjoyed the funny songs she make especially the Helium song one and the one about chicken.
When I started crocheting, I wanted to recreate their outfits on their music video of Ice Cream but I was not that confident yet. Until now, I have yet to actually recreate their outfits there. It is difficult since I really have low confidence on my skill.
But still, I always wanted to do something related to them. Fortunately, my youngest sister saw my Wanda amigurumi project.
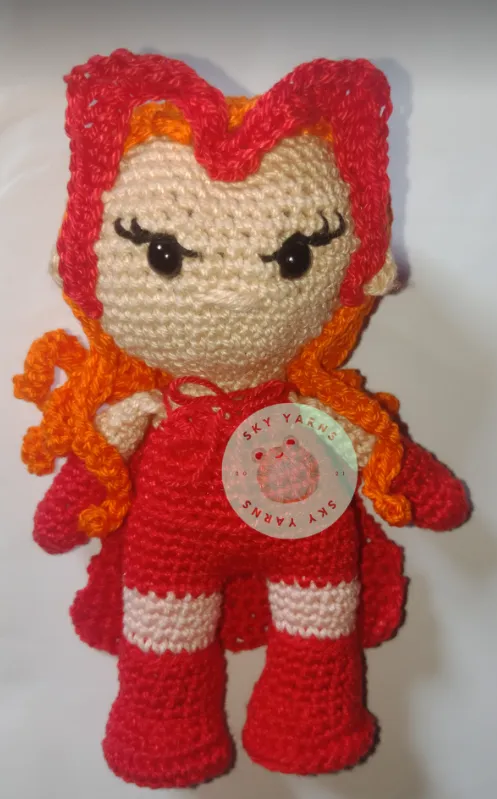
This is the project I am talking about. I actually already included this picture in my introductory post but I still attached it again in case a new reader wonders what Wanda amigurumi project I am talking about.
When my sister saw that, she said that she also wanted one but she wanted it to be Kim Jisoo. She has a limited budget so it was a fun challenge to create an amigurumi that can resemble Jisoo while also staying within the budget of my sister.
Process of making a Kim Jisoo Amigurumi
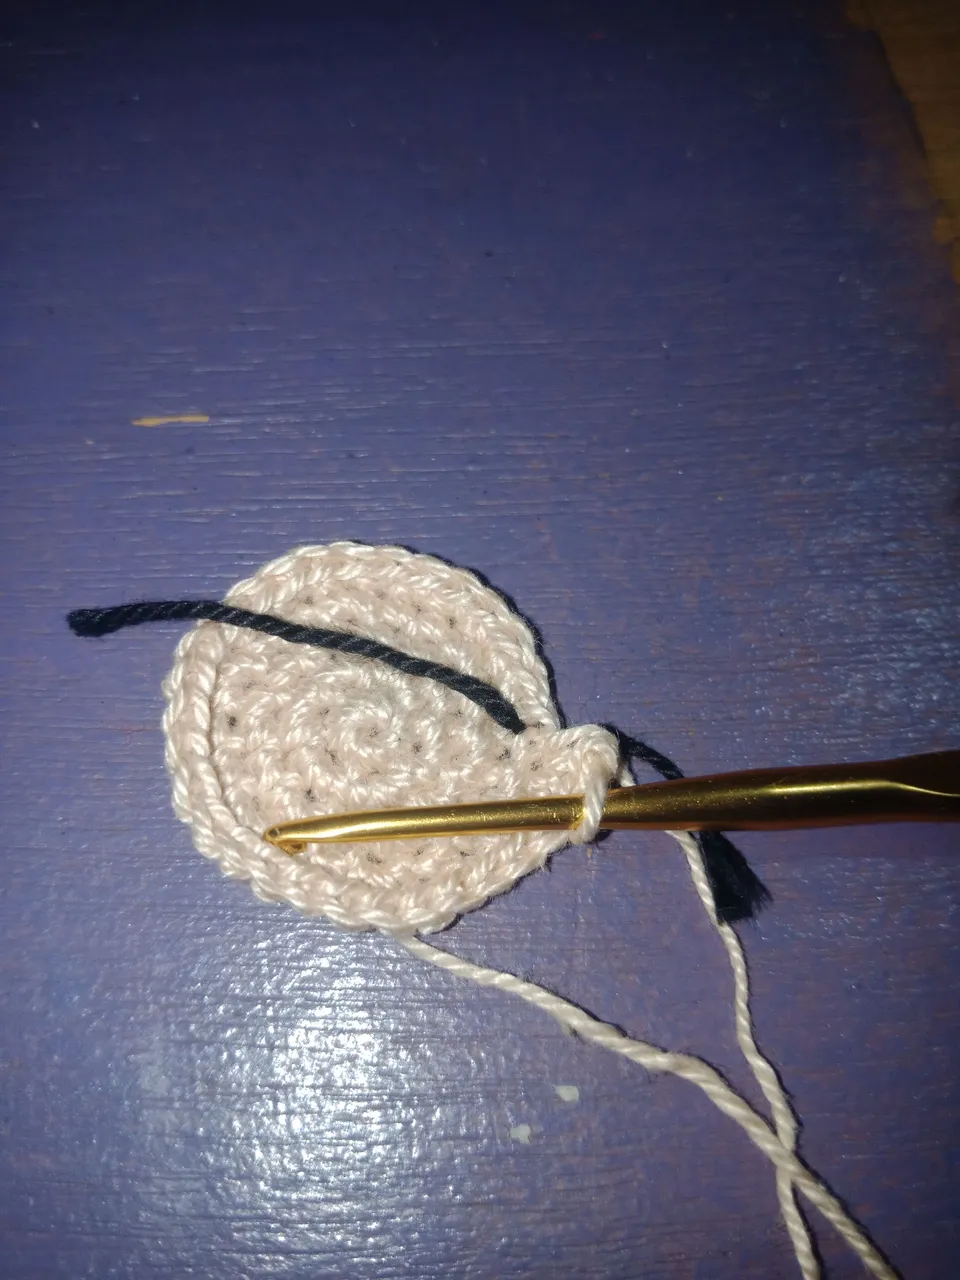
The first thing that I did was to create the head of the amigurumi. To do this, I just needed to create a magic ring, then I put 6 single crochet. I increased each round until I reached the desired head size. I worked in rounds so you can see me using a scrap yarn as a stitch marker because I forgot to bring one when I was making the project.
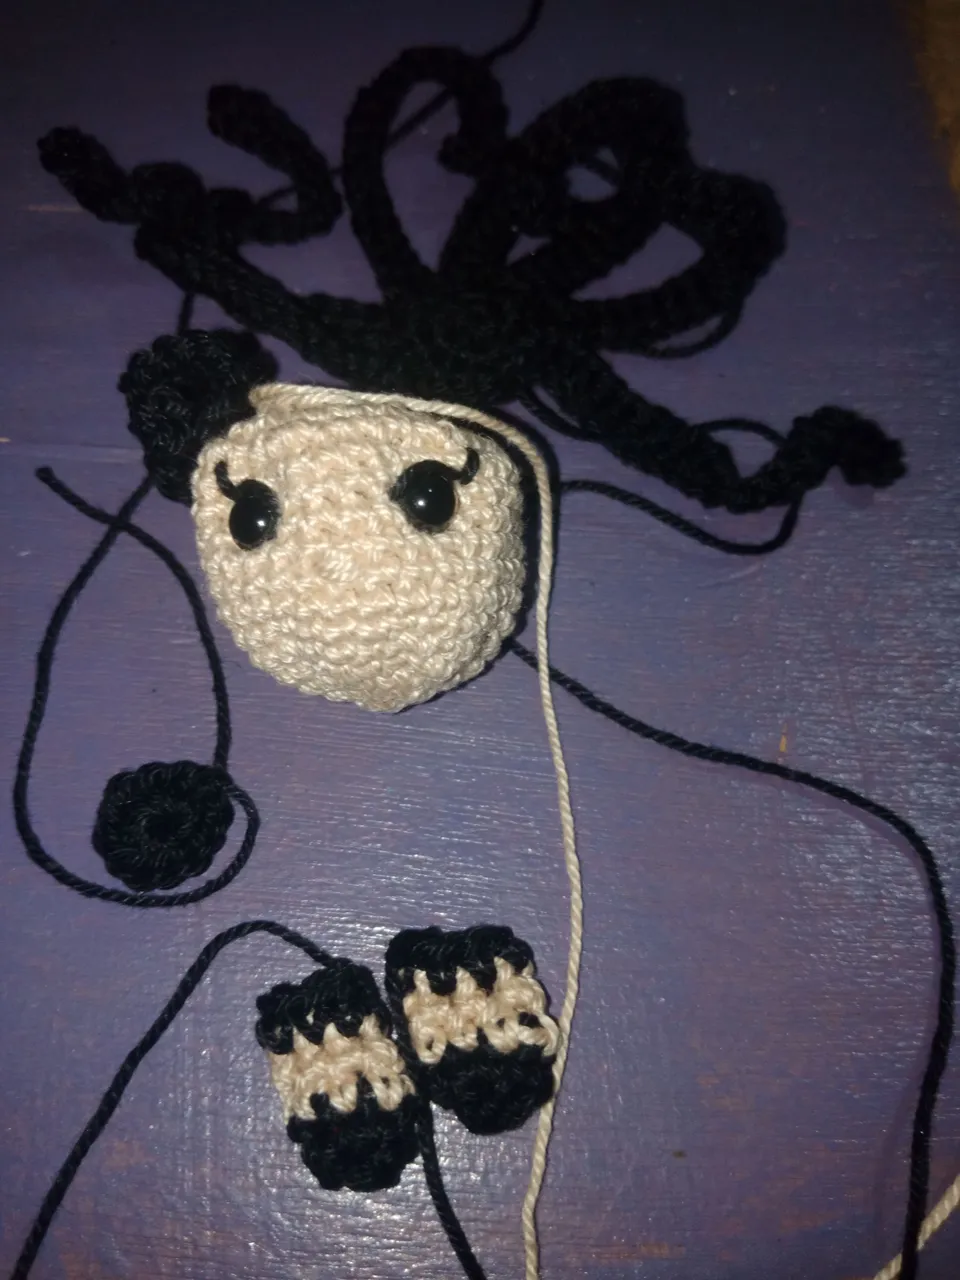
In this picture, you can see that most of the parts are already done. I already finished making the head. I had even put the safety eyes,a nd embroidered the nose and the eyelashes on the head. Moreover, I also finished making the hair, and the feet.
The only things left to do were the arms, and the body itself. Then I could sew the parts together.
In this picture, you can see that the project is mostly done. The limbs were already sewed onto the body, and the body is also completed. I used pins to hold the hair in place so that I can sew it without a worry.
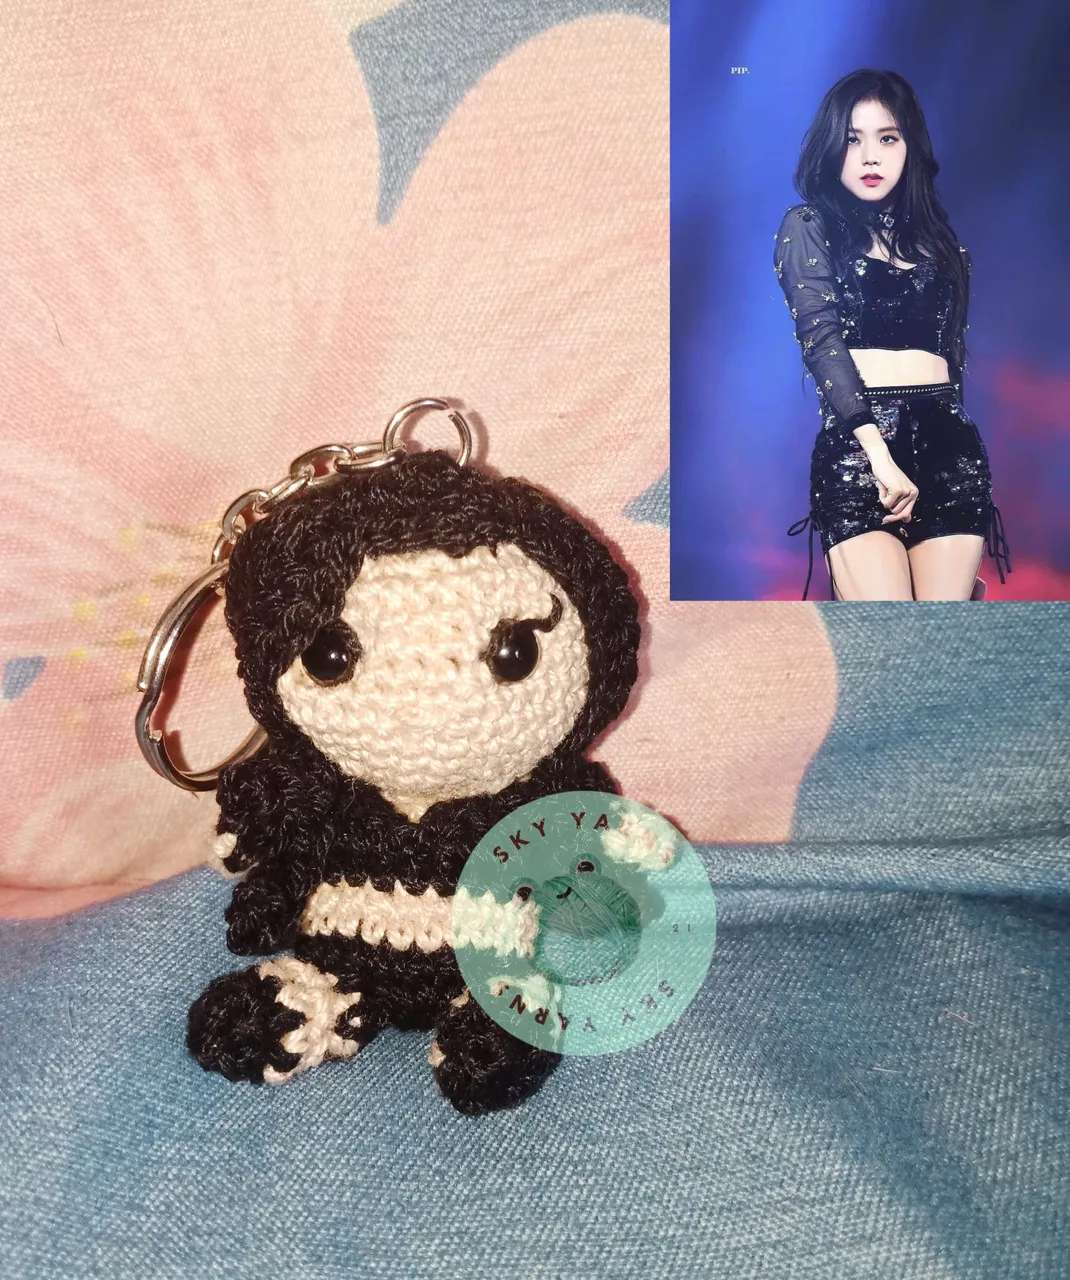
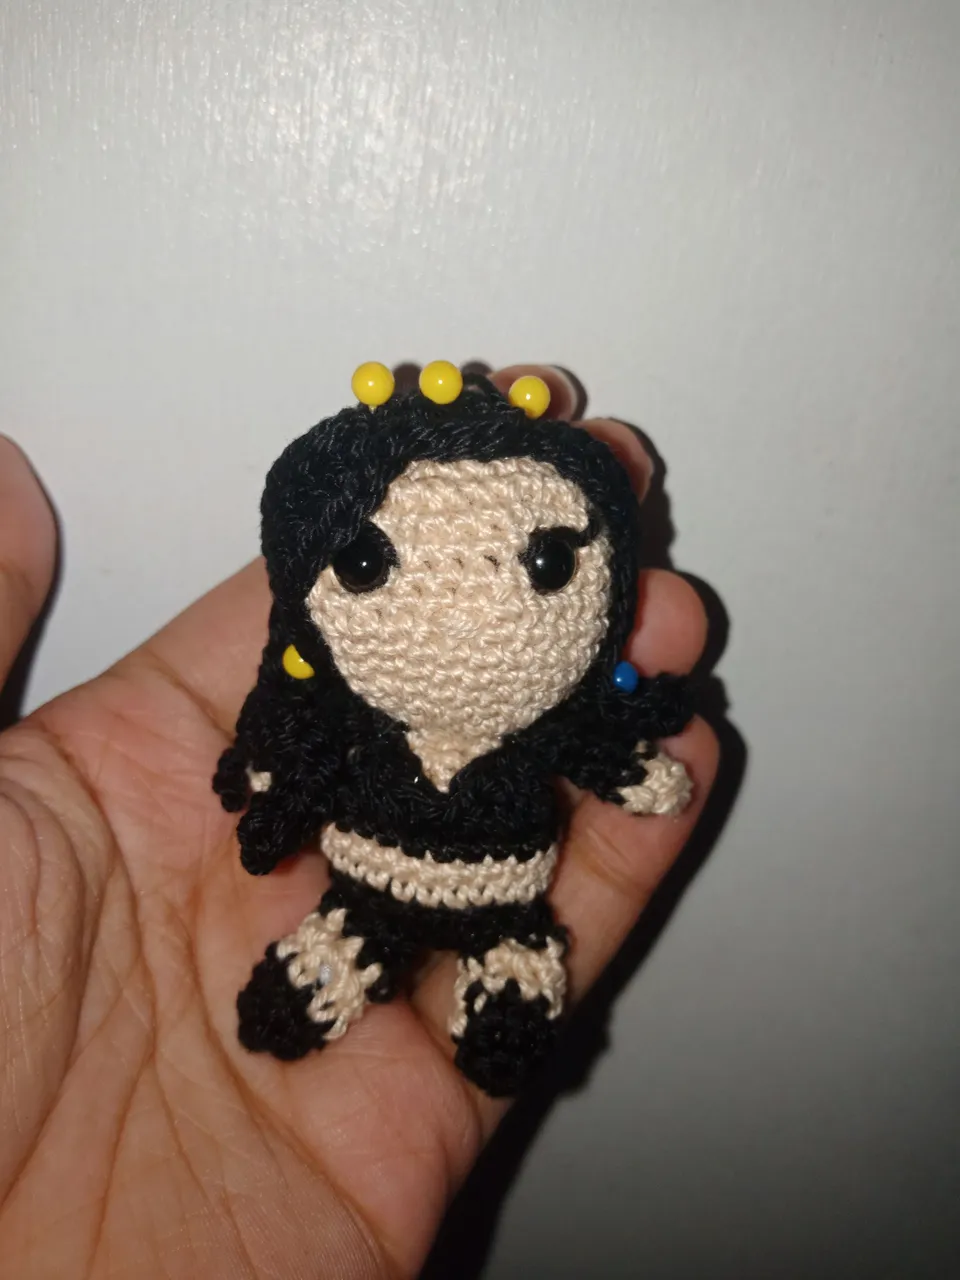
Finished Project + Reference Image
After I finished attaching all the parts, I added a keychain ring on to the amigurumi since my sister wanted to use it as a keychain.
You can see that I made a sitting amigurumi instead of a standing one. The reason for this is so that the measurement will not be a lot. I price my amigurumi works for P100/inch (it is about $2/inch). Of course, sometimes I give discounts.
This Jisoo keychain is 2 inches when sitting down. You can also see the reference image that I used to make this amigurumi.
I hope that it resembles Jisoo even just a tiny bit.