Hola! Feliz Inicio de aemana para todos 👋🏻
Soy fuel creyente que la práctica hace al maestro y esto de la costura es algo de mucha práctica; asi que eso es lo hago en mi tiempo libre, coser con la máquina. Asi que hoy traigo para ustedes una nueva costura se trata de un llavero hecho con retazo de tela, para mi esto es una buena idea 💡 es facil y rápido, tambien podemos aprovechar esos pedazos de tela que nos quedan. Les muestro como lo hice:
Necesitamos:
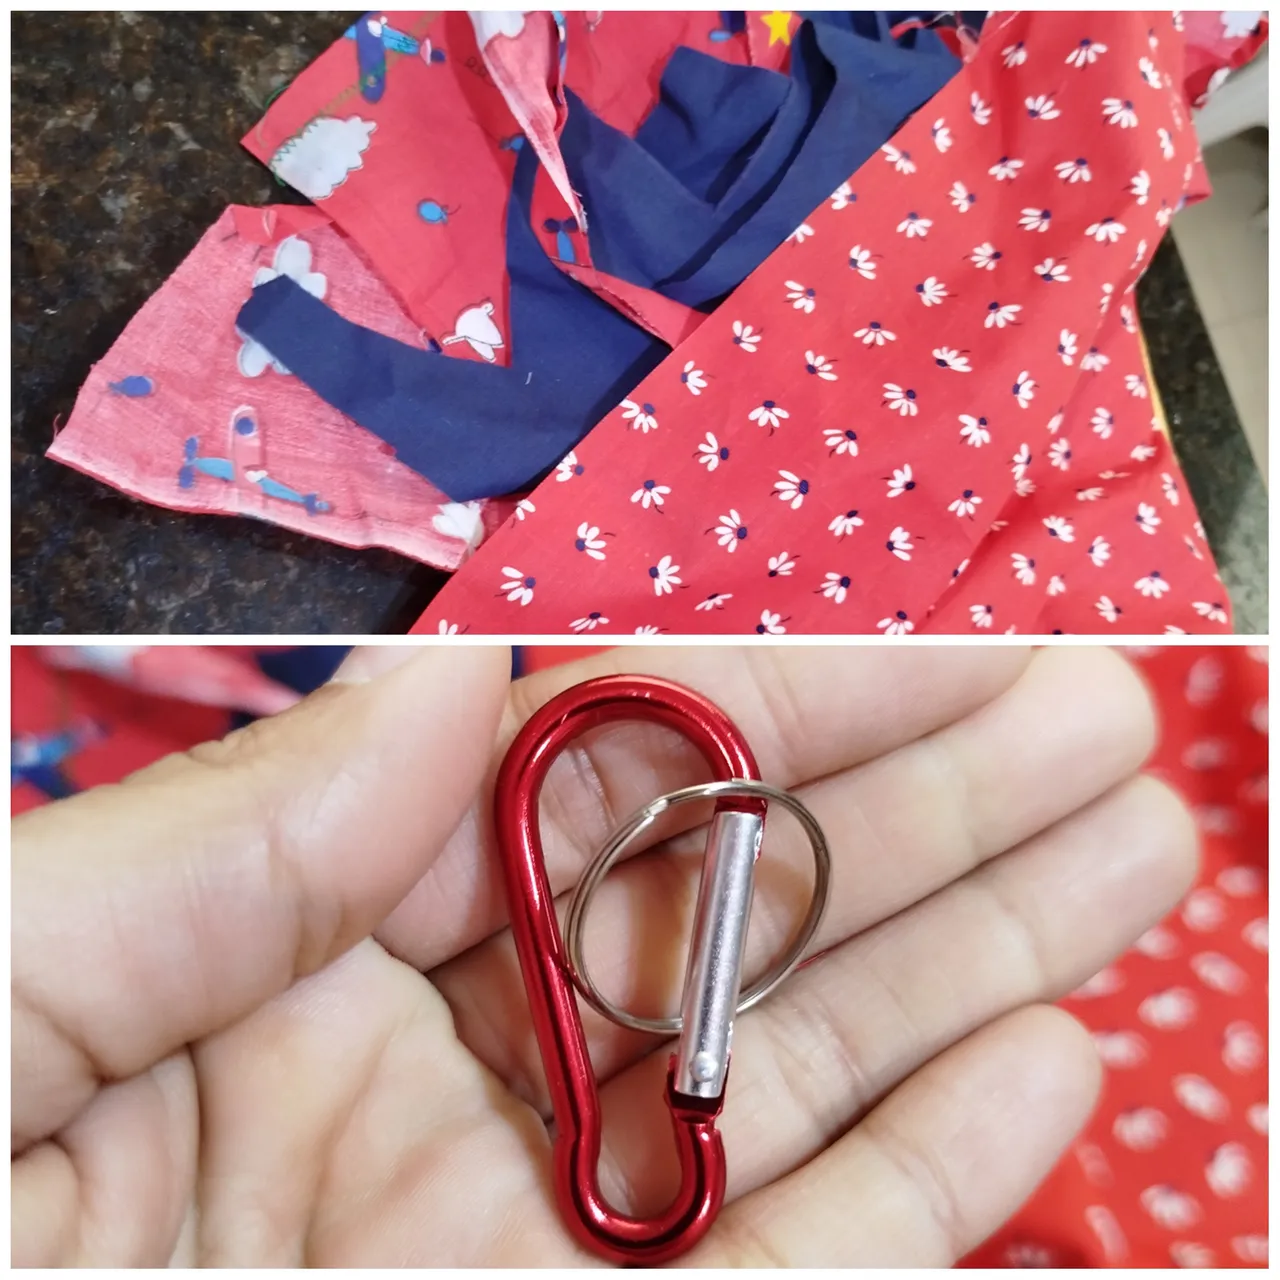
✅ Retazos de tela
✅ Aro de llavero
✅ Tijera
✅ Hilo
Pasp a paso:
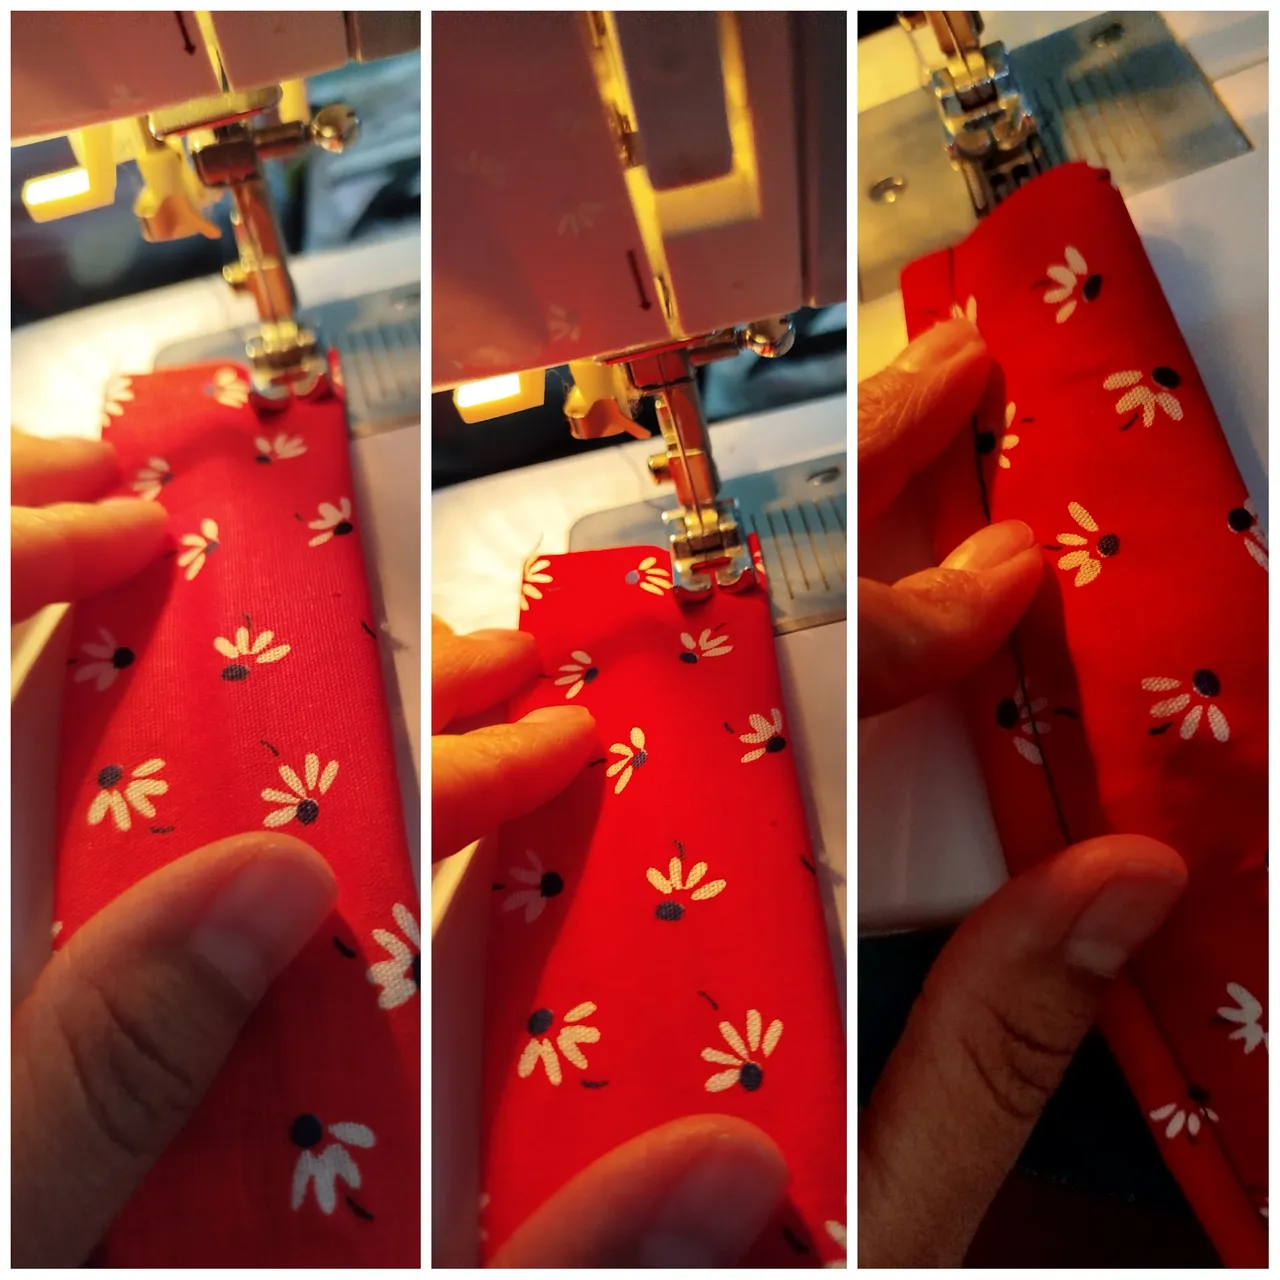
Lo primero que hacemos es recortar dos pedazos de tela, uno sera el llavero y el otro sera un poco mas delgado que no funcionara oara colocar la argolla del llavero.
El primer pedazo de tela es un rectángulo de 26cm largo por 10cm de ancho.
El segundo pedazo es una tira de 2cm de ancho por 10cm de largo.

El siguiente paso, es coser muestras telas, para realizar esto debemos coser por el lado de revés, uniéndo las esquinas hacermos una costura recta por todo lo largo, esto aplica para ambas telas.
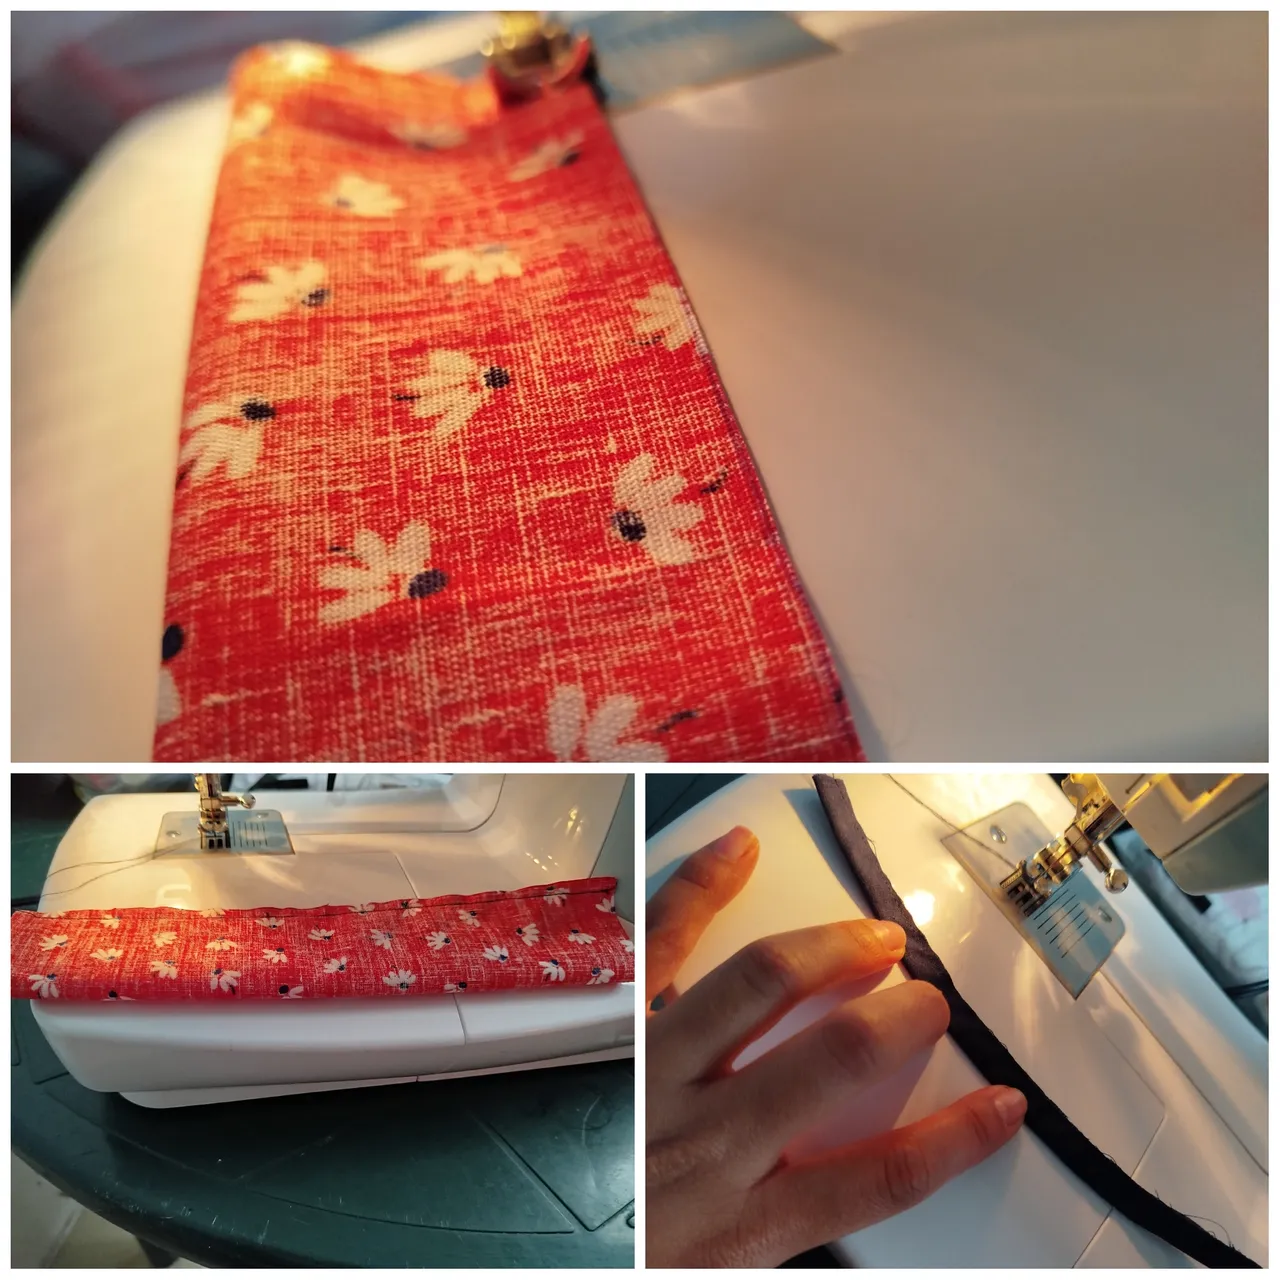
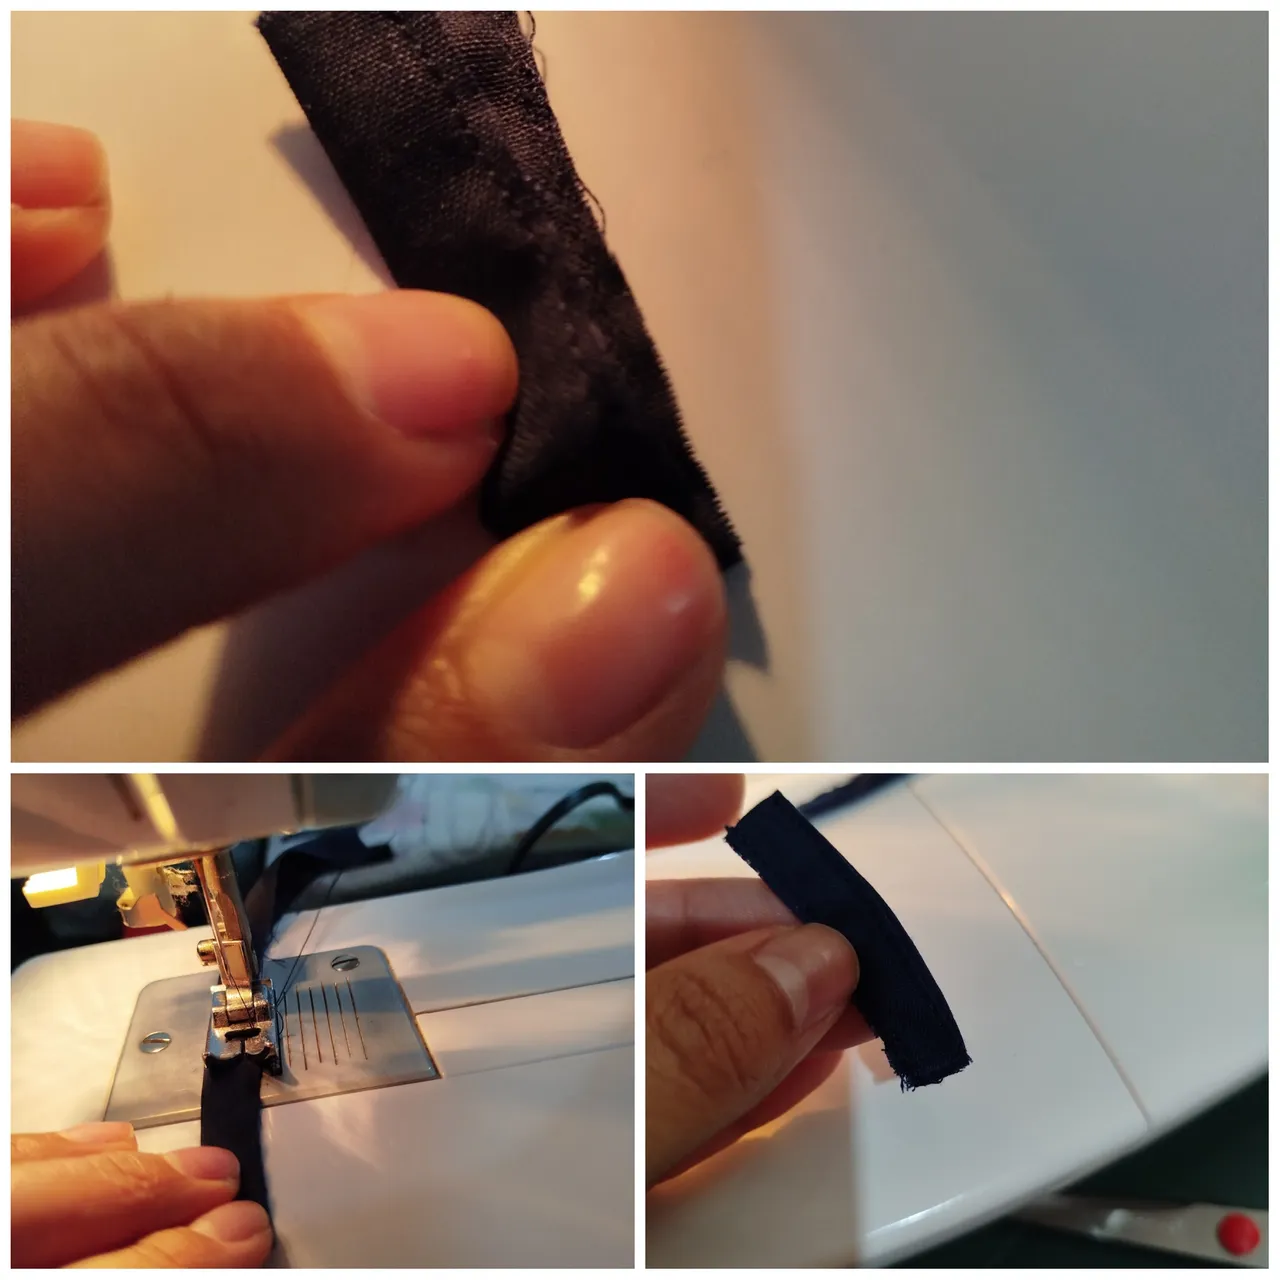
Ahora le damos la vuelta para colocarlos por el lado derecho y entonces pasamos dos costura por cada lado de la tela esto para darle una vista mas linda al llavero...
Estas costura también aplica para la tela axul, ademas que se fuerza lo qie estamos haciendo.
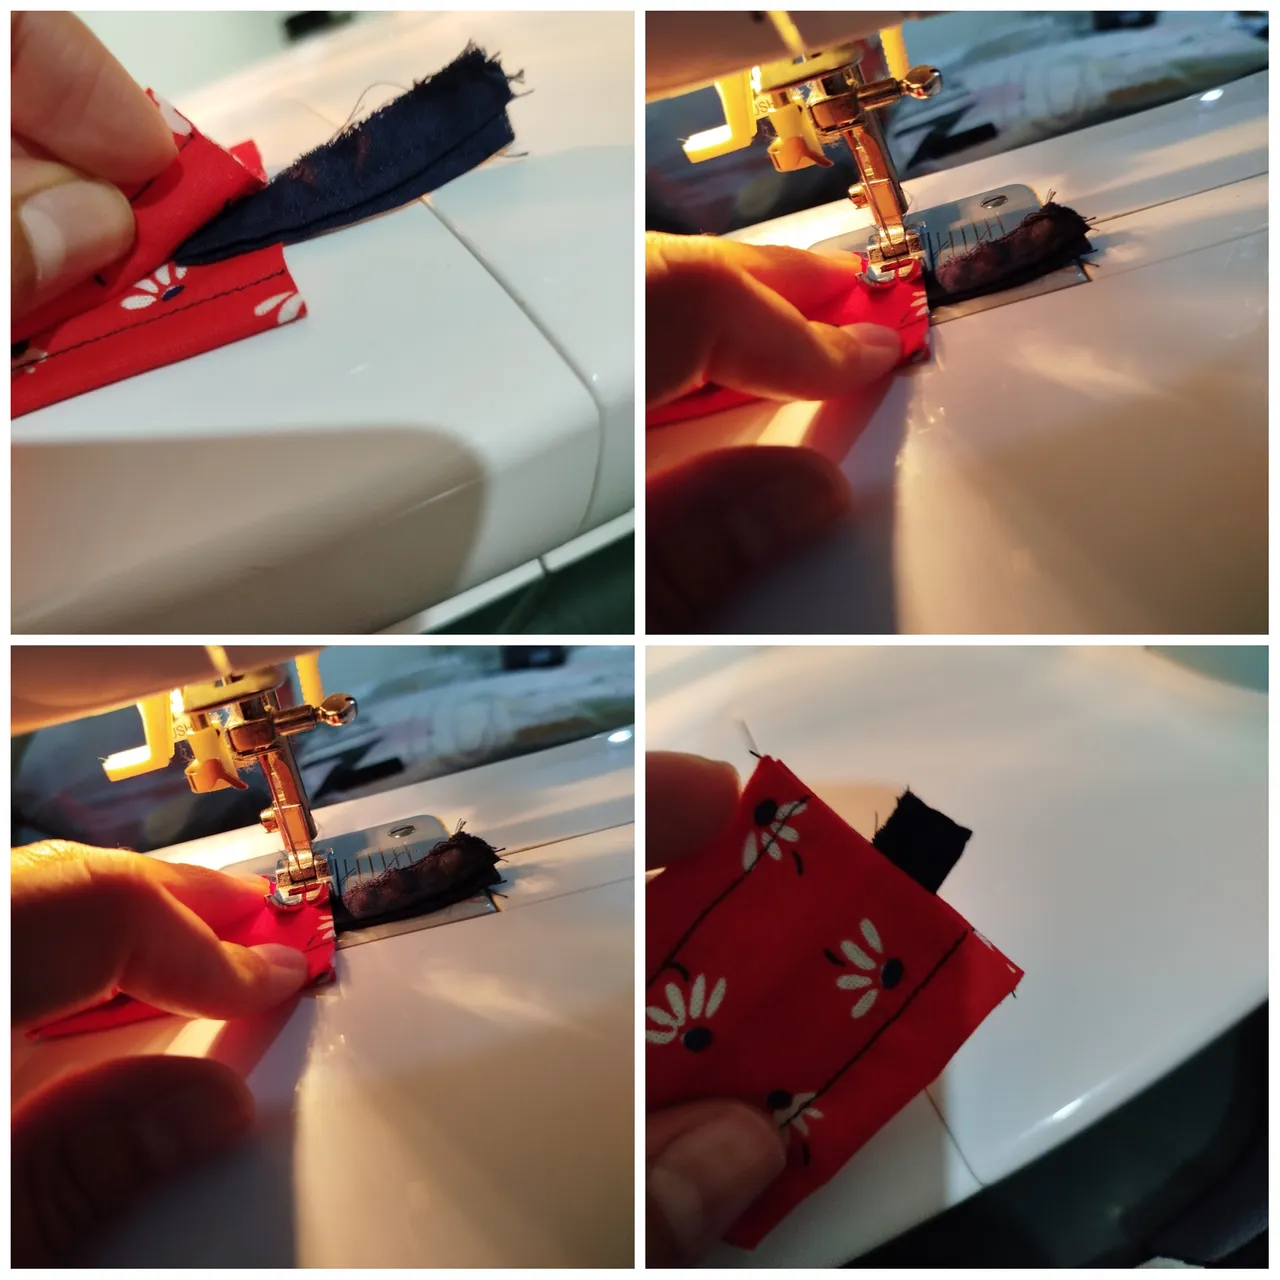
Ahora bien, doble mi llavero a la mitad pero me di cuenta que era un poco largo y para lo que lo usaría no me funciona tan grande. Es por esto que decidi cortarlo y dejarlo de 6cm

Es momento de unir ambas piezas, para esto trabajaremos al revés nuevamente, doblaremos en dos ambas piezas y pegaremos dejando la orejita por donde se colocaron la argolla del llavero pasaremos la maquina para unir las piezas, una vez pegado le daremos la vuelta.
Yo decidí pasar unas costuras por el lado derecho como para hacsr in pequeño diseño
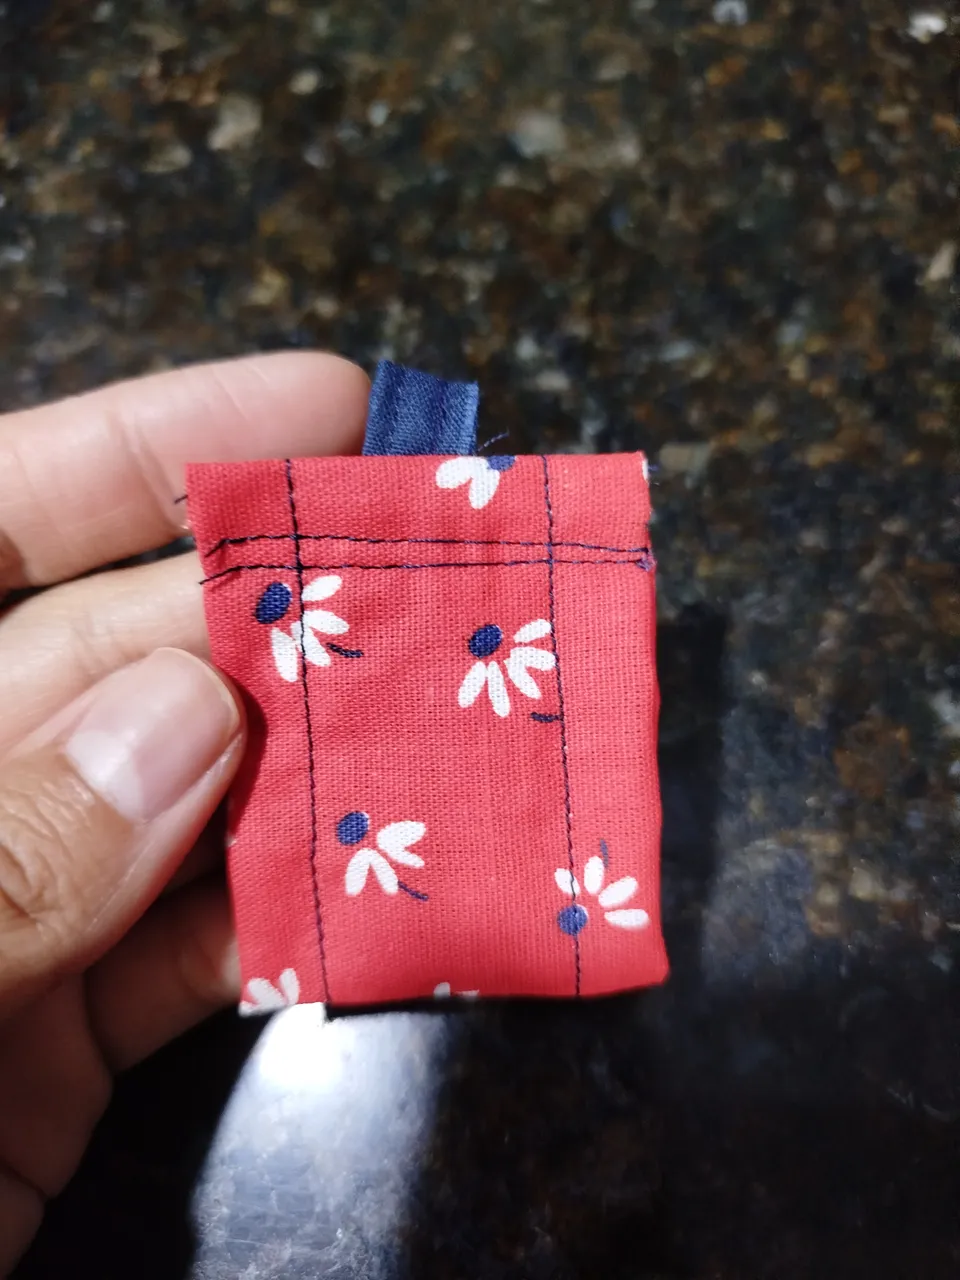
Como pueden ver estás costuras finales no me quedaron tan derechas como esperaba, pero me gisto mucho el resultado final.
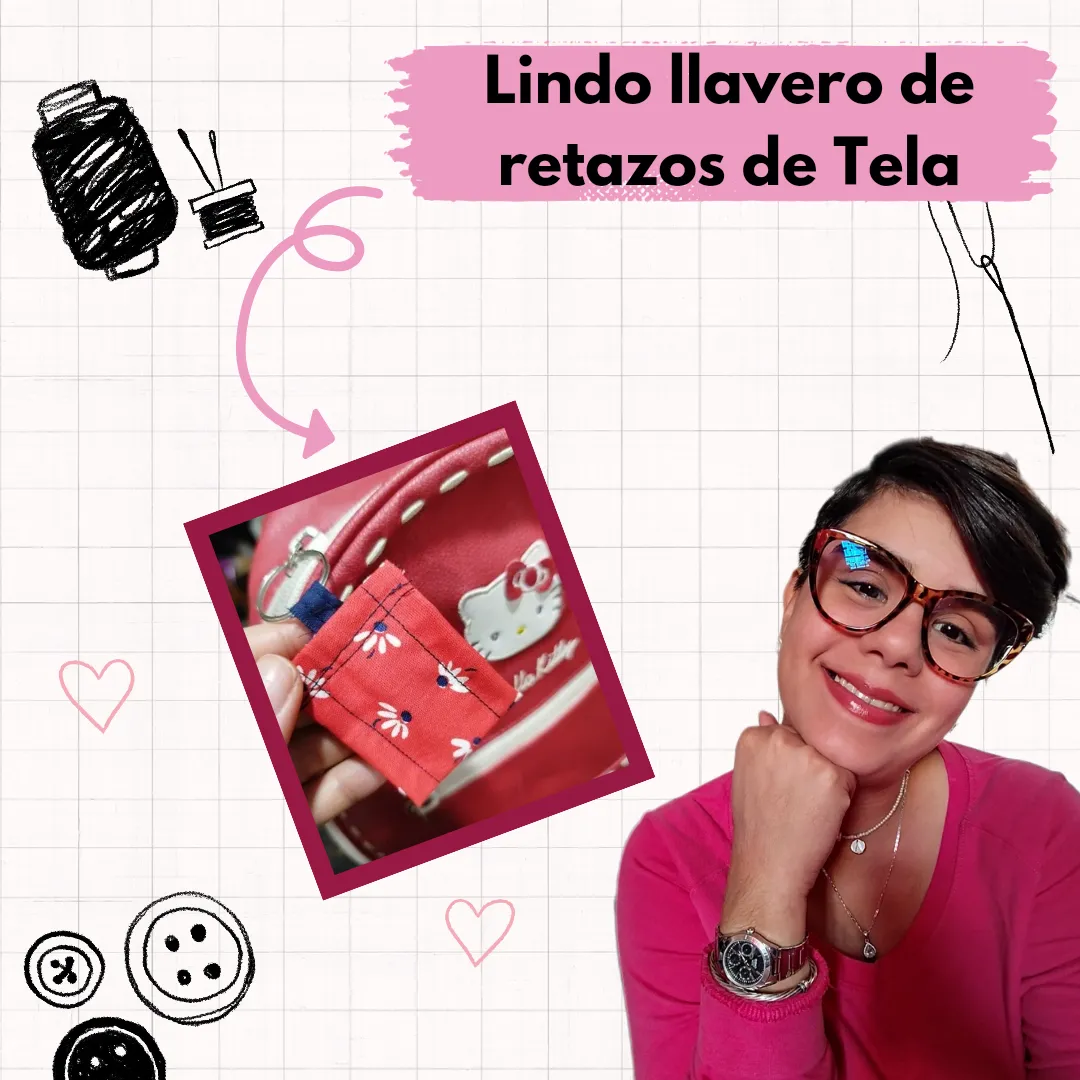
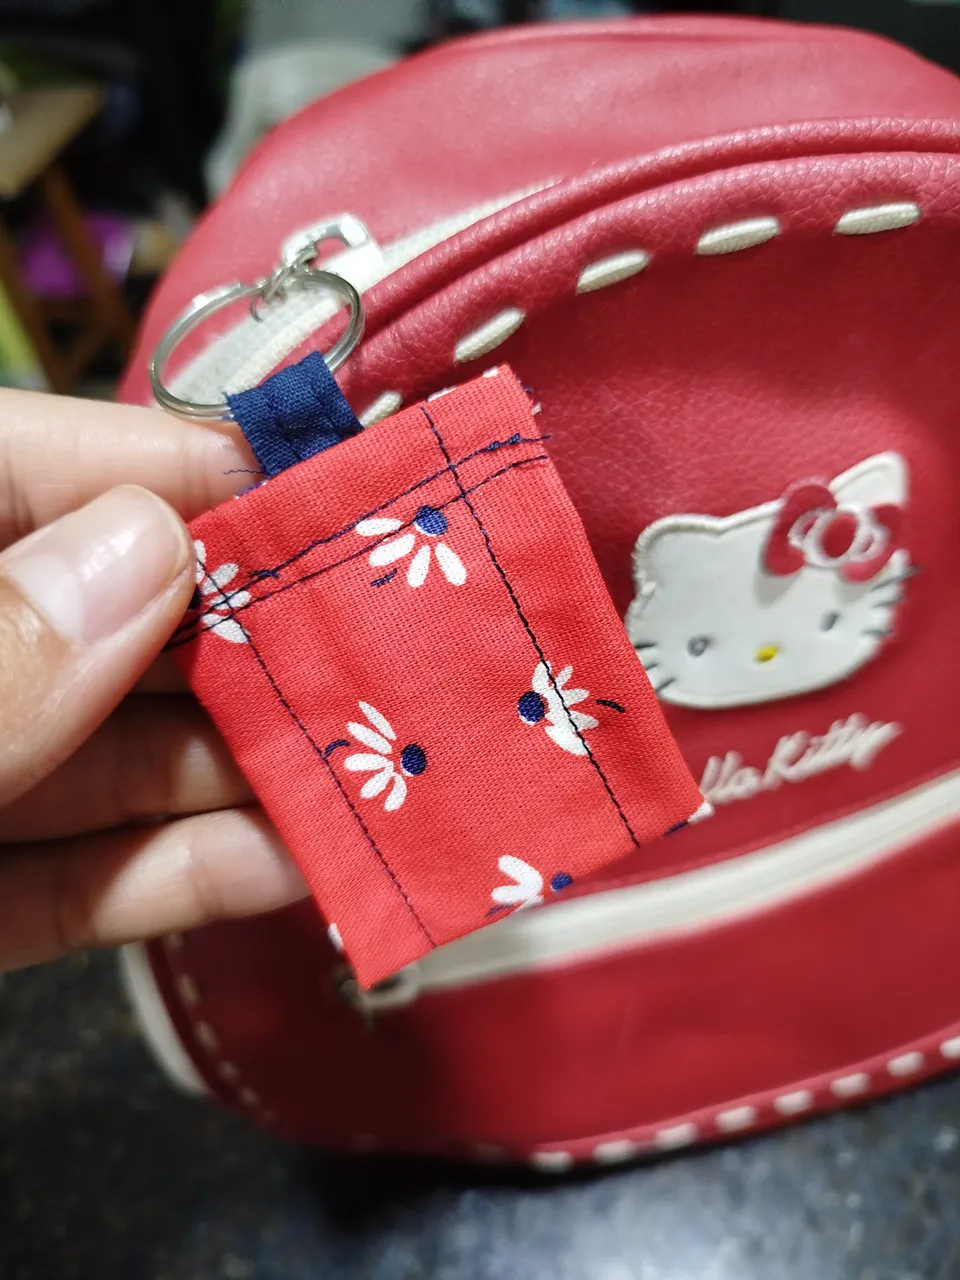
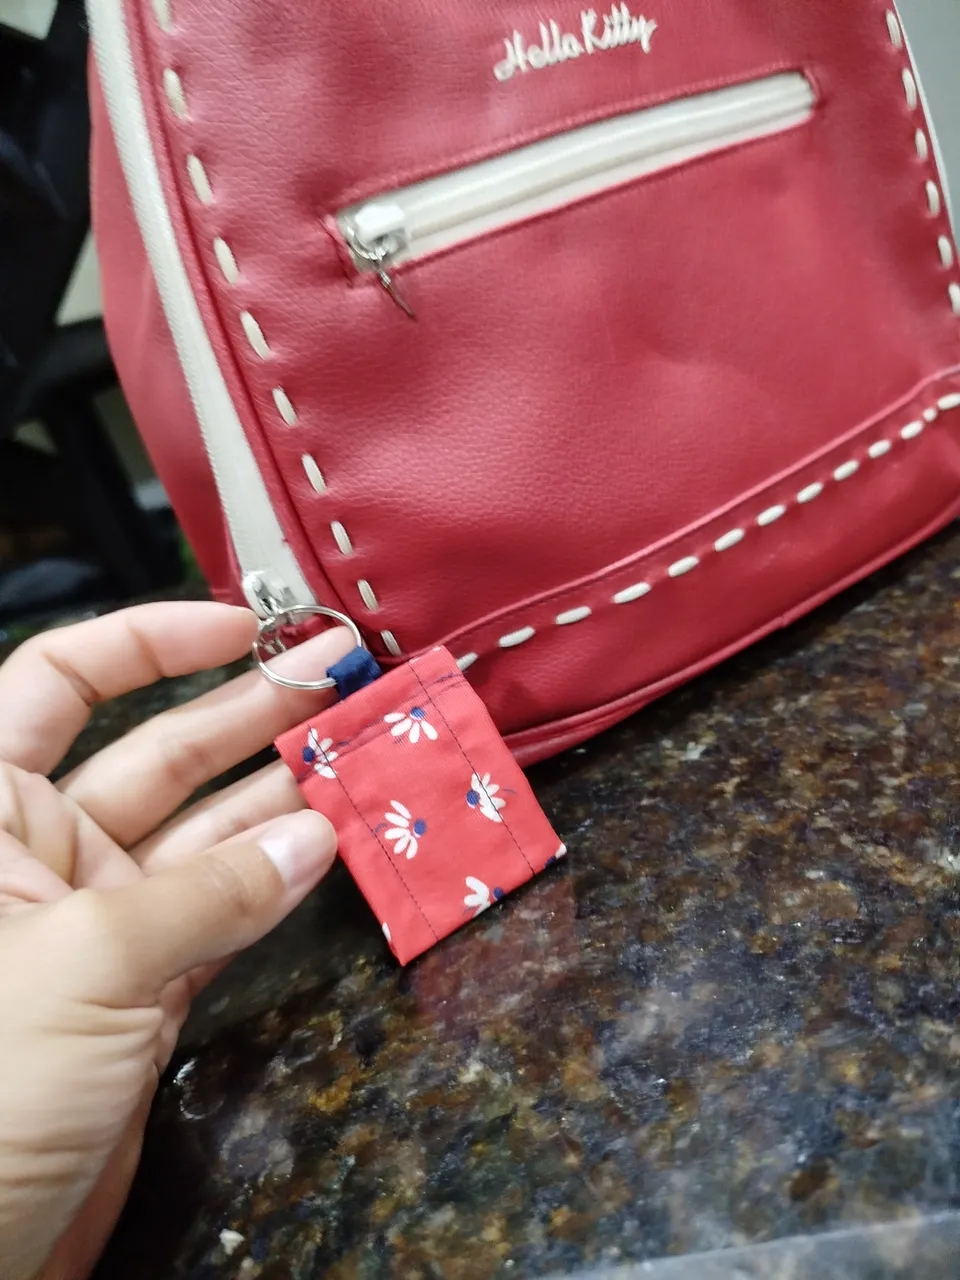
Este llavero yo quise hacerlo para colocarselo al cierre de un bolso de espalda, lo hice en estos colores porque es el que mas combinaba con mi cartera.
Sinceramente me pareció algo súper facil de hacer, organizandose se realizan varios en diferentes colores y funcionan perfectamente para un regalo en cotillon o un detalle para un amigo... Pensé que se piedem agregar algunas mostacillas o lentejuelas..
Siempre quedo muy feliz con los lindos resultados quedan maravillosamente bien.
Portada editada con Canva
Fotografías de mi propiedad
Traductor DeepL
Hello! Happy New Year to all of you 👋🏻
I'm a big believer that practice makes perfect and this sewing is something that requires a lot of practice; so that's what I do in my free time, sewing with the machine. So today I bring for you a new sewing is about a keychain made with scraps of fabric, for me this is a good idea 💡 is easy and fast, we can also take advantage of those pieces of fabric that we have left. I show you how I did it:
We need:
✅ Fabric scraps.
✅ Keychain ring
✅ Scissors
✅ Thread
Step by step:
The first thing we do is cut out two pieces of fabric, one will be the key ring and the other will be a little thinner that won't work to attach the key ring ring.
The first piece of fabric is a rectangle 26cm long by 10cm wide.
The second piece is a strip 2cm wide by 10cm long.
The next step is to sew the fabric samples together, to do this we must sew on the wrong side, joining the corners to make a straight seam all the way around, this applies to both fabrics.
Now we turn them right side out and then we sew two seams on each side of the fabric to give a nicer look to the key ring...
This stitching also applies to the axul fabric, so that we can force what we are doing.
Now, I folded my keychain in half but I realized that it was a little long and for what I would use it for it doesn't work that big. That's why I decided to cut it down to 6cm.
It's time to join both pieces, for this we will work backwards again, we will fold in two both pieces and glue leaving the little ear where the ring of the key ring was placed, we will pass the machine to join the pieces, once glued we will turn it over.
I decided to put some seams on the right side to make a small design.
As you can see these final seams were not as straight as I expected, but I really liked the final result.
I wanted to make this keychain to attach it to the clasp of a back bag, I did it in these colors because it was the one that matched the best with my purse.
Sincerely it seemed to me something super easy to make, if you are organized you can make several in different colors and they work perfectly for a gift in cotillion or a detail for a friend.... I thought that you could add some beads or sequins...
I am always very happy with the beautiful results and they look wonderful.
Cover edited with Canva
Photographs of my property **Translator
Translator DeepL