✨Si deseas leer este post en Español da click aquí✨
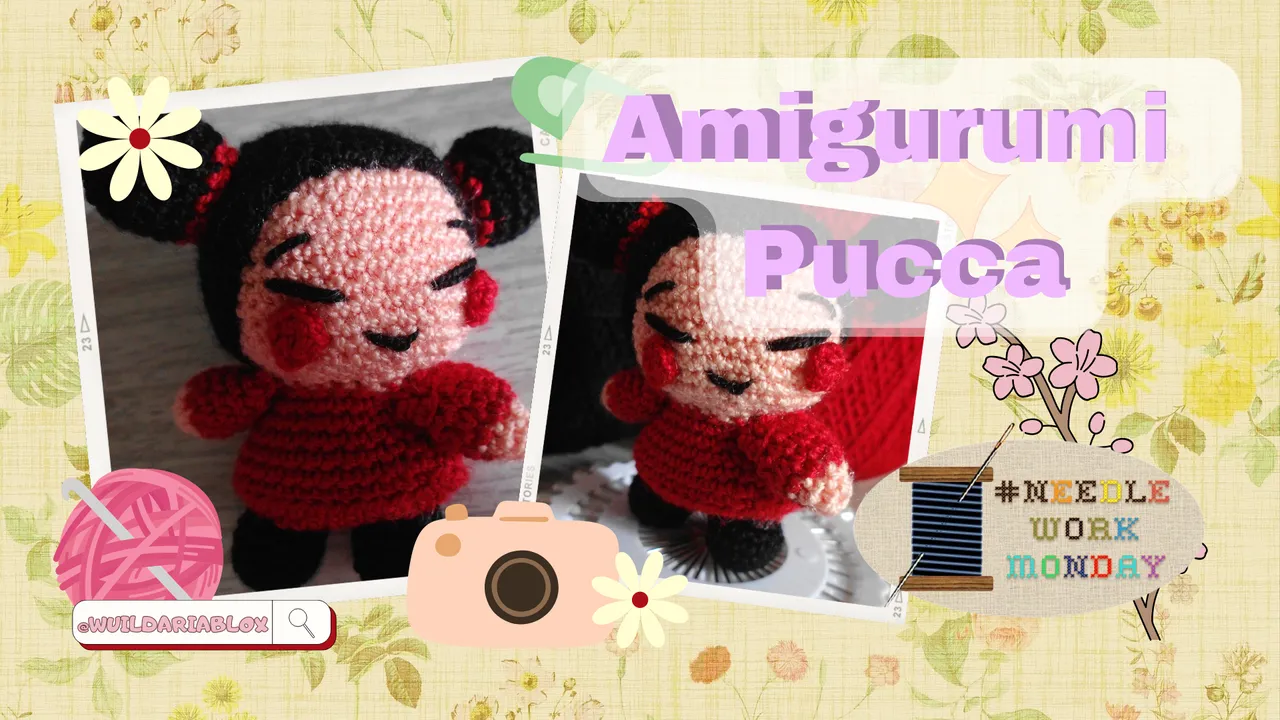
Hello beautiful and creative people of NeedlWorkMonday, I hope you had a nice day🍃🌼. Today I want to share with you how it was to create an amigurumi of Pucca's character, although it was not as difficult as I thought, but I did get to stress on several occasions (っ- ‸ - ς). Join me to see the process and the final result :D

A few days ago I was visiting my dear aunt to whom I showed my crochet projects. She liked so much what I made that I promised her that I would make for her and her partner cute amigurumis🧸✨.
I had previously asked him if he wanted me to do anything or anything specific and he chose a character that I really like from a series that I also really like, Pucca, and her partner Garu.
- Skin colored acrylic yarn🧶.
- Red acrylic yarn.
- Black acrylic yarn.
- Tijeras✂️.
- Stitch marker.
- Crochet needle number 1.
- Embroidery needle.

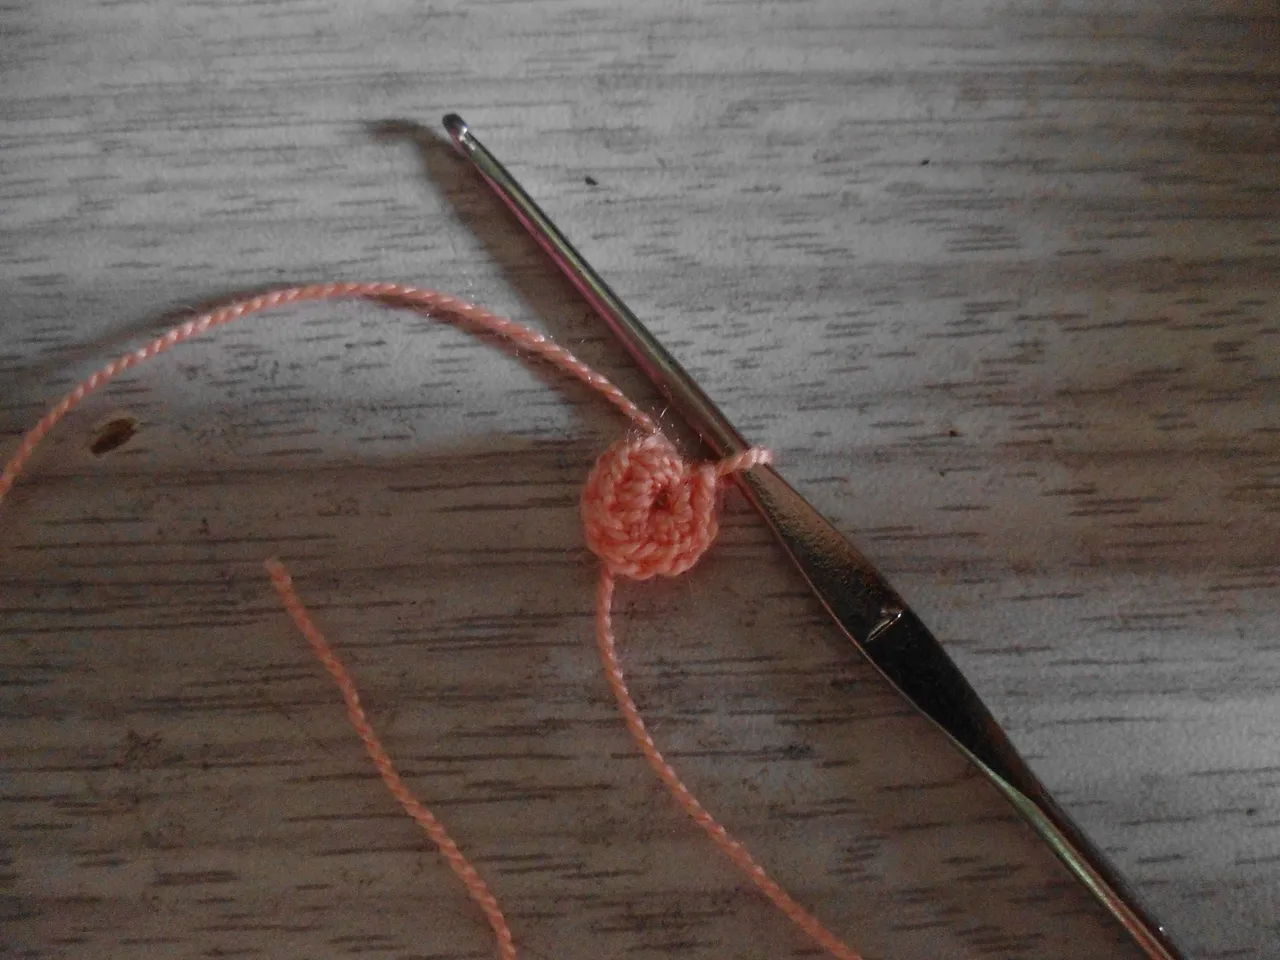
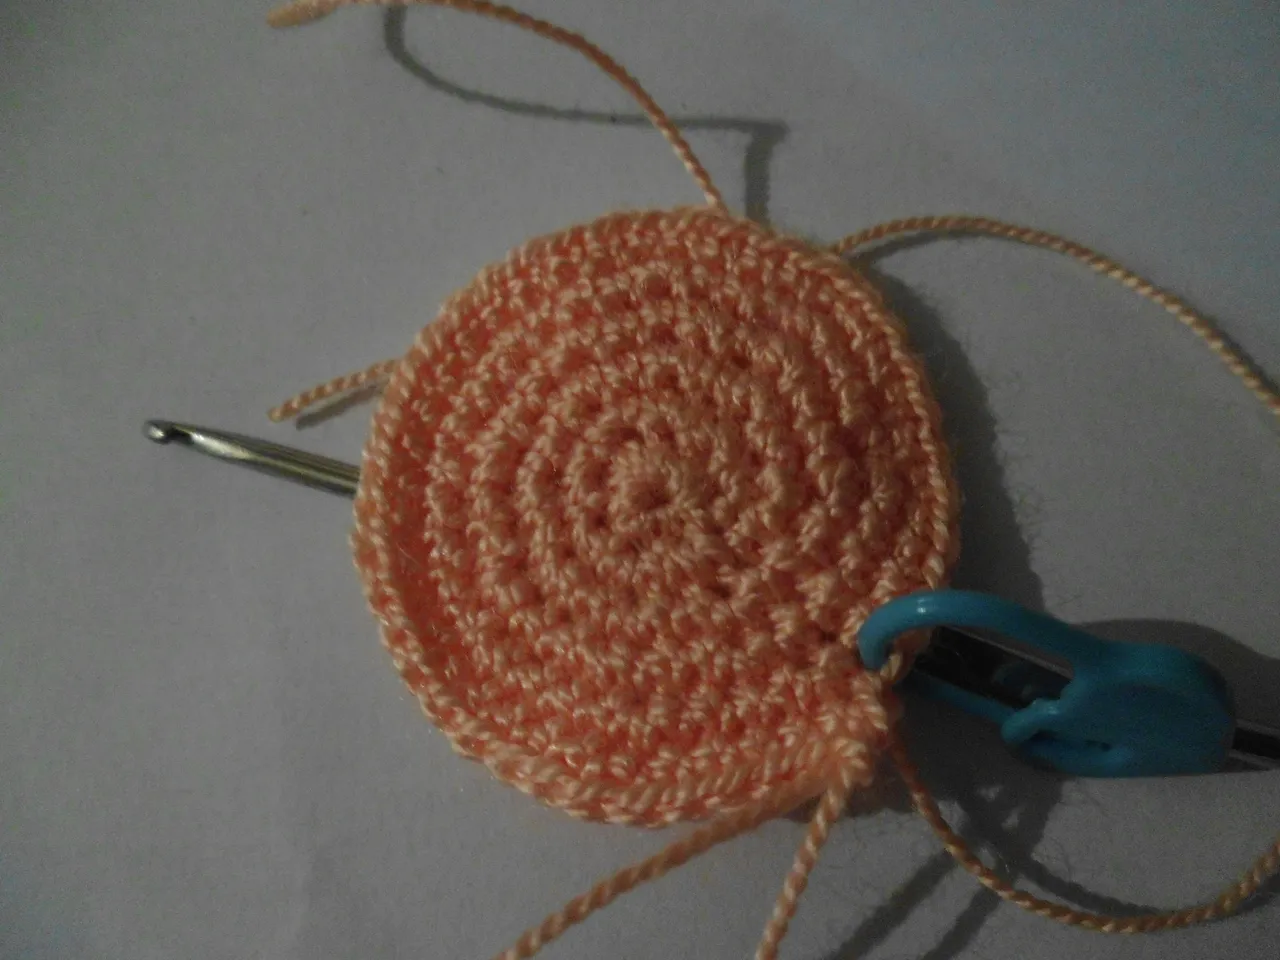
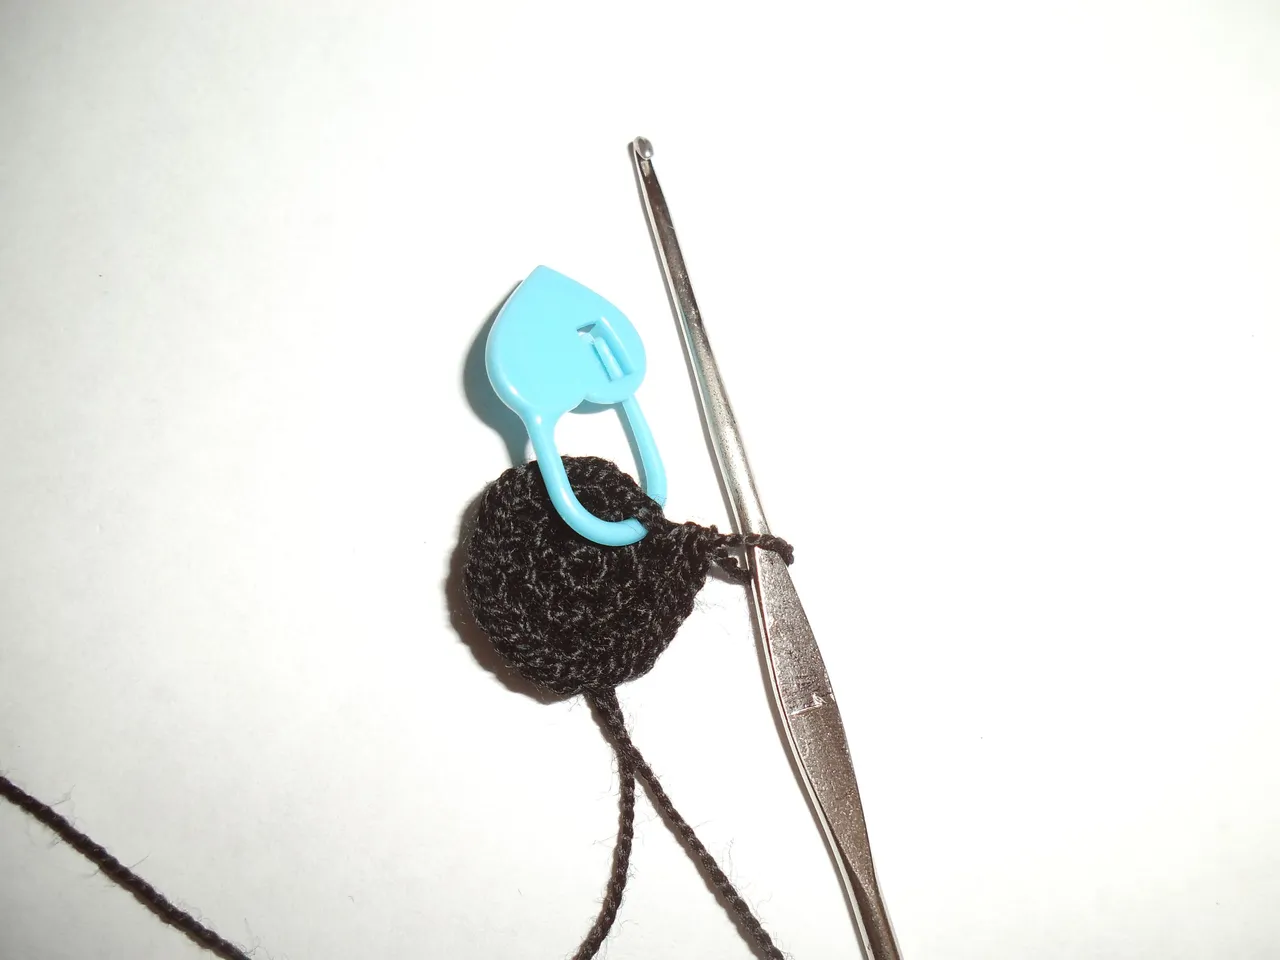
I started by making the head with a skin colored yarn, I made a magic ring of 8 sts. In the second row I made only increases, for row 3 I was to make 1 sts and 1 increase. In row 4, 2 sts and 1 increase. And for the 5th row, 3 sts and 1 increase.

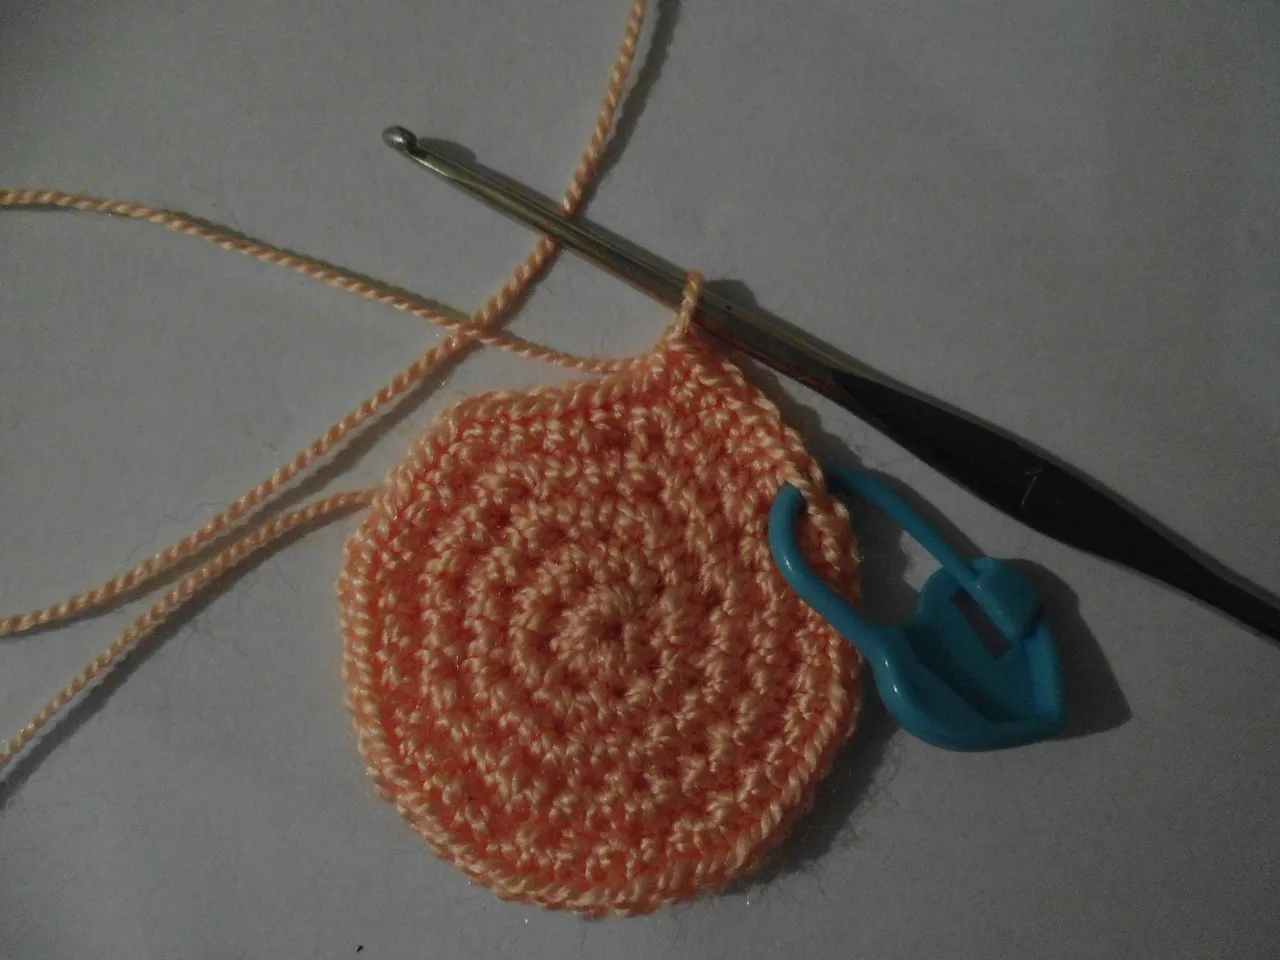
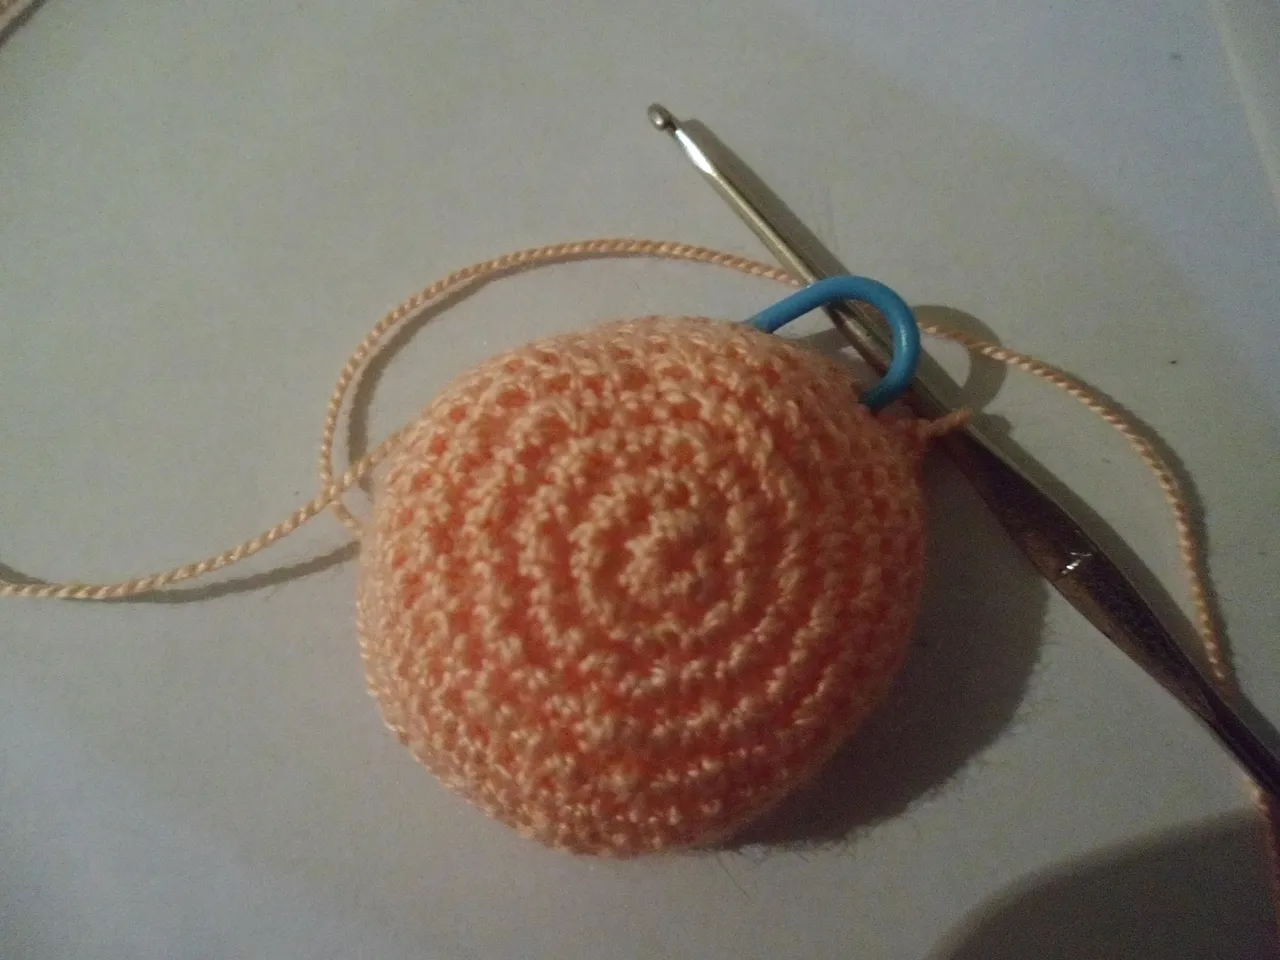
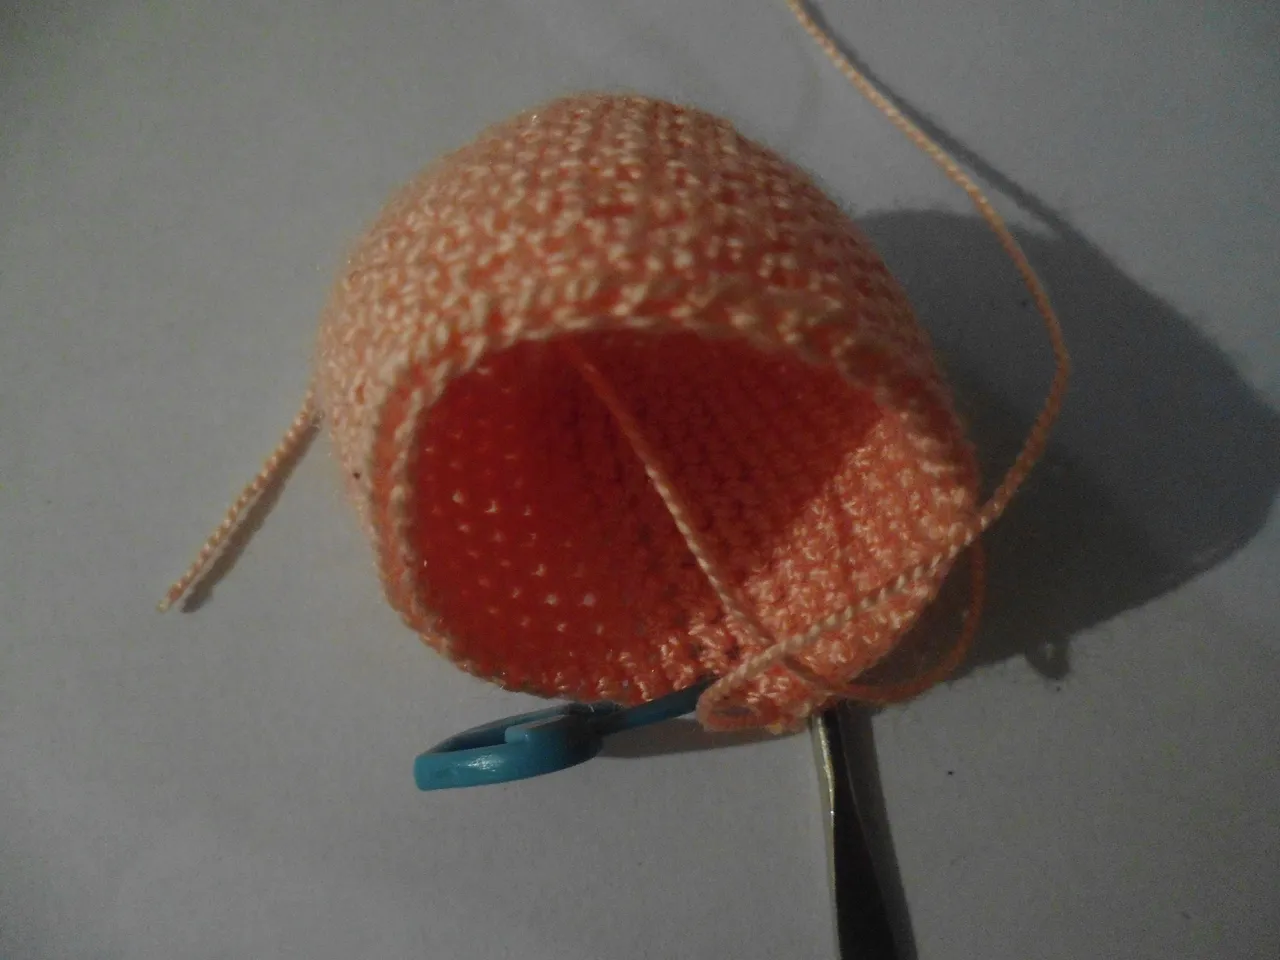
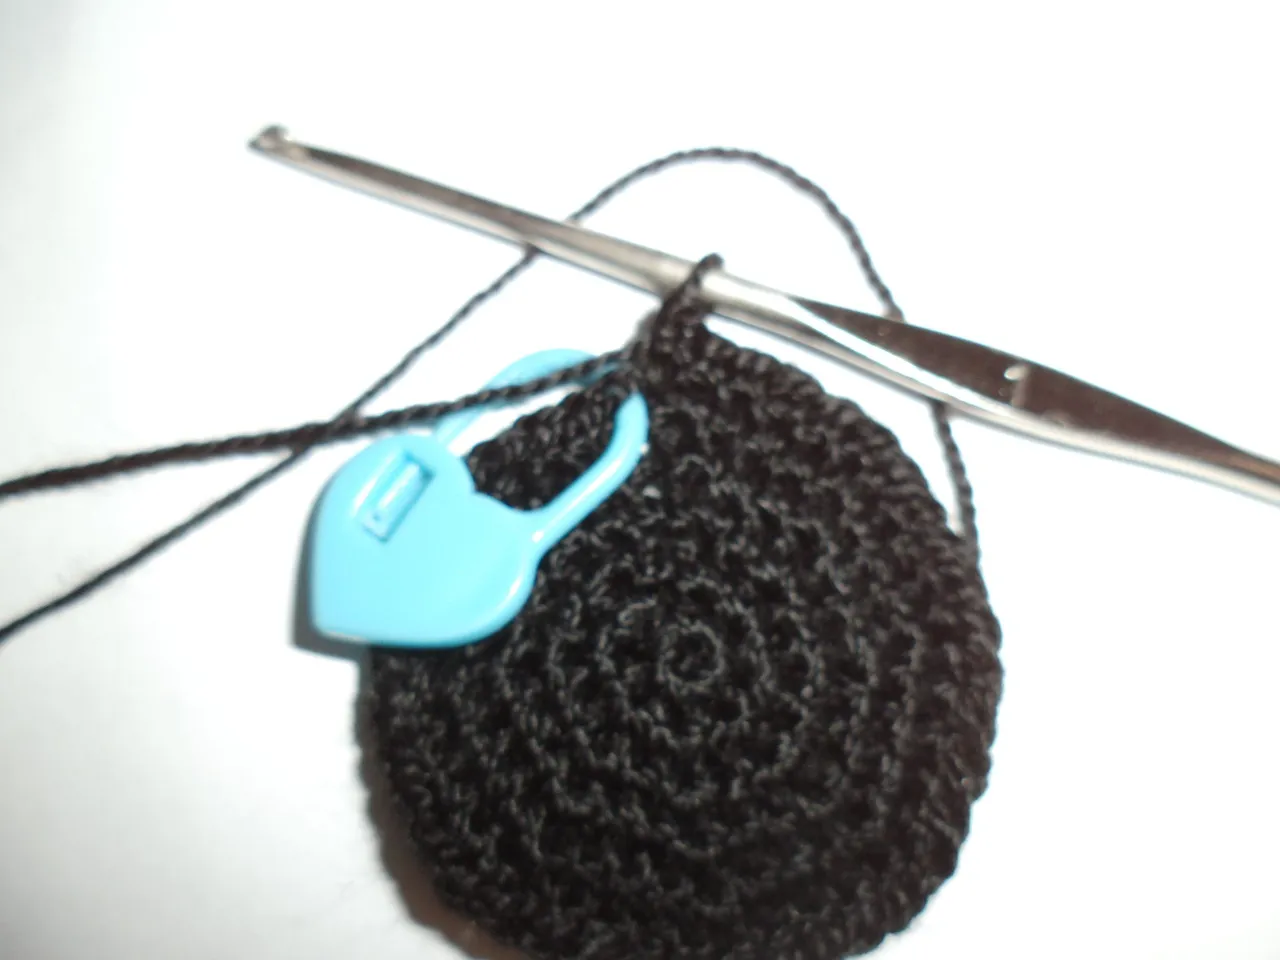
In row number 6 to 14 I only made a single crochet in each stitch. From row number 15 to 17 we would be making reverse stitches, that is, in row 15, 3 sts and 1 decrease, row 16, 2 sts, 1 decrease, row 17, 1 sts and 1 decrease.
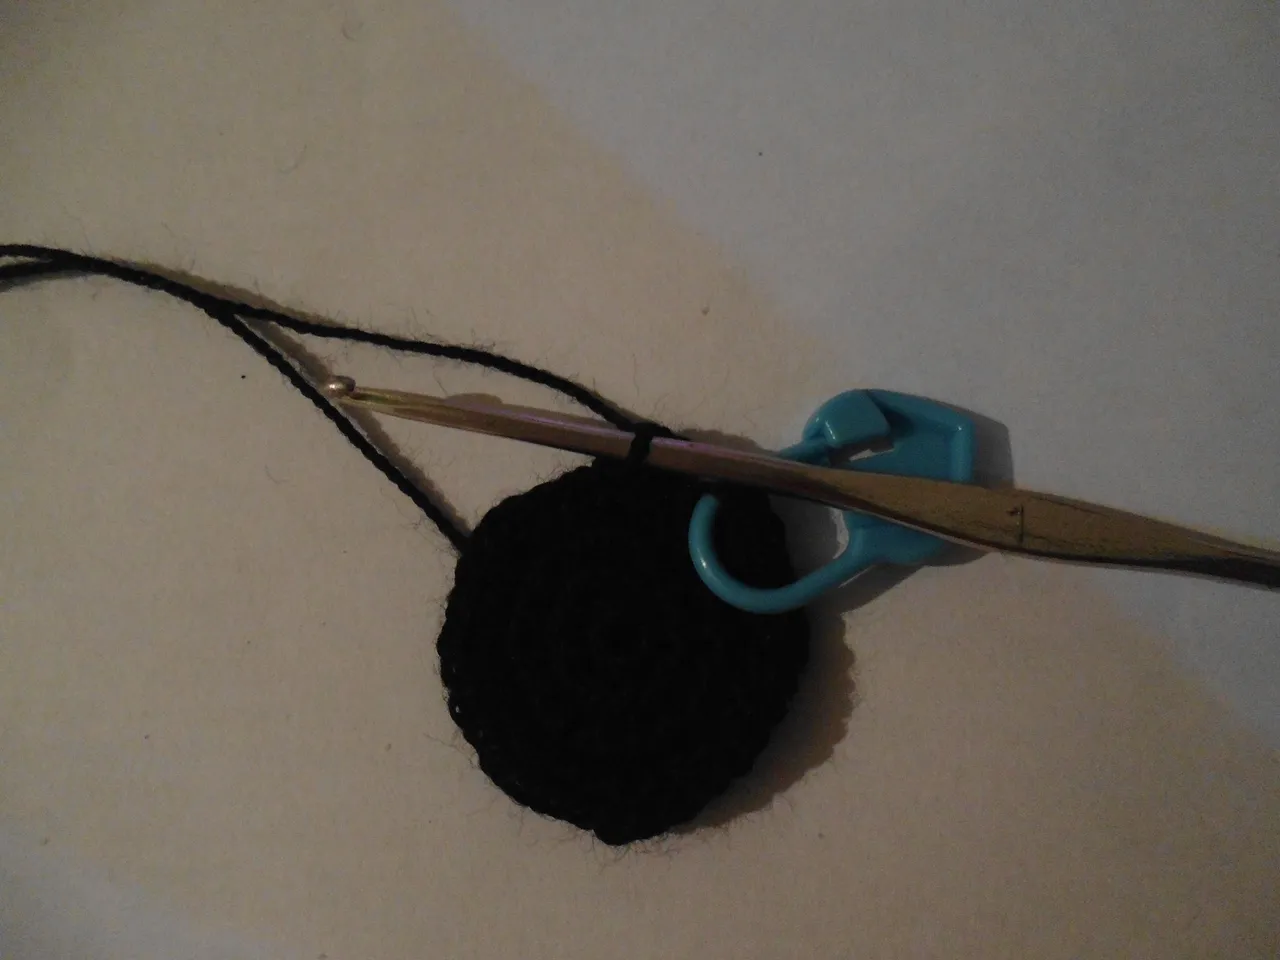
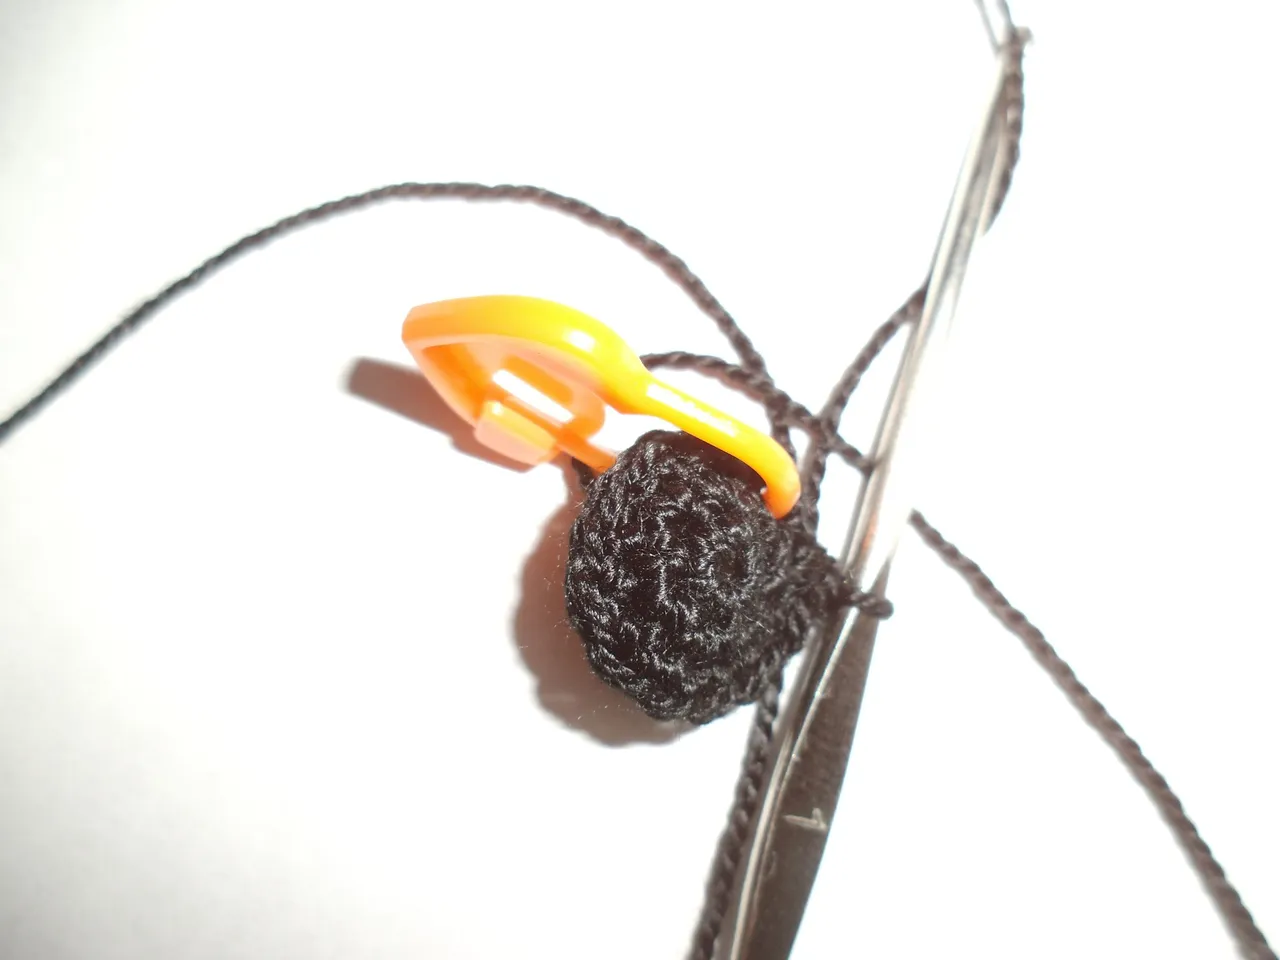
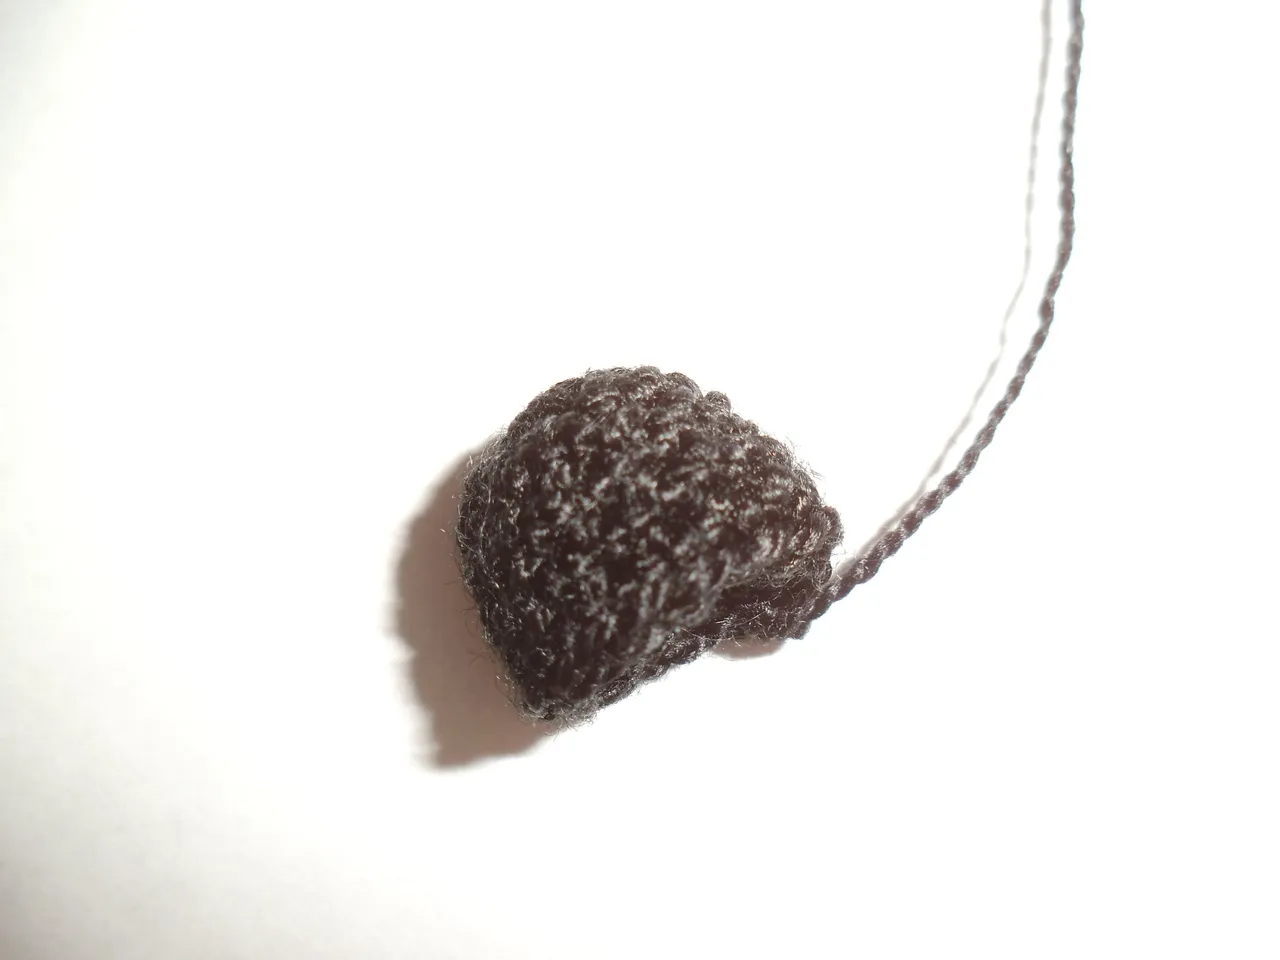
To make the hair black was practically the same as at the beginning of making the head, only that in rows 6 to 14 we ended up making only stitches in each stitch, closing with slip stitch.
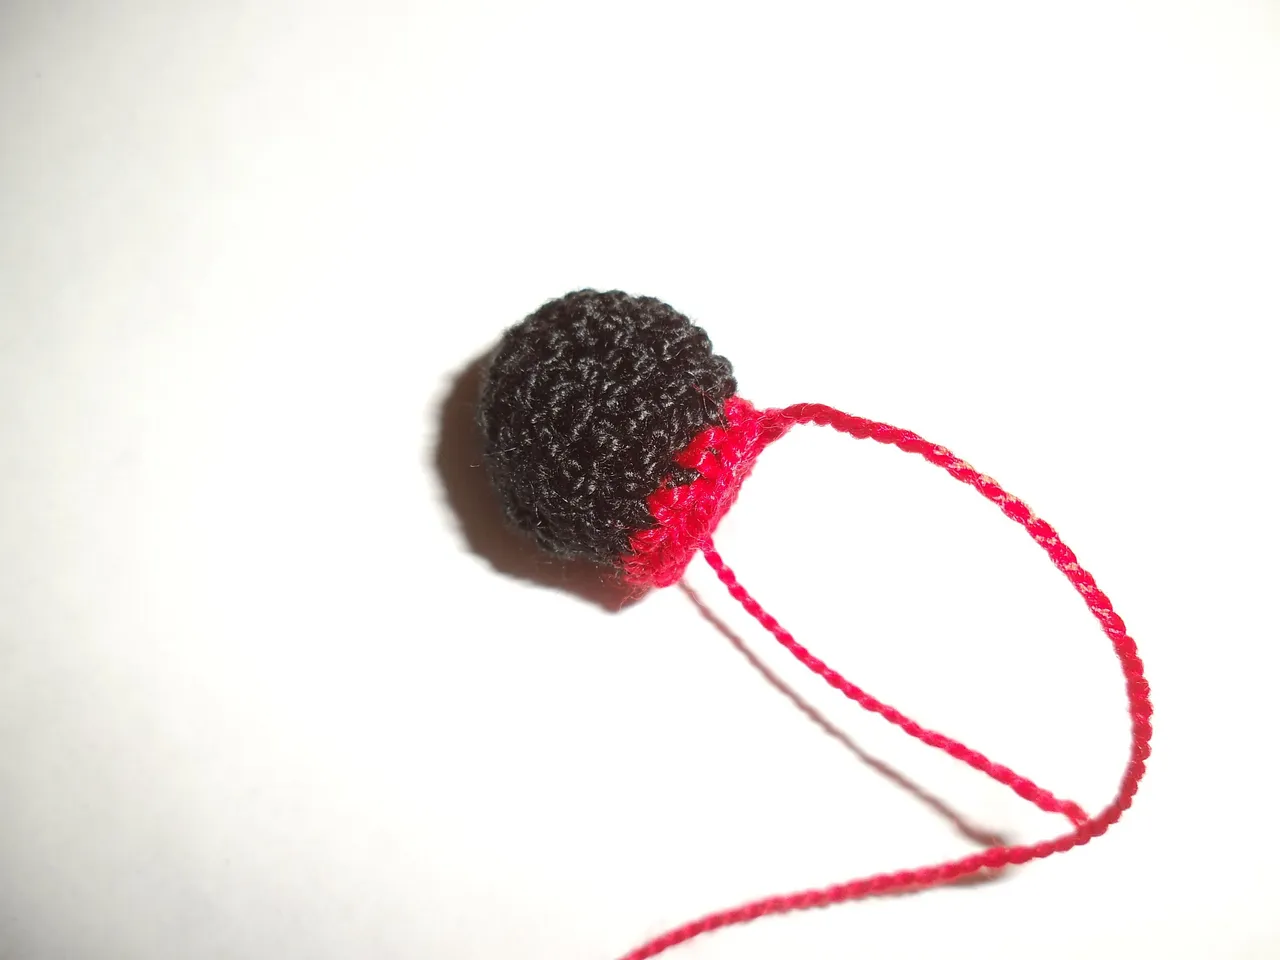
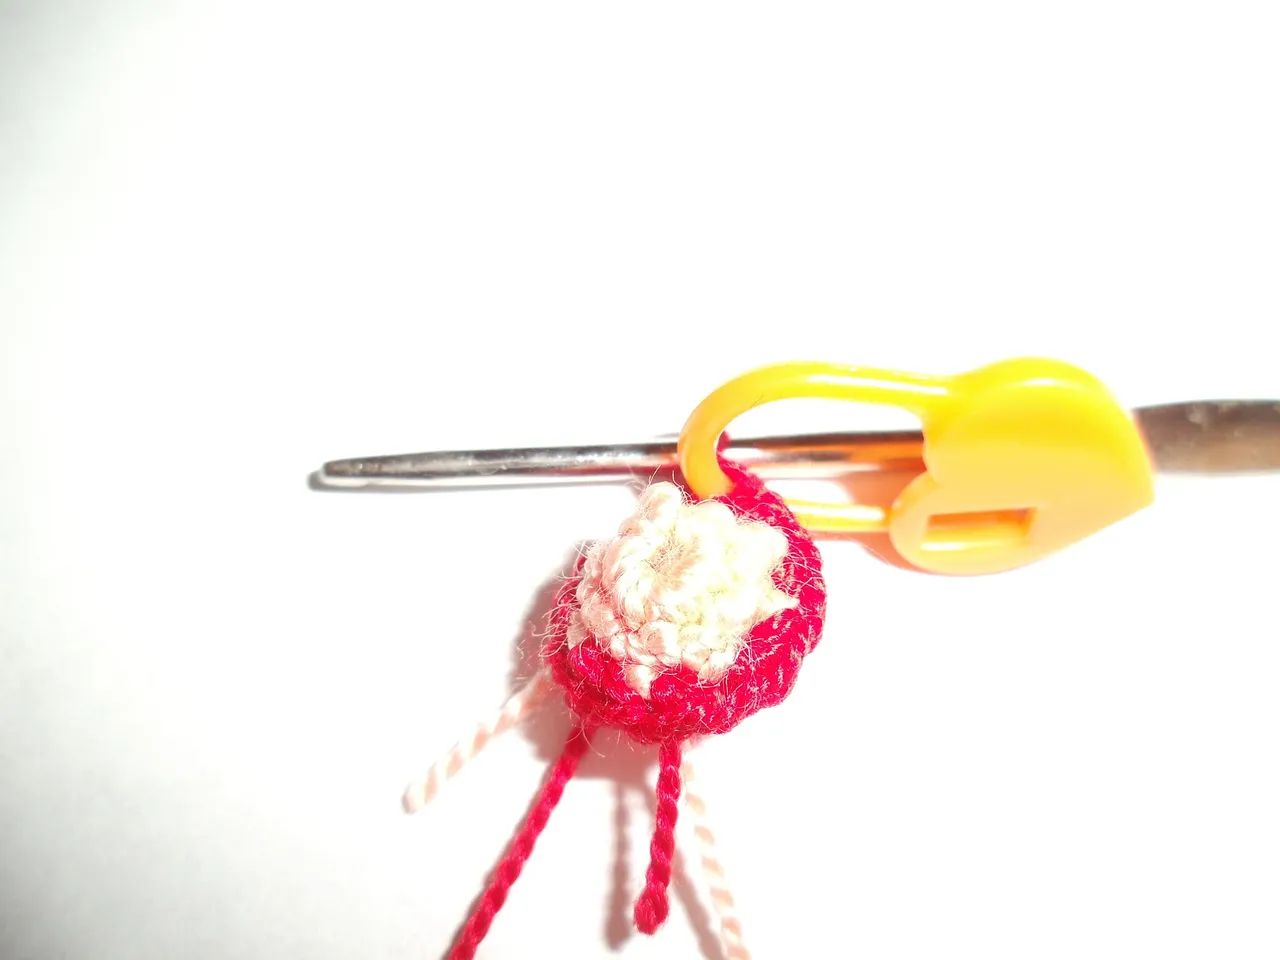
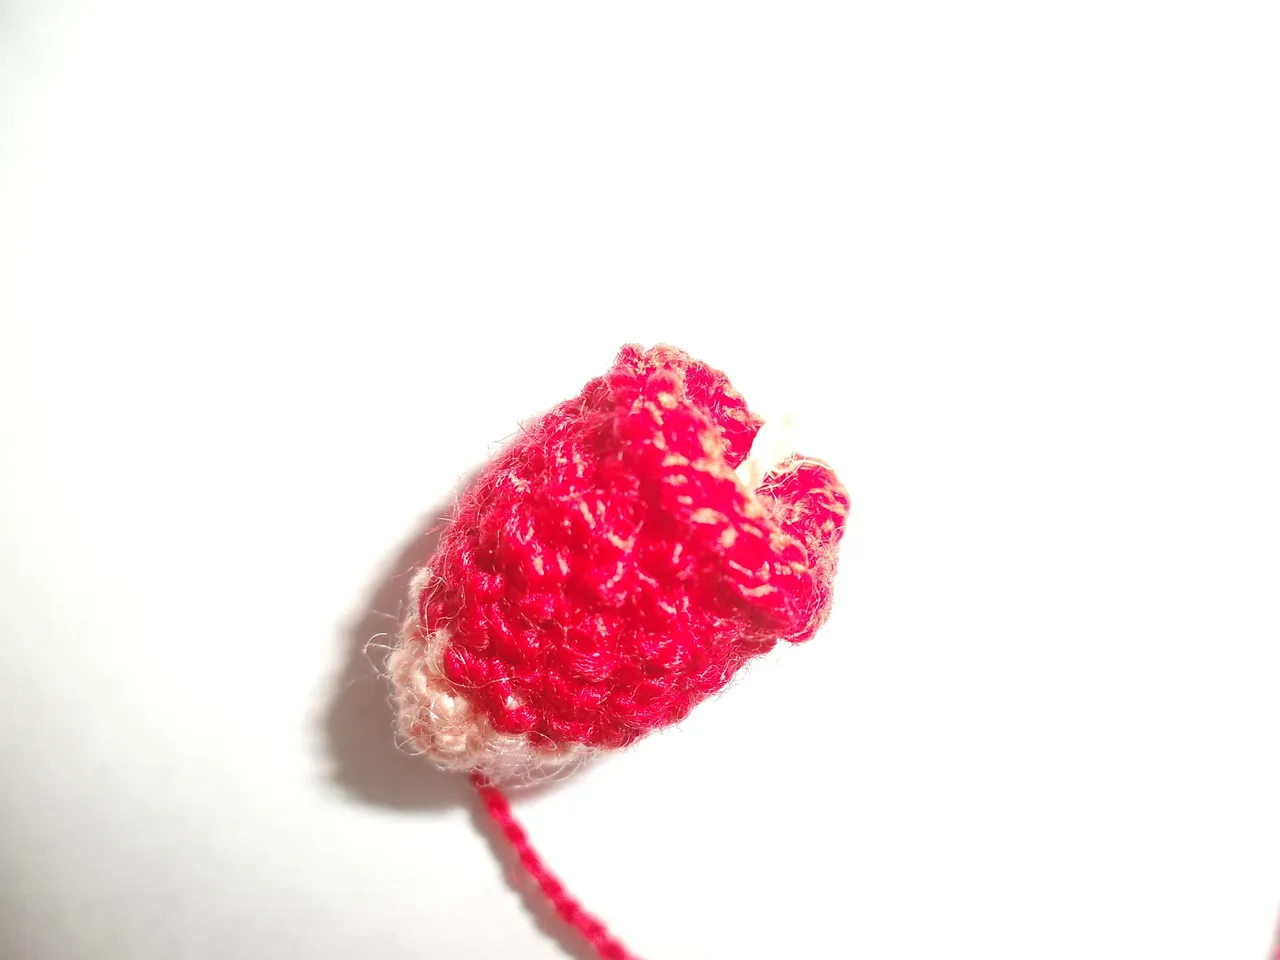
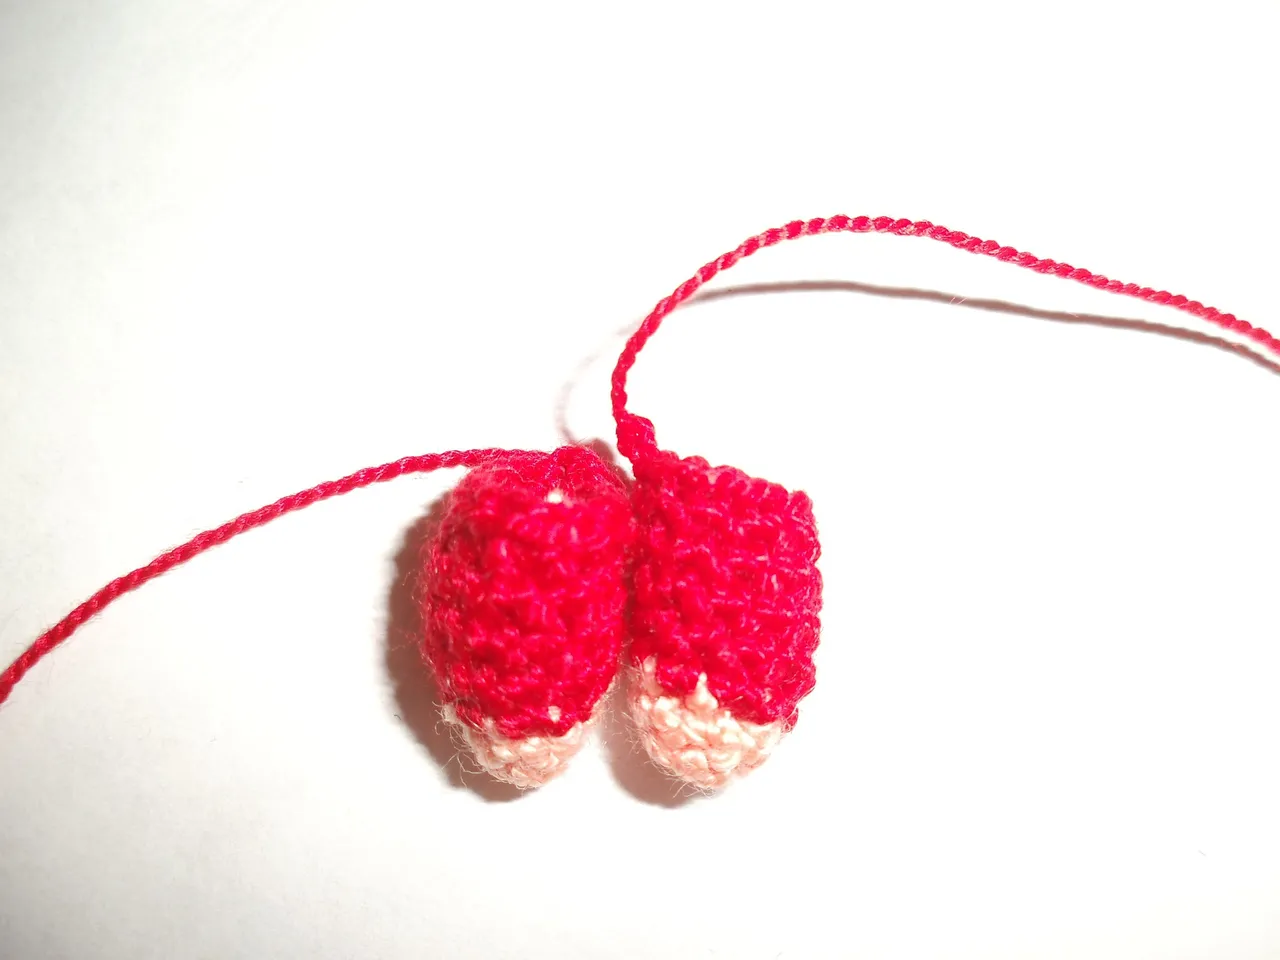
To make the bows of our pretty Pucca, I made a magic ring with black yarn of 6 sts, in the 2nd row I made only increases, 3rd row 1 sts and 1 increase. From the 4th to the 6th row I made only bps in each stitch, as indicated in the video. In the 7th row, almost at the end, I made 1pb and 1 decrease, I changed to red. And finally I finished making only single crochet with red yarn and closed with slip stitch.
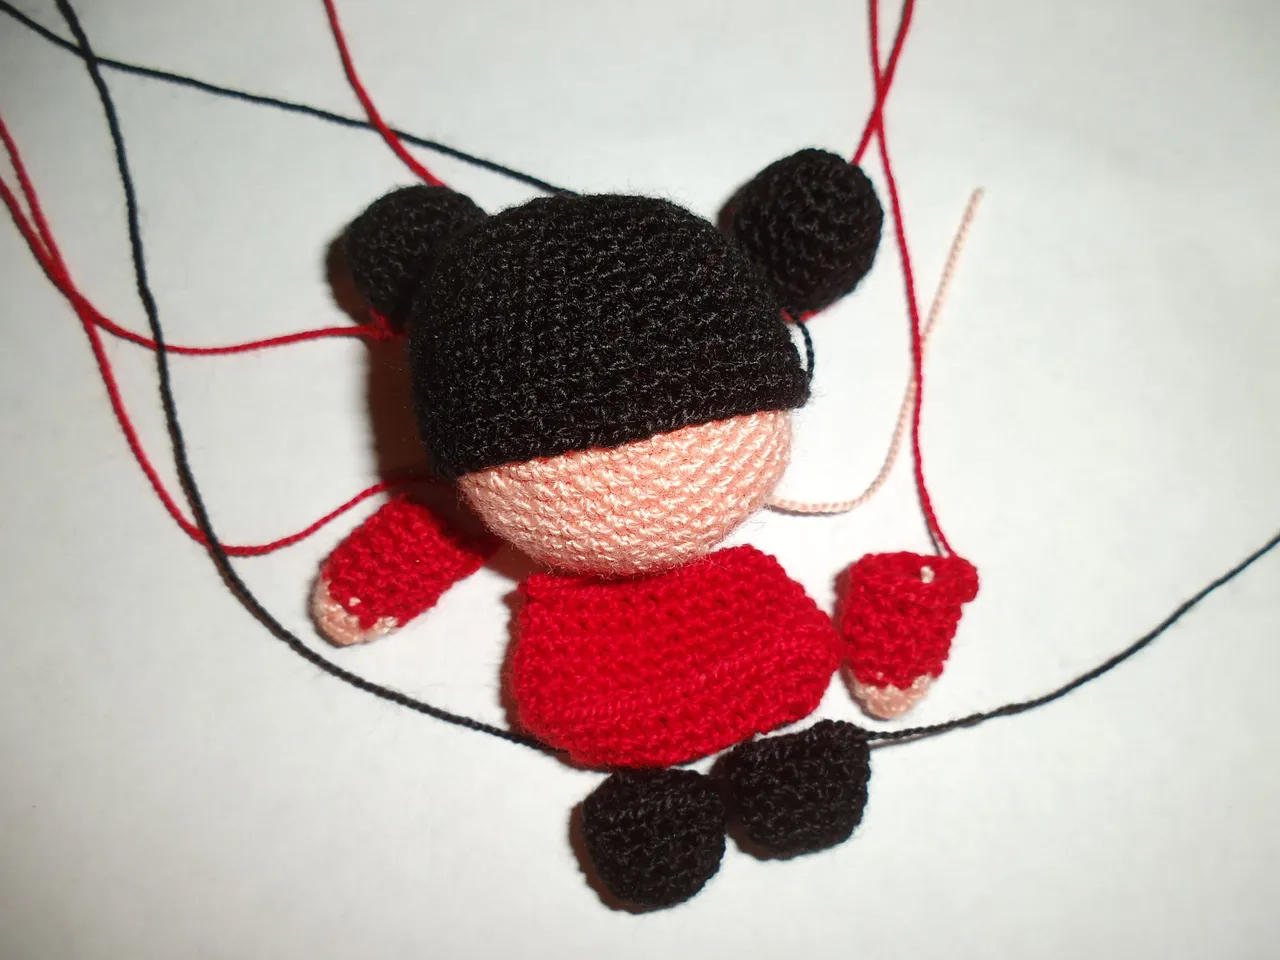
I have to admit that at this point I was tired of knitting so I stopped this project and continued it the next day.( ꩜ ᯅ ꩜;)
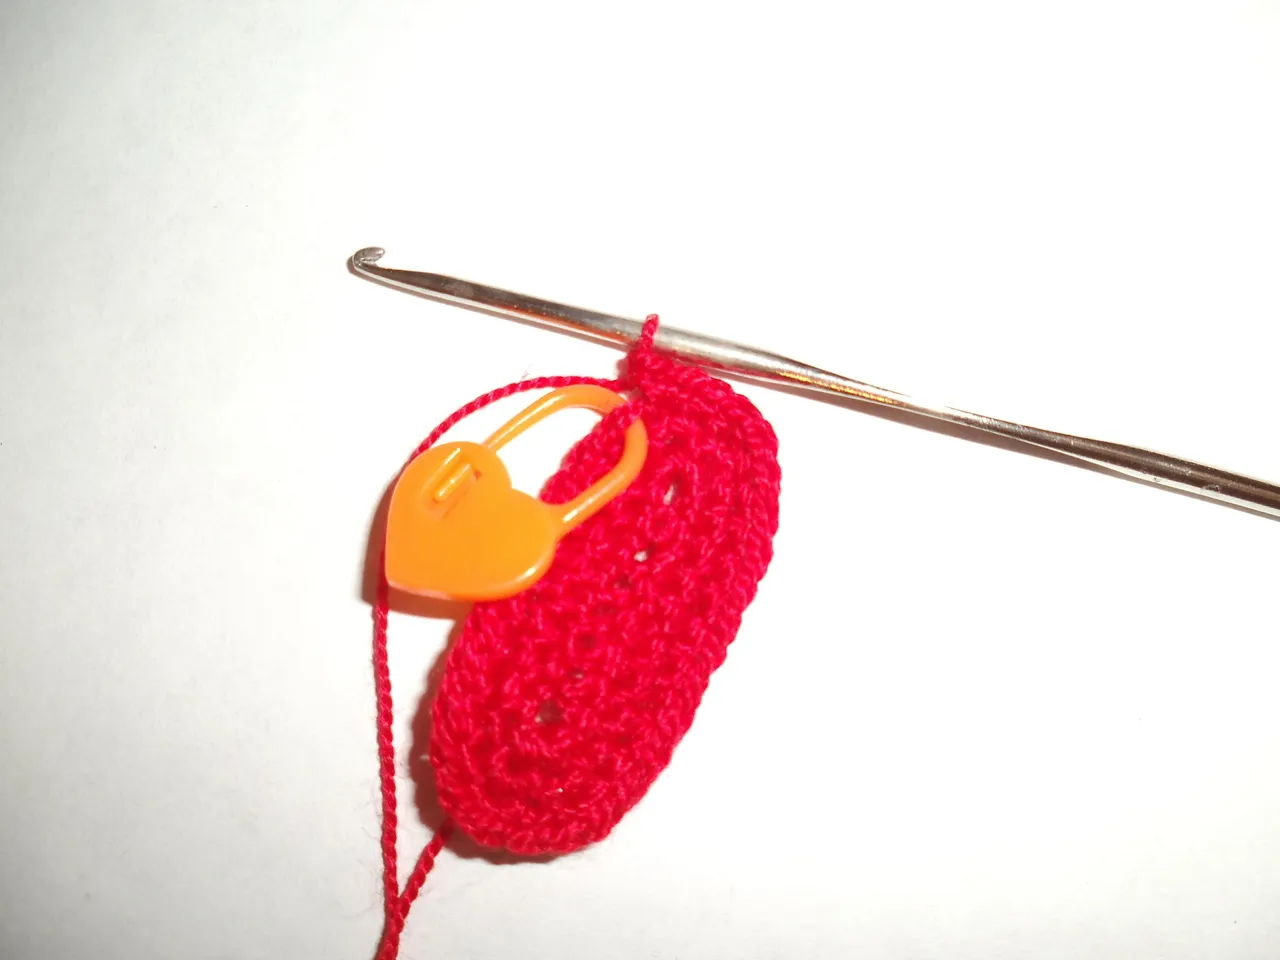
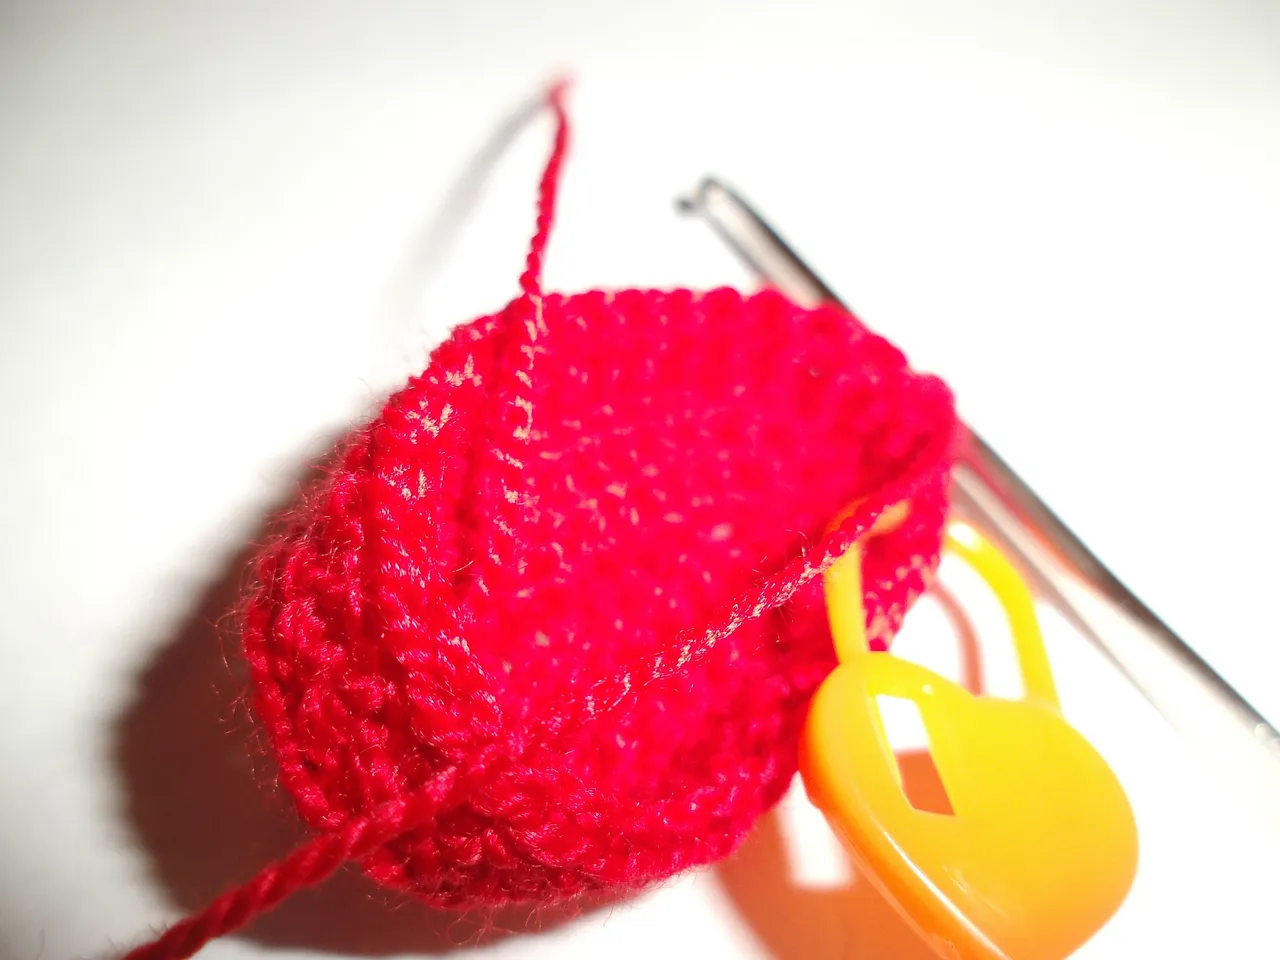
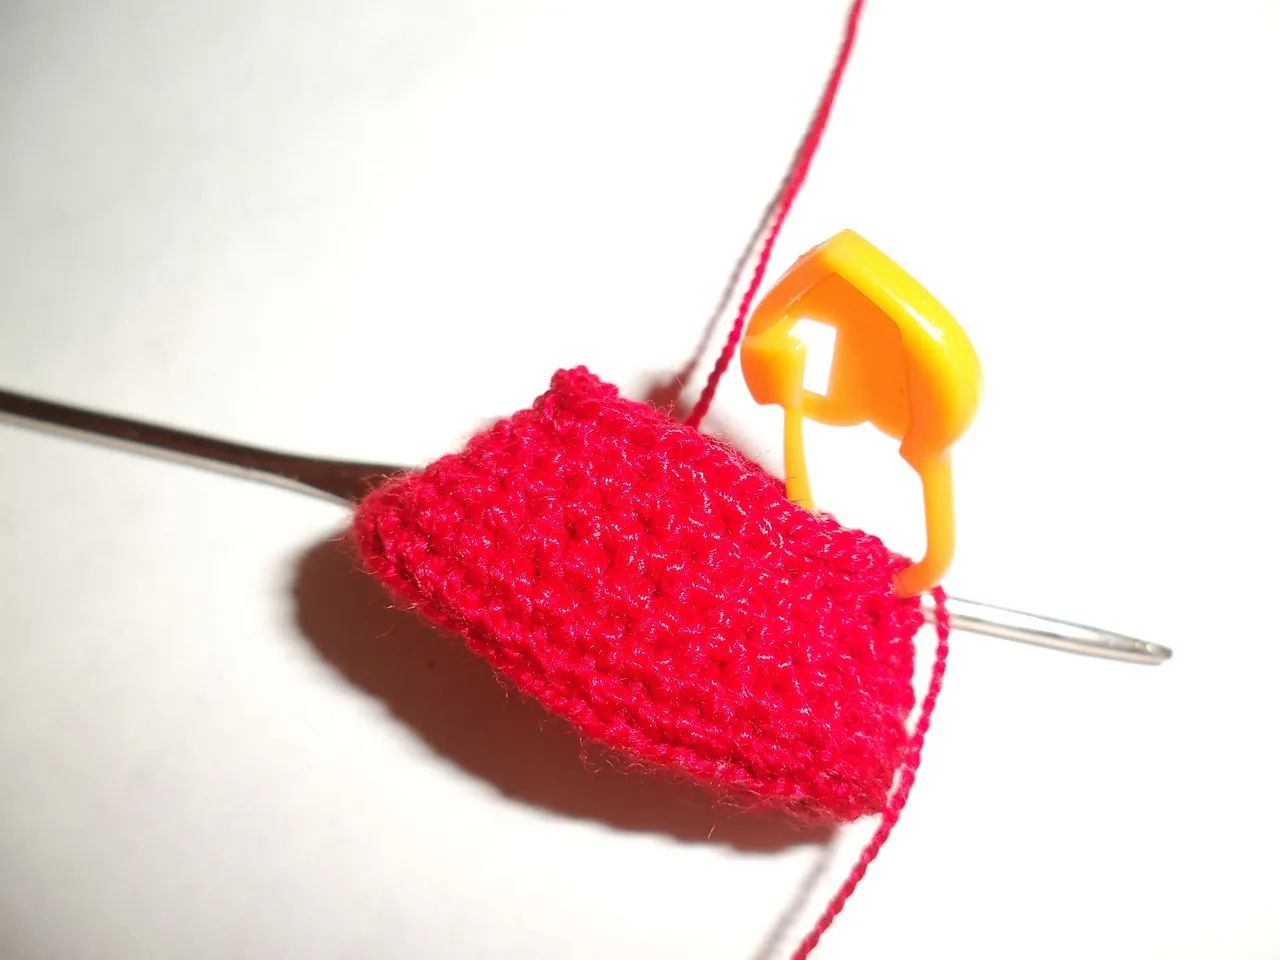
In the elaboration of the red skirt, it was the most complicated part, I had to watch the video many times in the part where I made the skirt because I did not understand. I had to watch the video many times in the part where I was making the skirt because I didn't understand it, until I finally understood the technique used to make it correctly. Even so, when I finished the skirt I was not so satisfied with the result.
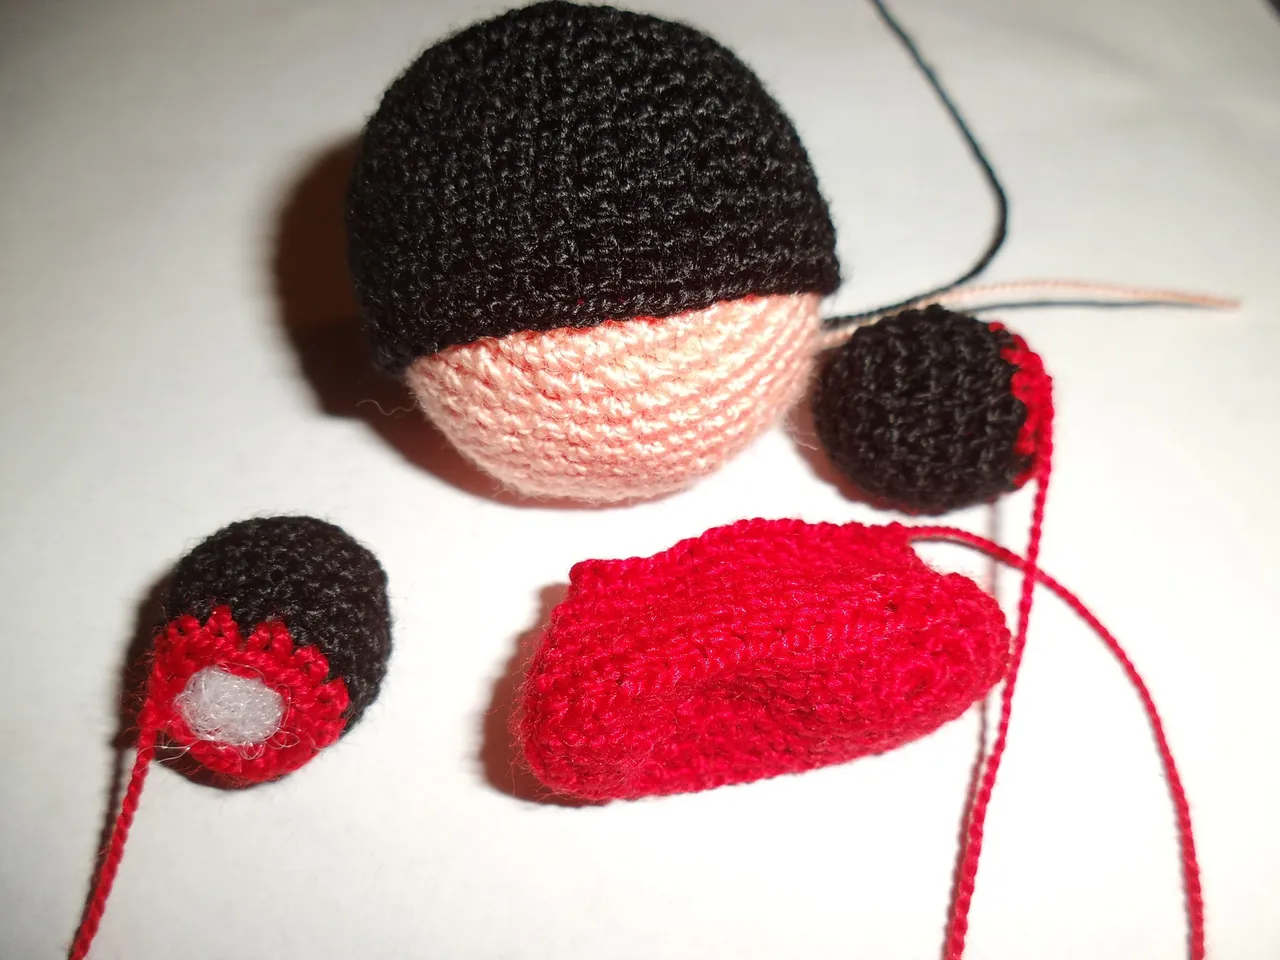
The creation of Pucca's feet I think it was the easiest and calmest to knit, I started with a magic ring in black yarn of 6 stitches, in the second round I did only increase, in the 3rd and 6th rounds I finished with only stitches in each stitch.

The arms were also easy to make, with skin colored yarn I started in the first row with a magic ring of 6 stitches, in the second row I only made stitches in all stitches, in the third row I changed to red color. 4 round 1pb and 1 increase, from round number 5-7 I only made single crochet in all stitches and closed with slip stitch.
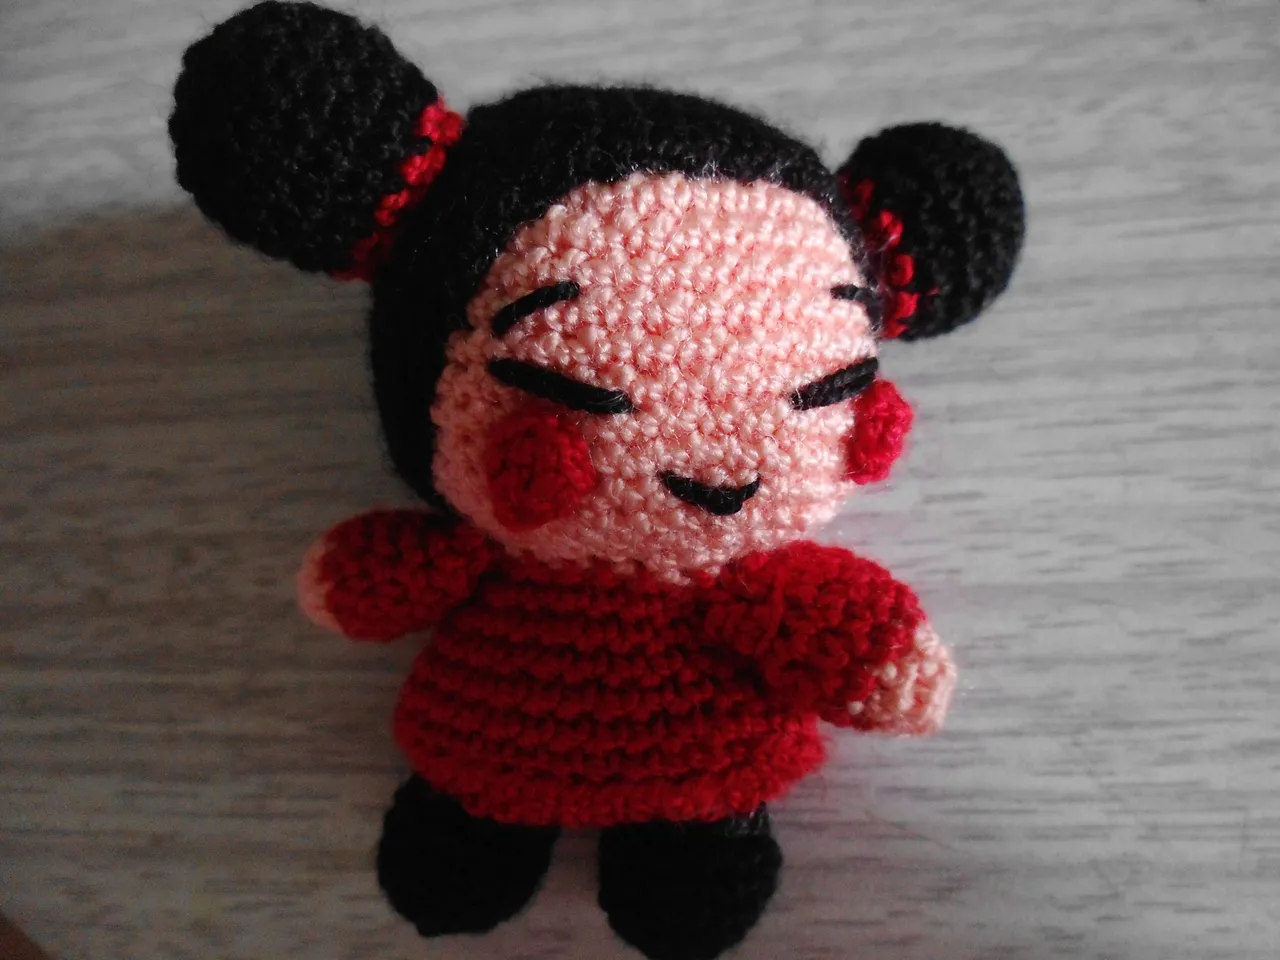
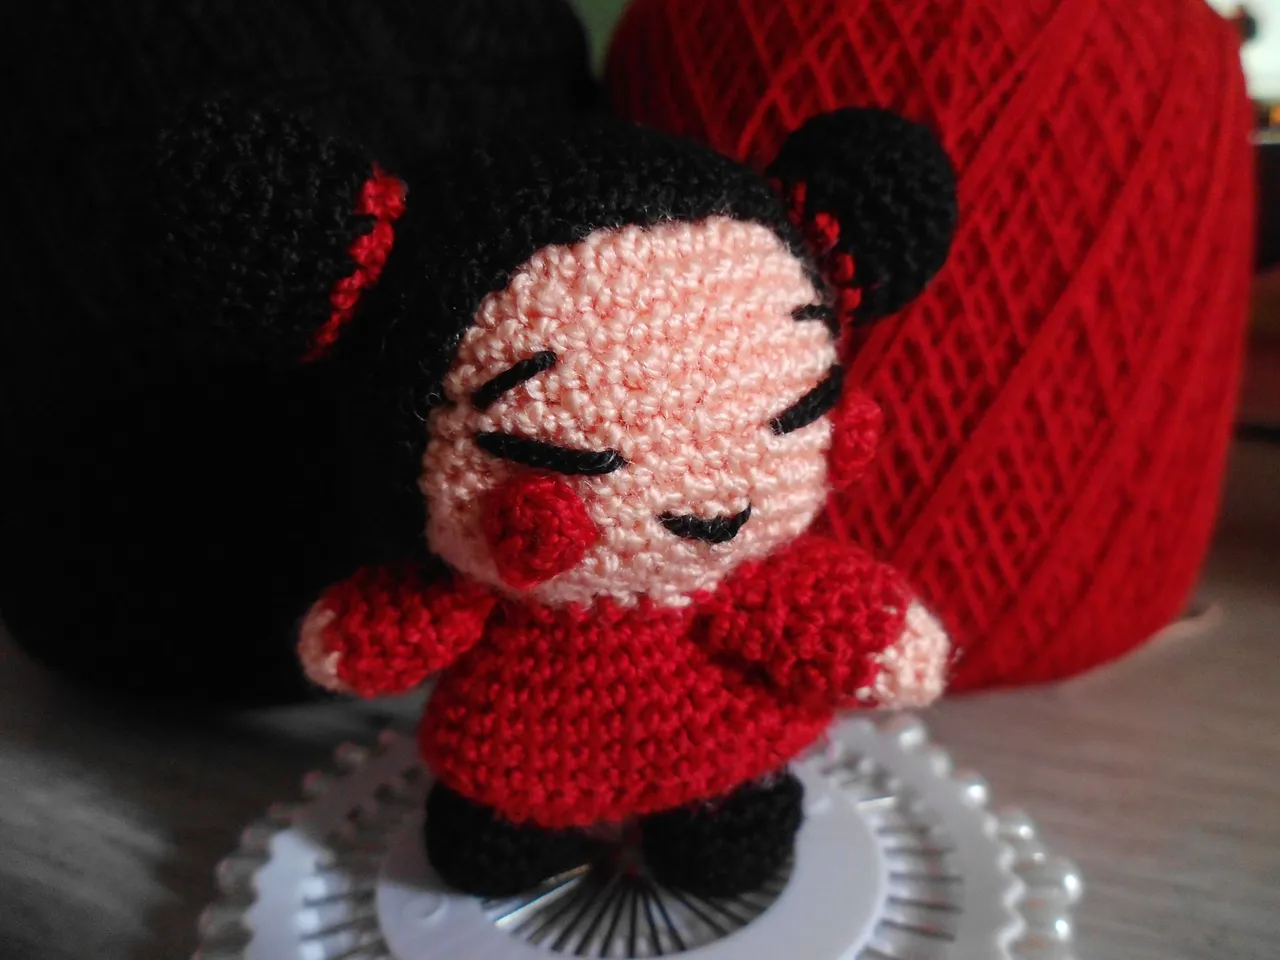
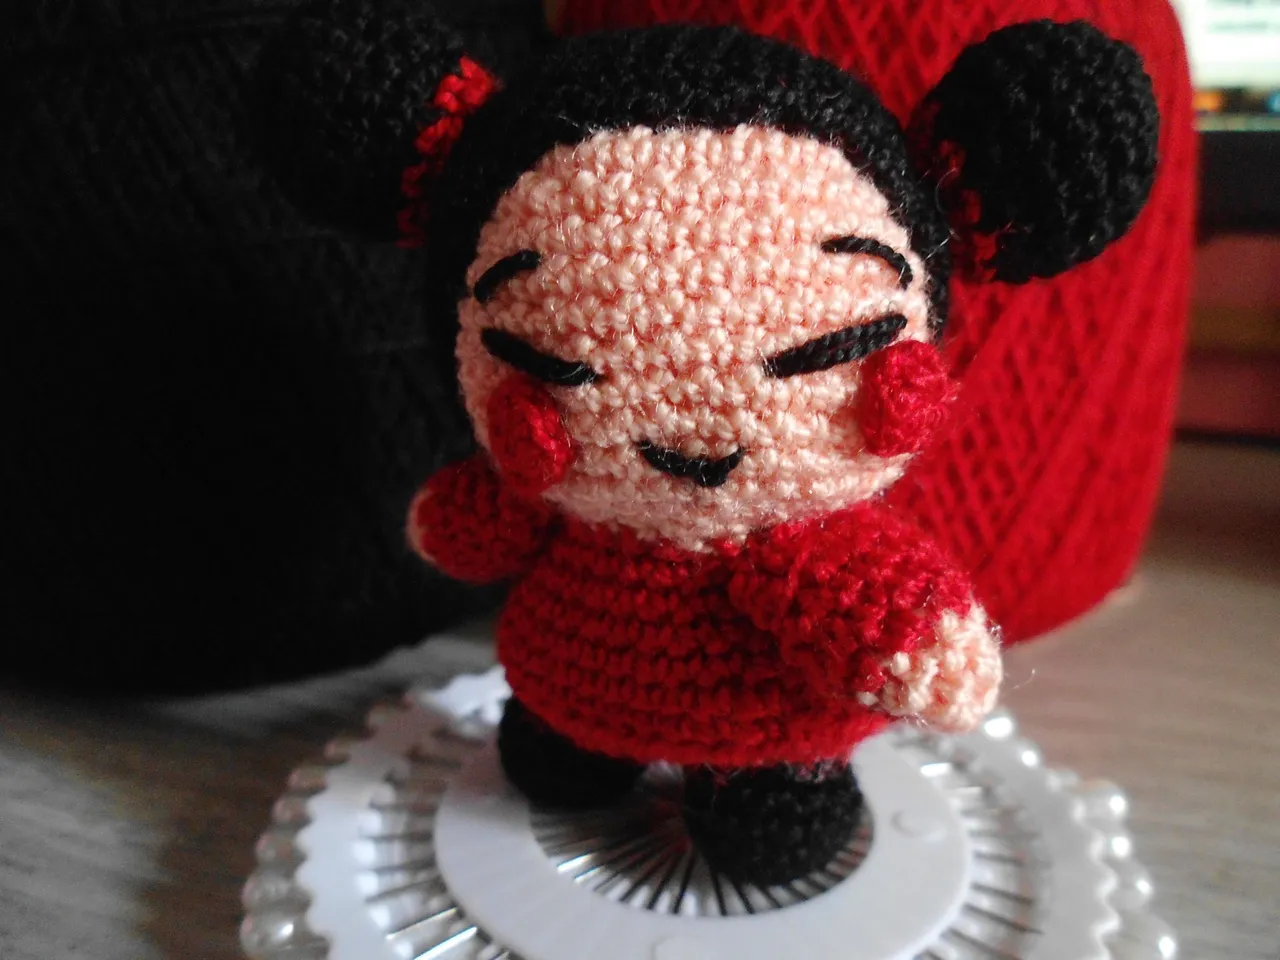
Here is the result of Pucca. I feel happy with what I have done💐💫, although although she has some flaws in terms of sewing her limbs, I know that with the passage of time and practice I will improve.
Now I just hope my aunt likes her amigurumi🎁, I already want to see her reaction. Soon I will bring you over here the creation of Garu, Pucca👫's partner.
I had a lot of fun making this amigurumi, as I feel it was different from what I usually do, although I did get frustrated and angry on several occasions so I had to expand this project for three days, as I felt I would go crazy haha. The first day I spent 4 hours making Pucca's head and hair. The next two days I only spent 2 hours. So I think it took me about 8 hours to finish this project. Unbelievable, it was totally worth it. ૮ ˶ᵔ ᵕ ᵔ˶ ა
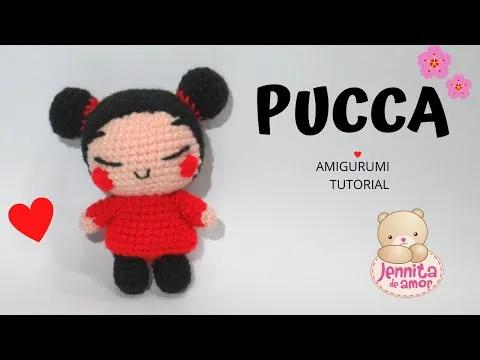
Here is the video tutorial I saw on Youtube to make this cute Pucca:
And well folks this has been all for today's post, I hope you liked it as much as I did, what did you think? Remember that the pictures 📸✨ were taken by me, thanks for making it this far, see you in a next post! (。・ω・。)ノ🍰☕

Hola gente linda y creativa de NeedlWorkMonday, deseo que hayan tenido un buen día🍃🌼. Hoy quiero compartirles como fue crear un amigurumi del personaje de Pucca, aunque no fue tan difícil como pensé, pero si me llegue a estresar en varias ocasiones (っ- ‸ - ς). Acompáñenme a ver el proceso y el resultado final :D
Hace unos días atrás estuve visitando a mi querida tía a quien le mostré mis proyectos que he hecho a crochet. Le gustó tanto lo que hice que le prometí que haría para ella y su pareja lindos amigurumis🧸✨.
Anteriormente le había preguntado si quería que hiciera cualquier cosa o algo en específico y eligió un personaje que me gusta mucho de una serie que también me gusta mucho, Pucca, y su pareja Garu.
- Hilo acrílico color piel🧶.
- Hilo acrílico color rojo.
- Hilo acrílico color negro.
- Tijeras✂️.
- Marcador de puntos.
- Aguja Crochet número 1.
- Aguja para bordar.
Comencé haciendo la cabeza con un hilo de color piel, hice un anillo mágico de 8pb. En la segunda vuelta hice solo aumentos, para la vuelta 3 debía hacer 1 pb y 1 aumento. En la vuelta 4, 2pb y 1 aumento. Y para la vuelta número 5, 3pb y 1 aumento.
En la vuelta número 6 hasta la 14 solo hice pb en cada punto. Ya a partir de la vuelta número 15 hasta la 17 iríamos haciendo pb en reversa, es decir que en la vuelta 15, 3pb y una disminución, vuelta 16, 2pb, 1 disminución, vuelta 17, 1pb y 1 disminución.
Para hacerle el pelo de color negro fue prácticamente lo mismo que al comienzo de hacer la cabeza, solo que en la vuelta 6 hasta la 14 terminamos haciendo solo pb en cada punto, cerrando con punto deslizado.
Para la elaboración de los moñitos de nuestra linda Pucca, hice un anillo mágico con hilo negro de 6pb, en la 2 vuelta hice solo aumentos, 3 vuelta 1pb y 1 aum. A partir de la vuelta número 4 hasta la 6 hice solo pb en cada punto, como me lo indicaba el vídeo. Ya en la vuelta número 7 casi terminando hice 1pb y 1 disminución, cambie a color rojo. Y para finalizar termine haciendo solo puntos bajos con hilo rojo y cerré con punto deslizado.
Tengo que admitir que a este punto estaba cansada de tejer por lo que deje este proyecto y lo continúe al día siguiente.( ꩜ ᯅ ꩜;)
En la elaboración de la falda de color rojo, fue lo que más se me complicó, tuve que ver el vídeo muchas veces en la parte en la que hacia la falda ya que no entendía. Hasta que por fin pude entender bien como era la técnica que se usaba para hacerla correctamente. Aún así cuando termine la falda no quede tan satisfecha con el resultado.
La creación de los pies de Pucca creo que fue lo más fácil y tranquilo de tejer, comencé con un anillo mágico en hilo negro de 6pb, en la segunda vuelta hice solo aumento, en la 3 y 6 vuelta termine con solo pb en cada punto.
Los brazos también fue algo fácil de hacer, con hilo color piel comencé en la primera vuelta con un anillo mágico de 6pb, 2 vuelta solo hice pb en todos los puntos, ya para la vuelta 3 hice el cambio a color rojo. 4 vuelta 1pb y 1 aumento, desde la vuelta número 5-7 solo hice puntos bajos en todos los puntos y cerré con punto deslizado.
Aquí el resultado de Pucca. Me siento conforme con lo que he hecho💐💫, aunque si bien tiene algunos fallos en cuanto a la costura de sus extremidades, sé que con el paso del tiempo y la práctica mejoraré.
Ahora solo espero que a mi tía le guste su amigurumi🎁, ya quiero ver su reacción. Pronto les traeré por aquí la creación de Garu, la pareja de Pucca👫.
Me divertí mucho haciendo este amigurumi, ya que siento que fue diferente a lo que suelo hacer normalmente aunque si me llegue a frustrar y enojar en varias ocasiones por lo que tuve que expandir este proyecto por tres días, ya que sentía que me volvería loca jaja. El primer día pase 4 horas haciendo la cabeza y el cabello de Pucca. Los siguientes dos días solo dedique 2 horas. Por lo que creo que fue alrededor de 8 horas que me tomo terminar este proyecto. Increíble, valió totalmente la pena. ૮ ˶ᵔ ᵕ ᵔ˶ ა
Por acá les dejo el vídeo tutorial que vi en Youtube para hacer esta linda Pucca:
Y bueno gente esto ha sido todo por el post de hoy, espero les haya gustado tanto como a mi,¿ A ustedes que les pareció? Recuerden que las fotos 📸✨ fueron tomadas por mi. ¡Gracias por haber llegado hasta aquí, nos vemos en un próximo post! (。・ω・。)ノ🍰☕