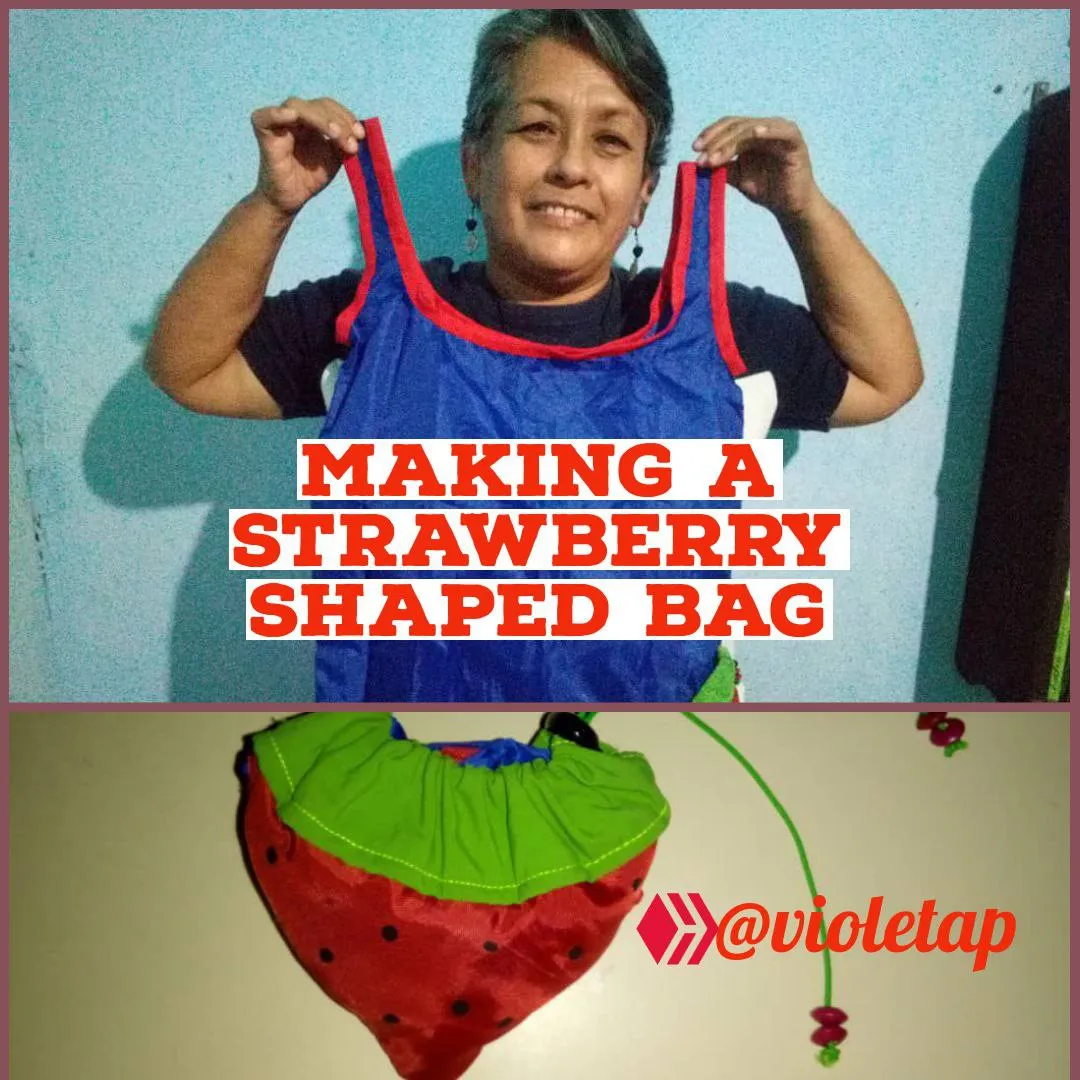
Haciendo un hermoso bolso que se transforma en una fresa
Hello to all dear friends of Hive.
Hola a todos queridos amigos de Hive.
I hope you are very well, this time I would like to show you how I made this beautiful bag, and that can be stored anywhere for very small, makes it very practical because it does not take up too much space, and this I have achieved because it can become a nice strawberry, so let's go to the step by step, but first I must mention the materials I used in my creative process.
Espero se encuentren muy bien, en esta oportunidad me gustaría mostrarles cómo realicé este bello bolso, y que se puede guardar en cualquier sitio por muy pequeño, lo hace muy práctico ya que no ocupa demasiado espacio, y esto lo he logrado porque se puede convertir en un linda fresa, así que vamos al paso a paso, pero primero debo mencionarles los materiales que ocupé en mi proceso creativo.
Materiales|Materials:
- Half a meter of blue fabric (taffeta lining).
- Half a meter of red fabric (taffeta lining).
- Half a meter of green fabric (taffeta lining).
- A piece of cord.
- A quarter of a cord (tricot).
- Scissors
- Thread.
- Pins
- Needles.
- Two meters of red bias.
- Medio metro de tela azul (forro tafeta)
- Medio metro de tela roja (forro tafeta)
- Medio metro de tela verde (forro tafeta)
- Un piza cordón
- Un cuarto de cordón (tricot)
- Tijera
- Hilo
- Alfileres
- Agujas
- Dos metros de sesgo rojo
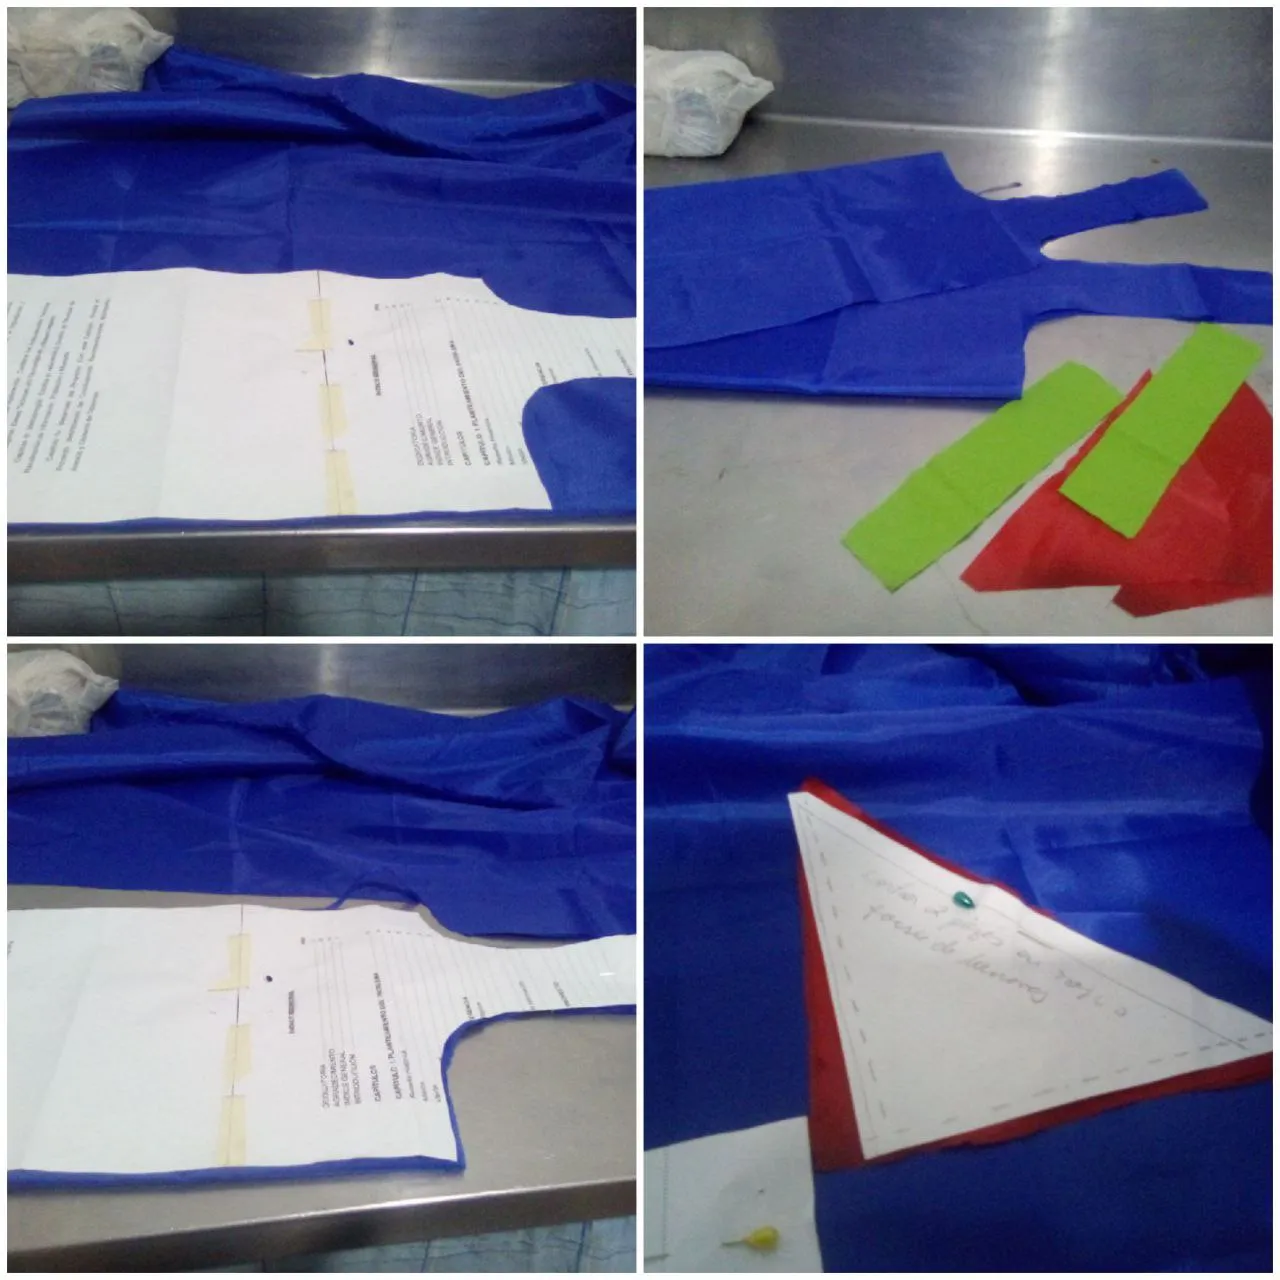
The first thing I did was to place the pattern on top of the fabric placing pins so that it does not move, and to be able to hold the pattern well on the fabric when proceeding to cut, this same procedure was done with all the pieces.
Lo primero que realicé fue colocar el patrón encima de la tela colocando alfileres para que no se mueva, y poder sujetar bien el patrón en la tela al momento de proceder a cortar, este mismo procedimiento lo realice con todas las piezas.
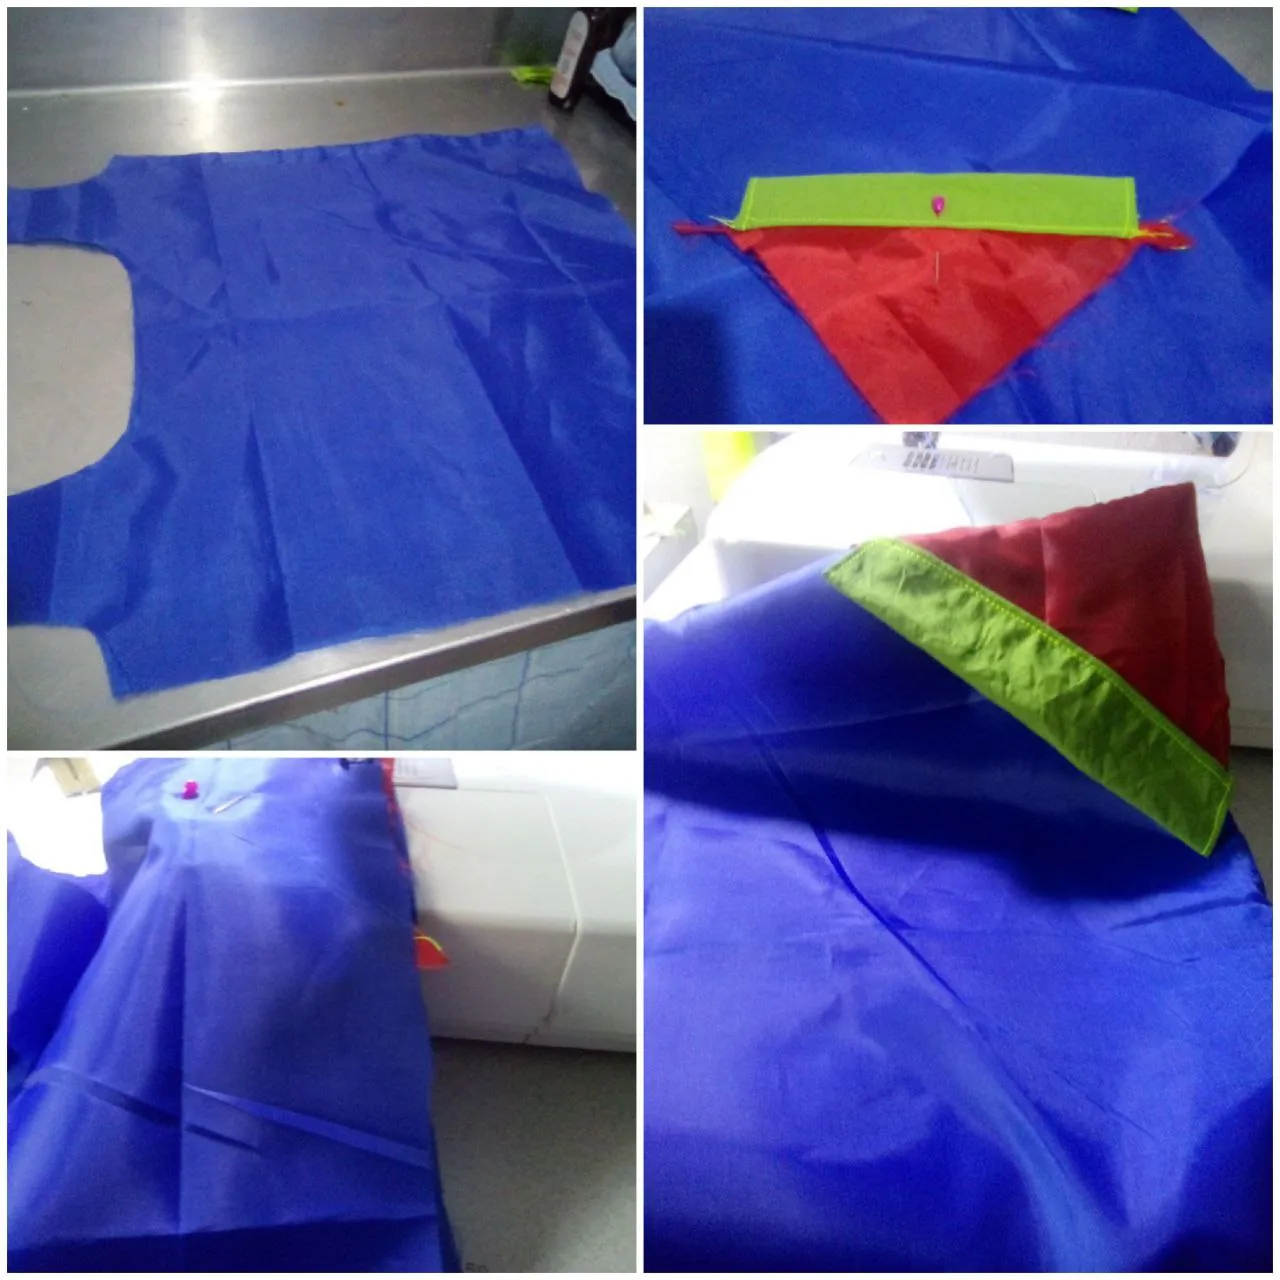
The next thing I did was to go slowly joining all the pieces, both the front and the back and just behind, with the blue fabric, and then you have to both front and back in the lower left corner small pieces of red and green, after sewing the pieces you have to place the bias where the bag will grab the bag and what would be the top of the bag, which colloquially we would call "the mouth of the bag".
Lo siguiente que hice fue ir poco a poco uniendo todas las piezas, tanto por la parte delantera y como por la parte trasera y justo atras, con la tela azul, y luego se le tiene que tanto por delante como por detras en la esquina inferior izquierda pequeñas las piezas de color rojo y verde, después de coser las piezas se le tiene que colocar el sesgo por donde se agarrará el bolso y por lo que sería la parte superior del bolso, lo que coloquialmente le llamariamos “la boca del bolso”
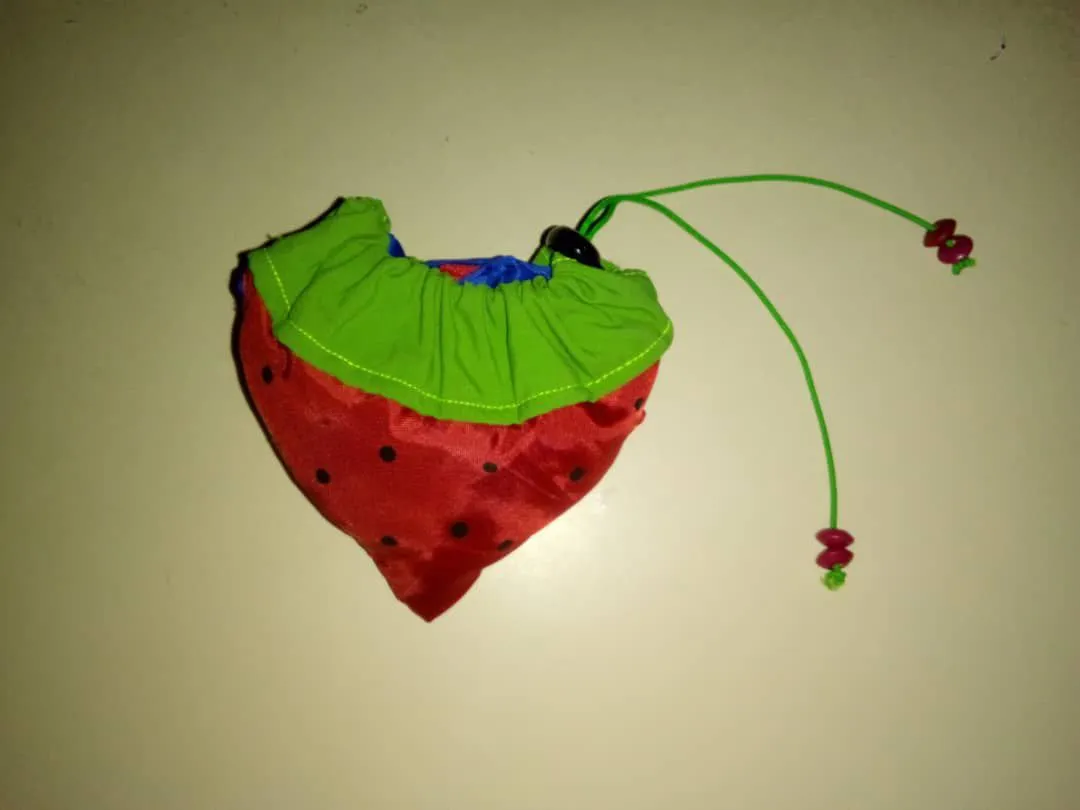
After sewing everything you have to pass the cord through the green fabric and then place the cord treader, which will allow us to hold the boso and give it the beautiful strawberry shape, and to finish the creative process, and decoratively, I placed at the ends of the cord a couple of pebbles and also placed black dots on the red fabric to simulate the seeds of the strawberry.
Luego de haber cosido todo se tiene que pasar el cordón por la tela verde para después colocarle el pisa cordón, lo que nos permitirá sujetar el boso y darle la bonita forma de fresa, Ya para ir terminando el proceso creativo, y de forma decorativa, le coloque a las puntas del del cordon un par de piedritas y también le coloque puntos negros a la tela roja para simular las semillas de la fresa.
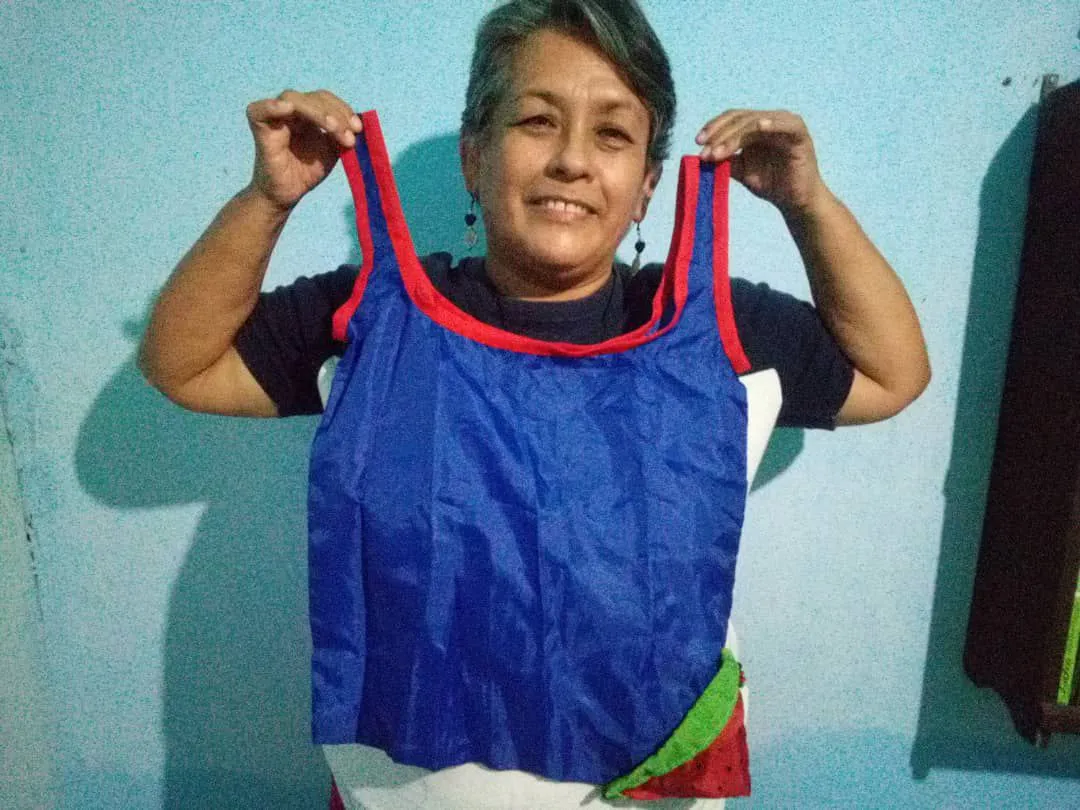
As you can see it is a little complicated, or well it was a little complicated for me to make the bag, but it is worth it because as you can see it is very nice and also very practical to use and store, since it does not take up too much space.
Como pueden ver es un poco complicado, o bueno a mi se complicó un poco poder hacer el bolso, pero merece la pena realizarlo ya que como ven es muy lindo y además muy práctico de utilizar y guardar, ya que no ocupa demasiado espacio.
I hope you liked it...
Espero que les haya gustado…
Hasta la próxima.|See you next time.