In August of 2023, I attended my first-ever goldwork class. Combining embroidery and precious metals seems like the most epic craft for a former jeweller and needle lover.
The quick backstory is that as part of my Country Women's Association (CWA) membership there are craft competitions and I've discovered heaps of traditional crafts that I'd previously heard of, including trapunto, corn pad embroidery, hardanger, mountmellic, and shadow embroidery.
In 2023 the committee decided to highlight a less popular craft and introduced a special section of the competition where the craft will change each year. In 2023 it is Goldwork. The local CWA team organised a goldwork workshop so that we could learn, socialise, and not spend hours running down internet rabbit holes trying to figure out the best way to get started with goldworking.
I talk in detail about the first class and the techniques of goldwork in this previous post.
Since then I attended the second class with a bunch of questions, to which nearly all the answers were, it depends.
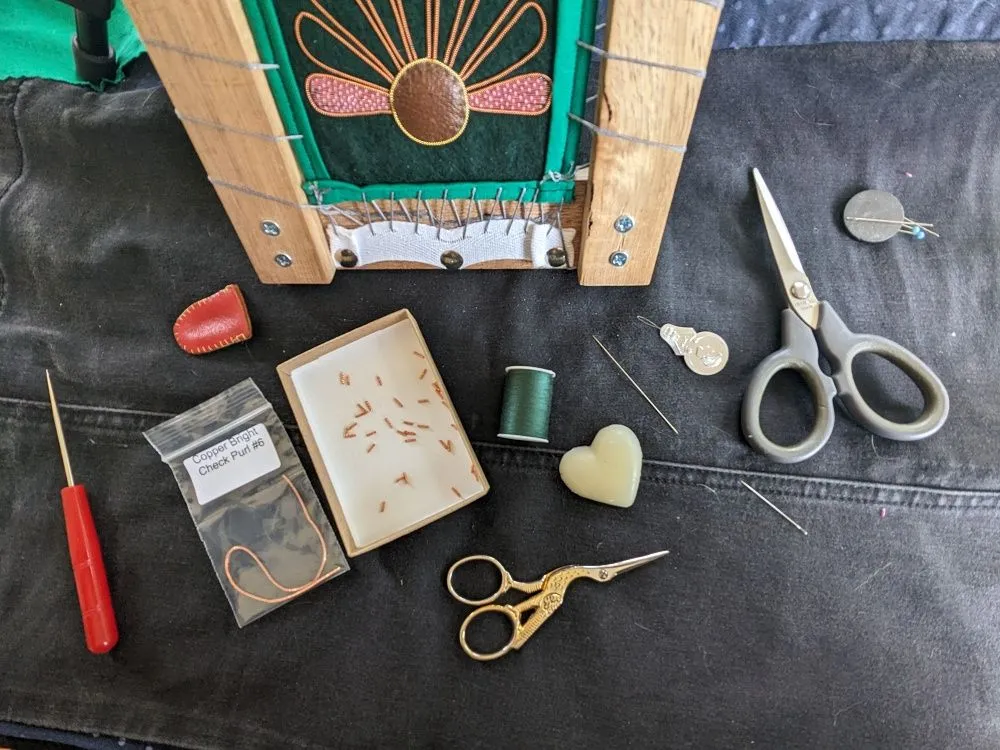
- How do you know how much supplies to order? It depends.
- What's the best way to cover the back? It depends.
- How should I outline a design on a dark background? It depends.
- What's the best backing fabric? It depends.
The answers were more detailed; it depends on the fabric, the purpose of the finished piece, the play of the thread, what look you want to achieve on the front, what works with your design, etc. What I learned most is that there are rarely strict answers, use what creates the outcome you desire, and add in plenty of inspiration and creativity. What works for you is what works.
In the second class, we worked on two more sections of the sampler, with the remaining for our own freestyle goldwork.
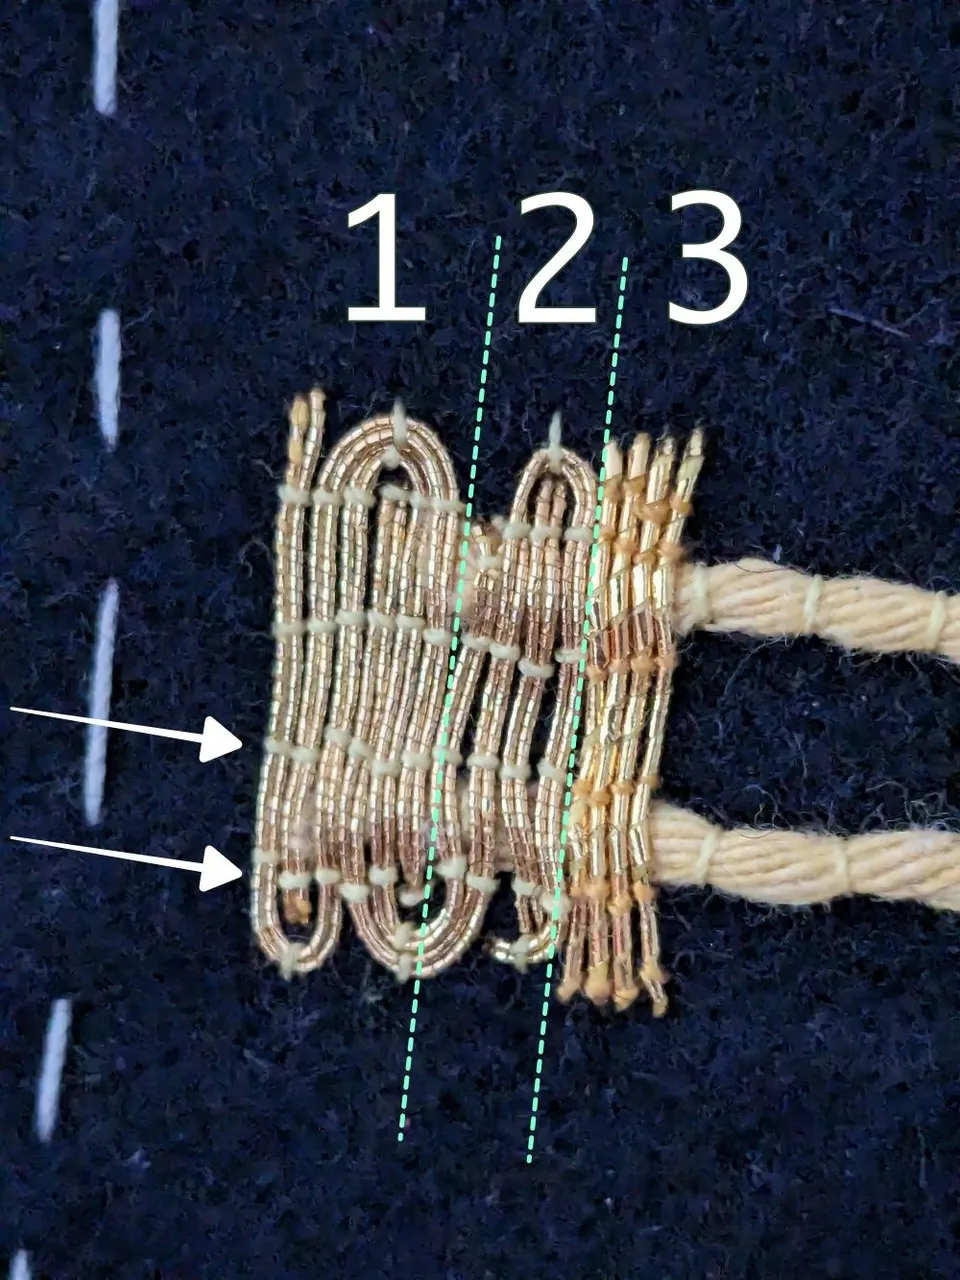
Wool/Thread Padding
Layering couching over padded wool to create the wave effect of light and shadows, and trying it on different widths and directions of wool. We tried different threads and different edges. Learning different ways you can use goldwork stitches and different ways to manage ends and edges.
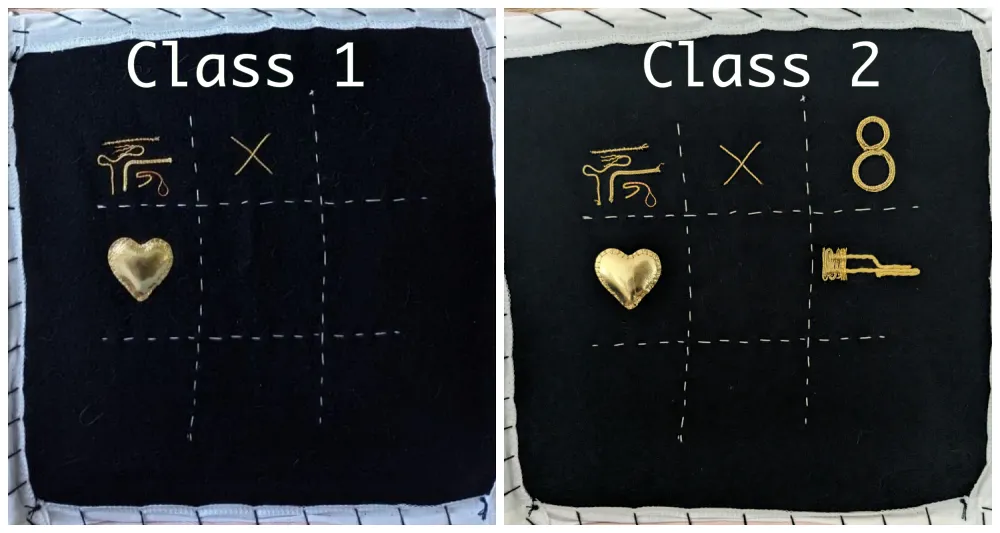
Hiding Ends
Doubling lines of thicker thread (this was twist) and hiding the joins with stitches to make the lines appear seamless - a lot of which is determined by how you secure the thread on the back because it impacts the direction of the thread on the front.
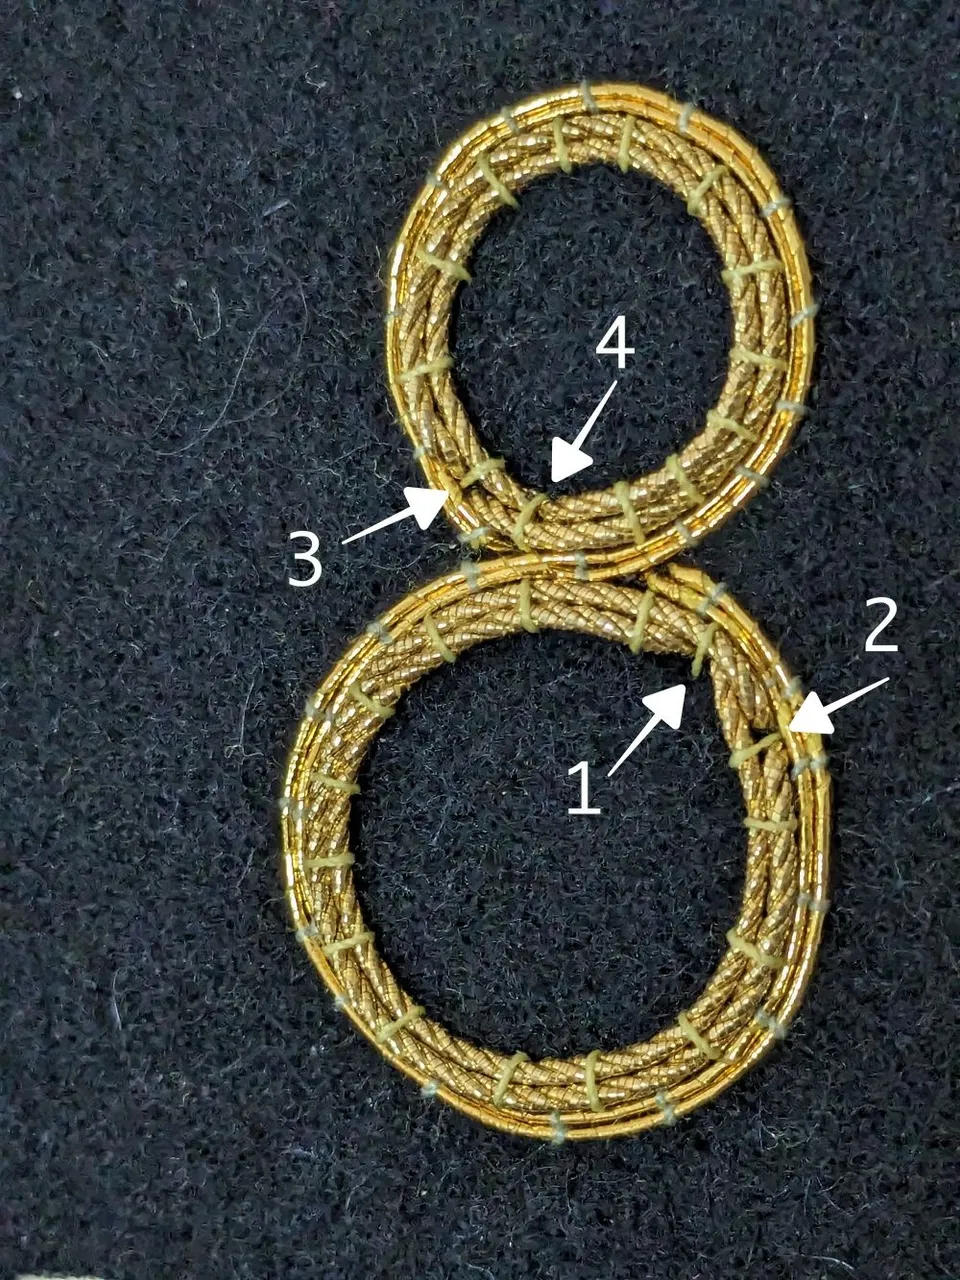
But you can see from both that between the first and third or fourth attempt, I improved a lot. Straighter stitch lines on layering and almost invisible joins on the top inner circle.
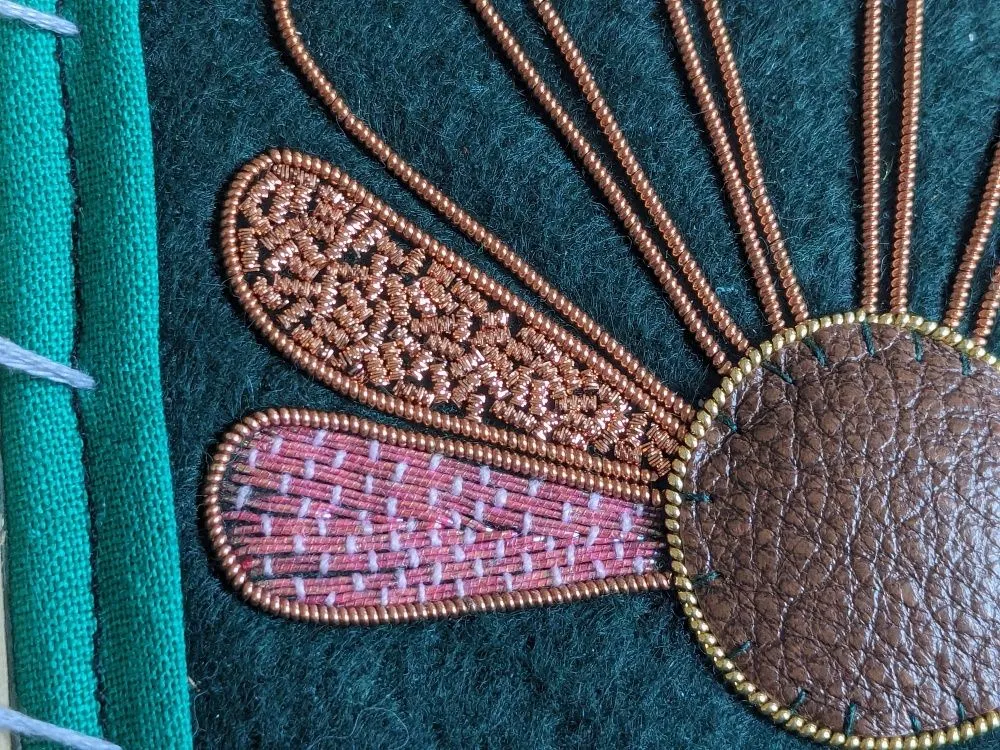
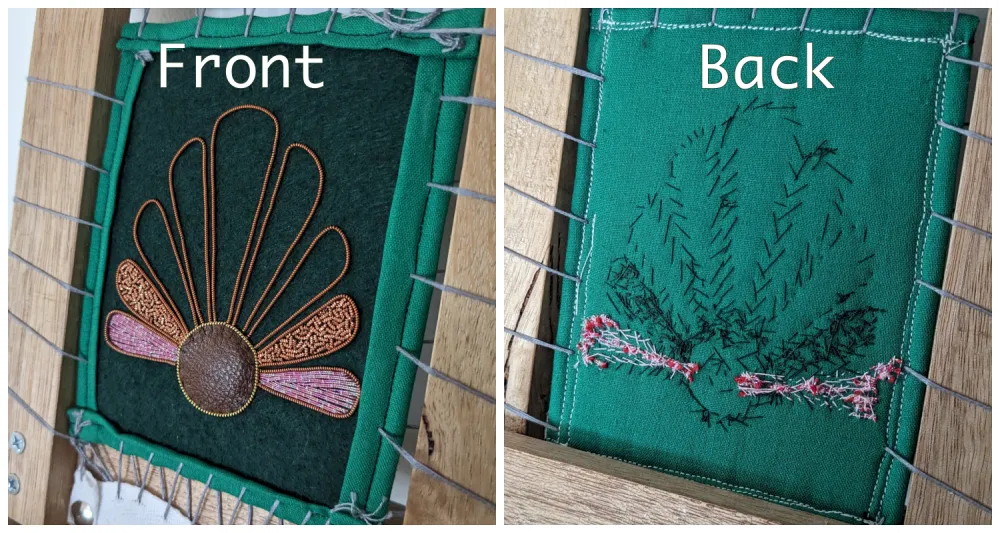
I started working on my first independent project inspired by this Royal School of Needlework piece under strict supervision, of course.
I've already adapted a few elements from the original, I've changed straight lines for curves because honestly, straight lines are hard to achieve. And I've changed the fill designs because I'm not an advanced goldworker. Plus I realised that if I tried to copy the design it wasn't going to measure up and that I could be comparing my beginner level to a clear goldwork expert.
My two major lessons from this project:
Avoid symmetry - like straight lines, symmetry is a level of difficulty I've not yet achieved. There's no grid to guide you like in cross stitch, it's all free-hand tiny stitches. Equally with the fill of the design, symmetry is hard to achieve, those pink lines are not equal on both sides, but once I started on the second there were too many hours in the first to make changes.
Go smaller but not tiny - it doesn't seem like a huge project but progress is slow and the elements are tiny. However, you don't want it too small as it is more difficult as there are fewer elements to 'distract' the eye from any mistakes. But if you want to get something finished in a reasonable timeframe either go smaller than you think or be prepared to give up the rest of your life.
Lastly, if you want to learn the slowest craft I've tried then go ahead and start goldworking! Two of those pink fill lines in the bottom section take a good 20-30 minutes. They are less than an inch long! I do love the craft but I'm not sure it going to become my favourite craft in the world. You need plenty of patience, precision, and riches to be a goldworker.
Case in point: these copper 'chips' in the top shape are approximately 2.5mm long (about 3/32 of an inch).