
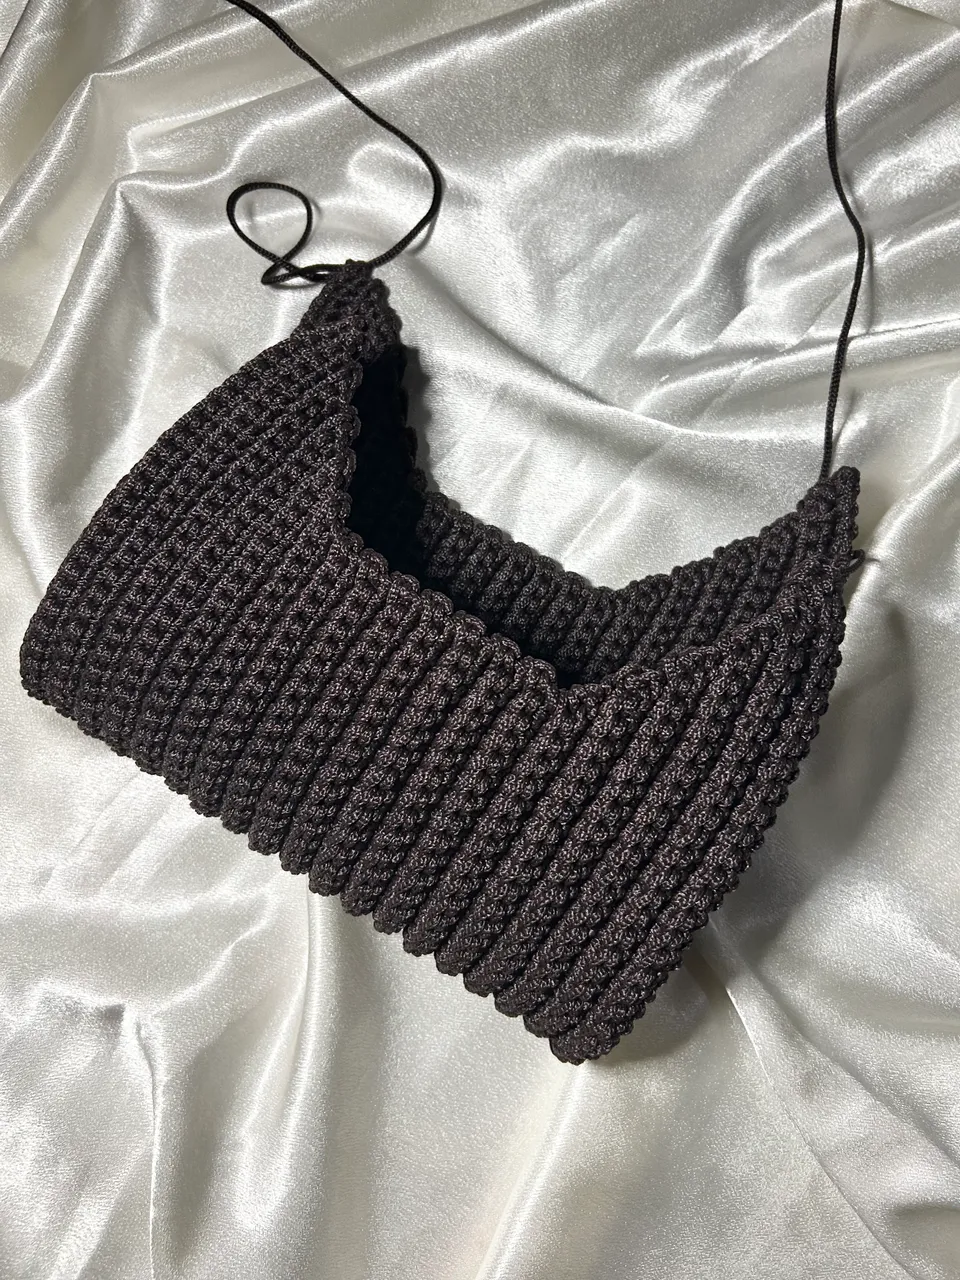
Hi, guys. I have an exciting project to show you! I worked with paracord for the first time and the result was a dainty and very much lovely bag.
Though I’ve always wanted to get my hands on paracord and try crocheting bags, the idea for this particular bag came from a picture I saw on Instagram. I took a screenshot of the bag because it looked so pretty and the there was an image of the bag before it was sewn up so I knew how it was made.
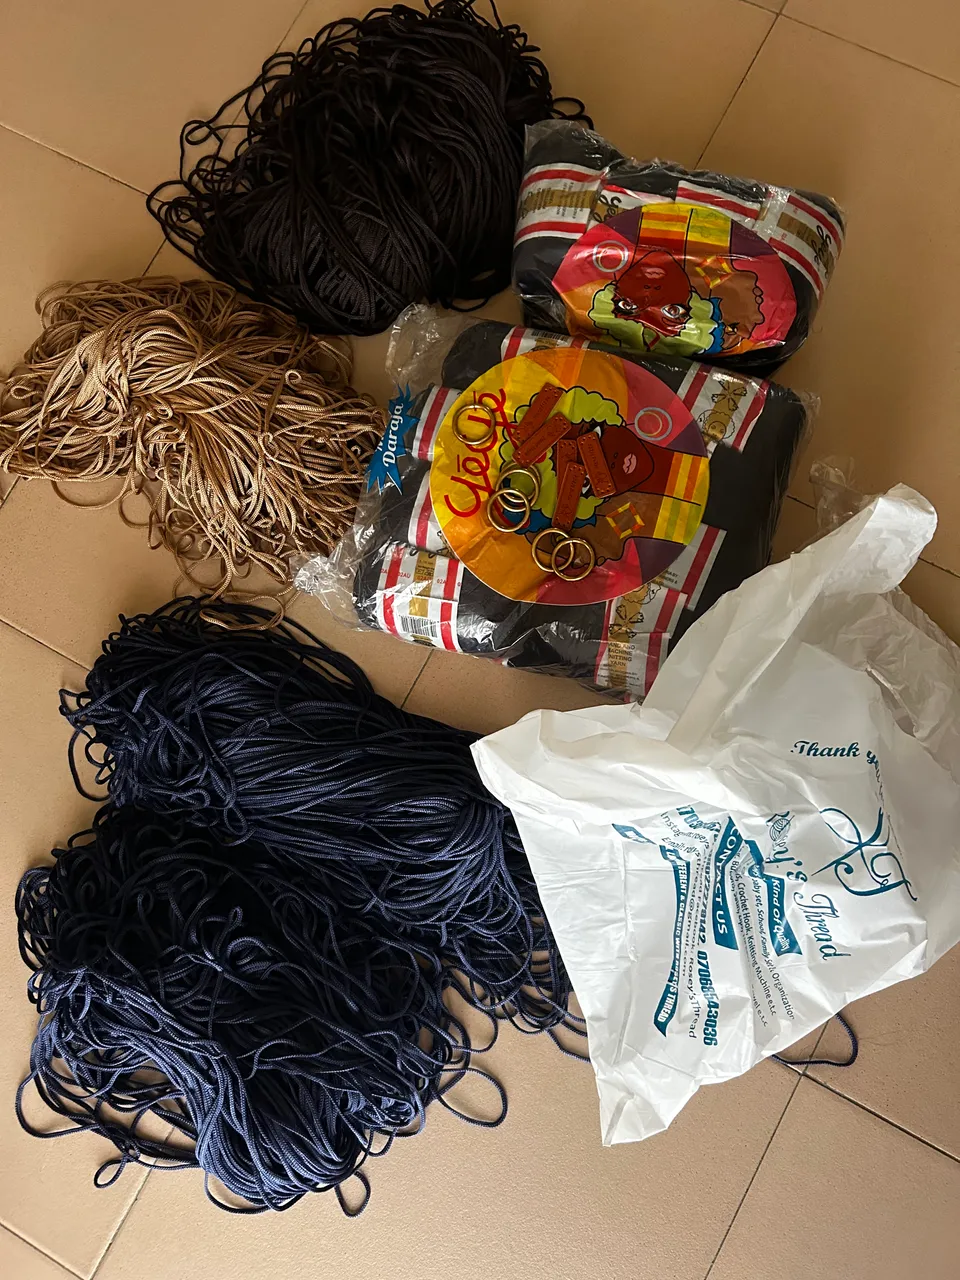
My sister wanted the bag and was going to pay for the materials so once I found out that my yarn customer had paracord, I decided to do it. The only issue was that I didn’t know if one hank would be enough. It was 200g and 4mm. I took a leap of faith actually. I thought the bag was small, so why wouldn’t a hank that big be enough. I was judging from the pictures the lady sent me. Anyways, I went ahead and got it.
I had an order so I ordered the paracord with the acrylic yarn I was getting to make the piece that was ordered. The plan was to make the bag alongside my order whenever I was tired of working on the piece because it was a big piece (a really thick sweater) and the bag wasn’t big.
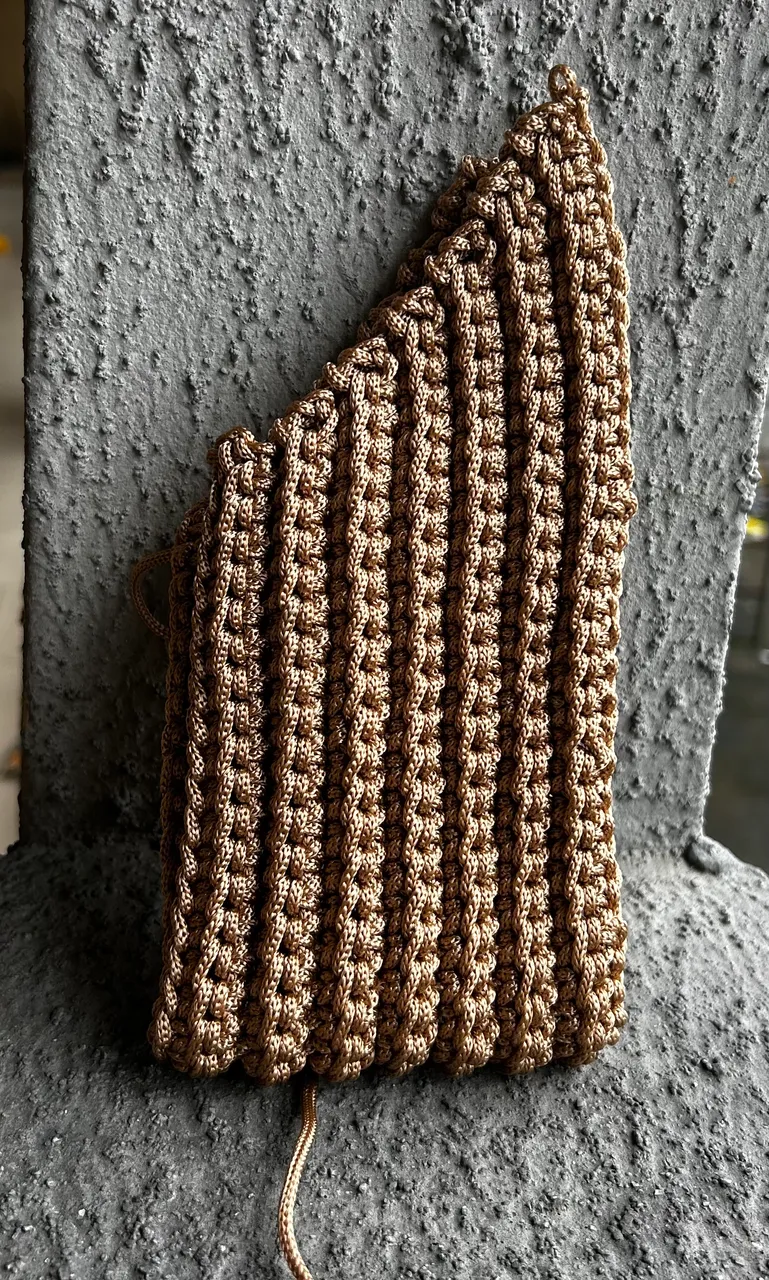
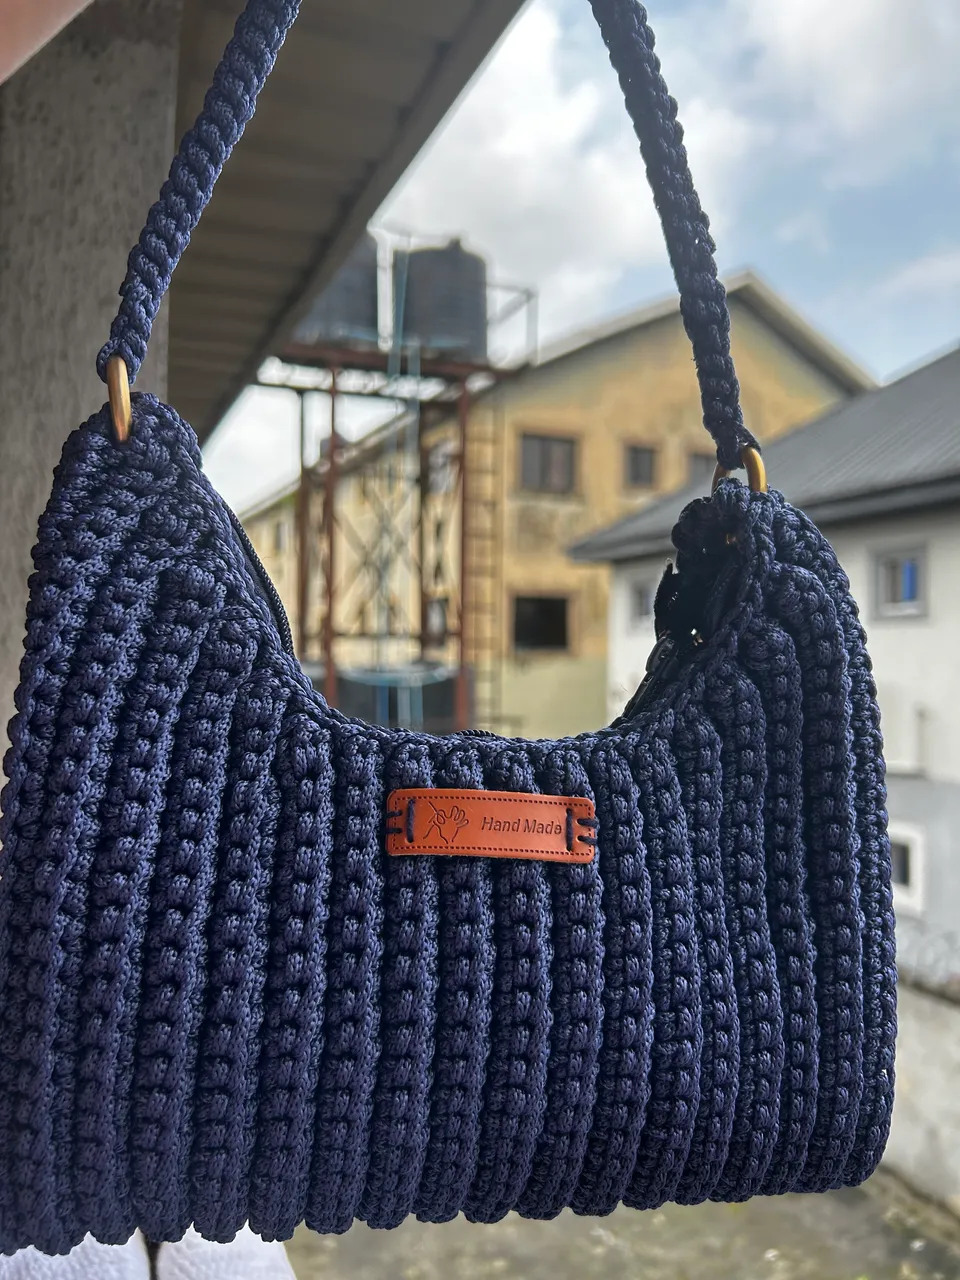
The bag was made with single crochet ribbing. It was going to be decrease stitches, straight stitches, and then increase stitches at both top and bottom to give the shape I wanted.
I began with 59 stitches which I kept reducing until I had 37. Then after the 6th line, I began the increases.
Here, I’d done 1/3rd of the body.
Normally, I can crochet the bag in two days, but because I had a more important order (the deadline was closer) coupled with the fact that paracord is not friendly to the hands, it took quite some time.
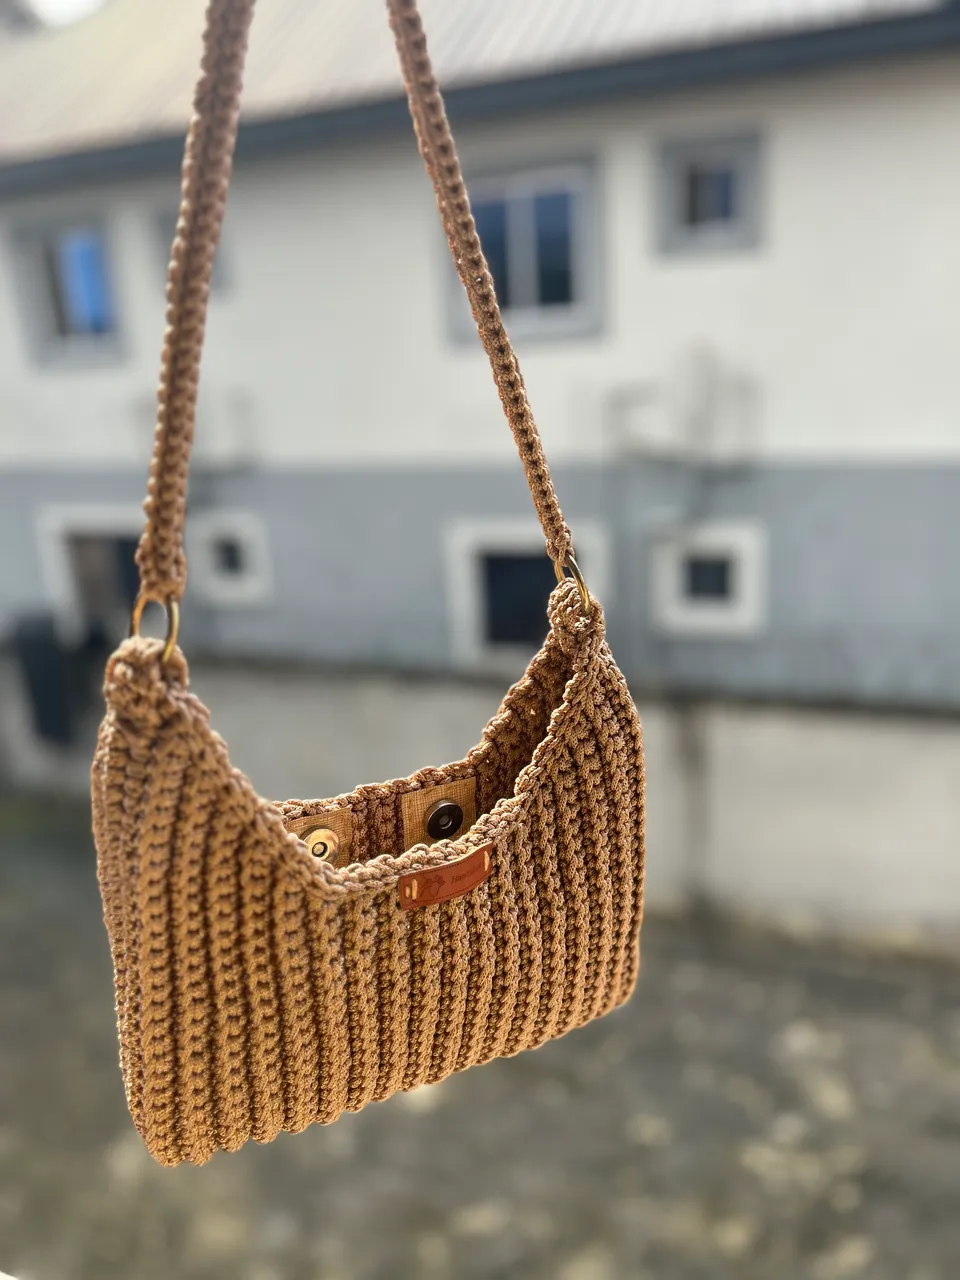
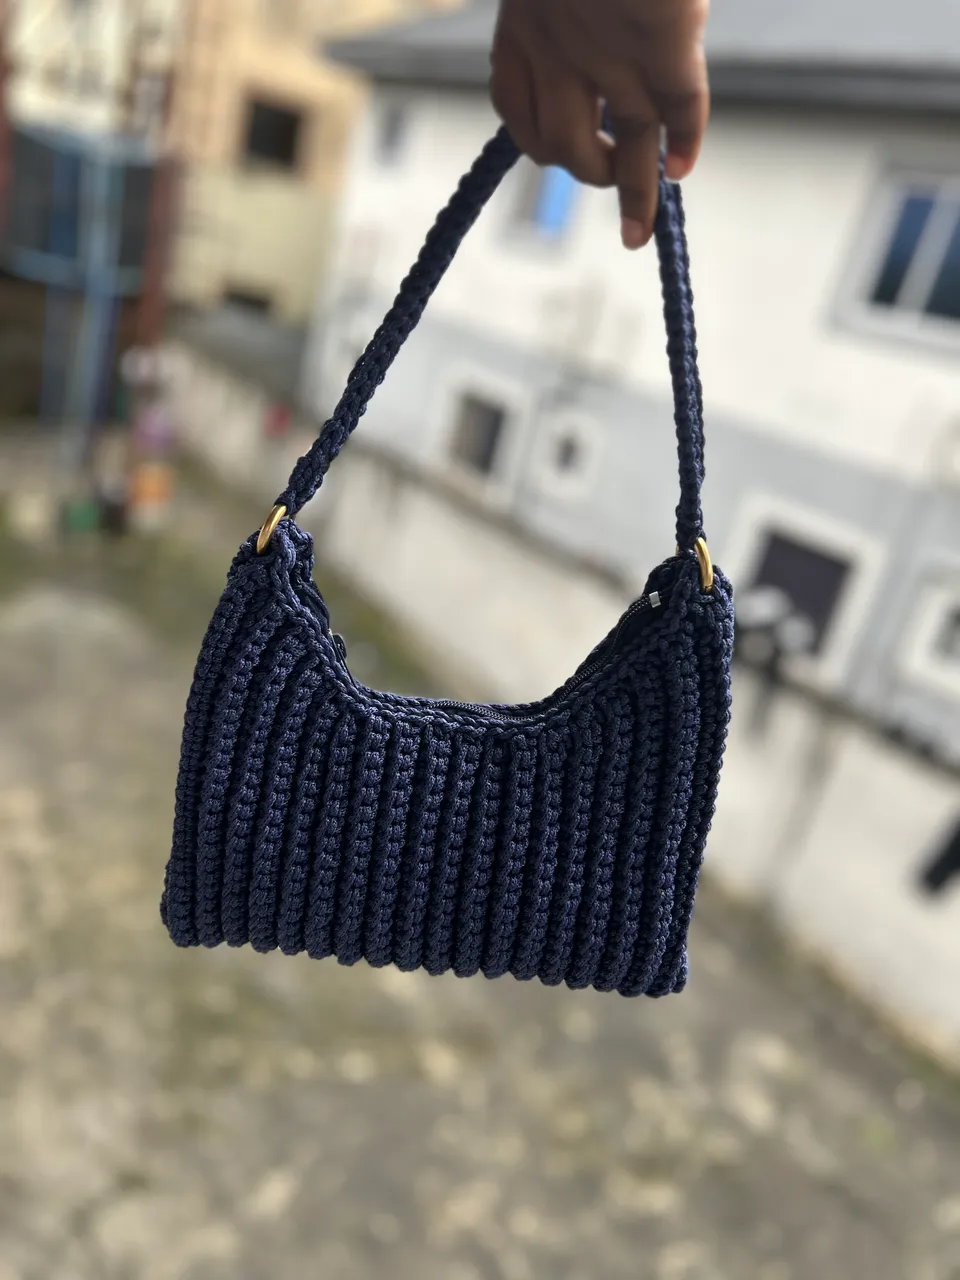
I’d ordered rings for attaching the straps. That was the next thing I did — crochet the straps to both rings and attach it to the bag. I also got leather handmade tags which I sewed on to the bag after the straps. At this point, what was left was the zip. Although a magnetic clasp was used for the inspo, I planned to use a zip, so I didn’t get the clasps when I ordered the materials. I got a zip form a tailor’s shop and proceeded to sew it. It was a trying job, but I got it done. It unzipped and zipped well, but I didn’t use exactly the same colour of thread so it was visible and the sewing wasn’t neat. I just had to remove it and get clasps. Luckily, I found it around where I lived, actually in the same tailor’s shop I got the zip.
Now, the clasp I got wasn’t the type that you sew. It was the type that you secure behind. I had to attach it to a small piece of leather before sewing it to the bag. I used two since my sis wanted the bag to be more closed.
The bag was all done at this point. Gosh, it took everyone’s breath away!

I went ahead to make 2 more bags with the other colours of paracord I got as well. I made a brown one first.
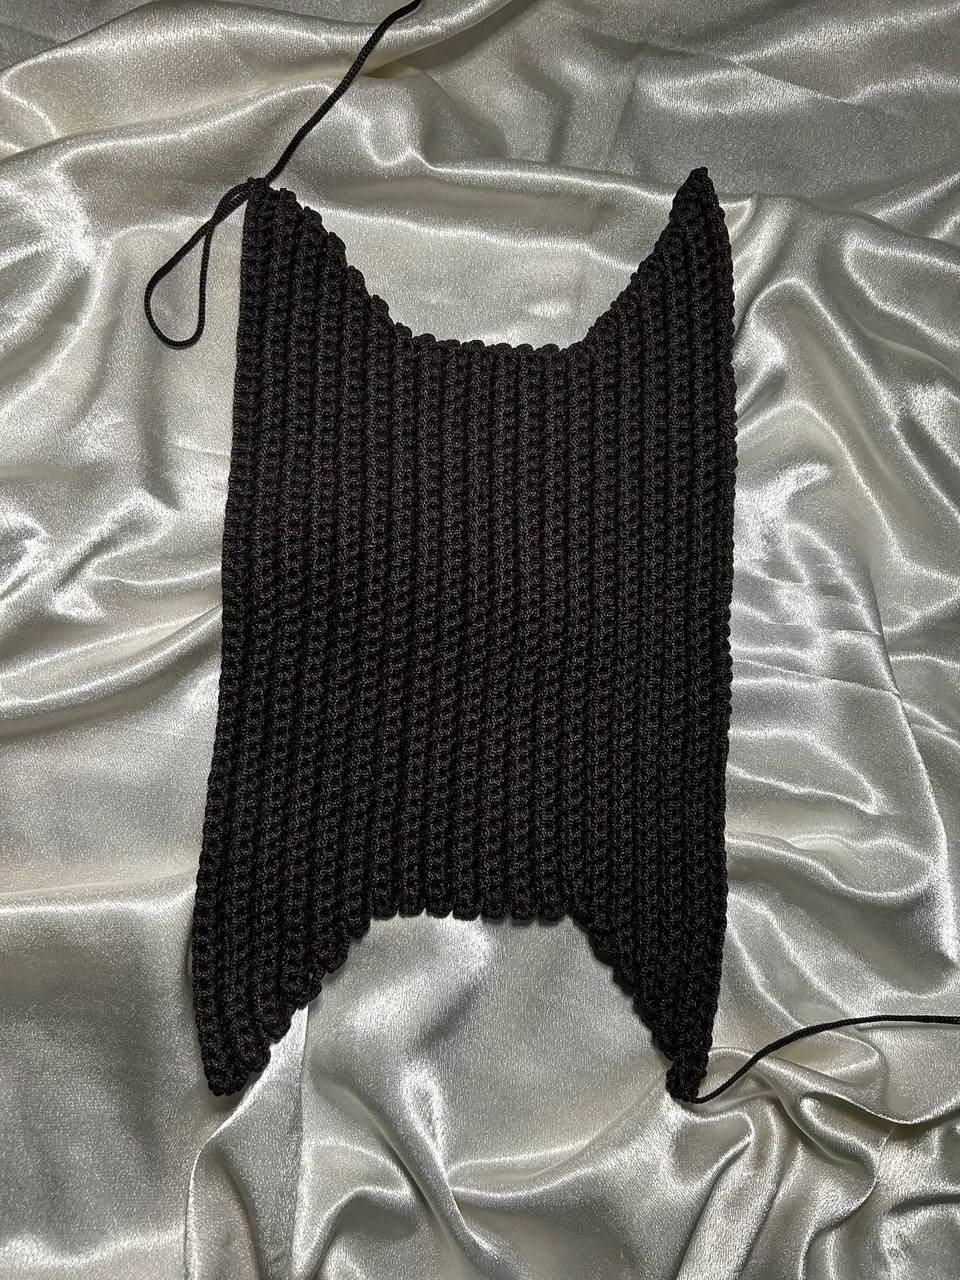
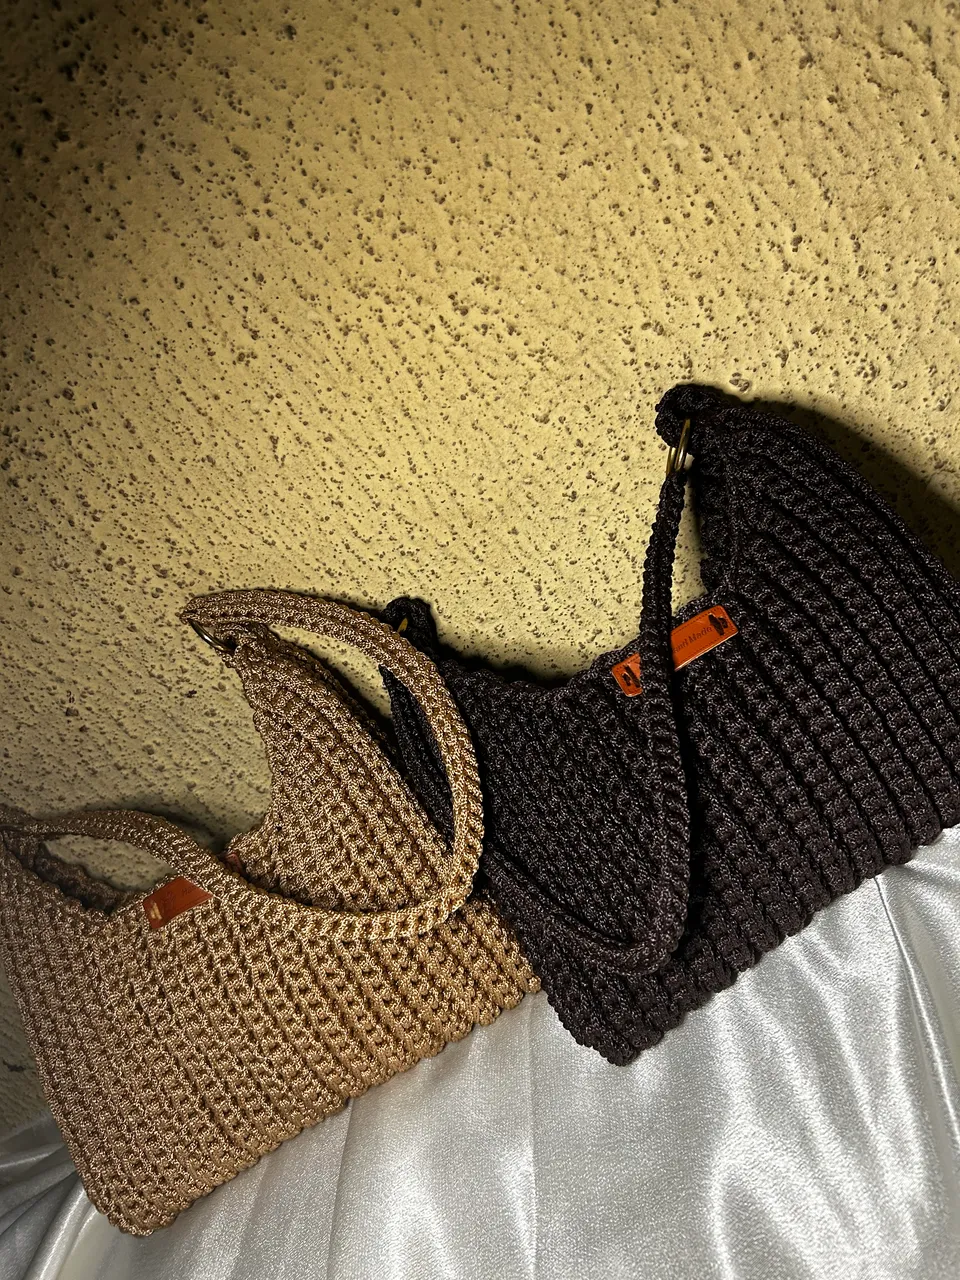
I used a clasp for the brown, but a zip for the blue. The stitches were neater this time because I used a different method (I actually crocheted it) and it was the same shade of blue, so not visible at all. However, it wasn’t smooth; it had some bumps which I did not like but people said it was okay so I guess it’s okay. It’s handmade after all.

Which is your favourite, guys? Is it the nude, the brown, or the blue?