Welcome to my blog.
Bendecido día a todos en esta maravillosa comunidad #needleworkmonday, espero se encuentren en excelente estado se salud y tomando todas las medidas pertinentes para ganarle la batalla al virus. Hoy quiero compartirles Cómo convertí un calcetín viejo en un Hermoso Muñeco-Llavero si me sigues hasta el final y te explico cómo lo logré de una forma muy fácil, solo con un poco de imaginación.
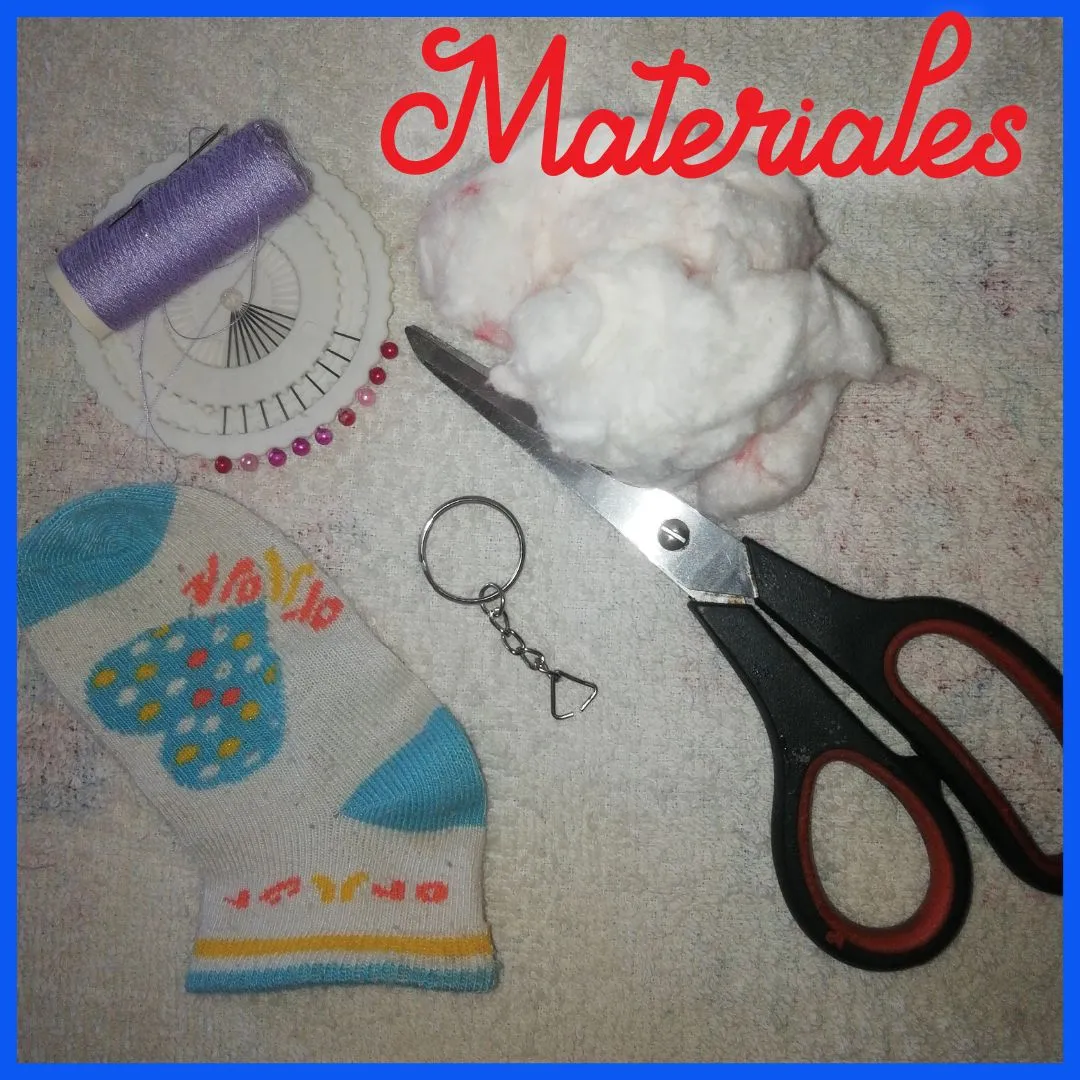
The materials I used were:
1 sock
Black and white sewing thread
1 needle
1 scissors
Pins
Wadding (stuffing)
1 key ring
Los materiales que utilicé fueron:
1 calcetín
Hilo de coser blanco y negro
1 aguja
1 tijera
Alfileres
Guata (relleno)
1 argolla de llavero
Procedure/Elaboración:
I made it in 4 simple steps that I specify below:
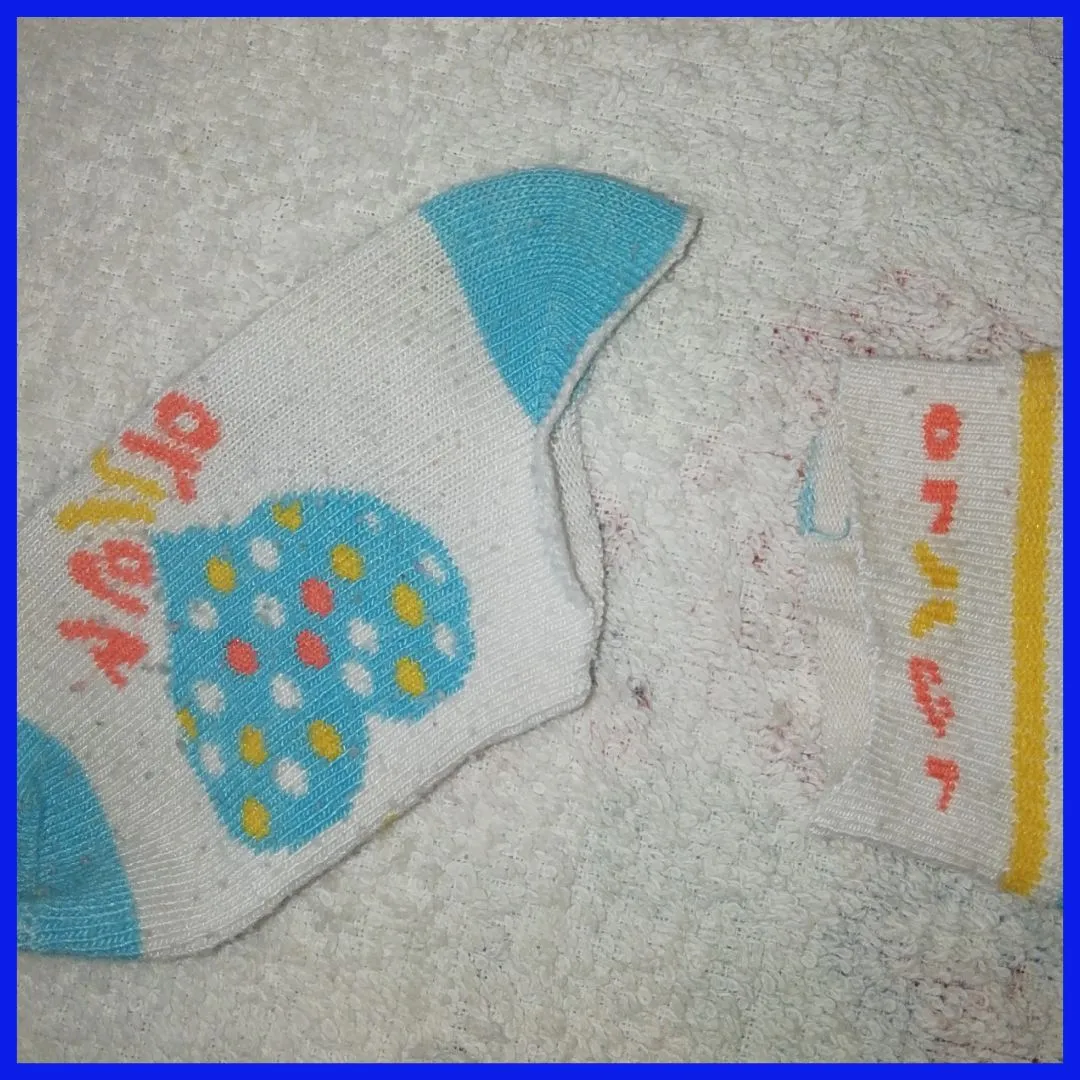
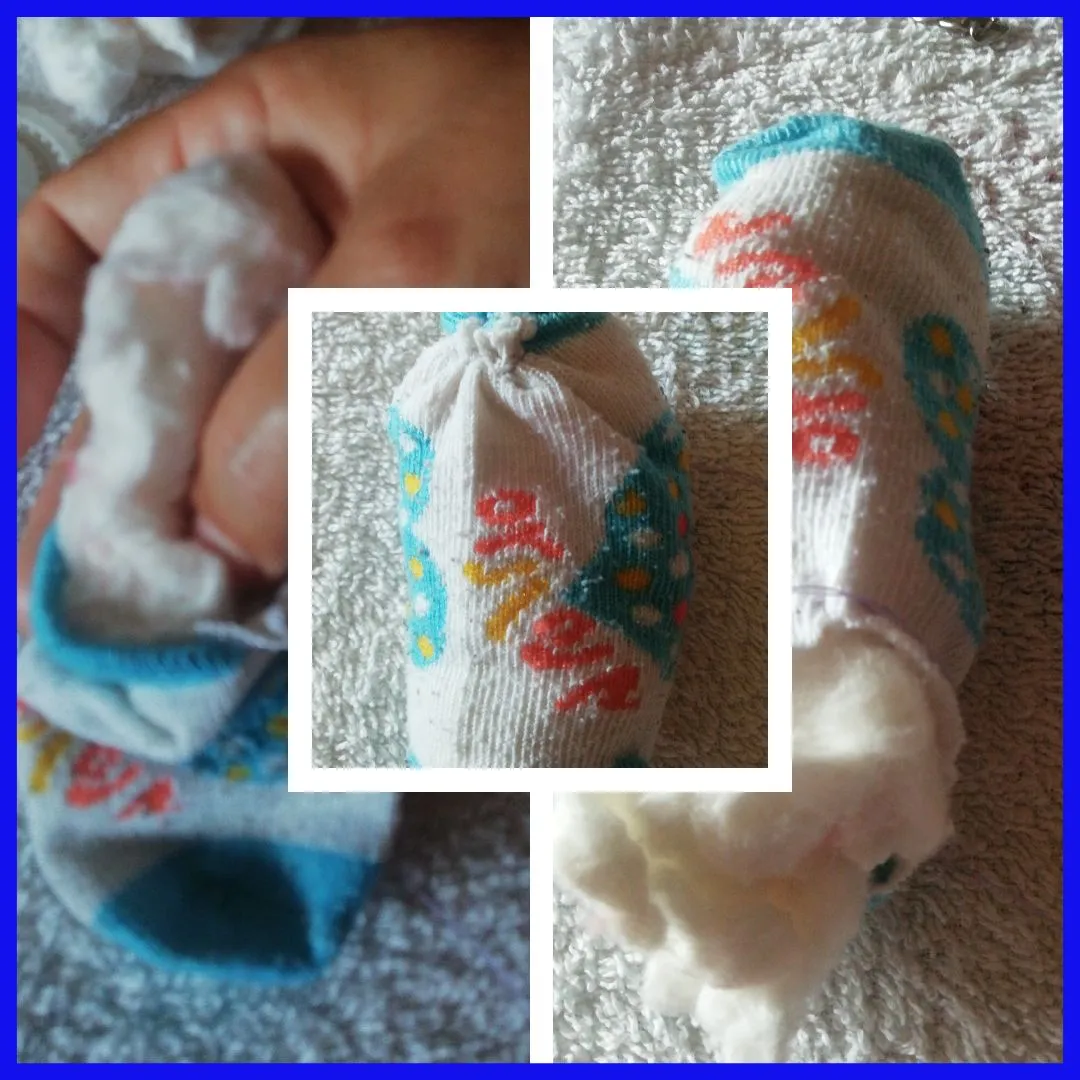
1.- The first thing I did was to cut the sock at the heel.
2.- Then, I began to sew the edge of the part towards the toe and when I finished the sewing I stuffed it with a little wadding and closed it, making several seams and securing it. Then, I divided the body with the same needle and thread, first I sewed seams to simulate the arms and then the legs.
3.- Then I shaped the other part of the sock and with it I made a hat for the doll and glued it by sewing it on.
4 .- Finally I made the details, with black thread I made the eyes with small stitches, then the mouth, put a bow on his neck and place the ring where the keys go.
Lo realice en 4 sencillos pasos que a continuación te específico:
1.- Lo primero que hice fue cortar el calcetín a la altura del talón.
2.- Luego, comencé a coser el borde de la parte hacia la punta y al terminar la costura lo rellené con un poco de guata y lo cerré, haciendo varias costuras y asegurándolo. Después, le fui dividiendo el cuerpo con la misma aguja e hilo, primero le hice costuras que simularan los brazos y luego las piernas.
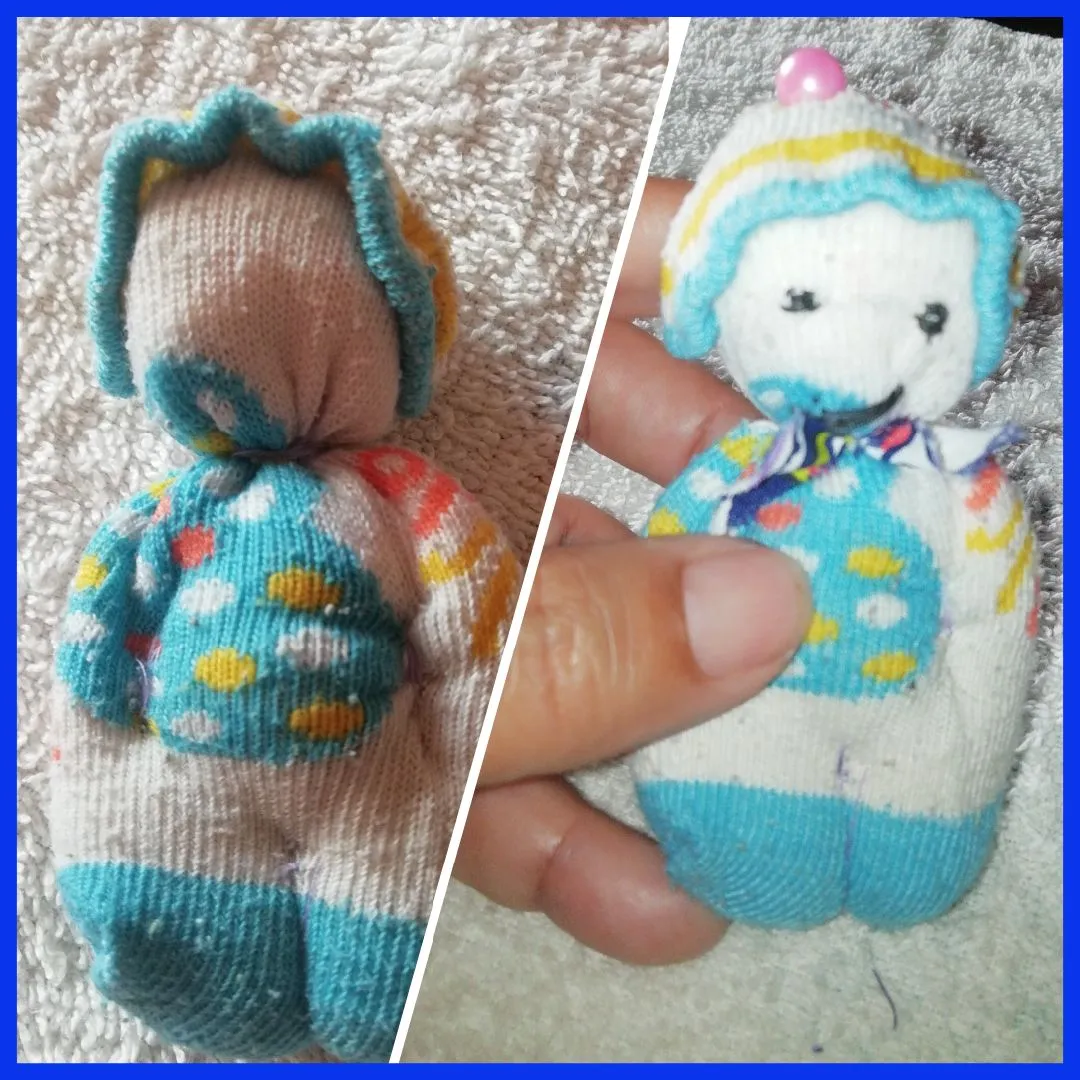
3.- Después le di forma a la otra parte del calcetín y con el realice un gorro para el muñequito y lo pegue cosiéndolo.
4.- Por último le realice los detalles, con hilo negro le hice los ojos con puntadas pequeñas, luego la boca, coloque en su cuello un lazo y coloque el aro donde van las llaves.
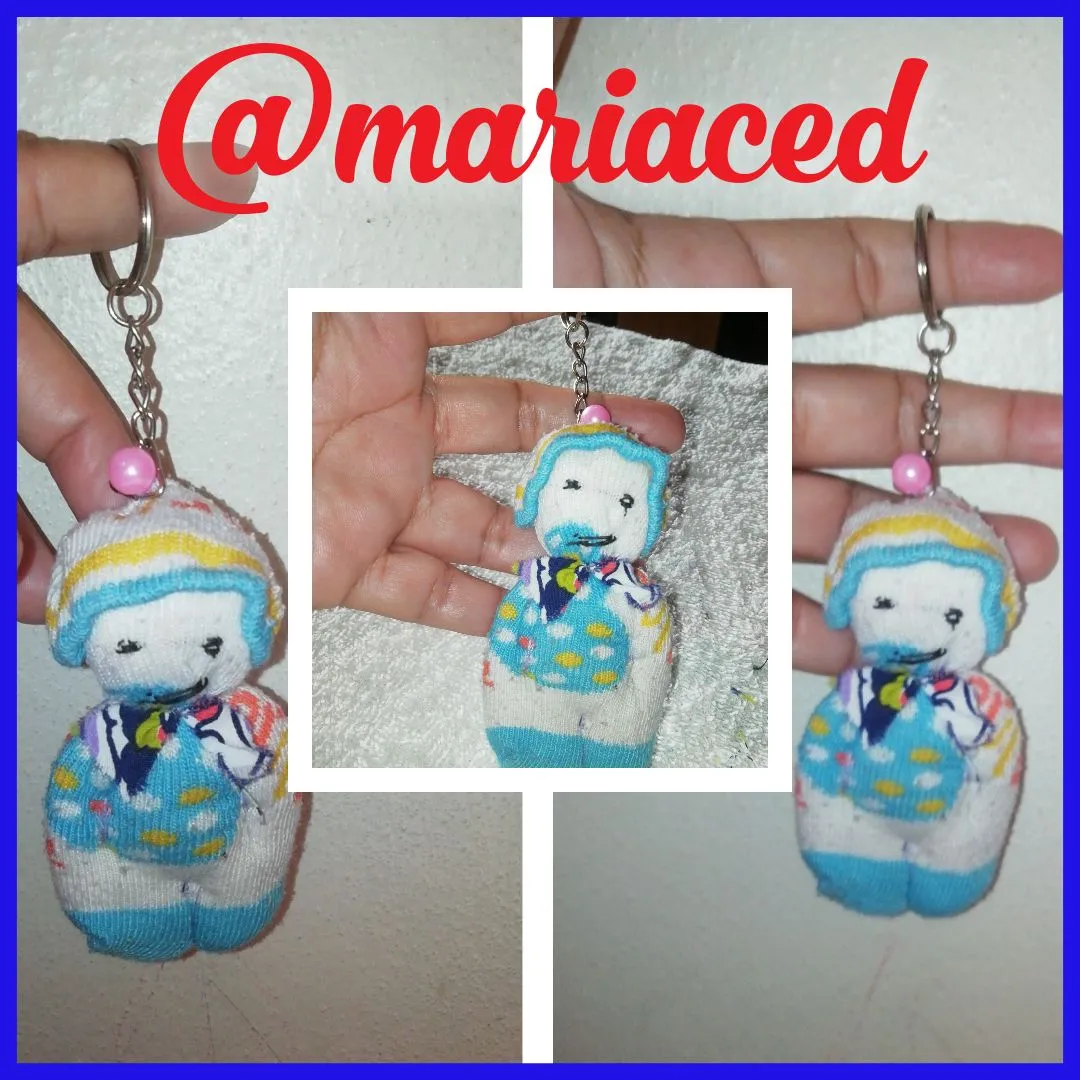
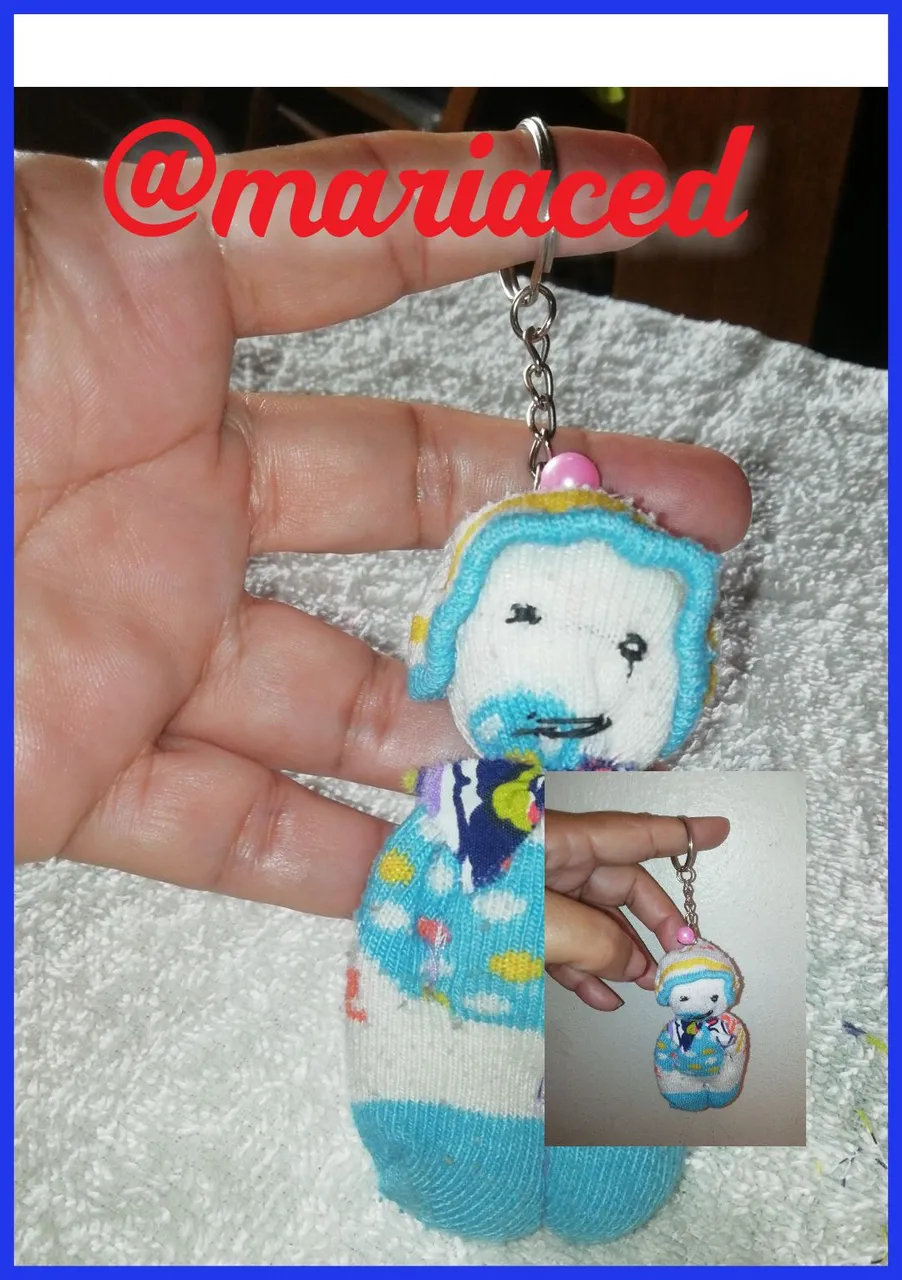
And that's how I easily and simply transformed an old sock into this beautiful keychain doll that I now present to you. By reusing pieces we give them a useful life and contribute to take care of our planet.
Y es así que de forma fácil y sencilla transforme un calcetín viejo en este hermoso muñeco-llavero que ahora les presento. Reutilizando piezas les damos vida útil y contribuimos a cuidar nuestro planeta.
Thank you for visiting me
Gracias por visitarme
Separators / separador
Todas las fotos son de mi propiedad, tomadas con mi telefono Huawei y editadas en una aplicación gratuita en el teléfono
Translated with www.DeepL.com/Translator (free version)