¡Hola, hola! Hivers y hermosa comunidad de NeedleWorkMonday, espero todos se encuentren súper bien, animados e inspirados 💟 estoy muy feliz de compartir con ustedes en este hermoso lunes y de tener la oportunidad de usar el #Needleworkmonday 😀
Les ha pasado que tienen en mente un proyecto y este va evolucionando y hasta cambiando por completo de la idea original debido a lo mucho que piensan en como realizarlo?
Pues eso me paso con este proyecto, y es que quería participar en el
Country Jewelry Contest de la Comunidad Jewerly pero, como he estado sufriendo de intensos dolores en las manos debido a que sufro de túnel carpiano no pude tejer mi proyecto a tiempo y luego de tejerlo me dolieron tanto las manos que la verdad ni pude realizar el post hasta ahora, y bueno decidí publicarlo acá para echarles el cuento de como esta orquídea paso de casi ser un par de aretes a ser un hermoso prendedor tejido a crochet.
Hello, hello! Hivers and beautiful NeedleWorkMonday community, I hope you all are super well, encouraged and inspired 💟 I'm so happy to share with you on this beautiful Monday and to have the opportunity to use the #Needleworkmonday 😀
Has it ever happened to you that you have a project in mind and it evolves and even changes completely from the original idea because of how much you think about how to do it?
Well, that's what happened to me with this project, and I wanted to participate in the
Country Jewelry Contest of the Community Jewerly but, as I have been suffering from intense pains in my hands because I suffer from carpal tunnel I couldn't knit my project on time and after knitting it my hands hurt so much that I couldn't even make the post until now, *and well I decided to publish it here to tell you the story of how this orchid went from almost being a pair of earrings to a beautiful crocheted pin.
La cosa es que yo quería realizar mi entrada basándome en la flor nacional de mi país natal Venezuela, pero no sabia si realizar un dije, un par de aretes o que cosa. Tenia varias ideas pero justo el día que me dispuse a tejer y ver que realizar llego una tía de visita y me encontró justo iniciando el tejido del primer pétalo de la flor, por cierto el patron de la flor lo hice guiándome de un video en el canal de Nathy Crochet, asi que aqui les dejo el link del video de la flor.
Nos pusimos a conversar y le conté que estaba tejiendo una orquídea y le mostré varias imágenes de la flor y le conté las ideas que tenia para hacer un accesorio de joyería con ella, y en eso mi tía tuvo la idea de que se vería genial esa flor en un prendedor.
Yo quede maravillada con la idea así que cambie todas mis ideas iniciales por la de ella y lo tejí en mas o menos 3 horas, mientras conversábamos y avanzaba con el tejido ella cada vez estaba mas emocionada con la ida de que yo le tejiera el prendedor ya que le dije que lo haría para regalárselo.
Cuando lo termine mi tía inmediatamente se lo colocó y le gusto tanto como se veía que dijo que sería la anidia de todas las maestras en la escuela jajaja.... Mi tía es maestra de primaria y es SUPER COQUETA y le encanta vestirse toda elegante y hasta se diseña sus propios atuendos ya que también es costurera.
A continuación les contare sobre los materiales que use para realizar este hermoso prendedor de orquidea y sobre el proceso de tejido.
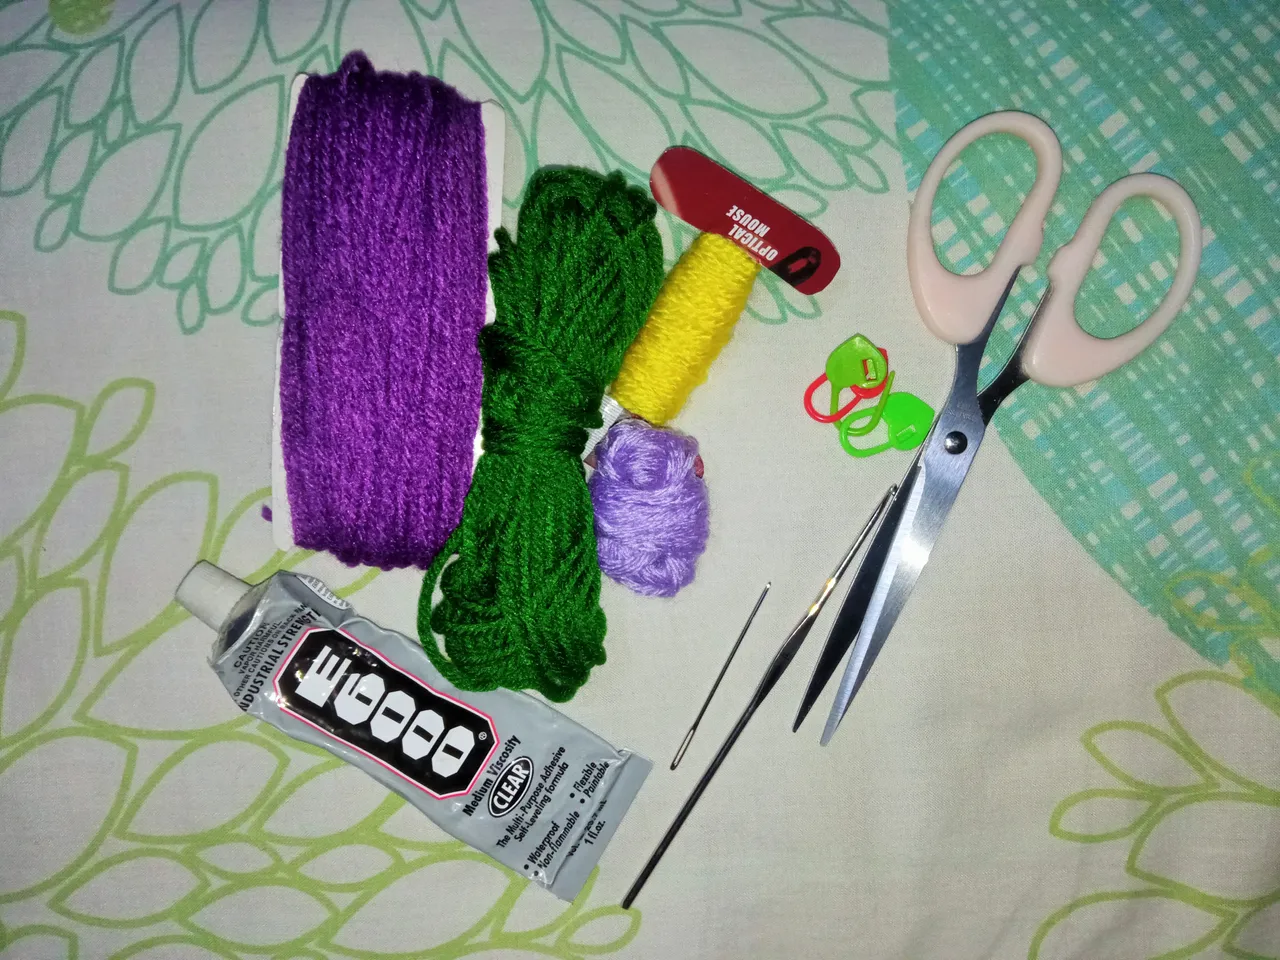
🌸🌸MATERIALES🌸🌸
🌸 Estambre en color lila, morado, amarillo, verde y marrón.
🌸 Ganchillo #000.
🌸 Aguja lanera.
🌸 Tijeras.
🌸 Marcador de puntos.
🌸 Pegamento.
The thing is that I wanted to make my entry based on the national flower of my native country Venezuela, but I didn't know if I should make a pendant, a pair of earrings or what. I had several ideas but just the day I was ready to knit and see what to do, an aunt came to visit me and found me just starting to knit the first petal of the flower, by the way I made the pattern of the flower following a video in Nathy Crochet's channel, so here is the link of the flower video.
We got to talking and I told her that I was knitting an orchid and I showed her several pictures of the flower and told her the ideas I had to make a jewelry accessory with it, and then my aunt had the idea that this flower would look great on a pin.
I was amazed with the idea so I changed all my initial ideas for hers and I knitted it in more or less 3 hours, while we were talking and advancing with the knitting she was more and more excited with the idea of me knitting the pin for her since I told her I would do it as a gift.
When I finished it my aunt immediately put it on and she liked it so much that she said it would be the favorite of all the teachers at school hahaha .... My aunt is an elementary school teacher and she is SUPER COOL and loves to dress up and even designs her own outfits since she is also a seamstress.
Below I will tell you about the materials I used to make this beautiful orchid pin and about the weaving process.
🌸🌸MATERIALS🌸🌸
🌸 Stamen in lilac, purple, yellow, green and brown.
🌸 Crochet hook #000.
🌸 Wool needle.
🌸 Scissors.
🌸 Stitch marker.
🌸 Glue.
🌸🌸PROCESO DE TEJIDO🌸🌸
Como les dije anteriormente esta flor la realice siguiendo un video tutorial, la misma se realiza en 4 partes o piezas que al unirlas orman la flor.
Yo use los colores de la Flor Nacional de Venezuela que son el lila y morado, pero estas flores se pueden encontrar en gran variedad de colores muy hermosos; aparte realice las hojas de la flor por mi cuenta y tambien una pequeña base marron para colocar el broche del prendedor y que simulara un pequeño tronco ya que comunmente esta planta la vemos como "sembrada" sobre un tronco.
Ahora sí, les indicare como fui tejiendo este hermosos prendedor de orquídea.
🌸 Pieza #1: (x2)
Ésta en realidad esta formada por dos pétalos tejidos de manera individual pero que son exactamente idénticas.
Tejer 9 cadenas y a partir de la segunda cadena contando desde el ganchillo tejer la siguiente secuencia 1Pb, 1Pb, 1mpa, 1Pa, 1Pa, 2Pa en el mismo punto, 1mpa, y en el ultimo punto cadena tejer 3Pb; y continuamos tejiendo el otro lado del pétalo en modo espejo repitiendo la anterior secuencia de puntos, al terminar se cierra con punto deslizado y se corta una hebra larga que se usara para unir las piezas.
🌸🌸WEAVING PROCESS🌸🌸
As I told you before this flower was made following a video tutorial, it is made in 4 parts or pieces that when joined together form the flower.
I used the colors of the National Flower of Venezuela which are lilac and purple, but these flowers can be found in a great variety of very beautiful colors; besides I made the leaves of the flower by myself and also a small brown base to place the brooch of the pin and to simulate a small trunk since we commonly see this plant as “planted” on a trunk.
Now I will show you how I was weaving this beautiful orchid pin.
🌸 Piece #1: (x2)
This one is actually made up of two individually woven petals but they are exactly identical.
Knit 9 chains and from the second chain counting from the crochet hook knit the following sequence 1 sc, 1sc, 1hdc, 1dc, 1dc, 1dc, 2dc in the same stitch, 1hdc, and in the last chain stitch knit 3sc; and we continue knitting the other side of the petal in mirror mode repeating the previous sequence of stitches, when finished close with slip stitch and cut a long strand that will be used to join the pieces.

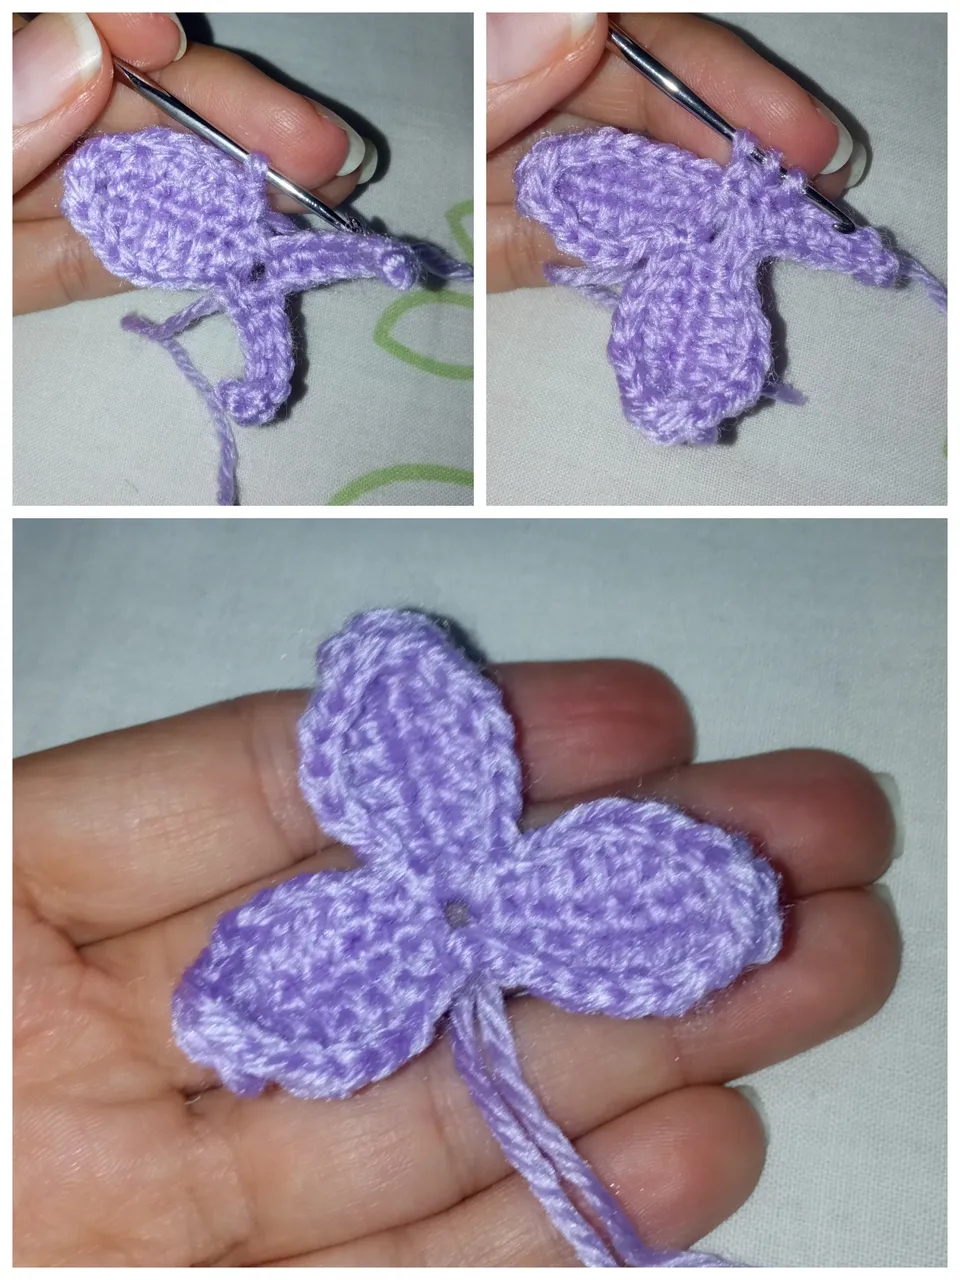
🌸 Pieza #2:
Básicamente esta pieza son tres pétalos tejidos dentro de 1 anillo mágico,
V1: Am, tejer 7 cadenas y a partir de la segunda cadena contando desde el ganchillo tejer 6Pb y luego hacer 1Pd dentro del anillo mágico, y repetir lo mismo 2 veces mas para así tener la base de los tres pétalos.
V2: luego de tejer el punto deslizado del ultimo pétalo, iniciaremos a tejer sobre el primero la siguiente secuencia, ( 1Pb, 1mpa, 3Pa, 1mpa) en el espacio de la cadena de altura (la 7ma cadena) tejer 3mpa; luego tejer el otro lado del petalo la misma secuencia en modo espejo, es decir, ( 1mpa, 3Pa, 1mpa, 1Pb), y para finalizar el petalo tejemos 1Pd dentro del anillo mágico e iniciar el siguiente petalo realizando una cadena al aire y repitiendo toda la secuencia para tejer los dos pétalos faltantes.
🌸 Piece #2:.
Basically this piece is three petals knit inside 1 magic ring,
R1: MR, knit 7 chains and starting from the second chain counting from the crochet hook knit 6sc and then make 1Psl st inside the magic ring, and repeat the same 2 more times so you have the base of the three petals.
R2: after knitting the slipped stitch of the last petal, we will start to knit over the first petal the following sequence, ( 1sc, 1hdc, 3dc, 1hdc) in the space of the height chain (the 7th chain) knit 3hdc; then we weave the other side of the petal the same sequence in mirror mode, that is, ( 1hdc, 3dc, 1hdc, 1sc, and to finish the petal we weave 1sl st inside the magic ring and start the next petal making a chain in the air and repeating the whole sequence to weave the two remaining petals.
🌸 Pieza #3:
Esta pieza está formada por 2 pétalos un poco mas grandes, y son los pétalos centrales de la flor.
V1: tejer 10Pa dentro de 1 anillo mágico, se inicia con 2 cadenas de altura que contaran como el primer Pa, cerrar la vuelta con Pd.
V2: tejer 2 cadenas de altura y en el mismo punto tejer 1Pa, en el siguiente punto tejer 2Pa, en el siguiente punto hacer 3Pa, en el siguiente 4Pa, en el siguiente (1pa, 1cad, 1Pb), en el siguiente punto ( 1Pb, 1cad, 1Pa), en el siguiente 4Pa, en el siguiente 3Pa, en el siguiente punto 2Pa, y en el ultimo punto ( 1Pa, 2cad, 1Pd). cortar la hebra un poco larga, pasar la hebra a la parte revés de la pieza atravesando el anillo mágico y cerrar el mismo.
🌸 Piece #3:
This piece is formed by 2 petals a little bit bigger, and they are the central petals of the flower.
R1: knit 10dc inside 1 magic ring, start with 2 chains high that will count as the first dc, close the row with slip stitch.
R2: knit 2 chains high and in the same stitch knit 1dc, in the next stitch knit 2dc, in the next stitch knit 3dc, in the next stitch knit 4dc, in the next stitch (1dc, 1ch, 1sc), in the next stitch ( 1sc, 1ch, 1dc), in the next stitch 4dc, in the next 3dc, in the next stitch 2dc, and in the last stitch ( 1Pdc, 2ch, 1sl st). Cut the strand a little long, pass the strand to the back of the piece through the magic ring and close it.

🌸 Pieza #4:
Esta pieza la tejí en color amarillo y es como el pistilo de la flor, y para realizarla se tejen 3 cadenas, el la primera se teje (1Pa, 2cad,Pd), repetir (3cad, 1Pa,3cad, Pd), cortar y asegurar la hebra.
🌸 Piece #4:
I knit this piece in yellow color and it is like the pistil of the flower, and to make it you knit 3 chains, the first one you knit (1dc, 2ch, sl st), repeat (3ch 1dc,3ch, sl st), cut and secure the strand.

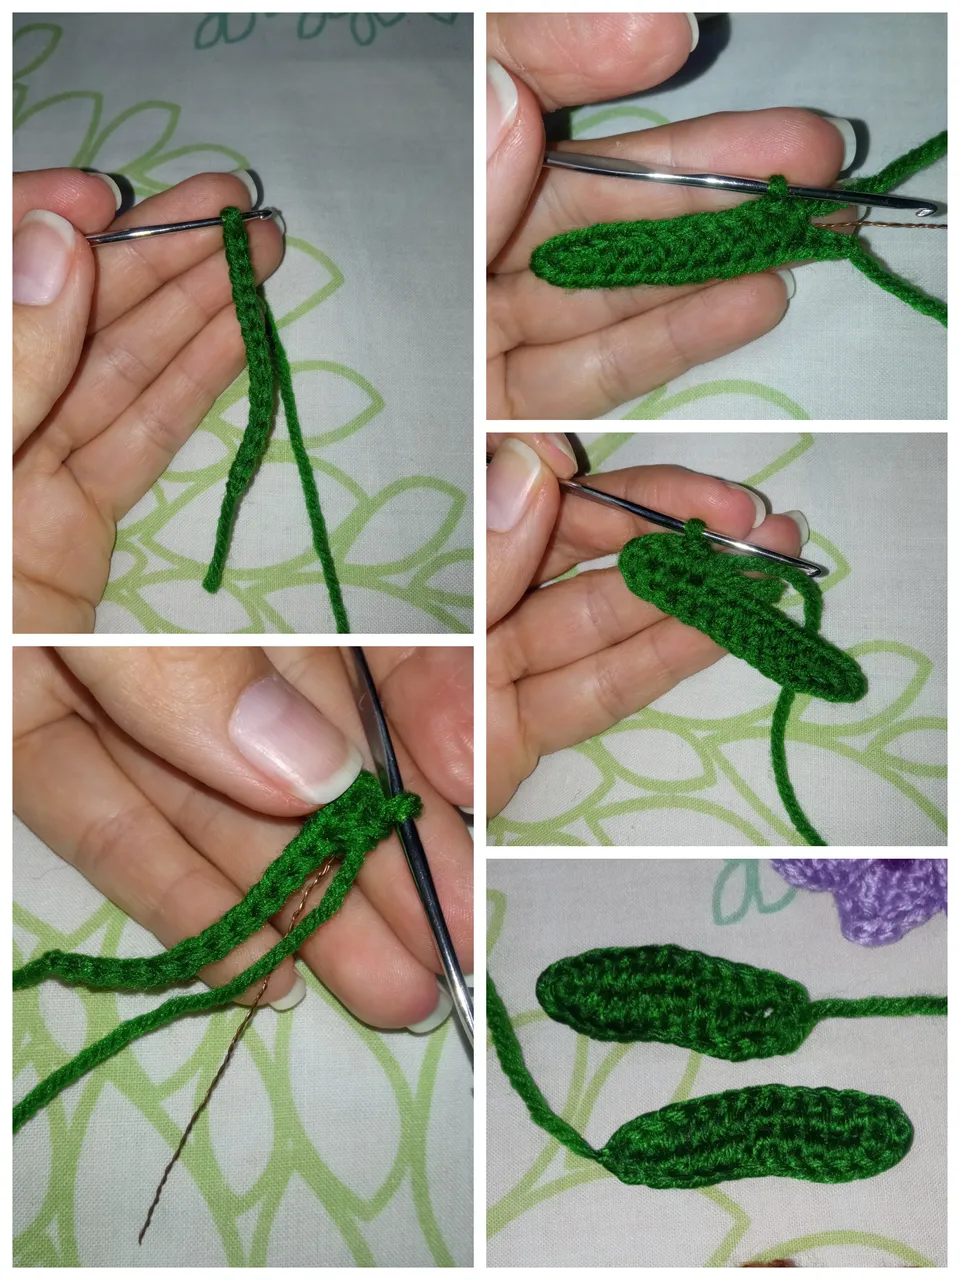
🌸 Hojas: (x2)
Tejer 13 cad, en la segunda cad desde el ganchillo tejer 1Pa, en el siguiente punto cadena hacer otro Pa, luego tejer 1mpa en cada punto cadena, y en el penúltimo punto tejer 1Pb, y en el ultimo 3Pb en el mismo punto, repetir la secuencia en modo espejo para formar el otro lado de la hoja, cortar hebra larga.
🌸 Leaves: (x2).
Knit 13 ch, on the second ch from the crochet crochet knit 1dc, in the next chain stitch make another dc, then knit 1hdc in each chain stitch, and in the second to last stitch knit 1sc, and in the last 3sc in the same stitch, repeat the sequence in mirror mode to form the other side of the leaf, cut long strand.
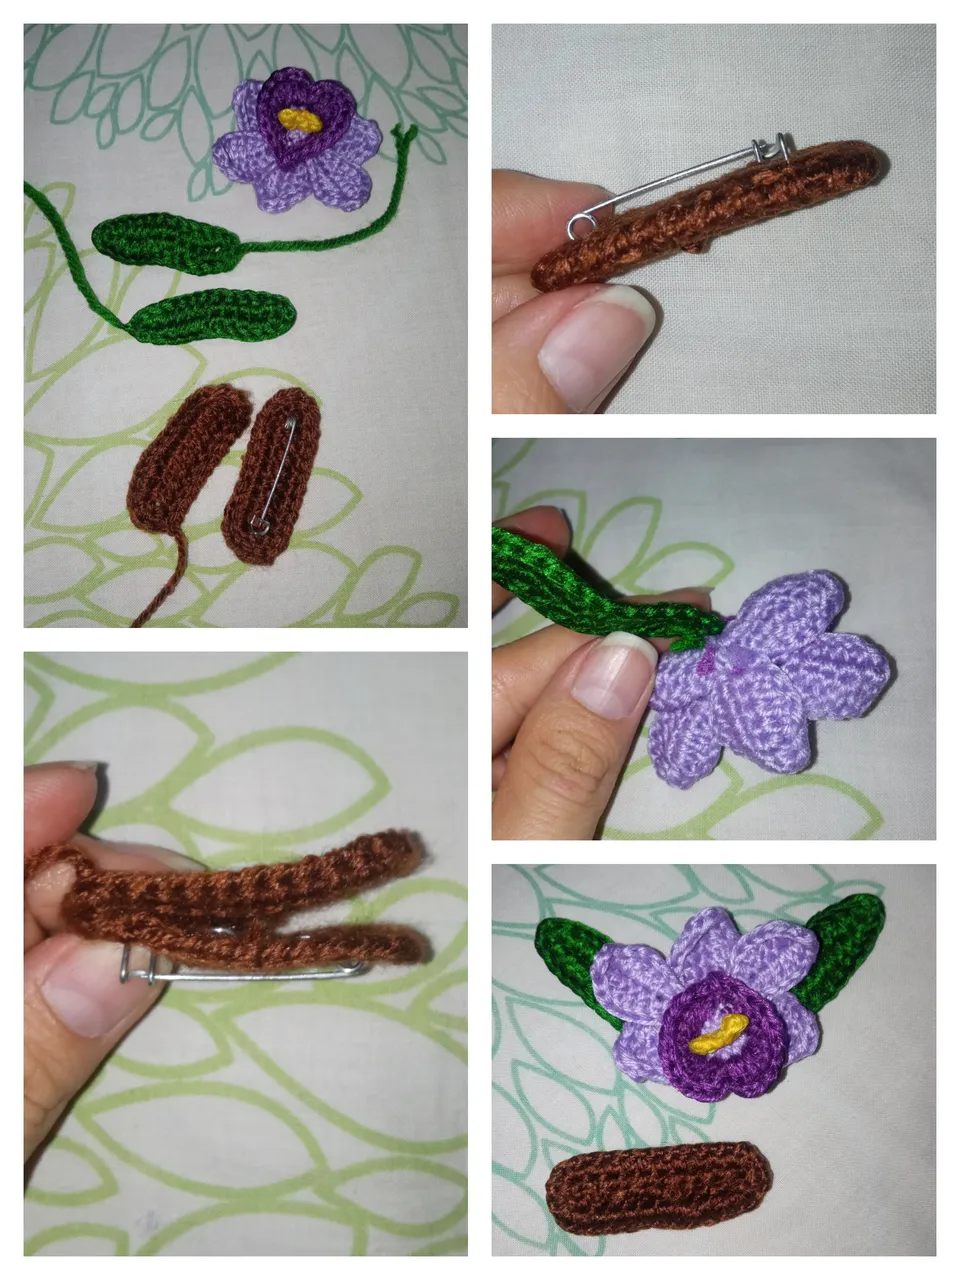
🌸Armado:
1- Unir el pistilo o Pieza #4 al petalo central o Pieza #3.
2- Juntar los 2 pétalos de la pieza #1 y pasarlos por el centro de la Pieza #2.
3- Por ultimo pasar por el centro de la pieza 4 y 3 el resultado de la unión de las piezas 1 y 2, o simplemente pegarlas con silicón caliente.
4- Pegar la flor a la base que tiene el alfiler o broche ( esta la hice tejiendo 2 pequeños rectángulos, los uní y antes de cerrar introduje el broche o alfiler tipo prendedor).
🌸Assembly:
1- Join the pistil or Piece #4 to the central petal or Piece #3.
2- Join the 2 petals of piece #1 and pass them through the center of piece #2.
3- Finally pass through the center of piece 4 and 3 the result of the union of pieces 1 and 2, or simply glue them with hot silicone.
4- Glue the flower to the base that has the pin or brooch (I made this by weaving 2 small rectangles, I joined them together and before closing I inserted the brooch or pin).

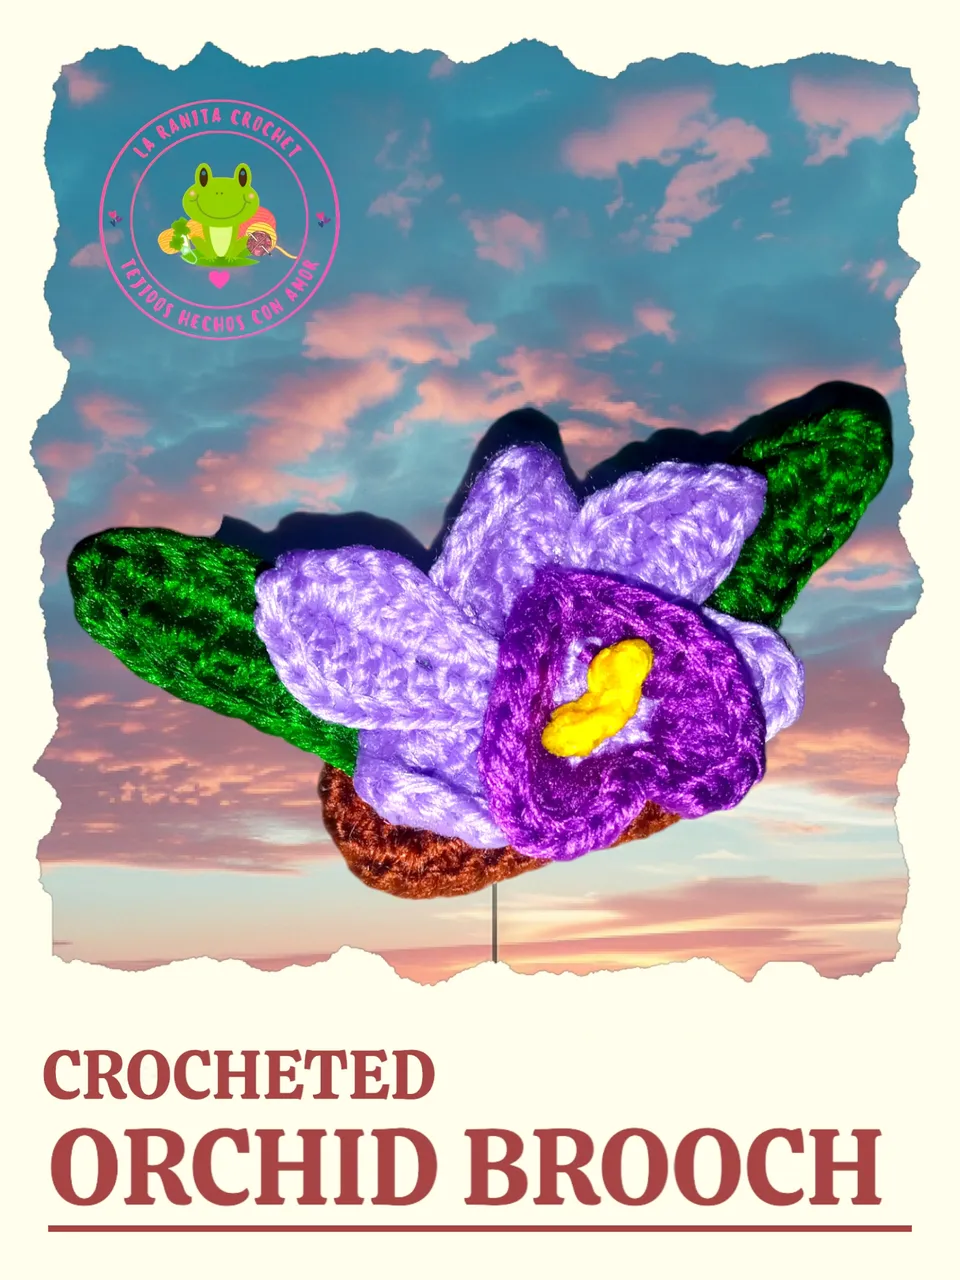
REALMENTE DESEO LES HAYA GUSTADO TANTO COMO A MI Y EL RESULTADO FINAL DE ESTE HERMOSO PRENDEDOR DE ORQUIDEA TEJIDO A CROCHET, AUNQUE DEBO DECIR QUE A NADIE LE GUSTO TANTO COMO A MI TIA YA QUE AL DIA SIGUIENTE SE FUE DE VIAJE CON MI MAMA Y SALIO CON SU PRENDEDOR PUESTO JAJAJA....
I REALLY HOPE YOU LIKED IT AS MUCH AS I DID AND THE FINAL RESULT OF THIS BEAUTIFUL CROCHETED ORCHID PIN, ALTHOUGH I MUST SAY THAT NOBODY LIKED IT AS MUCH AS MY AUNT BECAUSE THE NEXT DAY SHE WENT ON A TRIP WITH MY MOM AND LEFT WITH HER PIN ON HAHAHA ....


Resultado Final / Final Result
ESPERO SUS BONITOS COMENTARIOS Y/O VOTOS, ASÍ ME MOTIVAN PARA SEGUIR COMPARTIENDO MIS CREACIONES CON USTEDES, YO ESTARÉ FELIZ DE RESPONDER TODOS SUS COMENTARIOS, ¡SEAN FELICES Y QUE LA MUSA DE LA CREATIVIDAD NUNCA LOS ABANDONE!
¡GRACIAS POR VISITAR MI BLOG!
Se despide de ustedes con mucho cariño su amiga Nathalie @laranitacrochet
I LOOK FORWARD TO YOUR NICE COMMENTS AND/OR VOTES, THIS WAY YOU MOTIVATE ME TO KEEP SHARING MY CREATIONS WITH YOU, I WILL BE HAPPY TO ANSWER ALL YOUR COMMENTS, BE HAPPY AND MAY THE MUSE OF CREATIVITY NEVER LEAVE YOU!
THANK YOU FOR VISITING MY BLOG!
Your friend Nathalie @laranitacrochet bids you a fond farewell.
*Todas las fotografías utilizadas en la publicación son propiedad de la autora.
*Las fotografías fueron tomadas y editadas con mi REDMI 9 y con la App FotoRoom.
*La traducción la hice en https://www.deepl.com/es/translator
*All photographs used in this publication are property of the author.
*The pictures were taken and edited with my REDMI 9 and the FotoRoom App.
*The translation was done at https://www.deepl.com/es/translator