¡Hola, hola! Mi gente de Hive y linda comunidad de @NeedleWorkMonday 😊, espero todos se encuentren súper bien, animados e inspirados 💟
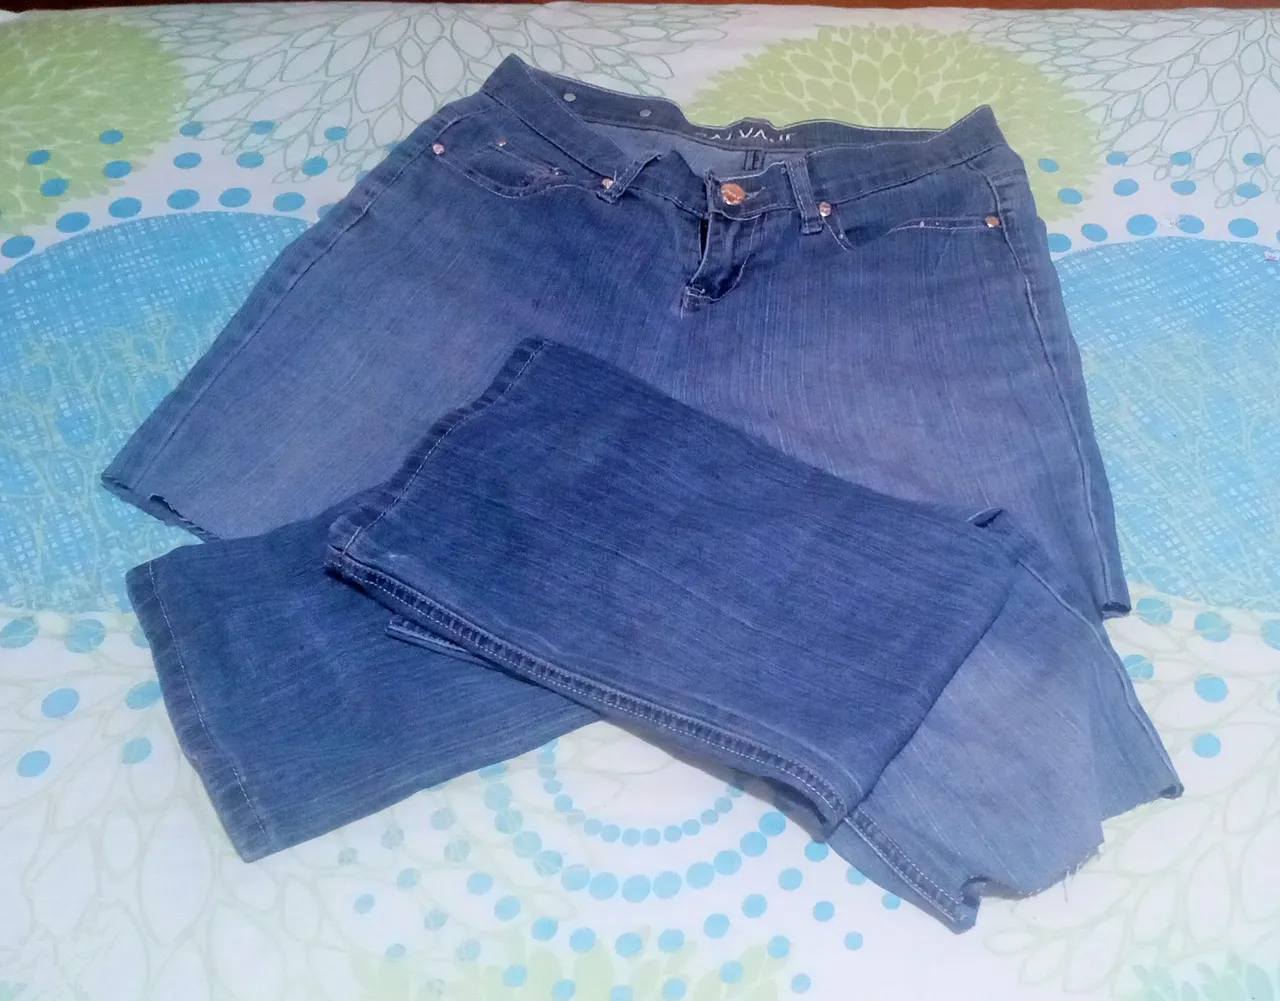
Esta es mí entrada en el NEEDLEWORK YOUR JEANS CONTEST, y la verdad debo confesar que me entusiasmó muchísimo la idea de poder reutilizar los jeans que hace muchísimo no uso y que tengo guardados justamente con este fin, ya que no me había dedicado a crear nada con ellos.
Ahora resulta que tengo muchas ideas de cositas que quiero hacer con los retazos de tela que voy sacando de estos pantalones viejos.
Hello, hello! My people of Hive and the beautiful community of @NeedleWorkMonday 😊, I hope everyone is feeling great, encouraged and inspired 💟
This is my entry in the NEEDLEWORK YOUR JEANS CONTEST, and I must confess that I was very excited about the idea of being able to reuse the jeans that I haven't used for a long time and that I have saved for this purpose, since I had not dedicated myself to create anything with them.
Now it turns out that I have many ideas of things I want to do with the scraps of fabric that I am taking out of these old pants.
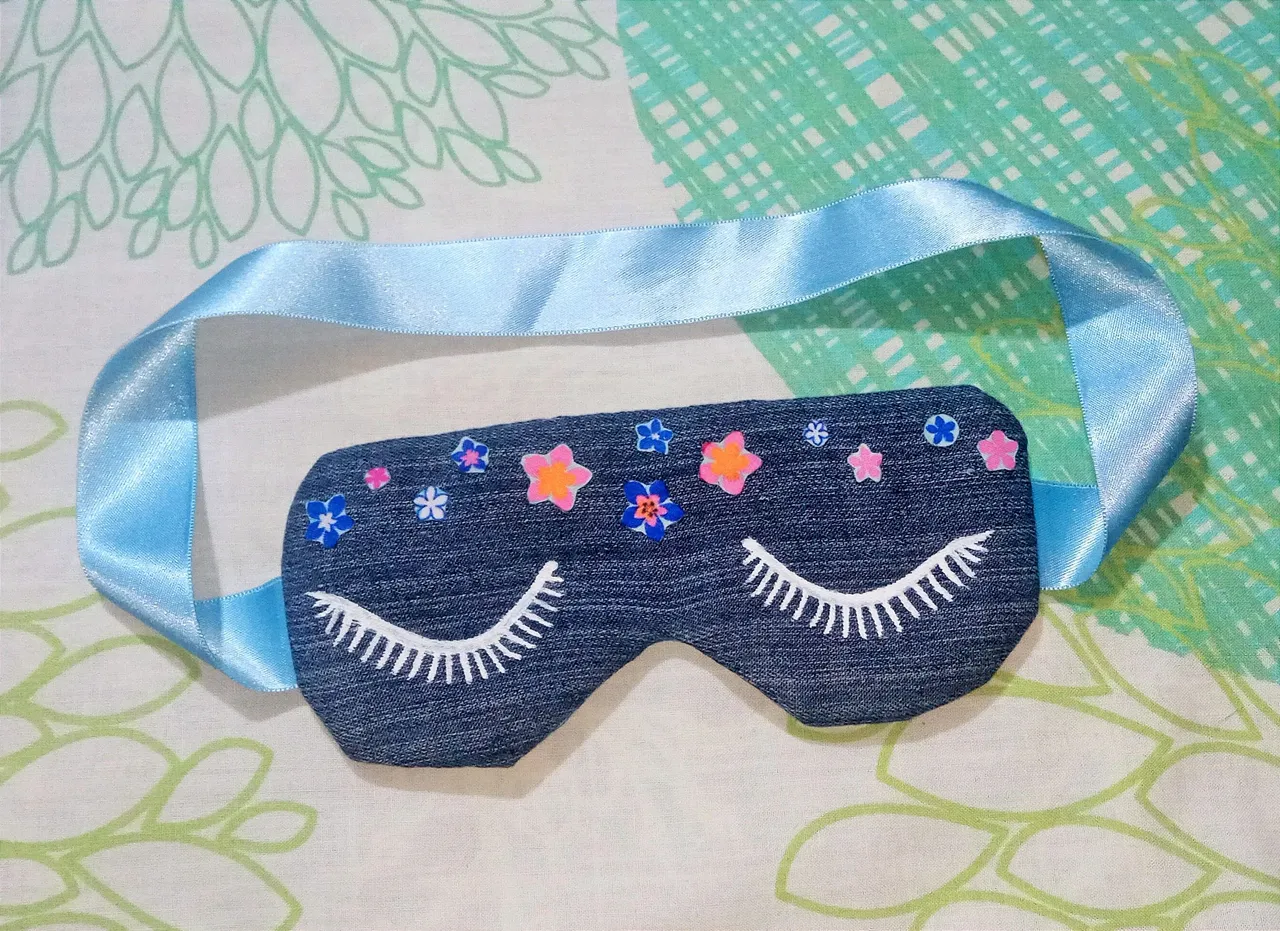
Pase varios días para decidir qué hacer primero, ya que como les dije me surgieron muchas ideas de cositas útiles que puedo crear con la tela que le puedo sacar a los pantalones que tengo guardados para reutilizar. Y pues me decidí por hacer un antifaz para dormir ya que nunca he tenido uno y siempre lo había querido tener. Y es que para mí es algo muy pero muy útil ya que sufro de migraña y uno de mis principales síntomas es la foto sensibilidad y este antifaz será de ahora en adelante mi mejor aliado a la hora de descansar para recuperarme de una migraña.
Y bueno mientras pasaban los días y la musa hacia su trabajo seguí buscando cositas guardadas para reciclar, y conseguí varios retazos de telas y cintas que tenía guardadas y olvidadas y así poco a poco reuní todos los materiales para hacer mi súper antifaz, jajaja…. Y es que yo quede enamorada del resultado final y me siento como niña con juguete nuevo jajaja...
I spent several days deciding what to make first, because as I said, I came up with many ideas of useful things that I can create with the fabric I can take out of the pants I have saved to reuse. And then I decided to make a sleeping mask since I have never had one and always wanted to have one. And for me it is something very, very useful because I suffer from migraine and one of my main symptoms is the photo sensitivity and this mask will be from now on my best ally when it comes to rest to recover from a migraine.
And well, while the days passed and the muse did her work I kept looking for little things to recycle, and I got several scraps of fabrics and ribbons that I had saved and forgotten and so little by little I gathered all the materials to make my super mask, hahaha.... And I was in love with the final result and I feel like a little girl with a new toy hahaha....
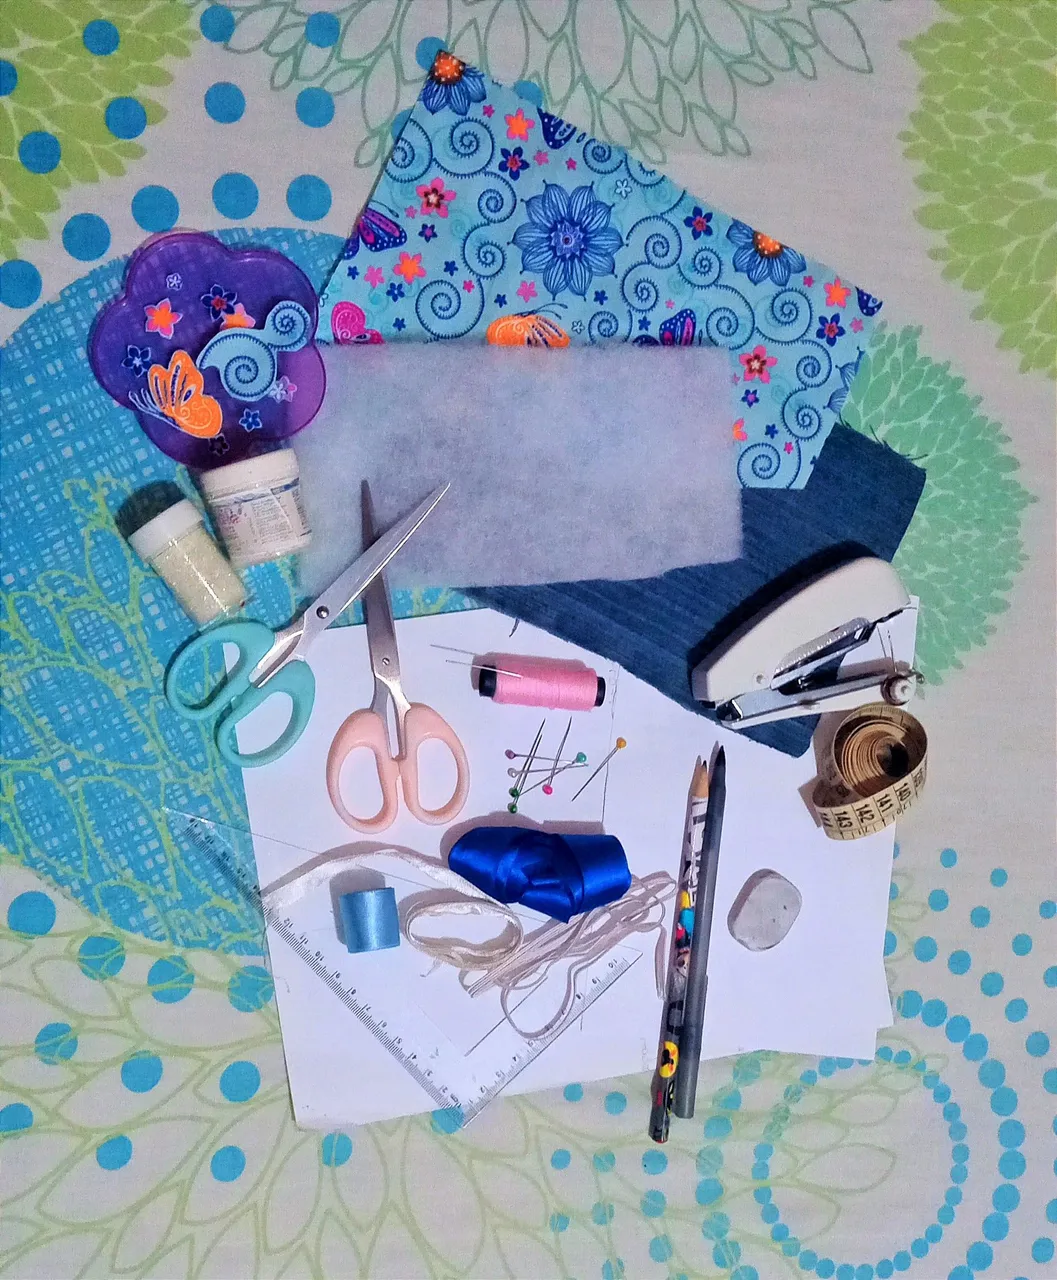
Materiales / Materials
Bueno les cuento como realice este lindo trabajo, lo primero que hice fue tomar las medidas de mi cabeza para saber la cantidad de cinta o elástico que necesitaría y dibujar como quería que fuera el antifaz y las medidas que más o menos tendría el mismo.
The first thing I did was to take the measurements of my head to know the amount of ribbon or elastic I would need and draw how I wanted the mask to be and the measures that more or less it would have.
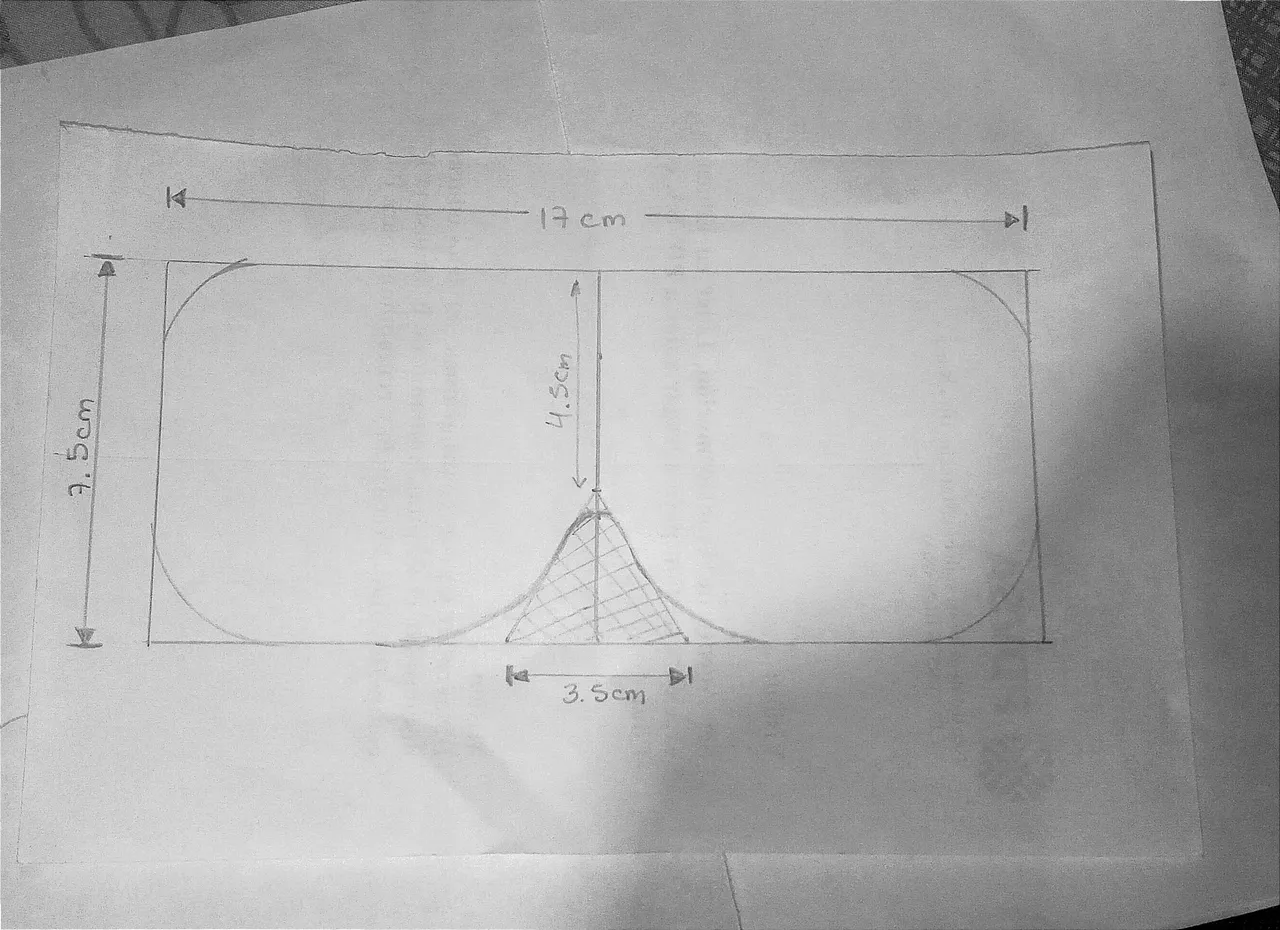
Patron del antifaz / Mask pattern
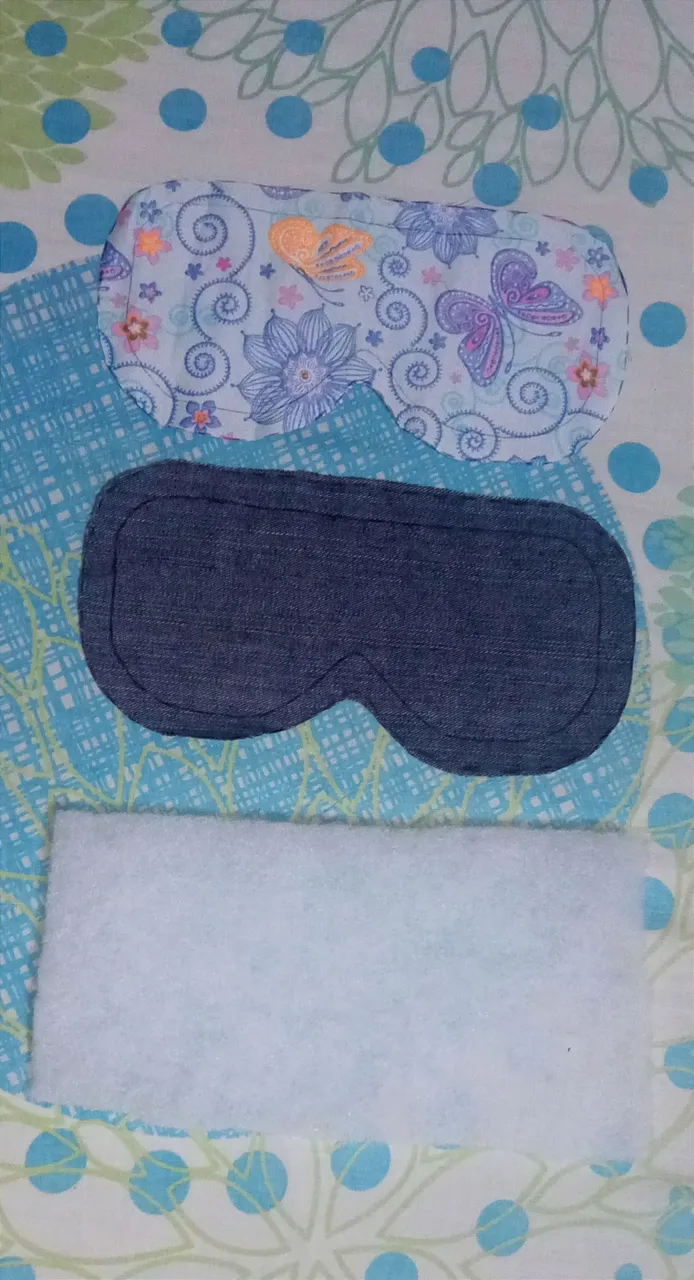
Seguidamente al tener el resultado deseado, que la verdad se me hiso más fácil de lo que pensaba, procedí a recortar la figura y marcarla en la tela de jeans y en la de mariposas, que fue la que escogí para esta manualidad, ya que era una de las más suave y bonita de todas las que encontré; luego procedí a cortar las telas como las había marcado.
After having the desired result, which was easier than I thought, I proceeded to cut out the figure and mark it on the jeans fabric and on the butterfly fabric, which was the one I chose for this craft, since it was one of the softest and prettiest of all the ones I found; then I proceeded to cut the fabrics as I had marked them.
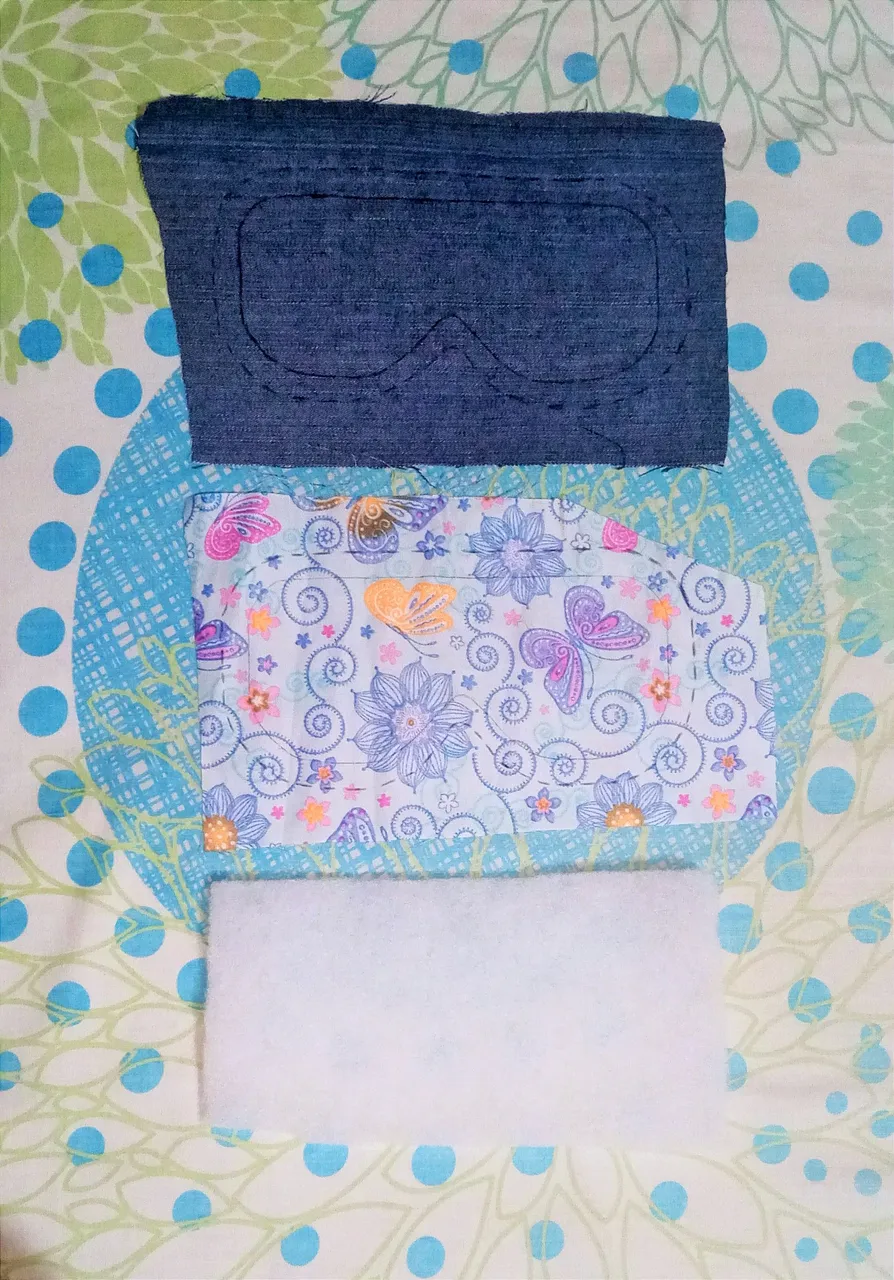
Ya solo quedaba ponerme manos a las agujas y coser las piezas. Inicialmente había pensado usar mi maquinita de coser manual, pero resultó que la guata se movía mucho al coser con la maquinita y termine cosiendo el antifaz a mano, y como es algo pequeño se hace bastante rápido.
Al momento de unir las piezas para coserlas lo que hice fue enfrentar los derechos o frentes de cada tela, y entre estos coloque la cinta, en este caso estoy usando cinta de raso ya que se me hacía muy incómoda la idea de usar una liga , pues pienso que es muy probable que me moleste un poco a la hora de usar el antifaz en medio de un dolor de cabeza o para dormir; ya enfrentadas las telas coloque algunos alfileres para facilitar el proceso de costura, y por último posicione la guata también con alfileres.
The only thing left to do was to sew the pieces. Initially I had thought of using my manual sewing machine, but it turned out that the wadding moved too much when sewing with the machine and I ended up sewing the mask by hand, and as it is something small it is done quite fast.
At the moment of joining the pieces to sew them what I did was to face the rights or fronts of each fabric, and between them I placed the ribbon, in this case I am using satin ribbon because it was very uncomfortable the idea of using a garter, because I think it is very likely to bother me a little when I use the mask in the middle of a headache or to sleep; once the fabrics were facing each other I placed some pins to facilitate the sewing process, and finally I positioned the wadding also with pins.
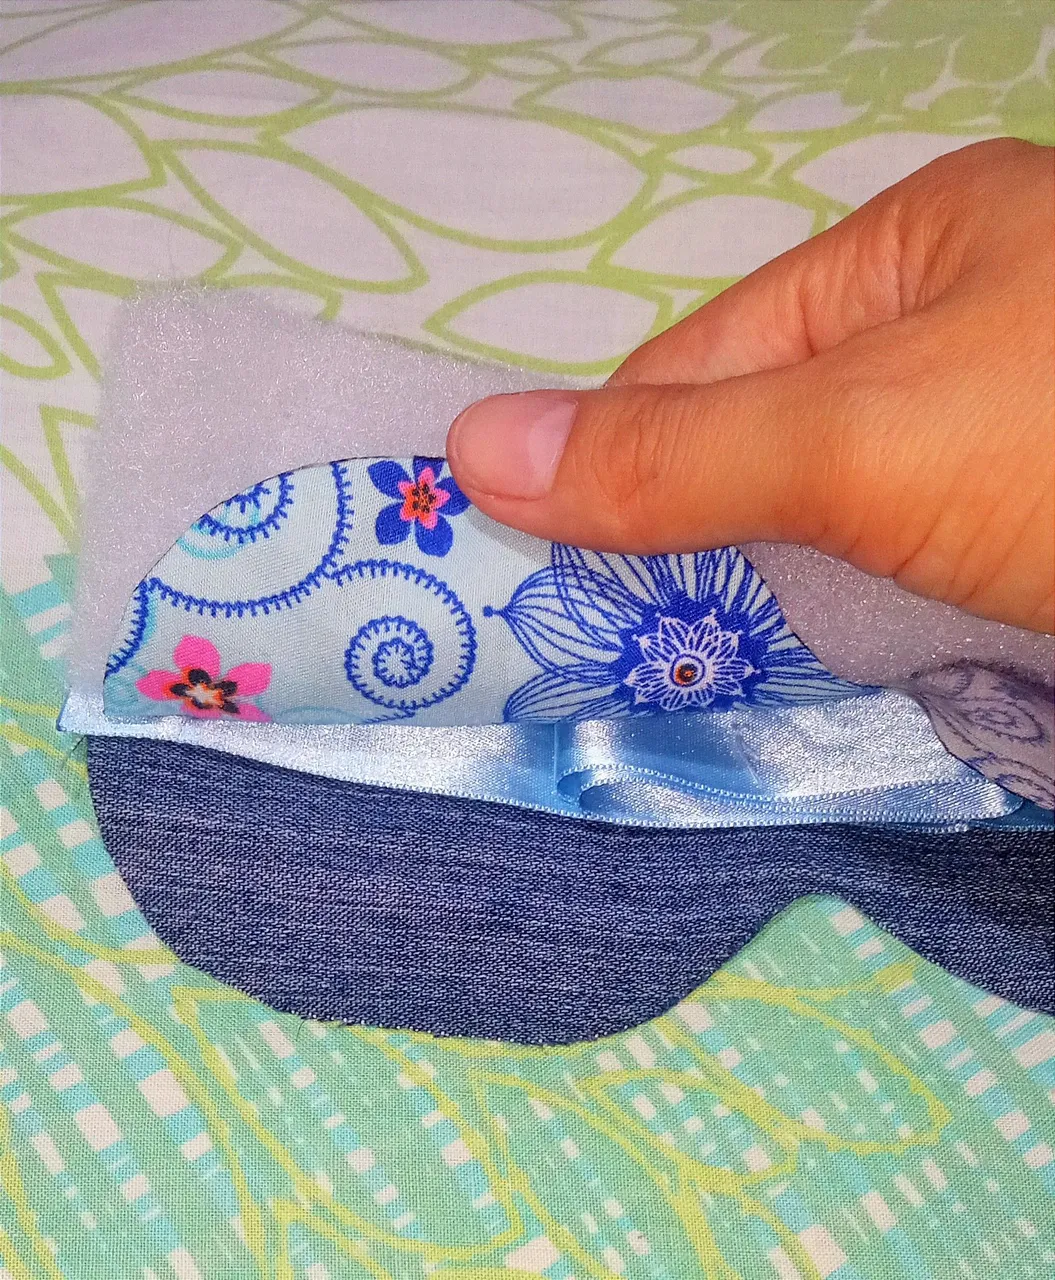
Detalle de como colocar las piezas para coserlas / Detail of how to place the pieces to sew them together
Otro detalle a tener en cuenta a la hora de coser el antifaz es que hay que dejar una abertura de más o menos 5cm para luego dar vuelta al trabajo, eta abertura la cosemos con costura invisible, luego de dar vuelta al antifaz.
Another detail to keep in mind when sewing the mask is that you have to leave an opening of more or less 5cm to then turn the work, this opening is sewn with invisible stitching, after turning the mask.
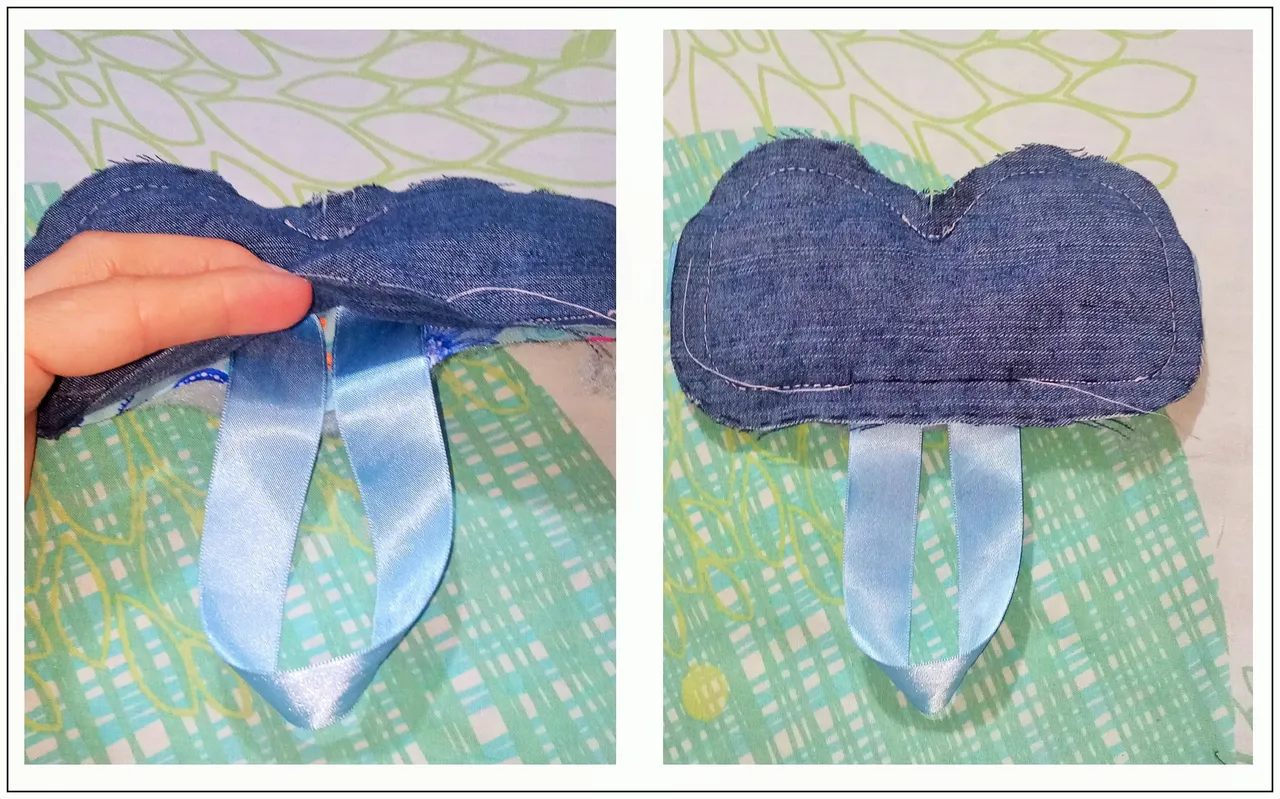
Detalle de la abertura / Detail of the opening
Lo siguiente que hice fue planchar la pieza para definir bien la forma, y proceder a decorar. Acá fue donde más tarde ya que no tenía clara la idea de cómo quería que quedara y bueno como había recortado algunas figuras de la tela estampada las use como apliques, y busque imágenes de antifaz para dormir en Google y así definí lo que haría para decorar mi antifaz.
The next thing I did was to iron the piece to define the shape well, and proceed to decorate. This is where it was later, since I didn't have a clear idea of how I wanted it to look, and since I had cut out some figures from the printed fabric I used them as appliqués, and I looked for images of sleep masks on Google and defined what I would do to decorate my mask.
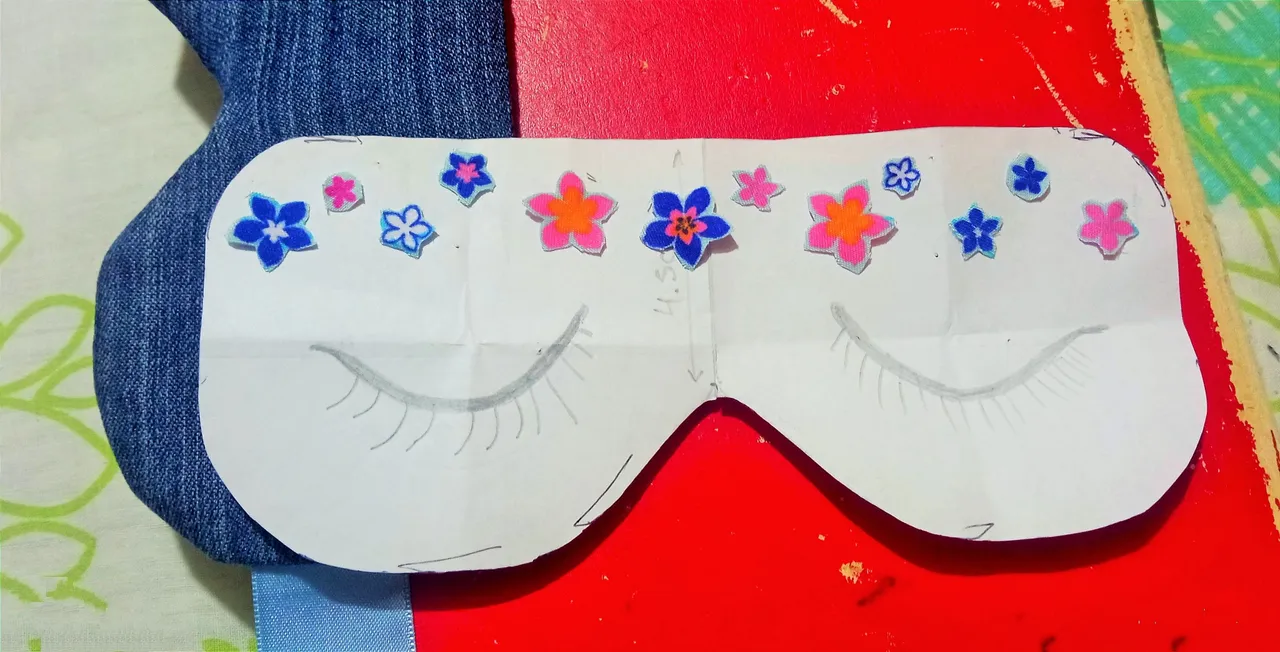
Definiendo la decoración / Defining the decoration
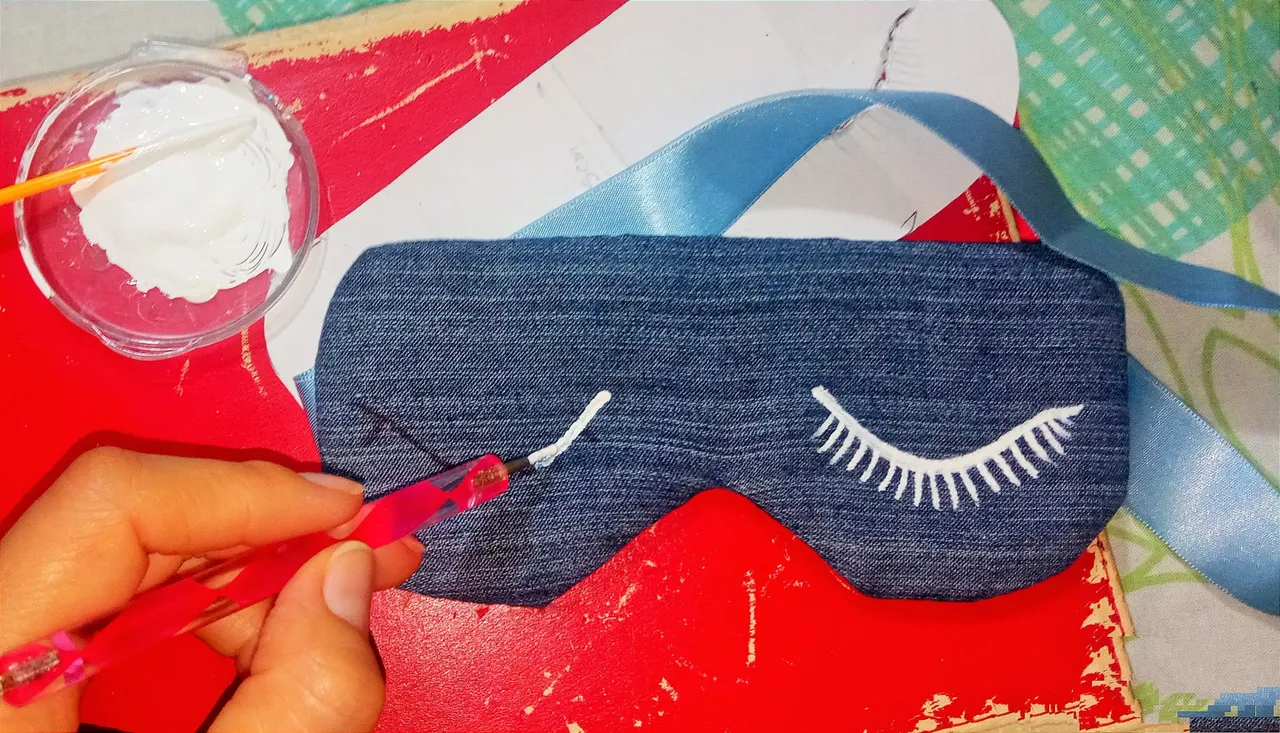
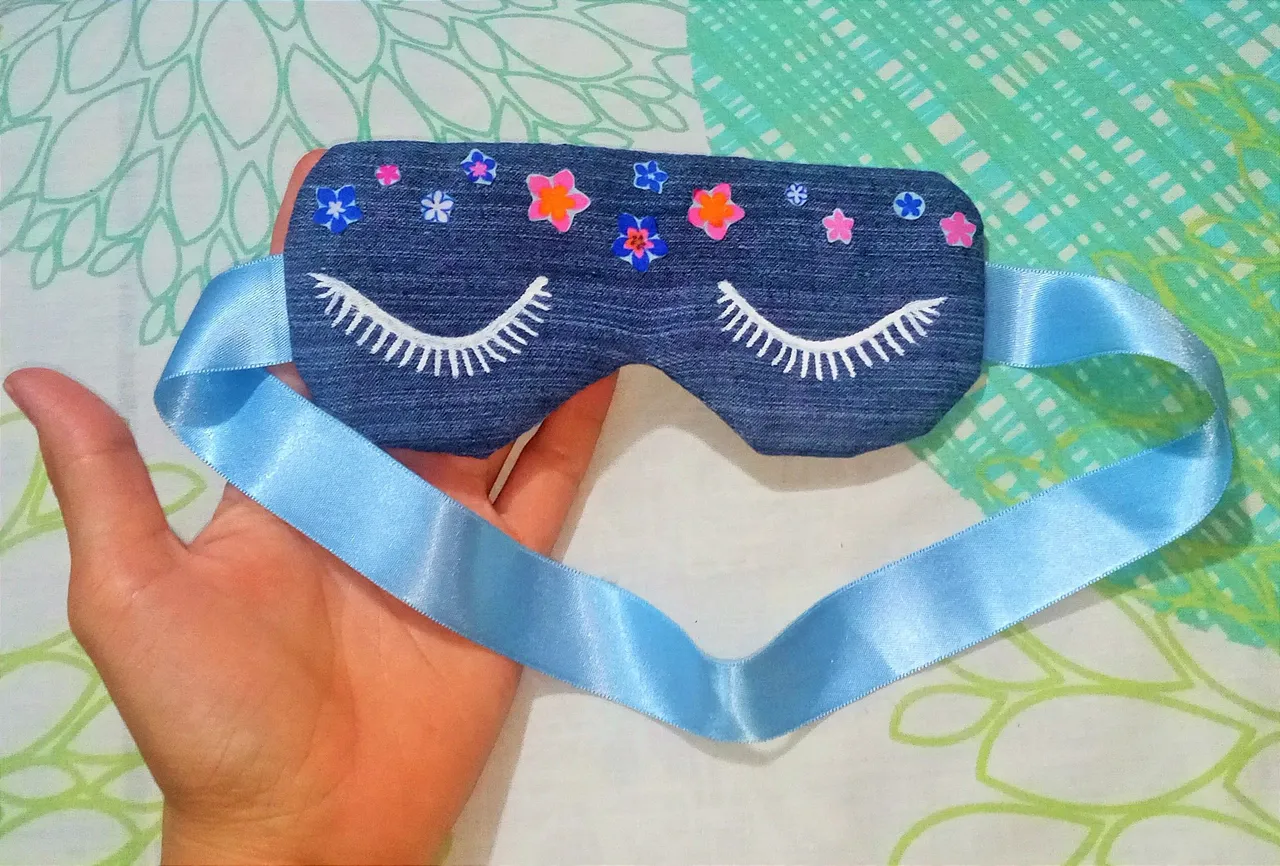
Las flores las pase levemente por el fuego de una vela para sellar los bordes y evitar que se deshilachen y las pegue con pegamento E-6000, y los ojitos los hice con un poquito de pintura para telas que ya tenía, los ojitos fue lo que más trabajo me dio porque no tengo pinceles y resolví con un repujado con el que me hago dibujos en las uñas y con un pincelito reciclado de un brillo de uñas.
The flowers were lightly passed through the fire of a candle to seal the edges and prevent fraying and glued with glue E-6000, and the eyes were made with a little fabric paint that I already had, the eyes was what gave me more work because I have no brushes and I solved with a embossing with which I make drawings on my nails and with a recycled brush from a nail polish.
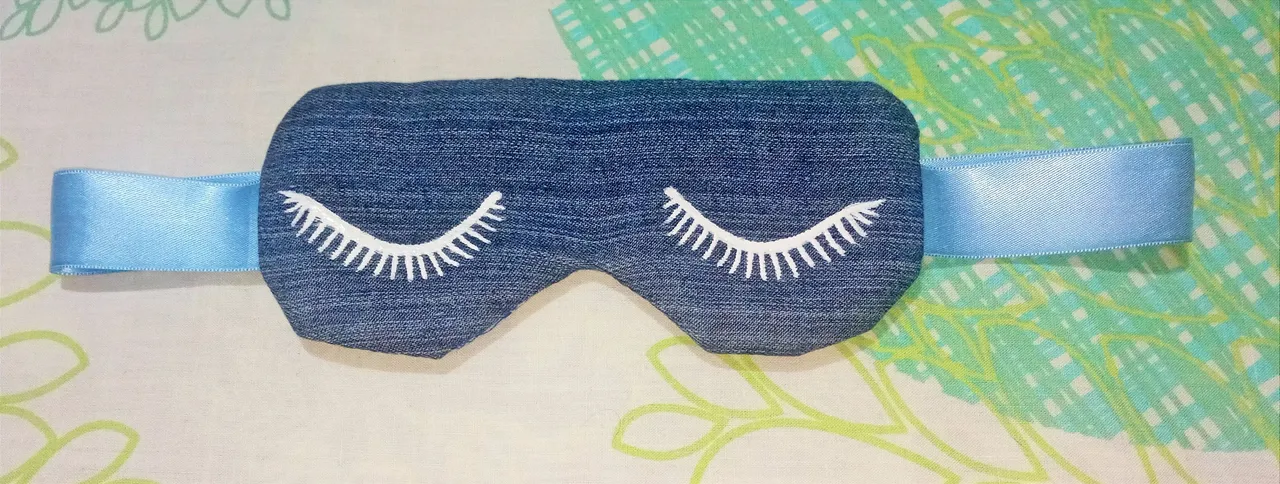

Y así obtuve el resultado final que pueden apreciar en las fotografías y del cual me sentí enamorada 😍 , no sé si sea porque es mi primer antifaz o simplemente porque es algo que realice yo misma pero de verdad me gustó muchísimo el resultado, espero que a ustedes también y se animen a hacer su propio antifaz para dormir.
And so I got the final result that you can see in the pictures and which I felt in love 😍 , I do not know if it is because it is my first mask or simply because it is something that I did myself but I really liked the result, I hope you do too and I encourage you to make your own sleep mask.
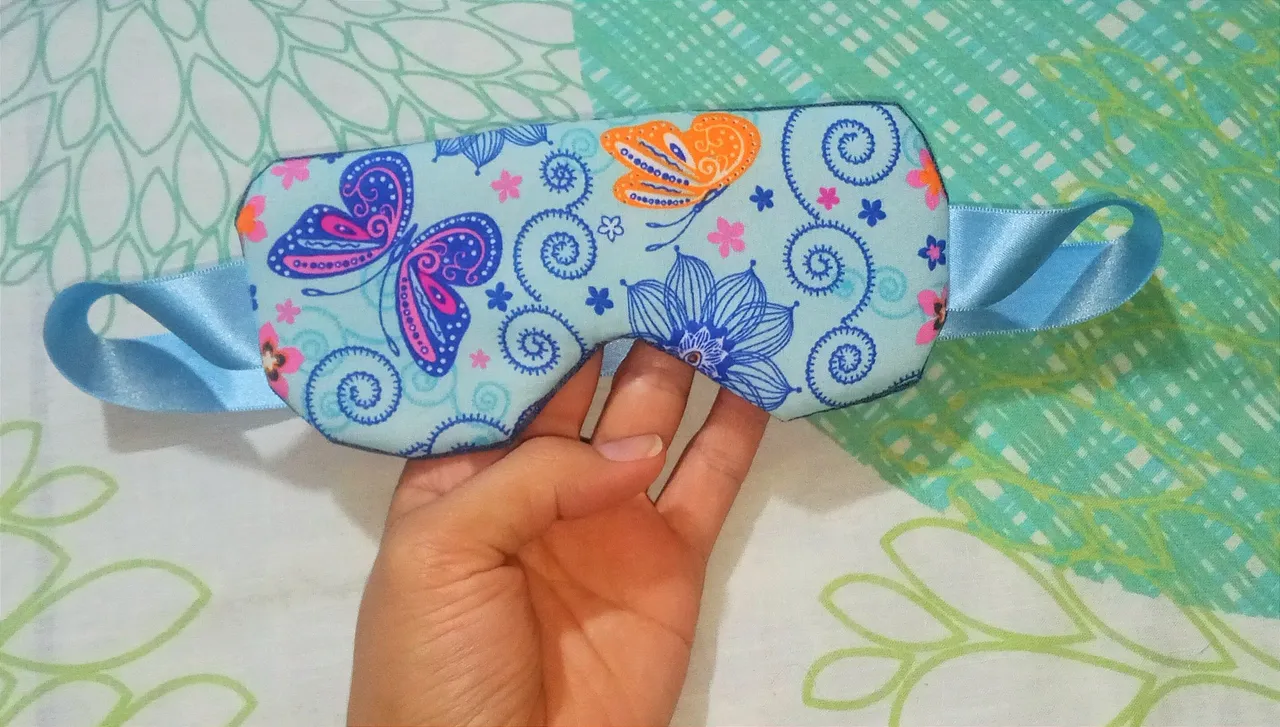
Deseo les haya gustado mucho este post de cómo hacer este hermoso y súper cómodo antifaz para dormir y aunque no es un trabajo de crochet como normalmente acostumbro hacer, es una linda manualidad que vale la pena realizar espero sus bonitos comentarios y/o un me gusta, así me motivan para seguir haciendo más publicaciones de este tipo.
Me encanto participar en este concurso y realmente espero todos lo hayan disfrutado tanto como yo.
Se despide de ustedes con mucho cariño su amiga Nathalie @laranitacrochet 🐸 💟
*Todas las fotografías utilizadas en la publicación son propiedad de la autora.
I hope you liked this post about how to make this beautiful and super comfortable sleep mask and although it is not a crochet work as I usually do, it is a nice craft that is worth doing, I hope your nice comments and / or a like, so I am motivated to continue making more publications of this type.
I love to participate in this contest and I really hope you all enjoyed it as much as I did.
Your friend Nathalie @laranitacrochet bids you a fond farewell. 🐸 💟
*All photos used in the publication are property of the author.